
PN - Configure the Hazchem pallet network
This article gives an overview of how to set up the Hazchem pallet network so specific requirements are included by default.
Table of contents
To use Hazchem as the pallet network, first complete the steps below.
Add a customer
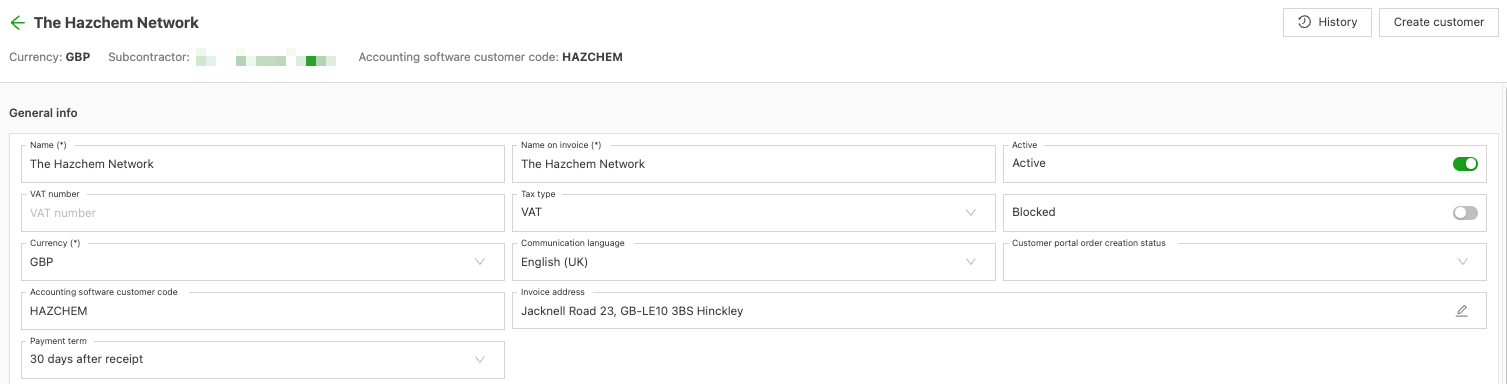
First, create Hazchem as a customer.
- Navigate to Customers
- Click Create customer
- Create a customer named “The Hazchem Network”
- Click Create contract carrier to also make Hazchem a contract carrier
Add the order input configuration
Add a transportation service
- Navigate to Configuration > Order input
- Click Transportation services
- Add a new transportation service. Give the service a name that makes the network easy to identify, for example: Hazchem Network or Hazardous.
- Save it.
Add service levels
- Navigate to Configuration > Order input
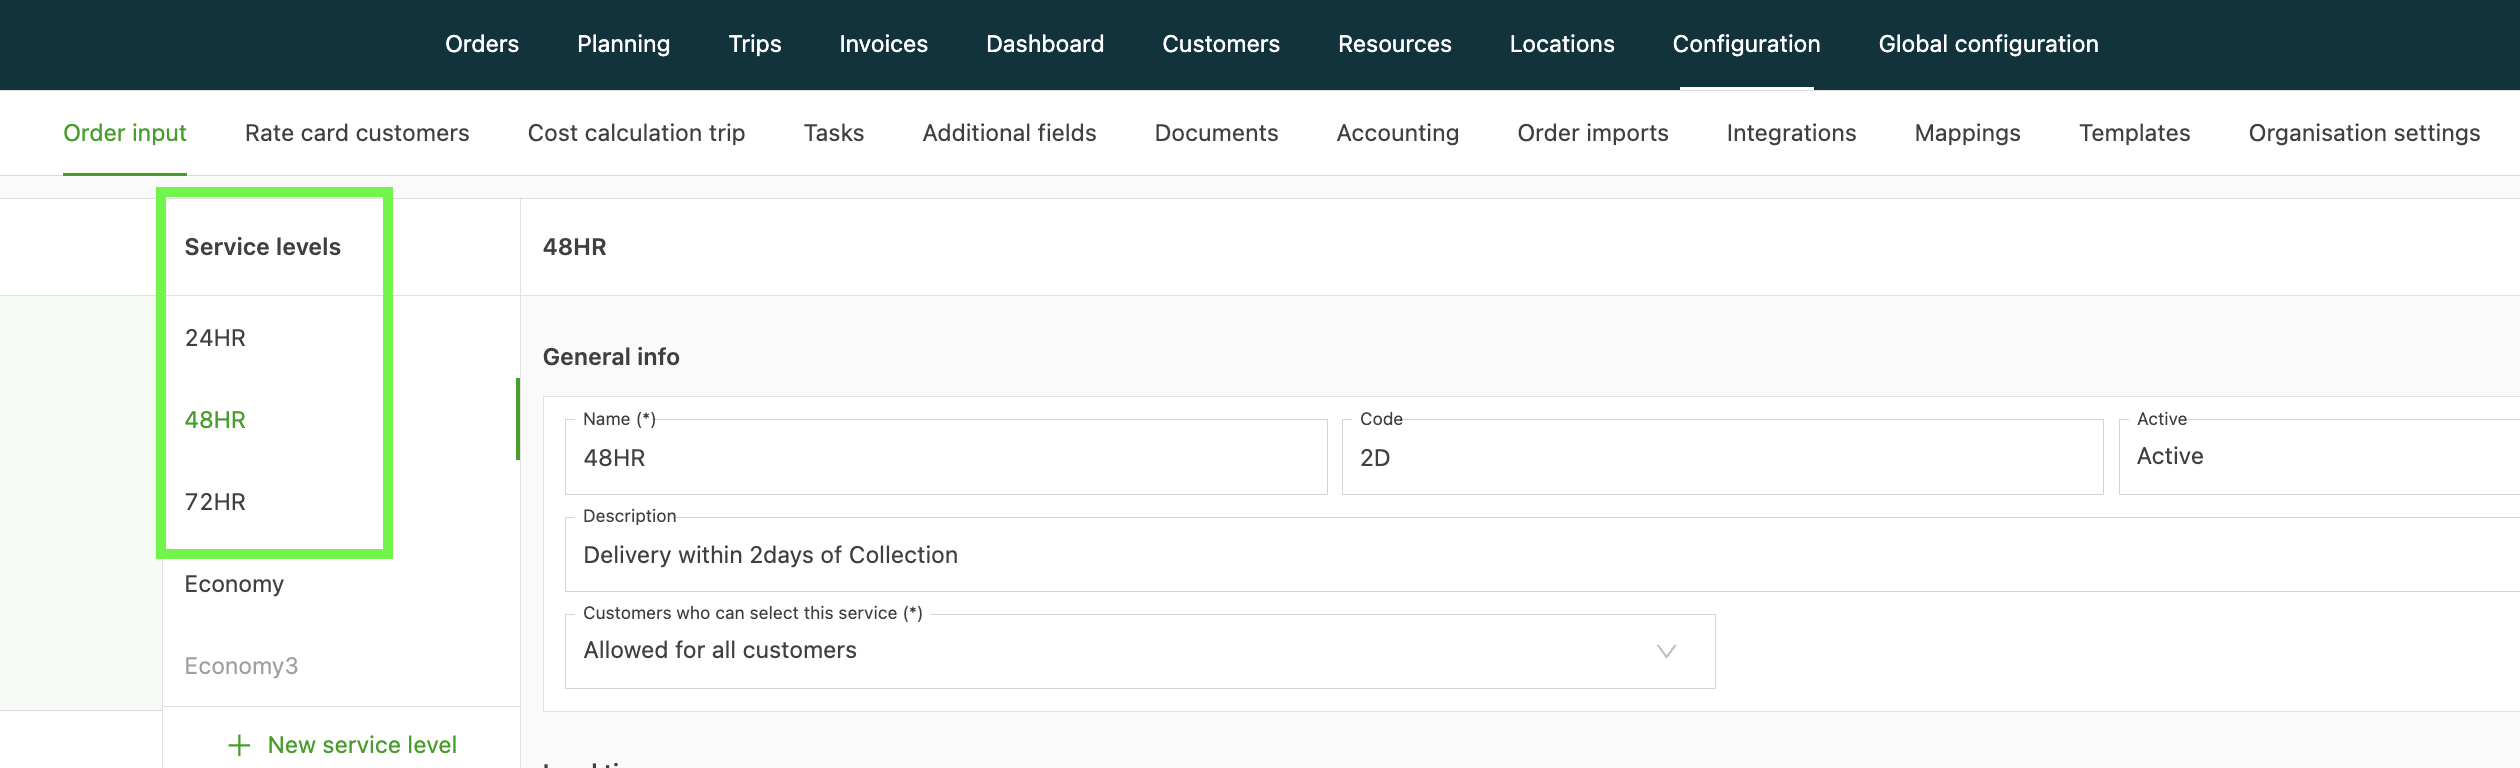
- Once a transportation service is added, click Service levels
- Add the service levels offered, for example:
| Name | Code |
|---|---|
| Next day | 1D |
| 2 day pickup/delivery | 2D |
| 3 day pickup/delivery | 3D |
Add time windows and extras
- Navigate to Configuration > Order input
- Click Time window to create new time windows.
- Click Collect/delivery extra to add any billable extras, for example: tail-lift.
- Complete any additional required information and click Save.
Example setup:
| Qargo type | Code | Name | Comments |
|---|---|---|---|
| Time window | PT | Pre 10am | |
| Time window | AM | Pre 12 am | |
| Time window | PM | After 12am | |
| Time window | BI | Book in | |
| Time window | TS | Timed specific surcharge | For when goods need to be picked up at the same time as a delivery to an address. Note: these are two shipments, one for the delivery and one for the pickup. |
| Time window | SA | Saturday | |
| Extra | TL | Tail-lift |
Add surcharge
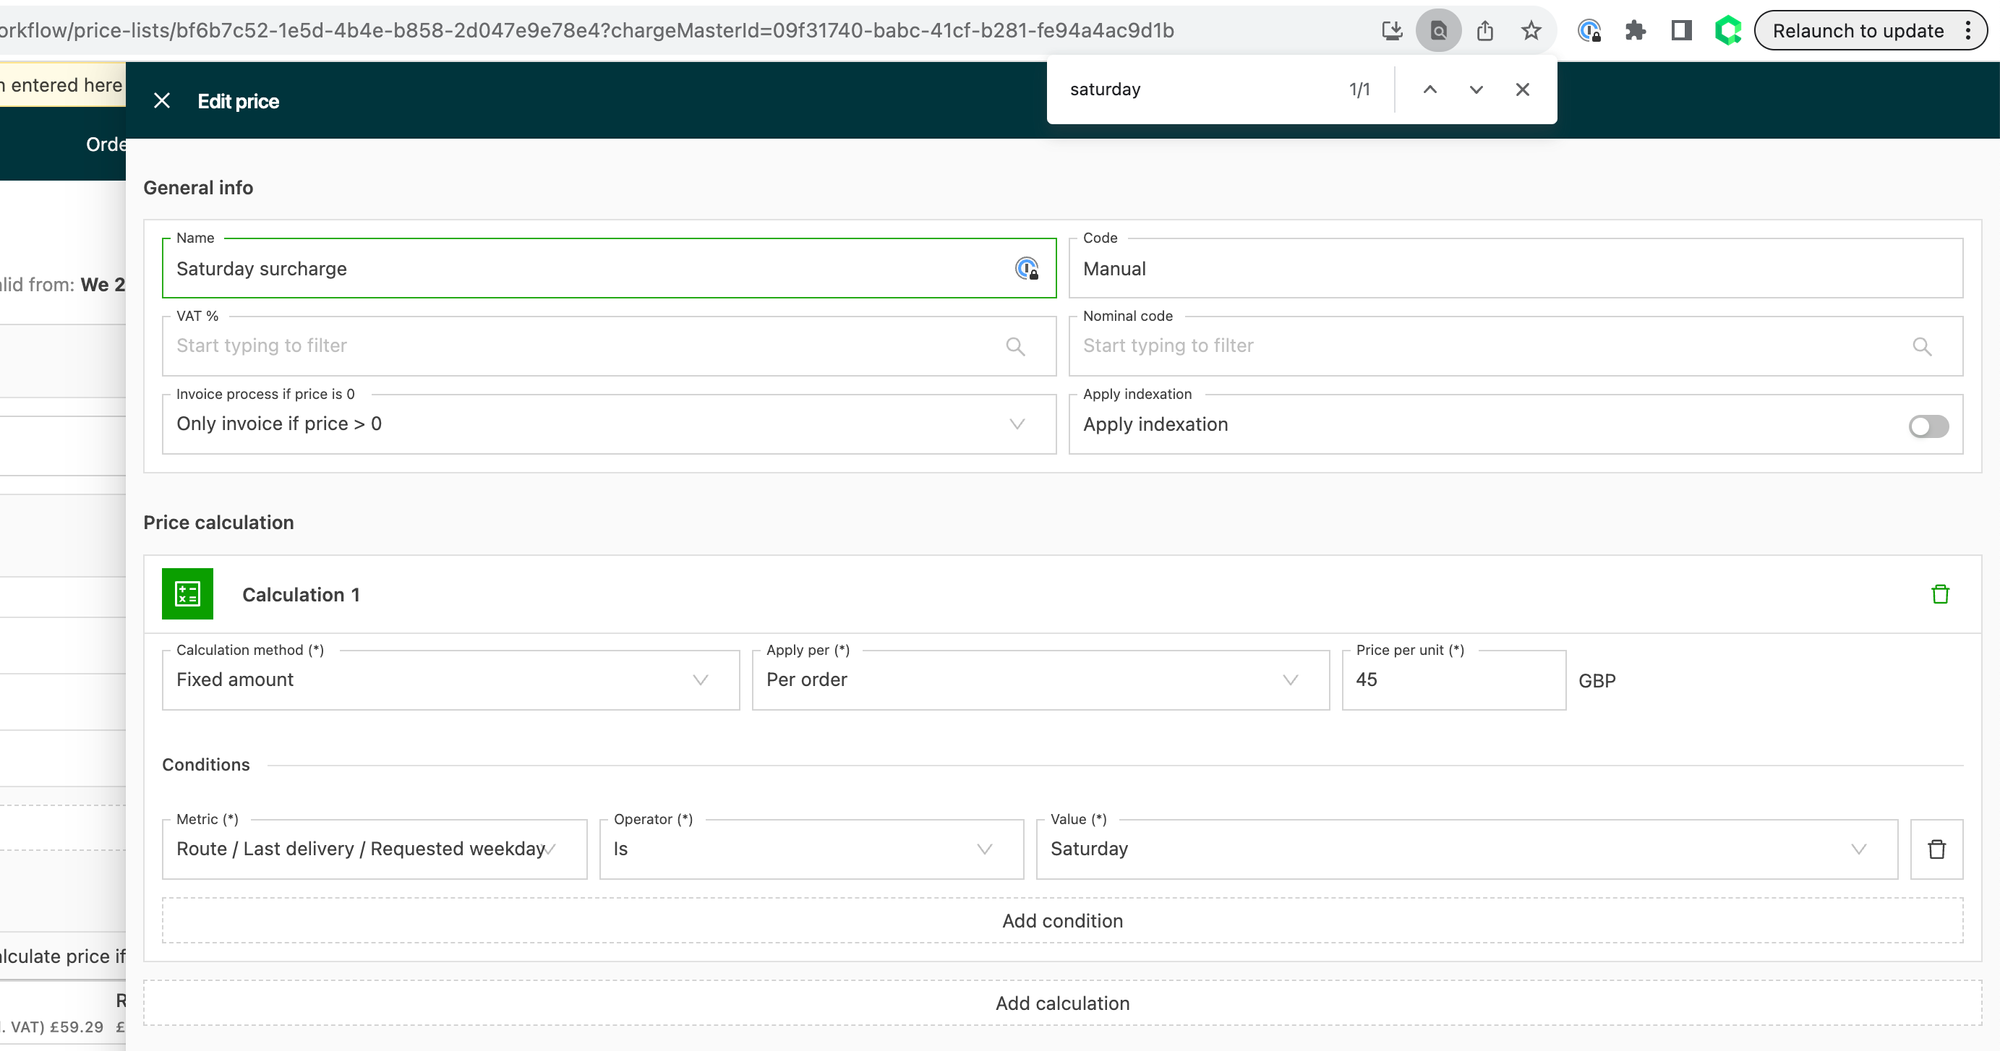
Once the time windows are set up, charges can be added, for example: a Saturday surcharge.
- Navigate to Configuration > Order input
- Click General surcharges
- Click Add new general surcharge. Add the relevant details and the price calculation condition: for example, last delivery requested weekday is Saturday
Add a packaging type
-
Navigate to Configuration > Order input
-
Click Packaging types
-
Click New packaging type
-
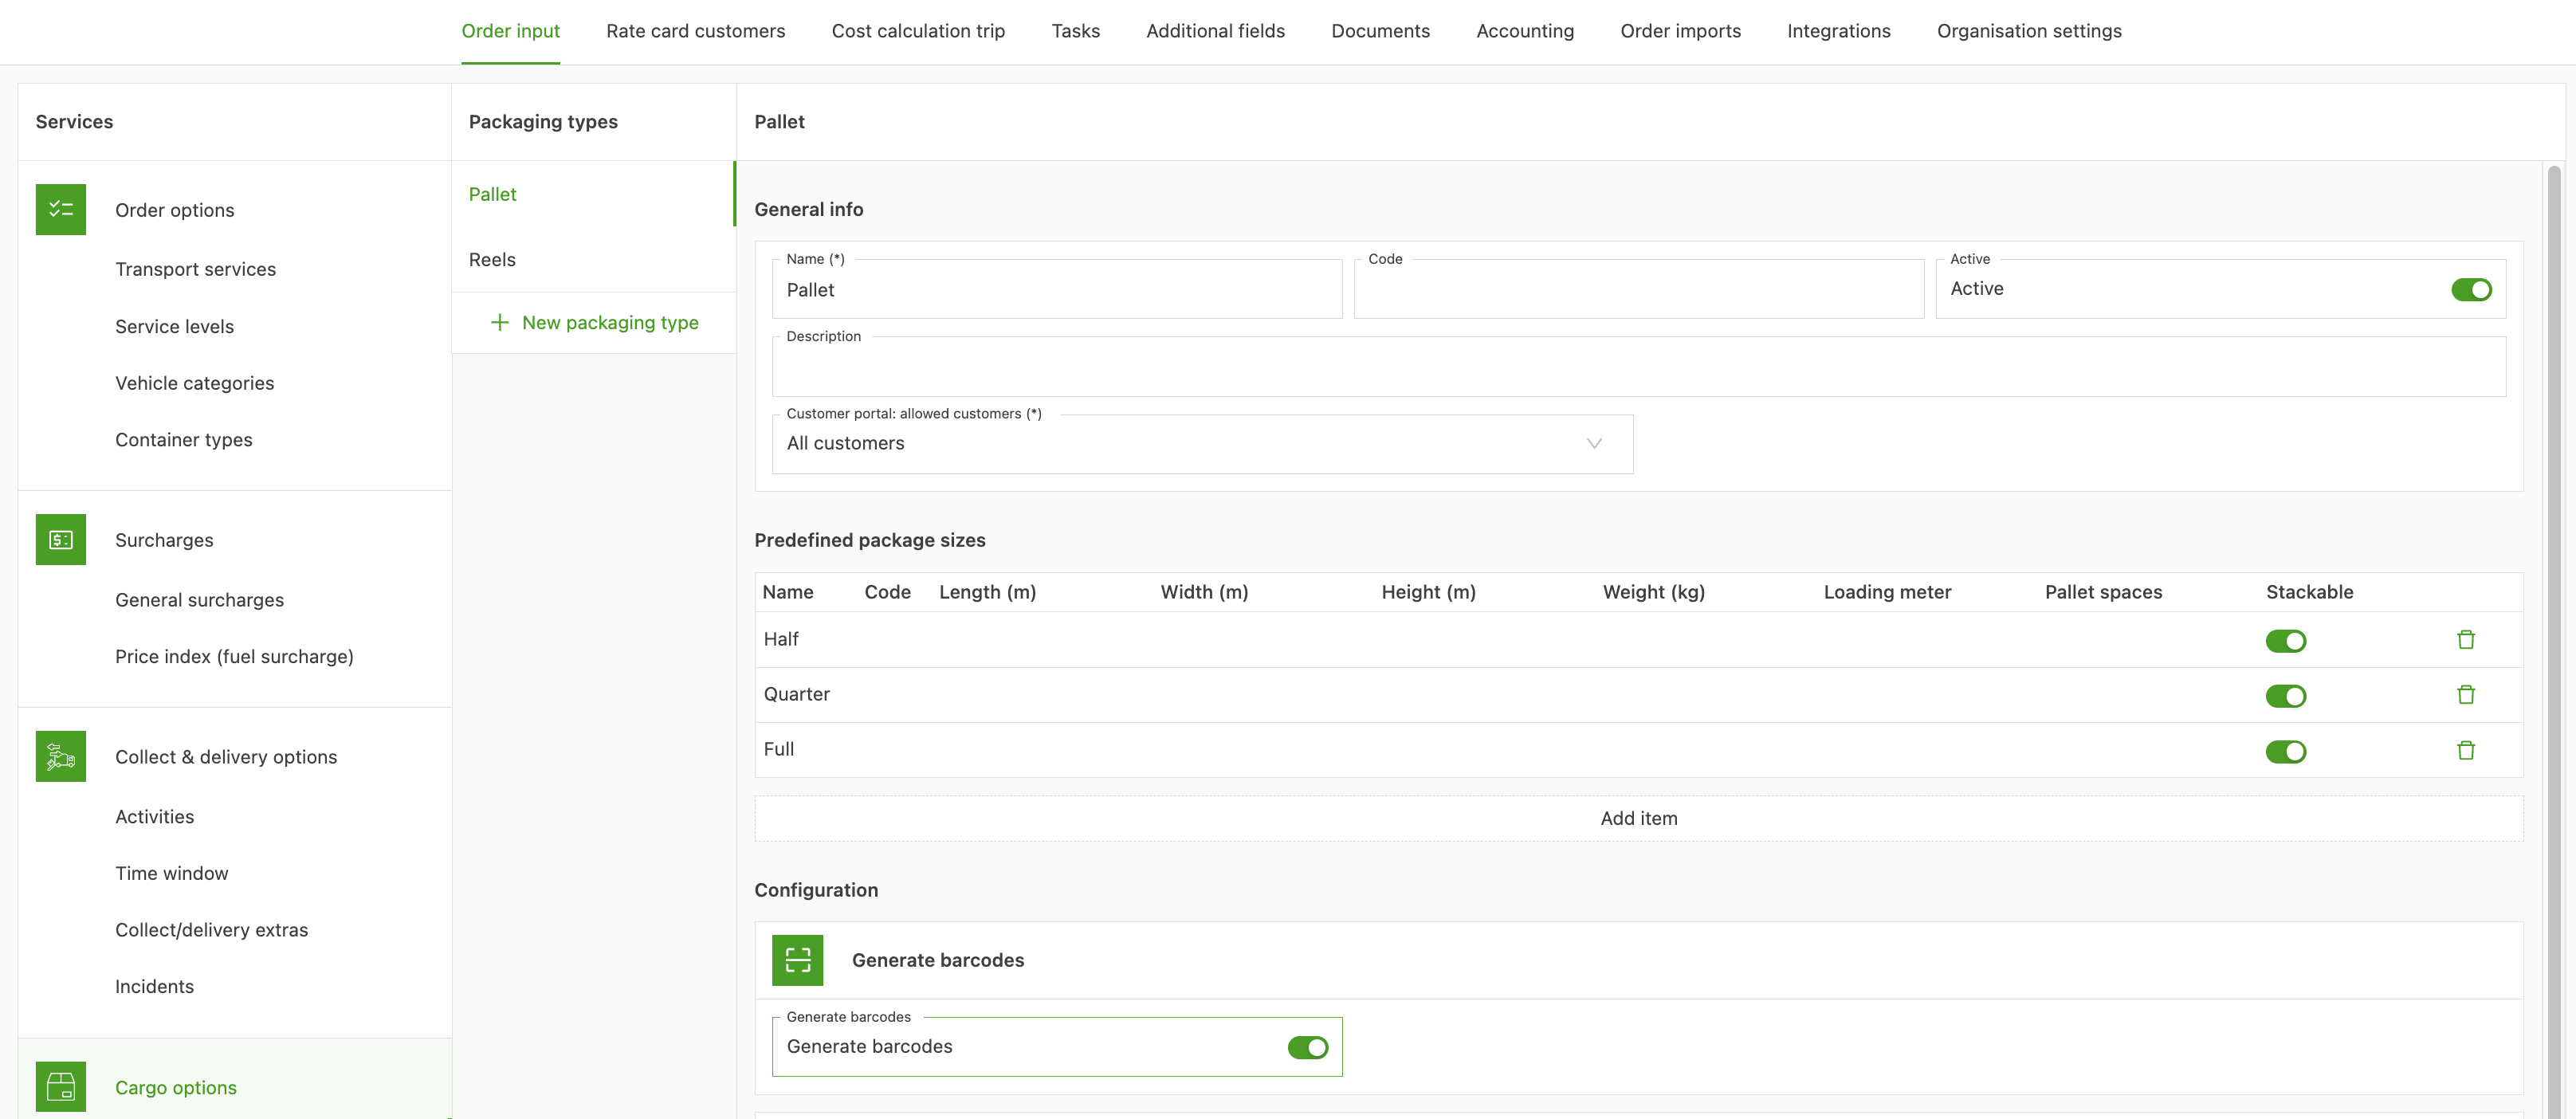
Create a packaging type for Pallet
-
Add predefined package sizes for
- Full pallet
- Half pallet
- Quarter pallet
-
Do not enter weights for these package sizes.
-
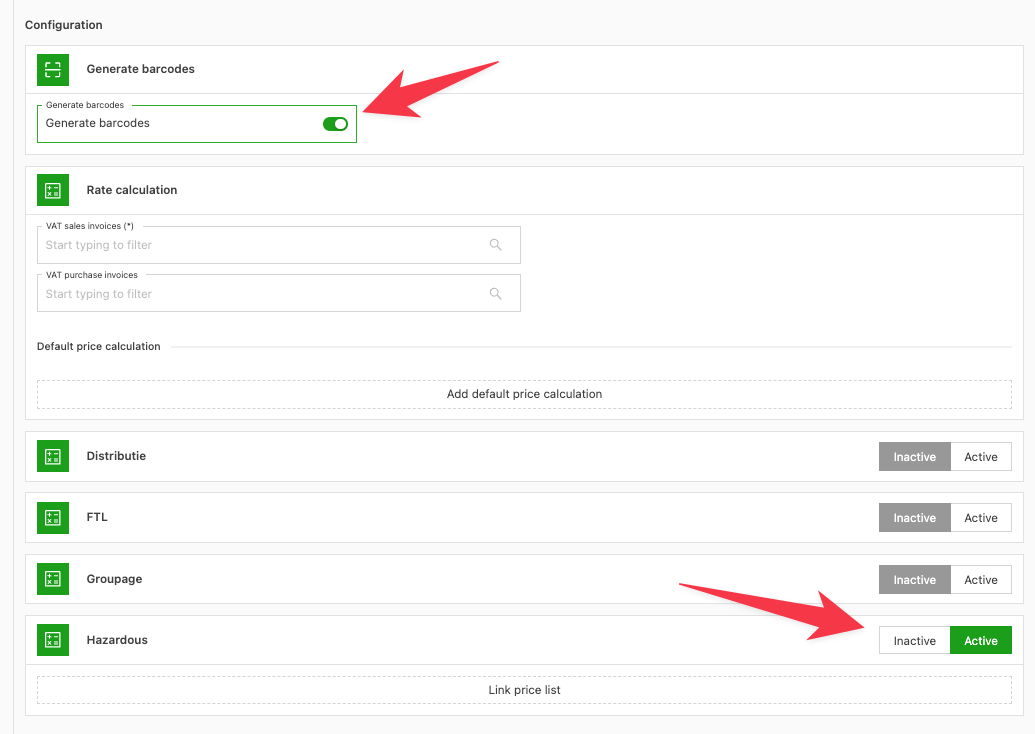
Turn on Generate barcodes
-
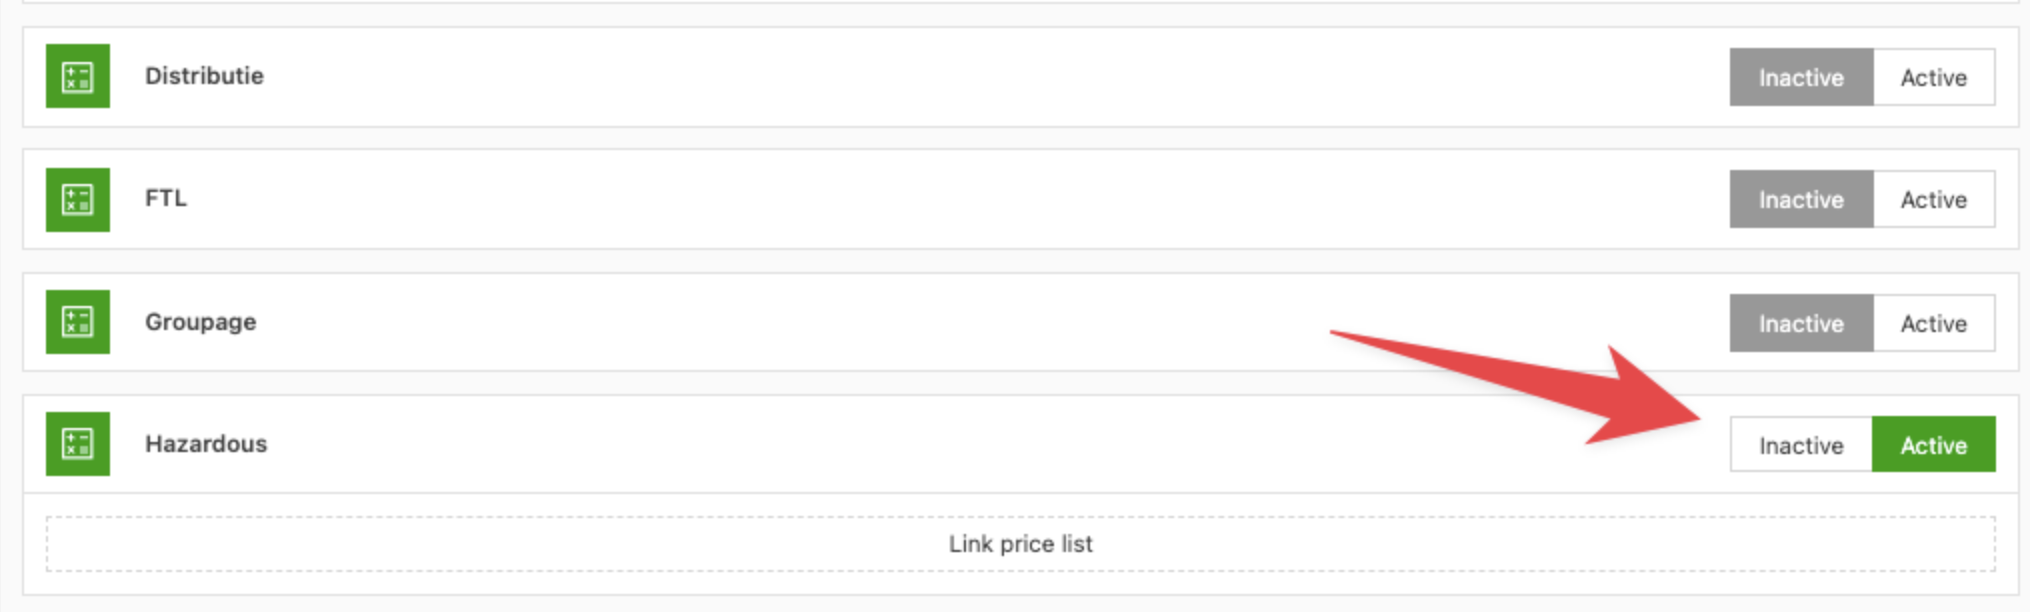
Make the packaging type active only for the transportation service “Hazardous”
- Click New packaging type again
- Create a packaging type for Parcel
- Add a predefined package size for a parcel
- Turn on Generate barcodes
- Make the packaging type active only for the transportation service “Hazardous”
Add additional fields
Next, set up the additional fields.
- Navigate to Configuration
- Click Additional fields in the header
The different categories of additional fields appear on the left side. Make sure the additional fields below are active or inactive as shown.
| Additional field category | Additional field name | Status | Comments |
|---|---|---|---|
| Orders | Requested price (order import) | Active | |
| Shipments | Shipment reference | Active | Shipment reference of the pallet network |
| Shipments | CMR reference | Inactive | |
| Freight | Pallet space | Active | |
| Freight | Loading meters | Inactive | |
| Freight | ADR | Active | |
| ADR | All | Active | Show by default: Always show |
Add a transport network
Add a transport network.
- Navigate to Locations
- Click Transport networks in the header
- Click Add transport network and create a new central network for Hazchem.
- Once it is created, add the Hazchem terminal in the Hubs and terminals section, mark it as internal and fill in the location, for example:
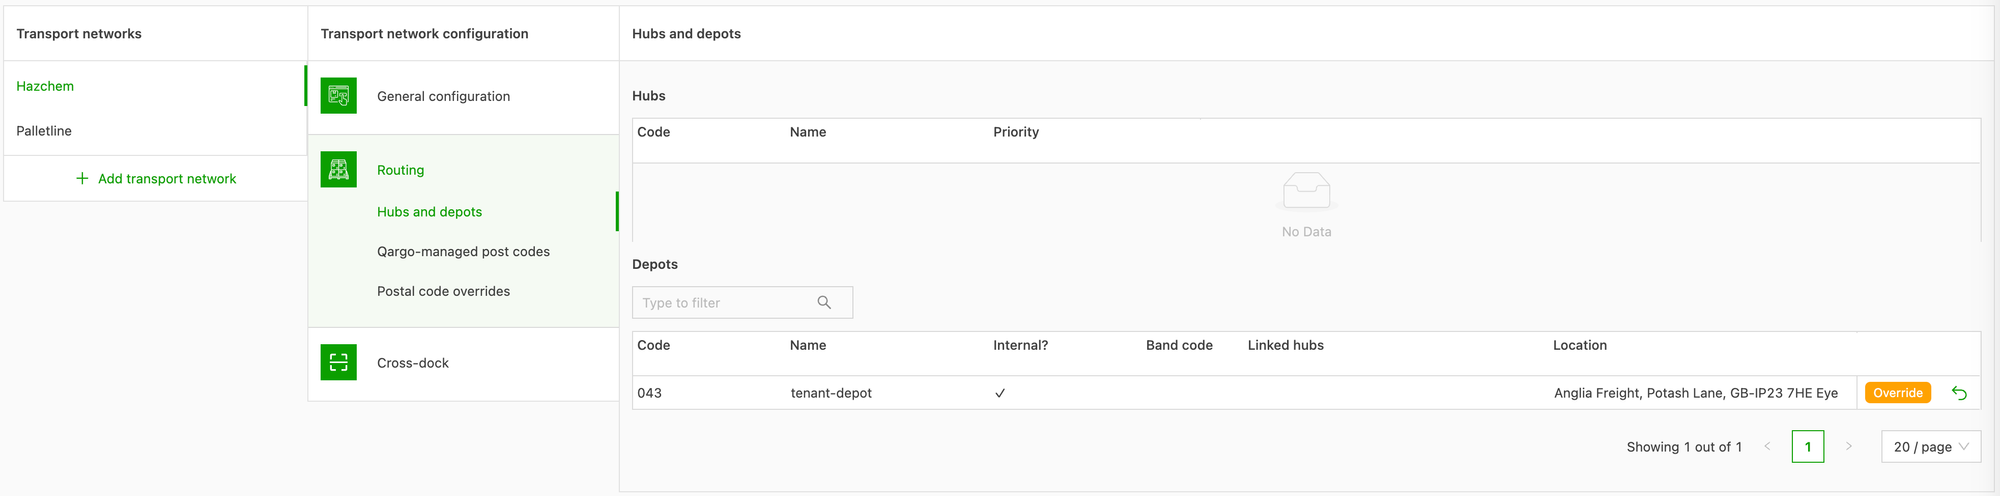
- In the Qargo managed ZIP codes section, enter the terminal code as the default
- Add the transport network to the transportation service as the default