PN - Configure the Palletline pallet network
Step-by-step guide to setting up the Palletline pallet network in Qargo, covering customer and contract carrier configuration, resources, transportation services, time windows, surcharges, packaging types, additional fields, transport networks, and task setup.
Table of contents
To use Palletline as the pallet network, complete the steps below first.
Add a customer
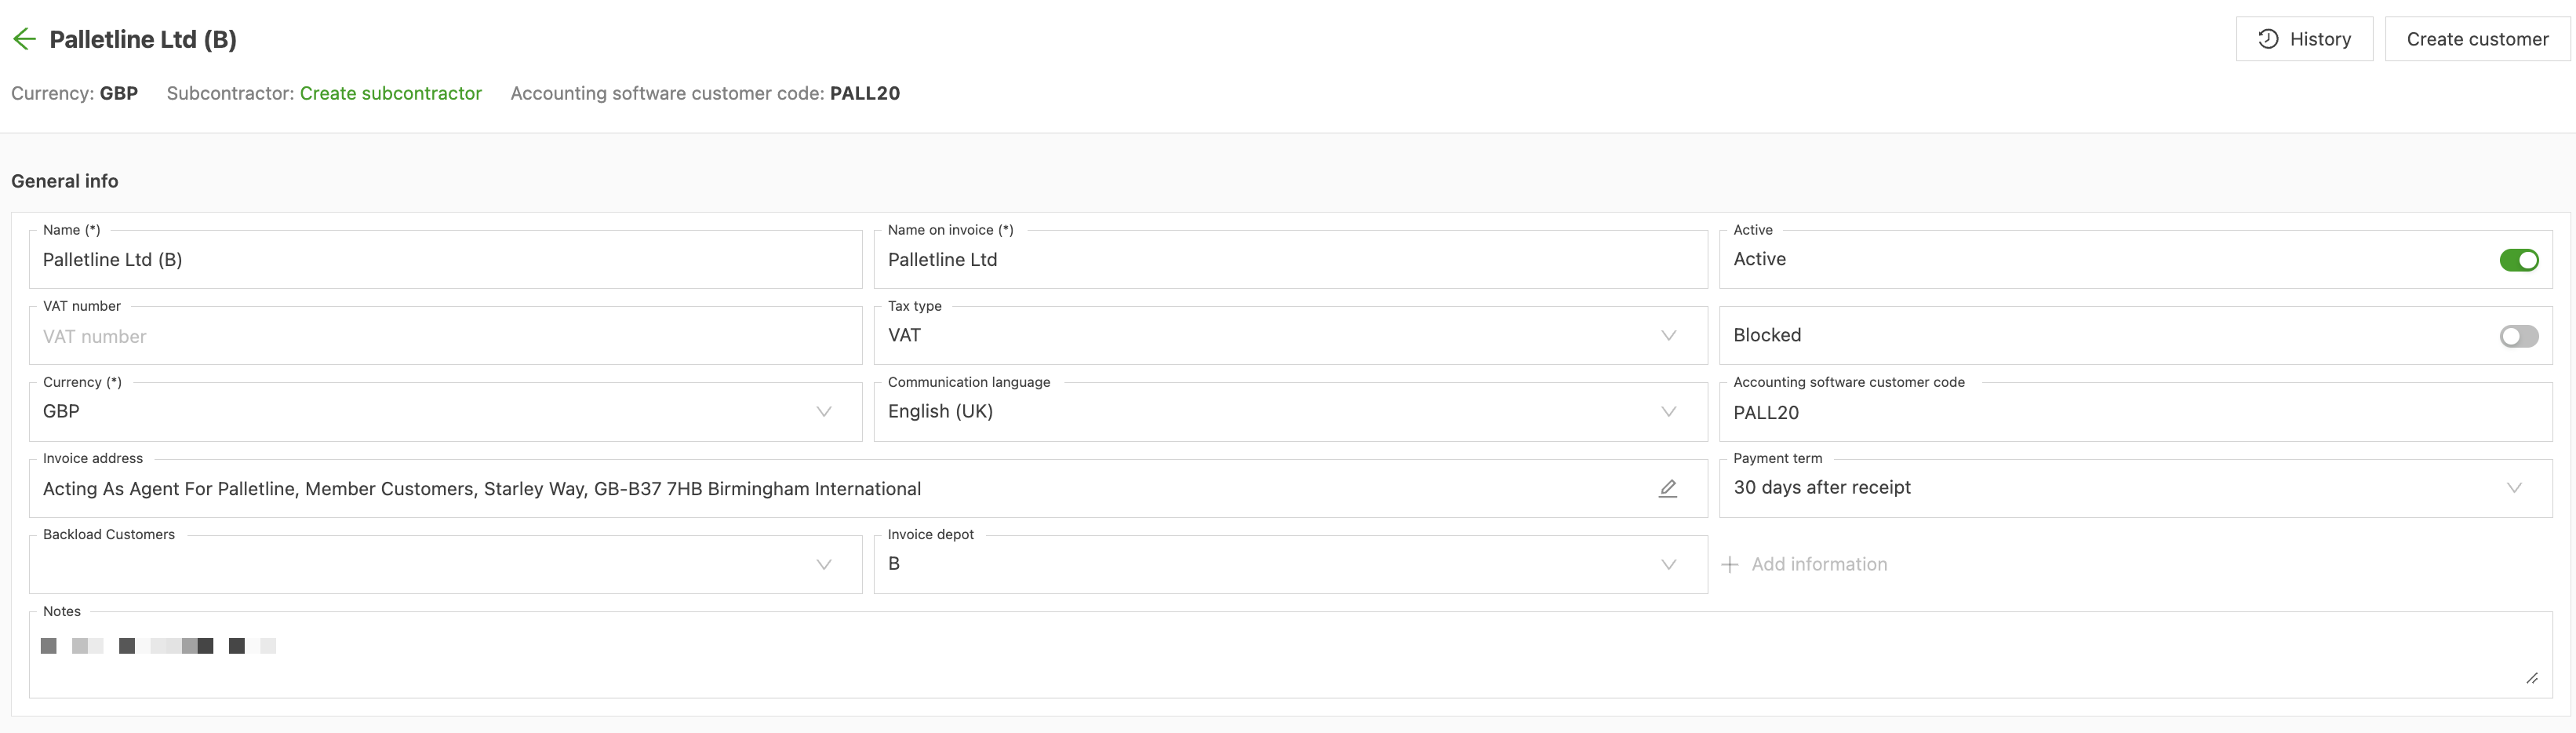
First, create Palletline as a customer.
- Go to Customers
- Click Create customer
- Create a customer named “Palletline”
- Click Create contract carrier to make Palletline a contract carrier as well
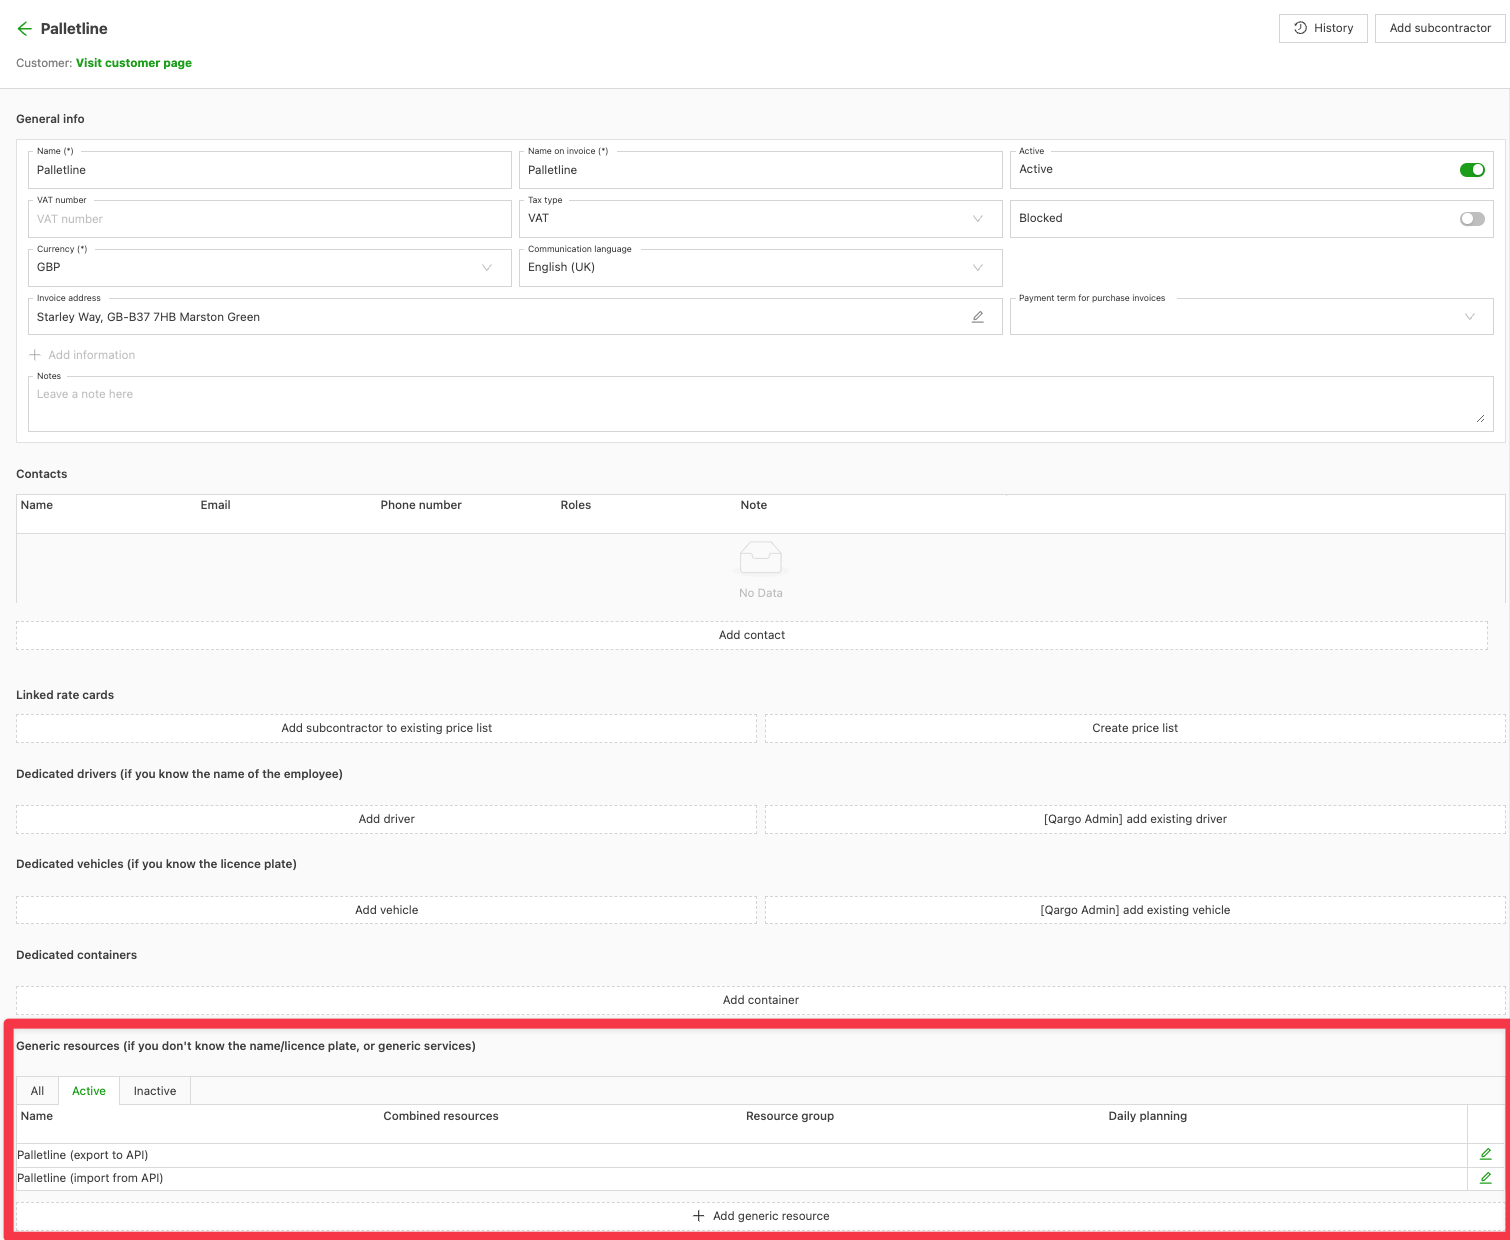
Create 2 resources for the Palletline contract carrier
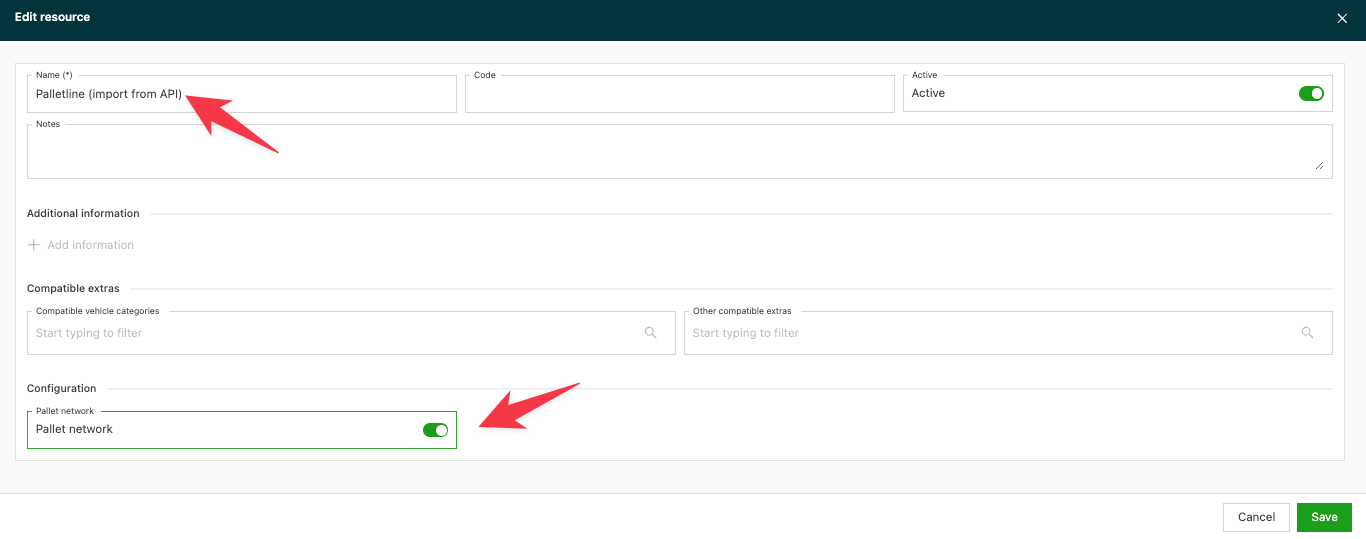
- Click “Add generic resource” or click the pencil to edit a resource that already exists.
- Double-check that the Active toggle is on
- Turn on the Pallet network toggle
Super admin access to Palletline integration configuration
Super admin users can view and edit Palletline-specific integration configuration fields on resources.
Add the order input configuration
Add a transportation service
- Go to Configuration > Order input
- Click Transportation services
- Add a new transportation service named “Pallets” (if it doesn’t exist yet)
- Save it.
Add service levels
| Name | Code |
|---|---|
Add time windows and extras
- Go to Configuration > Order input
- Click Time window to create new time windows.
- Then click Pickup/delivery extra. In the table below, this is named P/d extra.
- Fill in these fields with the details below
| Qargo type | Code | Name | Comments |
|---|---|---|---|
| Time window | CA | AM pickup | Pickup required before 12:00 |
| Time window | AM | AM delivery | Delivery required before 12:00\ |
| | |||
| Time window | BD | Specific time delivery | Delivery required at a specific time or within a 2-hour range.\ |
| Applies from 10:00–17:00. | |||
| Time window | BK | Booked in by delivery terminal. | Contact the delivery point to set a delivery window of +2 hours, between 10:00–16:00. |
| Time window | BW | Booked window | Window of 4 hours or more between 11:00–17:00 |
| Time window | PT | Premium timed - pre-10:00 delivery | Delivery window between 09:00–10:00\ |
| | |||
| Time window | VU | Very urgent | Specific timed delivery between 09:00–09:59\ |
| | |||
| P/d extra | AMAZON | Amazon delivery | Available for delivery only |
| P/d extra | COP | Customer paperwork | Available for delivery only |
| P/d extra | FC | FORS Bronze pickup | Available for pickup only |
| P/d extra | FD | FORS Bronze delivery | Available for delivery only |
| P/d extra | LA | Lift assist delivery | Available for delivery only |
| P/d extra | LC | Lift assist pickup | Available for pickup only |
| P/d extra | PU | Pallet unload / handball | Available for delivery only |
| P/d extra | SC | FORS Silver pickup | Available for pickup only |
| P/d extra | SD | FORS Silver delivery | Available for delivery only |
| P/d extra | SV | Small vehicle | Available for delivery only |
| P/d extra | TL | Liftgate | Available for delivery only |
Add additional configuration for Amazon delivery
- Once the extras are set, click the Amazon delivery extra in Pickup/delivery extras.
- Click “Add input fields” at the bottom of the page
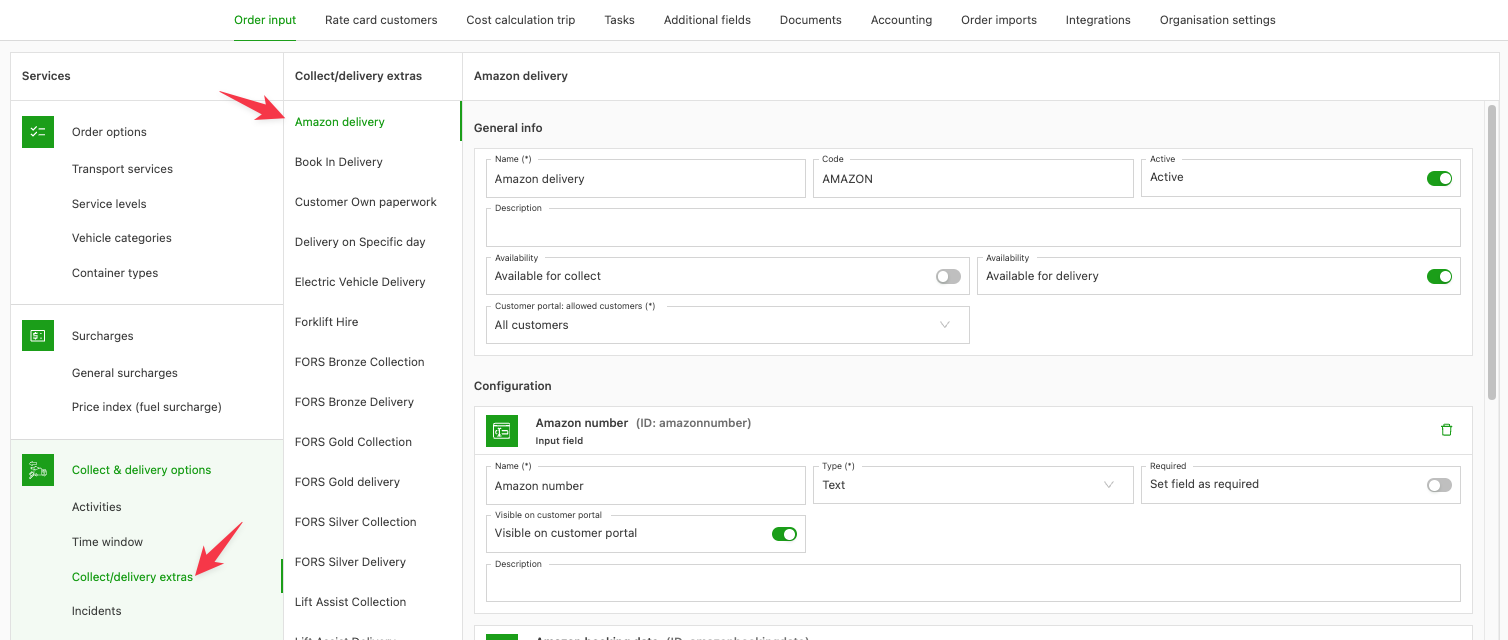
Create the following custom fields.
The custom fields must have exactly these names.
| Name | Type | Set field as required |
|---|---|---|
| Amazon number | Text | No |
| Amazon booking date | Text | No |
| Amazon booking time | Text | No |
| Amazon FBA number | Text | Yes |
| Amazon ASN number | Text | Yes |
| Amazon unit count | Text | Yes |
| Amazon PO number | Text | No |
| Amazon carton count | Text | Yes |
Add freight extras
| Qargo type | Code | Name | Comments |
|---|---|---|---|
| Freight extra | CM | Cargo insurance | Cargo insurance applies |
| Freight extra | LQ | Limited quantity | Info only - must be identified on the pallet according to the restricted goods instructions. |
| Freight extra | SL | Slaving bricks | Slaving bricks on a pallet |
| Freight extra | NS | Non-stackable | Non-stackable goods |
| Freight\ | |||
| extra | PW | Palletization | Pallet wrap & palletization |
Add surcharge
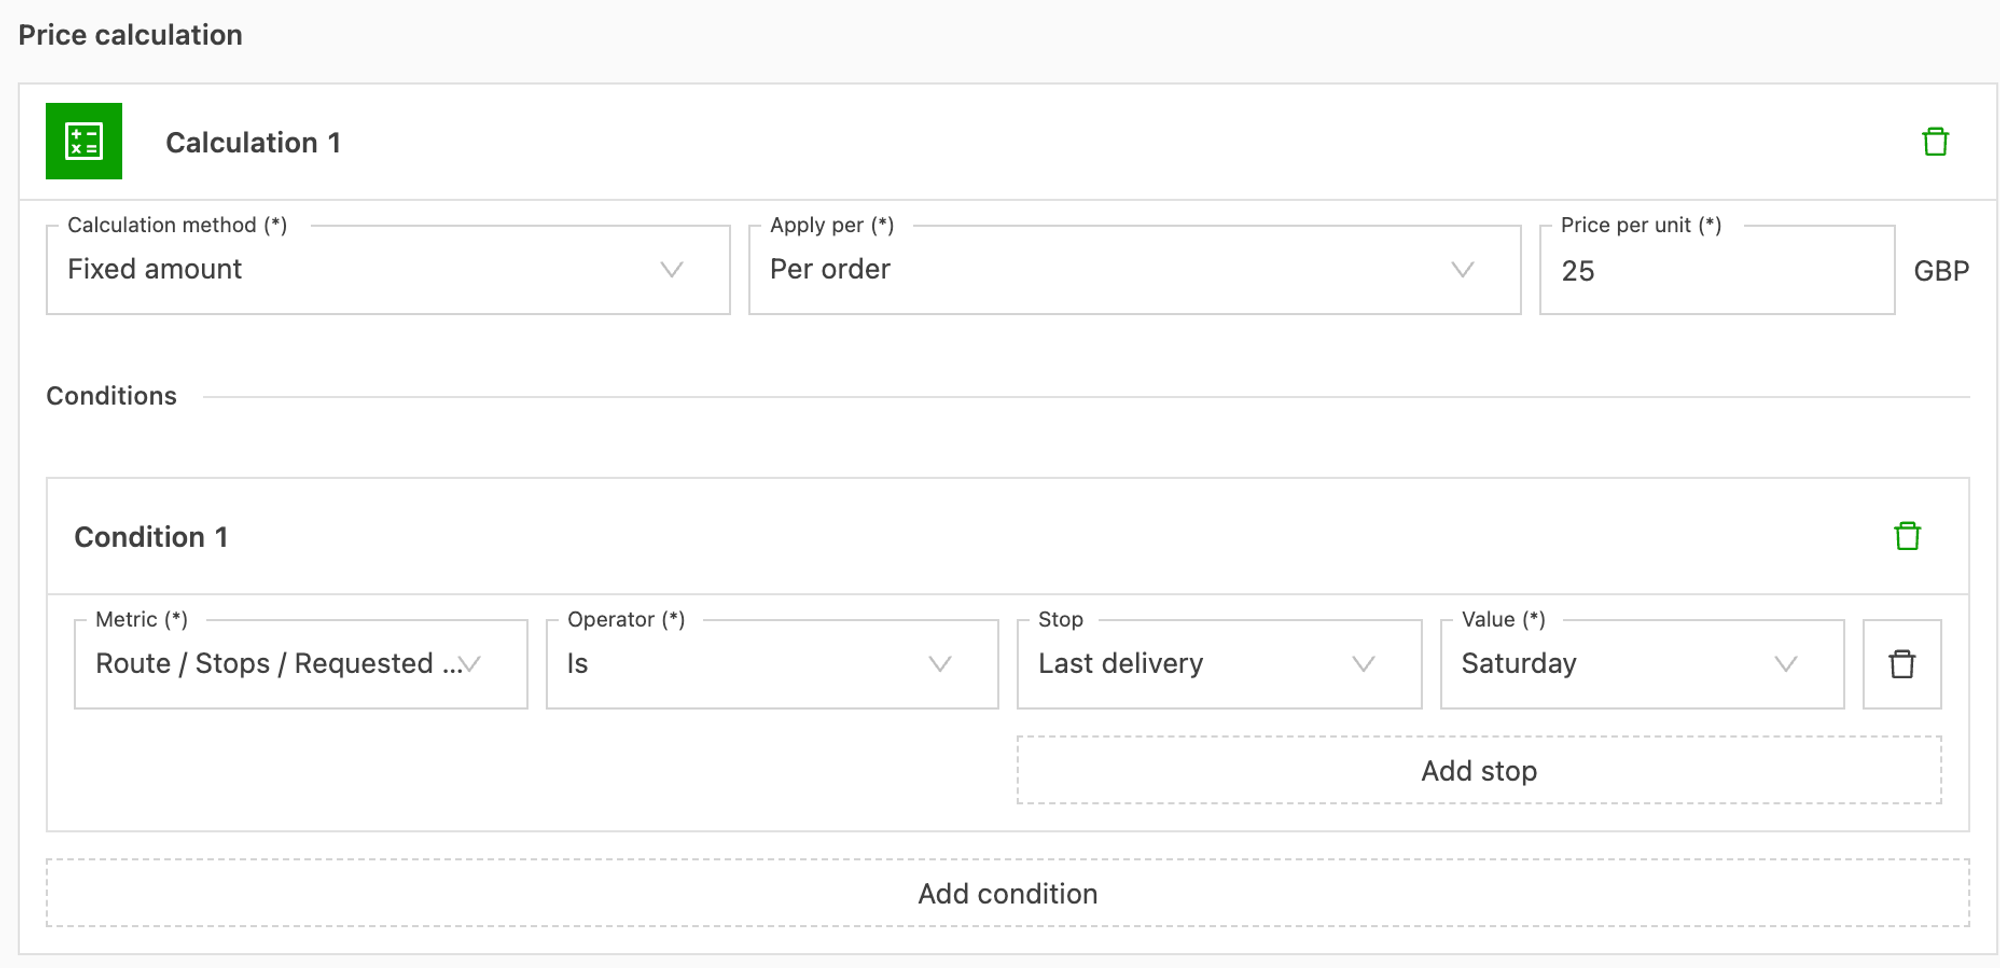
Once the time windows are set up, charges can be added, for example a Saturday surcharge.
- Go to Configuration > Order input
- Click General surcharges
- Click Add new general surcharge. Add the relevant details and the price calculation condition: last delivery requested weekday is Saturday
Add a packaging type
- Go to Configuration > Order input
- Click Packaging types
- Click “New packaging type”
- Create a packaging type for Pallet and add the sizes shown in the image below.
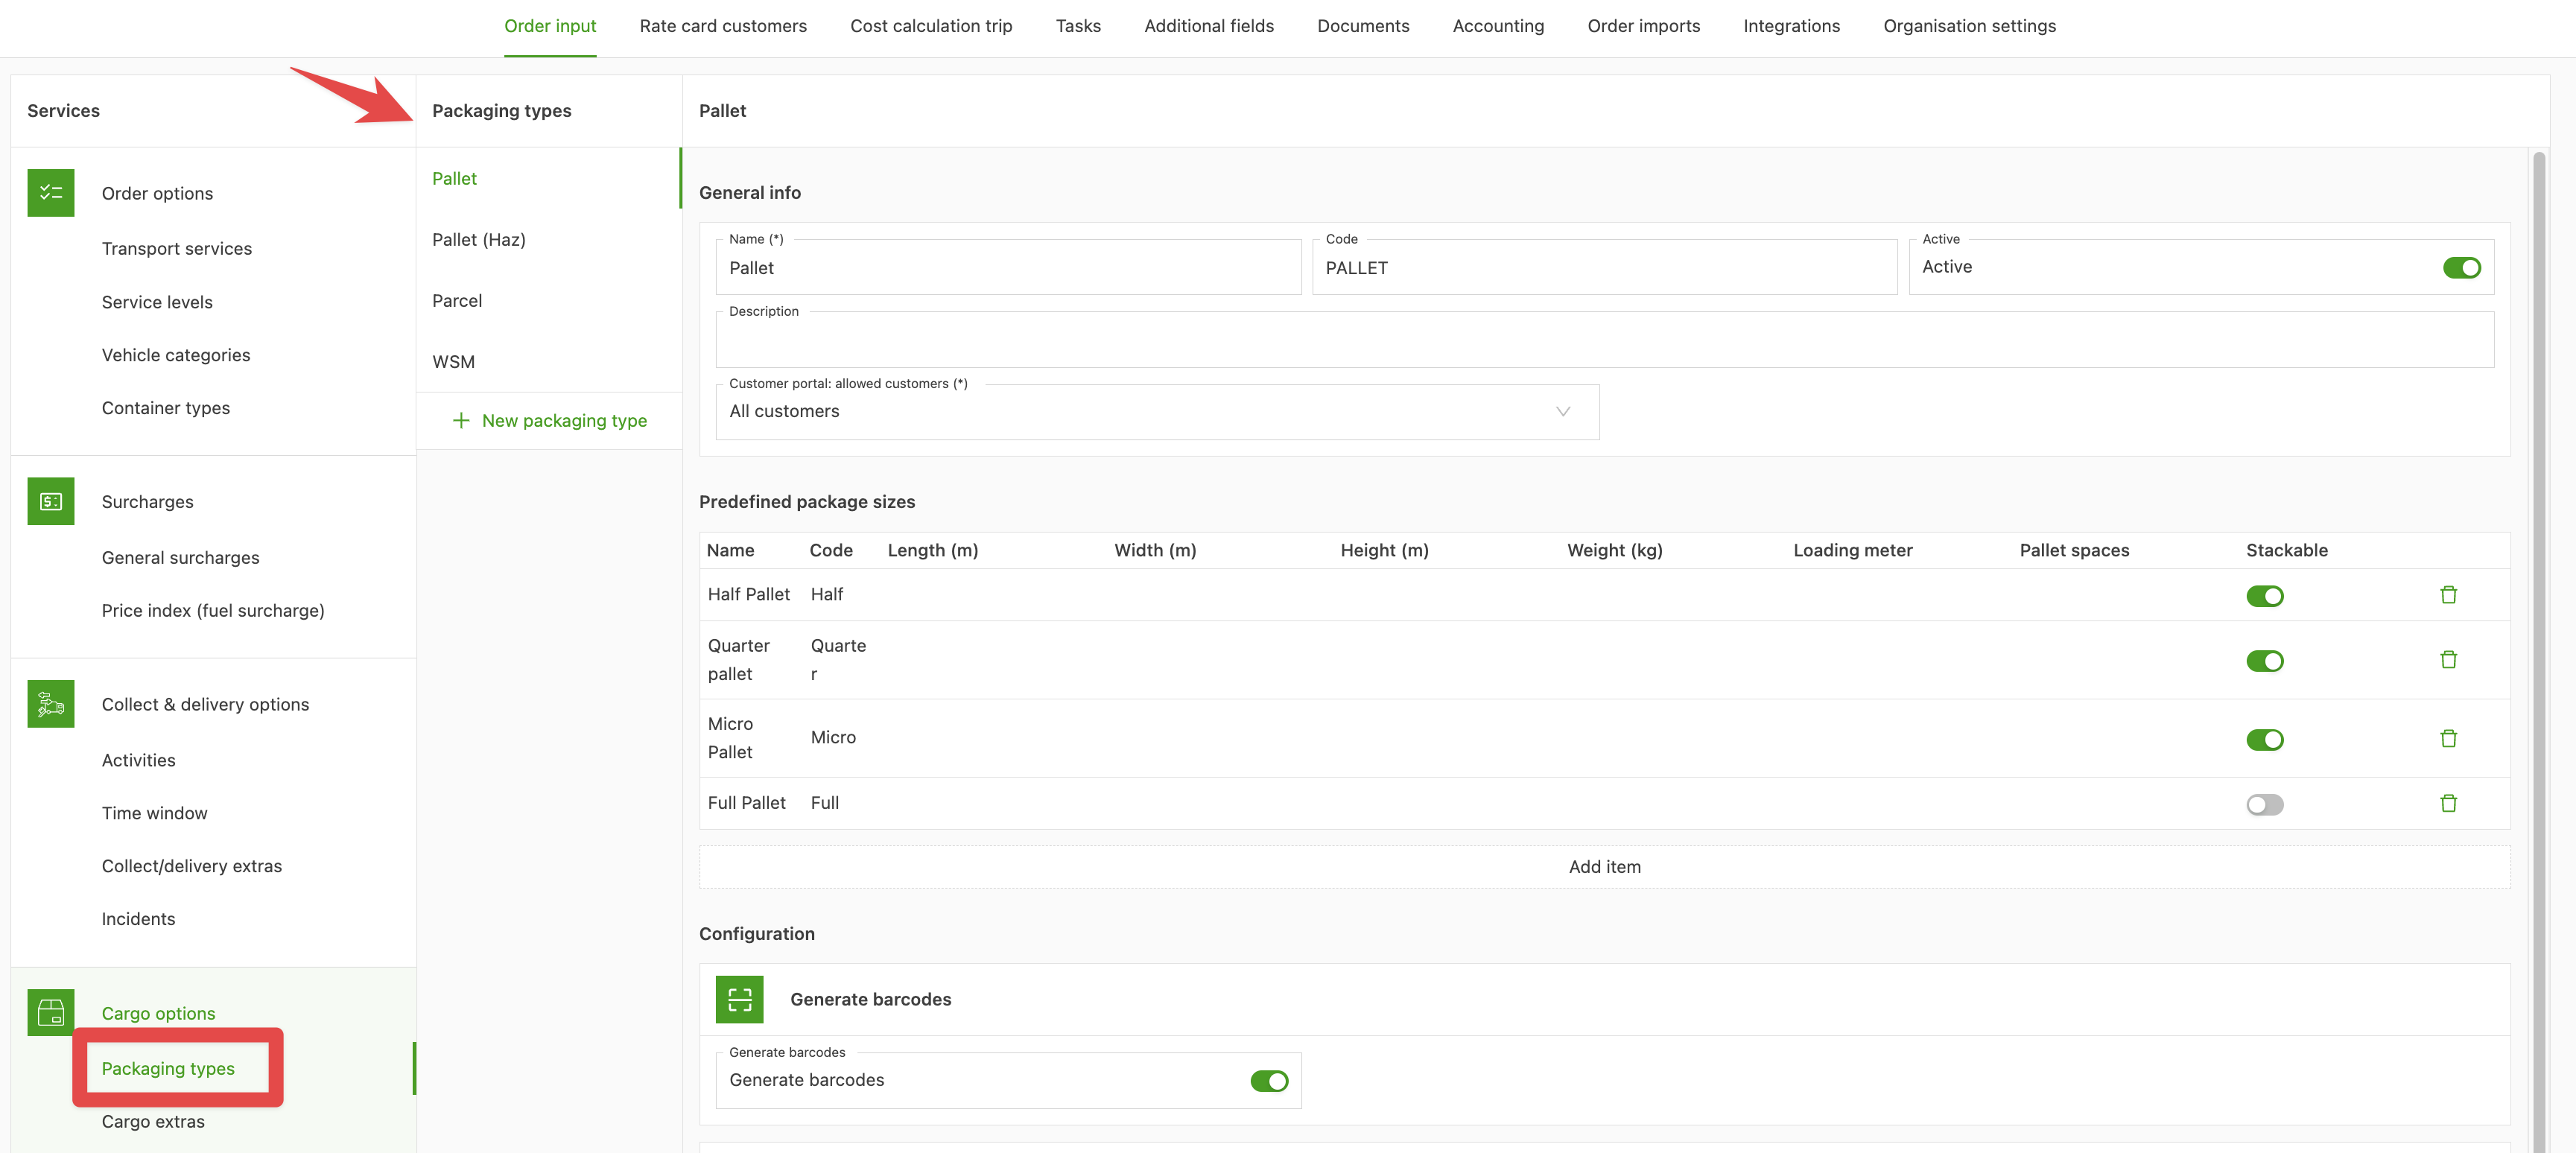
- Turn on the “Generate barcodes” toggle (Qargo admin only)

Add additional fields
Next, set up the additional fields.
- Go to Configuration
- Click Additional fields in the header
The different categories of additional fields appear on the left side. Make sure the additional fields below are active/inactive.
| Additional field category | Additional field name | Status | Additional action |
|---|---|---|---|
| Freight | Loading meters | Inactive | |
| Freight | Pallet space | Active | |
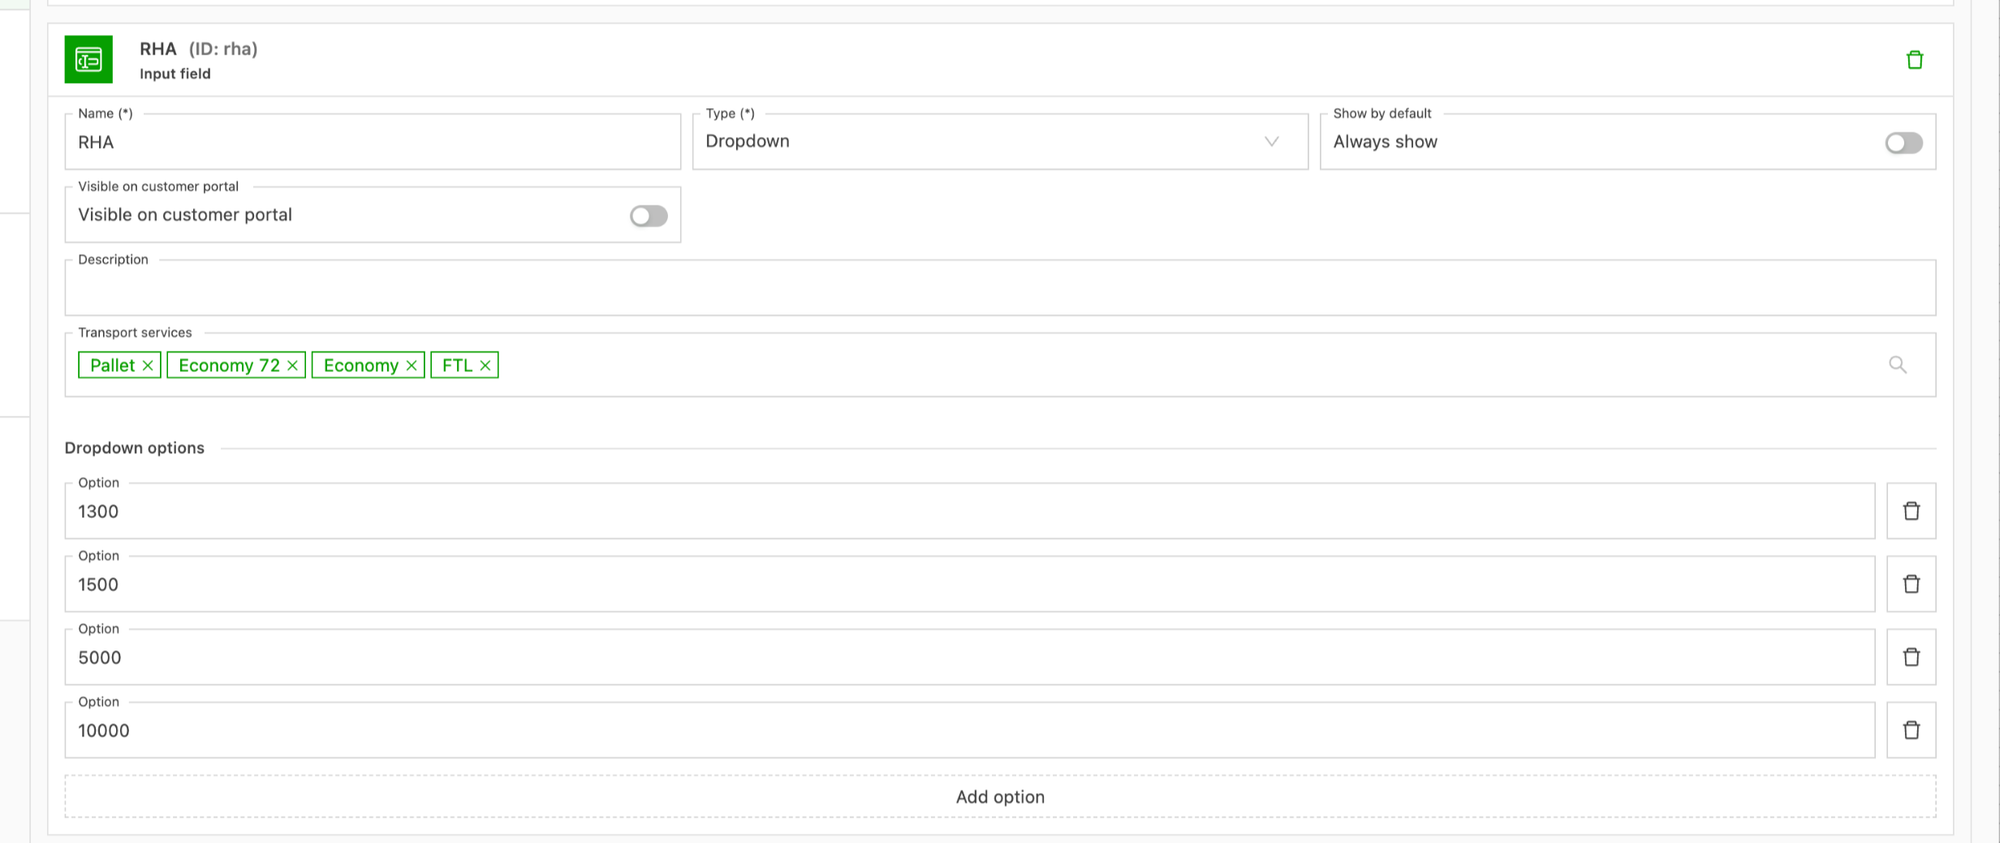
| Orders | RHA | Active | Create a custom field |
For the RHA custom field, make sure the details match the screenshot below:
Add a transport network
In addition, add a transport network.
- Go to Locations
- Click Transport networks in the header
- Click Add transport network and create a new Central network for Palletline (if it doesn’t exist yet).
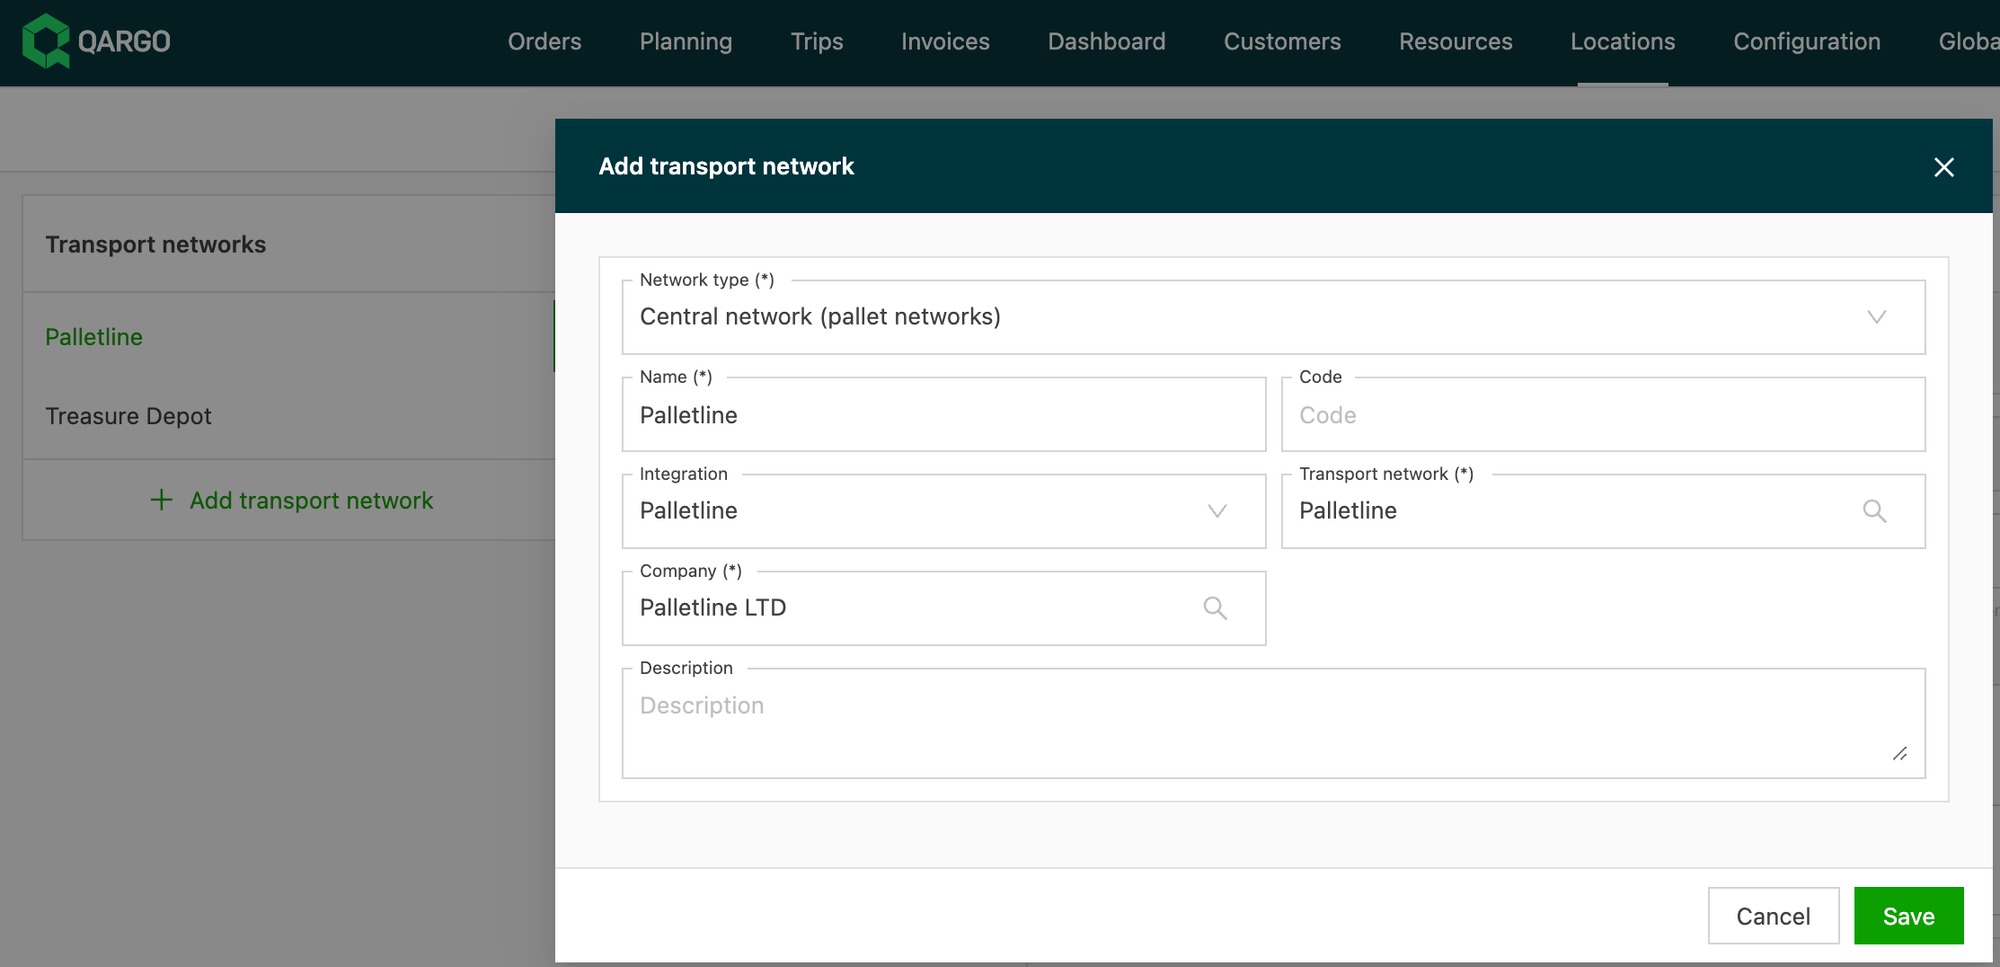
- Click Automatically assign resources and change it to For specific customers
- Select Palletline in the dropdown list
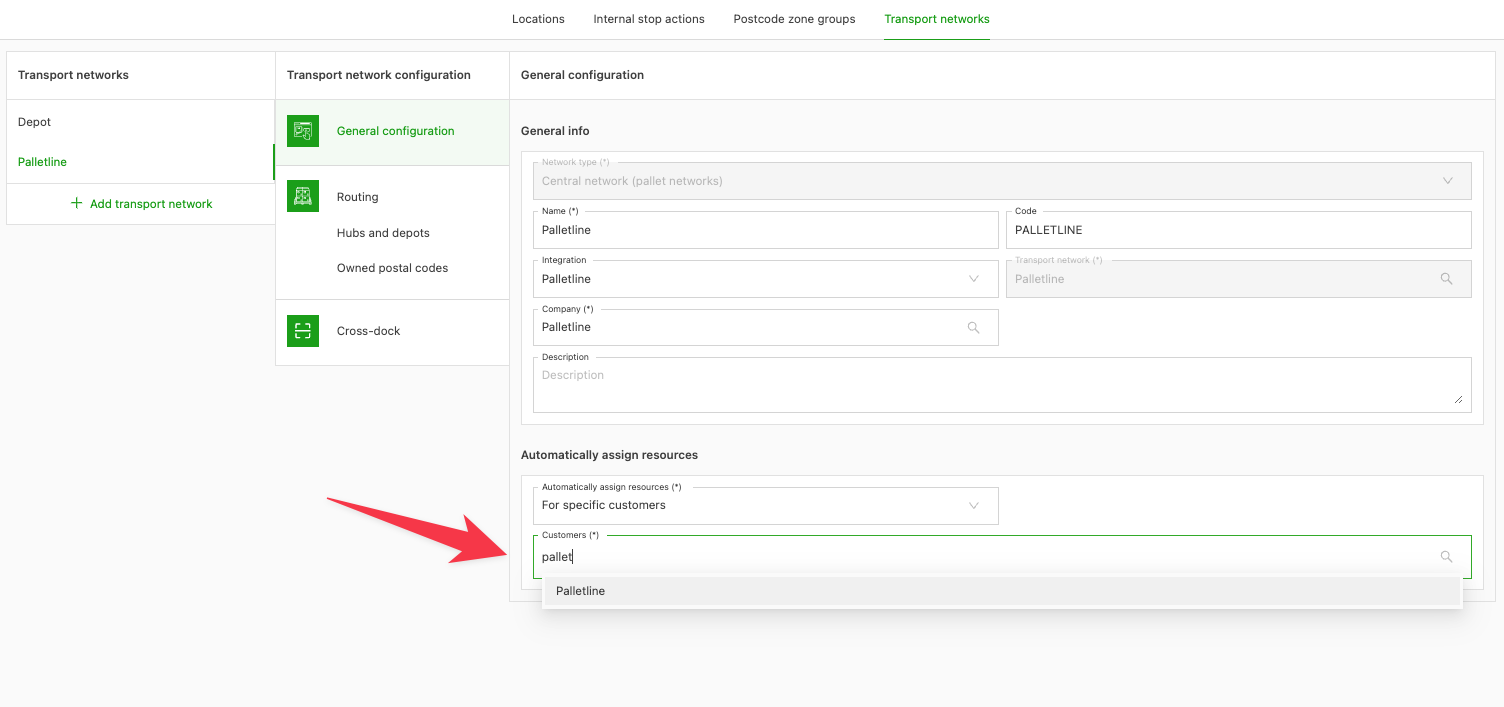
- Once it is created, add their terminal in the “Hubs and terminals” section, mark it as “internal” and fill in the location, for example:
Add tasks
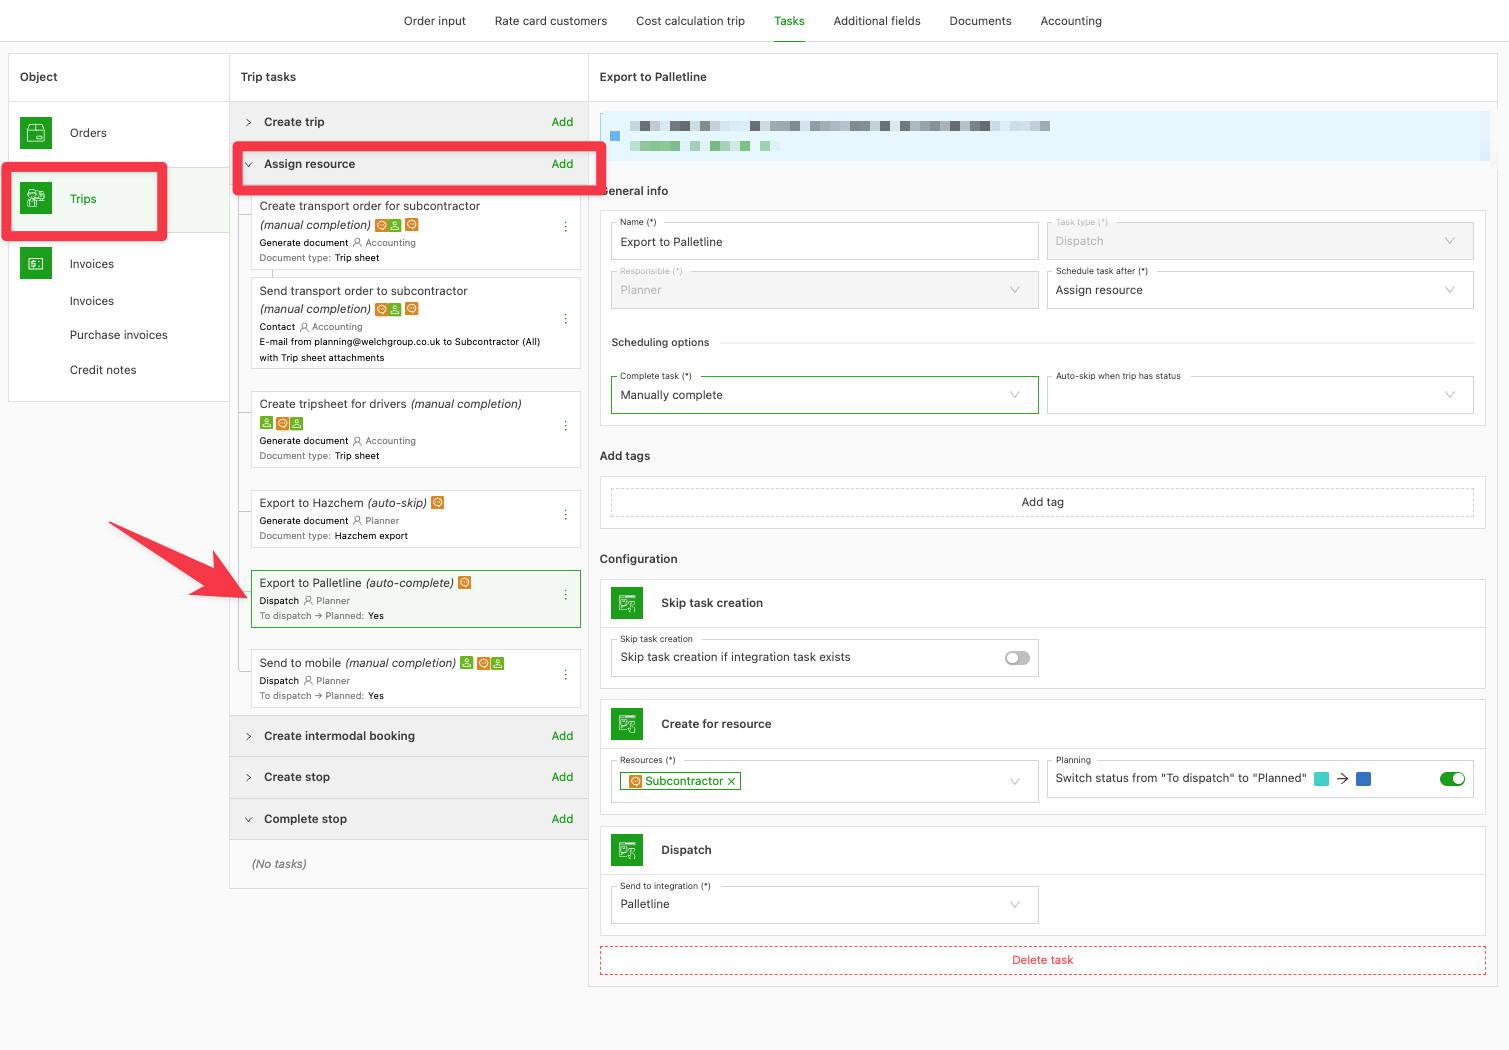
Add an “Export to Palletline” task
- Go to Tasks
- Add a new task in Loads > Assign resource that matches the details below
Configure delivery status task
-
Configure a specific Palletline delivery status in the driver question paths to distinguish between EPOD (regular delivery with signature on the device), DRDC (delivery at a distribution center) and LASI (left as instructed). The response is recorded and the status is sent as part of the integration.
-
The status is set up as an extra field that, once enabled, can be configured in the question paths.
-
To set it up, go to Configuration > Additional fields
-
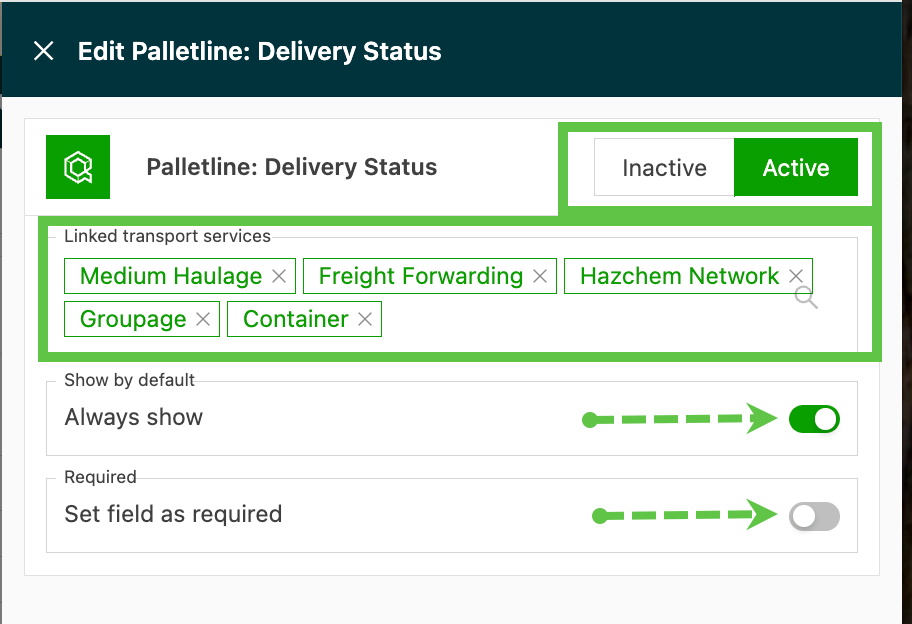
Select Shipments and find the ‘Palletline: Delivery status’ option.
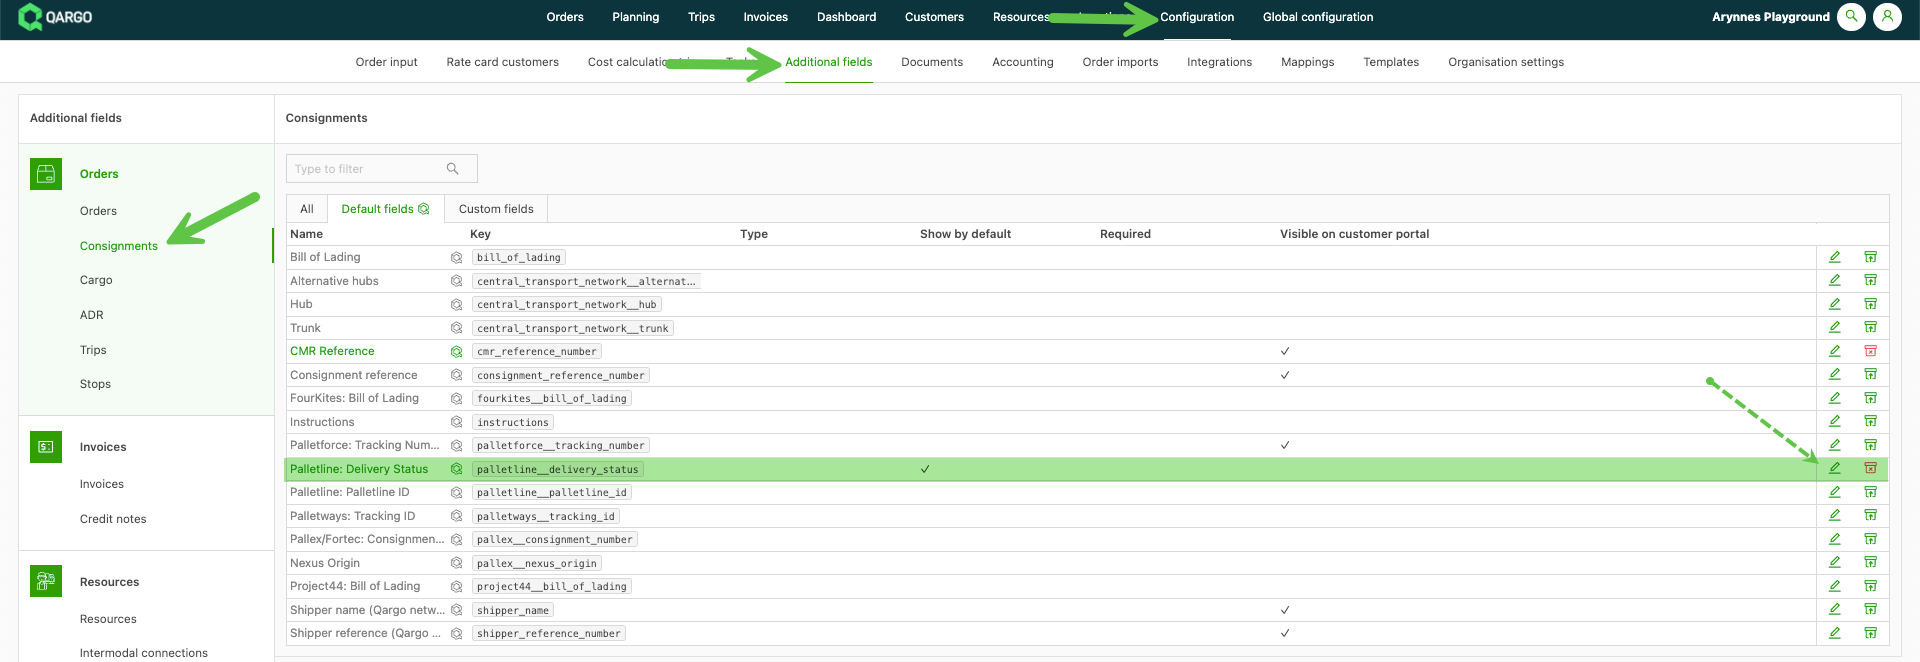
- Click the edit icon (pen). This opens the configuration panel for this option.
- Mark the option as Active.
- Add the transportation services that apply to this option.
- Select whether this option is ‘Always show’ and ‘Required’, and turn the toggles on or off as needed.
-
Create the task for the driver to complete as part of the delivery process.
- Set it at the ‘Delivery’ stop activity, after the sign on device requirement.
- Direct the driver to indicate the delivery status from the options provided.