
PN - Add transport networks
Table of contents
If orders from a customer always or in most cases go to the same terminal in a transport network, it’s helpful to set that terminal as the default terminal in Configuration.
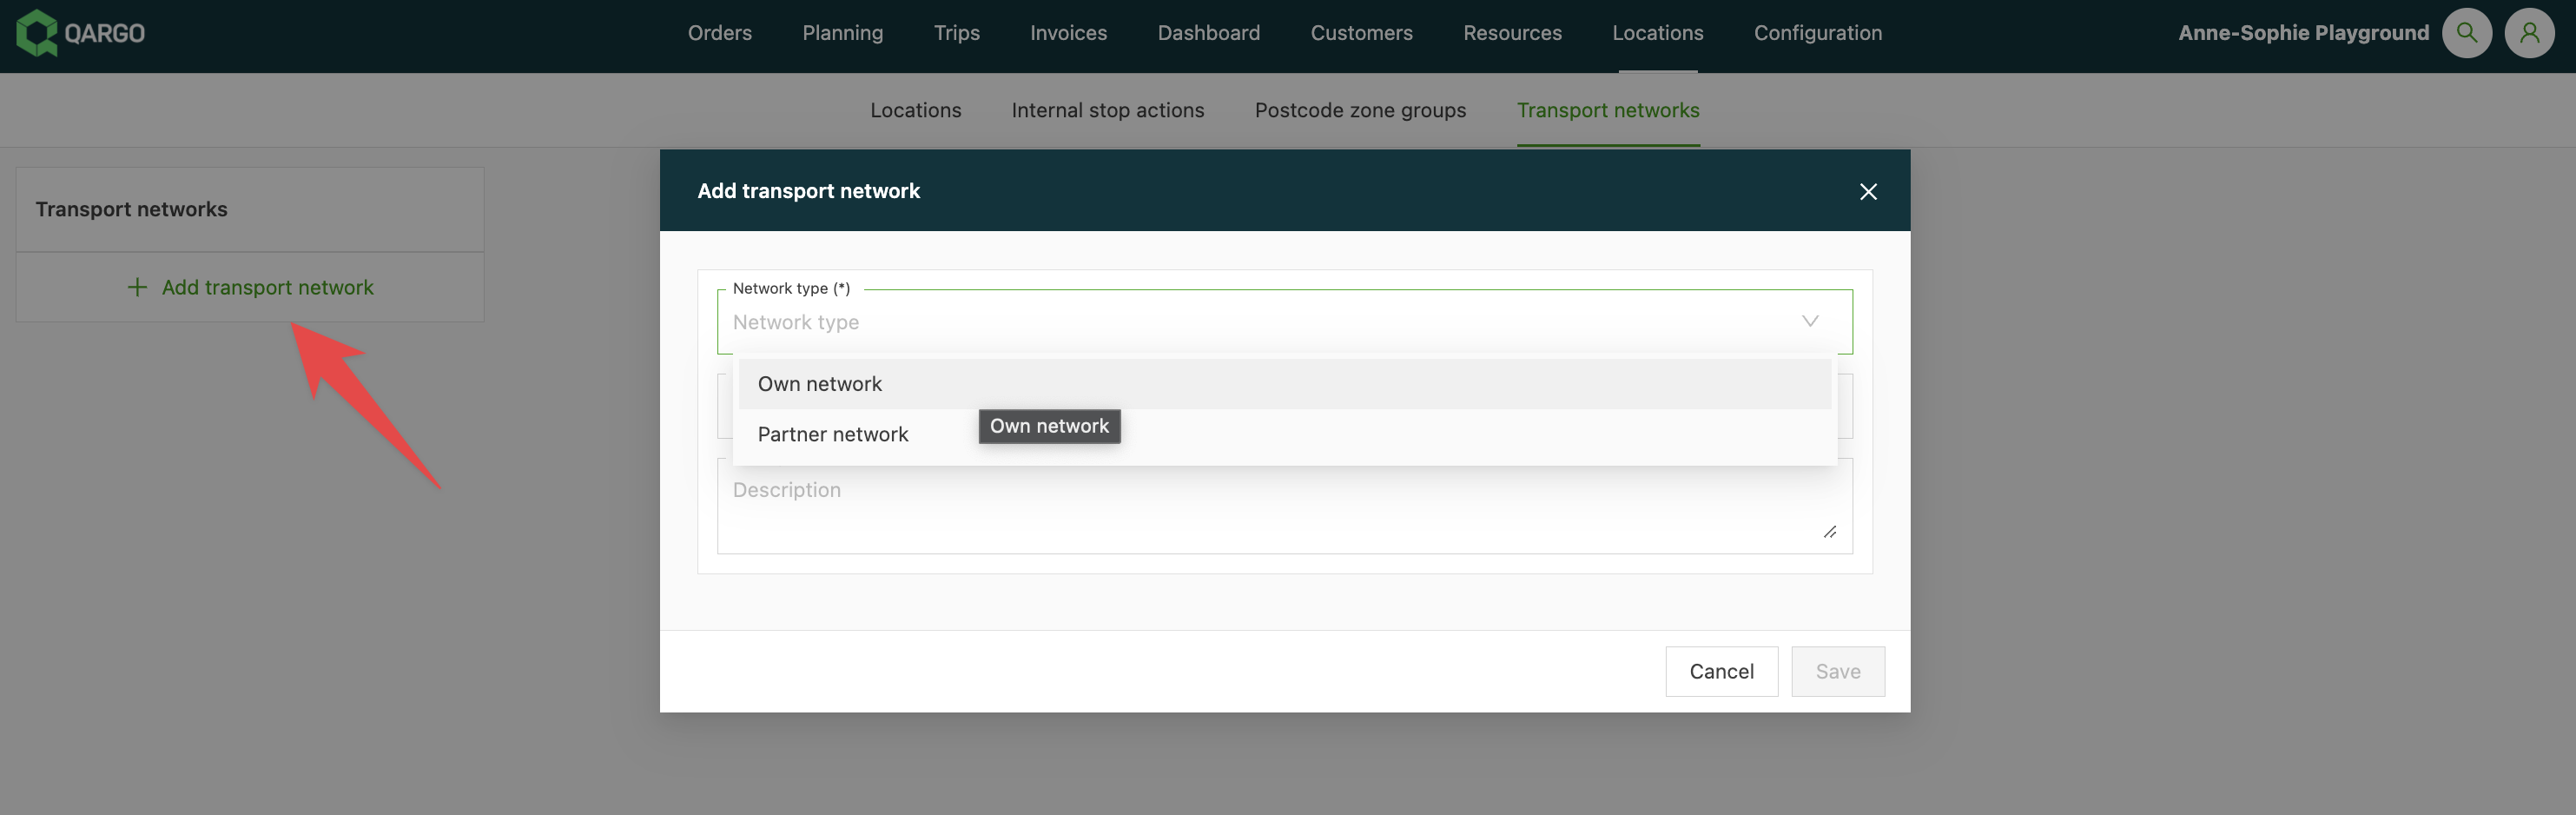
Adding transport networks
- Navigate to Locations > Transport networks.
- Click + Add transport network.
- Select the network type (Own or partner network) and enter a name for that network.
- Save it.
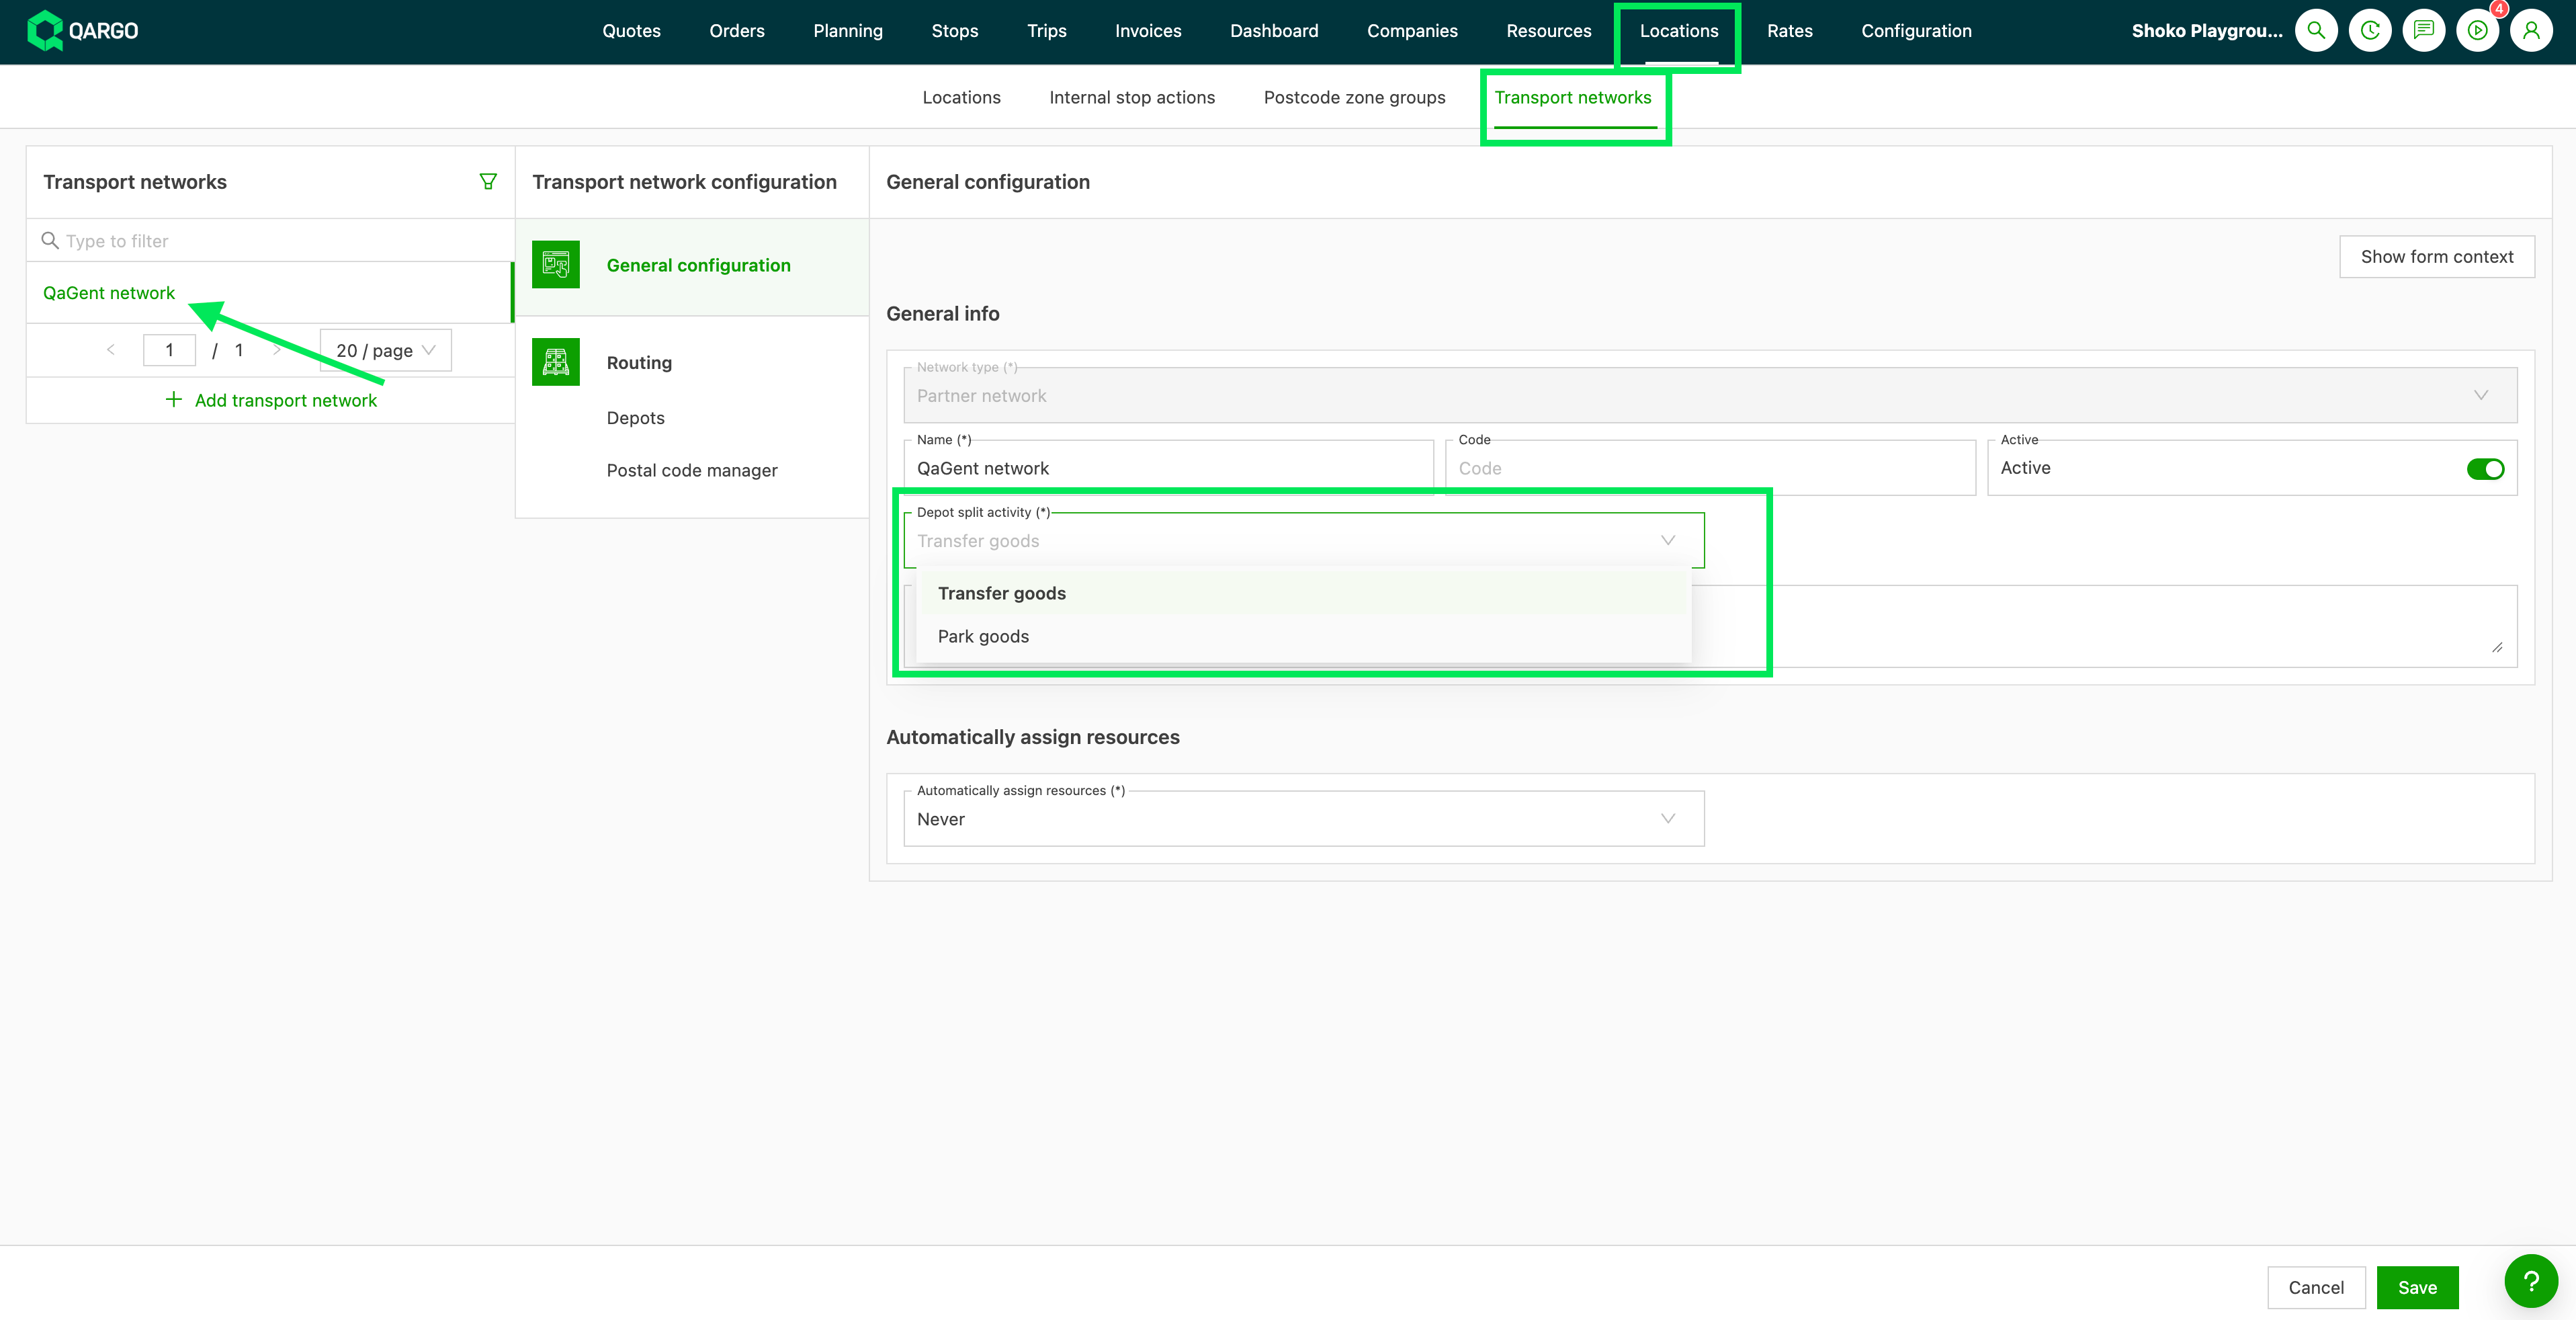
Choosing the terminal split activity (Transfer goods or Park goods)
Each transport network can be configured to generate one of two activities on the stop it inserts whenever an order is split at a terminal: Transfer goods or Park goods. The setting lives on the network itself. It is applied automatically to every order that uses that network, including orders created by a planner, orders arriving through order import, orders placed via the customer portal, and orders created through the external API.
- Transfer goods is the default for every existing network. The split stop carries Terminal: unload + load goods.
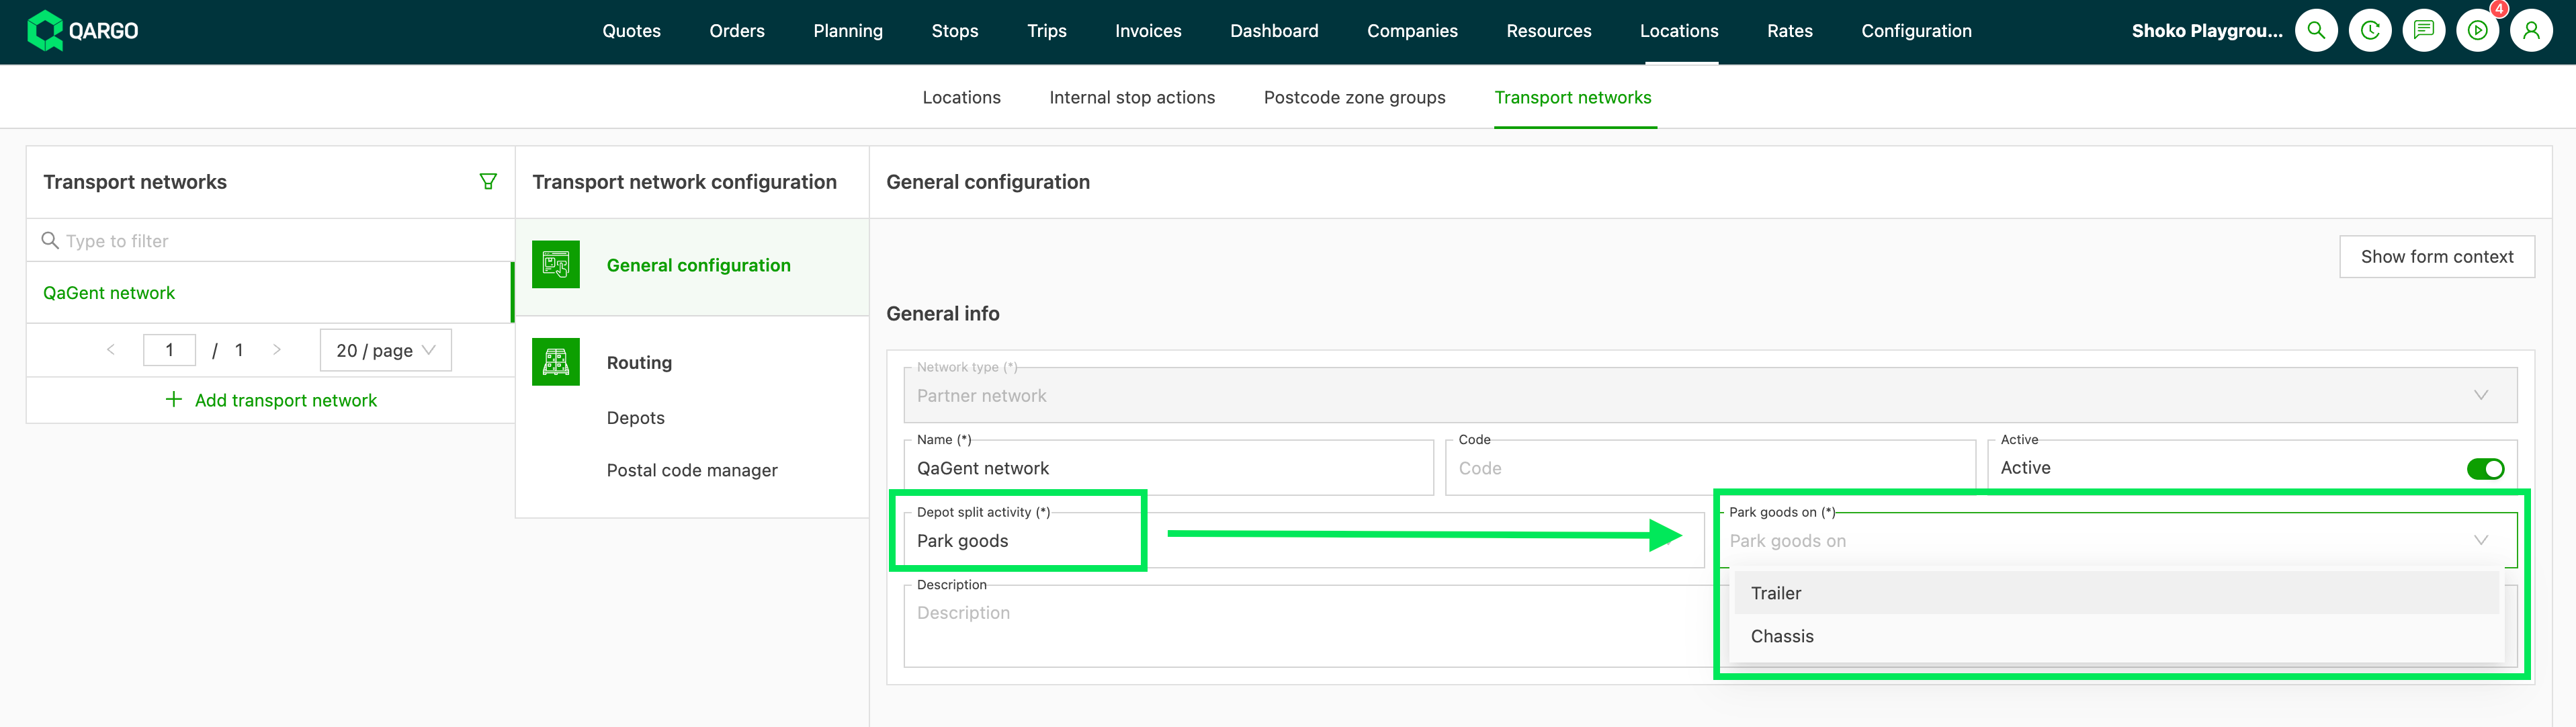
- Park goods is intended for terminals that function as a shunting yard, where a trailer or chassis is parked and later picked up by another driver rather than unloaded. The split stop carries Parking: drop + hook trailer or Parking: drop + hook chassis, depending on the resource chosen.
Configure the terminal split activity on a transport network:
-
Navigate to Locations > Transport networks.
-
Open the transport network to set up.
-
In the General info section, locate the Terminal split activity field.
-
Select Transfer goods to keep the default unload/load behavior, or
select Park goods to generate parking stops. -
If Park goods is selected, the Park goods on field becomes required.
Choose Trailer or Chassis. -
Save the network.
Note:
- A parked trailer or chassis is not carried onto the next leg automatically; it is still assigned per leg.
- Loads whose terminal split is set to Park goods cannot be route-optimized.
Add terminals
Once transport networks are set up, terminals can be added to these networks.
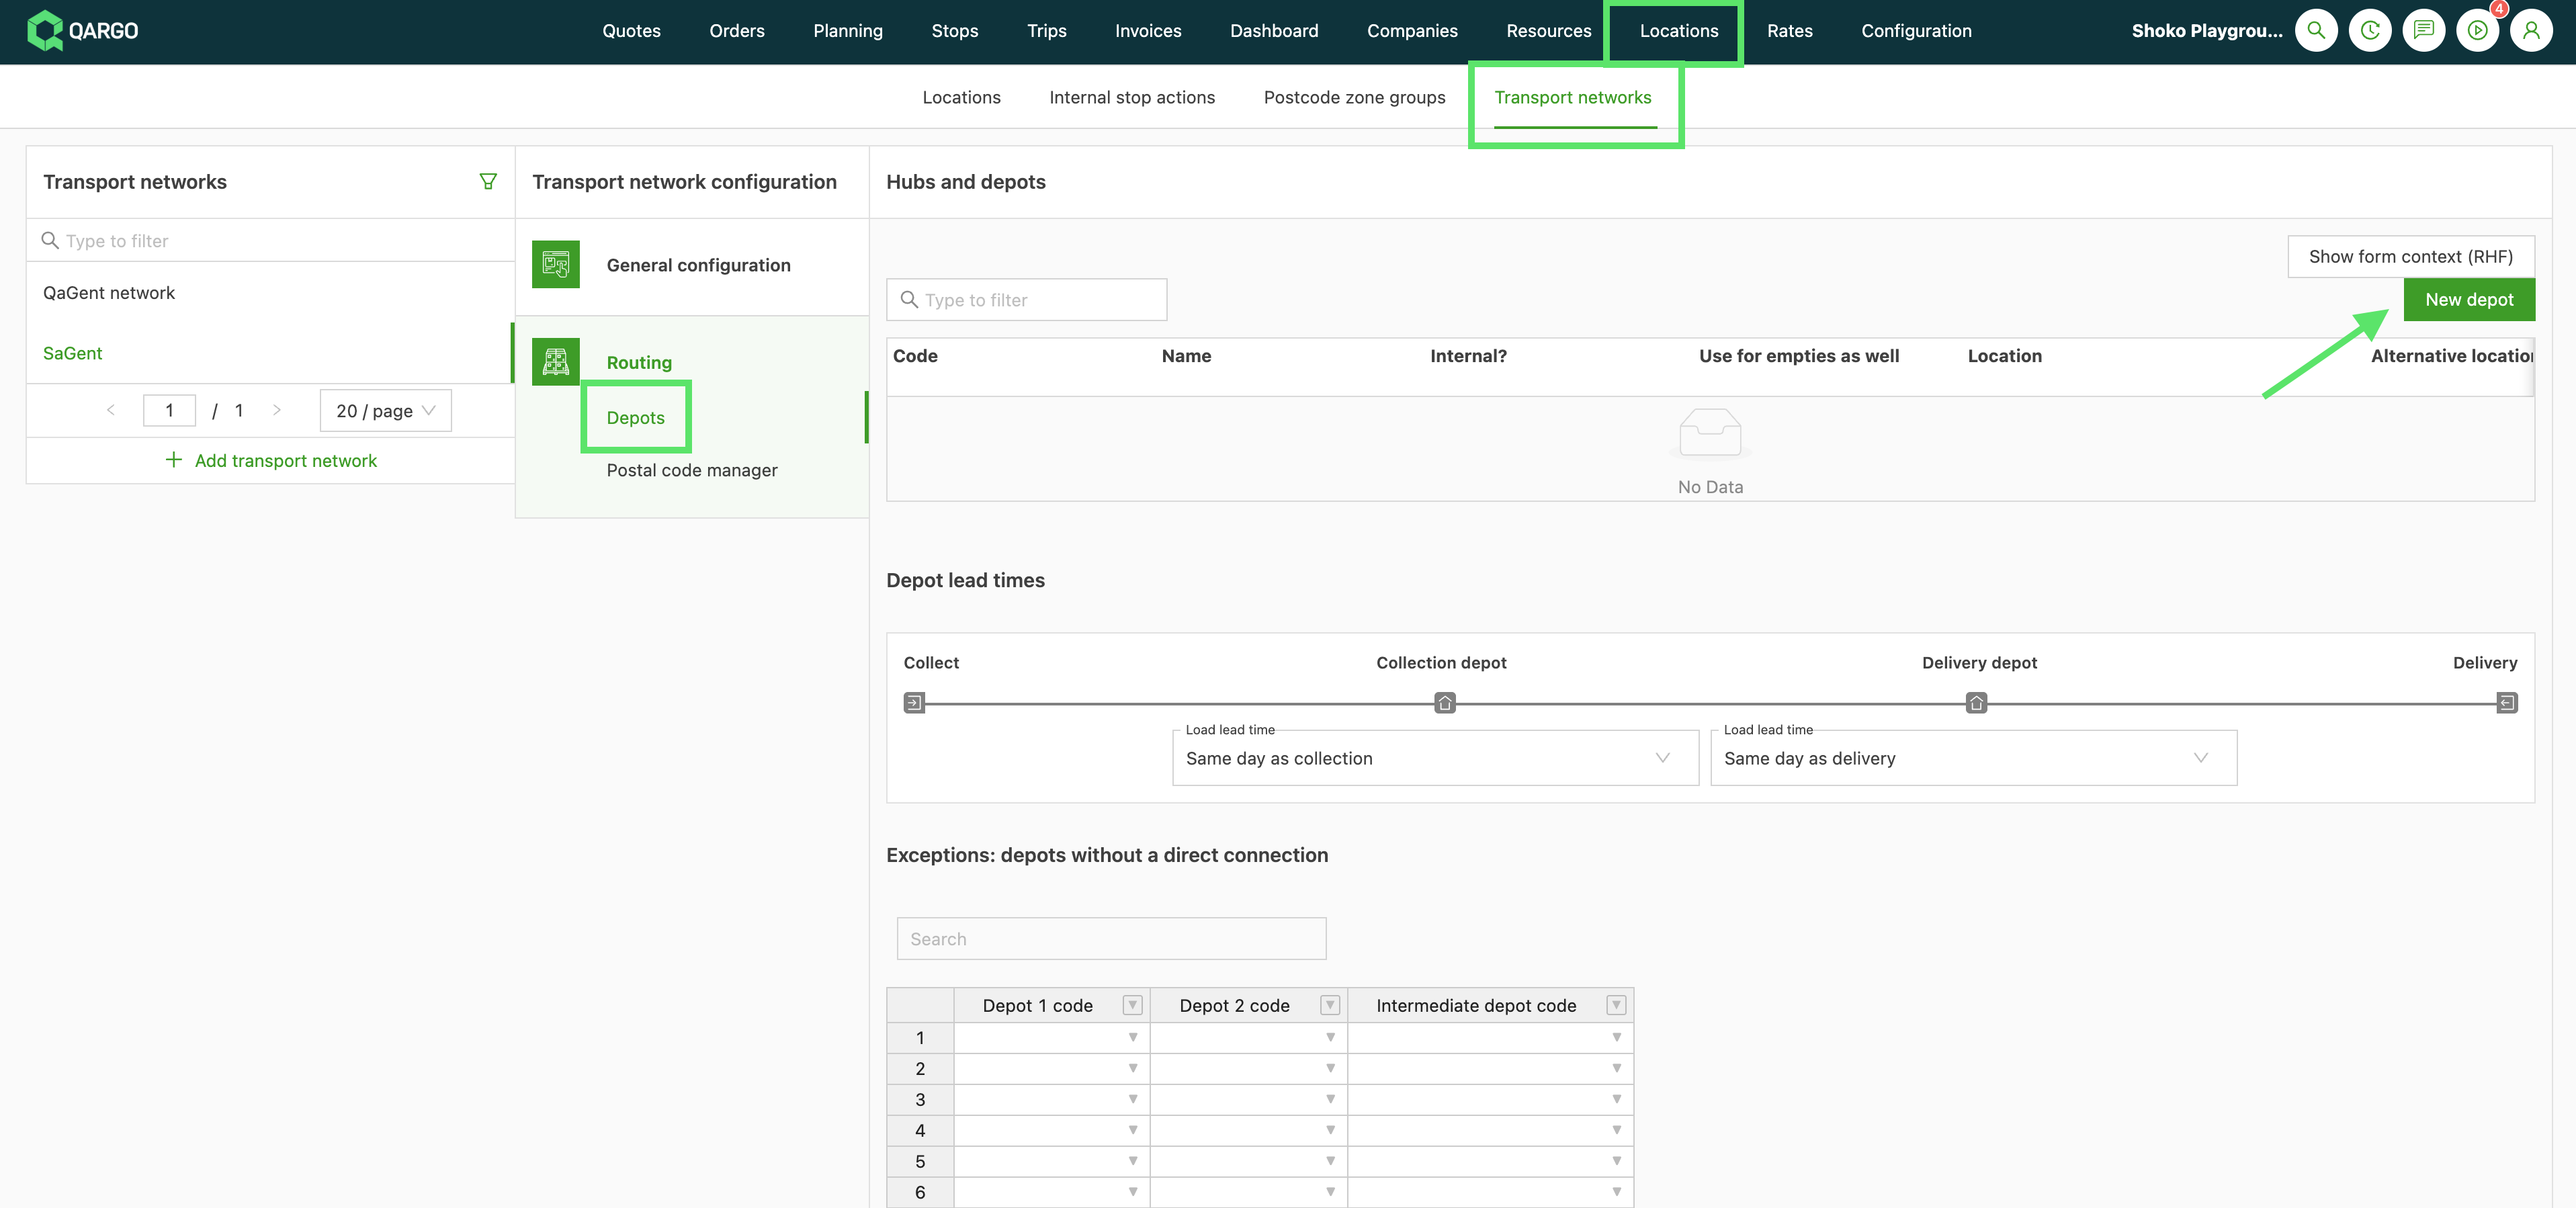
- Navigate to Locations > Transport networks.
- Open the transport network to set up.
- Click Terminals under Routing.
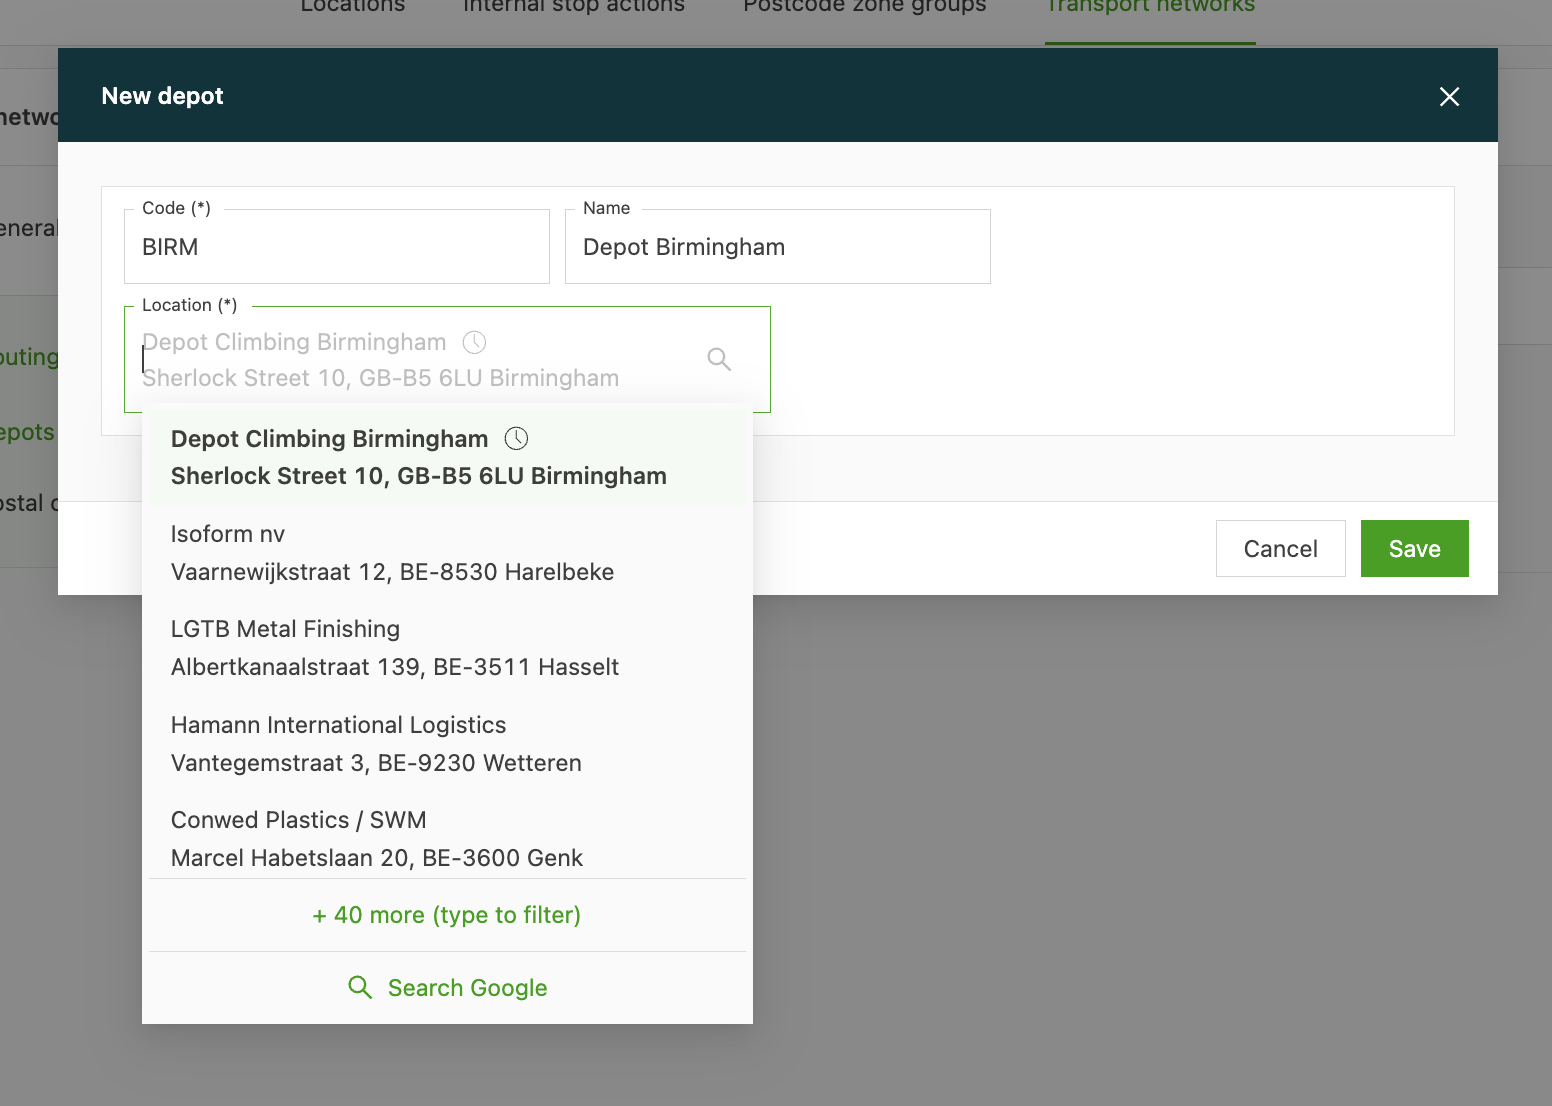
- Click the New terminal button.
- Complete the fields. The code is used to map the terminal location to the ZIP code zones.
Add the default terminal for a customer location
It is possible to configure which terminal is used for which customer.
- Navigate to Locations > Transport networks.
- Click the transport network that was created.
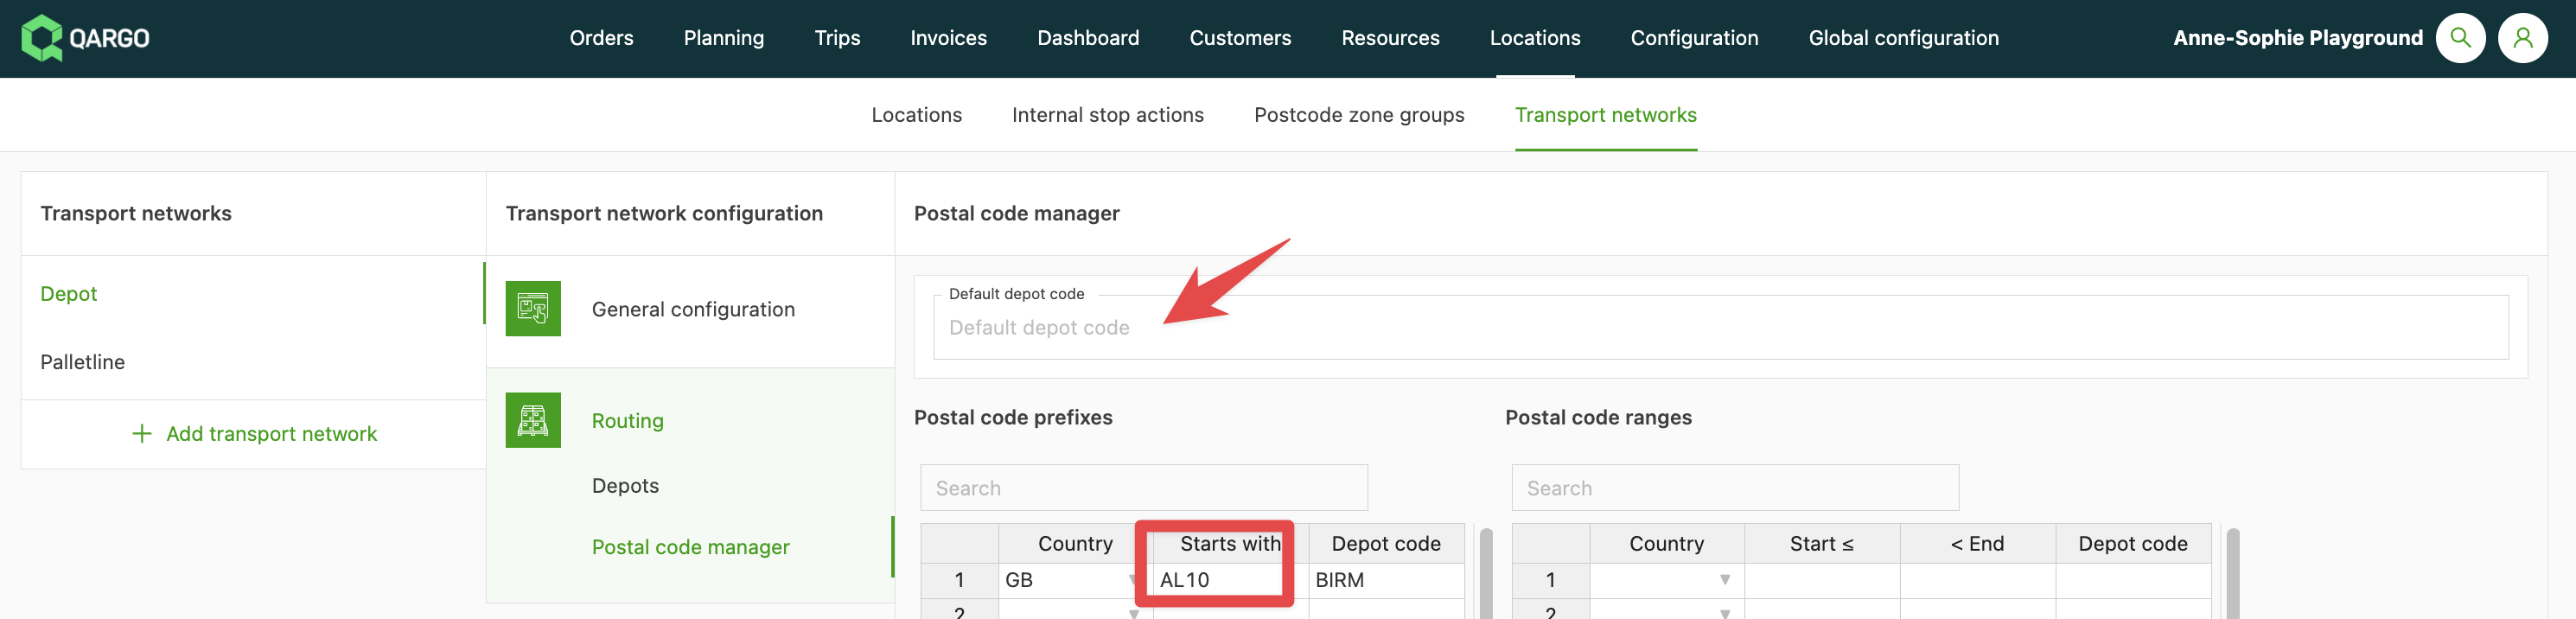
- Go to ZIP code manager.
- Add the terminal code for the ZIP code. If the code is not known by heart, go to Customers, search for a specific customer and check the ZIP code.
In addition, a default terminal code can also be added. This means that if no terminal location is set for a certain location, the default terminal code is shown on the order.
Applying or changing a transport network on an existing order
A transport network can be applied to or changed on an existing order without recreating the order. When it is applied, the system evaluates the transport network against the order’s pickup and delivery addresses, compares the result with the existing stop structure, and inserts only the missing terminal and hub stops. Planning groups are automatically assigned to each newly inserted leg, and lead times configured on the transport network are applied to the whole order.
Prerequisites
All affected order legs must be in To plan status before a transport network can be applied or changed.
How to apply a transport network to an existing order
- Navigate to the order detail page in Qargo TMS.
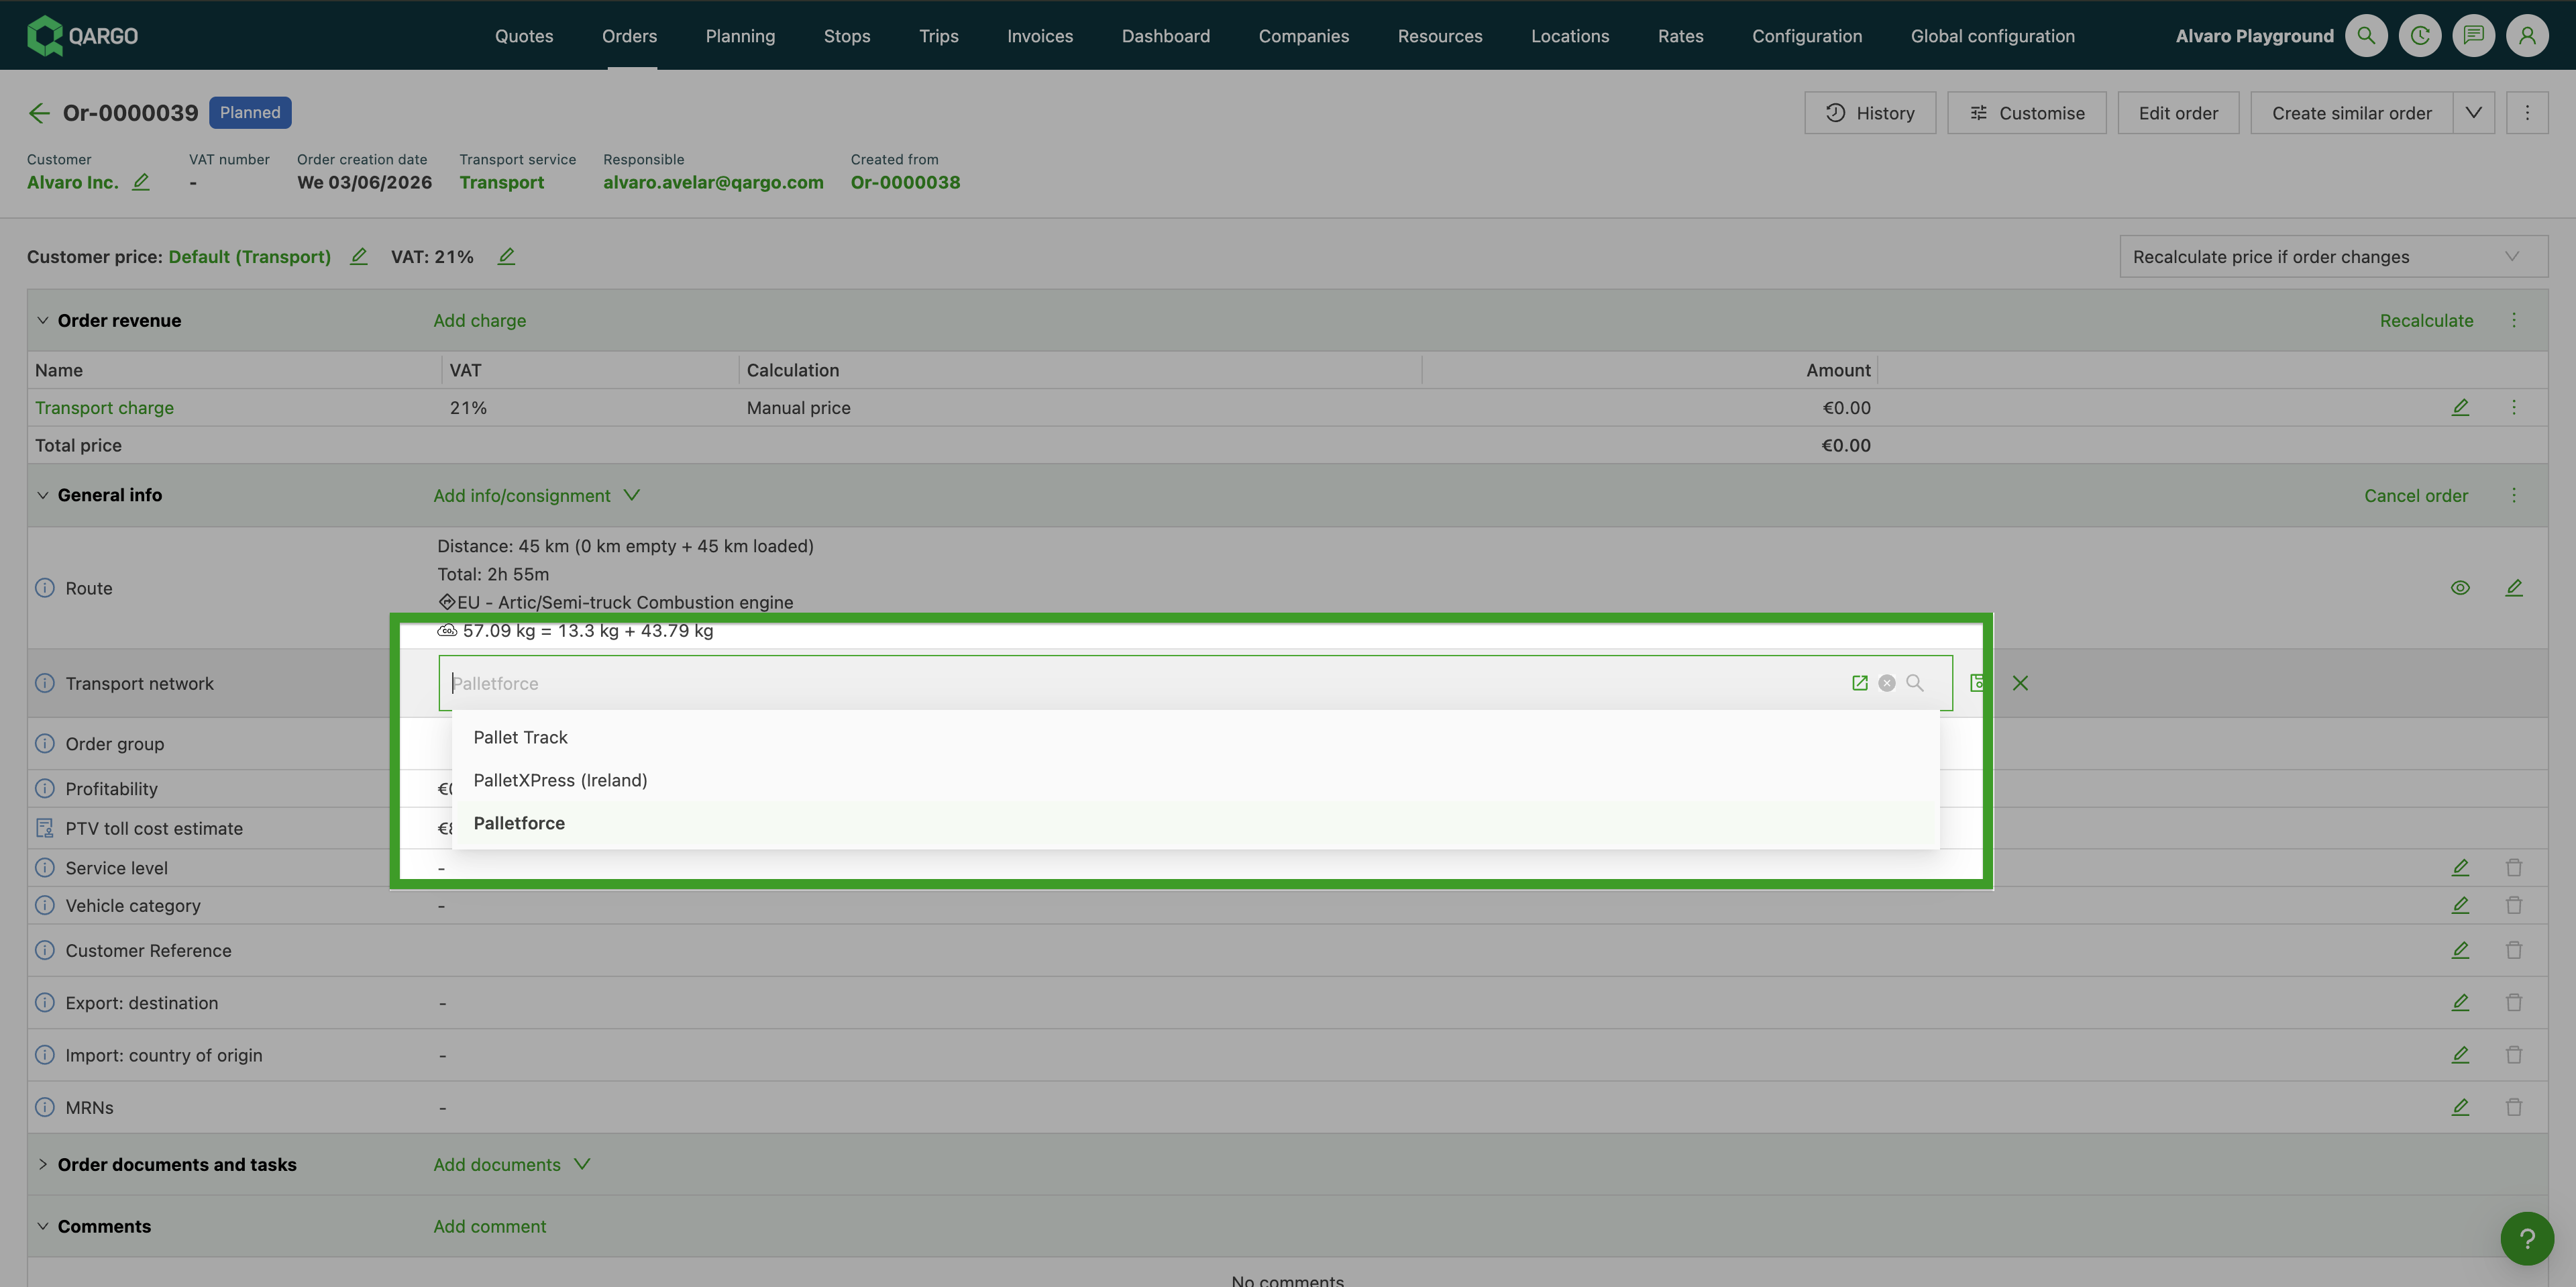
- Locate the Transport network field in the General info section of the order.
- Click the edit icon next to the Transport network field to edit it inline, or select Edit order to access the field via the full edit form.
- Select the desired transport network from the dropdown.
- Save the order.
The system inserts any missing terminal and hub stops, assigns planning groups to each leg, and applies the configured lead times to the whole order. If the transport network cannot be applied, an error message is displayed explaining the specific reason.
Limitations
- A transport network can only be applied when all affected legs are in To plan status. If any leg is dispatched or in progress, or if the stop structure prevents a clean evaluation, saving the order is blocked with an explanation.
- Applying a new transport network fully replaces the existing one on the order.
- Only single-shipment orders are supported in this release.
- The terminal locations currently on the order must also exist on the newly applied transport network.
- There is no history of previously applied transport networks; only the most recently applied transport network is stored on the order.
- Shipment operations data is overwritten when the new transport network is applied.
- If the transport network has already been dispatched, or was imported from an external transport network, it cannot be changed.