
Configuration: custom fields / additional fields
Manage Qargo forms with default, active/inactive, or custom fields. Link fields to services, set visibility, and tailor them to business needs.
Table of contents
Introduction
Default fields are built into Qargo, marked with the Qargo ‘Q’ icon, and appear automatically on the relevant pages. If a business needs a field that isn’t shown yet, an existing standard field can be set to Active, or a custom field can be created and included on Orders, Invoices, Resources or Customers.
For example, the Customer Reference field can be activated so users can add a purchase order (PO) or customer reference number to transport orders. This also makes it appear on invoices.
Additional fields make it possible to:
-
Choose which fields are visible for each transportation service
-
Set whether a field is required, or should always be shown in the form
-
Add custom fields in different formats, including:
- Text
- Number
- Toggle
- Date
- Dropdown
- Tag
- URL
Configuration
Go to Configuration > Additional fields.
- From the left-hand menu, select the category: Orders, Invoices, Resources or Customers. Each category maps to the matching module pages.
For example, the Customer Reference field can be configured for specific transportation services such as General Haulage, European Road, Air and Sea.
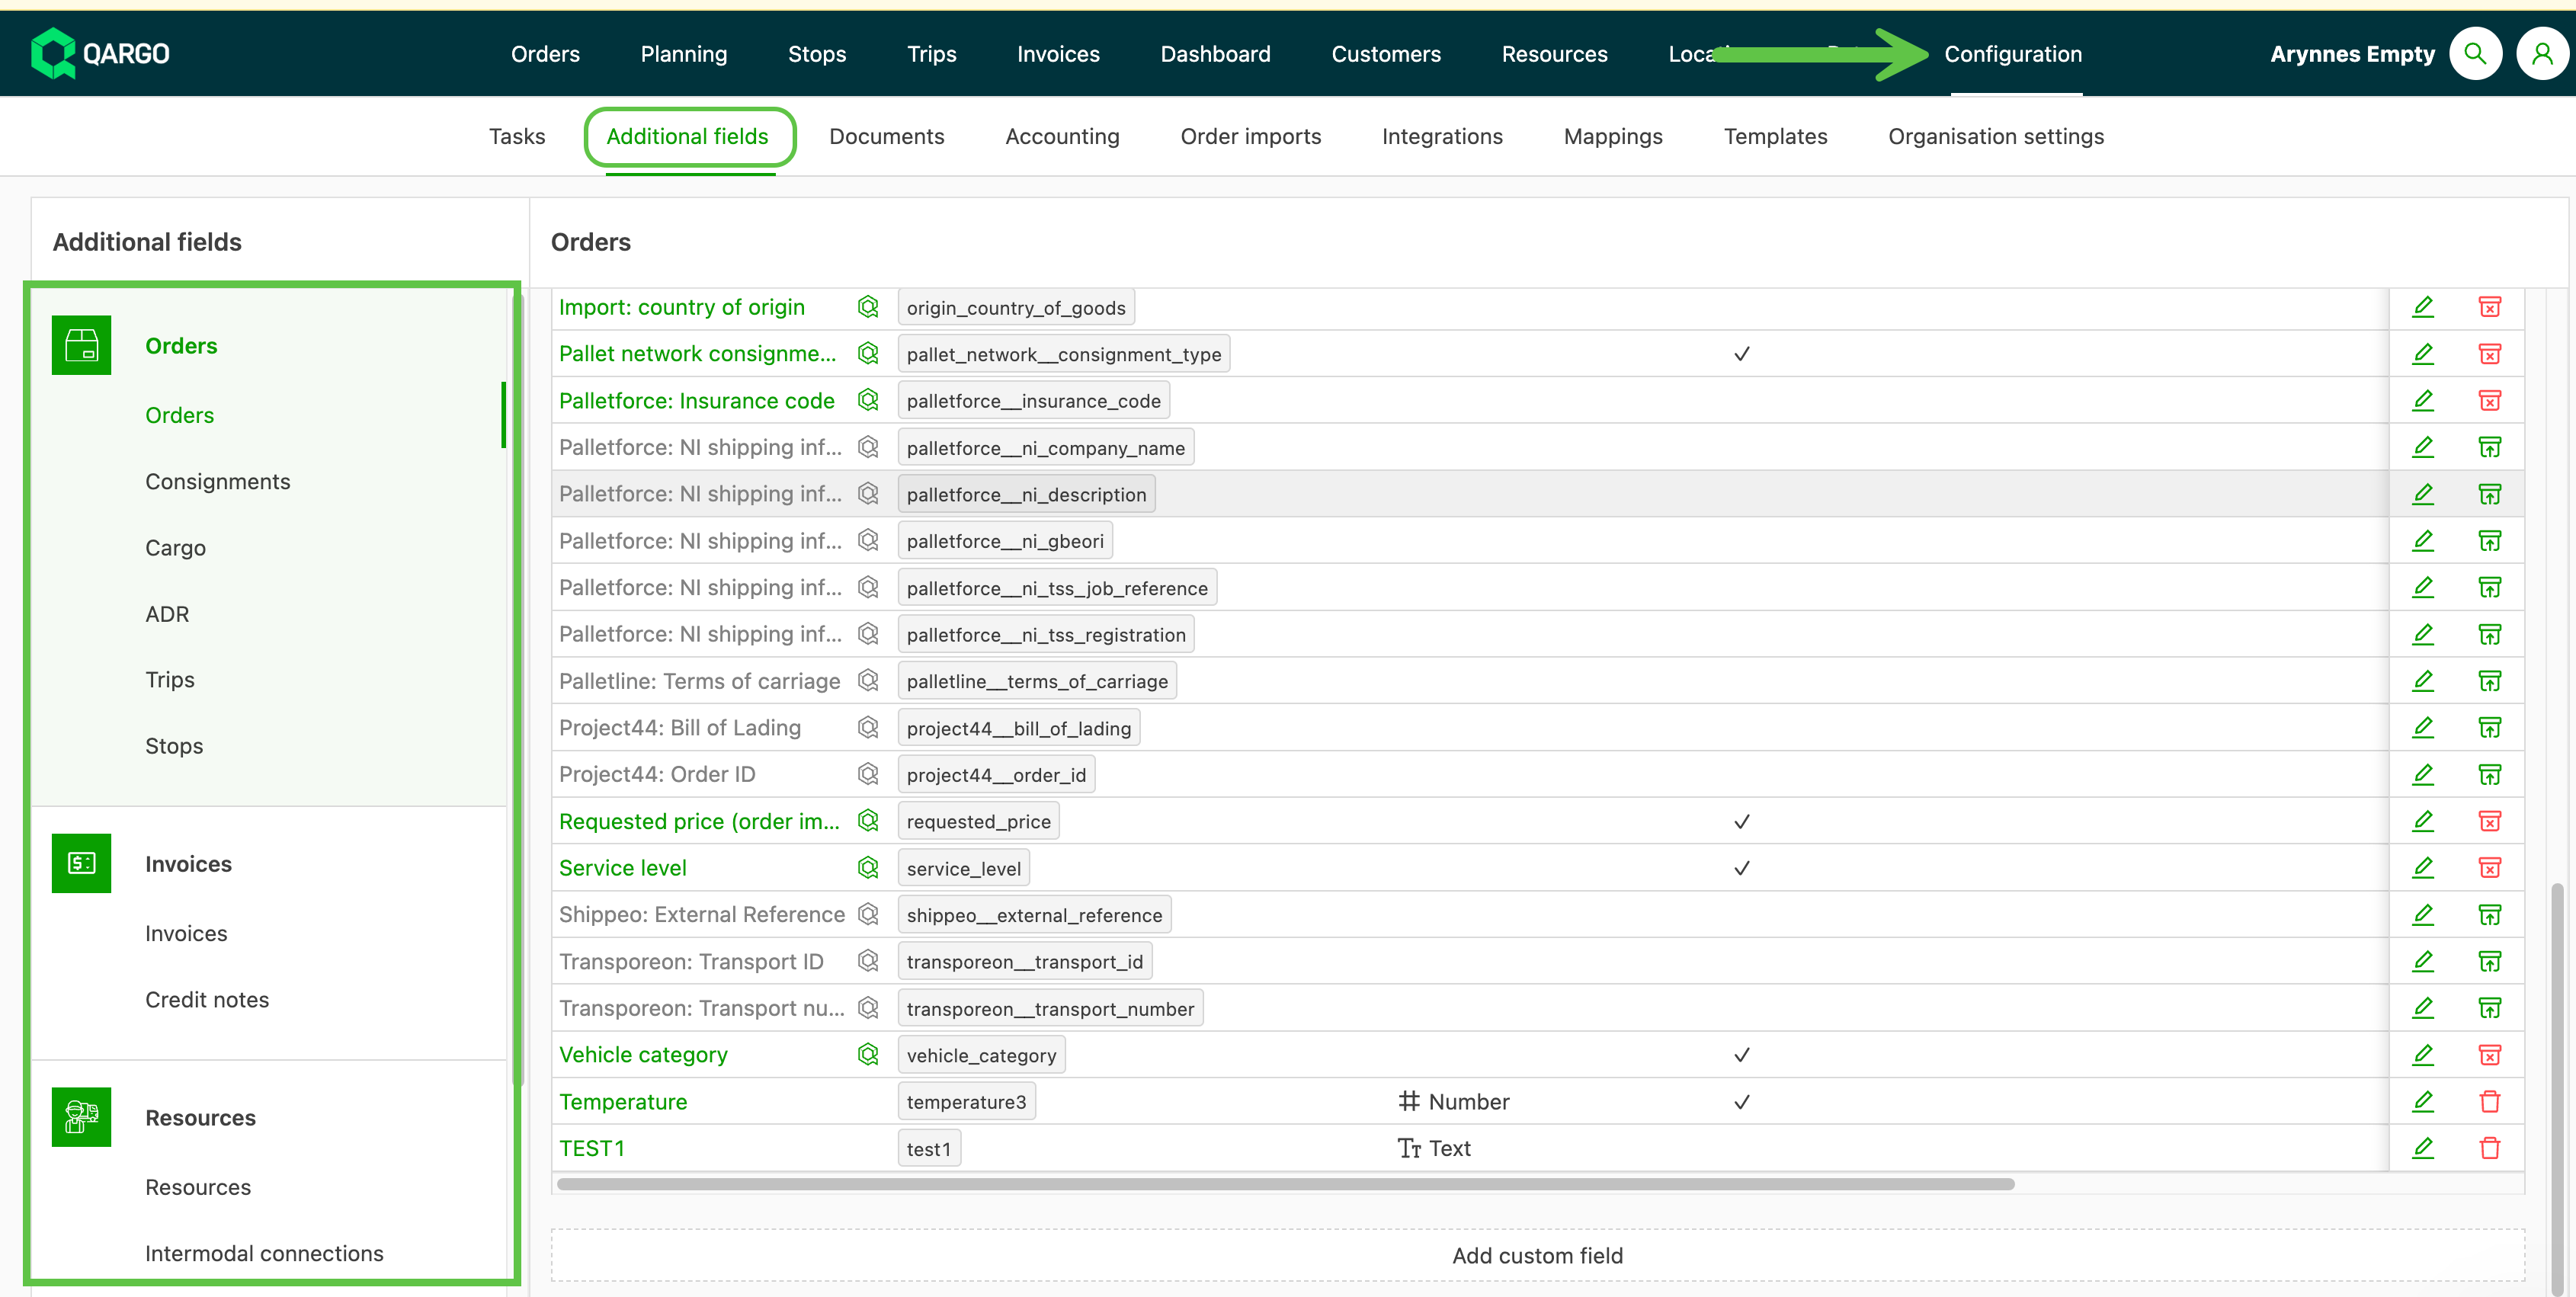
Additional fields (default fields (Q sign))
- Standard fields are the built-in fields available in the product, marked with the Qargo ‘Q’ icon.

-
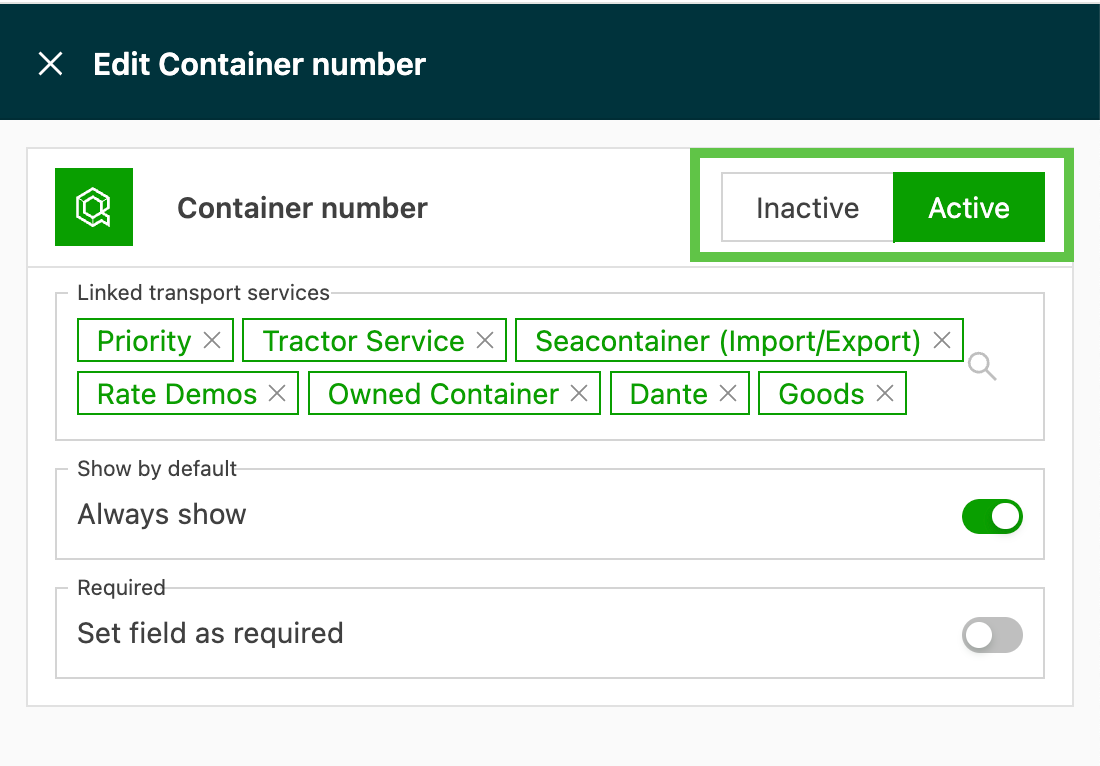
Set a standard field to Active to show it, or to Inactive to hide it. Setting a standard field to Inactive only hides it. It does not delete anything, and any data already entered is kept.
- Active fields appear green in the list.
- Inactive fields appear gray in the list.
-
Link a field to specific transportation services with the Linked transportation services field, so it only appears where relevant (for example, Customer Reference linked to General Haulage, European Road, Air and Sea).
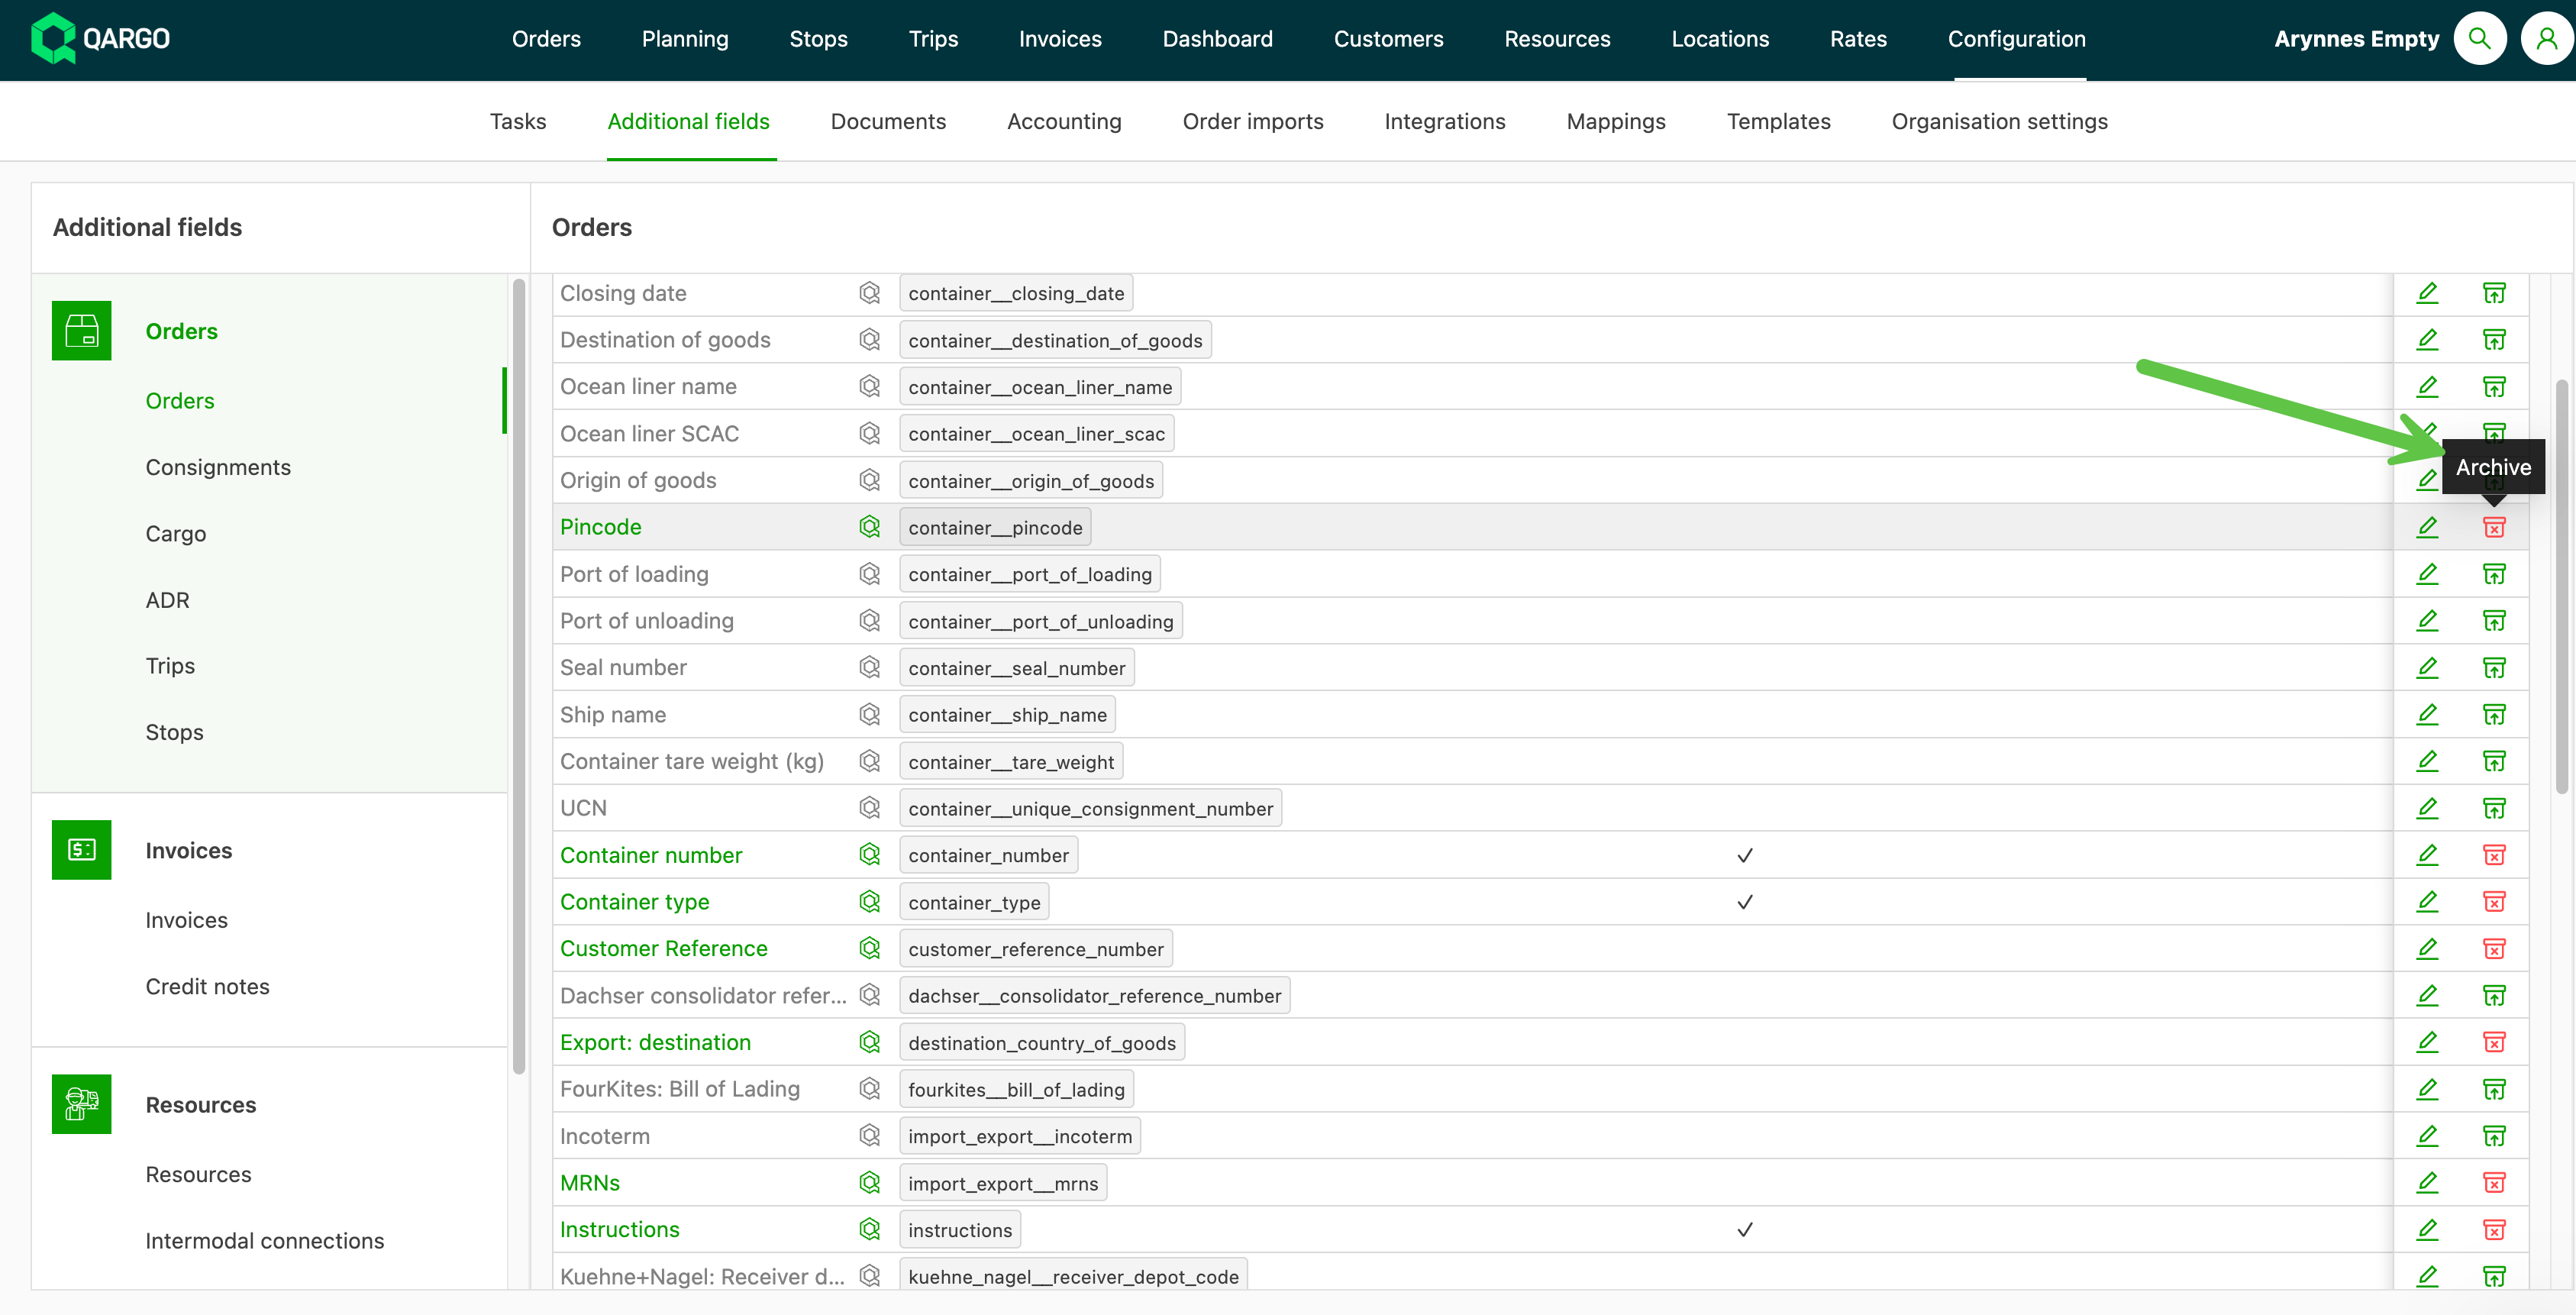
Custom fields
- When the required field isn’t already available, use Add custom field.
- A side panel opens to enter the field’s details.
- Choose the field format from the Type dropdown (Text, Number, Toggle, Date, Dropdown, Tag, URL).
- Link the custom field to transportation services if needed.
- Choose whether it should be visible in the customer portal.
- Click Save.
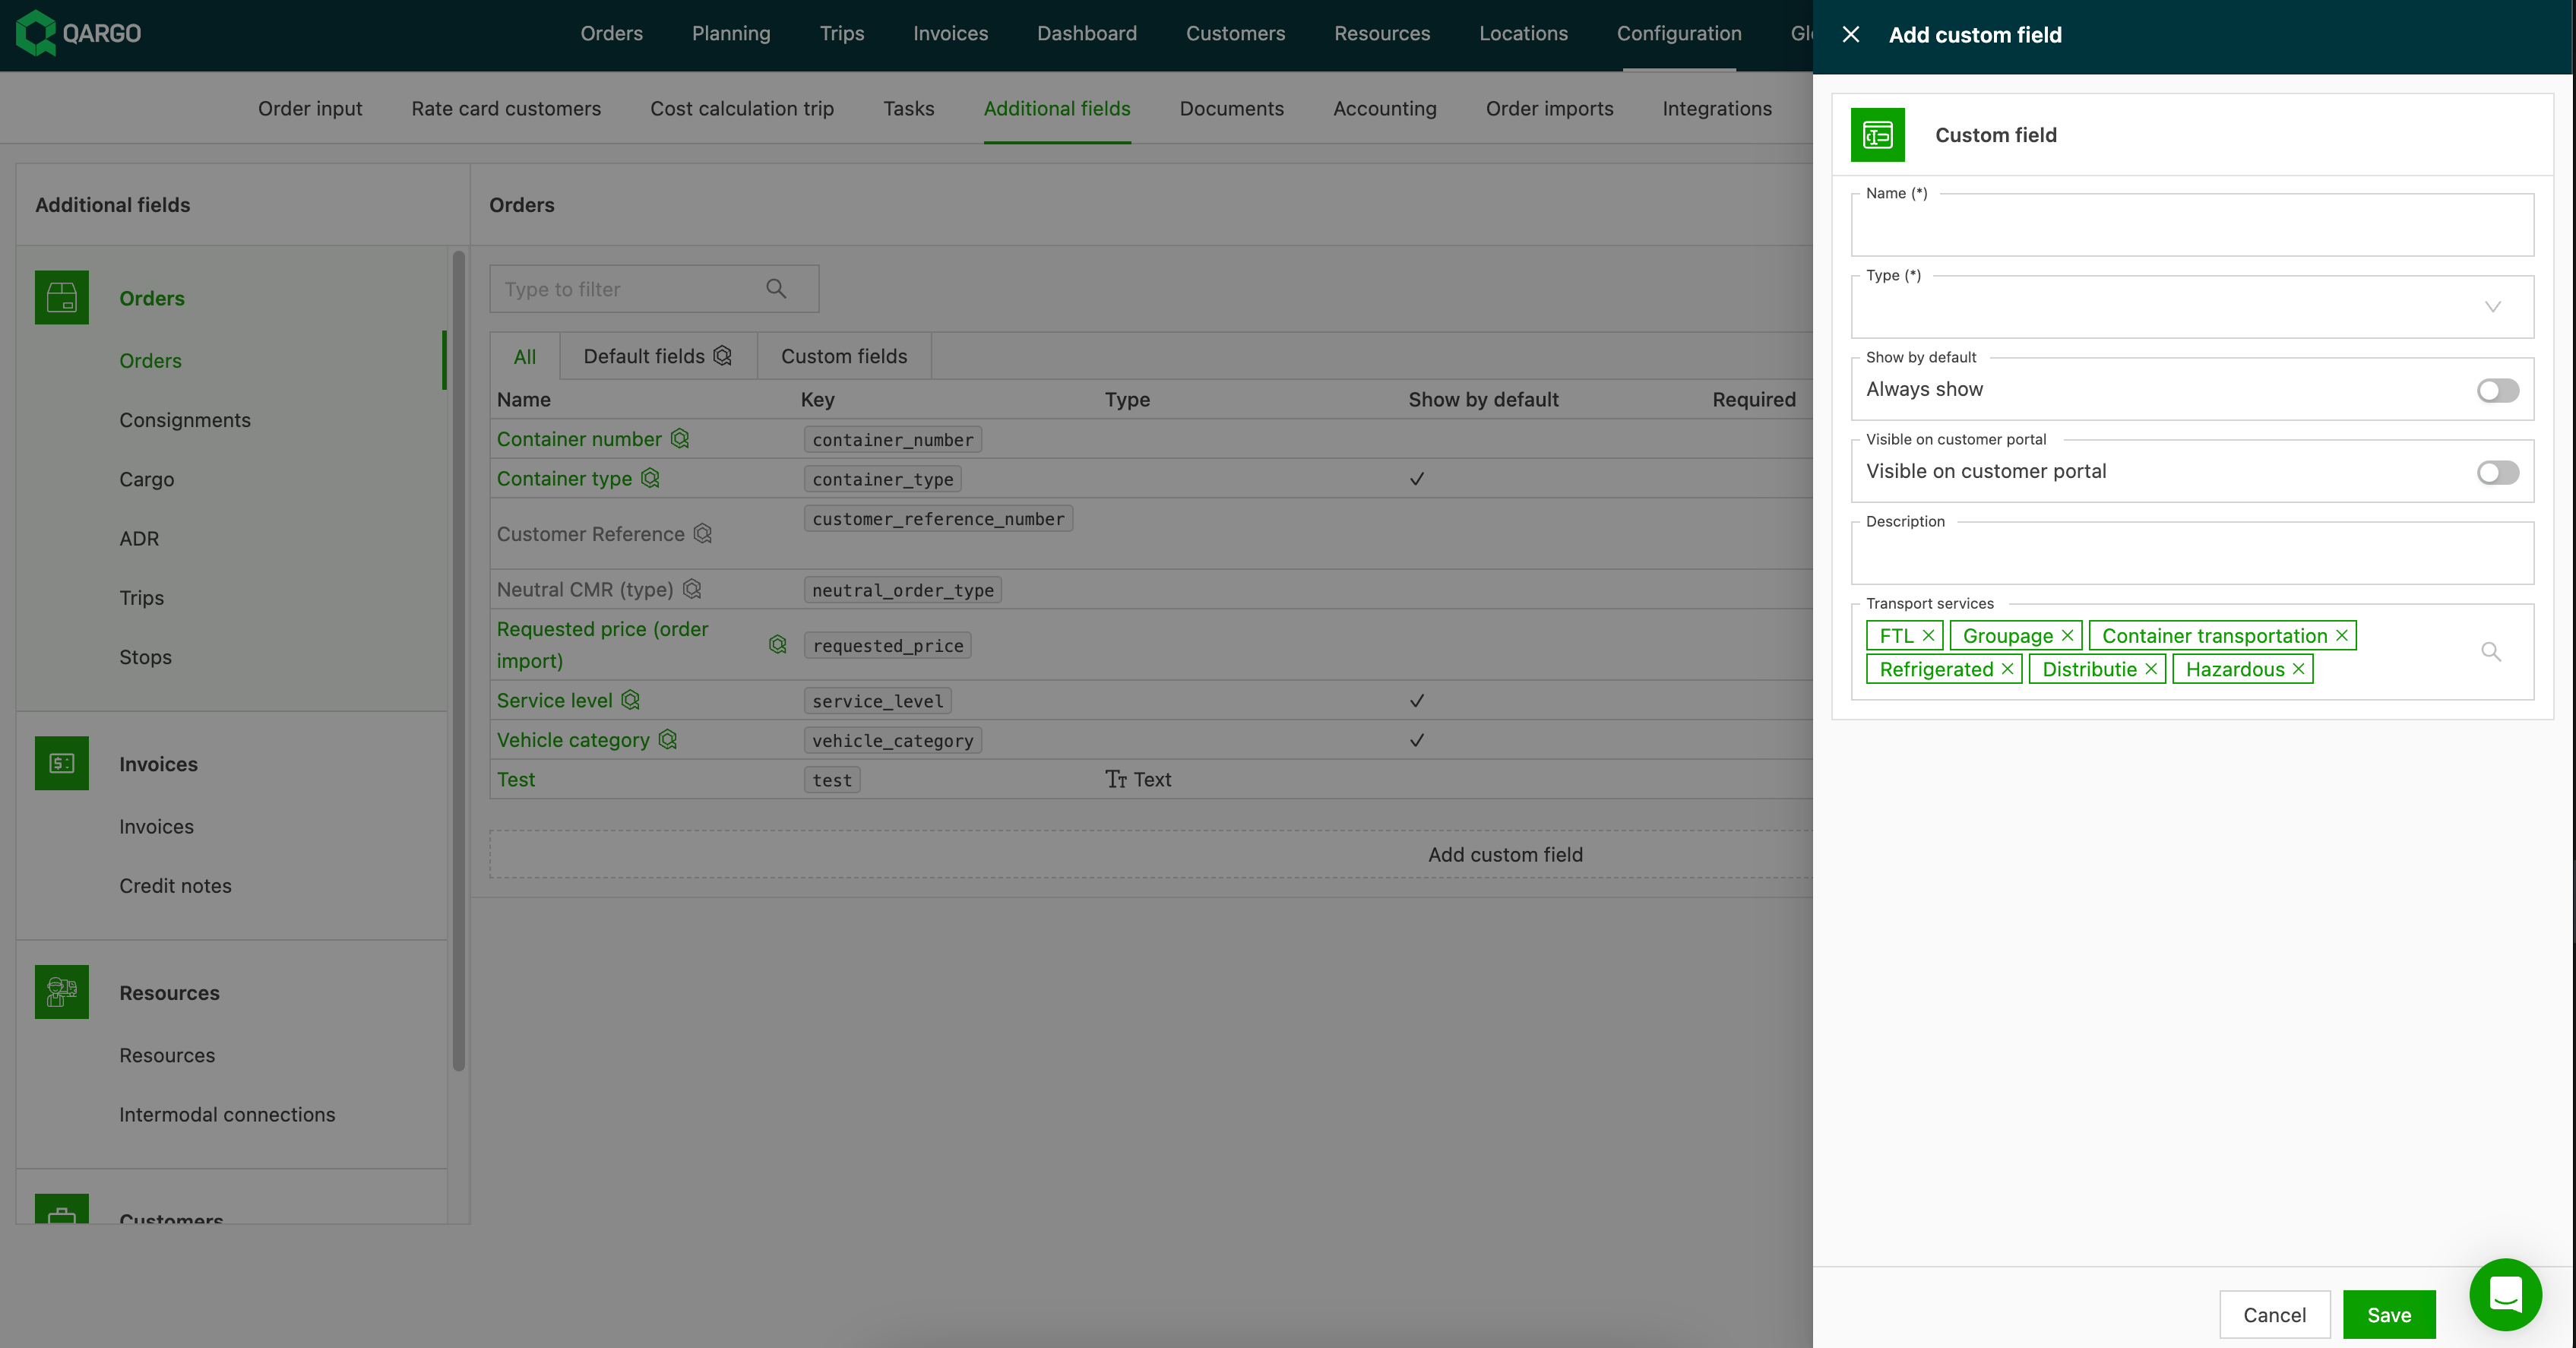
- In the list view, custom fields show their field type.

Removing a custom field: read before deleting a custom additional field
Unlike standard fields, custom fields cannot be set to Inactive or archived. The only way to remove a custom field is to delete it. So for a custom field, the choice is to keep it or delete it.
Workarounds: keep the data but stop using a custom field
Because a custom field can’t be set to Inactive, follow these steps to stop using one without losing history:
- Create the new field and start using it from now on.
- Move the existing values from the old field into the new field on the records that need to be kept.
- Check that the old field isn’t used in any PDF / document template (removing a field that a template relies on can break document generation).
- Only then delete the old field.
💬 To remove a custom field but keep its historical data, and if it is unclear how to do this, contact the Qargo account manager or support before deleting. Deletion cannot be reversed.
Practical example: enabling and configuring the Customer Reference field
Overview of the Customer Reference field
The Customer Reference field is a customizable field in Qargo that can be linked to specific transportation services. By enabling and configuring this field, users can make sure that the PO or customer reference number is visible on orders and invoices.
Steps to enable and configure the Customer Reference field
For General Haulage orders
To enable and configure the Customer Reference field for General Haulage orders:
-
Make the field visible in the order
- Open the order.
- Click the Customize button at the top of the screen.
- Toggle the Customer Reference field to “on” (it should appear green).
-
Configure the field globally
- Go to Configuration > Additional fields.
- Find and edit the Customer Reference field.
- Add General Haulage to Linked transportation services for this field.
- Set the field to Show by default / Always show.
Once these steps are completed, the PO or customer reference number can be entered in the order’s Customer Reference field, and it will appear on invoices.
For European Road, Air and Sea orders
To enable the Customer Reference field for European Road, Air or Sea orders:
-
Open the additional fields configuration
- Go to Configuration > Additional fields.
- Select the Orders level.
-
Edit the Customer Reference field
- Filter or search for the Customer Reference field and click the edit (pencil) icon.
- By default, this field is active only for UK Road transportation services. Add European Road, Air and Sea to its configuration.
-
Save the changes
- Save the updated configuration. The Customer Reference field now appears on orders for these transportation services.
Troubleshooting and FAQs
-
What if the Customer Reference field does not appear on invoices?
- Make sure that the field is enabled and linked to the appropriate transportation service in the additional fields configuration.
-
Can the Customer Reference field be enabled for multiple transportation services at once?
- Yes, multiple transportation services (e.g., General Haulage, European Road, Air, Sea) can be added to the Linked transportation services section when editing the field.
By following these steps, the Customer Reference field can be enabled and configured in Qargo to meet operational needs.
-
How many custom fields can be active at the same time?
- Up to 50 additional fields can be active per entity. This applies to all configurable entity types: Orders, Invoices, Resources and Customers.
-
What happens when the limit is reached?
- Once 50 active fields are configured for an entity, no further fields can be activated or created for that entity until existing active fields are set to Inactive or archived.
-
Is the limit the same across all entity types?
- Yes, the limit of 50 active fields applies equally to Orders, Invoices, Resources and Customers.
-
Can the limit be increased beyond 50?
- The 50-field limit is a platform-wide setting and cannot be adjusted per account. If the current limit does not cover all required fields for a specific workflow, consider whether some fields can be consolidated or made conditional with transportation service linking. Also consider whether the data is better captured elsewhere, for example in order notes or through an integration.