
How to configure custom export files
Configure custom exports for 12 data types; create exports, customize column headers, and manage export templates through the Configuration menu.
Table of contents
This feature allows Super Admins to create custom CSV and Excel documents based on data that is available in Qargo.
Any revisions made to an export, such as renaming the file to include identifiers, can also cause the export to be converted to a “Mapping.” This behavior helps streamline the handling of updates and classifications.
-Charge export
-Container
-Customer
-Driver
-Order
-Carrier credit memo
-Carrier invoice
-Sales credit memo
-Sales invoice
-Contract carrier
-Load
-Vehicle
Behavior of custom exports
When starting with a custom export under Templates, any significant modifications (e.g., renaming a file or adding specific identifiers) automatically convert the export into a Mapping. This helps manage changes efficiently by categorizing them appropriately.
Configure custom export
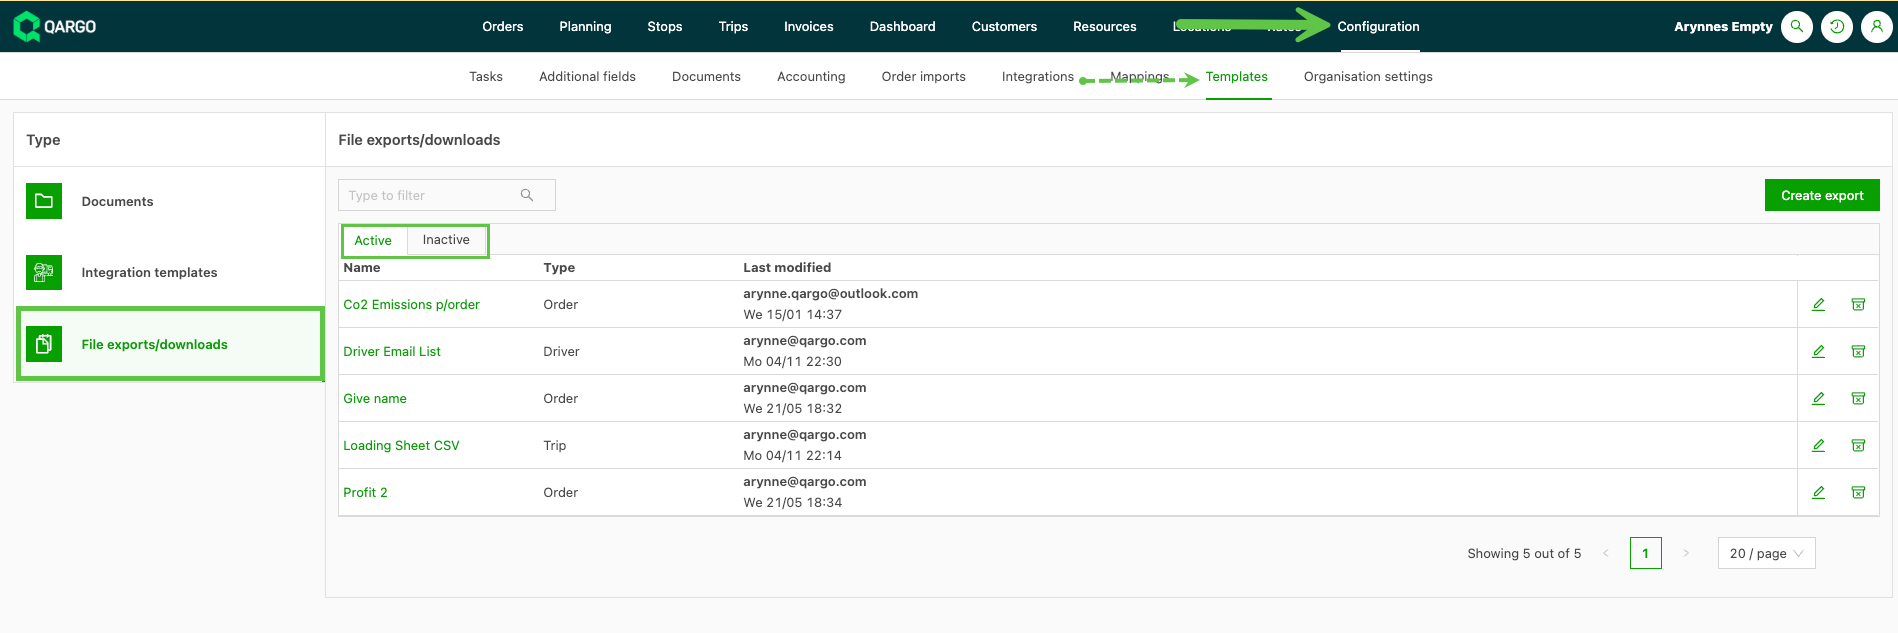
- Navigate to Configuration > Templates.
- Click File exports/downloads in the left-hand menu.
3. Click Create export. Select the export document type and name the export type:
-
The Name field refers to the object type-specific identifier for the export. For instance, in a Load export, it corresponds to the load number, which makes configurations clear and relevant.
-
Custom fields are not included by default in export templates. To add them, create a custom export template and manually select the additional fields.
-
The “Name” field in export templates refers to the name of the selected object type in the export.
- For example, in a load export, the “Name” field can be configured to output the load number.
- Select the Qargo field to show in the export file.
-
For example, include the customer reference by selecting Customer reference number. Include loading and unloading references with Shipments > Pickup stop > Reference number and Shipments > Delivery stop > Reference number, respectively.
-
Include location address fields such as pickup and delivery addresses to customize the export for location-specific data.
-
Click into the dropdown. Scroll to find the option. Alternatively, start typing and the list will show the data options.
-
The options that show in the dropdown depend on the Export type selected.
-
Click Add field to add more data to the export.
- Select the format the report should generate in (CSV / Excel)
- Click Save.
4. Once the export configuration is saved, navigate to the appropriate tab. In this example, the report is configured for Orders, so the next step is to navigate to the Orders list.
-
To run the report, click Create export and select the report from the list.
-
Select whether the report will run for all records, or select which orders to include.
-
Click Export if selecting rows.
-
The report will generate and download.
-
Tips for effective export customization:
- Identify the data requirements: list the specific fields needed before creating the export file.
- Organize the data fields: group related fields for better clarity and understanding.
- Test the export: run a test to ensure all selected data fields are captured correctly.
Workarounds for export limitations
Exporting larger datasets may generate a data limit warning
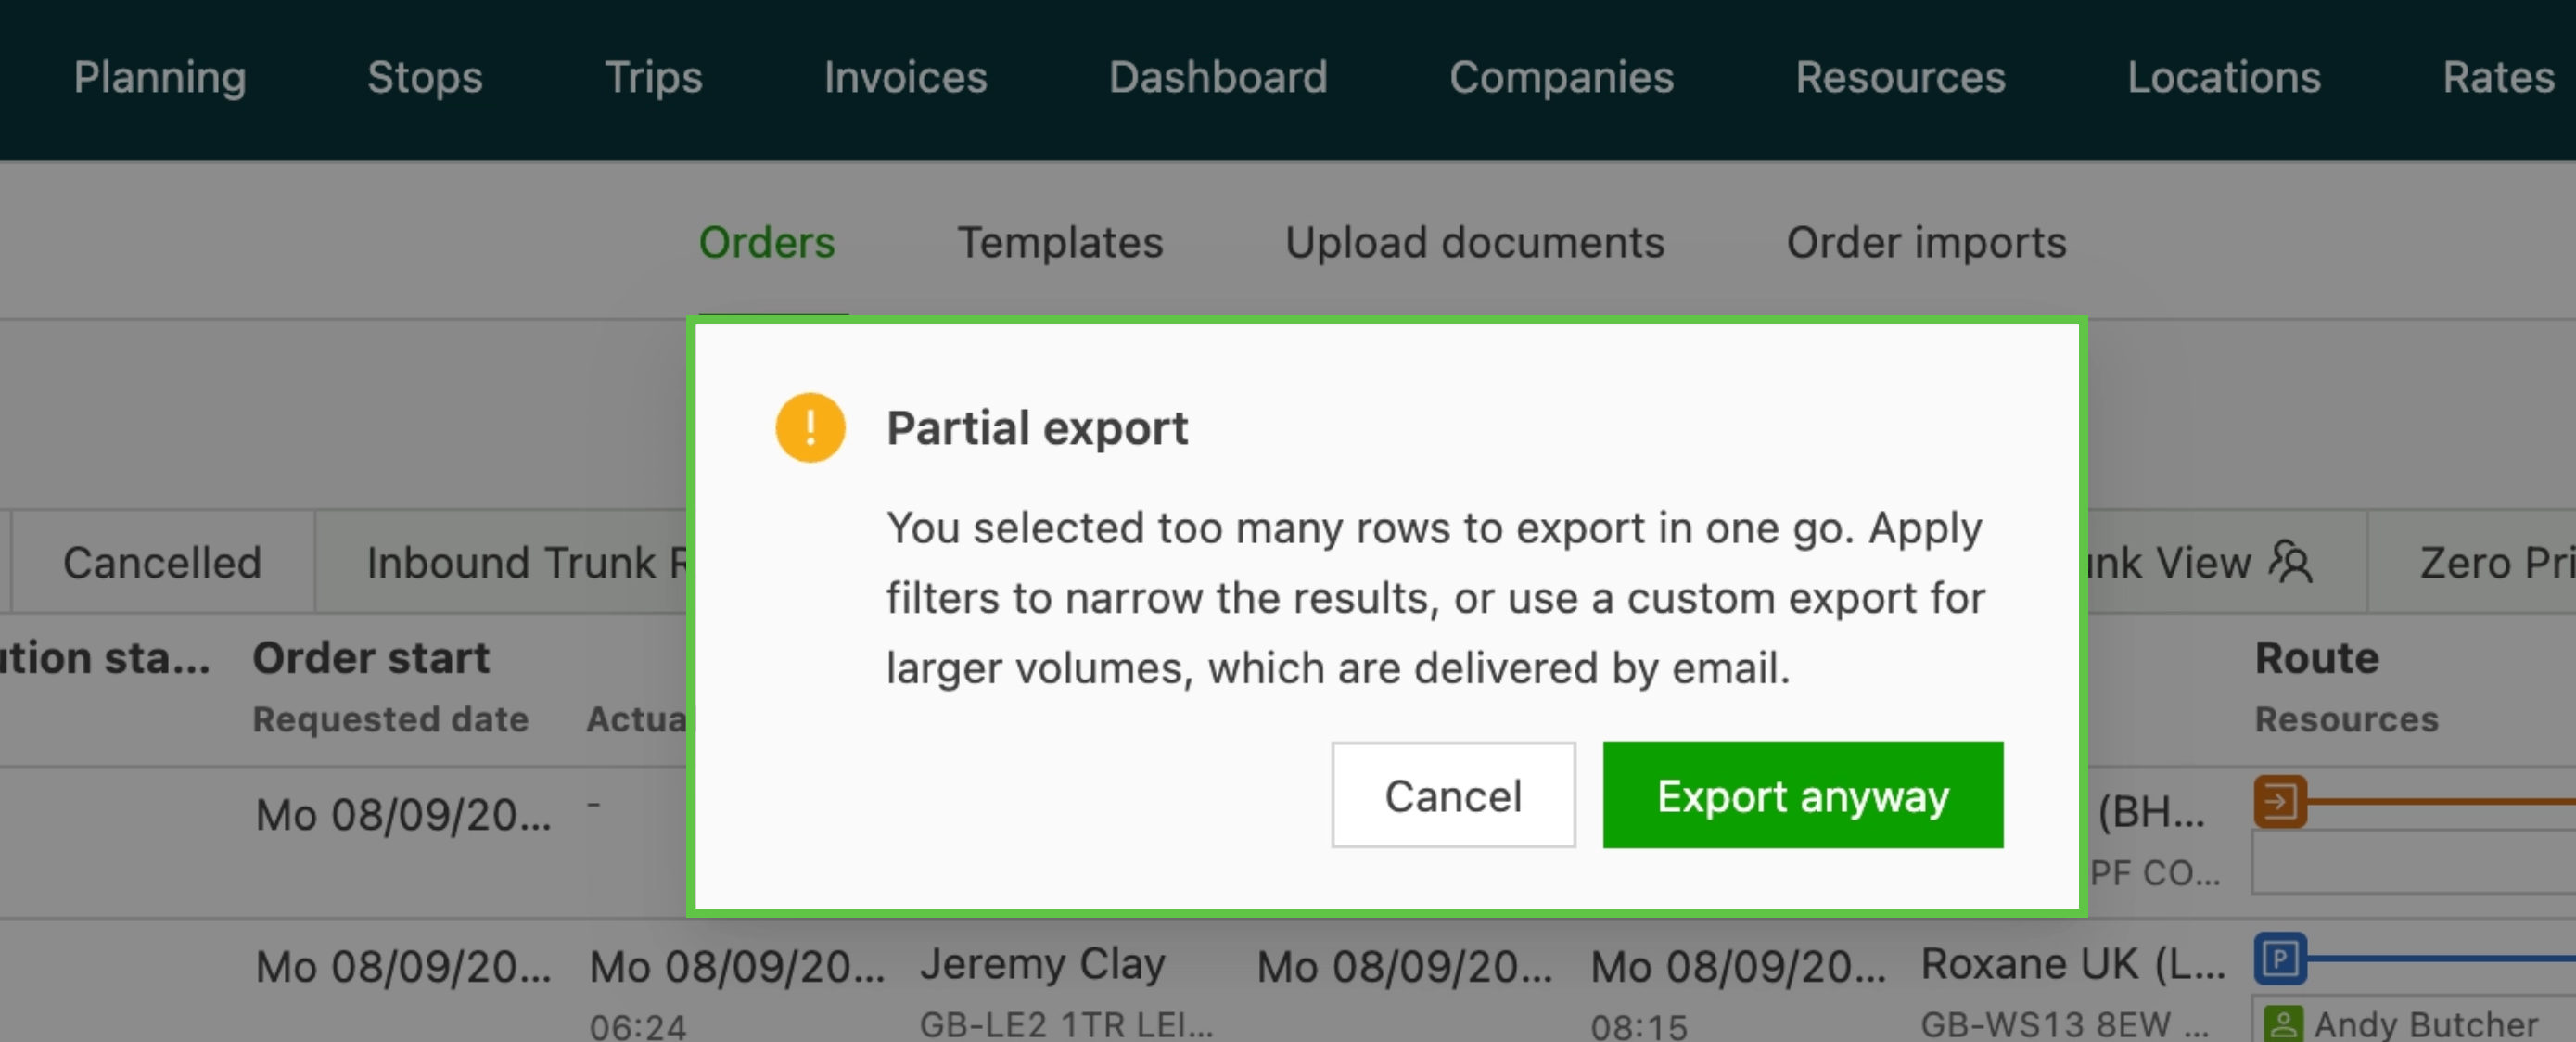
If a warning appears, follow these steps:
- Filter the data into smaller segments: Apply filters, such as a date range or additional criteria (like job status or customer type), to create manageable report sections.
- Export each filtered segment: Export each subset of data individually by applying the selected filters.
- Merge files as needed: After exporting all segments, combine the files manually in Excel or other spreadsheet software to create a complete dataset from the segmented exports.
Configuration options
Edit column headers
The column headers can be changed to something more meaningful to the user. When the report generates, the column headers show the revised wording.
Adjust the order of the fields so that the columns appear in a more meaningful way. This allows the user to configure the export quickly and make adjustments easily.
Templates show on the Active tab under the File exports/downloads option
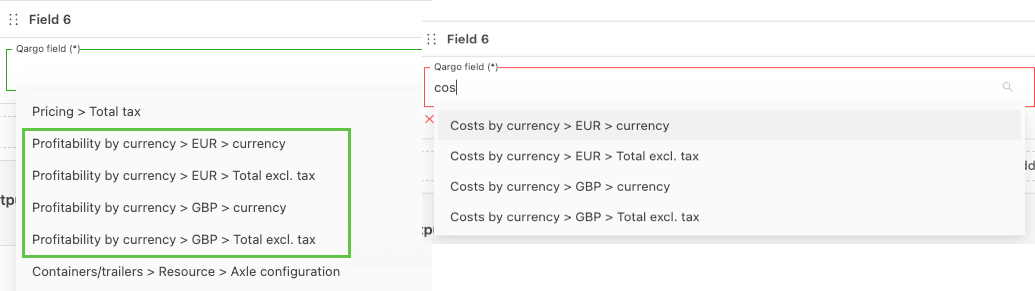
New profitability & cost options
When configuring custom reports, some options include the profitability from the order. Certain templates, such as Load export templates, focus on cost-related data and do not include fields like Revenue or Profitability. To access these fields, consider using an Order or Invoice export template. Alternatively, use the default Orders page export to obtain both cost and revenue data per order.
- For billing data exports, create a Charge export and include specific billing-related fields such as price calculation.
- Navigate to Dashboard > Accounting accrual.
- Apply the relevant filters, such as a date range or specific job criteria.
- Export the data from the Revenue accrual orders section. This report includes columns and details that are not available in standard order exports, so invoiced and non-invoiced orders can be told apart easily.
\
Intermodal exports {#h_3823678646}
\
What? {#h_9c4f2d220e}
- A new Intermodal details field group is available in intermodal export templates (Intermodal planning type) and Datashaper mappings. It covers customs references, dimensions, temperature requirements, goods information, transport type, schedule data, vessel details, seal numbers, and notes.
- Exported values reflect any manual overrides applied to the booking, in the same way as the values shown in the UI.
- Vehicle registration, trailer registration, container no., and container ISO code are not duplicated into this group. They remain available in the export’s existing resource-allocation fields.
How?
- The new fields appear automatically in the field picker when editing an Intermodal planning export template under Configuration > Templates > File exports/downloads. No additional configuration step is required. Existing export mappings and the previous flat fields (GMR, PBN, vessel name, voyage code, IMO number) keep working unchanged.
Use case
- A customs team running intermodal export declarations adds Vessel IMO and Voyage code to its export template to meet port authority requirements. This removes the need to add those columns manually after each export.
Adding intermodal details to an export
- Navigate to Configuration > Templates > File exports/downloads.
- Select the intermodal export template to update, or create a new template with the type Intermodal planning.
- Open the field picker and expand the new Intermodal details section.
- Add the required fields (customs references, schedule data, vessel information, etc.) to the export layout.
- Save the template. The new fields appear in the next export run.
Troubleshooting
| Issue | Resolution |
|---|---|
| New fields not visible in the field picker | Verify that the template type is Intermodal planning; the fields only appear for this template type |
| Exported field shows an unexpected value | The export respects manual booking overrides; check whether the intermodal booking has a manual override applied to that field |
| Vehicle/trailer/container identifiers missing from Intermodal details | Expected: these stay on the export’s existing resource-allocation fields and are not duplicated here |
| External API intermodal model does not include the new fields | The external API intermodal model is not yet aligned with this field structure; alignment is tracked separately |
\
Custom export: expression builder {#h_9516d2bf06}
The expression builder makes it possible to shape data for custom exports without writing code. It can:
- Filter lists down to just the required items
- Aggregate values such as sum, count, min, or max
- Format dates, date/times, and numbers for the target system
- Preview results during configuration
-
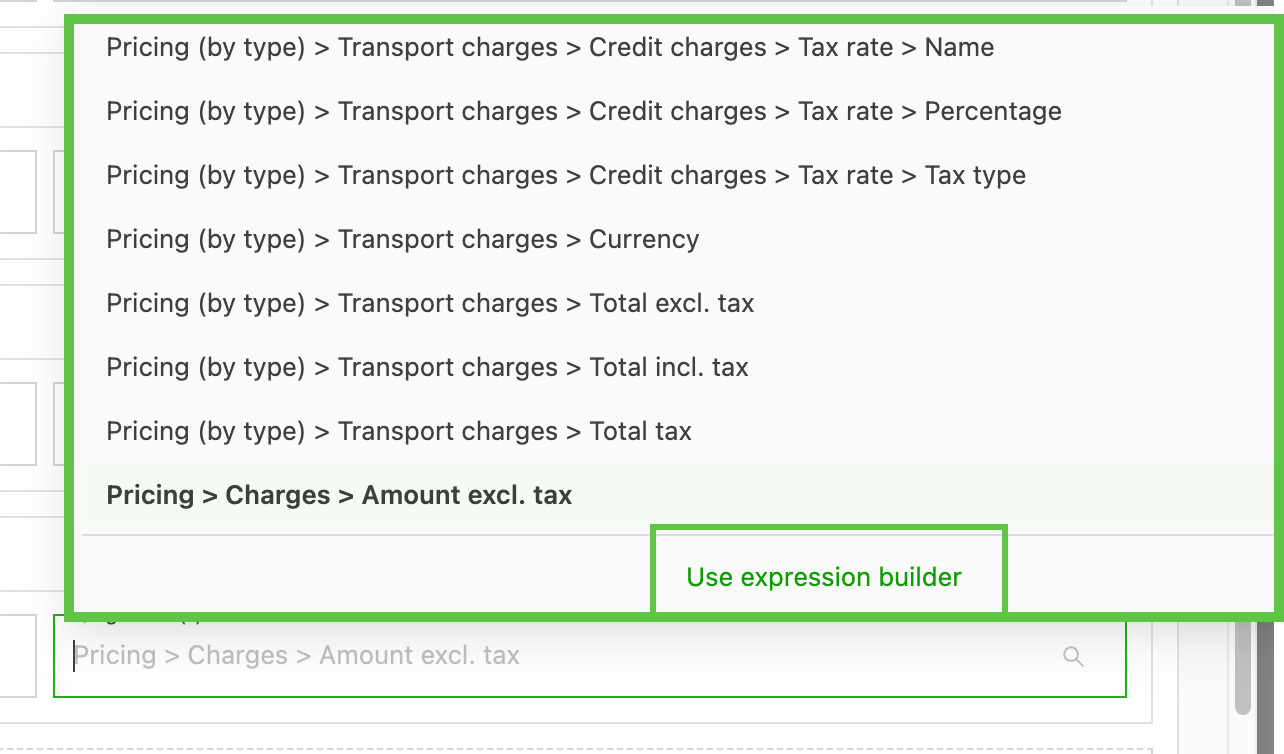
Click into the field that needs to be modified.
-
Click Use expression builder at the bottom of the list.
-
This opens a new modal where the additional configuration is added.
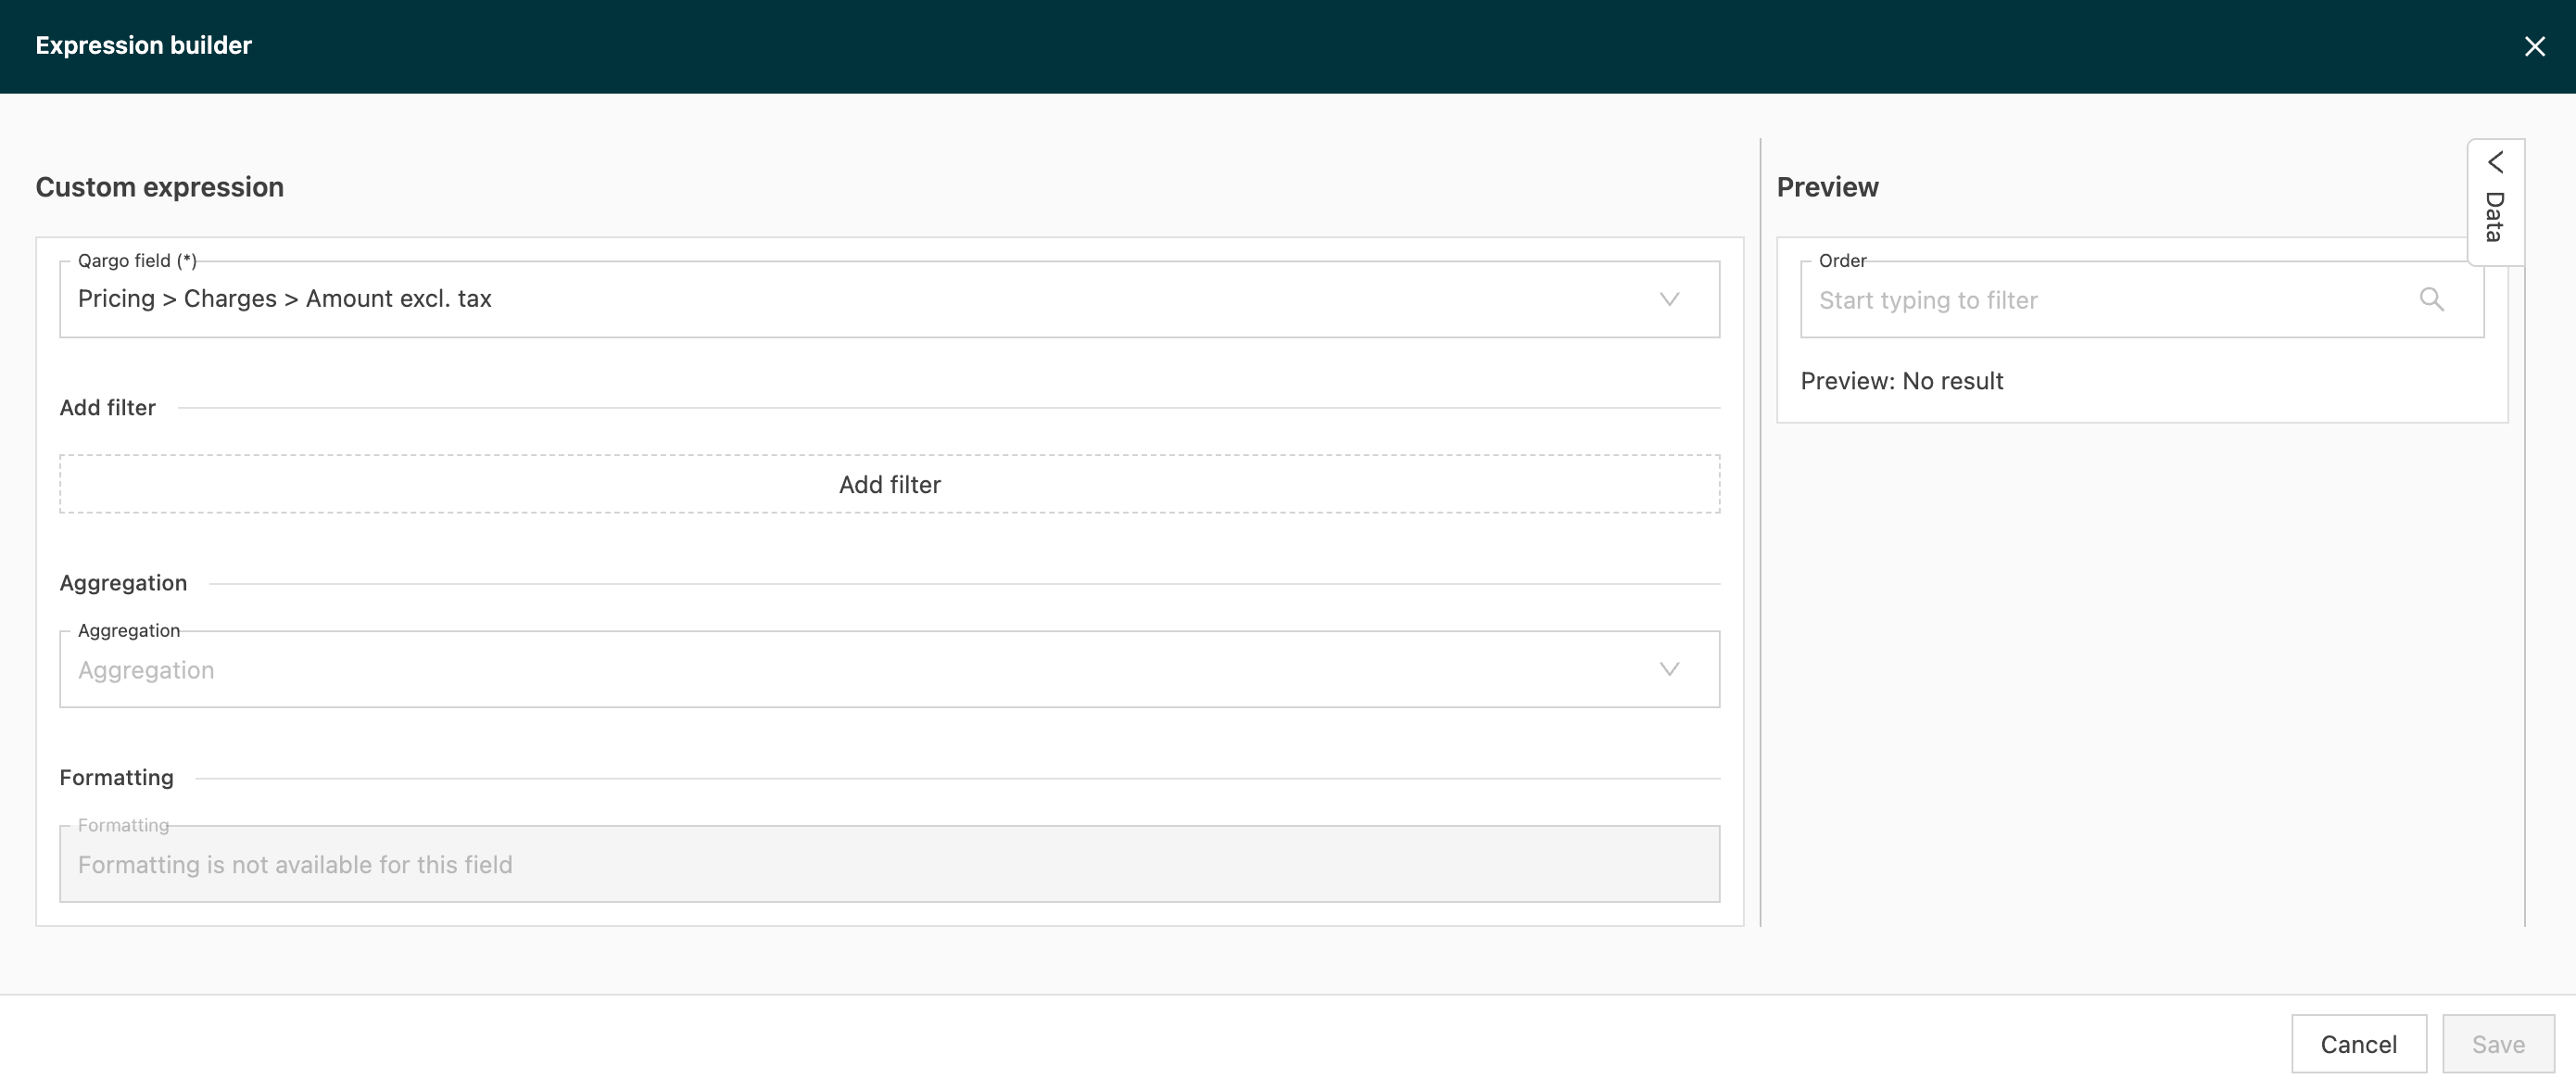
Click the link below to learn how to use the additional builder tool👇
Generate the export
The new template is available on the list page under the Export button.
- Select whether the report will run for all records or only for selected rows.
- Using Filters combined with the All option allows users to pull more granular data
Troubleshooting export issues
If the intended custom export falls within the set limits but still fails to complete, environment-specific factors may be involved.
Try the following to address these issues:
-
If an export template cannot be saved because the system requires a “Name” value, simply enter any label in the “Name” field. This label does not have to be tied to a specific customer or object.
-
Use a different web browser to rule out browser-specific incompatibilities.
-
Switch to Incognito/private browsing mode, which can reduce potential interference from cached data or browser extensions.
-
Verify the stability of the internet connection, as unstable or slow connections can lead to timeouts.
-
If the order export fails due to pallet size or packaging type mapping issues, make sure the order is created under the correct transportation service that supports the selected packaging types (e.g., UPN vs. Full Loads & General Haulage).
-
For limitations on load-level fields in order exports, create a new export based on the Load data type and include only the required fields.
-
Direct export of all location addresses from the Locations screen is not supported. Use the custom export feature in the Orders section to include address-related fields.
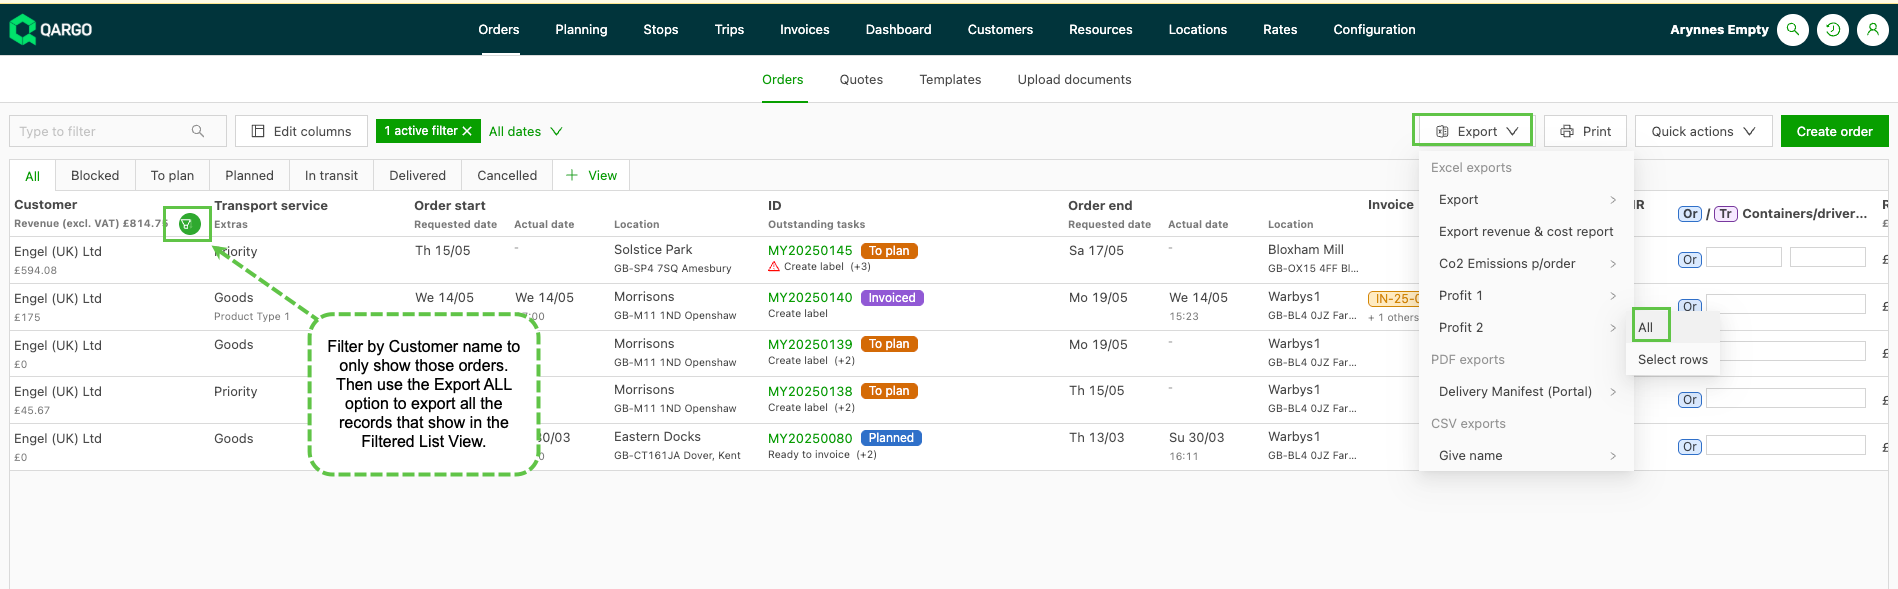
-
Avoid using special characters in custom column headers, including square brackets
[ ]. These can cause import errors. If an export fails unexpectedly, check the column header names, remove any special characters, and then try again
Deactivate / reactivate export template
If the export is no longer applicable, deactivate it under Templates.
- Click the Archive icon next to the template that is no longer needed.
- The template immediately moves to the Inactive tab.
- To reactivate it, click the Archive icon to move the template back to Active.
🎥 These export templates can also be enabled for the customer portal:
FAQs on export customization
Q. Can all location addresses be exported directly from the Locations screen?
A. No, Qargo does not support exporting all location addresses directly from the Locations screen. Instead, users must use the custom export feature in the Orders section to include address-related fields.
Q. Why does a custom export move from Templates to Mappings?
This happens when a revision is made, such as renaming the file or adding unique identifiers. Qargo then categorizes the export as a “Mapping” to reflect its customized nature.
Q. Are custom fields included in export templates by default?
A. No, custom fields must be added individually to custom export templates. Default templates only include standard fields. Another common restriction is that load-level fields, such as load reference or trailer rental, cannot be included in order-type exports. This is due to the separation of data levels, which restricts fields to their respective export type.
Q. Can a custom export template be duplicated?
A. No, duplicating custom export templates is not currently supported.
For an export similar to an existing one, create a new export template from scratch and manually select the required fields.
Q. Why does data appear in a single cell instead of separate cells or rows?
A. When a field can hold multiple values (for example, a customer with multiple contacts, or references across multiple stops), all values are combined into one cell and separated by a comma or pipe character, rather than split into separate rows.
This is a known limitation of the current export structure. These values cannot be expanded into separate rows unless the export type is specifically designed for it.