
Document templates: what, why & how.
This article offers a guide to document templates: what they are, and how to set them up and use them.
Table of contents
Summary
-
What is a Qargo template?
- A customizable, reusable blueprint for generating business documents such as invoices, delivery receipts, loading sheets, quotes, etc.
- Can be used in tasks to automatically generate and/or send documentation.
-
Why use templates?
- Templates allow users to define how documents look and what data is included.
- Each company can generate documents in a preferred format, tailored to the company’s workflow, language and branding.
- All required data is filled in dynamically from the TMS.
-
How are templates used?
- Used to create documents associated with orders and loads.
- Paired with workflow tasks, documents can be generated seamlessly, at the appropriate time.
- Automatic generation reduces data entry errors and, paired with contact tasks, makes workflows more efficient, i.e., sending a POD or invoice by email, etc.
Example: ‘Generate document’ tasks
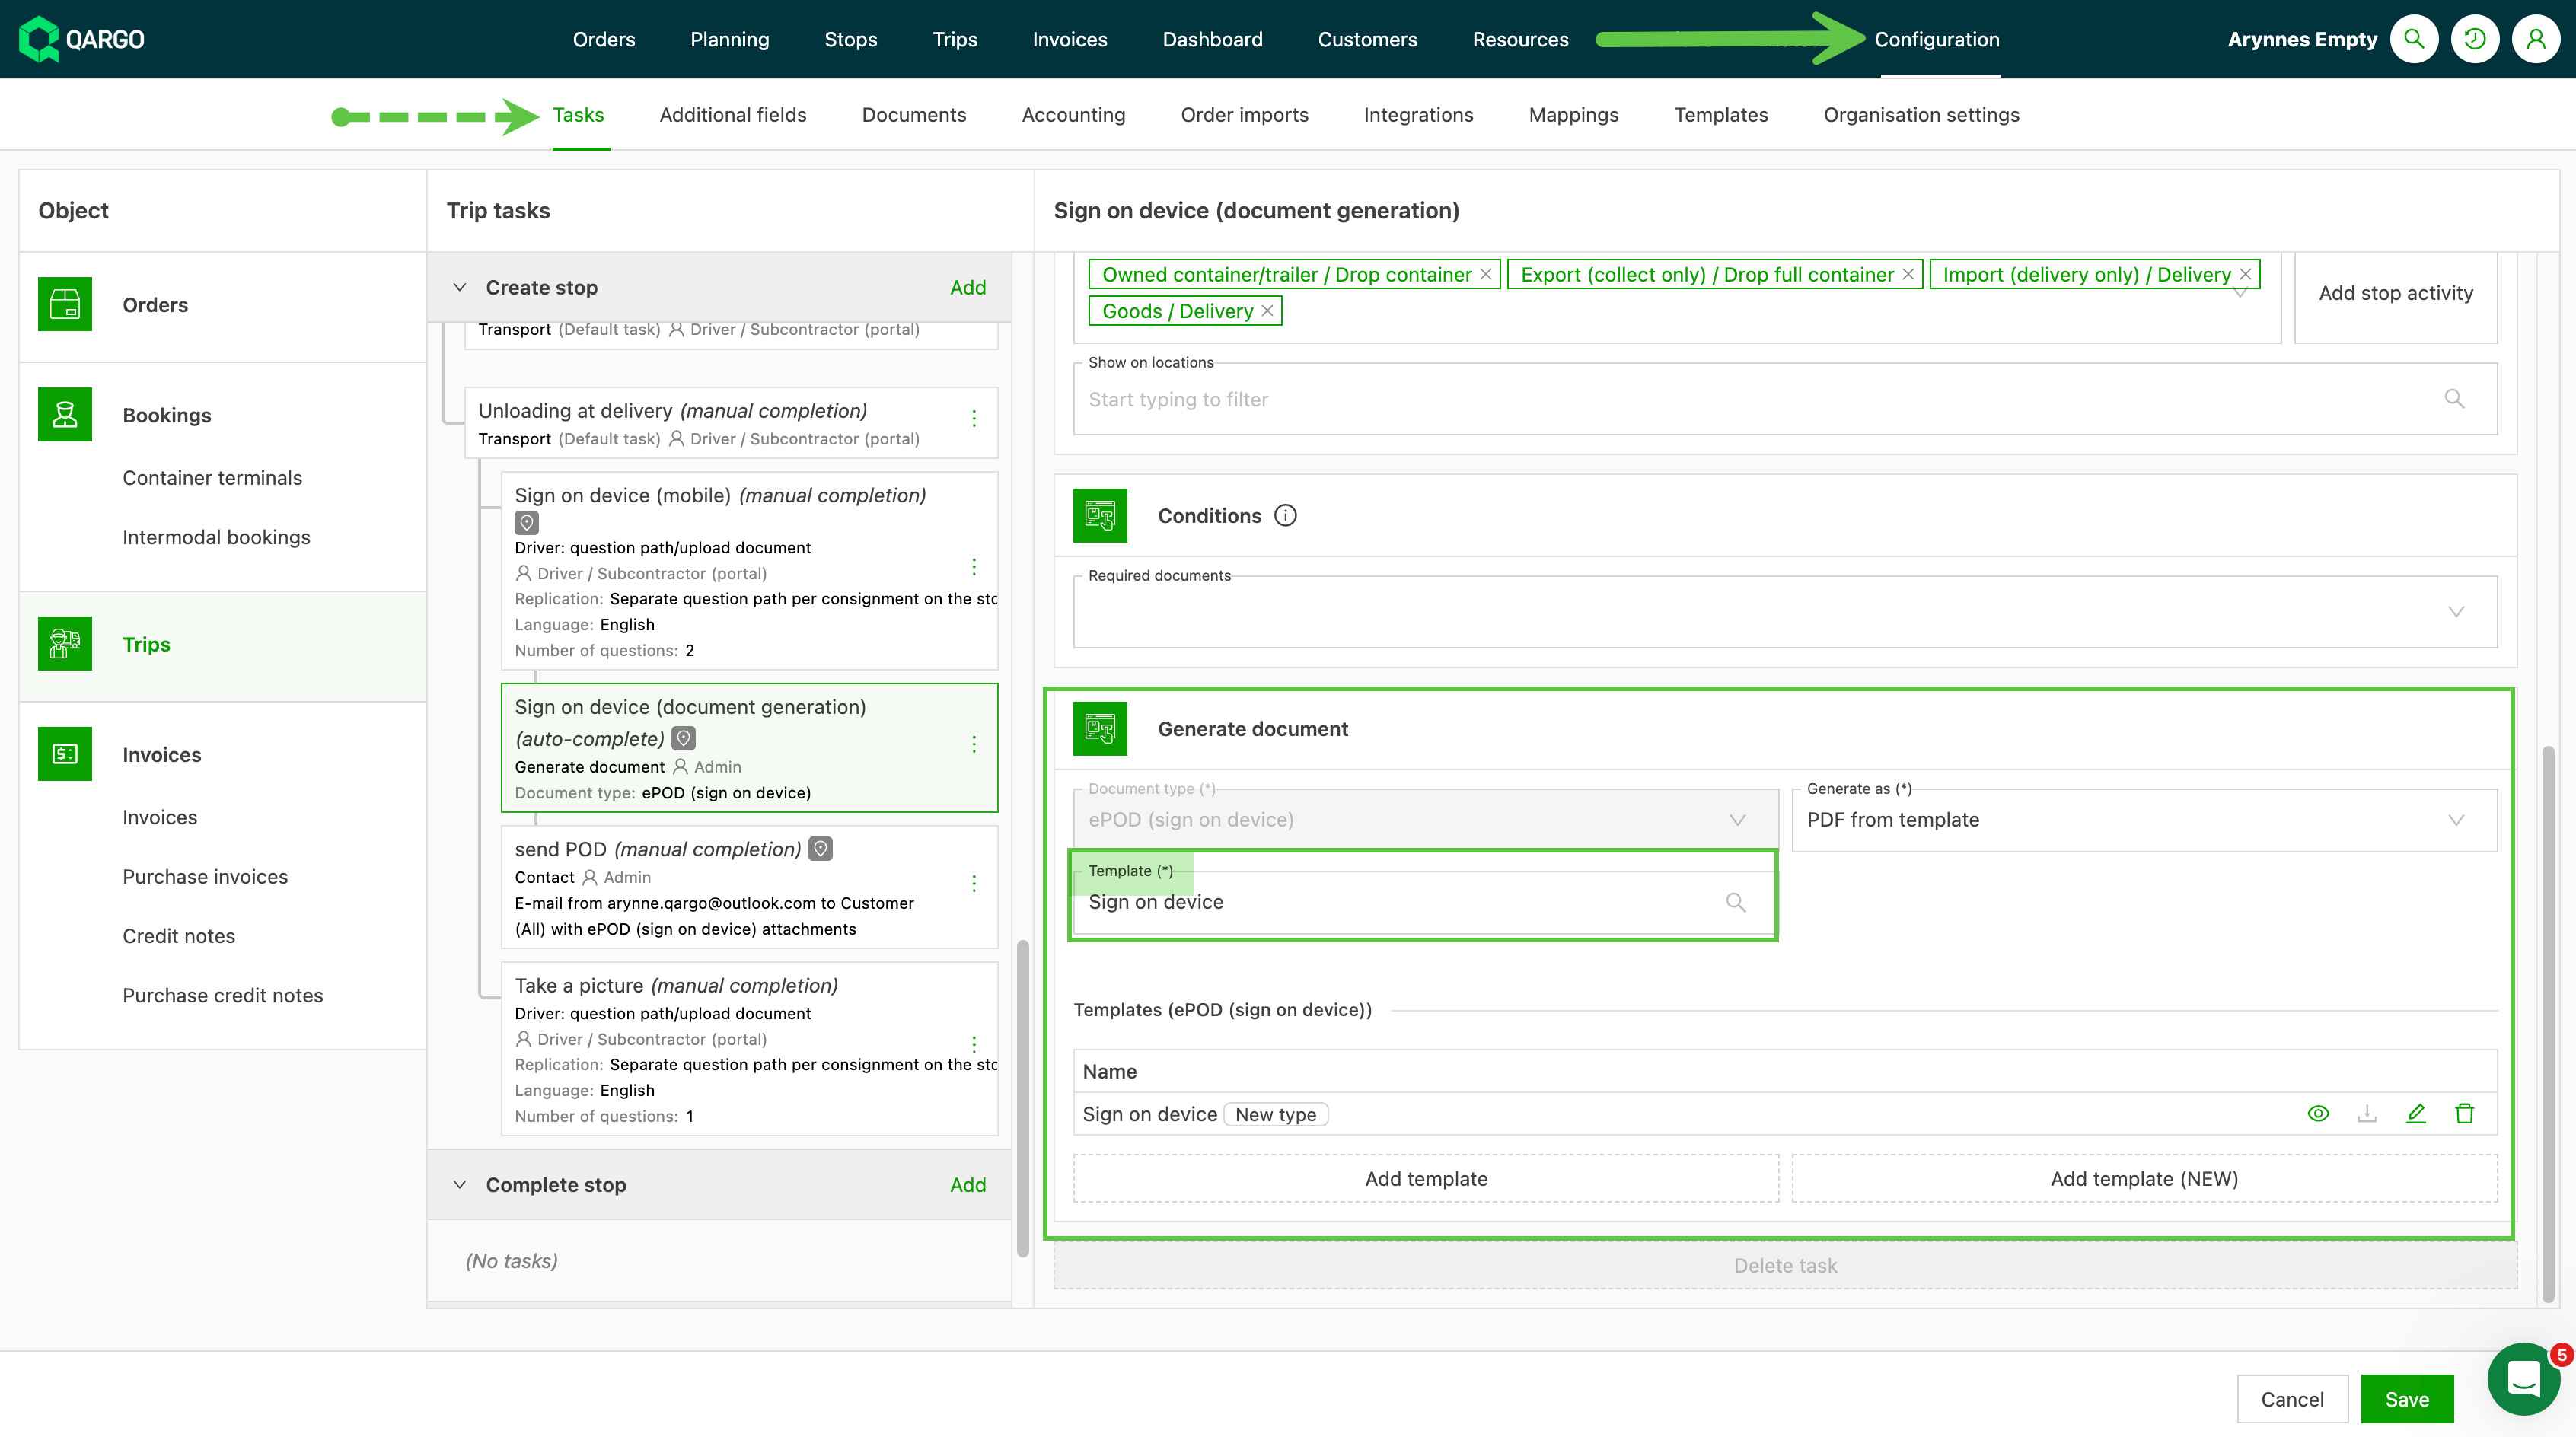
-
3 core components:
- Handlebars template: dynamic placeholders to insert data
- Template schema: structured definition of all dynamic fields available in the template; can include lists, tables, text, etc.
- Data model: actual data passed to the template when it is generated (i.e., order value)
-
Fields in the template schema define which dynamic data elements can be pulled in and shown, or repeated.
- Fields can be simple, i.e., ‘title’, or more complex ones for lists and tables that require parameters.
-
Templates can be configured by editing schemas and visual layouts.
- Select which fields to show and define logic (i.e., if/else, conditions, etc.)
-
Document generation: the template pulls the latest data and fills out the dynamic fields according to the template schema and data model.
- The output is a ready-to-use document in the desired format (i.e., PDF, CSV)
-
Templates can be global or tenant-specific.
- Global template = base layout that can be overwritten, or extended with custom variables
- Tenant template = tailored for special requirements, i.e., meeting legal or regulatory needs.
-
Supported features in templates:
- Multi-language support (localization), where enabled
- Tables and context-specific loops
- Custom helpers (such as formatting dates, barcodes, etc.)
- Handling of special cases and conditionals, i.e., if a field is empty, do not show it
- Attachments or images, i.e., signatures
-
Handlebars expressions allow for advanced logic.
Terminology
| Term | Definition |
|---|---|
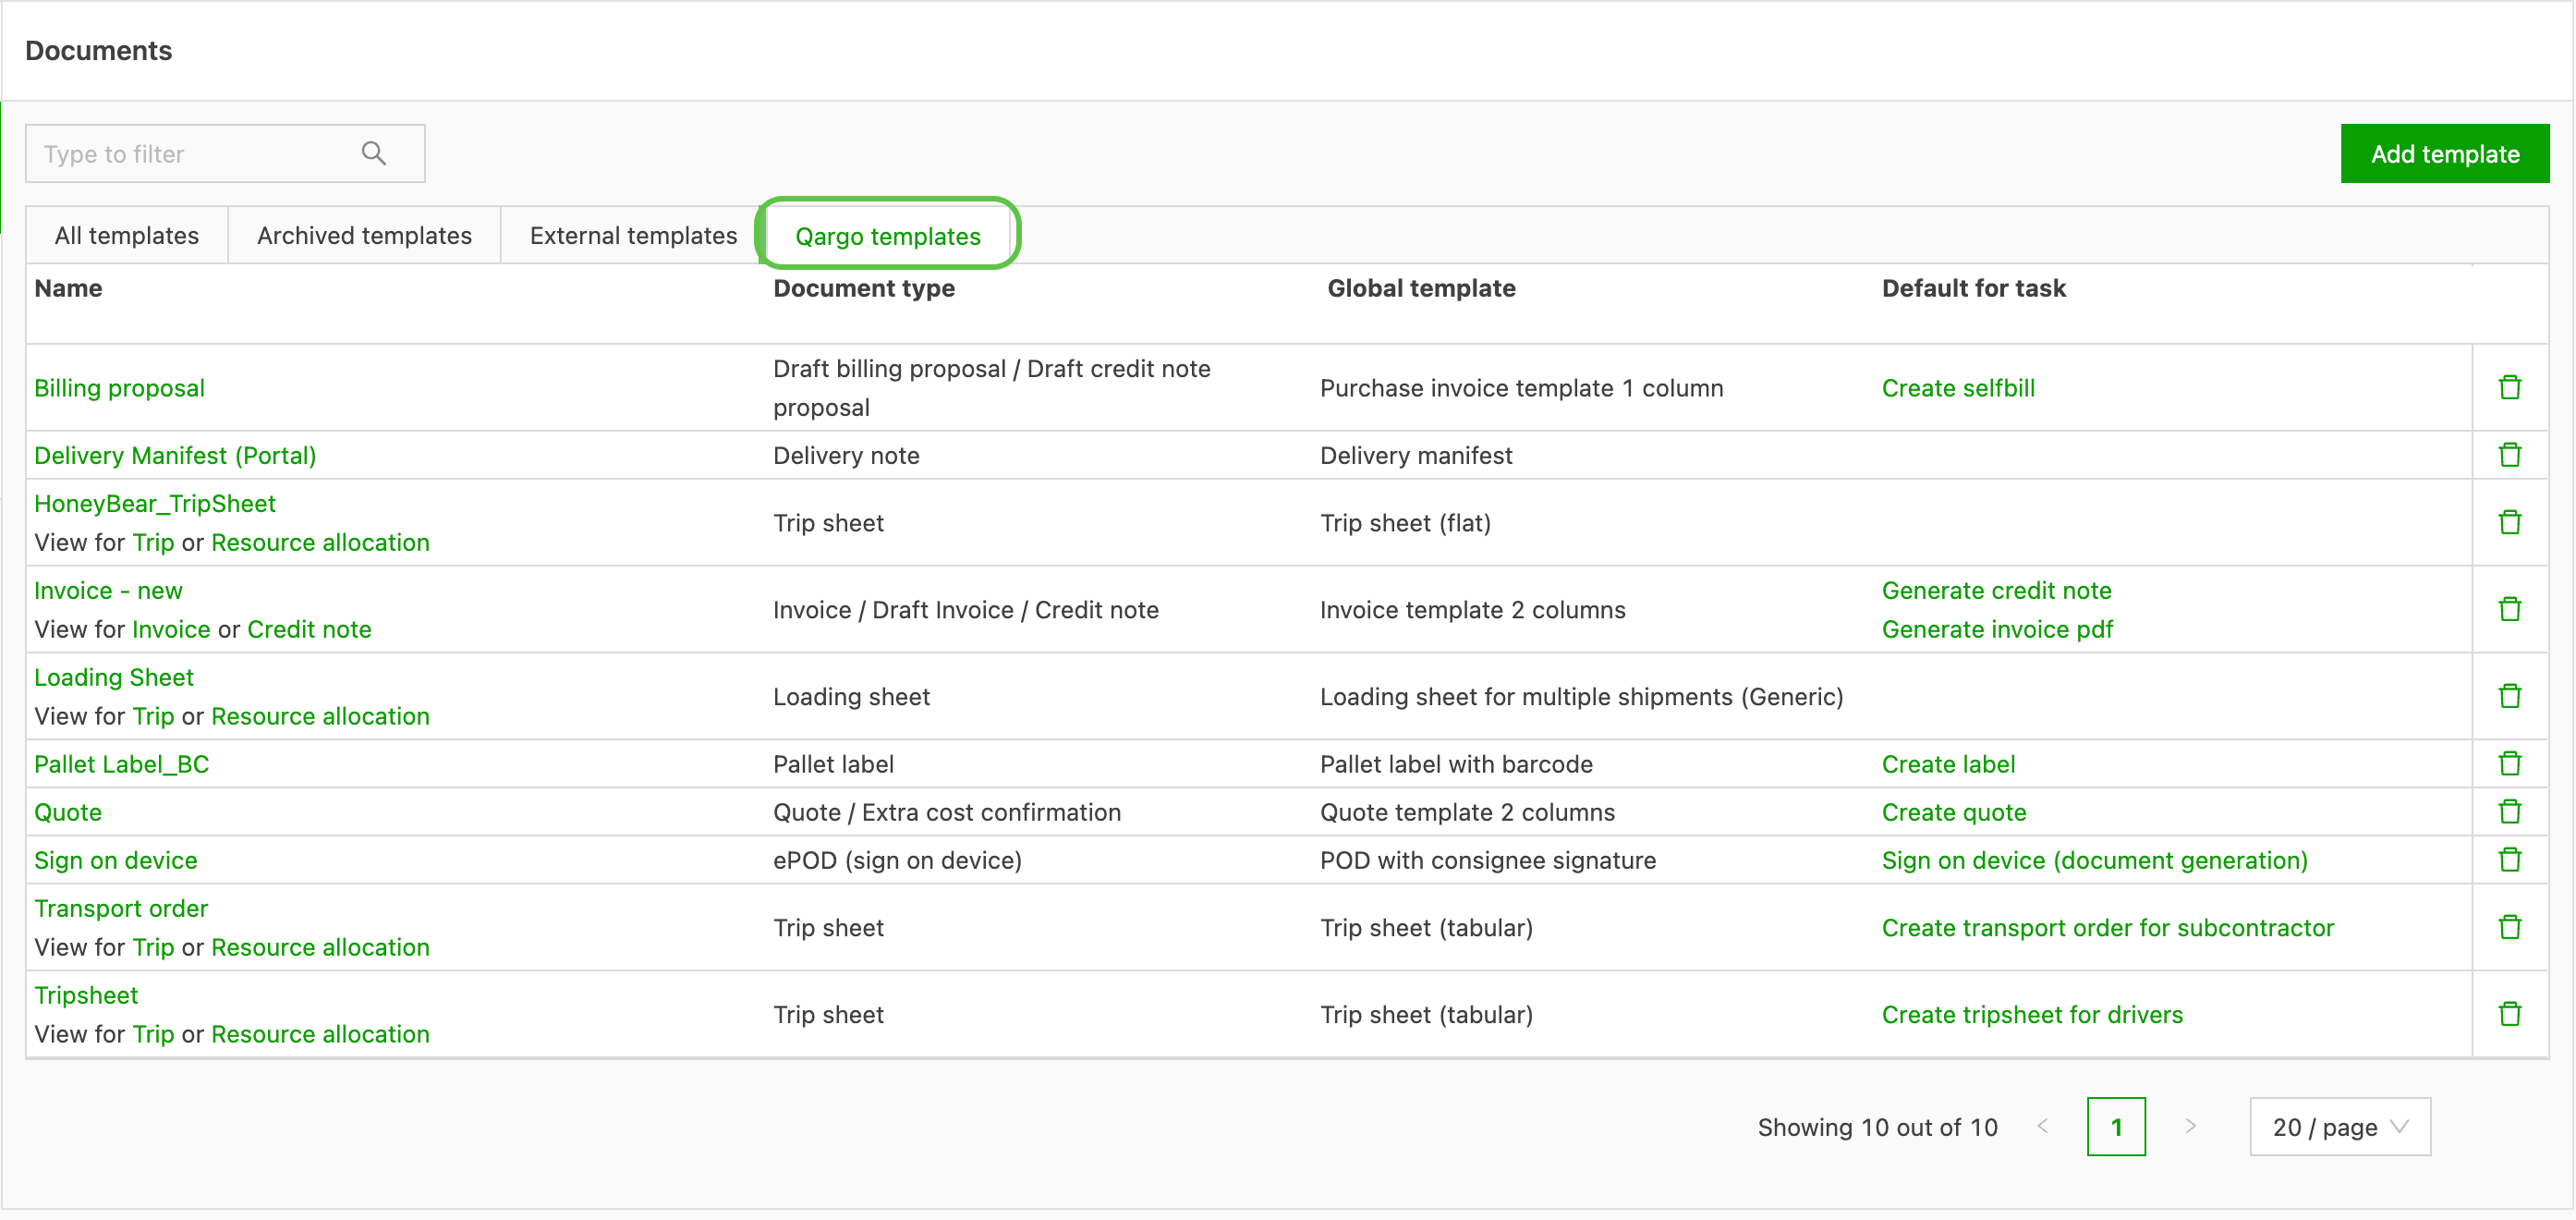
| Qargo template: | Standard, global template versions provided and maintained by Qargo. They act as a reference library and are easy to adapt as needed for branding, language, special data requirements, etc. |
| Tenant template | Customized template specific to the tenant (account) |
| External template | Document templates from an outside source that can be used or referenced. These can include templates shared across multiple organizations or locations, industry-standard formats and templates imported from external systems, i.e., credit memos, self-bills, load sheets, CMRs. |
| Base template | Generic template used to create a new document template. It is selected from a drop-down of predetermined options, based on the category of document being created, i.e., ‘invoice’. |
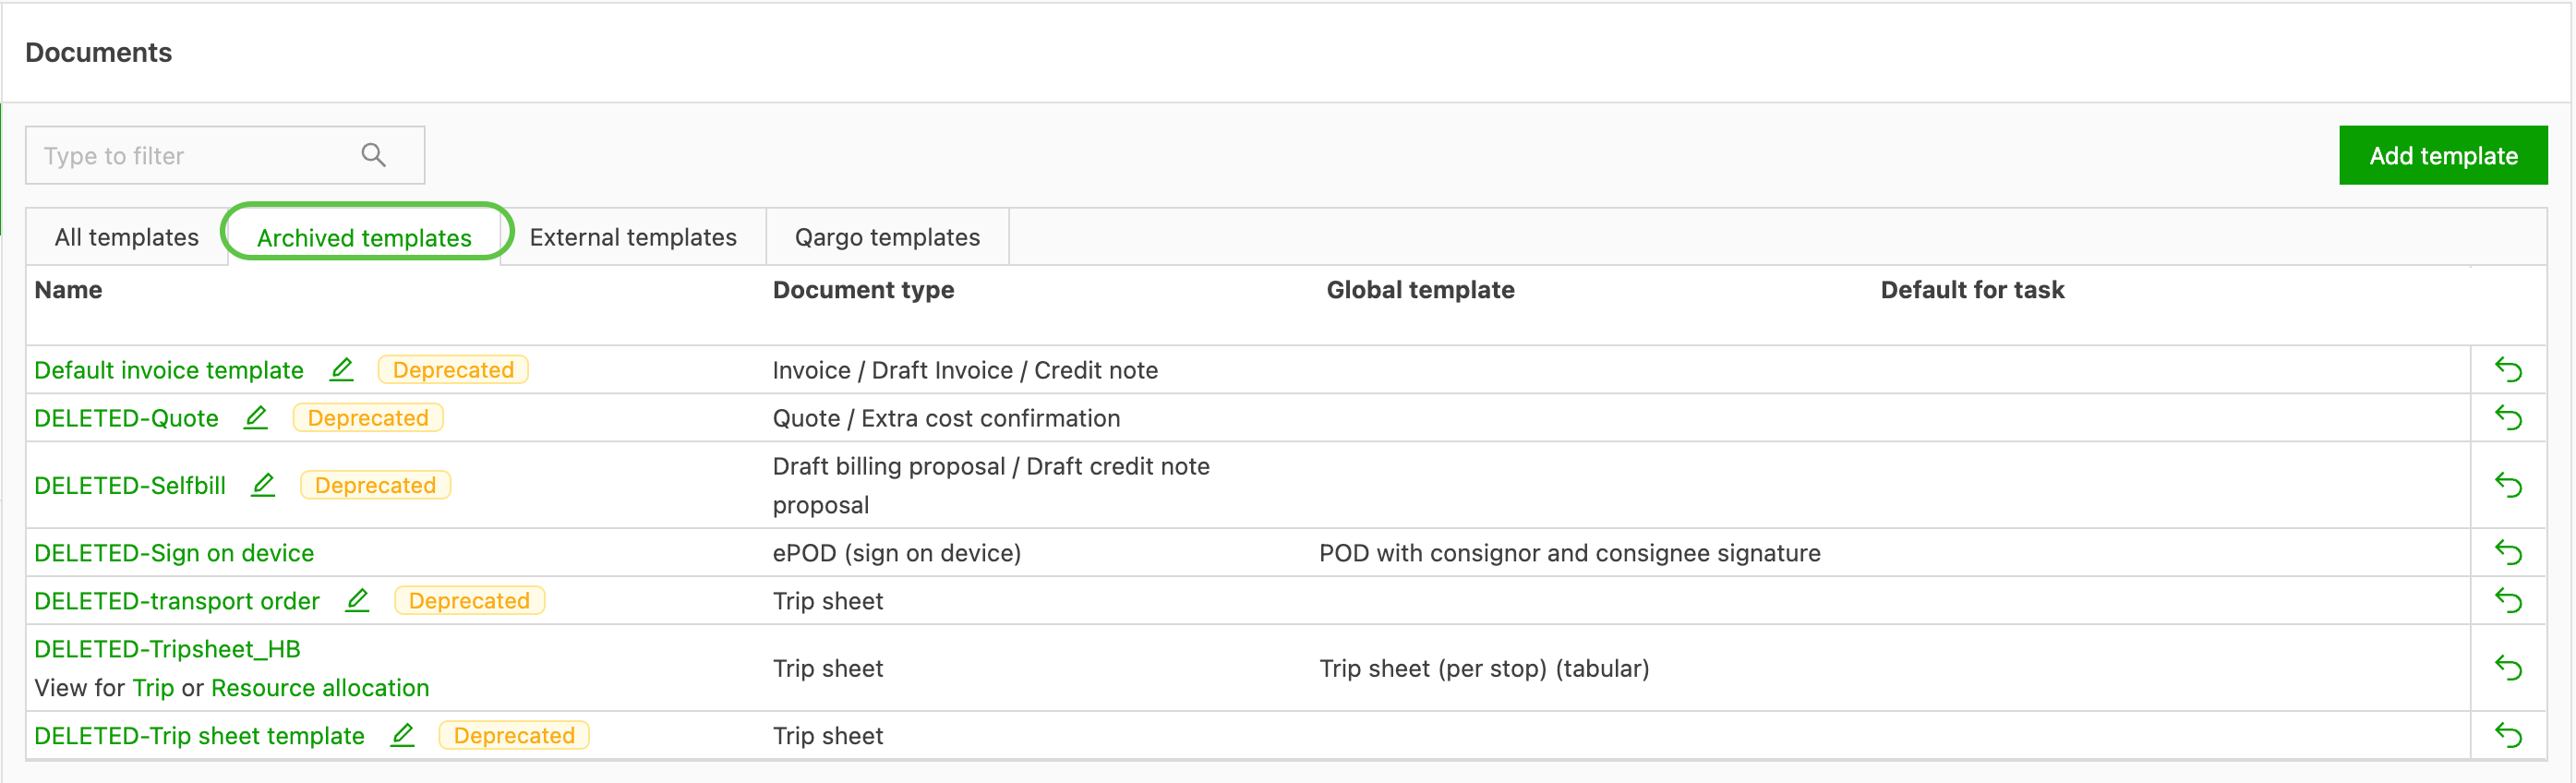
| Archived template | Templates that are no longer supported in the platform, typically replaced with an updated version. |
| Handlebars expression | Handlebars expressions are special placeholders and logic blocks used in templates to insert data and add conditional or repeating logic when generating documents or emails. |
| Context tag (blue) | Shown next to particular fields or rows in the template editor. It indicates that a field is tied to a specific part of the underlying data, i.e., stops, which then show as one row per stop. |
Understanding template layout
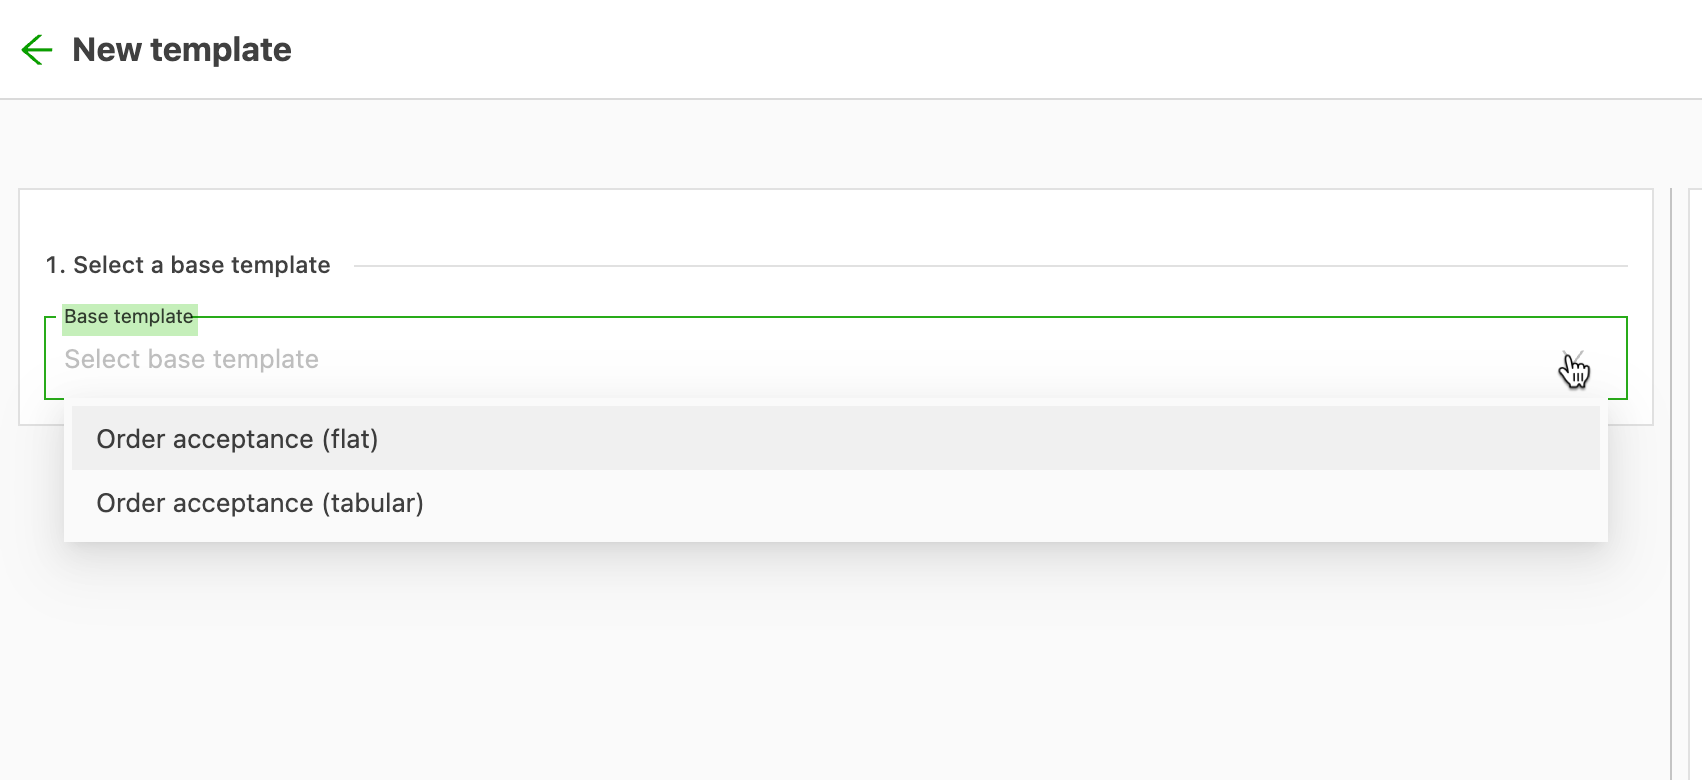
When adding a new template, a base template must be selected first. Once it is selected, the data rows and the preview panel (#3 Visualize) are shown. The template shows with generic data.
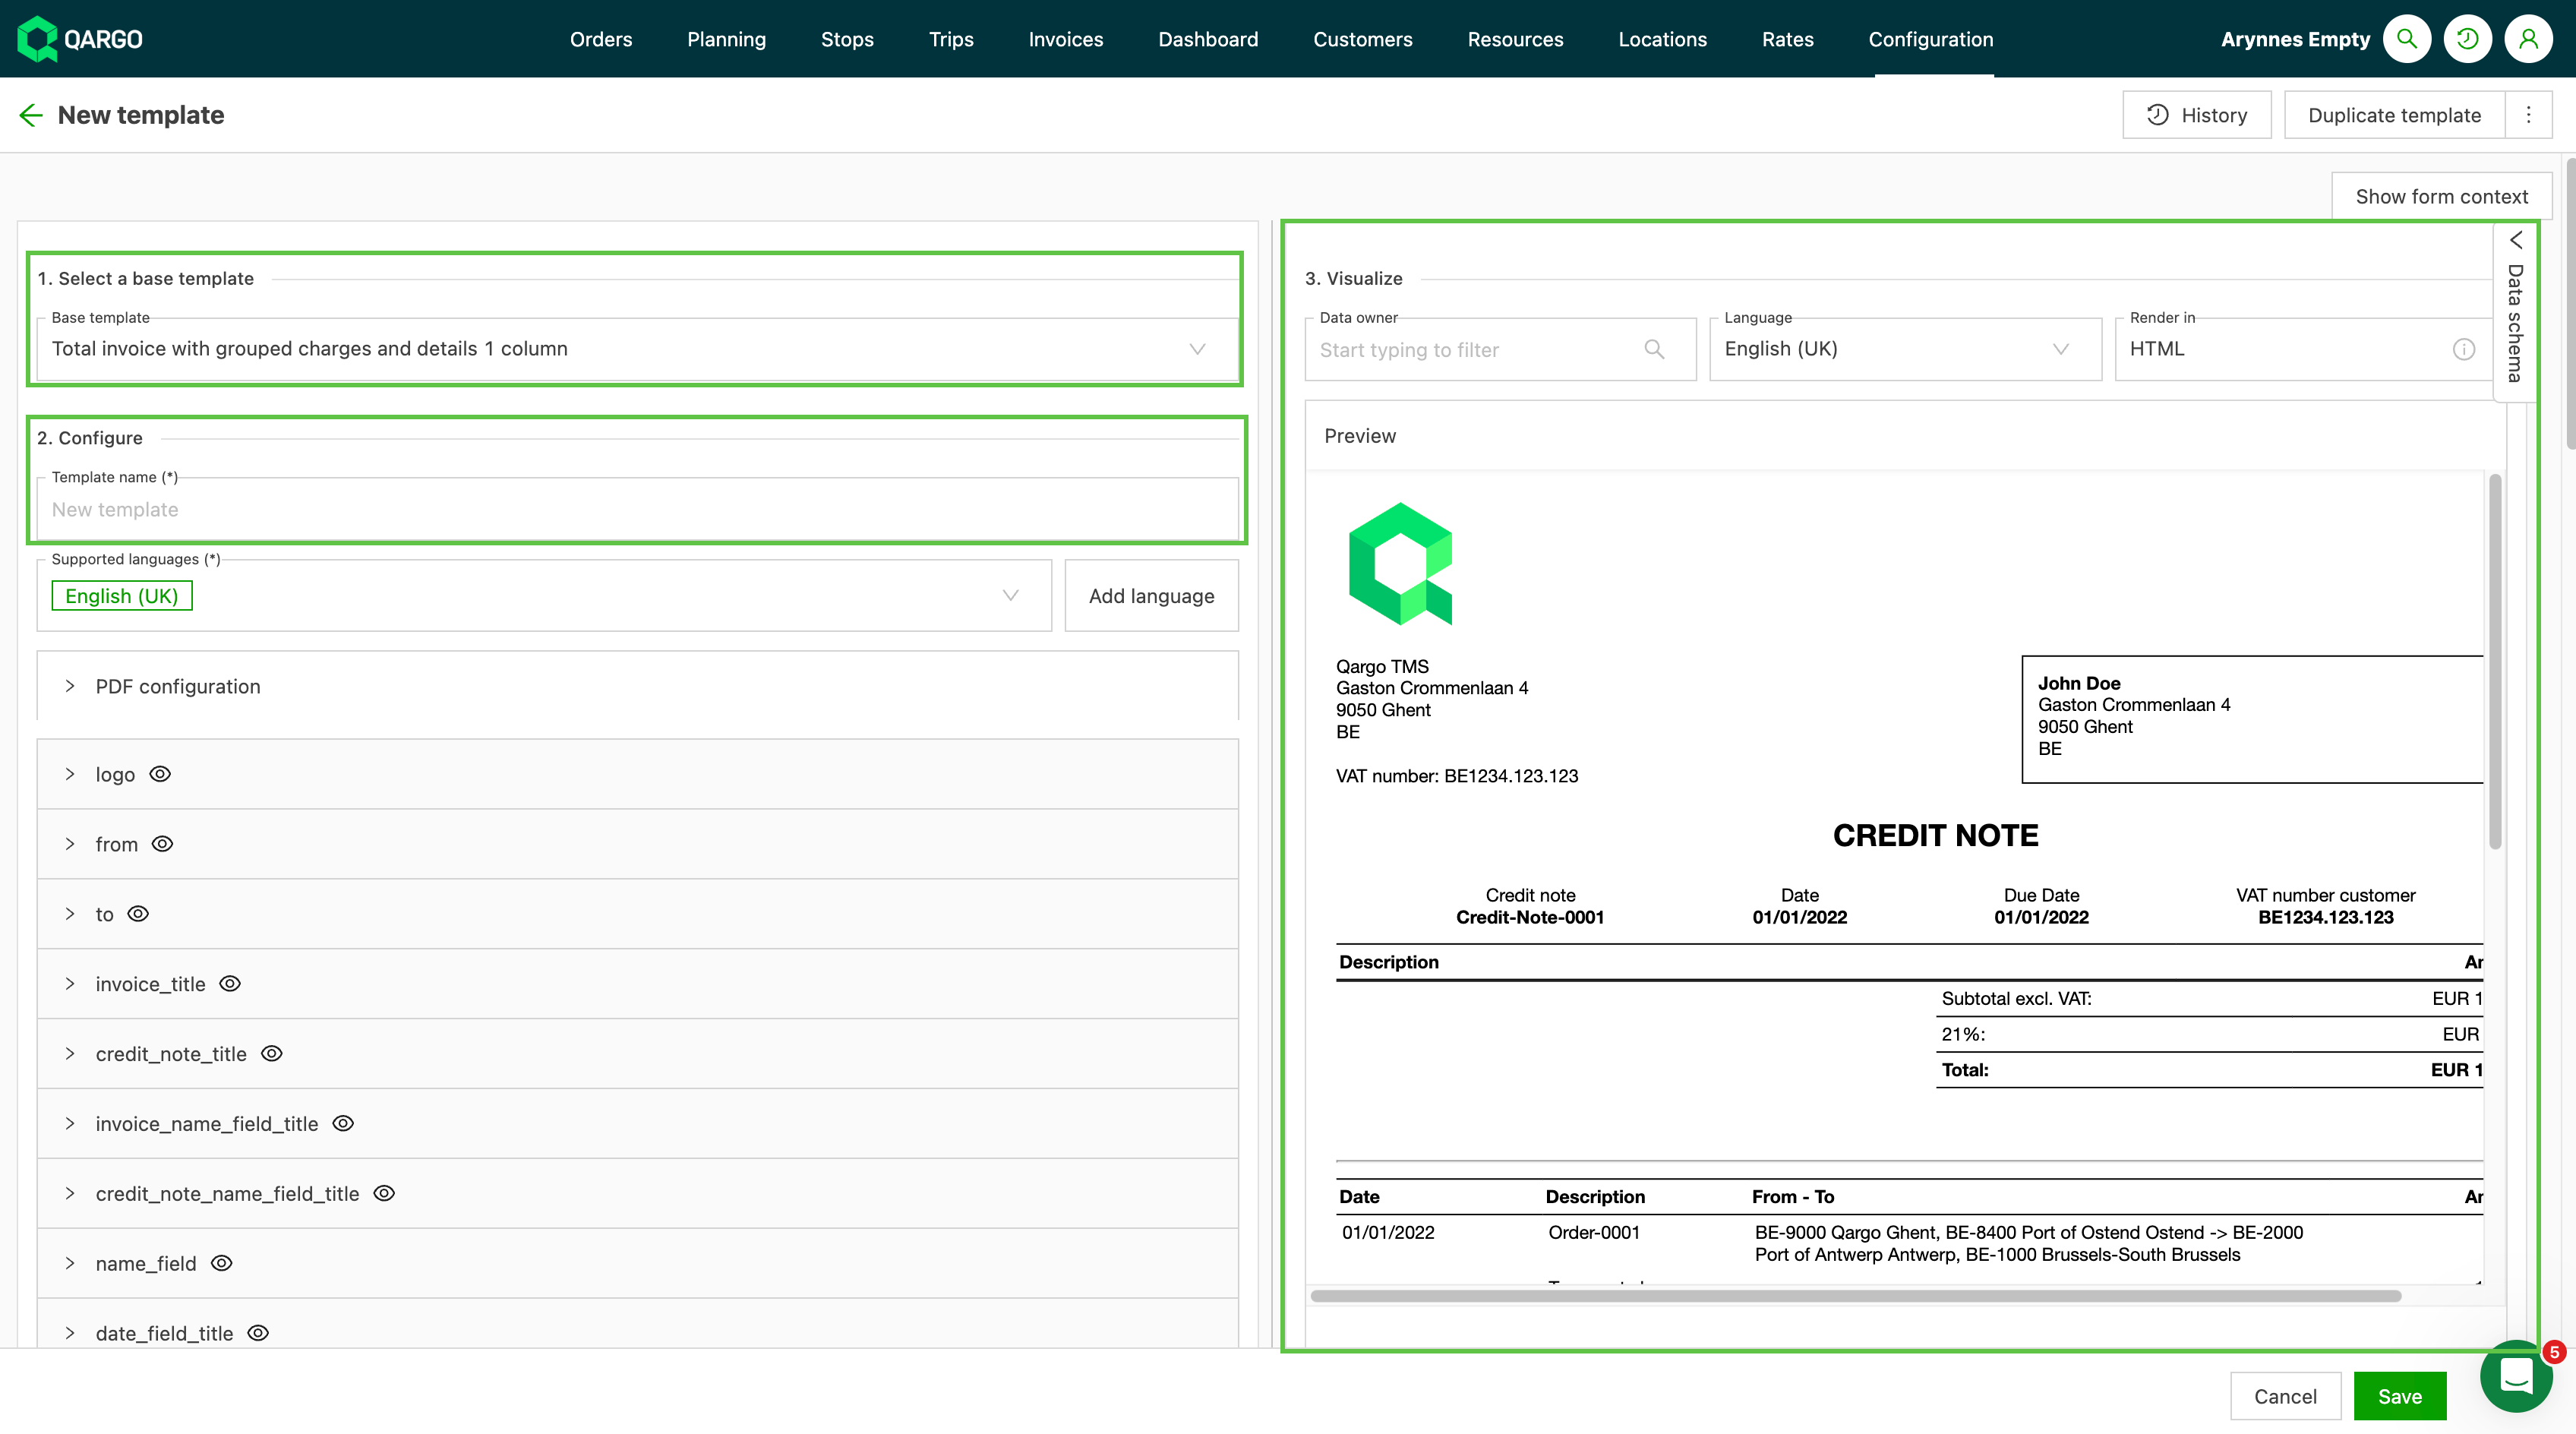
- On the New template page, select the appropriate Base template from the drop-down list.
- Configure the new template. Give the new template a name that makes the use case easy to identify. Modify any fields to customize the template, or use the base template as is.
- Visualize the template format in the preview panel. Clicking an element in the preview panel highlights the corresponding data row. Click into the row if the displayed data needs to change.
-
Edit the template data by clicking into the appropriate row and editing the content.
- Clicking into the row or using the ‘eye’ icon highlights the data set from this row in the preview panel.
- Clicking information in the preview panel highlights the row where that data set can be edited.
- Use the Data owner field to view live data. The options displayed relate specifically to the document. In the example below, for instance, the document is a billing proposal, so the options shown in the data owner field are carrier invoices.
Understanding edit icons
- Clicking into a row to edit details displays a selection of edit options.
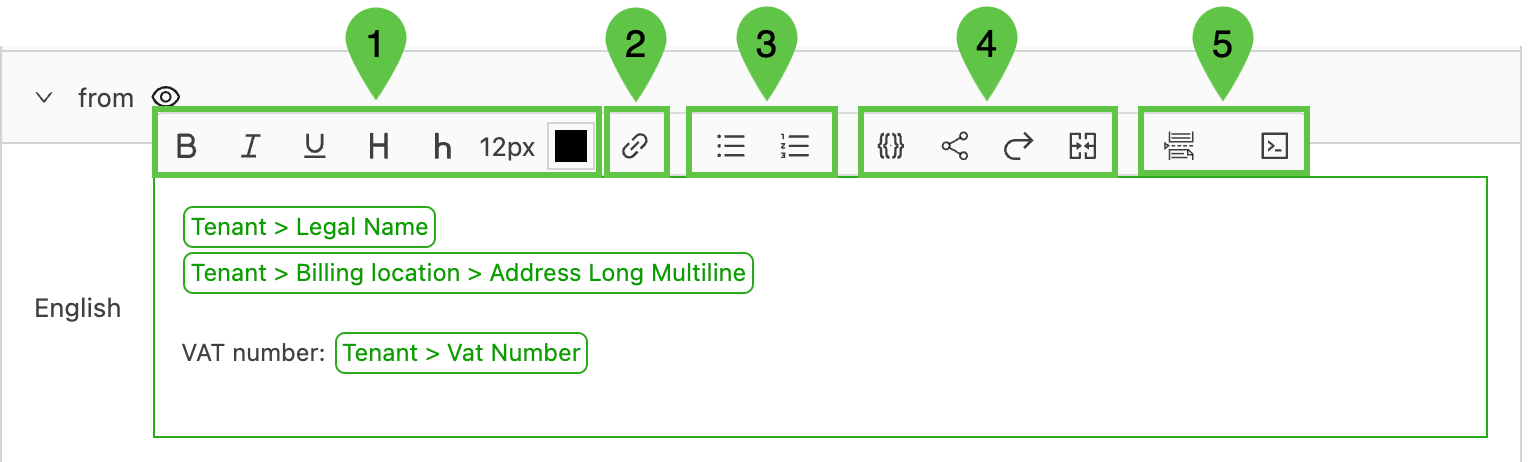
- Text editing options, including bold, italic and underline; font size and color. H and h format the data as Heading 1 (H) or Heading 2 (h).
- Add a URL link to a website. A pop-up window displays where the link can be added.
- Add data as bullet points or a numbered list.
- Syntax blocks for creating more advanced conditions using expressions that combine multiple variables or conditions.
- Formatting options to add a page break or HTML block
Using syntax blocks
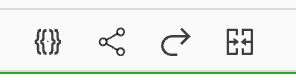
- When editing a template, syntax options can be used to make templates reflect specific conditions.
 Handlebars expressions
-
Handlebars expressions are used to select variables associated with the document. The variables displayed in the drop-down are specific to the document and the associated row.
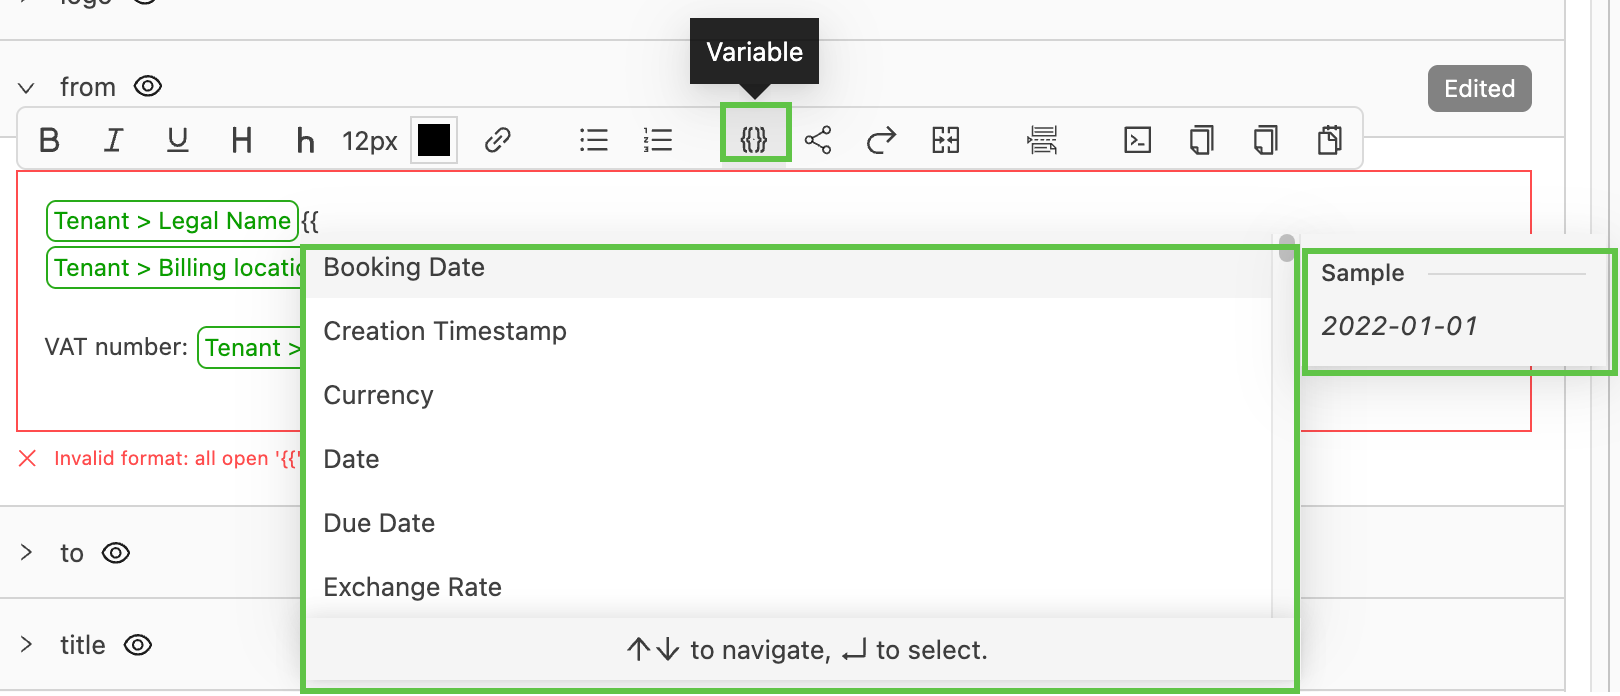
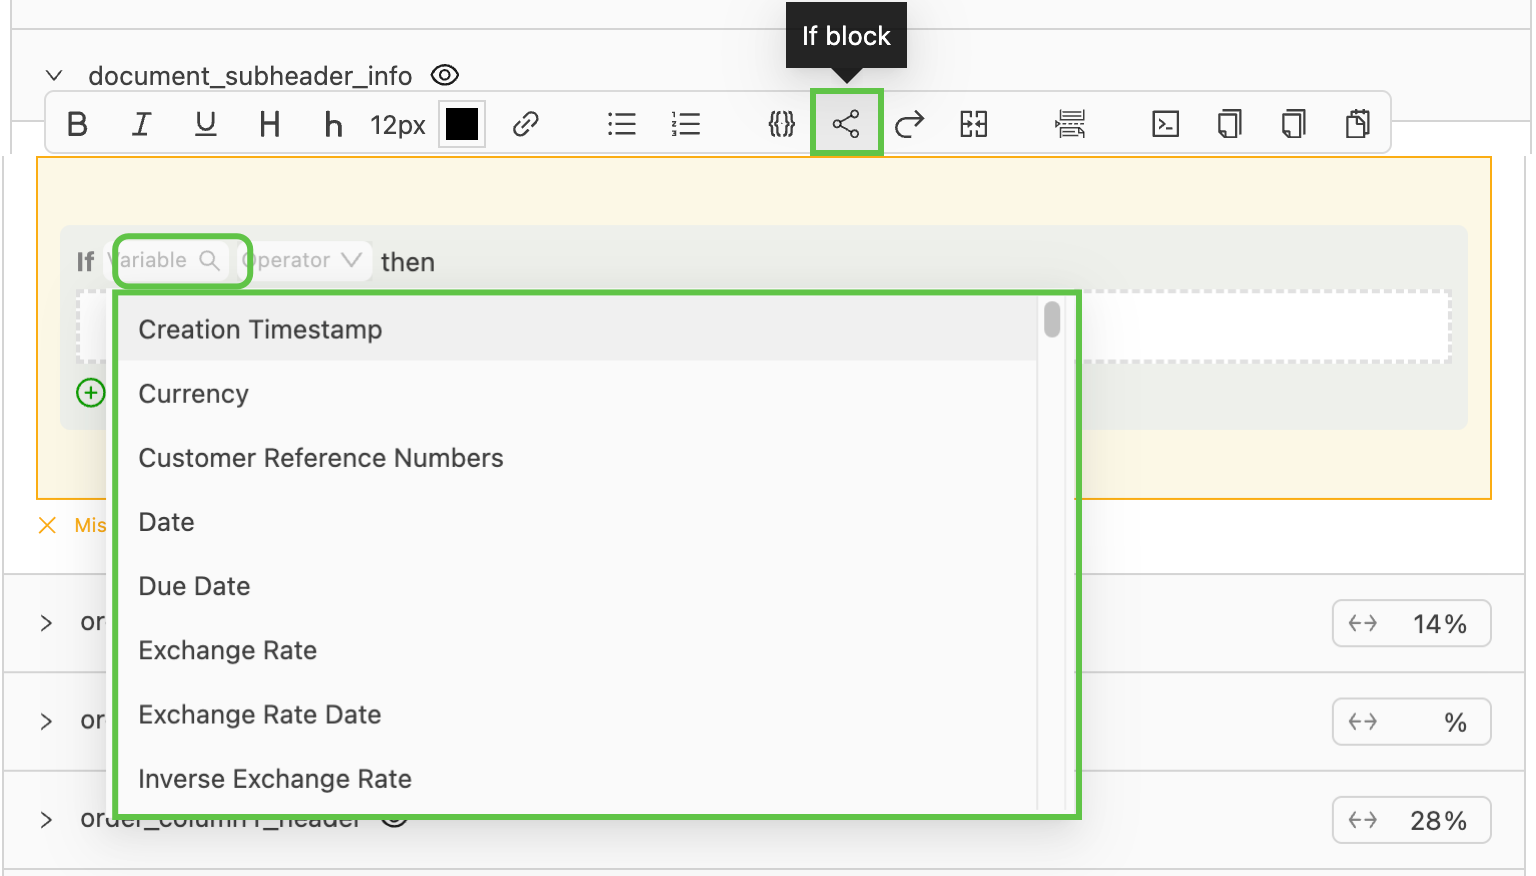
 ‘If’ block
-
Use the IF block in a document template to display certain content or formatting only under specific conditions, based on the data. For example, a field can be shown only if it is not empty, or a row can be highlighted only if a value exceeds a threshold.
-
Common scenarios:
- Hide charges with amount 0: use an IF block to display a charge only if its value is more than zero.
- Show content conditionally: for example, display a note or section only if a field contains certain text (such as a specific contract carrier name or a filled-in comment).
- Conditional formatting: make text bold or apply special styles when a value meets a condition (e.g., bold a location if a related note exists).
 For block
-
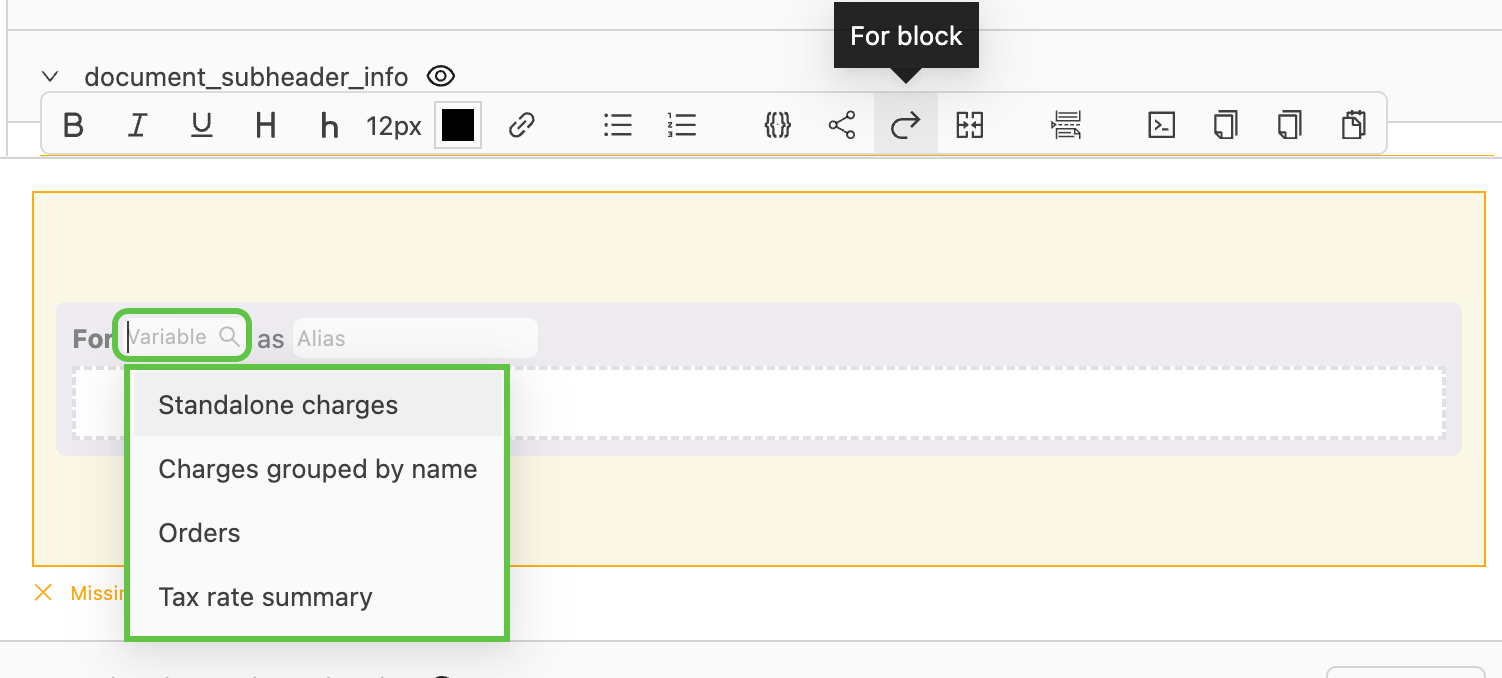
The FOR block is a powerful feature in the Qargo document template editor that enables dynamic, data-driven document generation.
-
To list all products for an order, with each product and its description on a new line, add a FOR block for the goods array and place the product details inside the block. The FOR block ensures each product gets its own line in the final document.
 Combine statement
-
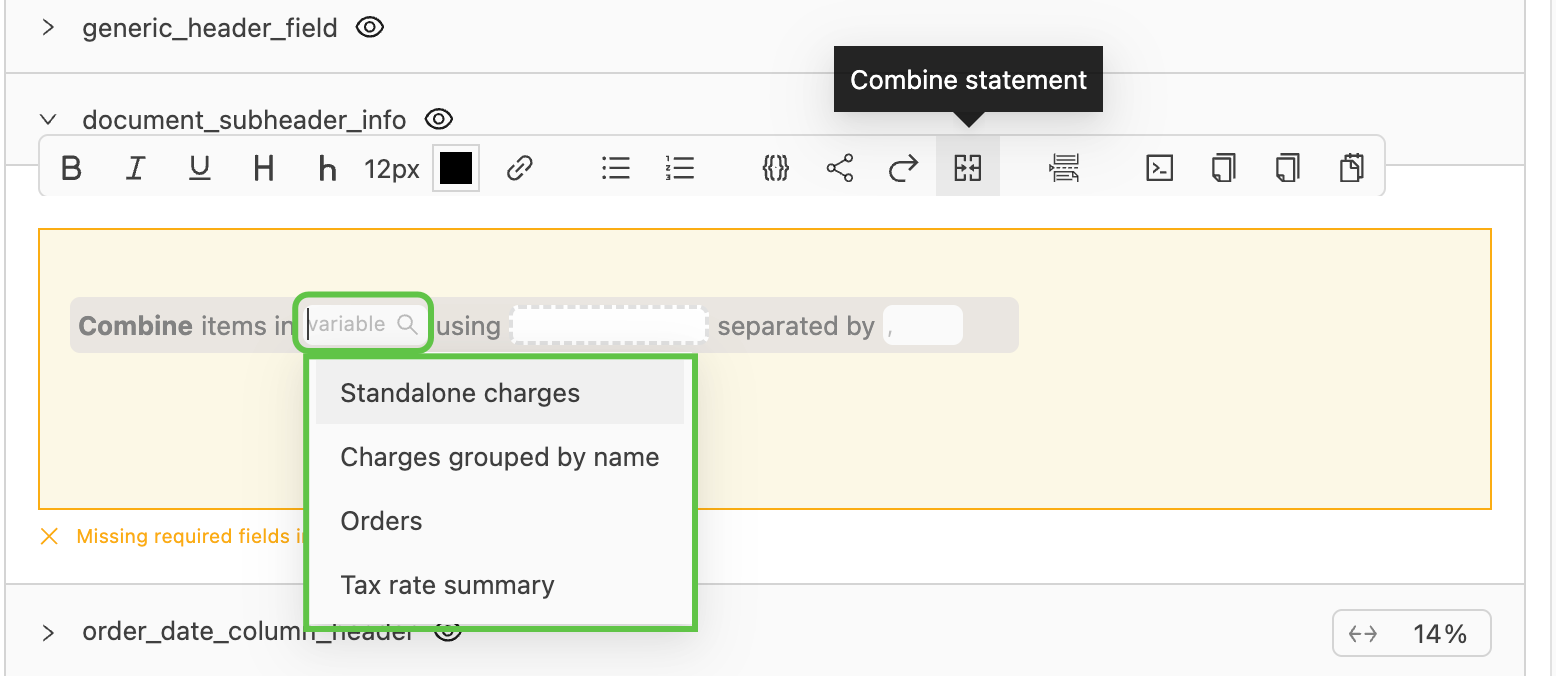
Use the COMBINE block to display a joined or aggregated list from an array in the template, such as joining a list of values into a comma-separated string.
-
Unlike a FOR block, which iterates over each item and renders content repeatedly, the Combine block processes the array to output a single result, typically by concatenating or otherwise aggregating its elements.
-
One important limitation is that IF statements (conditional logic) cannot be used inside a Combine block. This means the Combine block is best suited for straightforward aggregation without item-level conditions.
Add new template
-
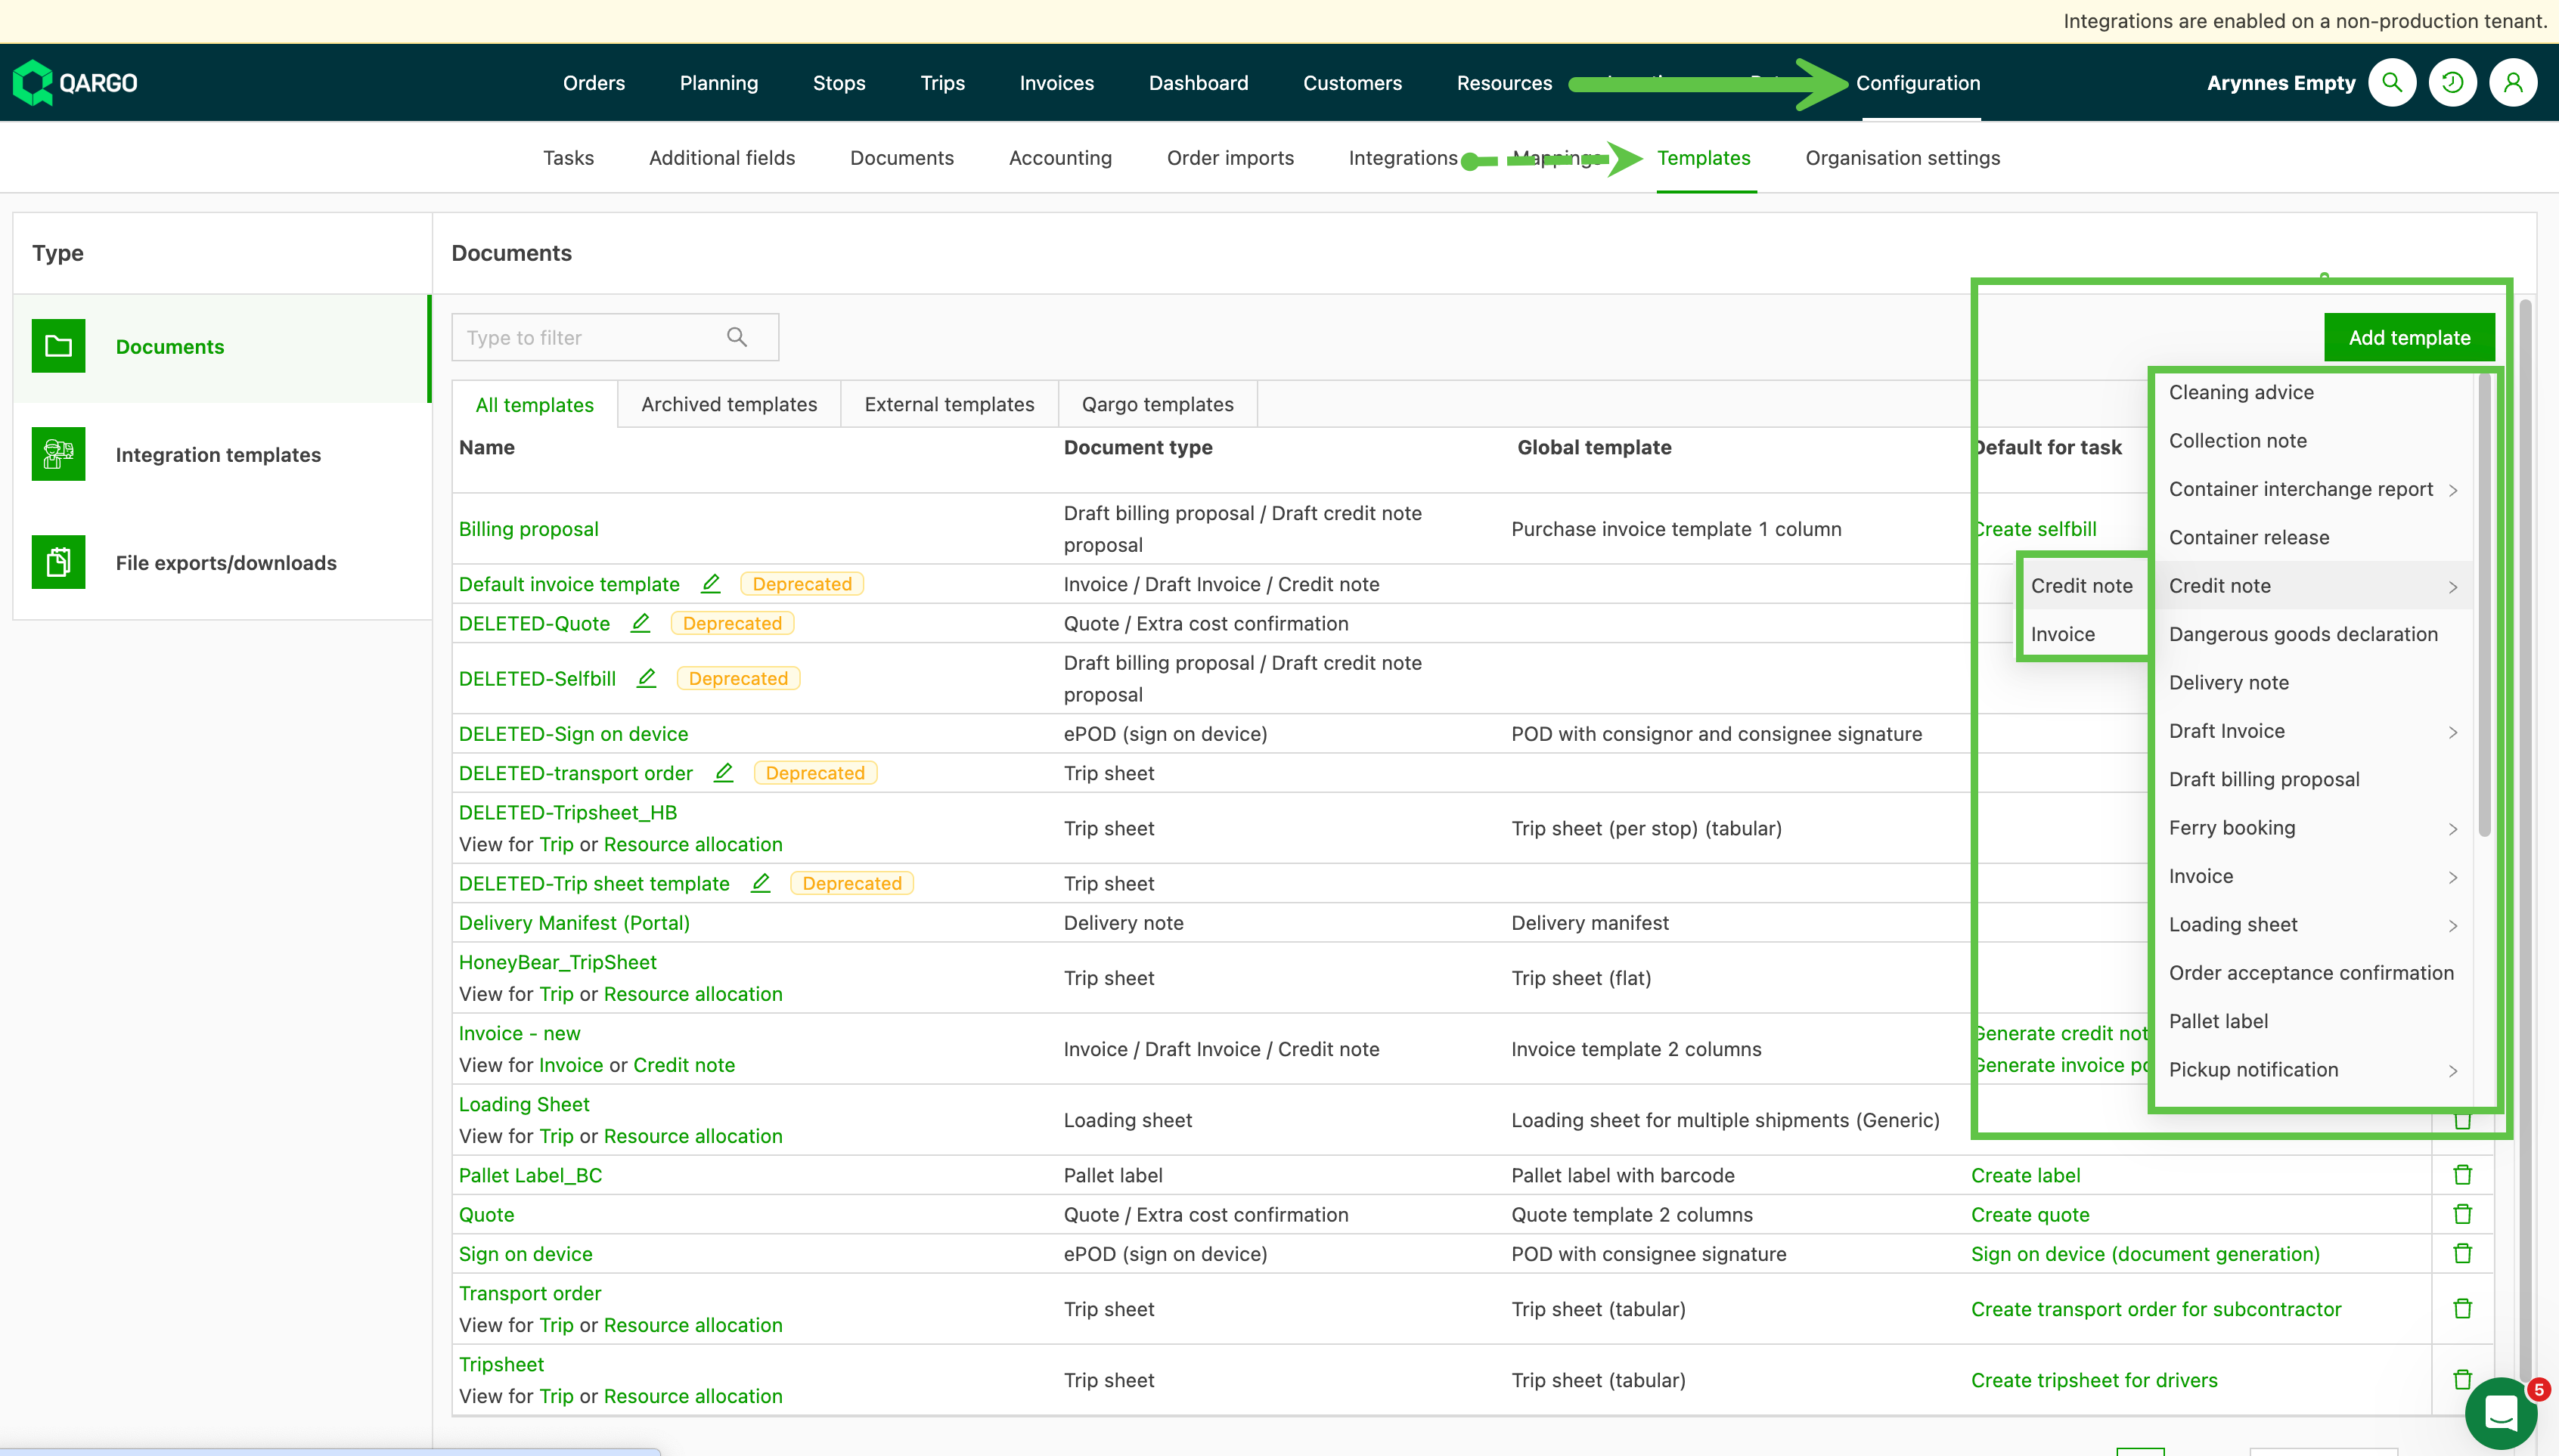
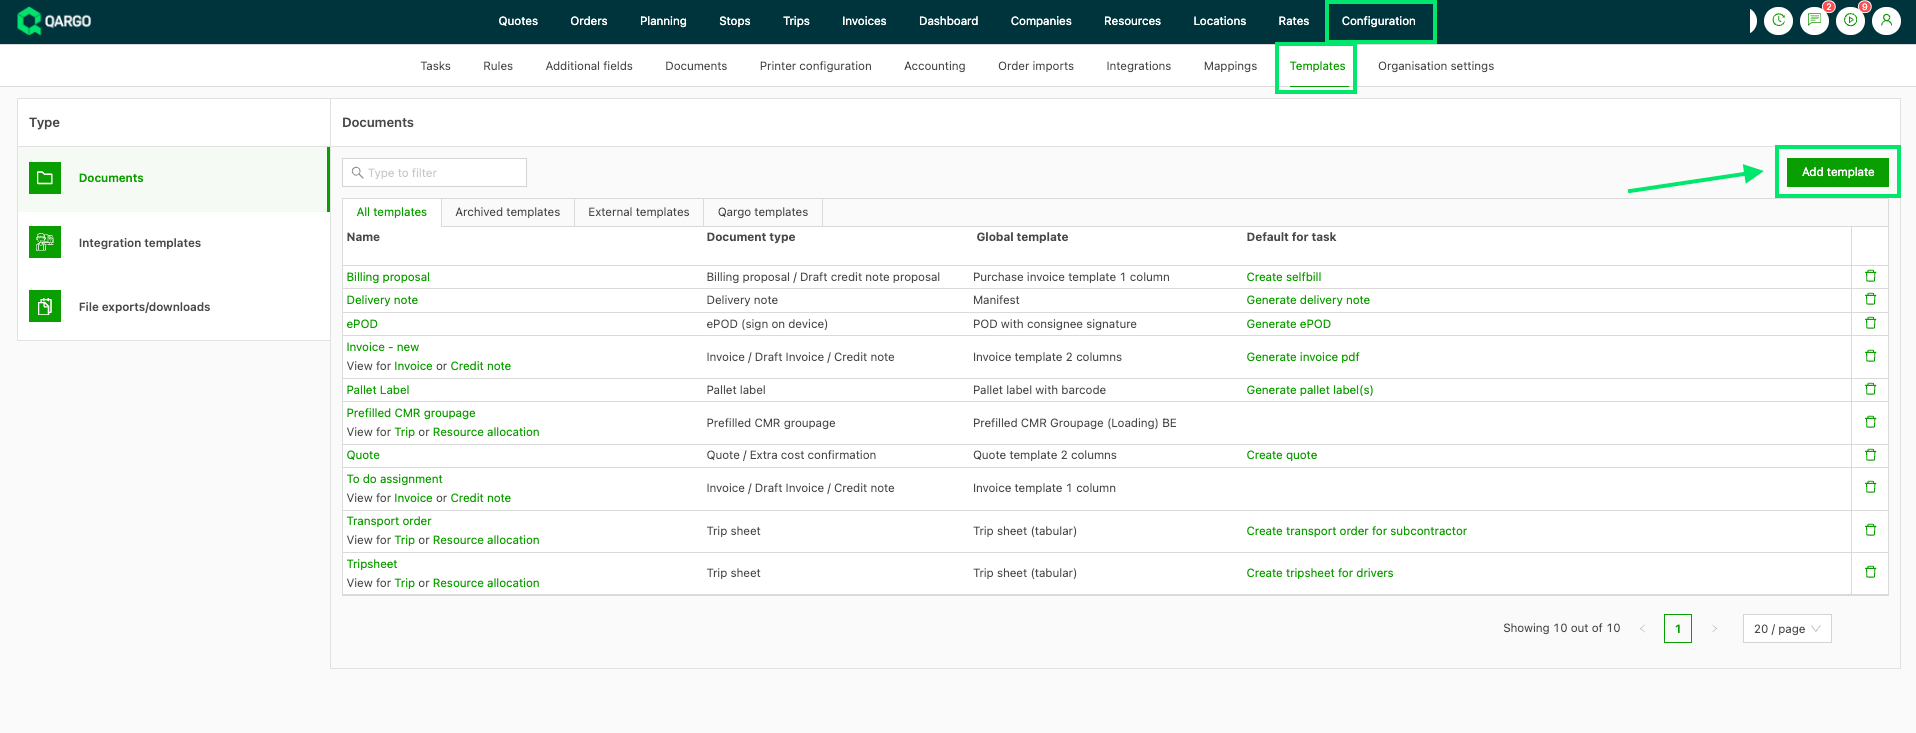
Navigate to Configuration > Templates
-
Click Add template
-
Select the document type from the drop-down list.
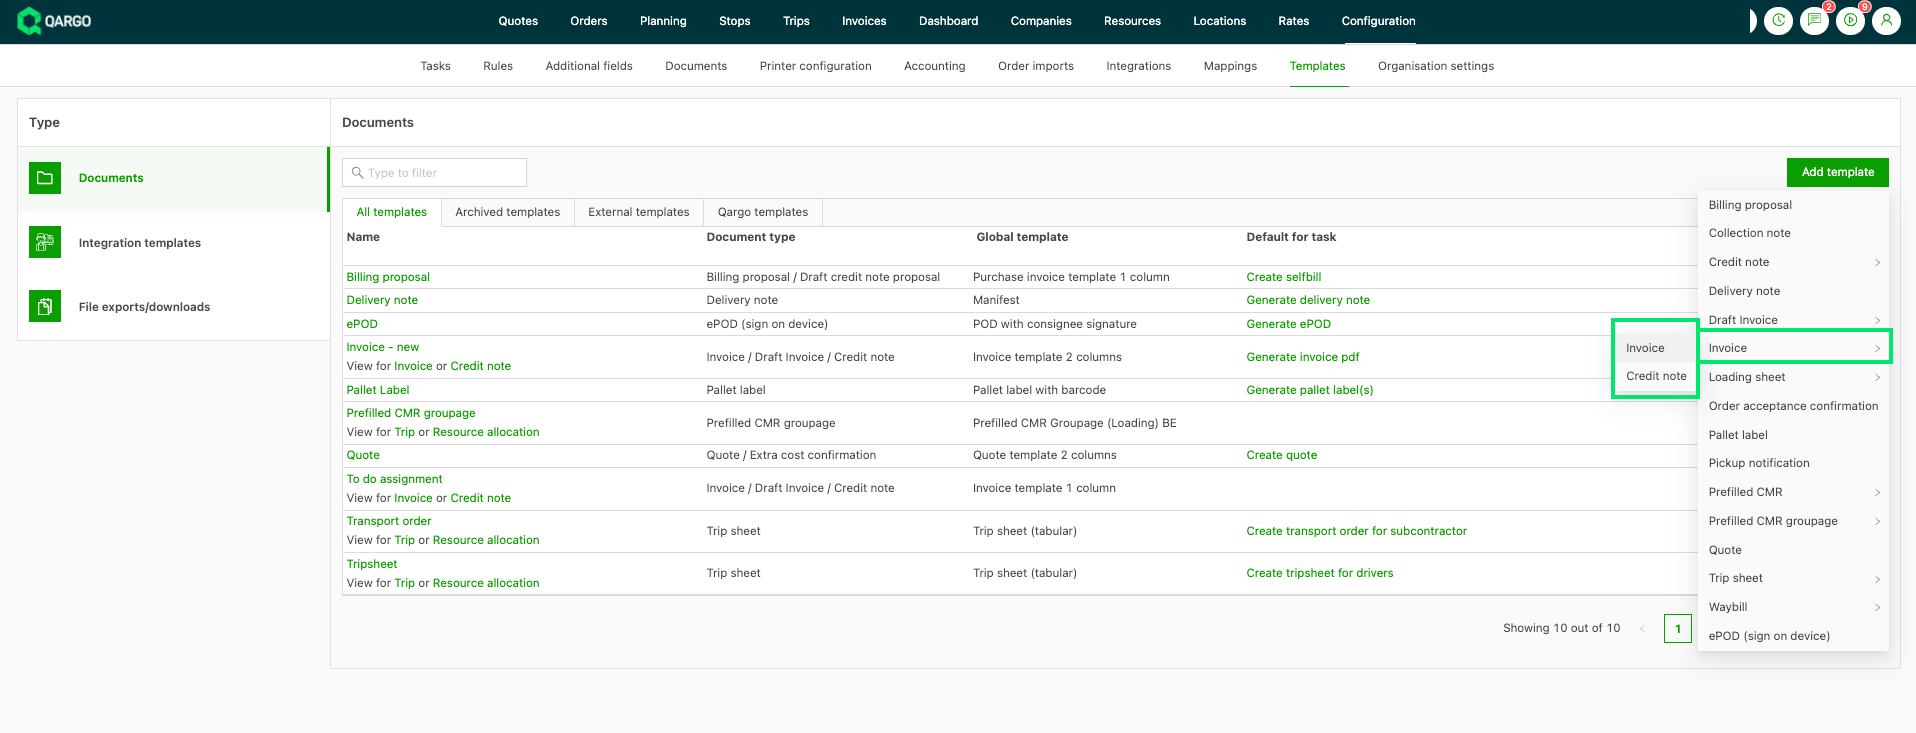
- Note: additional options may be available, i.e., “Invoice” gives an option for invoice or credit memo, and “Loading sheet” gives an option for load or resource
-
Select a base template from the drop-down.
-
In the Visualize panel, clicking the Data owner field displays matching records for this type of document. Selecting one of them updates the template preview to show customer data.
- If the basic template provides all the data in the required layout, give the template a name and click Save.
-
If the template layout needs modifications, use the rows in Configure to update the data.
Modify a template
-
The template format is available in either HTML or PDF.
-
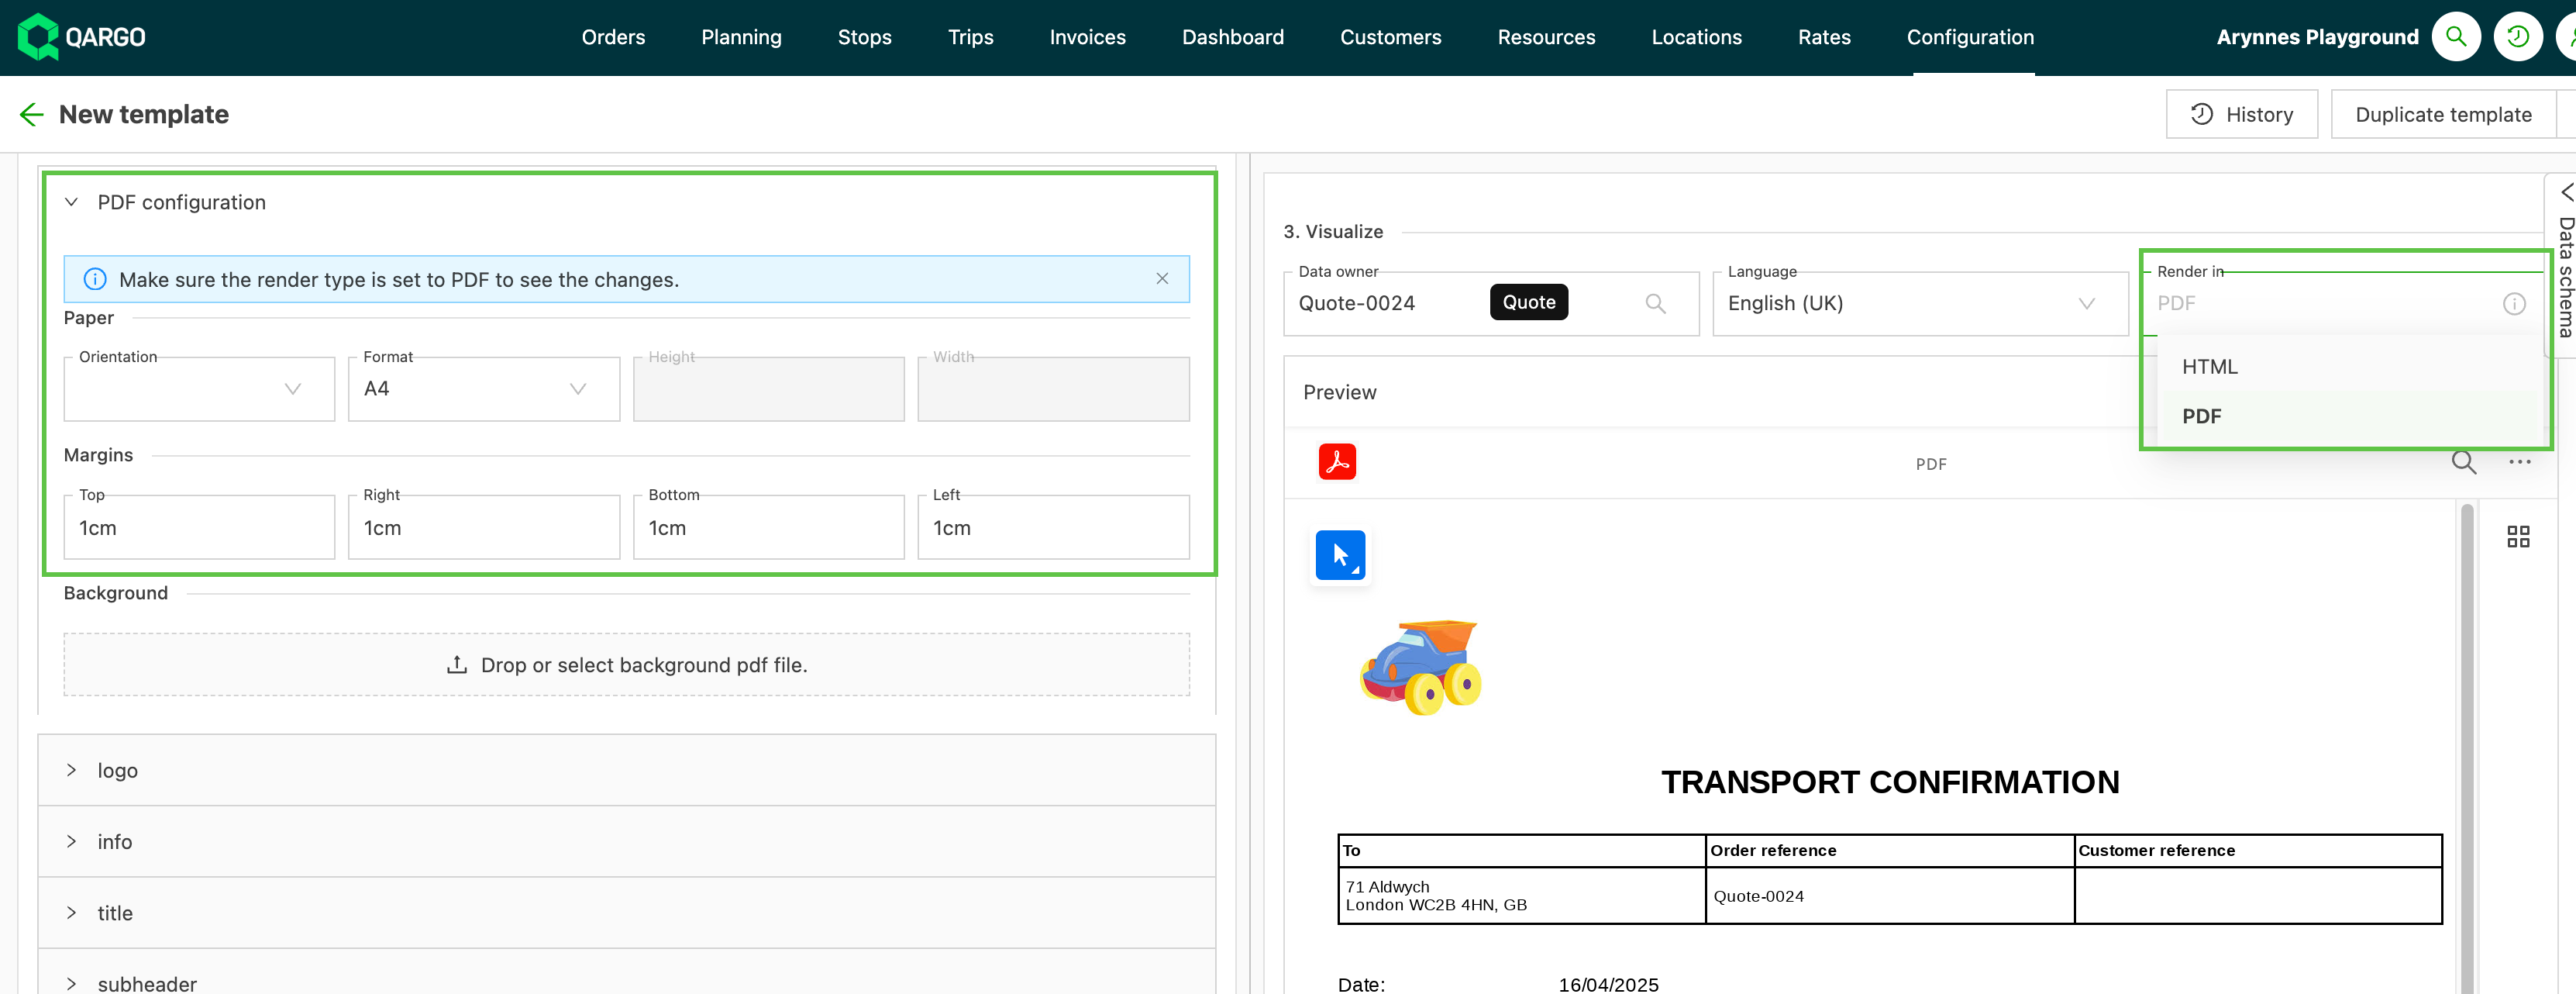
With PDF, additional formatting is available. Expand the PDF configuration row.
- Changes made in the configuration panel are previewed in the right panel.
-
To modify individual elements, click the element to highlight the row that needs the update.
- Click into the row and the edit options display.
- Select the appropriate action from the options.
- Once it is selected, the modified data updates in the preview/visualize window for confirmation.
-
Use the Background option to upload an existing letterhead to use as the background layout for an invoice.

-
Once the template matches the required layout and content, click Save.
Configuring the row sort order
The document template editor now allows lines to be sorted by a chosen field. Every PDF made from that template follows that order: sales invoices, credit memos, contract carrier self-bills, billing proposals and load exports. The setting is defined once on the template and applies every time.
Until now, lines always came out in the same fixed order (by the planned start time of the first stop, then by charge name) with no way to change it. That order is now configurable.
Setting a sort key
- Navigate to Configuration > Templates and open the template to edit, or add a new one.
- Select the row-iteration block that emits the order or charge rows.
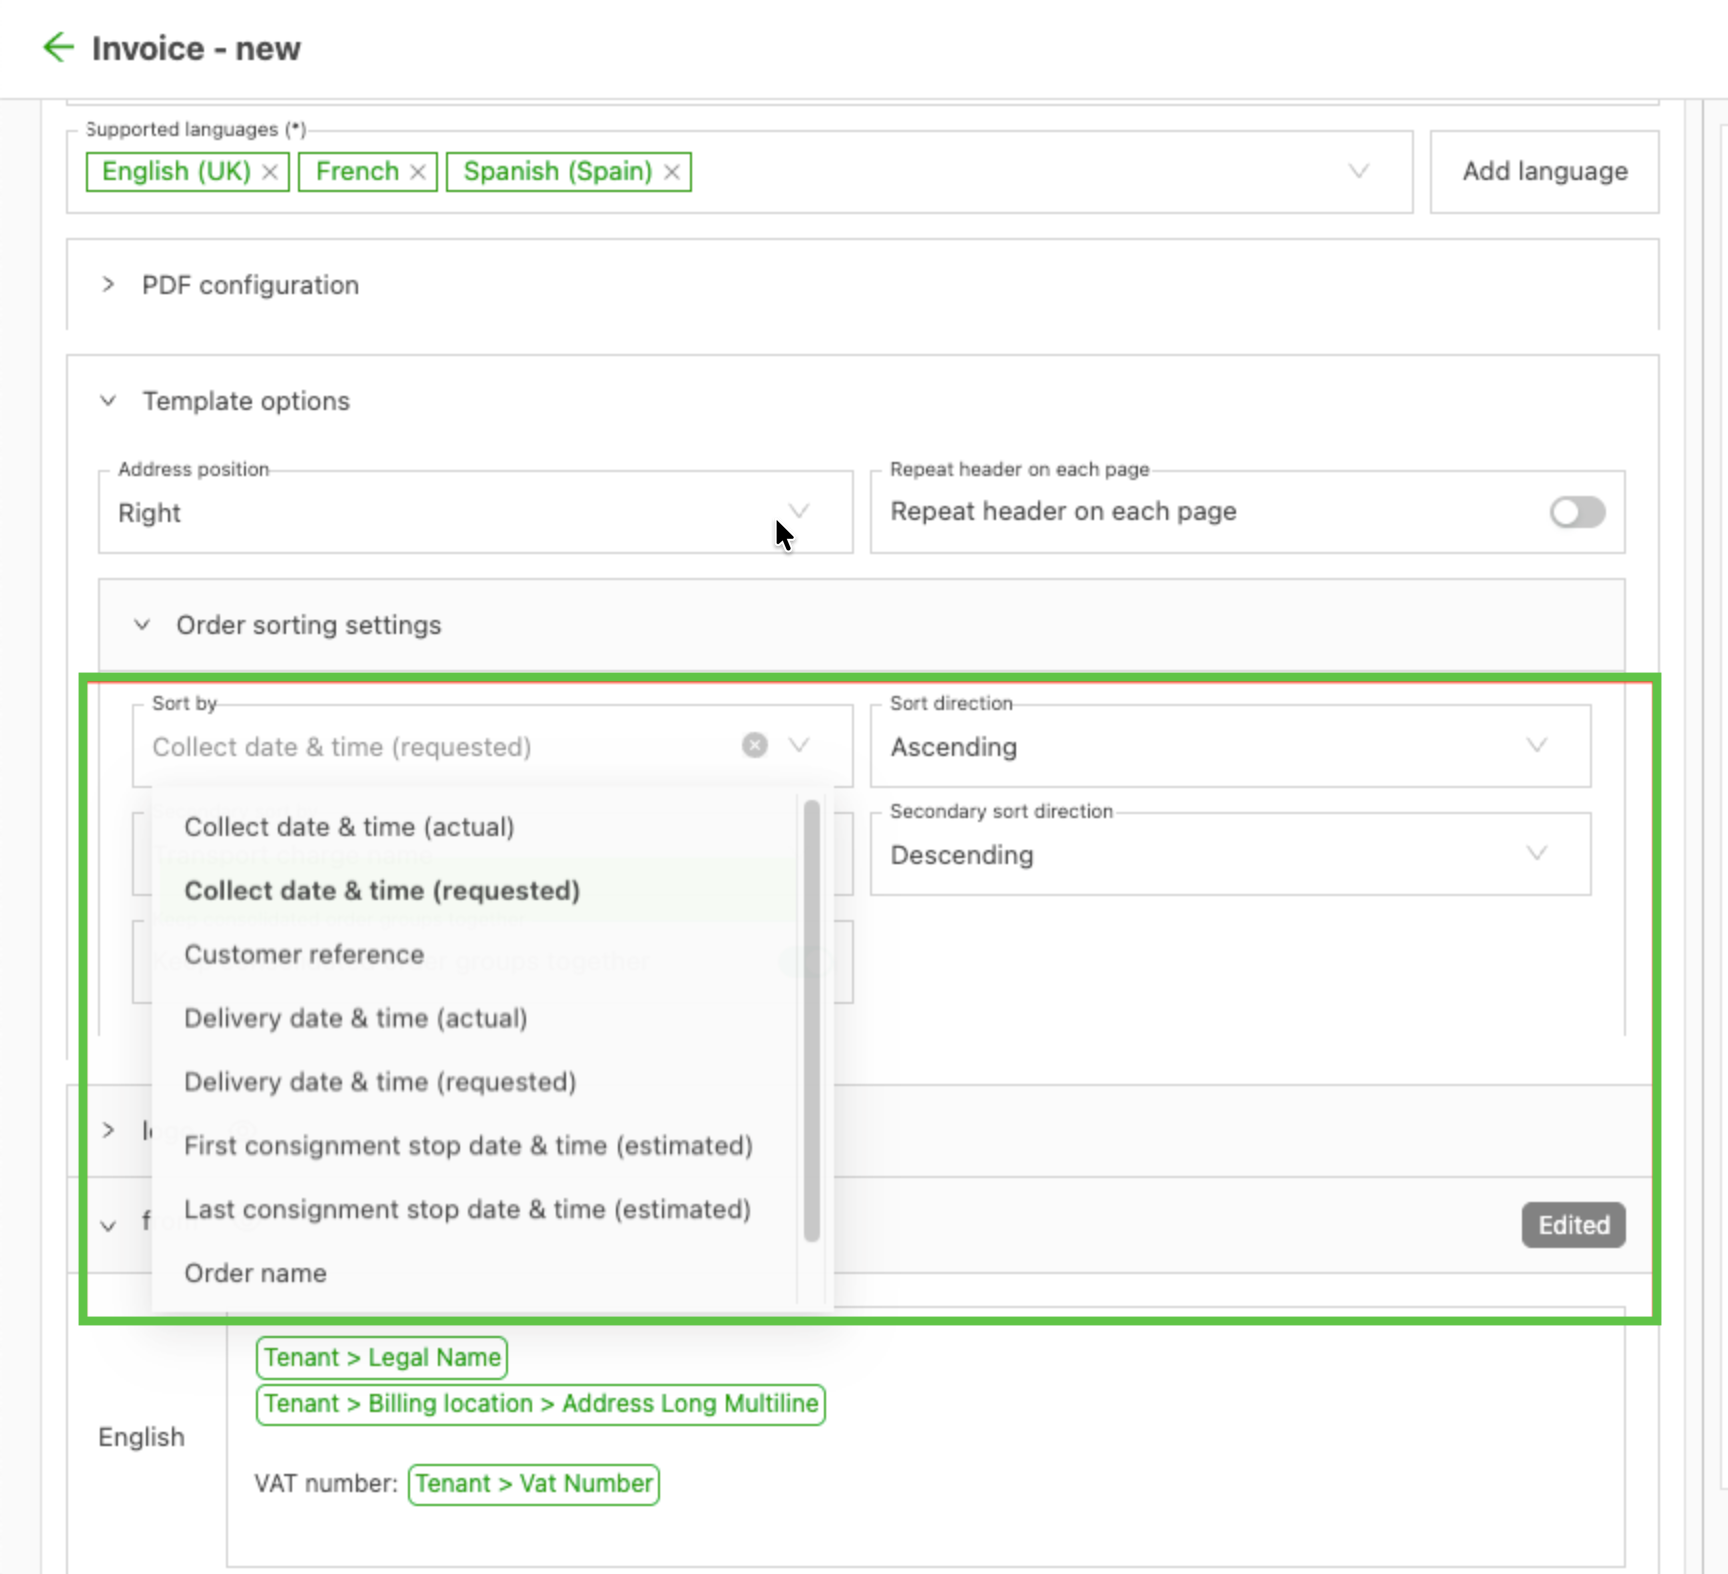
- In the Sort section, set Sort by to the field the document should follow, then choose a Direction of Ascending or Descending.
- Add a secondary Sort by as an optional tiebreaker, for example driver name first and estimated start timestamp second.
- Save the template. Every PDF generated from that template then respects the configured sort.
Available sort keys
The keys offered depend on the type of rows the selected block renders.
For order rows (sales invoice and credit memo templates):
- Order number
- Customer reference
- Delivery date (requested)
- Delivery date (actual)
- Pickup date (requested)
- Pickup date (actual)
- Last shipment stop timestamp (the existing default)
For charge rows (carrier invoice and billing proposal or self-bill templates):
- Driver name
- Resource (vehicle) name
- Load number
- Estimated start timestamp (the existing default)
- Charge name
Load export templates also expose Vehicle and Driver as sort keys.
Common uses
- A sales invoice sorted by Customer reference or Delivery date so the customer can reconcile it against their own records.
- A contract carrier self-bill or billing proposal grouped by Driver name (primary) and then chronologically by Estimated start timestamp (secondary), so each driver’s loads sit together.
- A load export grouped per vehicle by using Resource (vehicle) name as the sort key.
Grouping lines and subtotals
Invoice templates can print charge lines in blocks, with a subtotal under each block. This helps customers and contract carriers who need a total per truck, per driver, per order or per load, without working it out by hand. The grand total always stays at the bottom of the document.
Two options are available:
- Two grouped-lines base templates that group lines by a chosen key.
- An optional subtotal row after each order or load on the existing invoice templates.
Grouping lines by order, load, vehicle or driver
-
Navigate to Configuration > Templates and click Add Template.
-
Select the document type, then pick the base template: Invoice template - grouped lines for sales invoices and credit memos, or Purchase invoice template - grouped lines for billing proposals and self-bills.
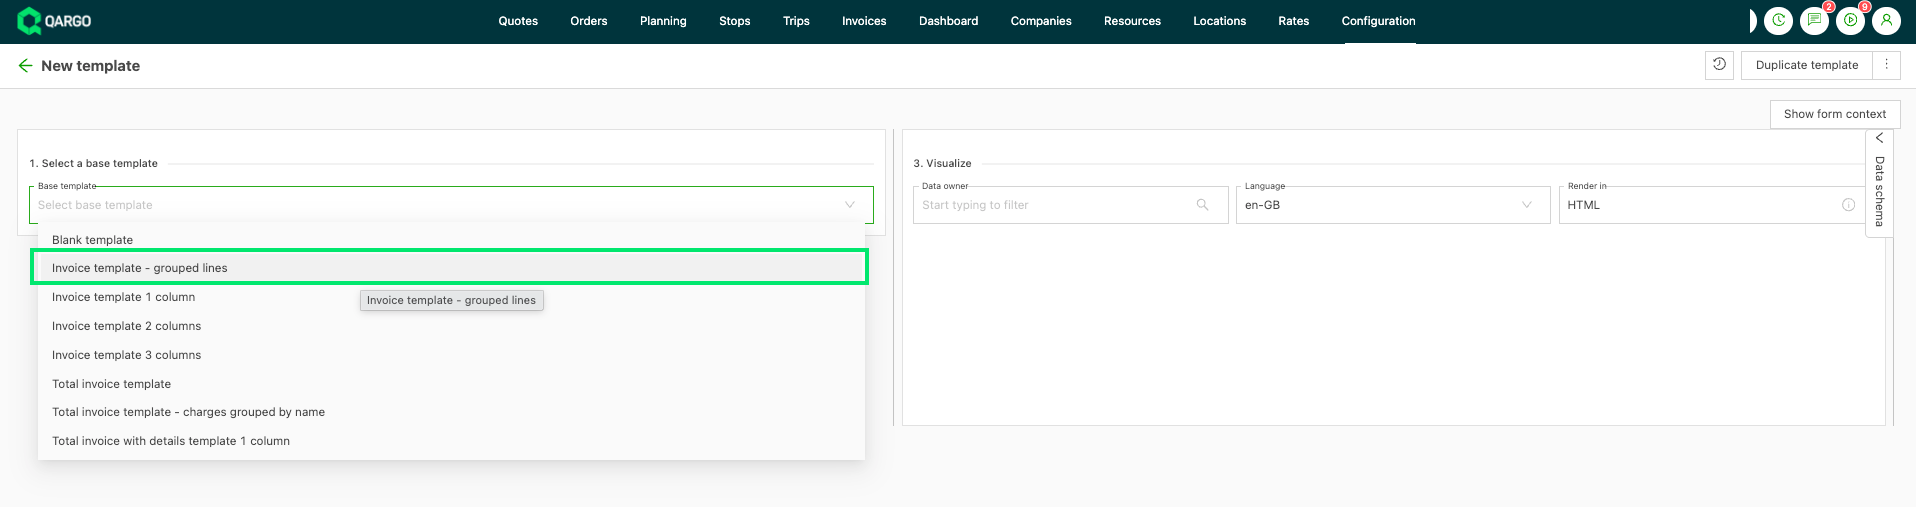
-
Expand Template options and open Line grouping settings.
-
Set Group lines by to the key the document should follow.
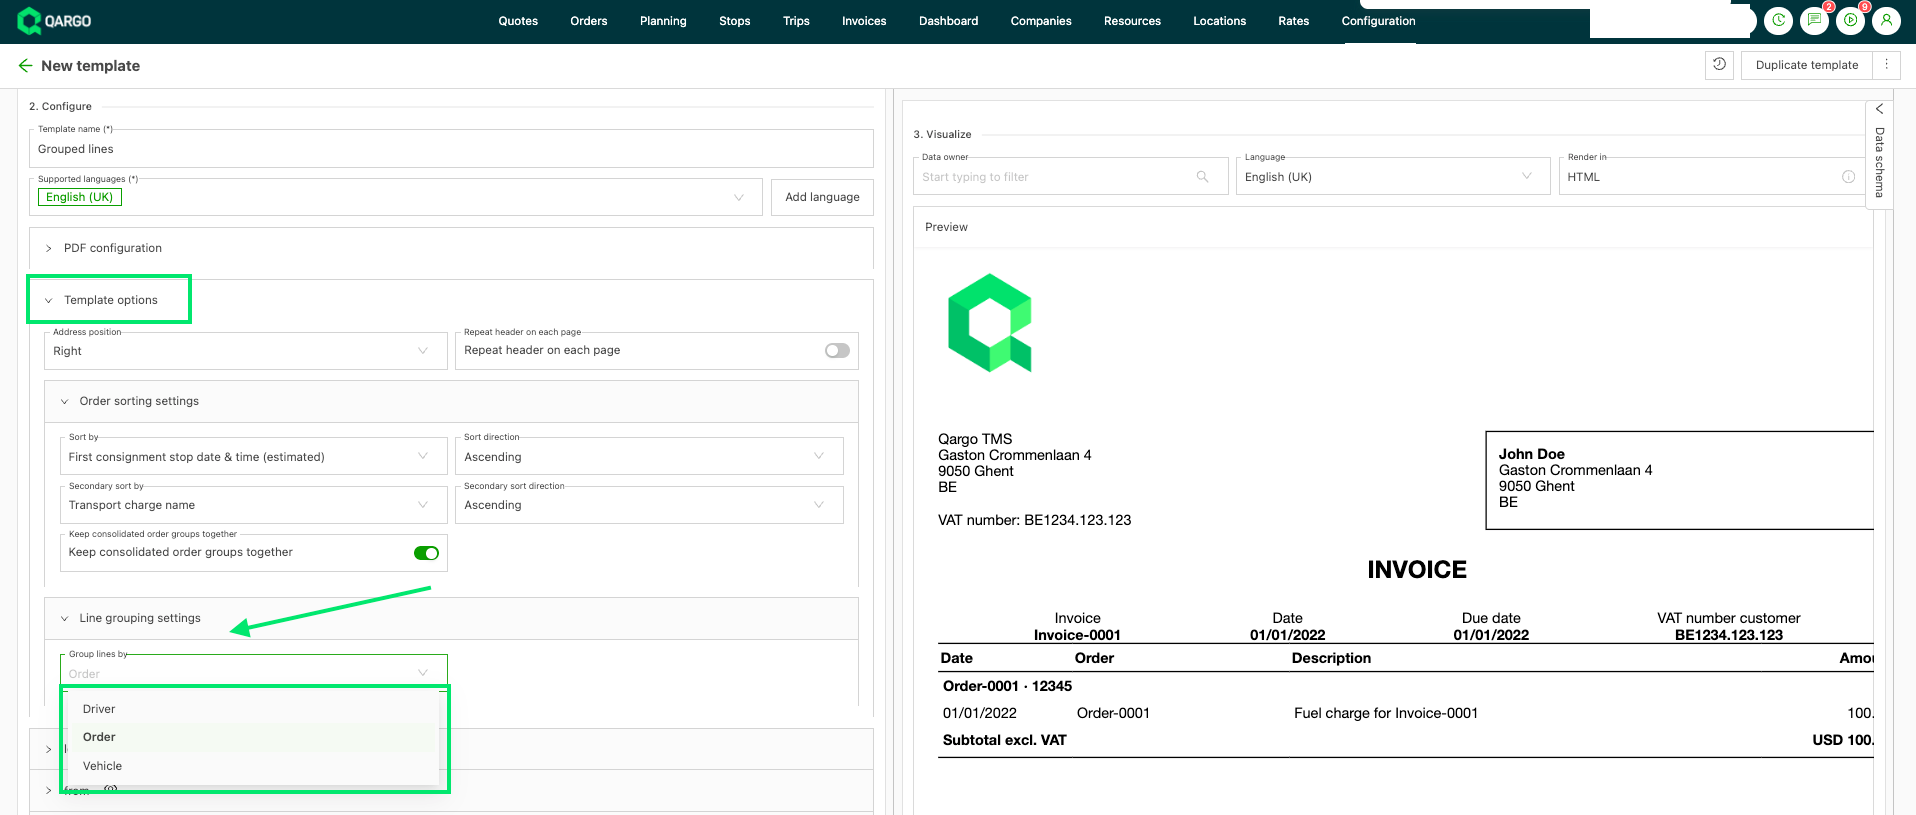
-
Save the template. Every document generated from it prints one block per group.
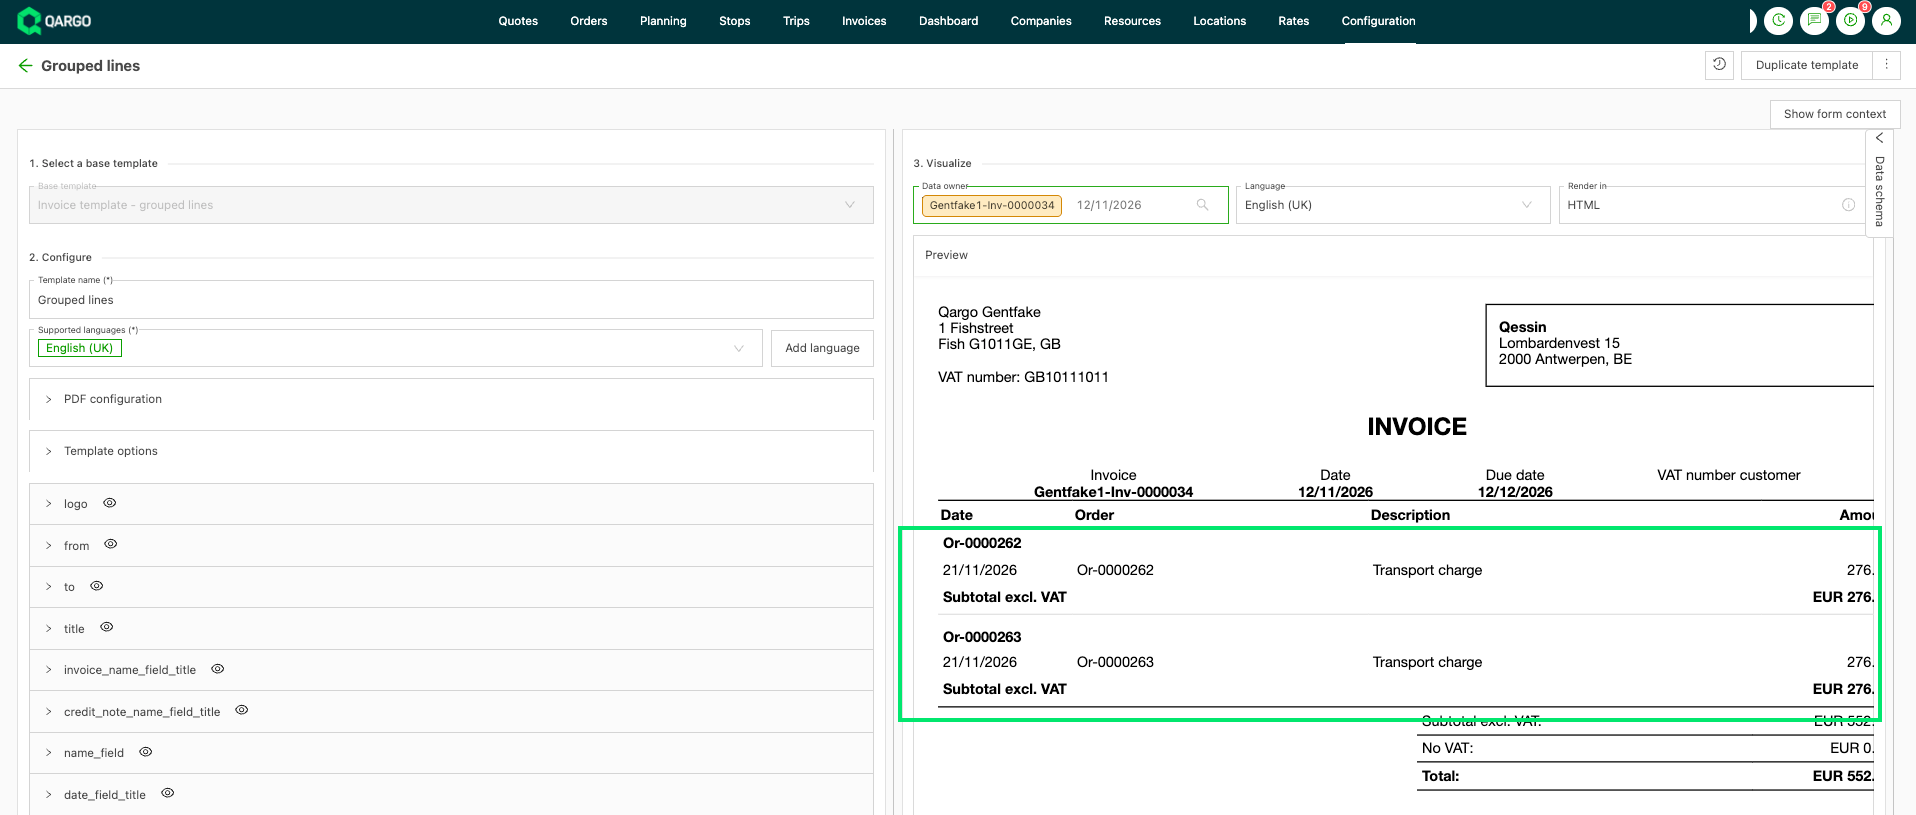
The keys on offer depend on the document:
- Sales invoices and credit memos: Order, Vehicle and Driver.
- Billing proposals and self-bills: Load, Order (the cost order of the line), Vehicle and Driver.
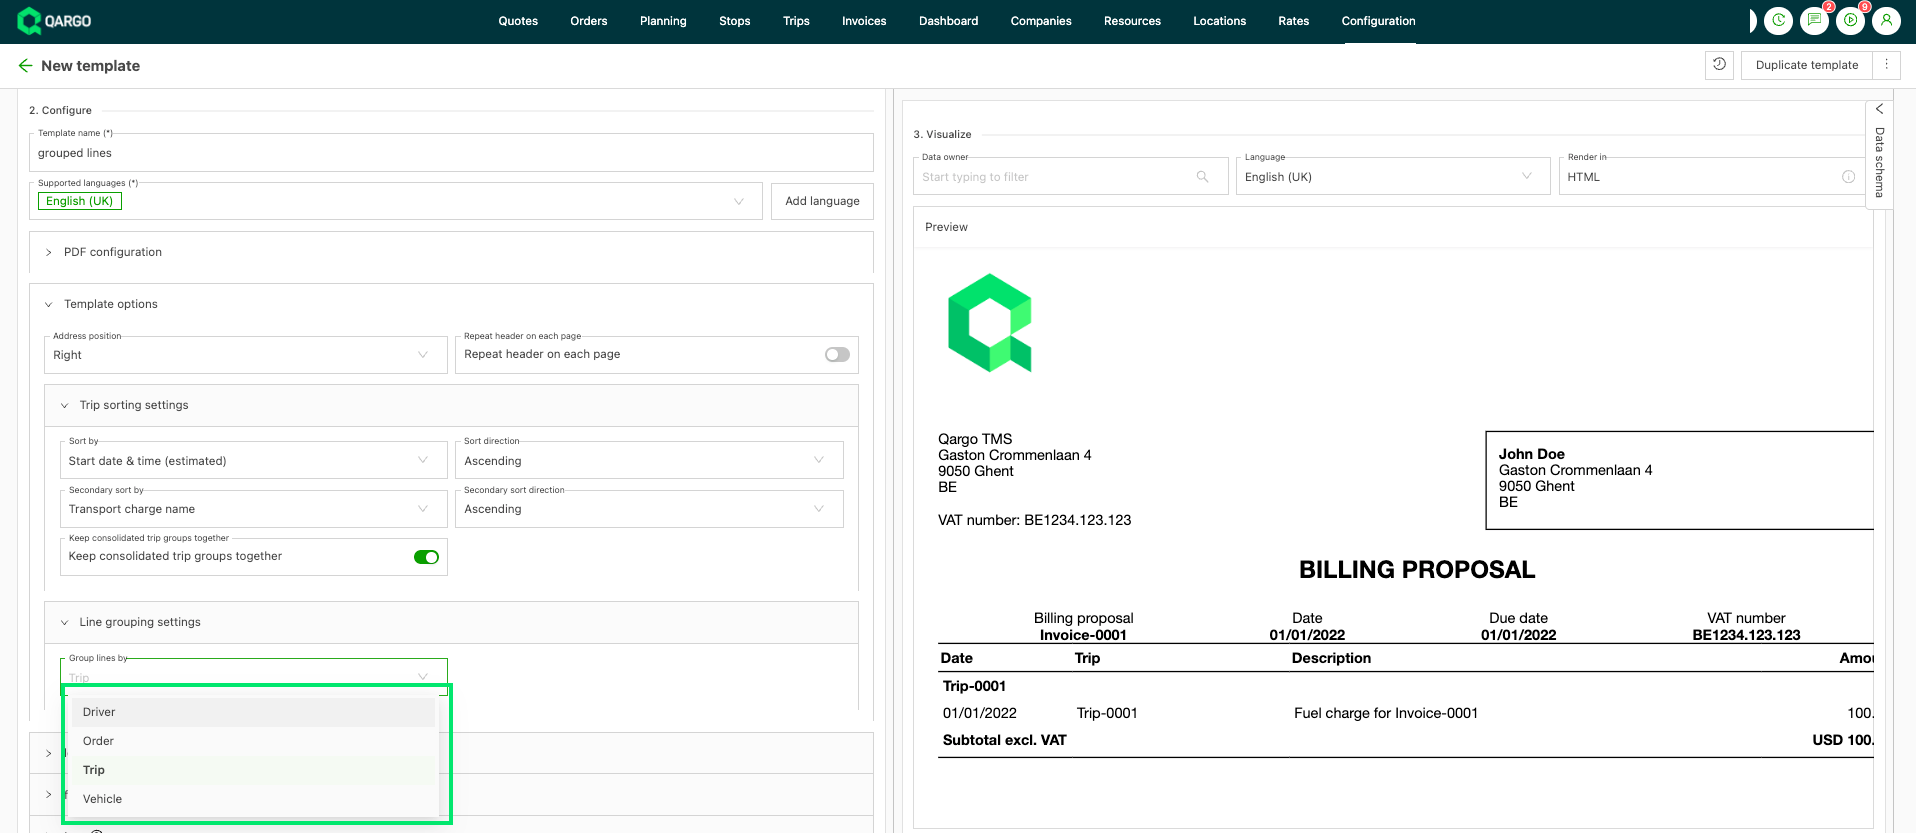
Each block has a header (for example the order number, the license plate or the driver name), its charge lines and a subtotal. Subtotals print by default. To hide them, empty the group_subtotal_label field on the template. Group headers and lines stay in place.
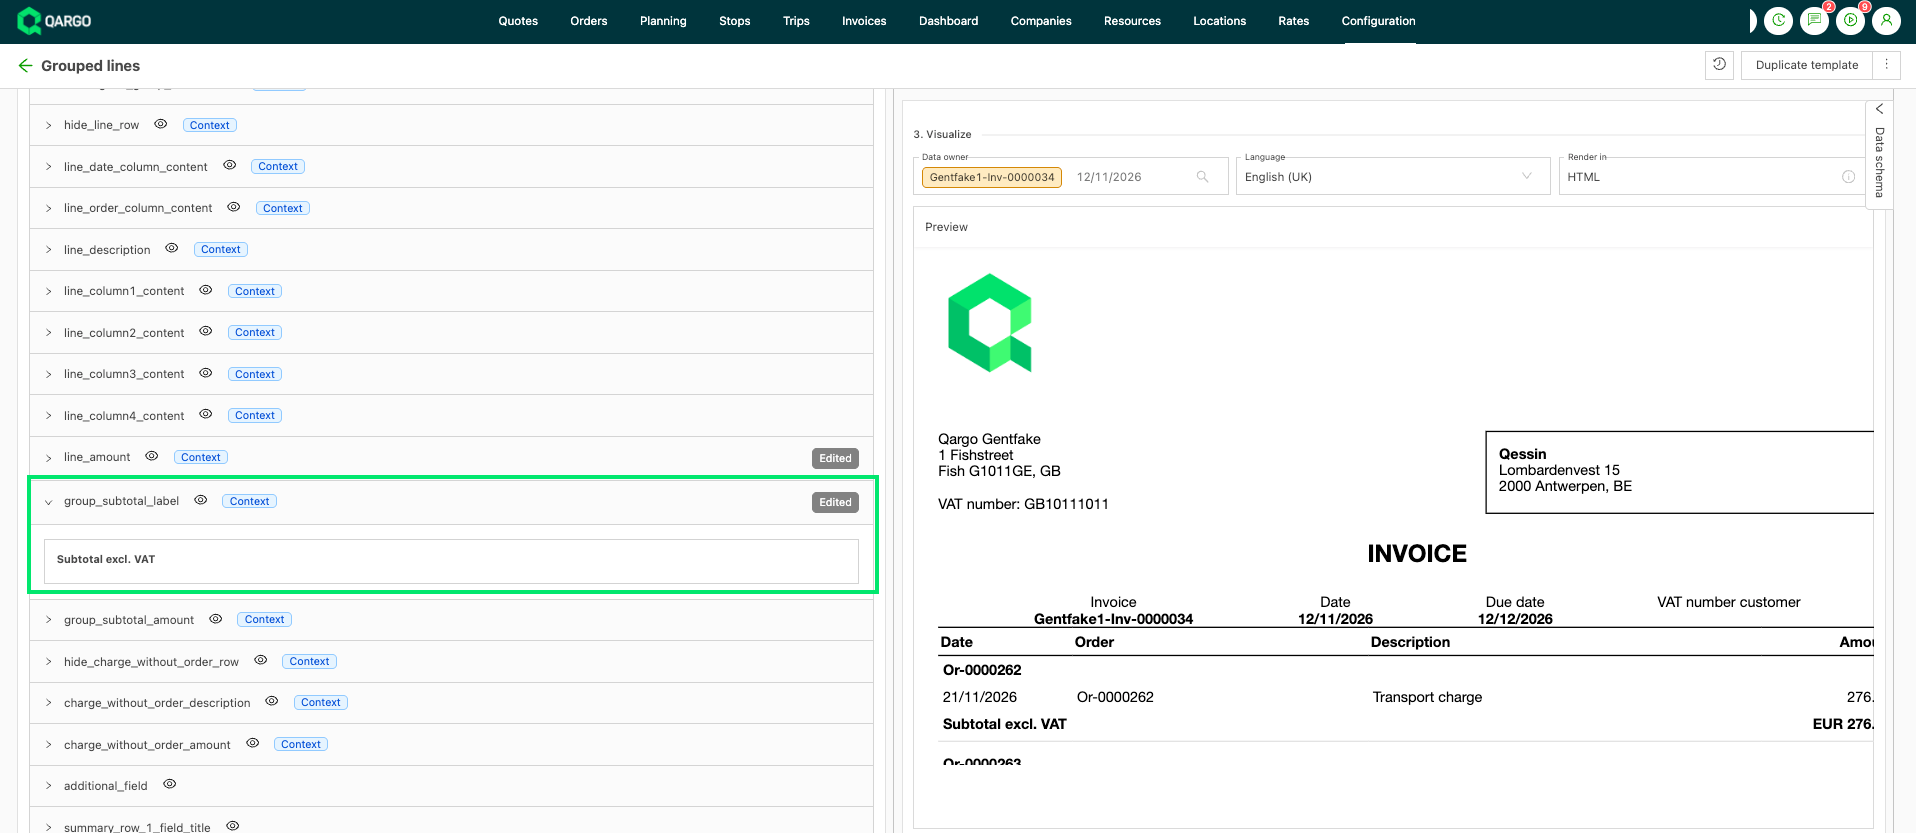
Lines with no value for the chosen key are collected in one block at the end of the document, with its own subtotal. The block is named after the key: “No vehicle assigned” or “No driver assigned”.
How lines are assigned to a vehicle or driver:
- On sales documents an order is never split over two groups. All its charge lines print under the vehicle or driver of the delivery stop.
- Vehicle means the primary tractor, rigid or van. A trailer is never used as a group.
- A load with two primary tractors shows both plates in one header. The same goes for two primary drivers.
Adding a subtotal row on existing invoice templates
The existing sales invoice templates (1, 2 and 3 columns, total with details, and total with grouped charges and details) and the matching purchase invoice templates can print a subtotal row after each order (sales) or each load (purchase).
-
Navigate to Configuration > Templates and open the template to change.
-
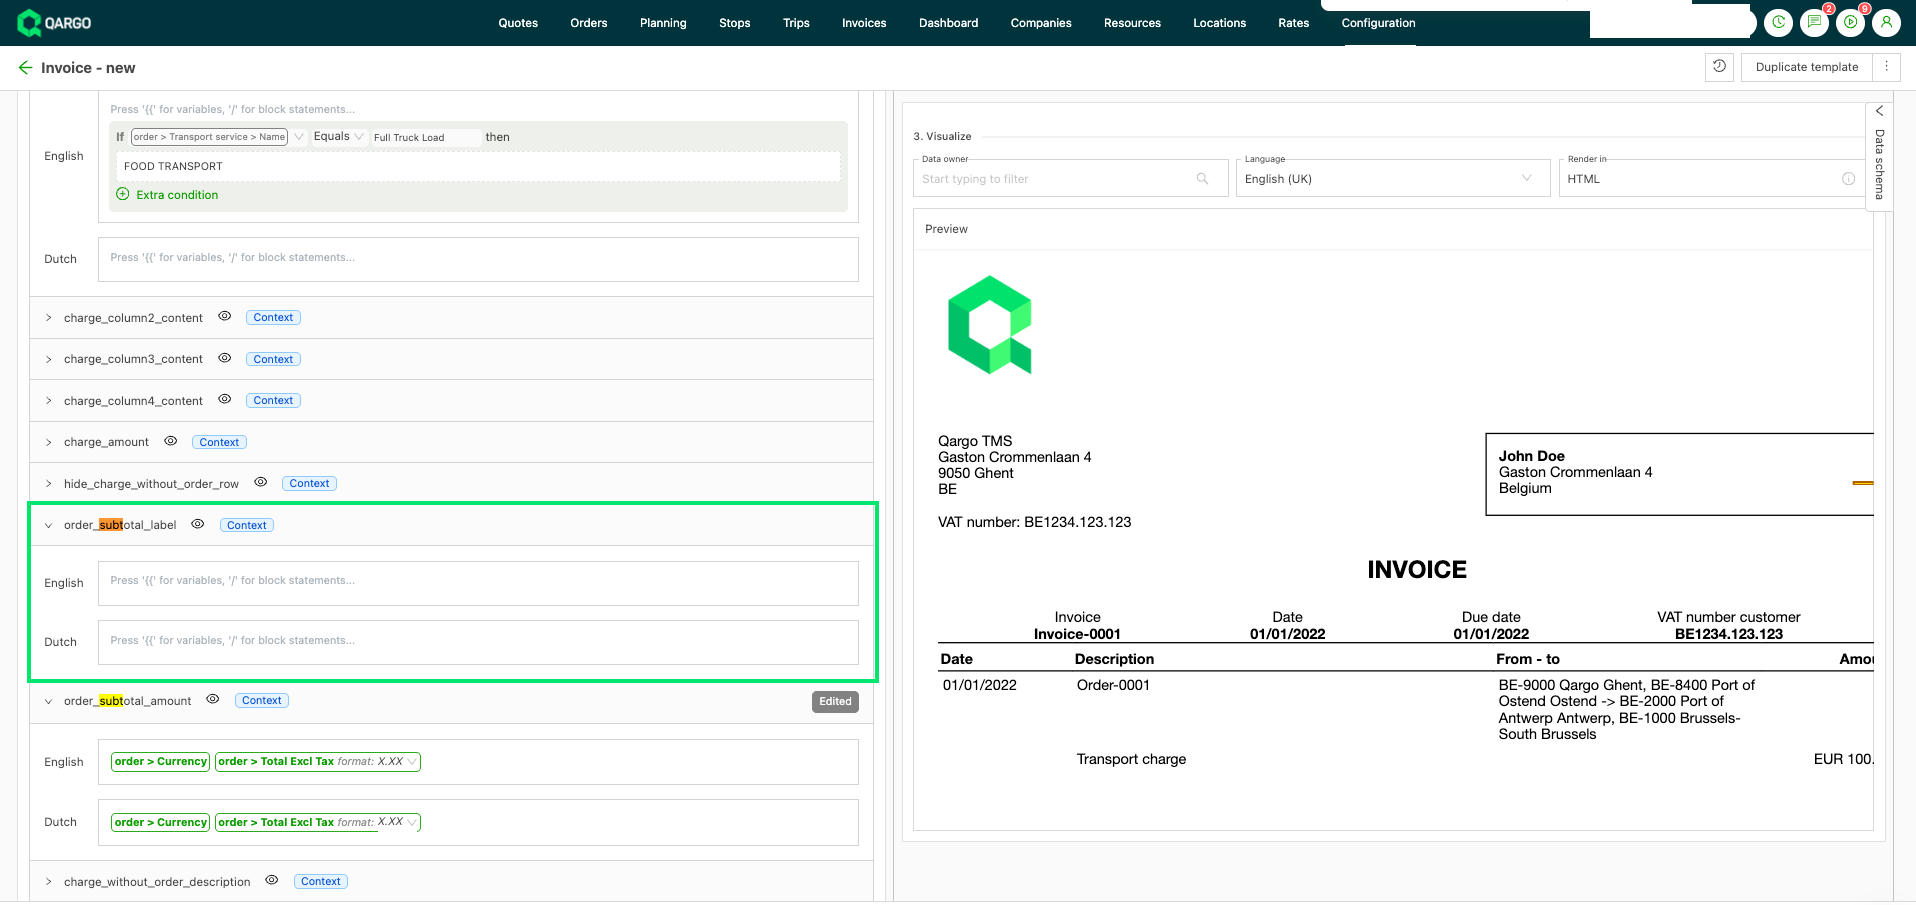
Fill in order_subtotal_label on sales templates, or shipment_subtotal_label on purchase templates, for example with “Subtotal”.
-
Check the preview in the Visualize panel. The row appears under the last charge line of every order or load, in the same column layout as the charge rows.
-
Save the template.
Both fields are empty by default, so existing documents do not change until a label is entered. To remove the row again, empty the field completely.
Good to know
- There is no page total and no setting for rows per page. A multi-page invoice shows its total on the last page only.
- There is no summary block that lists every group’s total before the detail lines.
Practical troubleshooting: examples for invoice templates
-
Background not displaying: verify that the file format matches the supported types and make sure the Show in PDF option is enabled during editing.
-
Error
Preview could not be rendered or updated. Please verify that all open '#{{' tags have a corresponding '}}' tag.: the preview rendering may fail because of the large size of the document. Test with a smaller document (only a few orders) to check whether the preview works. Document generation is not affected by this. -
Element removal challenges: if unwanted elements such as an email address are part of a background file, edit that file externally with a tool such as a PDF editor before re-uploading it in the template’s configuration settings.
-
Recurring background issues: always save edits to the background file before re-uploading it, and verify the updates with the preview function.
-
Wrong reference numbers: to update the reference number that appears on invoices:
- Navigate to the Templates section in Qargo.
- Open the template used for the specific customer’s invoices.
- Click into the address field. This highlights the field in the left panel where the reference is stored.
- Update the reference number to the desired value.
- Save the template. The updated reference applies to all newly created invoices. If an invoice already has the status Invoiced, the PDF can be updated by re-triggering the invoice PDF so the new reference appears.
-
Verifying customer references in Peppol XML: to confirm that a customer reference is present in the Peppol XML for an invoice:
- Open the invoice in Qargo.
- Open the Peppol XML preview.
- Use the search function to locate the reference value by pasting the expected reference number.
- Verify that the reference appears in the XML in the right-hand preview pane.