
Configure a product and a product type
Adding product types in Rates > Order input allows users to configure details, restrictions and custom fields to autocomplete information.
Table of contents
When an order is created or edited afterward, the product or product type it contains can be added. Once selected, it automatically completes several important details to save time. These details can be added in Configuration.
Add a product type
- Navigate to Rates > Order input > Product options.
- Click Product types
- Click New product type.
- Add the details of the new product type and save it.
- Repeat until all relevant product types are created and saved.
-
Add the name of the product type, a code, a description, etc.
- Option to enable the product type for customer use when creating orders in the portal.
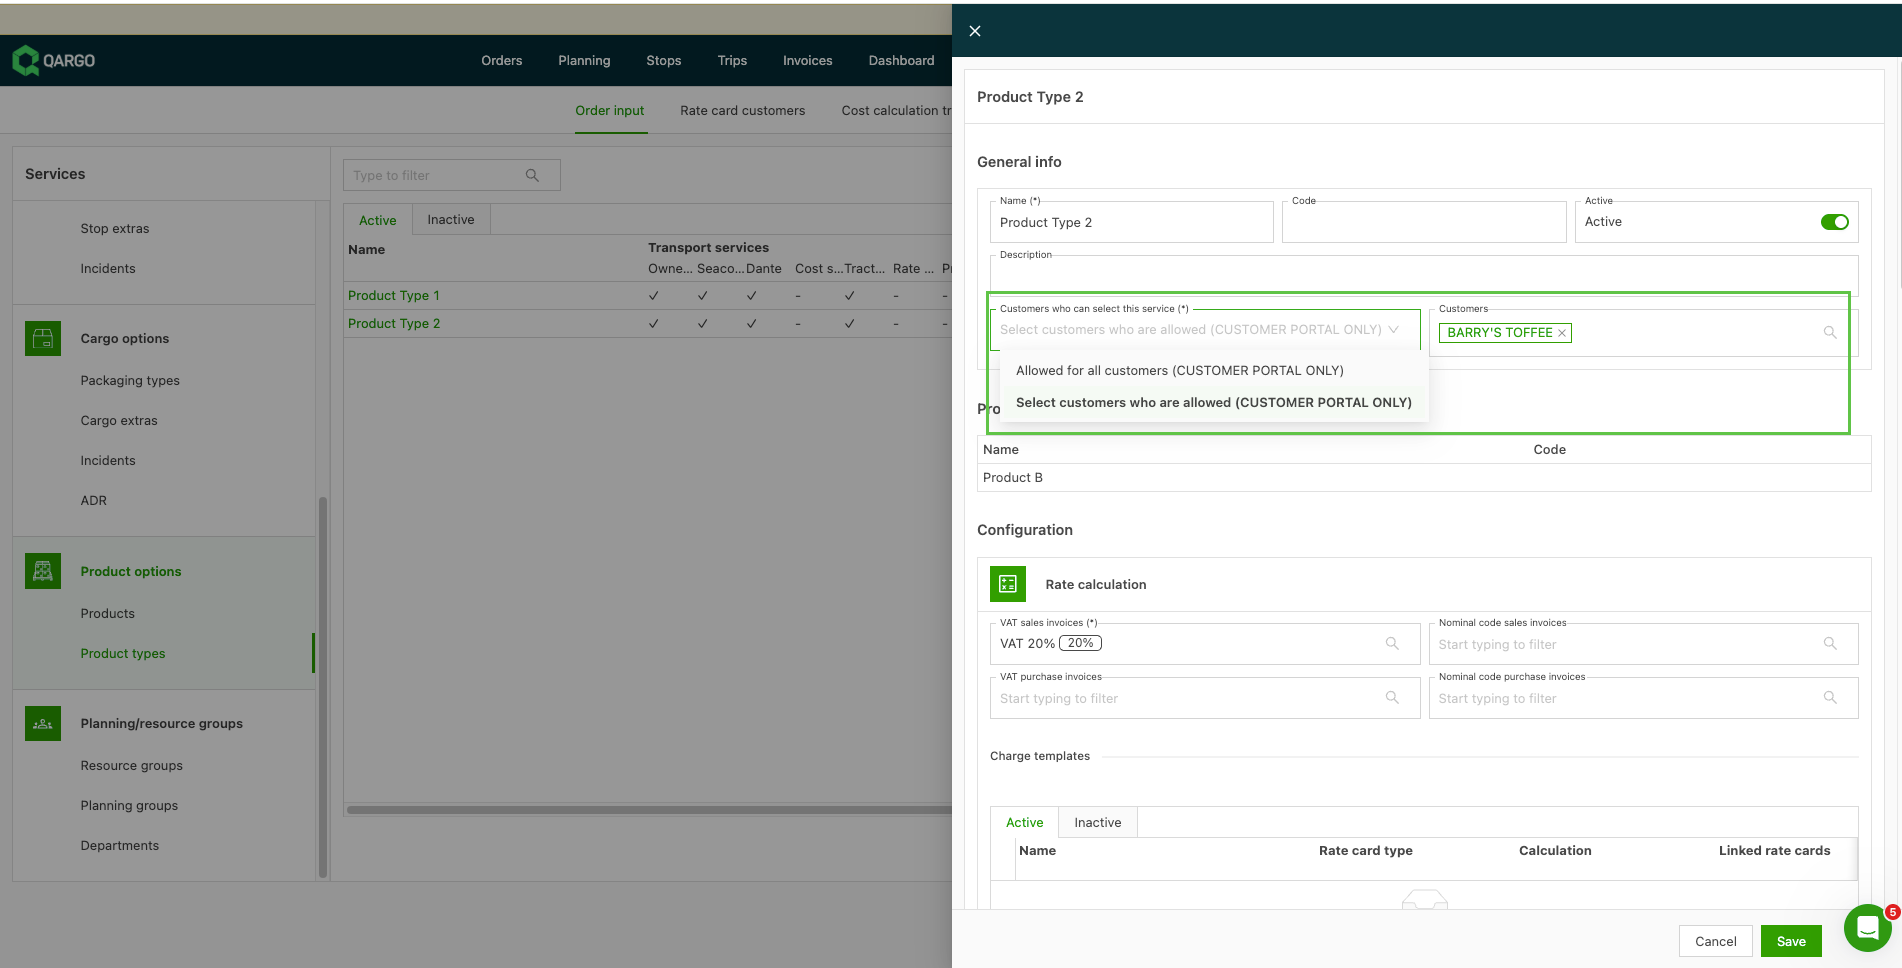
-
Restrict a product type to specific vehicles, drivers, contract carriers or containers.
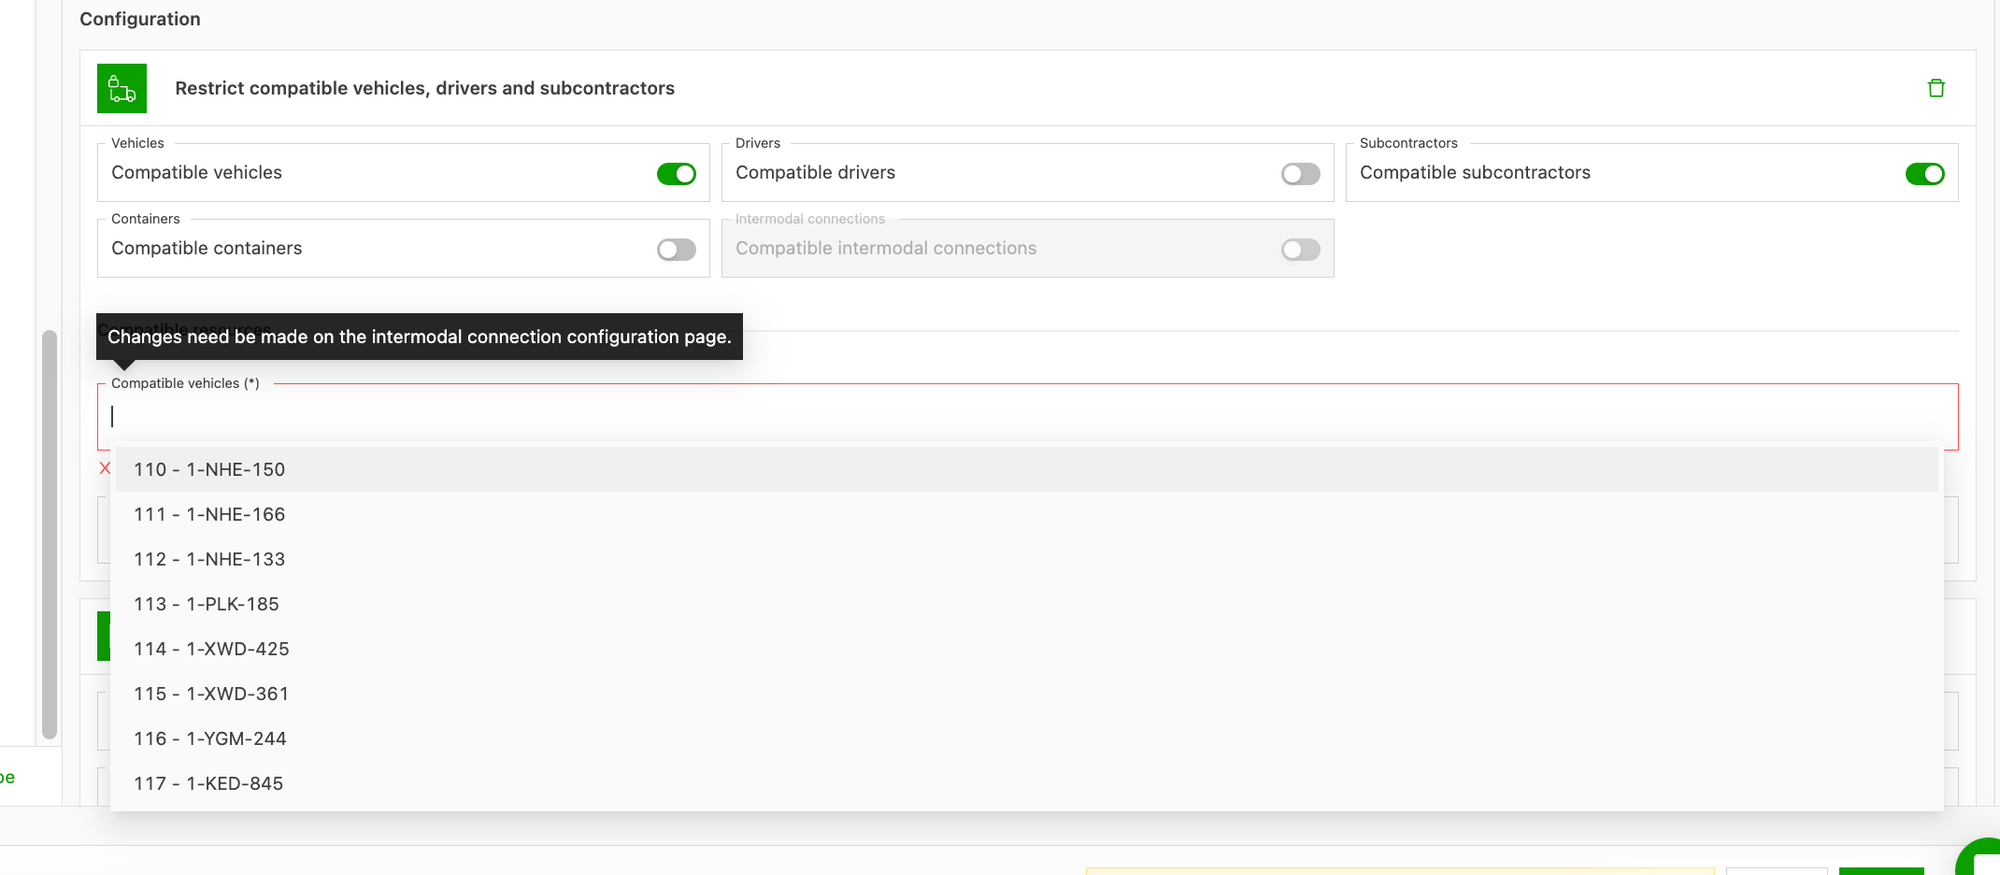
-
Limit a product type to a certain transportation service.

Add a product
Once the product types are created, products can be added.
- Navigate to Rates > Order input > Product options.
- Go to Products.
- Click New product.
- Add the relevant products and assign the product types already created.
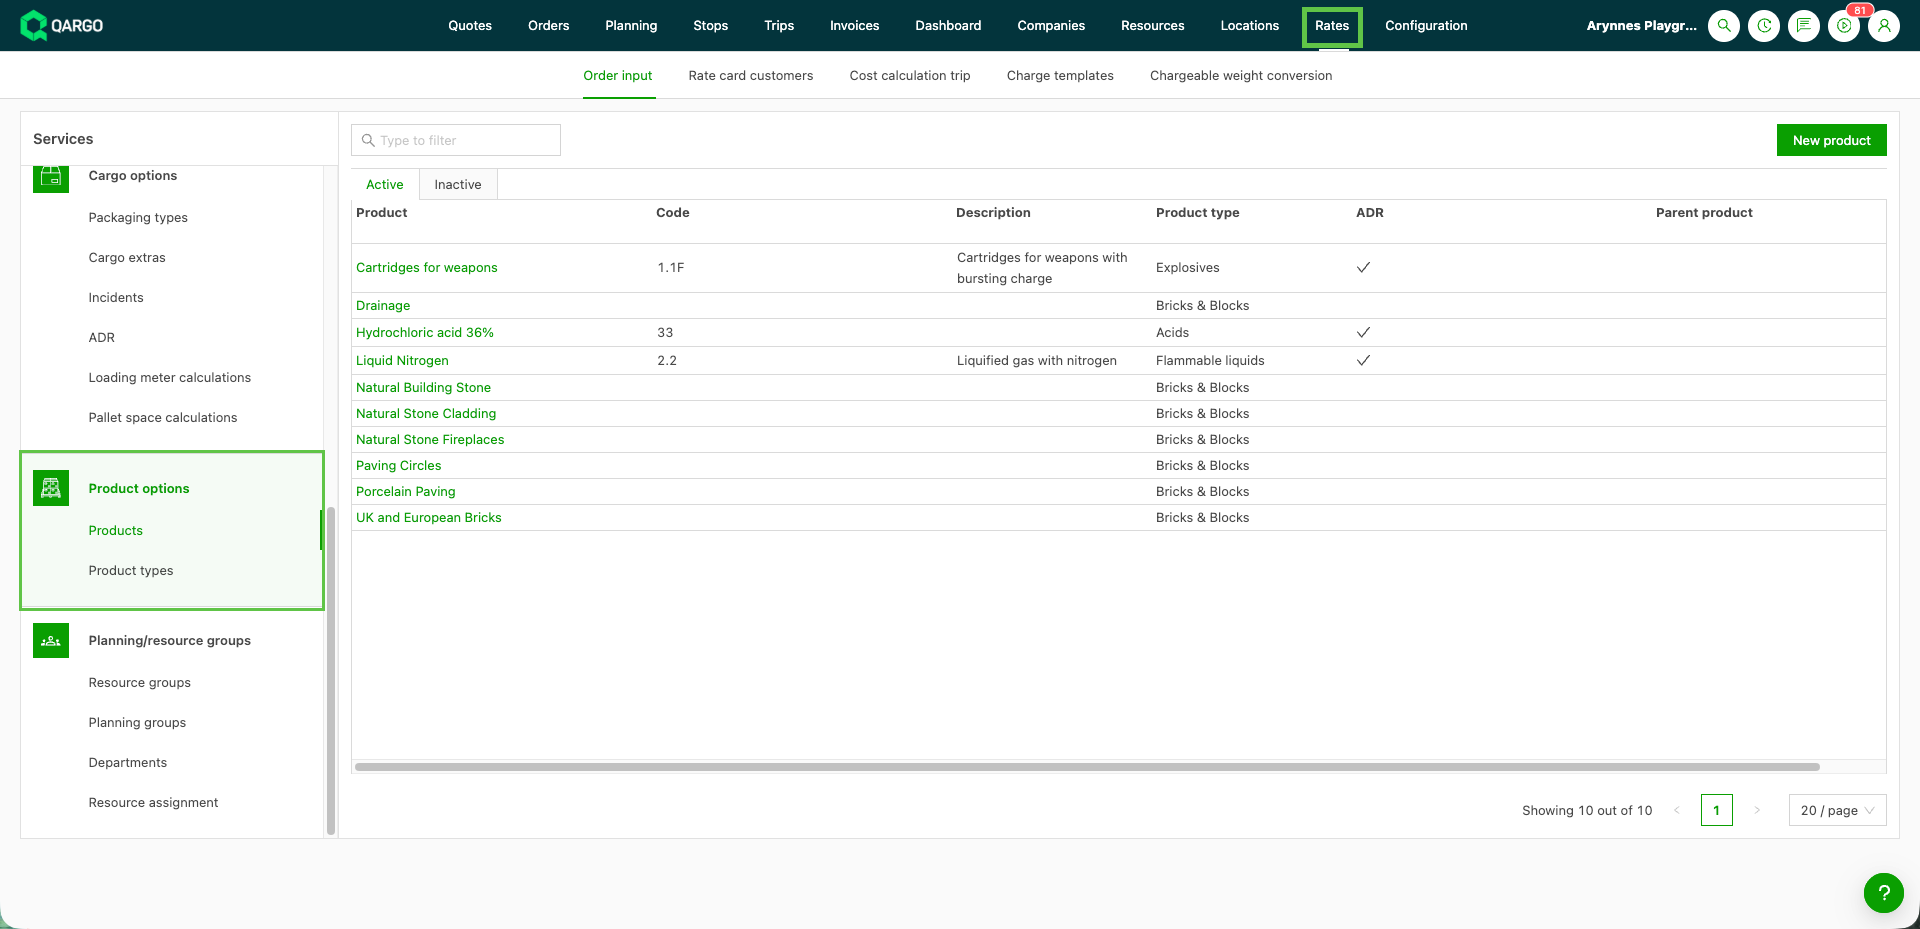
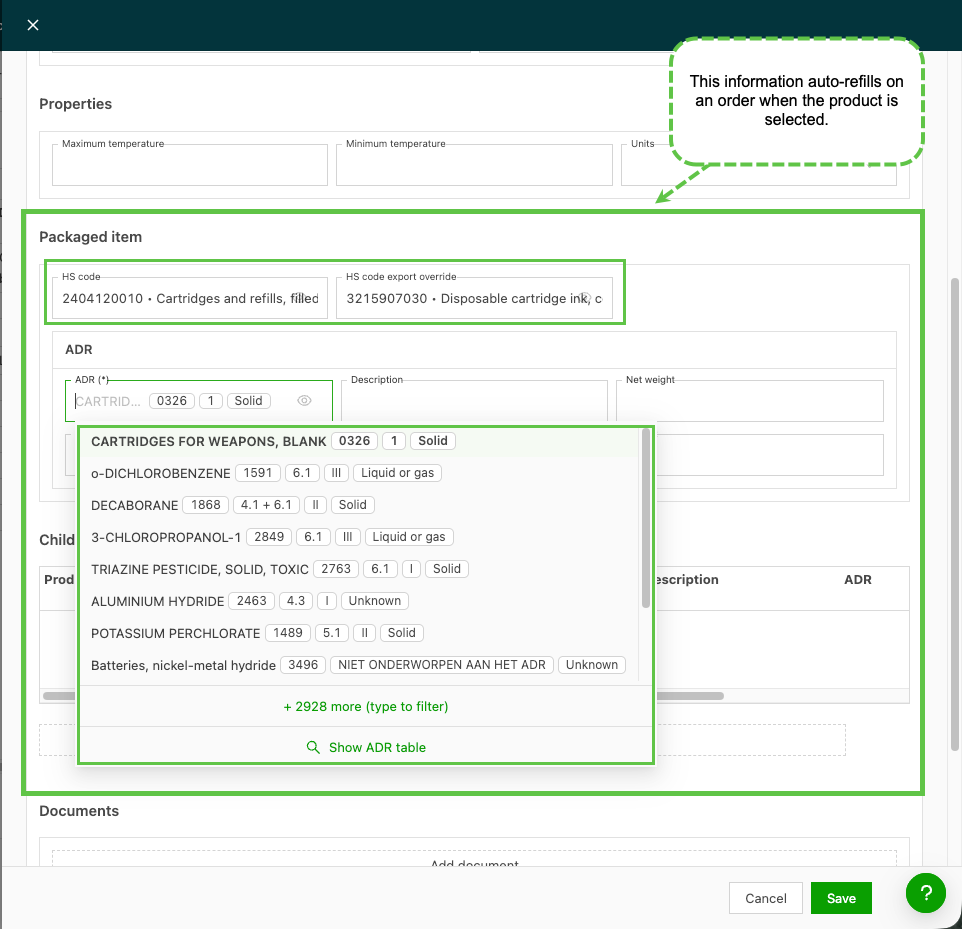
Configure the Packaged item section on a product
The product configuration page now includes a dedicated Packaged item section, below the existing sections. The ADR properties that were previously configured separately are now grouped into this same section.
-
Navigate to Rates > Order input > Product options > Products.
-
Open an existing product, or create a new one.
-
Scroll to the Packaged item section.
-
Set the prefill defaults that apply to the product:
- HS code and HS code export override
- Description
- Ordered quantity
- Weight and Net weight
- Volume
-
For hazardous materials (HazMat), set the ADR properties in the same section.
-
Save the product.
Example of ADR product information
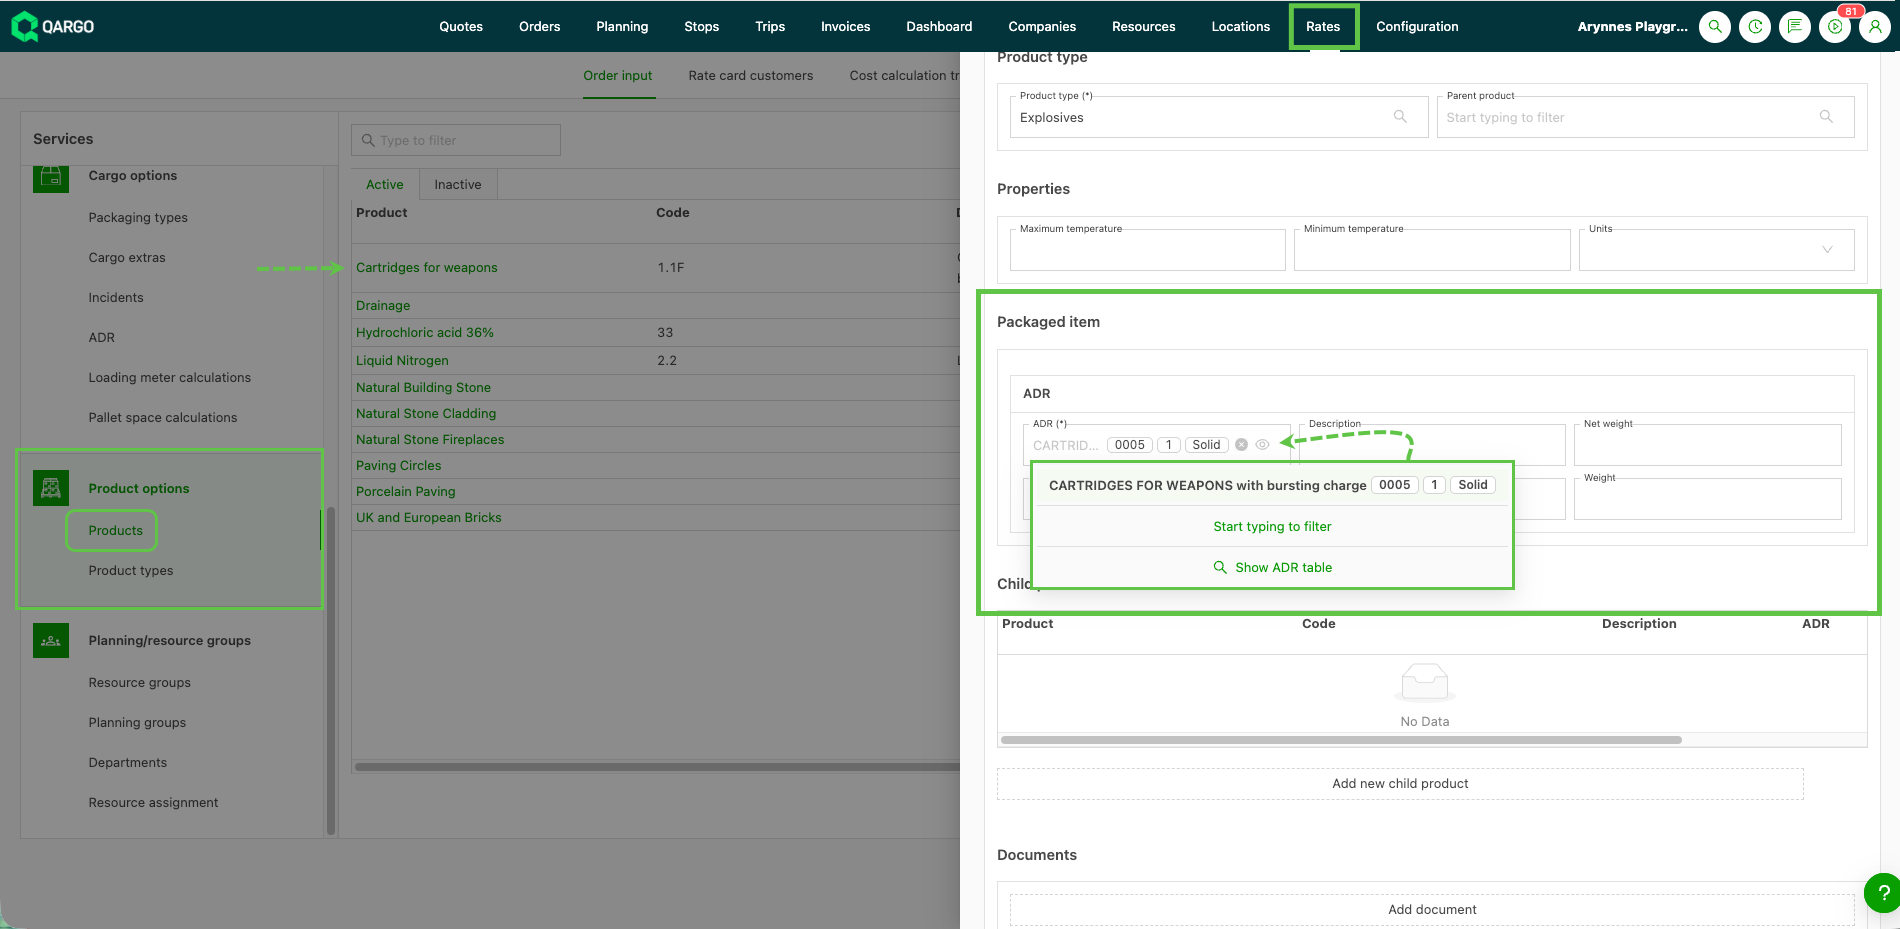
How the prefill behaves on an order
- When a product is selected on a good, the configured packaged item values and ADR values are filled in on the first packaged item of that good.
- For non-ADR products, the packaged item is now created automatically and shown on the good. The prefilled values are therefore visible rather than written silently in the background.
- Prefill precedence is respected: values on a child product override values on the parent product.
- Prefill works in manual order creation and in order imports. Import prefill remains opt-in per order import master.
Create a product directly from an order
Products can also be created on the fly from within the order form itself, without navigating away to Configuration. This is particularly useful when an unfamiliar product comes up mid-order and there is no time for a separate configuration step.
- Open the order creation or order edit screen and locate the Product field.
- Type the product name in the search field.
- If no matching product is found, a + Create new product option appears at the bottom of the dropdown.
- Click that option to open the product creation form.
- Fill in the product details and save.
- The newly created product is immediately selected on the order; no page reload is required.
Customize which fields are shown on the Products page
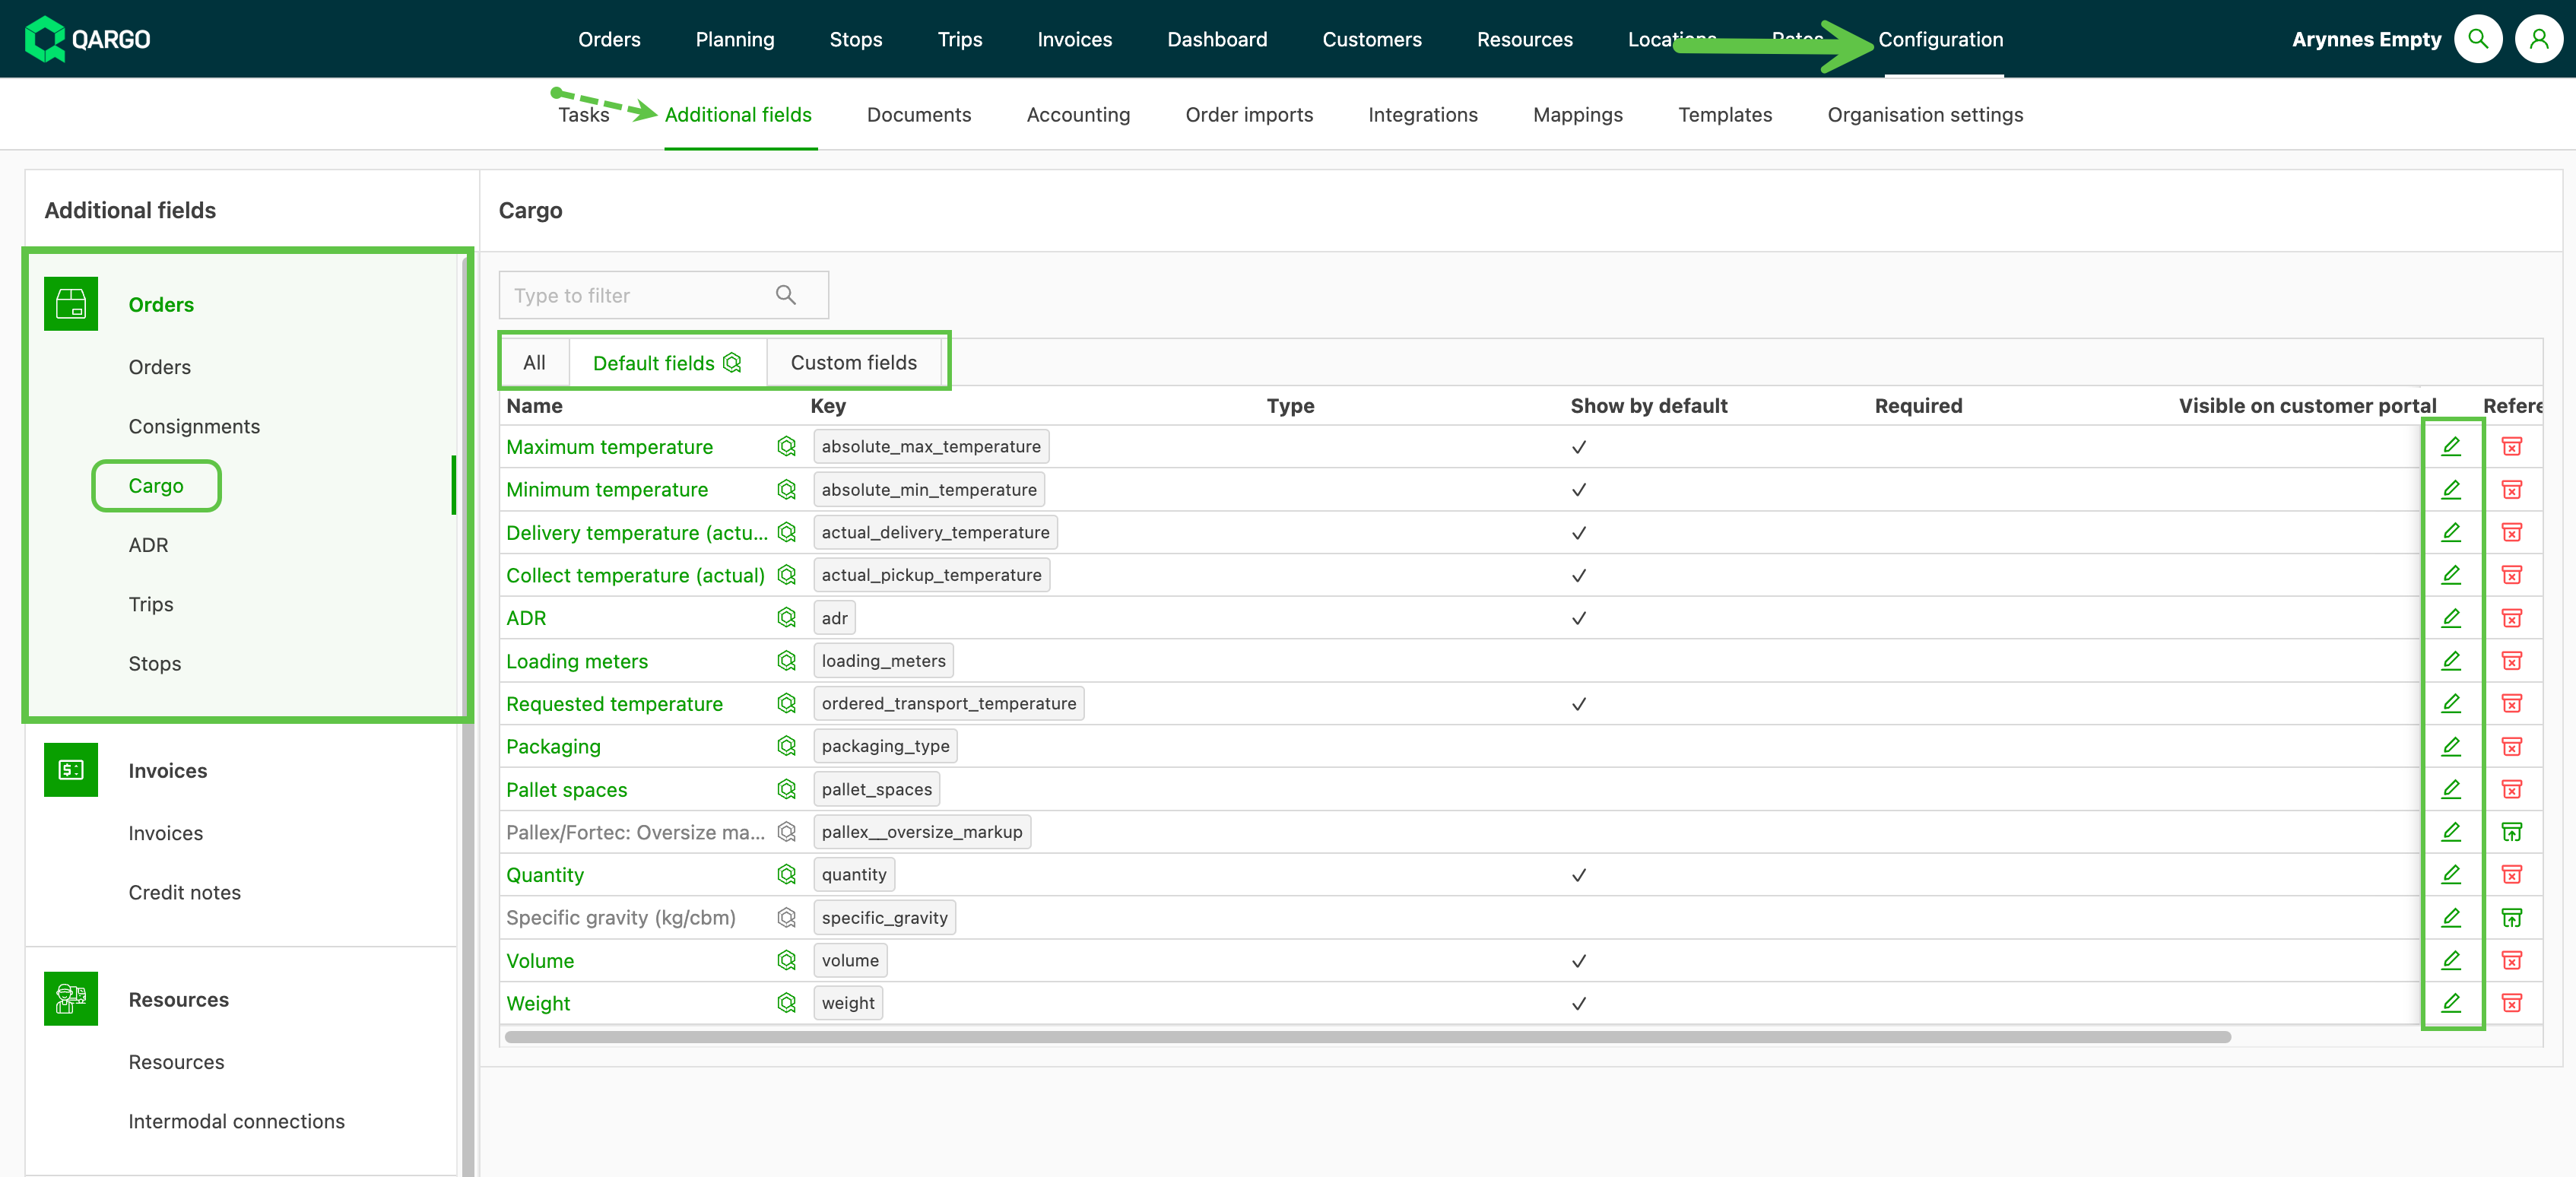
The fields shown on the Products page can be customized.
- Navigate to Configuration > Additional fields
- Click Freight in the left sidebar
- Click the Edit icon (pencil) to add or update a field
-
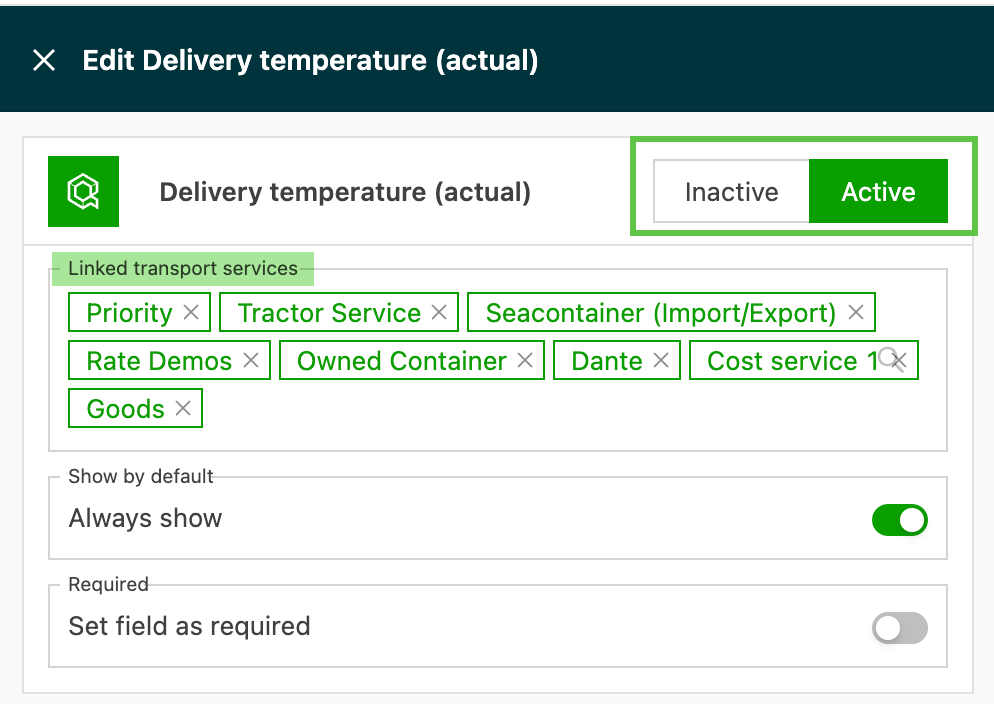
Set the freight item to active or inactive. Only active items are shown on the Products page.
-
Select the transportation services this product is available for.
-
Toggle on or off to indicate whether this field is always visible and/or required.
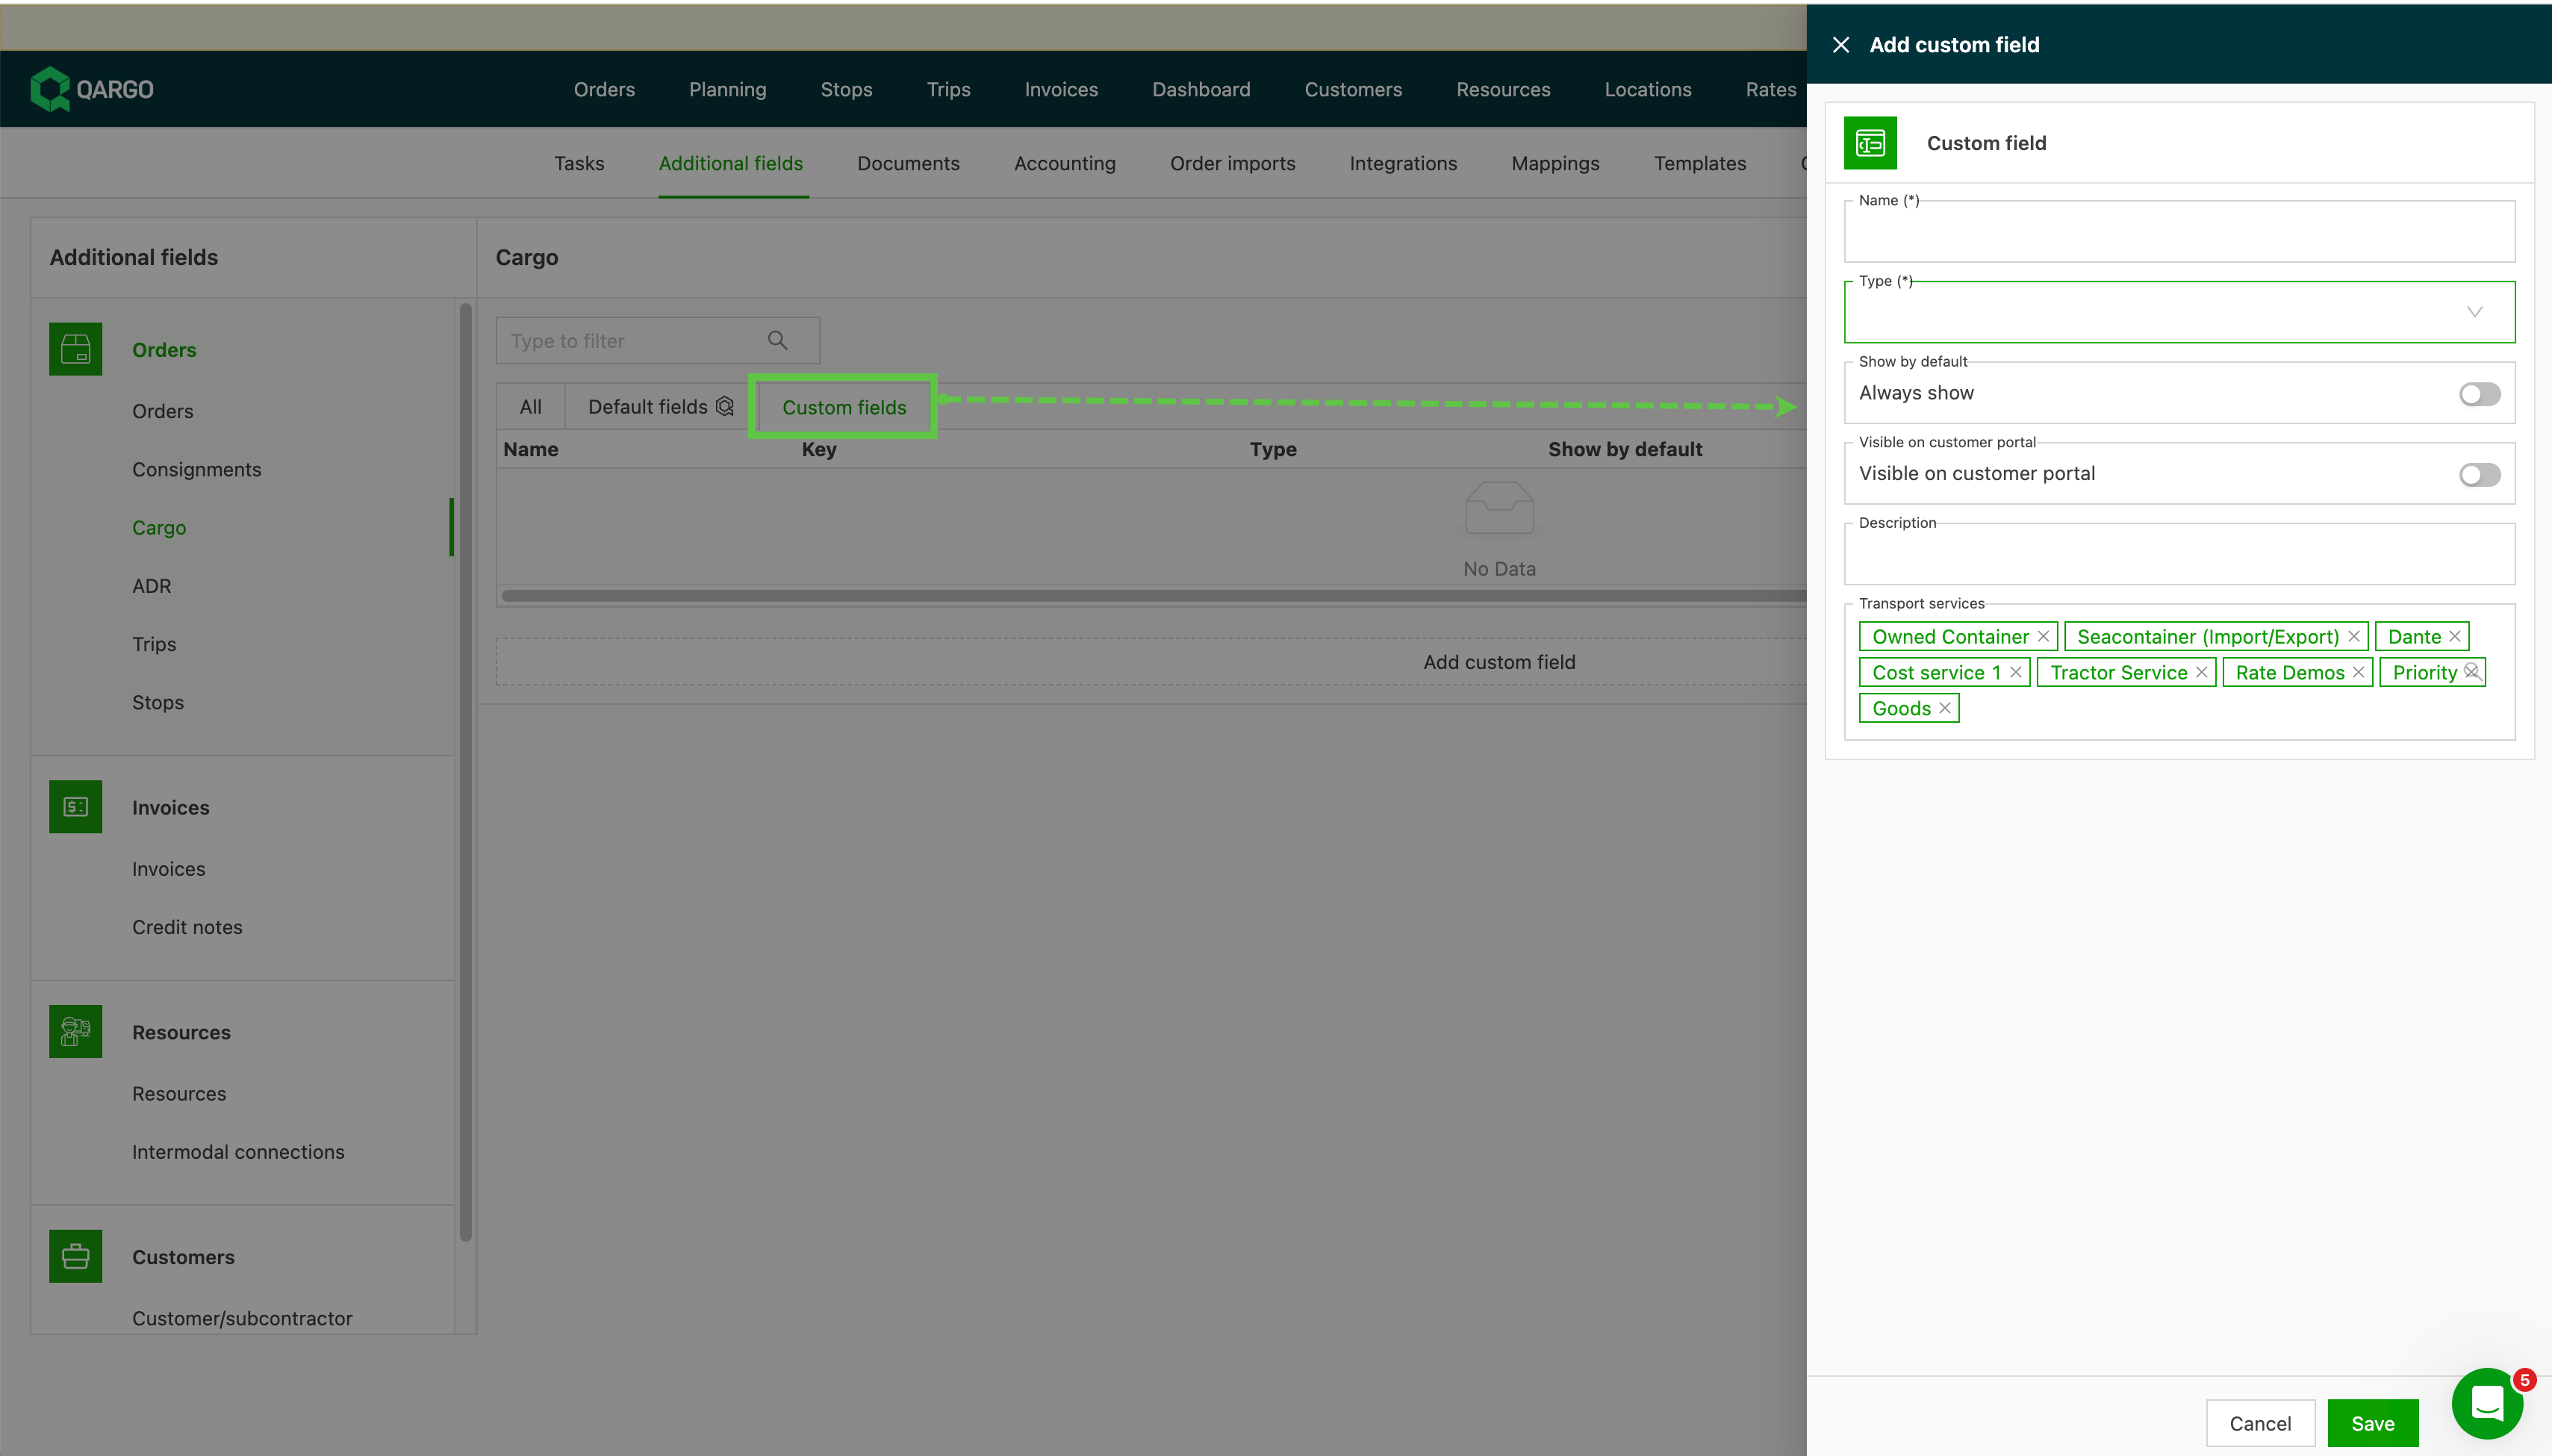
If the required field does not exist in the default list, add extra fields by clicking the Custom fields tab.
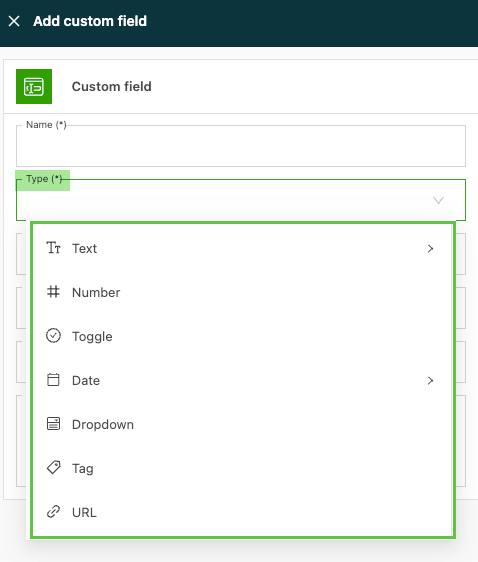
- Click Add custom fields; a side panel opens where the new field can be added.
-
Options under Type include:
-
Text: free-form text field, single-line or multi-line
-
Number: numerical values only
-
Toggle: adds the option to toggle the field on or off
-
Date: date values only, with a side menu to select the preferred format
-
Dropdown: use when multiple options are available for the user to select
-
Tag: tag labels can be added, along with a corresponding color
-
URL: option to add a website
-