Configure the Palletforce pallet network
An overview of how to configure the Palletforce network
Table of contents
To use Palletforce as the pallet network, complete the steps below first.
Add a customer
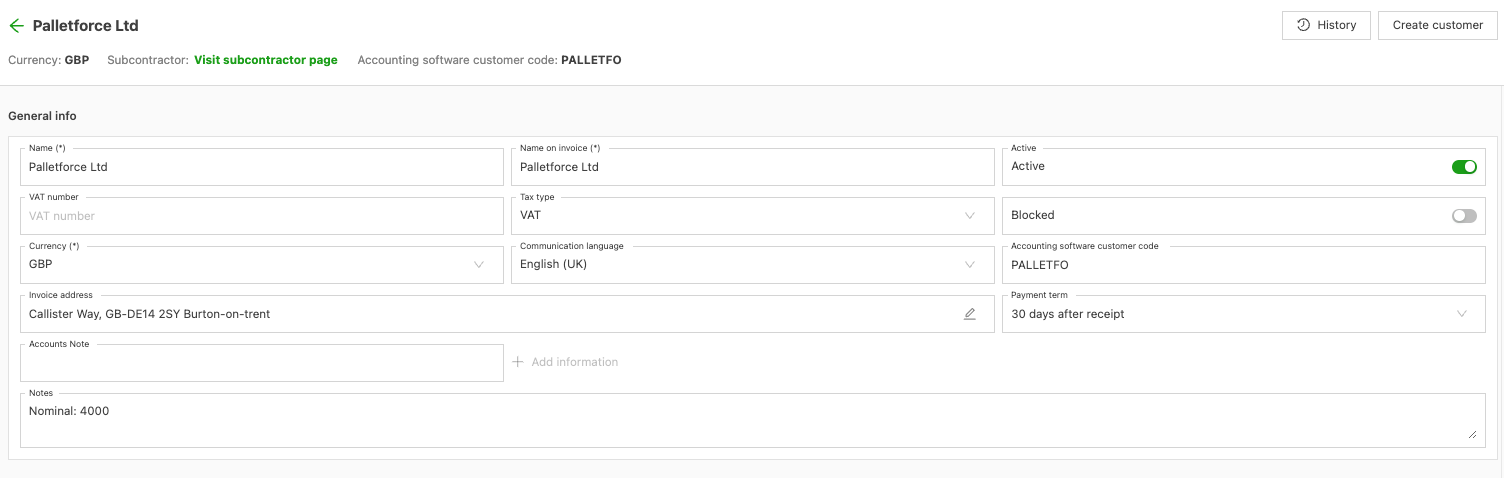
First, create Palletforce as a customer.
- Go to Companies
- From the ‘Customers’ submenu, click ‘Create customer’
- Create a customer named “Palletforce”
- Click Create contract carrier to also make Palletforce a contract carrier
Add the order input configuration
Add a transportation service
-
Go to Rates > Order input
-
Click Transportation services
-
Add a new transportation service named “Pallets”
-
The name can be chosen freely; the code is what matters
- The code should stay the same
-
Click Save
Add service levels
- Go to Rates > Order input
- Once a transportation service is added, click Service levels
- Add the service levels below with the following details:
| Name | Code |
|---|---|
| 24 hours | A |
| 48 hours | B |
| 72 hours | C |
| 3–5 days | D |
Add time windows and extras
- Go to Rates > Order input
- Click Time window to create new time windows.
- Then click Pickup/delivery extra. In the table below, this is called P/d extra.
- Fill in these fields with the details below
| Qargo type | Code | Name | Description | Comments |
|---|---|---|---|---|
| Time window | AM | AM Delivery | Delivery before 12 PM | “Time window”:\ |
| 06:00 - 12:00 | ||||
| Time window | BW | Booked Window | Delivery any time between 09:00 and 17:00 with a\ | |
| minimum window of 3 hours.\ | ||||
| | “Time window”:\ | |||
| 09:00 - 17:00 | ||||
| Time window | TA | By 10:00 AM | Delivery before 10 AM | |
| Time window | TB | Timed Booking | Delivery any time between 10:00 and 16:00 | “Time window”:\ |
| 10:00 - 16:00 | ||||
| Time window | BI | Book In | ||
| Time window | AZ | Amazon Book In | Carton count and reference number | |
| P/d extra | TL | Tail-Lift vehicle required for pickup and delivery | ||
| P/d extra | CD | Check On Delivery | ||
| P/d extra | EB | Economy Delivery | ||
| P/d extra | PW | Paper POD Required |
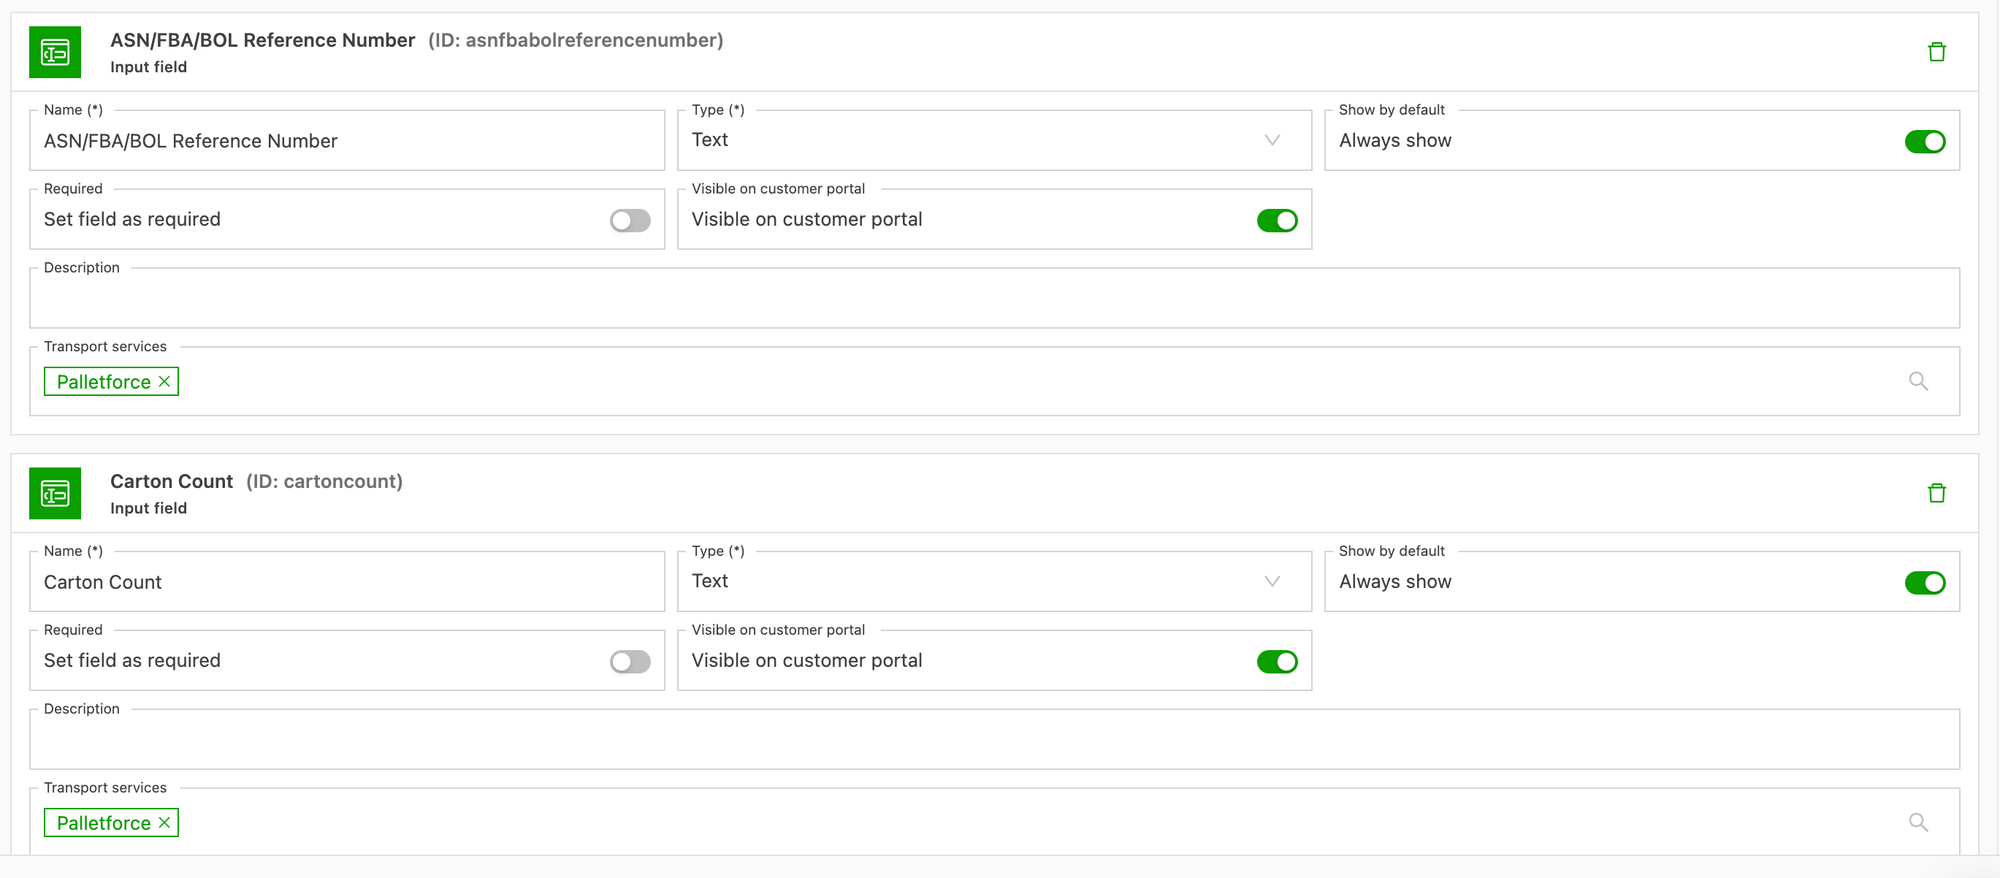
“Add input field”
| Orders | ASN/FBA/BOL Reference Number | Active | Create custom field |
|---|---|---|---|
| Orders | Carton Count | Active | Create custom field |
Add surcharge
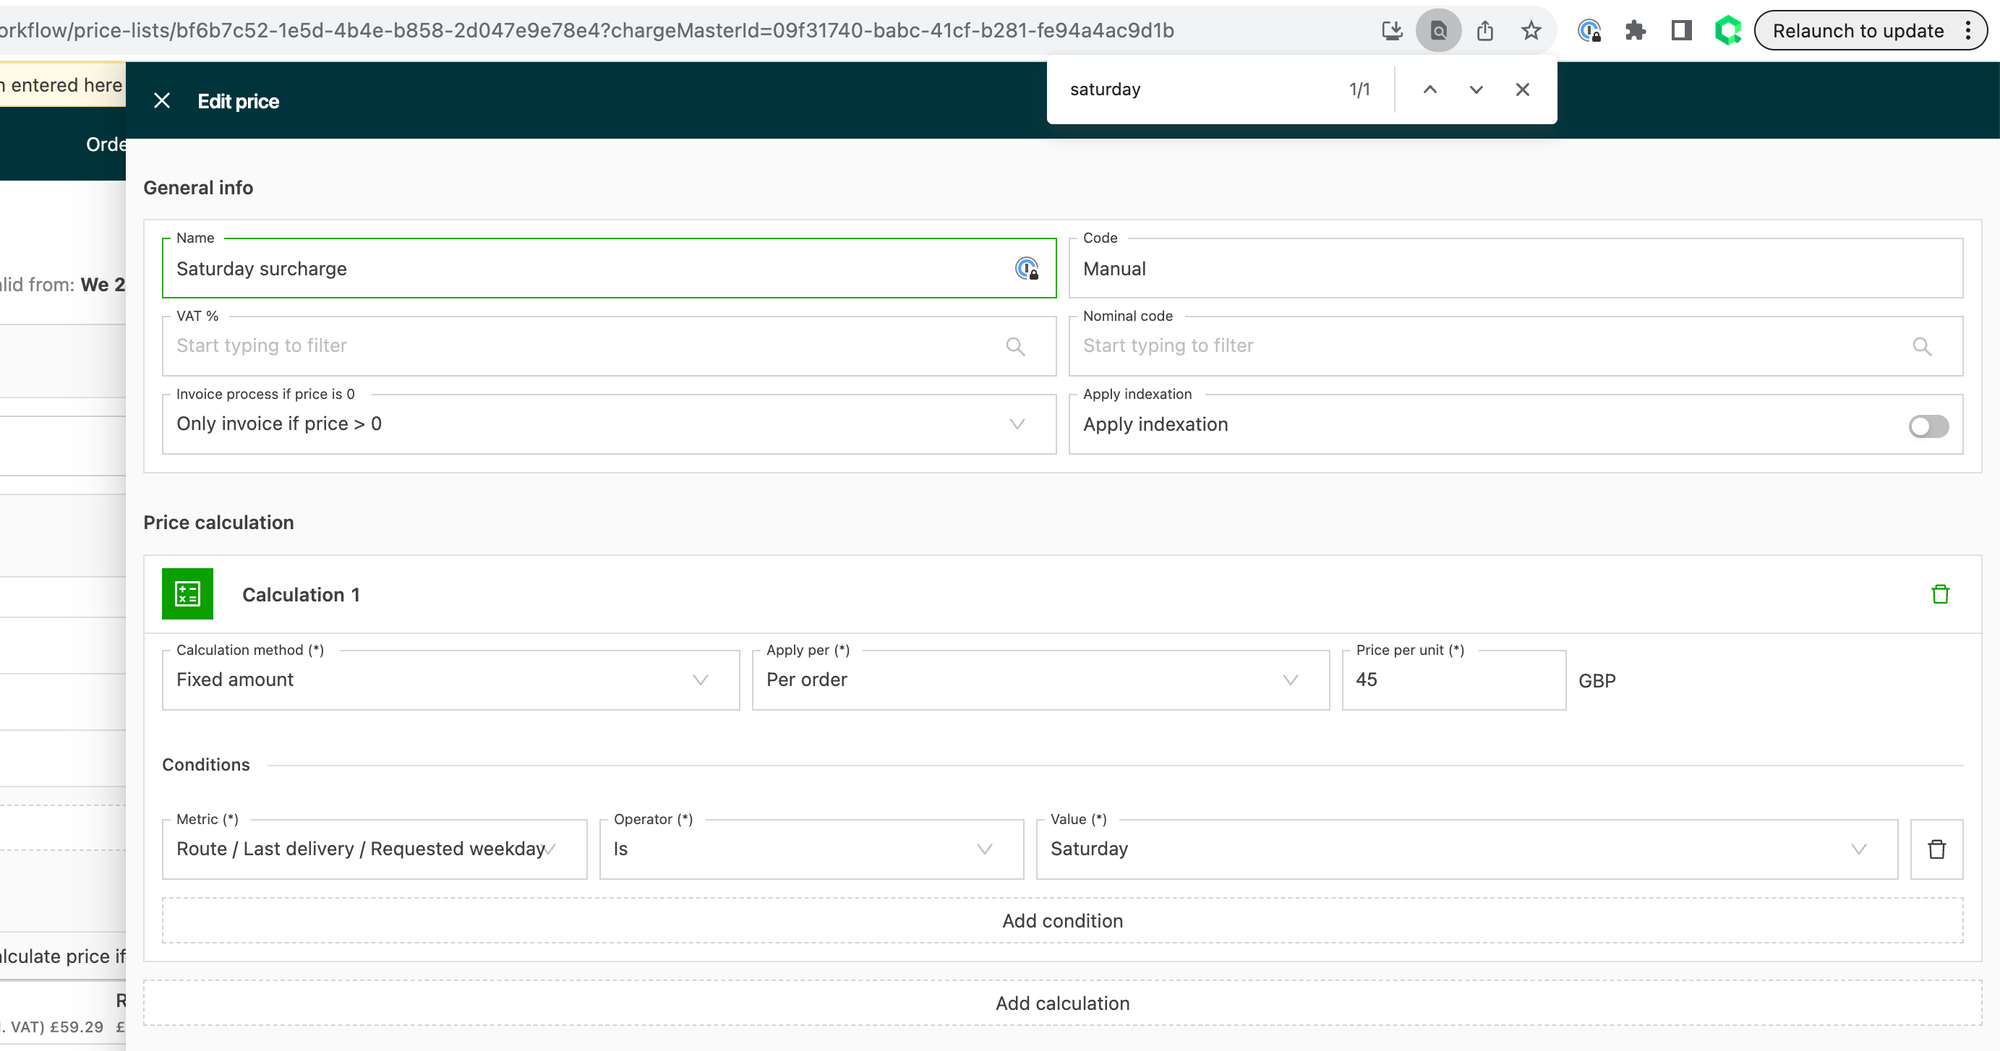
Once the time windows are set up, charges can be added, for example a Saturday surcharge.
- Go to Rates > Order input
- Click General surcharges
- Click Add new general surcharge. Add the relevant details and the price calculation condition: last delivery requested weekday is Saturday
Add a packaging type
- Go to Rates > Order input
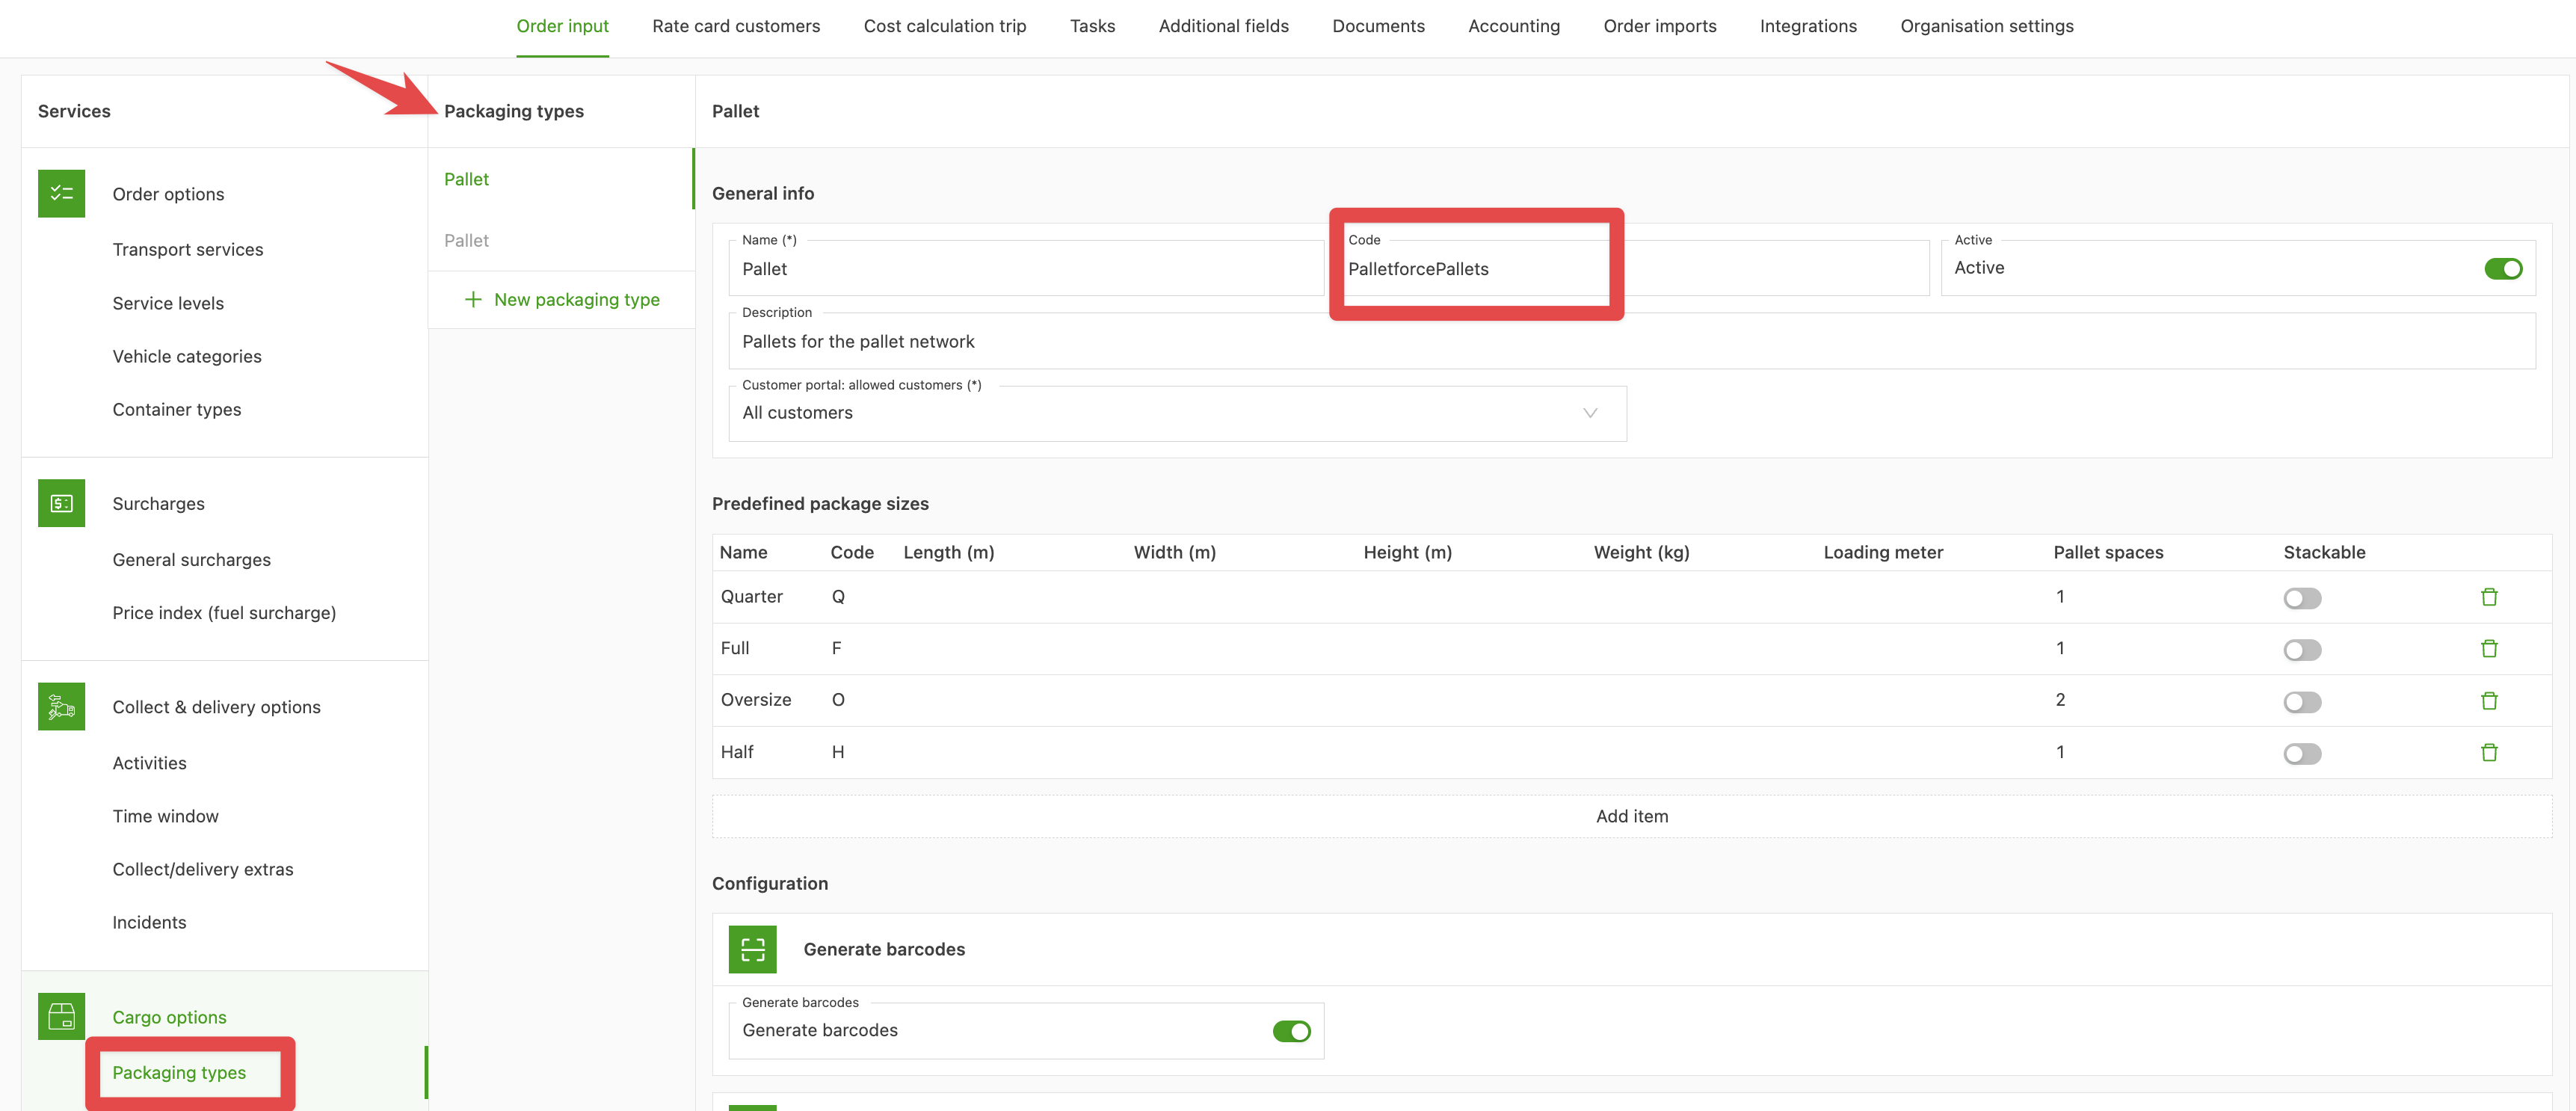
- Click Packaging types
- Click “New packaging type”
- Create a packaging type for Pallet with the code PalletforcePallets
-
Add predefined package sizes for
- Full pallet
- Half pallet
- Quarter pallet
| Palletforce pallet type | Qargo code |
|---|---|
| Full | F |
| Half | H |
| Quarter | Q |
| Oversize | O |
- Turn on “Generate barcodes” (Qargo Admin only)

Add additional fields
Next, set up additional fields.
- Go to Configuration
- Click Additional fields in the header
The different categories of additional fields appear on the left. Make sure the additional fields below are active or inactive as shown.
| Additional field category | Additional field name | Status | Additional action |
|---|---|---|---|
| Orders | Requested price (order import) | Active | |
| Palletforce Insurance Code | Insurance code | Active | |
| Shipments | Shipment reference | Active | |
| Shipments | CMR reference | Inactive | |
| Freight | Pallet spaces | Active | |
| Freight | Loading meters | Inactive |
- For the custom fields, make sure the details match the screenshot below:
Insurance code:
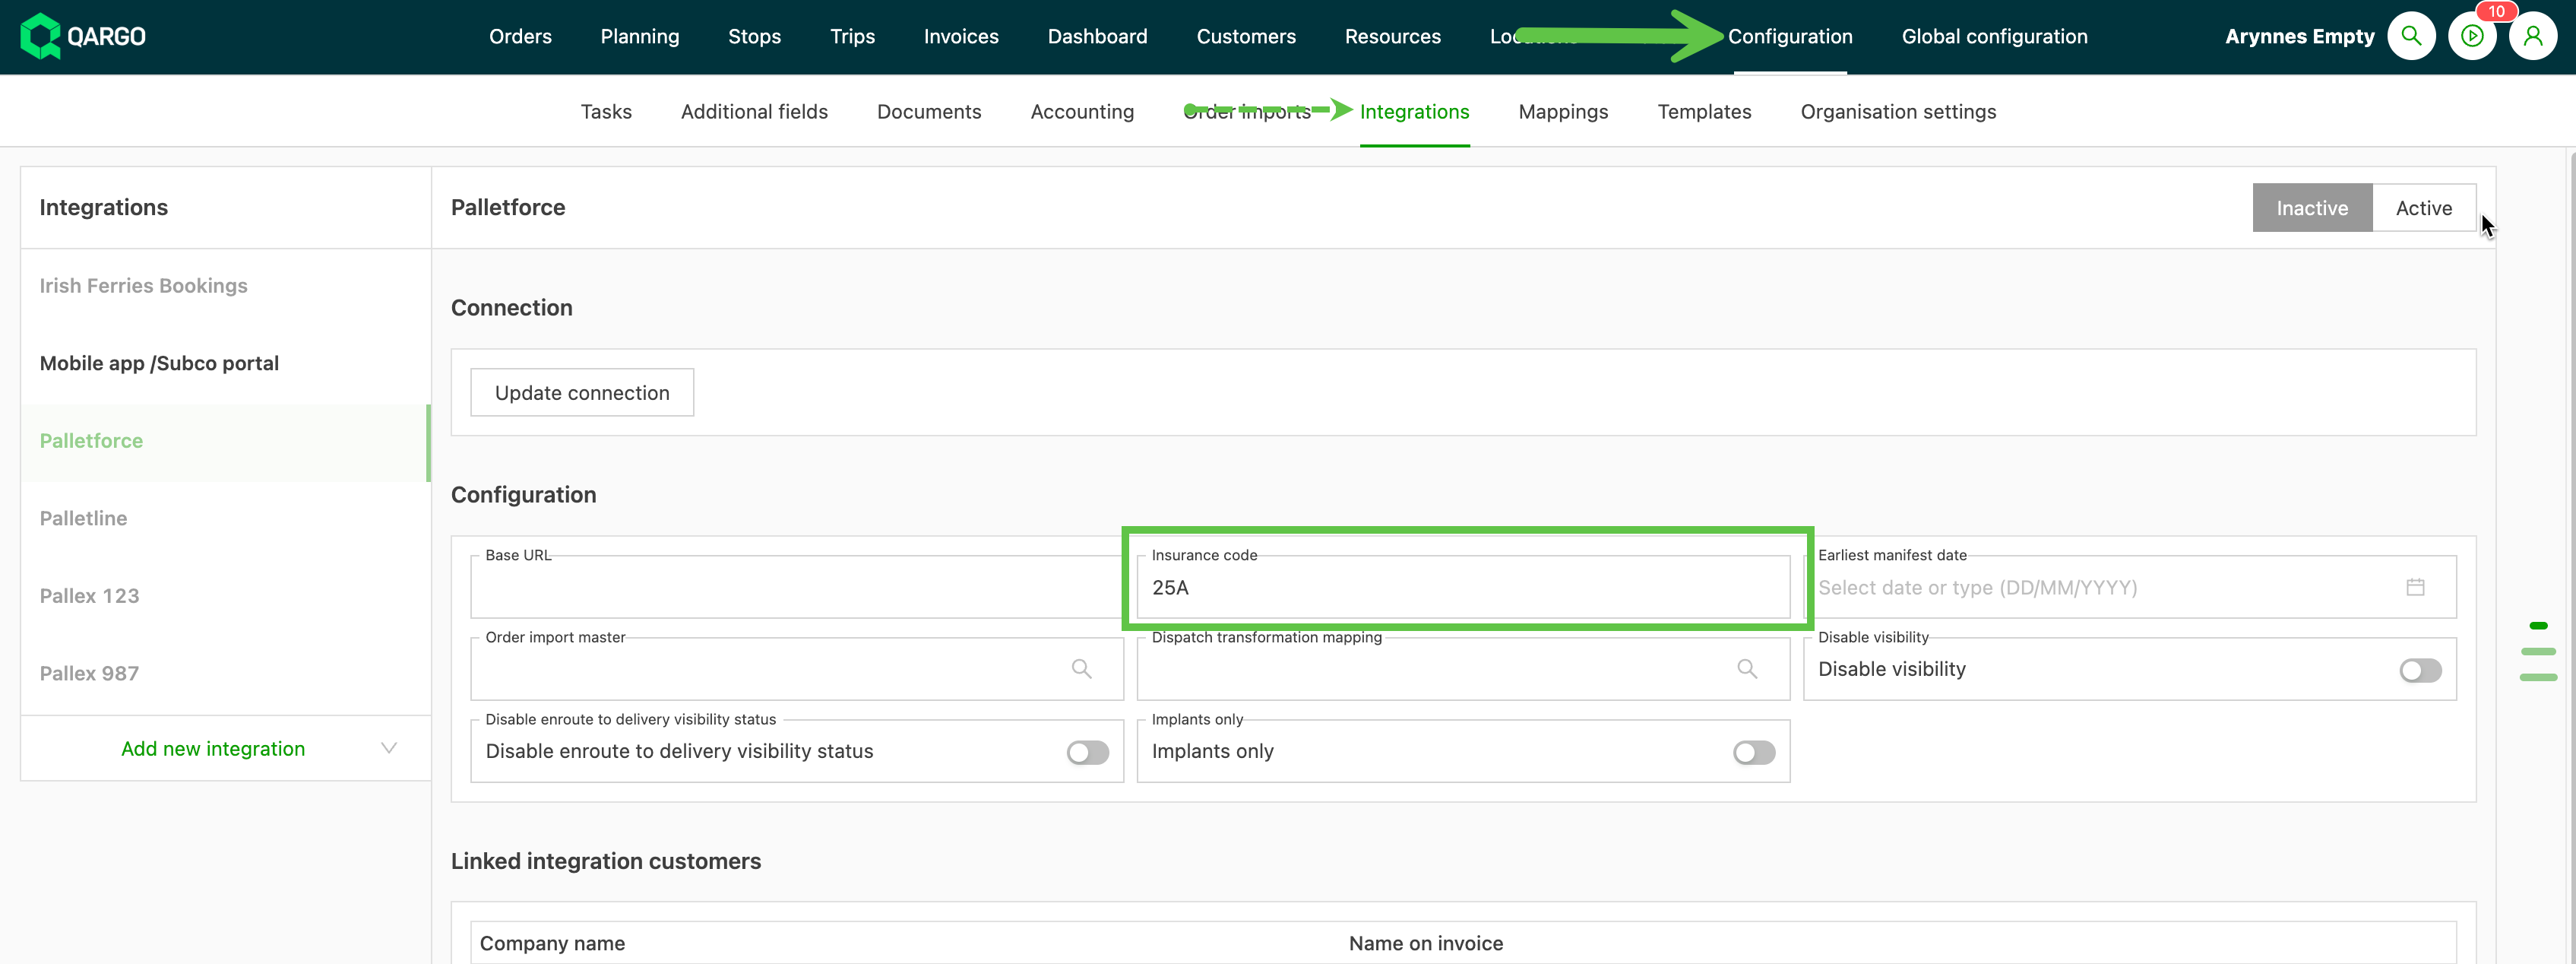
The integration configuration includes an option to add an insurance code for goods. By default, the code is added at the integration level. The code can also be set at the customer and order level. The values for these can be activated in Additional fields, for both customer and order**.**
Set insurance at configuration level.
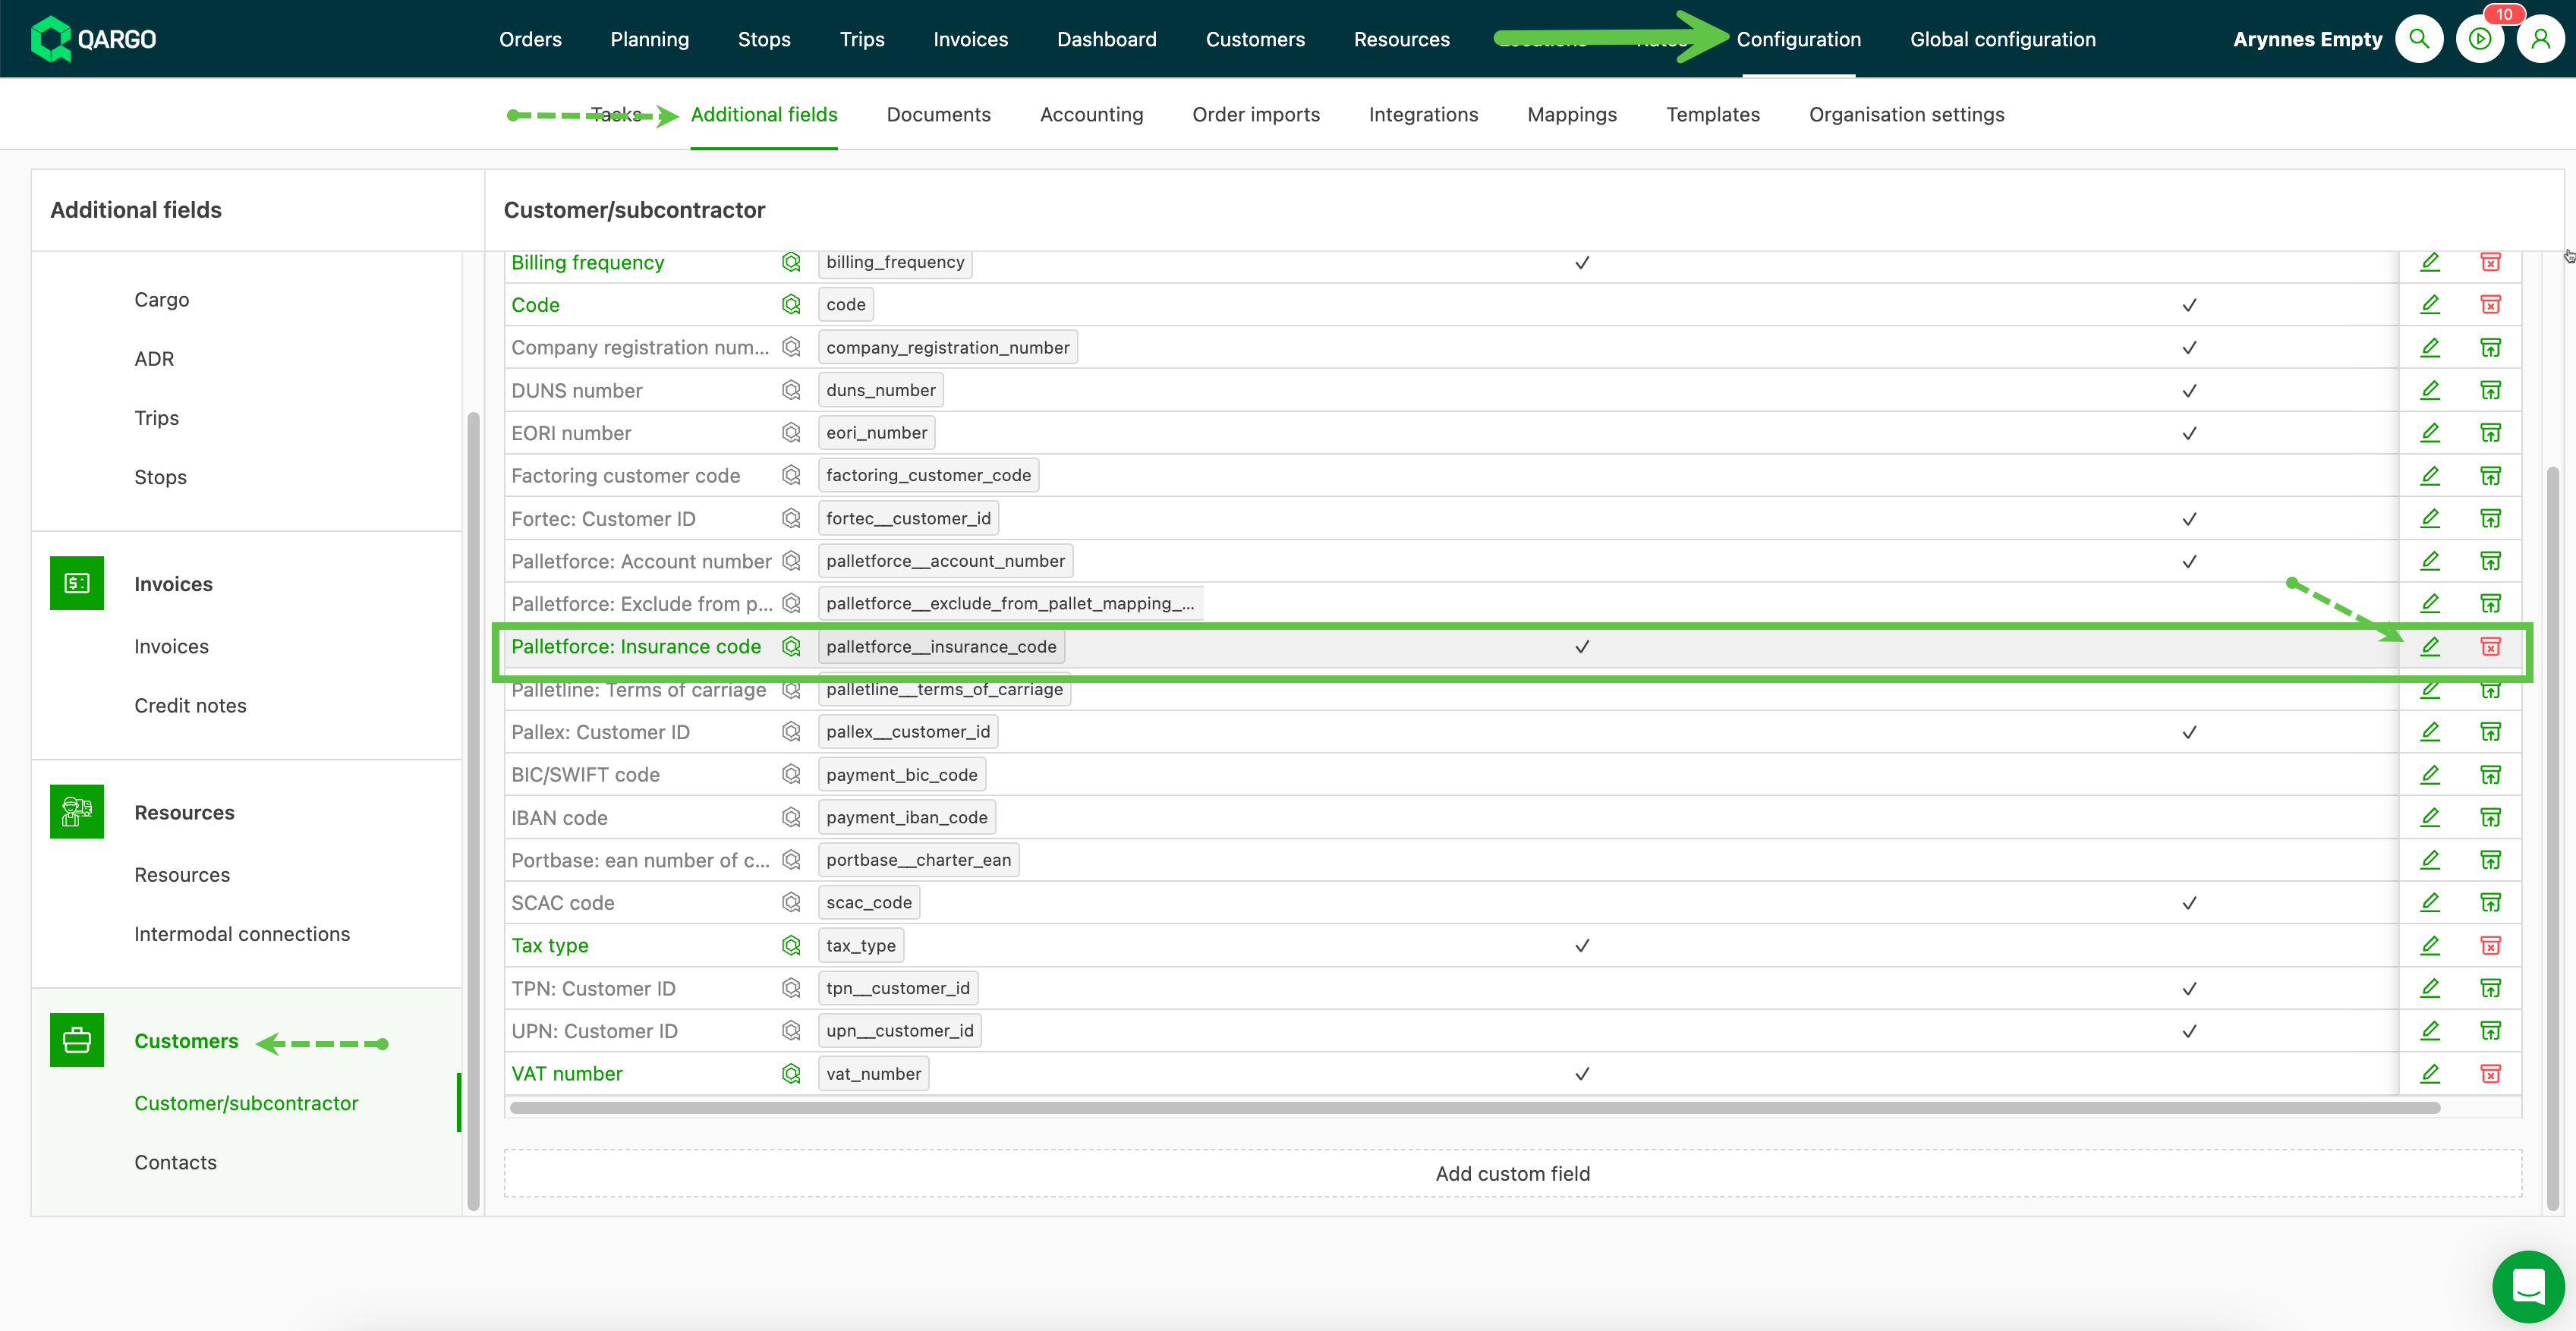
Activate the field on the customer:
-
Go to Configuration
-
Click ‘Additional fields’ in the submenu.
-
In the side menu, select Customers.
-
Select ‘Palletforce Insurance Code’ in the list and click the pencil icon to edit.
-
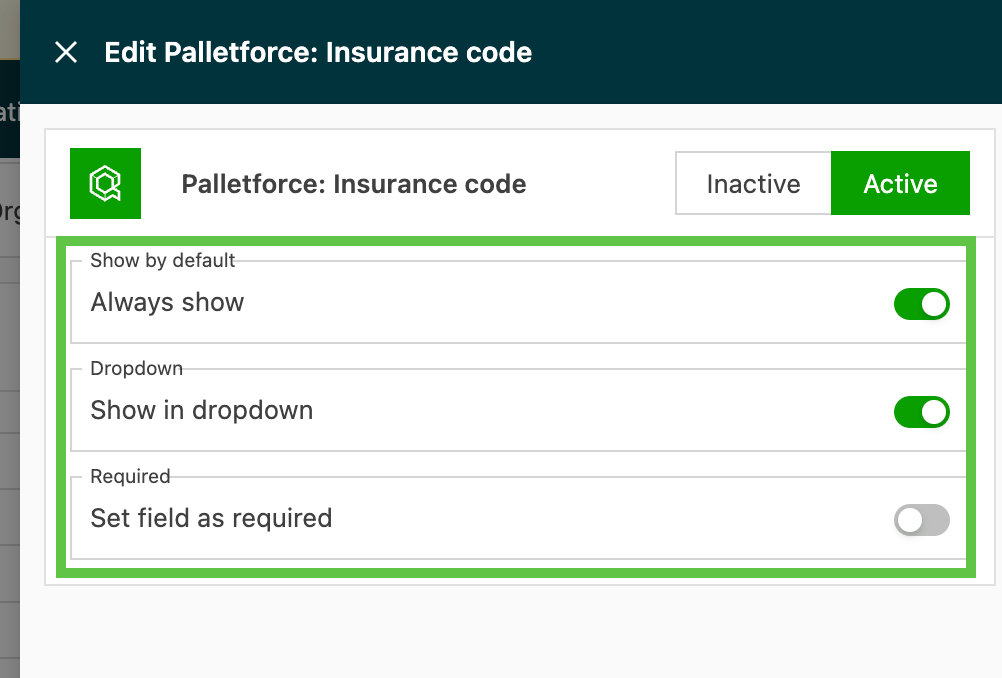
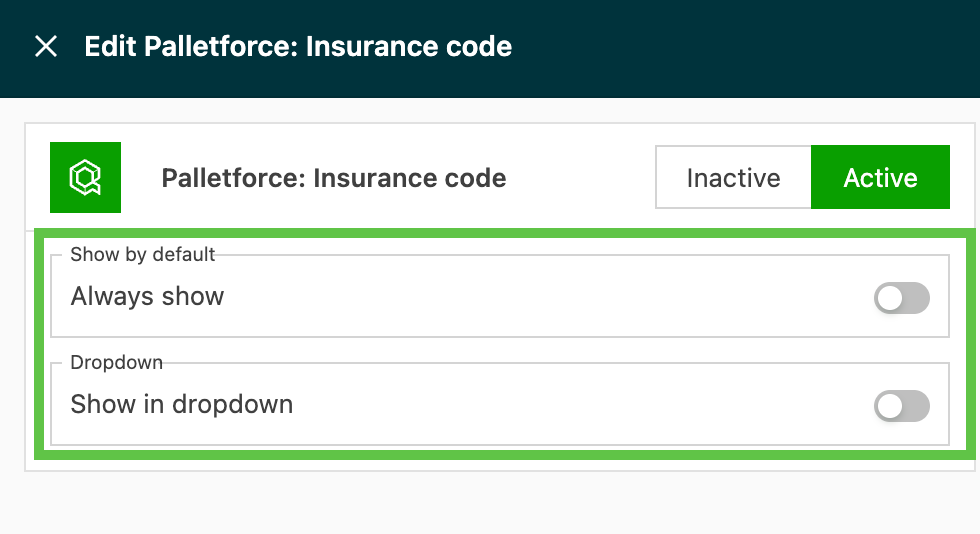
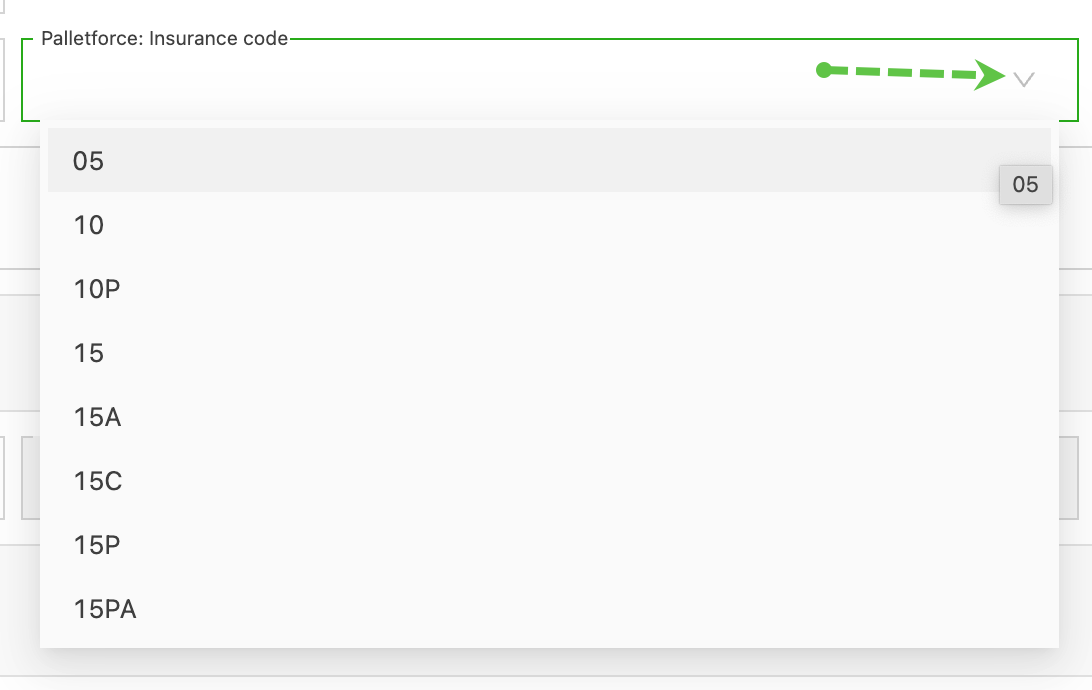
Select Active and turn on ‘Always show’. This adds a field with a drop-down menu (when turned on):
-
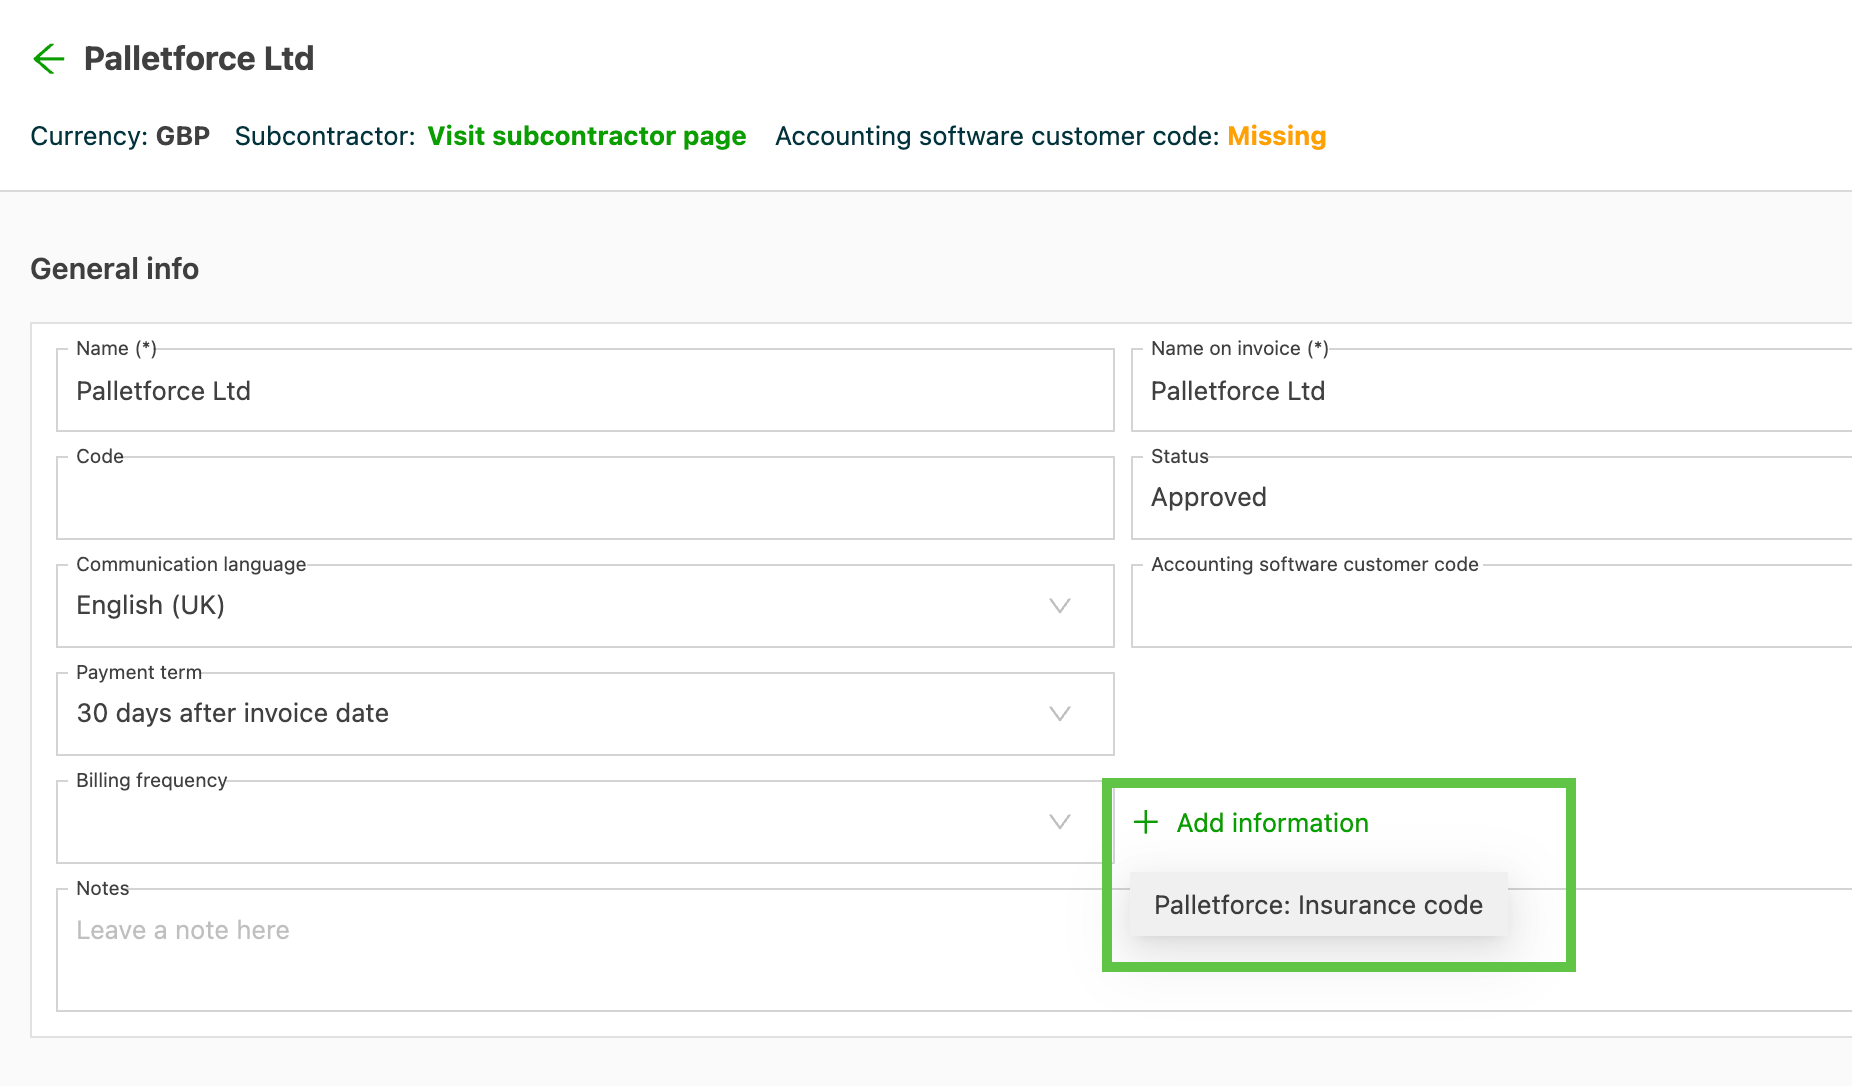
Select Active and turn off ‘Always show’. This adds a + Add information option to select.
Activate the field on the order:
-
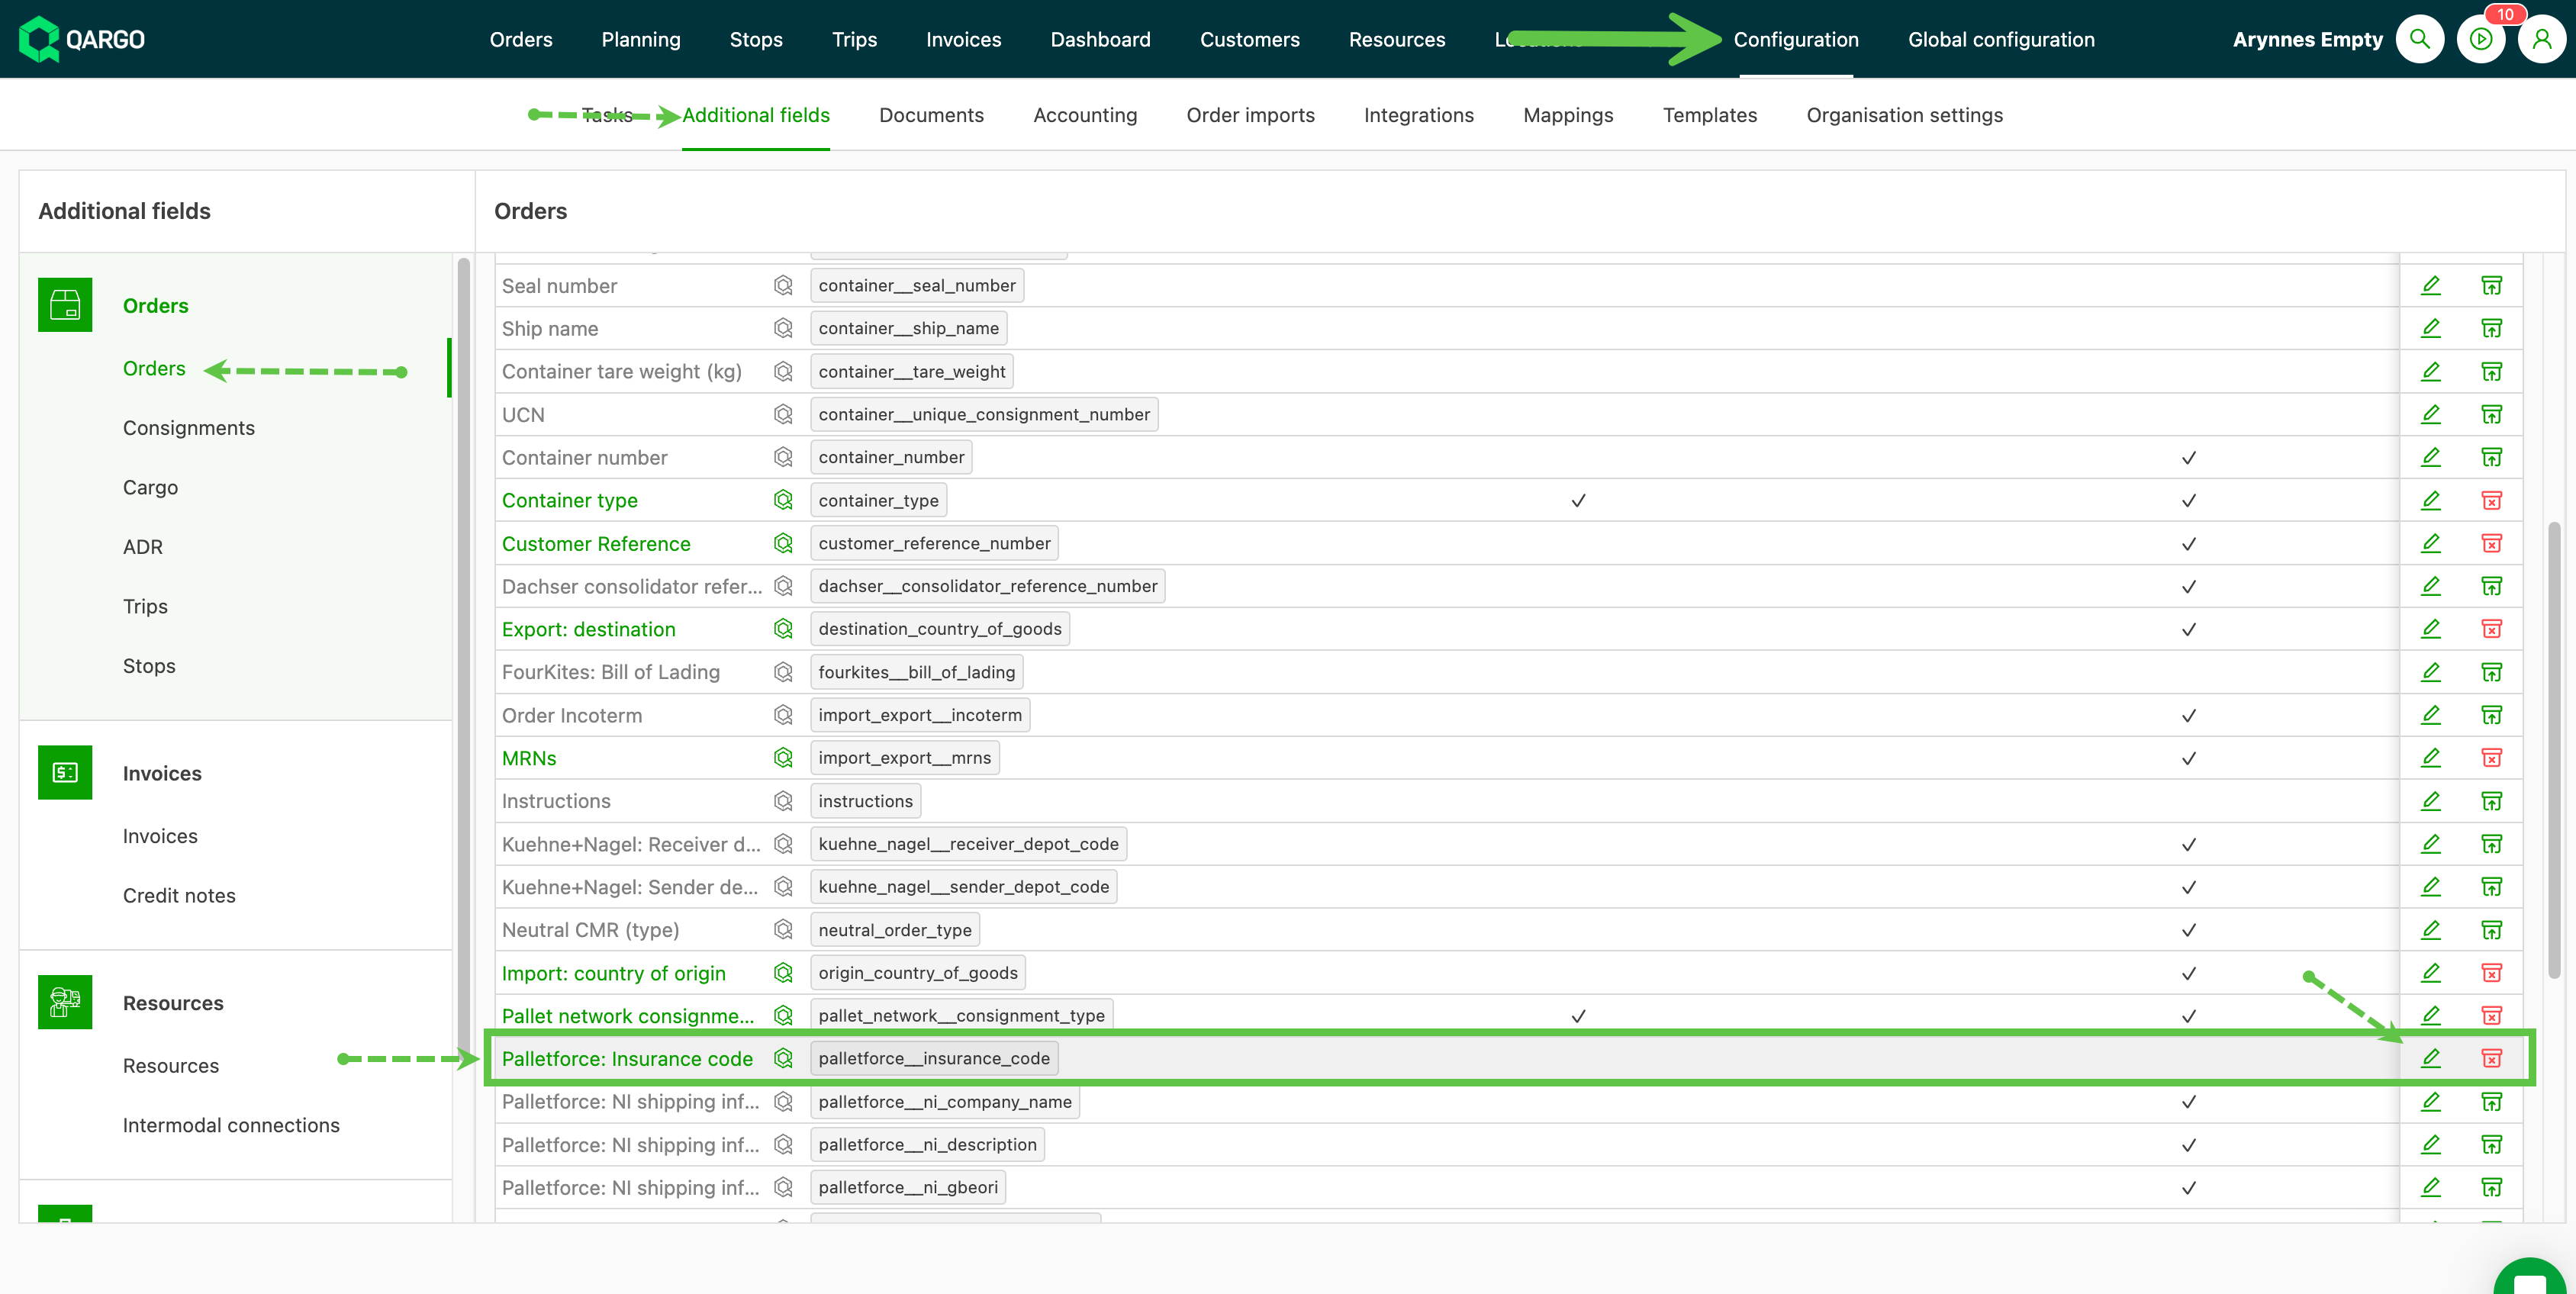
Go to Configuration
-
Click ‘Additional fields’ in the submenu.
-
In the side menu, select Orders.
-
Select ‘Palletforce Insurance Code’ in the list and click the pencil icon to edit.
-
Select the transportation services on which to make this field active.
-
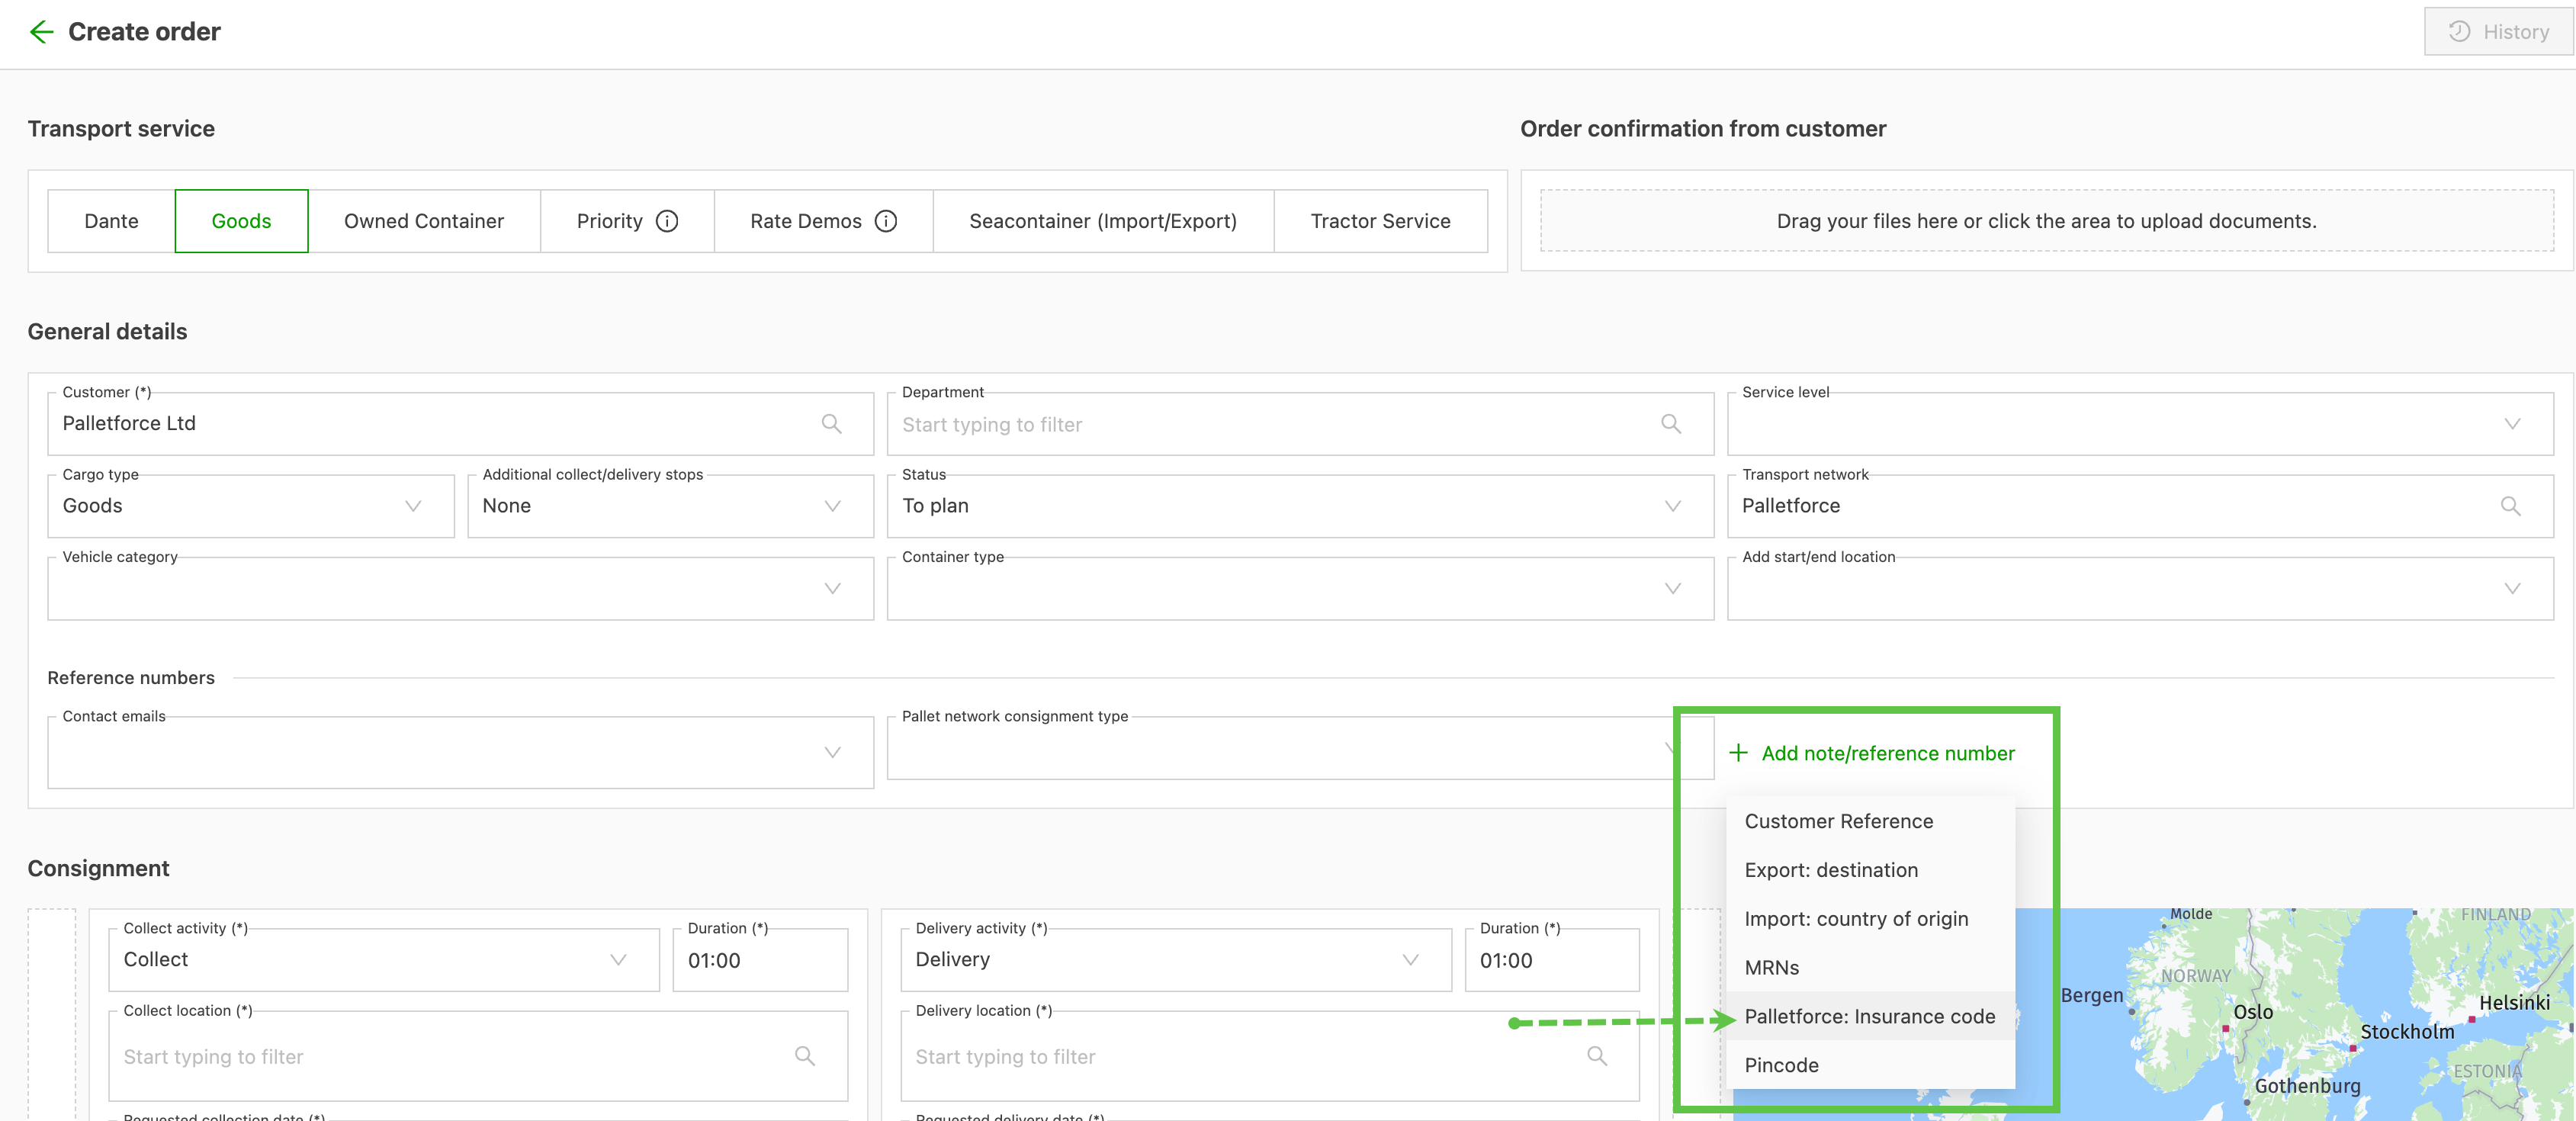
Set the ‘Always show’ default. When turned off, the field is added from ‘Add note/reference number’
-
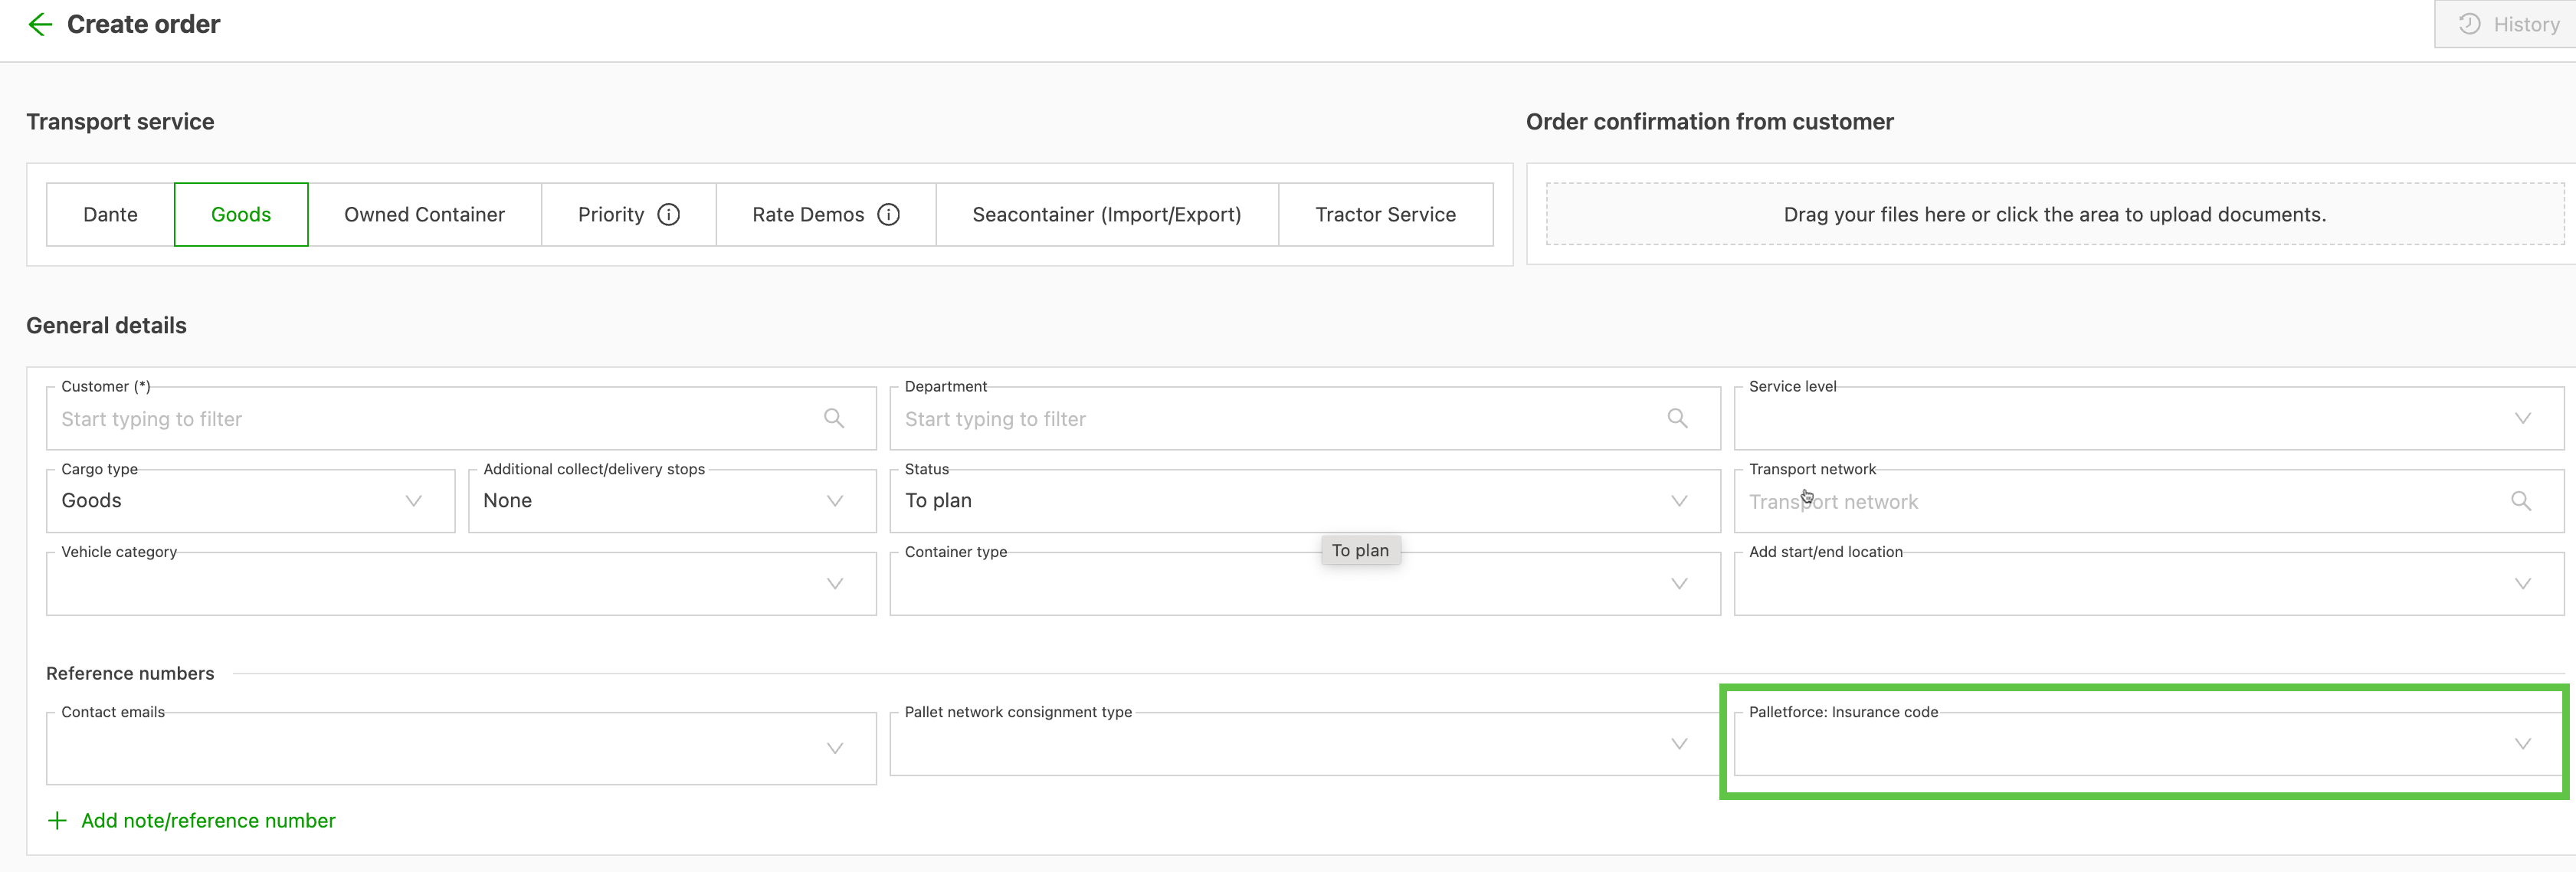
Set the ‘Always show’ default. When turned on, it shows as a field to fill in during order capture.
-
Sending logic in export:
- Order-level code, if present; otherwise
- Customer-level code, if present; otherwise
- Integration-level code.
Add a transport network
Next, add a transport network.
- Go to Locations
- Click Transport networks in the header
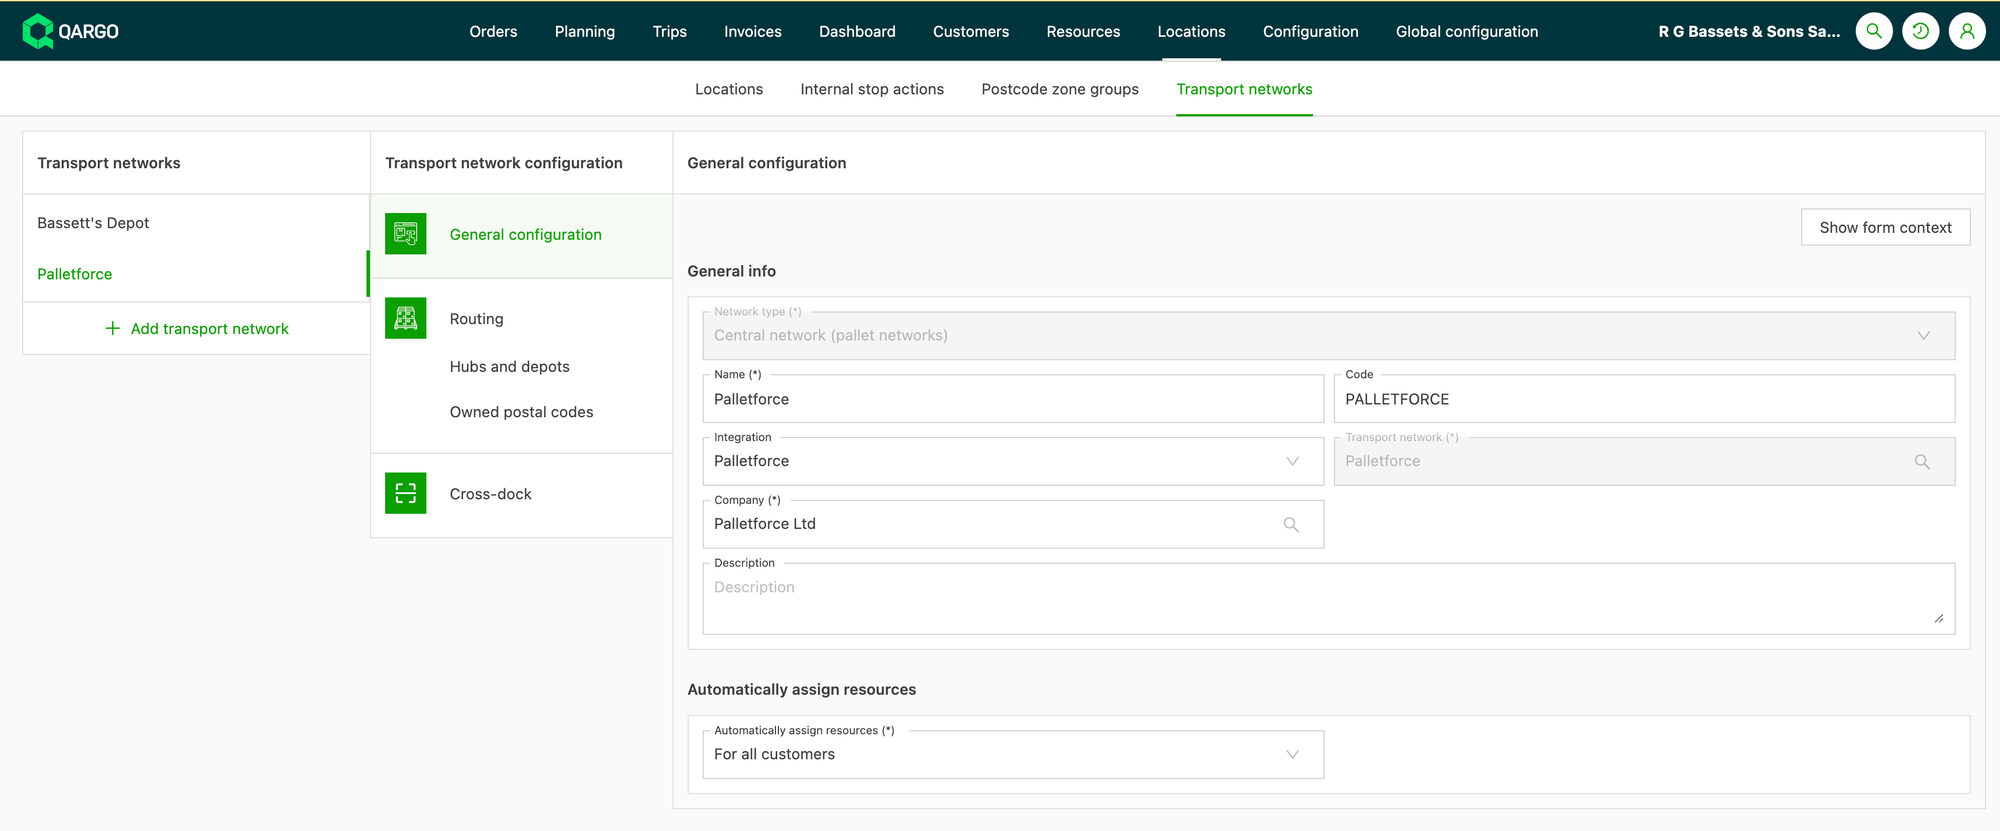
- Click Add transport network and create a new central network for Palletforce
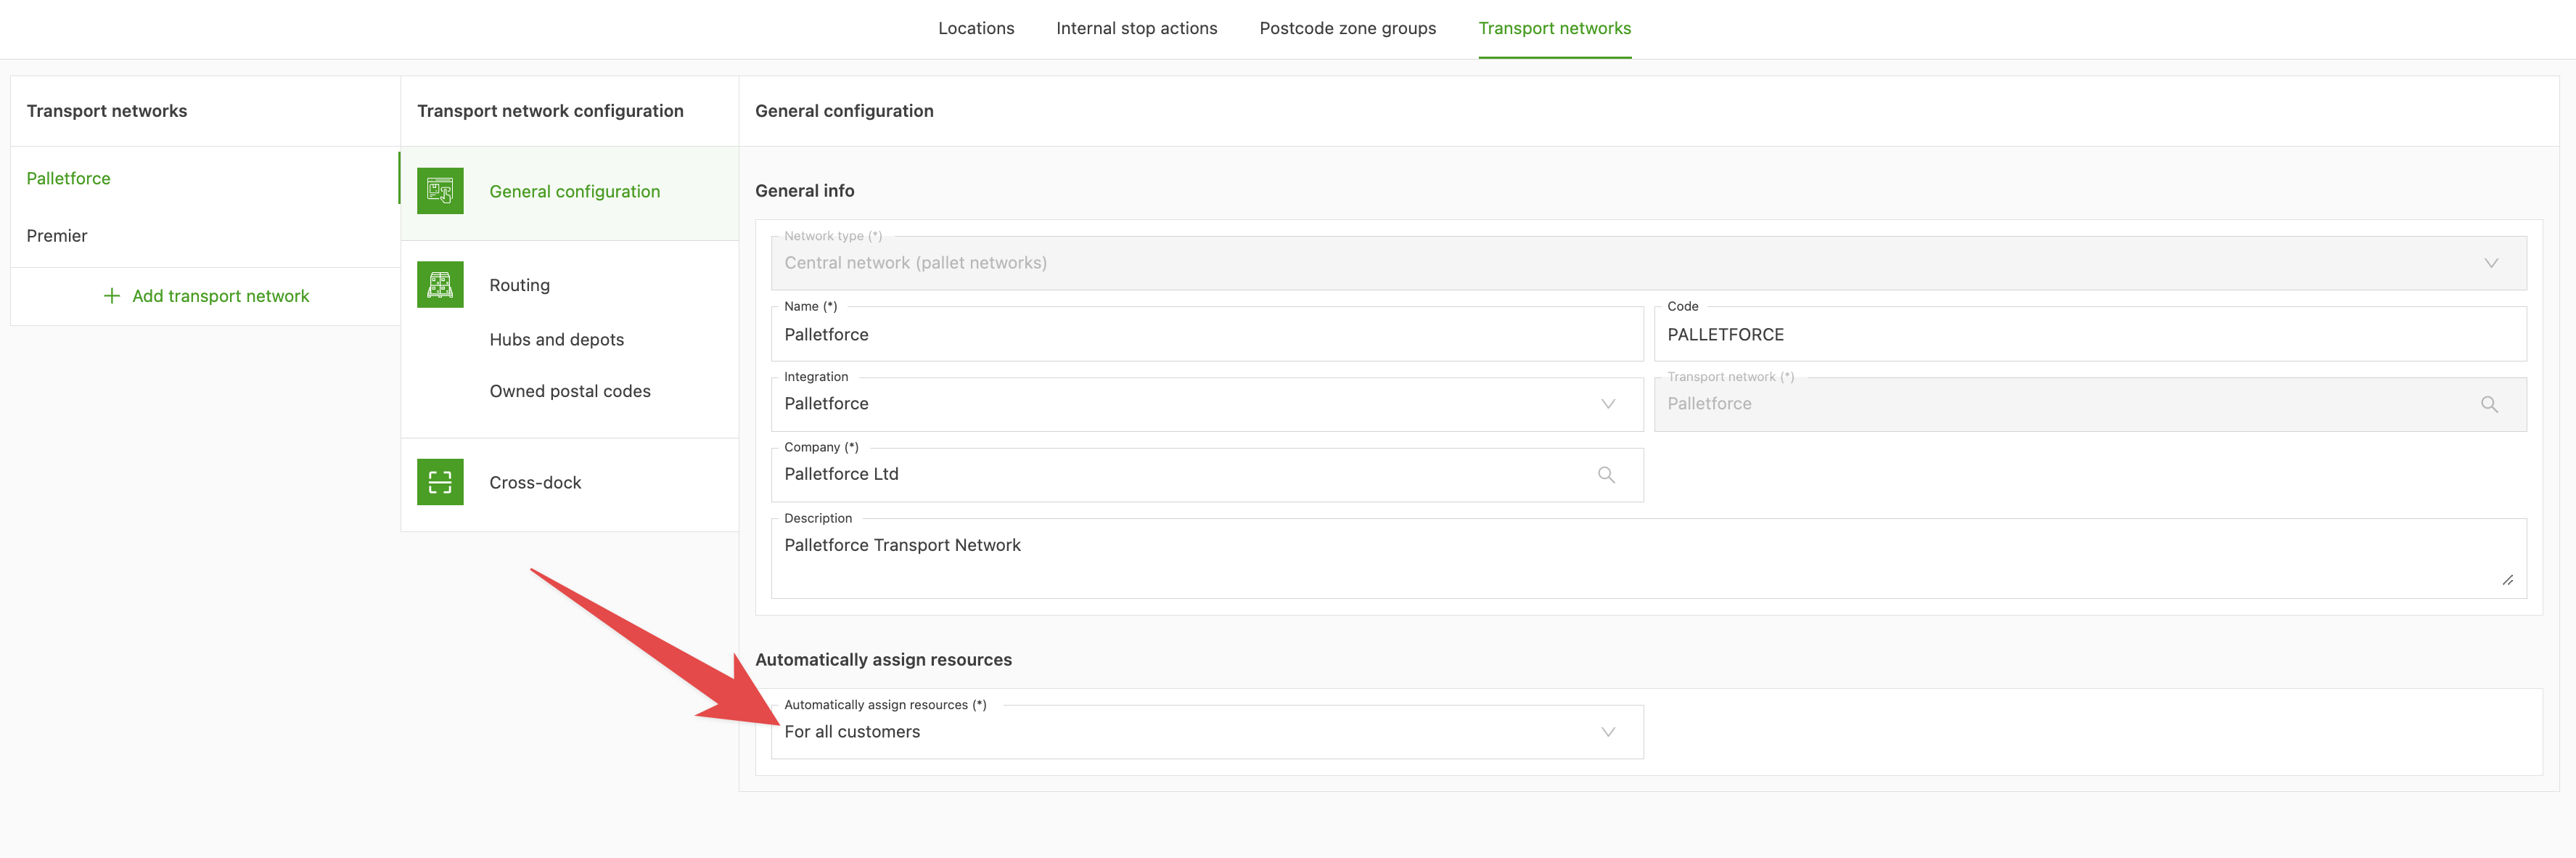
- Once it is created, select the ‘For all customers’ option in the ‘Automatically assign resources’ drop-down menu

- Add the terminal in the “Hubs and terminals” section, mark it as “Internal” and fill in the location, for example:

-
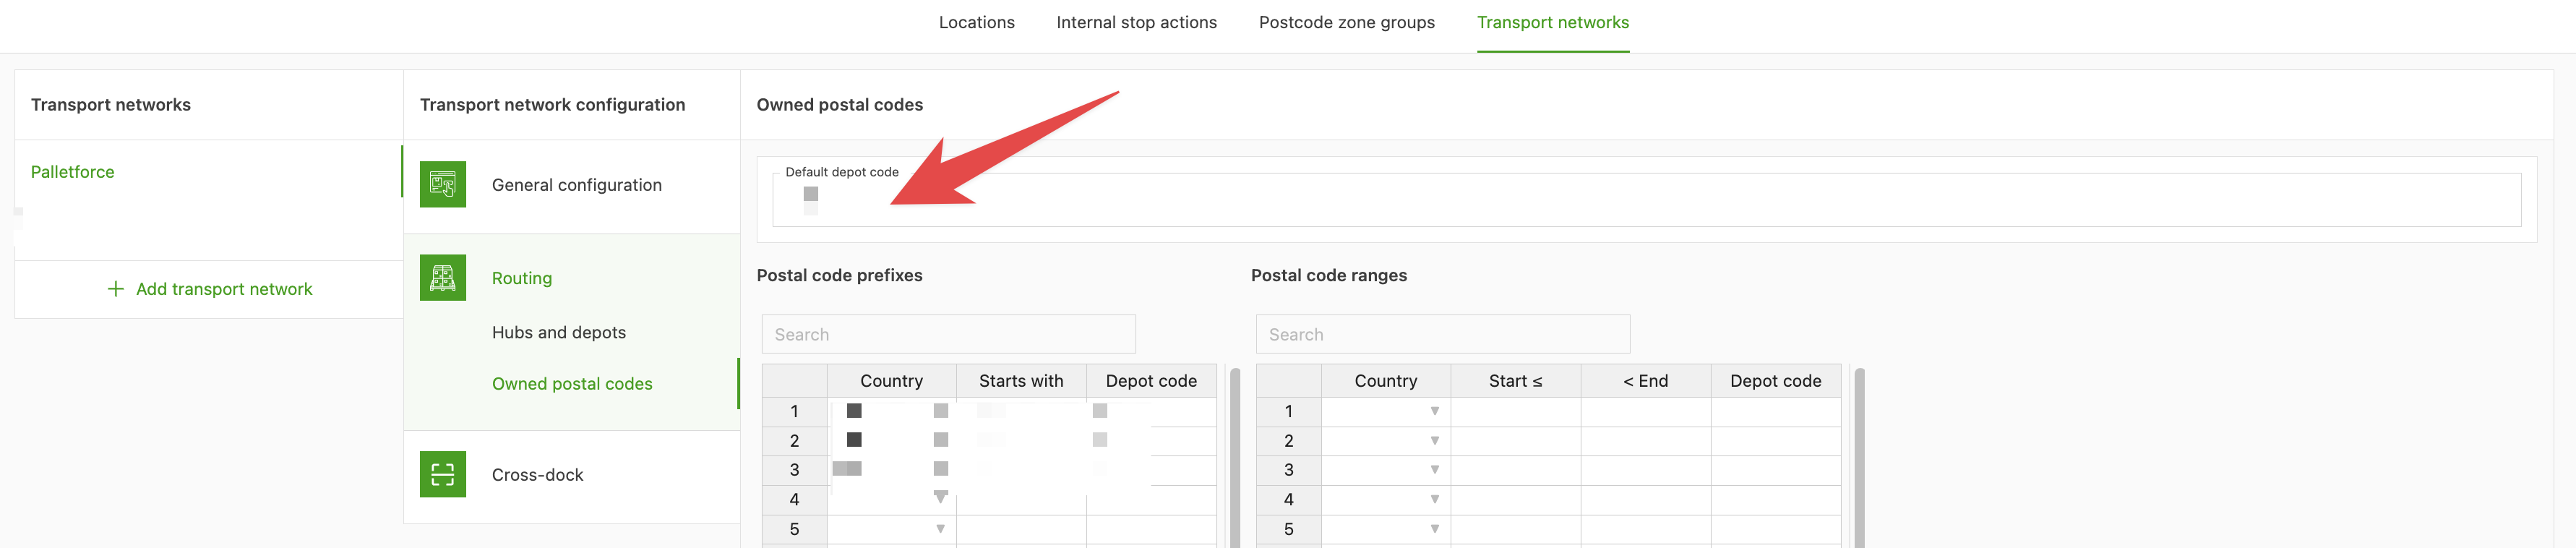
Click Owned postal codes
- Add the terminal’s code in Default terminal code.
- Add the ZIP code ranges or prefixes that the terminal is responsible for.