
PN - Configure Pall-Ex/Fortec
Table of contents
Introduction
This article explains how to configure the Pall-Ex/Fortec integration in Qargo. The Qargo onboarding team typically completes the configuration. The steps below serve as a reference for support and for customers who need to understand how the integration is set up.
What does this article cover?
- Requesting Nexus API credentials from Pall-Ex/Fortec
- Adding the integration and terminal code in Qargo
- Enabling customer Nexus ID fields
- Setting up contract carrier resources for each network
- Configuring service levels, time windows, extras, and packaging types
- Setting up the order import master
Who performs this configuration?
- The Qargo onboarding team and technical support configure the integration
- The terminal provides the terminal code(s) and a list of Nexus customer IDs for its customers
Terminology
| Term | Definition |
|---|---|
| Terminal code | The unique identifier that Pall-Ex/Fortec assigns to the terminal (e.g., PGD302) |
| PallexID / FortecID | The Nexus customer IDs for each of the terminal’s customers, configured as extra fields in Qargo |
| PALLEX_OUT / FORTEC_OUT | Resource codes that identify a contract carrier as belonging to the Pall-Ex or Fortec network |
| Transport network | A Qargo configuration object that maps pallet network service levels, time windows, and extras to orders |
| Order import master | The Qargo configuration that controls the automatic import of orders from Nexus |
| Nexus | The API and portal platform shared by Pall-Ex and Fortec |
Before you start
The following information is required before configuration begins:
- Whether the terminal is a Pall-Ex member, a Fortec member, or both
- The terminal code(s) assigned by the network (e.g., PGD302 for a dual-network terminal, UKD prefix for Pall-Ex only, FTD prefix for Fortec only)
- A list of Nexus customer IDs for each of the terminal’s customers (one ID per customer per network)
- Nexus API credentials (obtained from Pall-Ex/Fortec; see below)
Configuring the integration
Step 1: Add the integration
- Qargo Admin completes this step
Step 2: Enable additional fields
Customer records in Qargo need two extra fields to store Nexus customer IDs: one for Pall-Ex and one for Fortec.
- Navigate to Configuration > Additional fields > Customers.
- Enable PallexID on the Customer entity.
- Enable FortecID on the Customer entity.
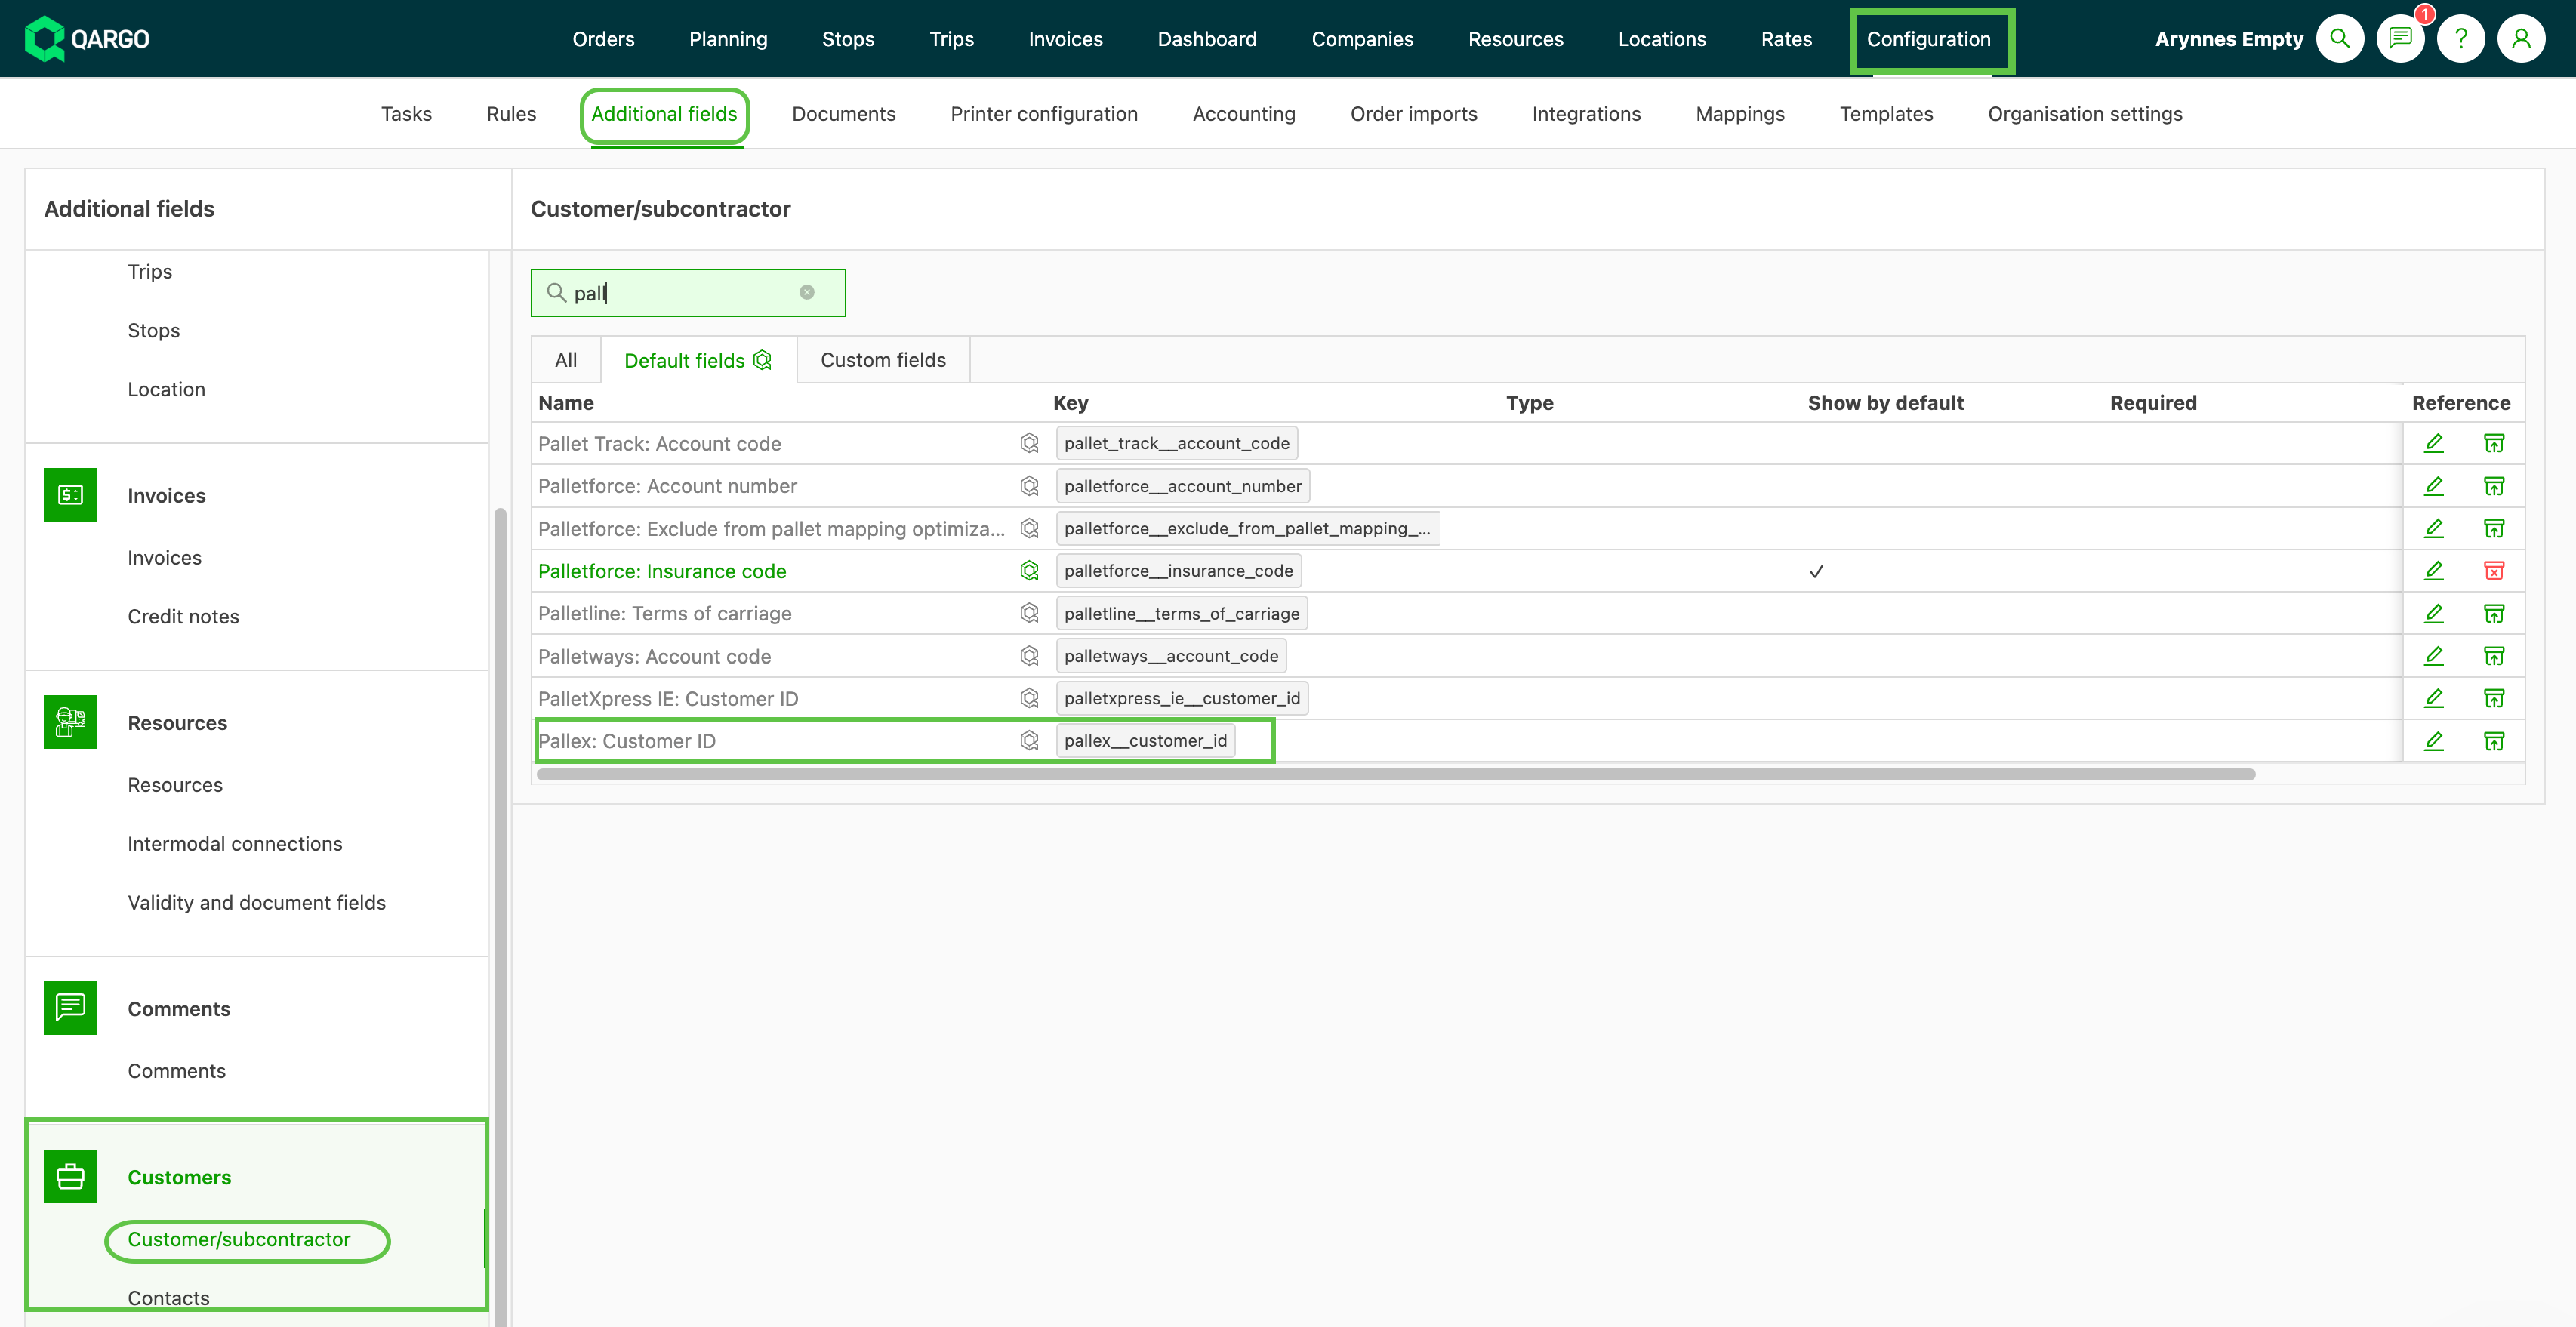
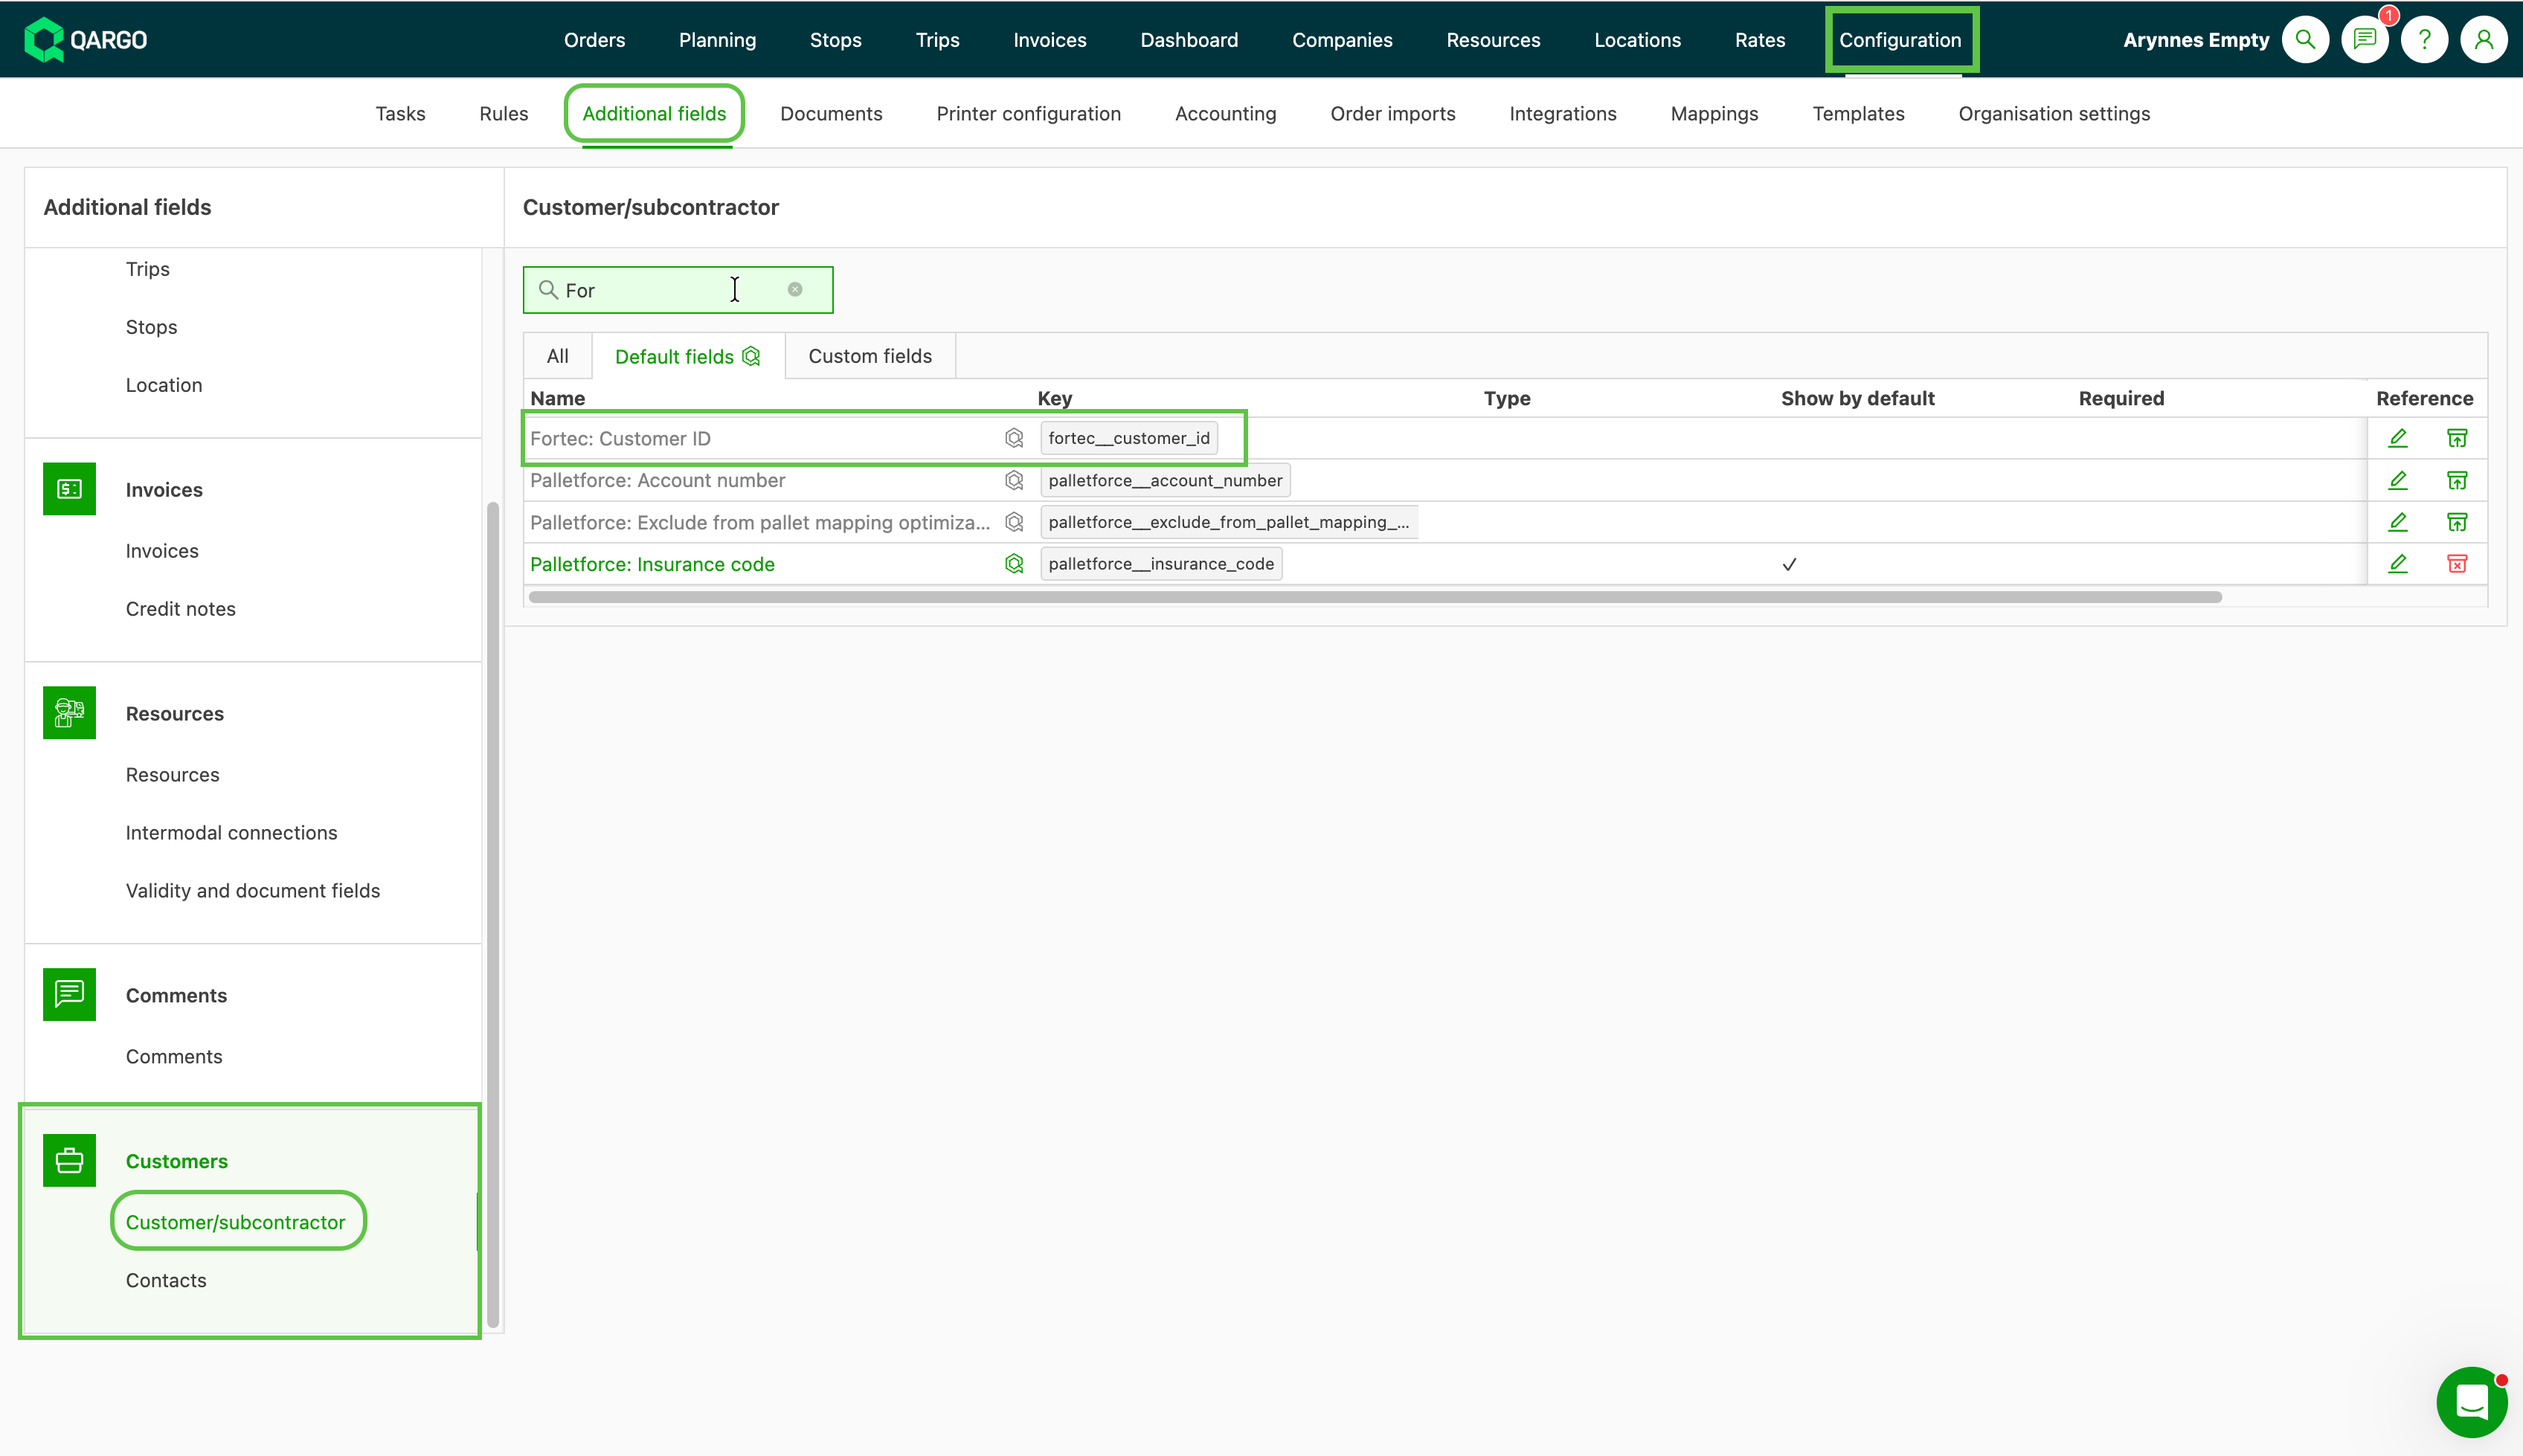
Step 3: Configure customer Nexus IDs
For each customer whose shipments will be dispatched via Pall-Ex or Fortec:
- Open the company record in Qargo.
- Enter the customer’s Nexus Pall-Ex ID in the PallexID field (if the customer ships on Pall-Ex).
- Enter the customer’s Nexus Fortec ID in the FortecID field (if the customer ships on Fortec).
Step 4: Create contract carrier resources
A contract carrier resource must be created in Qargo for each network the terminal is a member of.
- Navigate to Resources > Contract carriers.
- Create a contract carrier for Pall-Ex and set its resource code to `PALLEX_OUT`.
- Create a contract carrier for Fortec (if applicable) and set its resource code to `FORTEC_OUT`.
- Enable the Pall-Ex/Fortec integration on each contract carrier resource.
Step 5: Add the export task
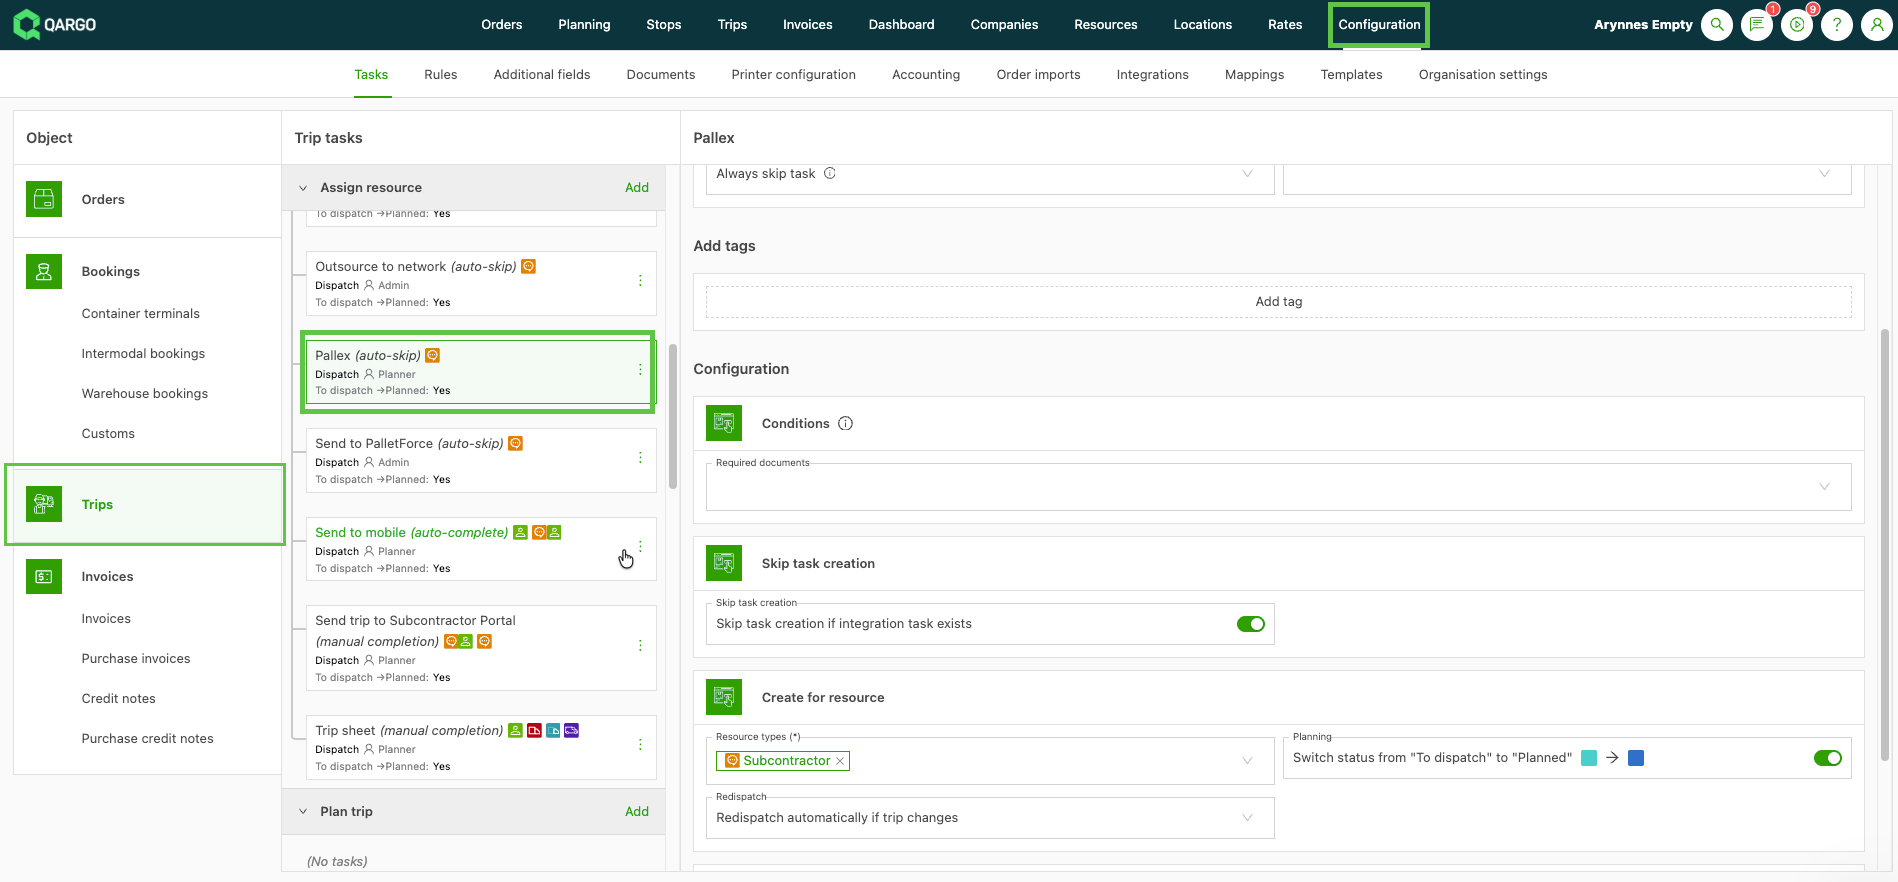
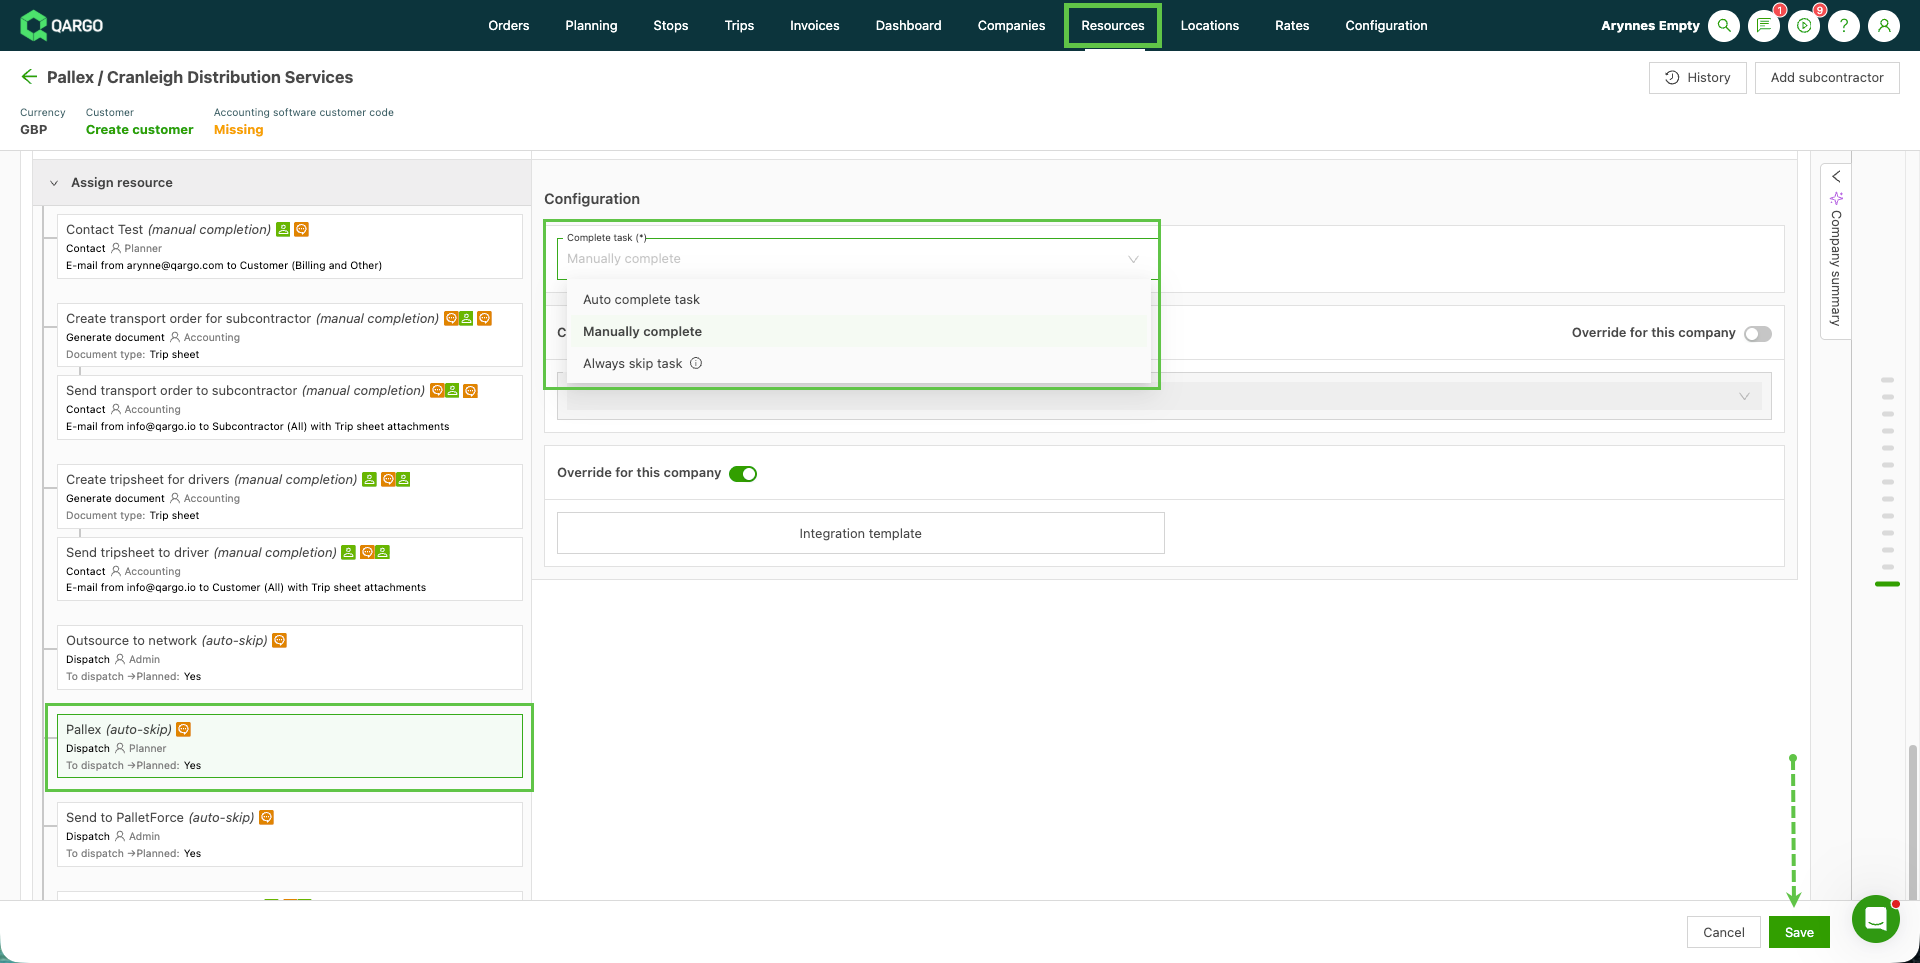
- Navigate to the contract carrier resource profile
- Scroll to Tasks and select the Pallex option
- Configure the task to auto-complete if desired (this sends shipments to Nexus automatically when the resource is assigned to a load).
Step 6: Create a transport network
The transport network maps pallet network service levels, time windows, and extras to orders imported from or dispatched to Nexus.
- Navigate to Locations > Transport networks
- Create a new transport network for Pall-Ex/Fortec.
- Link the transport network to the transportation service used for pallet shipments.
Service levels
Configure the following service levels on the transport network. These map to the Nexus API service IDs.
Pall-Ex service levels:
| Nexus service | serviceID | Qargo service level | Qargo time window | Notes |
|---|---|---|---|---|
| Premium | 1 | A | — | |
| Premium AM | 4 | A | AM | |
| Premium Timed | 5 | A | TD | |
| Premium Before Timed | 10 | A | BT | |
| Premium PM | 21 | A | PM | |
| Premium Before Defined Time | 10 | A | BDT | |
| Economy | 2 | B | — | |
| Economy AM | 7 | B | AM | |
| Economy Timed | 6 | B | TD | |
| Economy PM | 22 | B | PM | |
| Economy Before Defined Time | 17 | B | BDT | |
| Book-in | 11 | B | BI | |
| Specific Day | 3 | SD | — | |
| Saturday AM | 9 | A | SAT-AM | |
| Amazon | 8 | Any | — | Requires Amazon extras |
Fortec service levels:
| Nexus service | serviceID | Qargo service level | Qargo time window | Notes |
|---|---|---|---|---|
| Premium / Next Day | 1 | A | — | |
| 24HR AM | 4 | A | AM | |
| 24HR Timed | 5 | A | TD | |
| Economy | 2 | B | — | |
| Book-in / Book In | 11 | B | BI | |
| Specific Day / Spec Day | 3 | SD | — | |
| Spec Day AM | 7 | SD | AM | |
| Date Specific Timed | 6 | SD | TD | |
| Saturday AM | 9 | A | SAT-AM | |
| Amazon | 8 | Any | — | Requires Amazon extras |
Time windows
Configure the following time window codes on the transport network:
| Code | Description |
|---|---|
| AM | Morning delivery (before noon) |
| PM | Afternoon delivery |
| TD | Timed delivery (specific time) |
| BT | Before time |
| BDT | Before defined time |
| BI | Book-in required |
| SAT-AM | Saturday morning delivery |
Extras
Configure pickup and delivery extras as required by the terminal’s service offering. The *AZ* extra is required for Amazon shipments.
Packaging types
Configure the packaging types (pallet types) available on the network. Only domestic pallet types are supported. See the table below for the supported types and their dimensions.
| Pallet type | Nexus palletTypeID | L (cm) | W (cm) | H (cm) | Max weight |
|---|---|---|---|---|---|
| Full | 1 | 120 | 120 | 220 | 1,200 kg |
| Half | 2 | 120 | 120 | 120 | 600 kg |
| Quarter | 3 | 120 | 120 | 80 | 300 kg |
| Full Plus | 4 | 160 | 120 | 220 | 1,200 kg |
| Bundle | 5 | 300 | 15 | 30 | 25 kg |
| Oversize | 6 | 510 | 240 | 220 | 2,000 kg |
| Full Light | 7 | 120 | 120 | 220 | 600 kg |
| Micro | 8 | 120 | 120 | 60 | 150 kg |
Step 7: Add the order import master (Qargo Admin completes this step)
Step 8: Enable the integration (Qargo Admin completes this step)