Orders – Add or delete extra stops on an order
This article shows the different options for adding or removing extra stops on an order.
Table of contents
Multiple stops can be added to an order with the plus icon on the route overview of the order.
Overview of extra stops
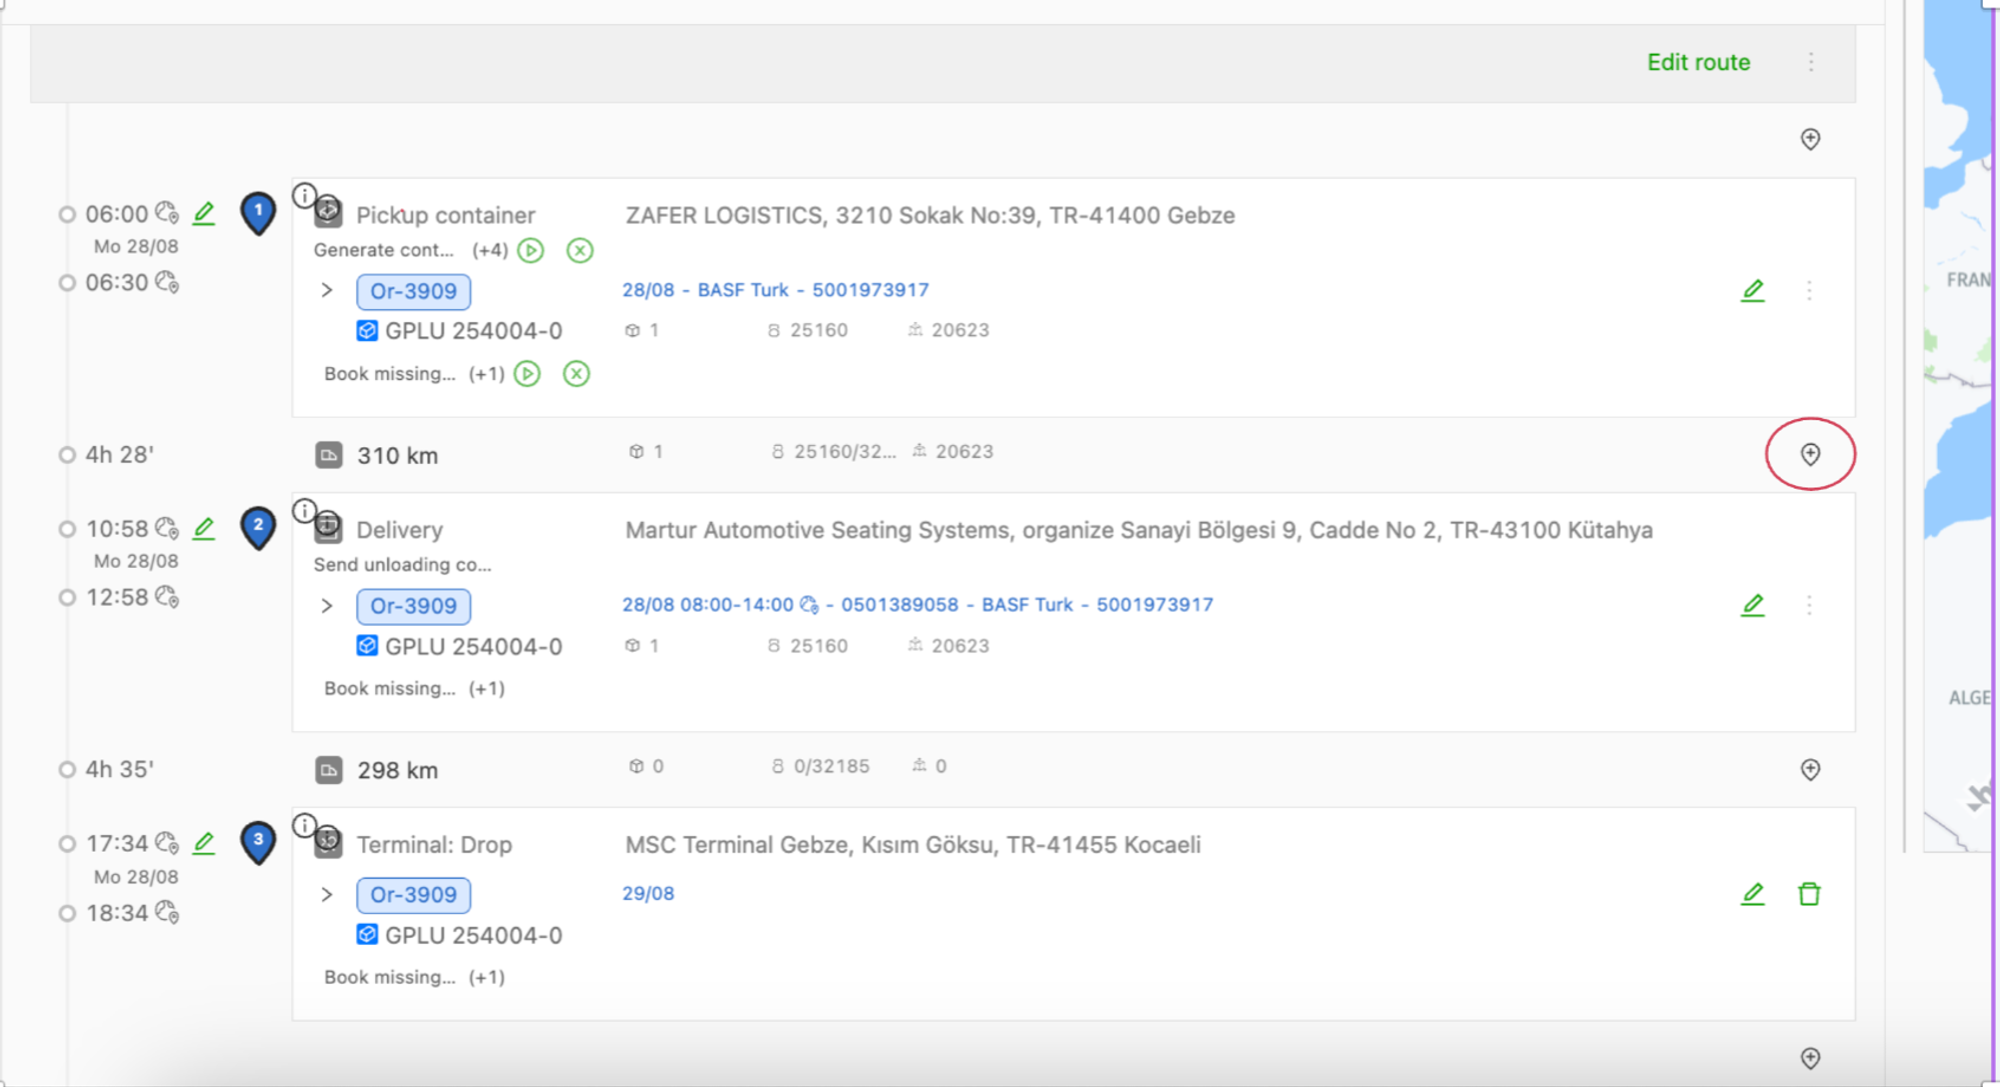
Clicking the icon shows the options below for adding to or splitting the order:
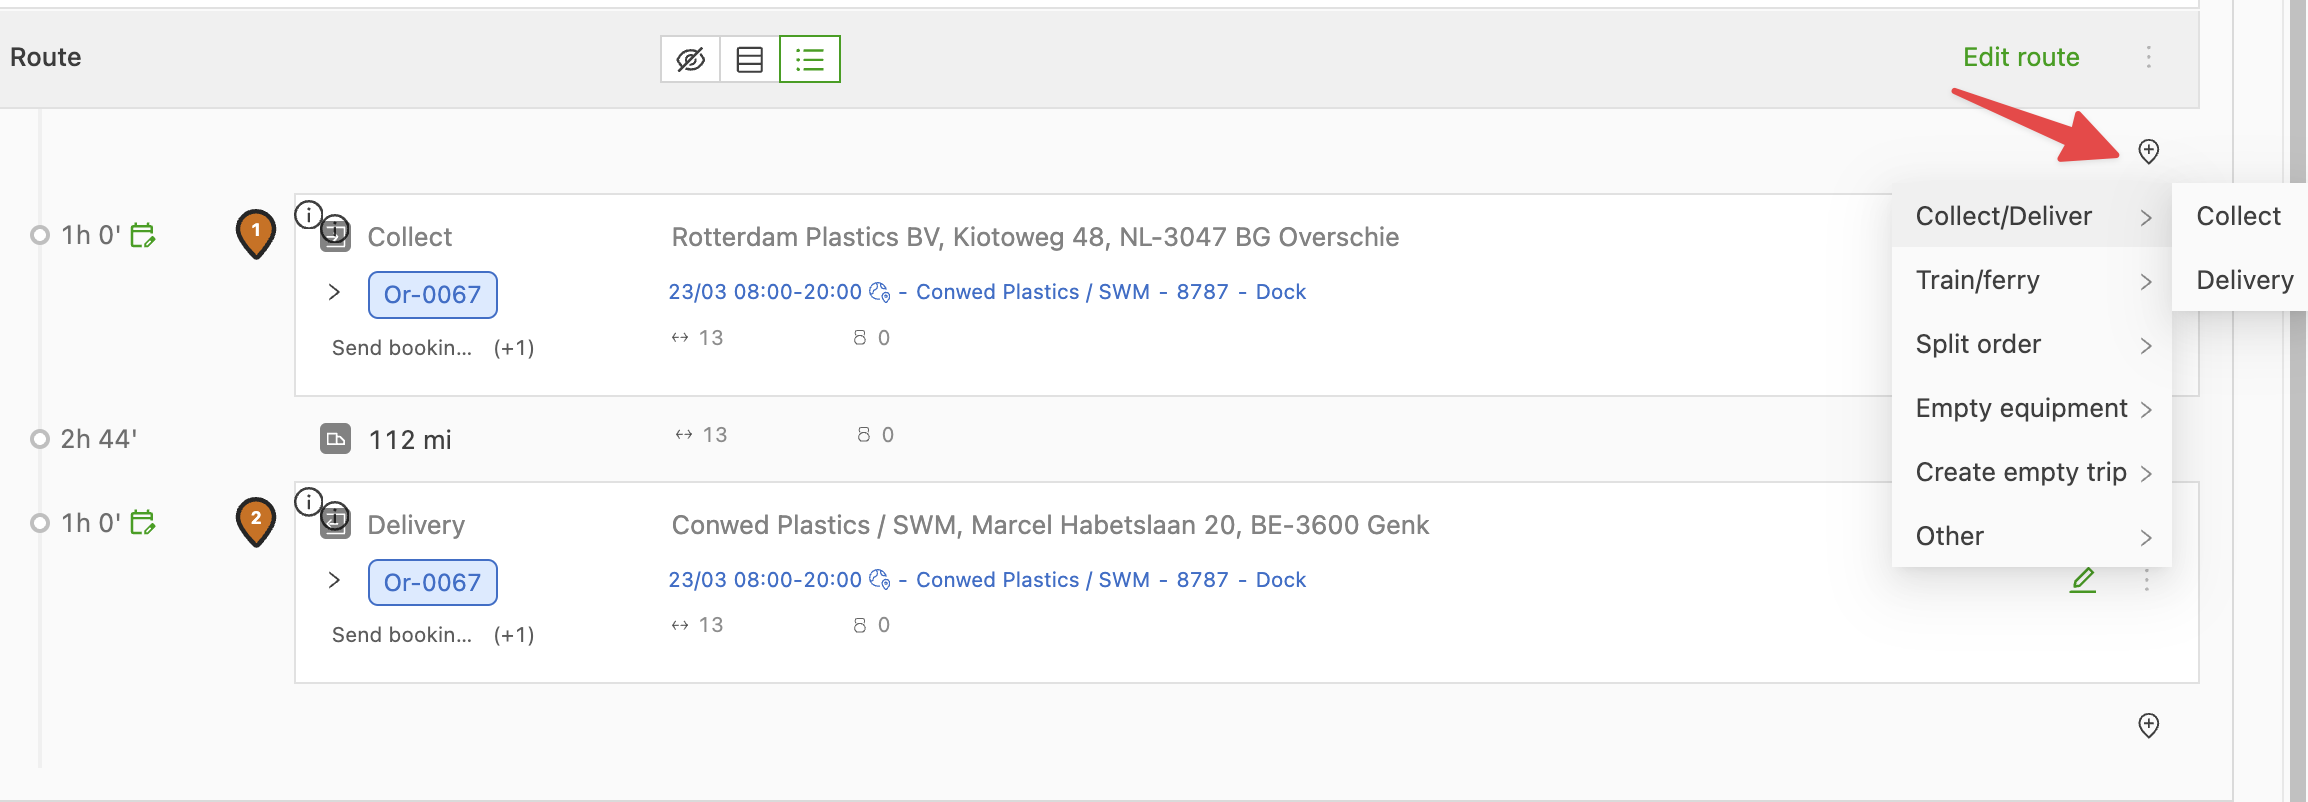
Pick up/deliver
Extra pickup and delivery locations can be added. There are also other ways to add an extra pickup or delivery stop.
Train/ferry
Used for intermodal locations for ferry and train transport.
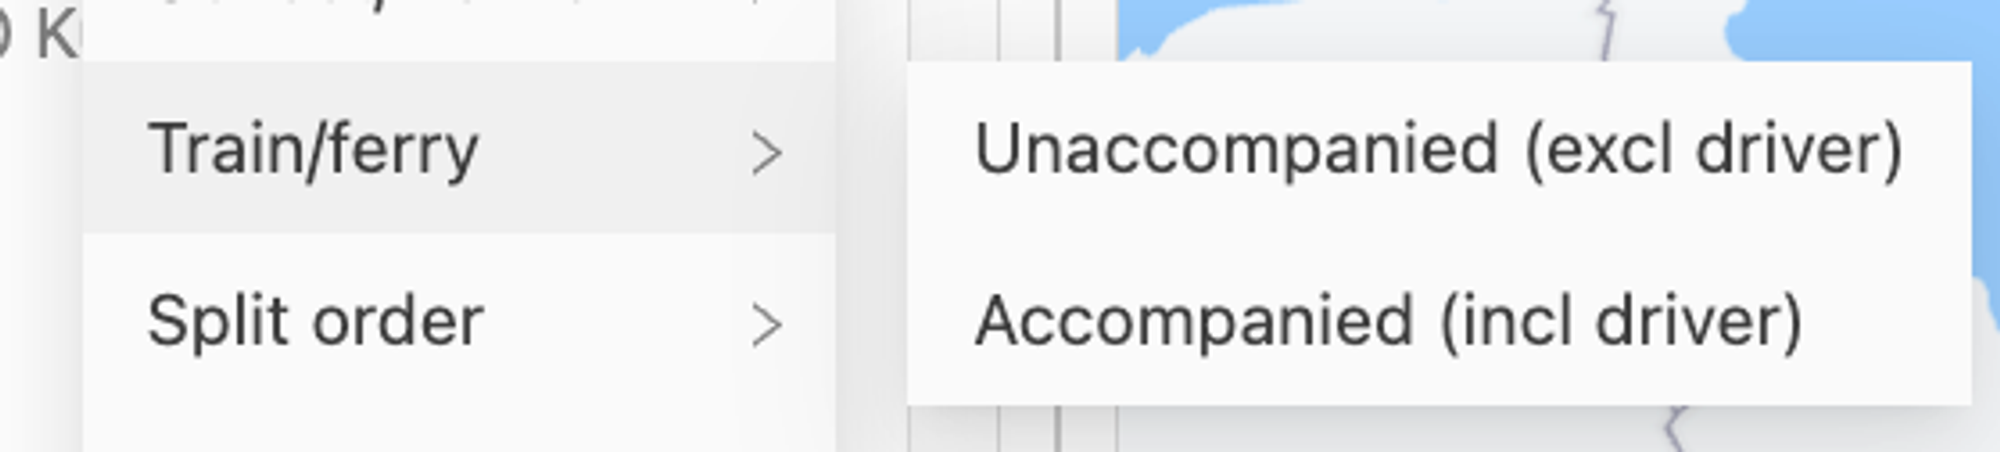
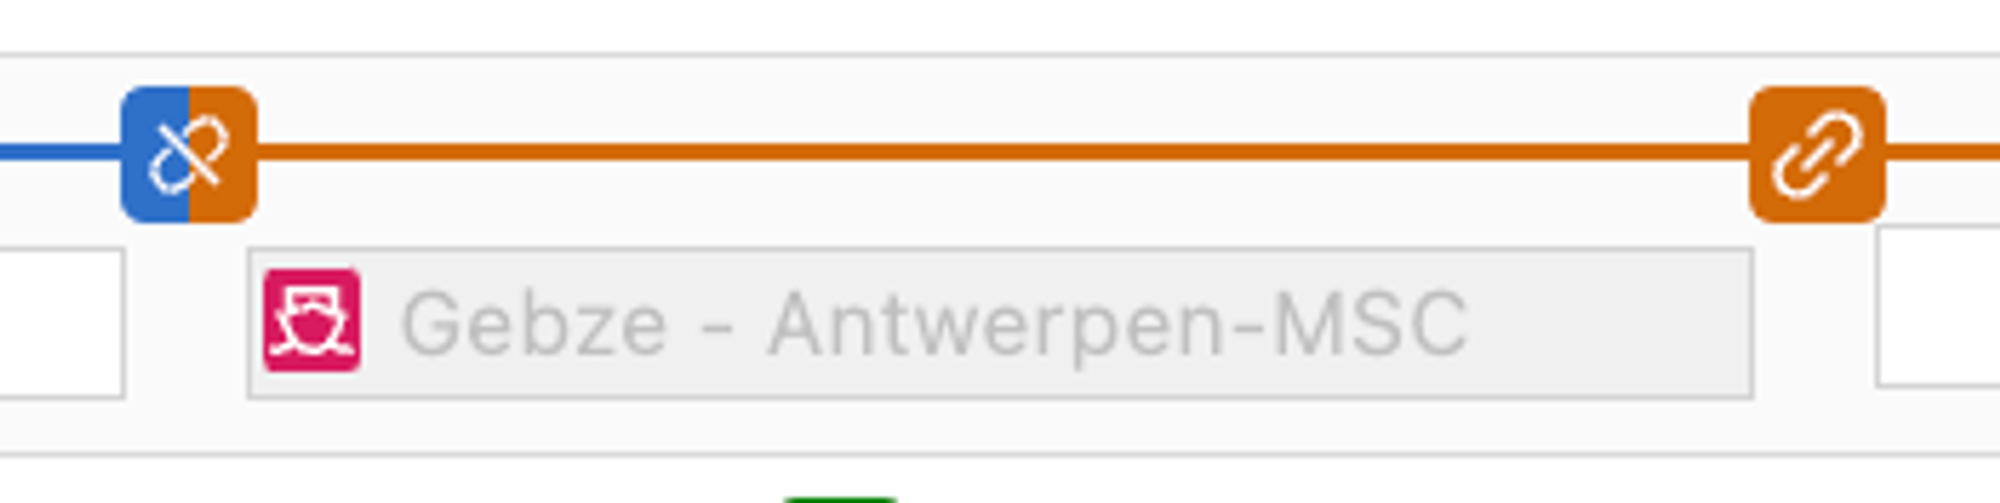
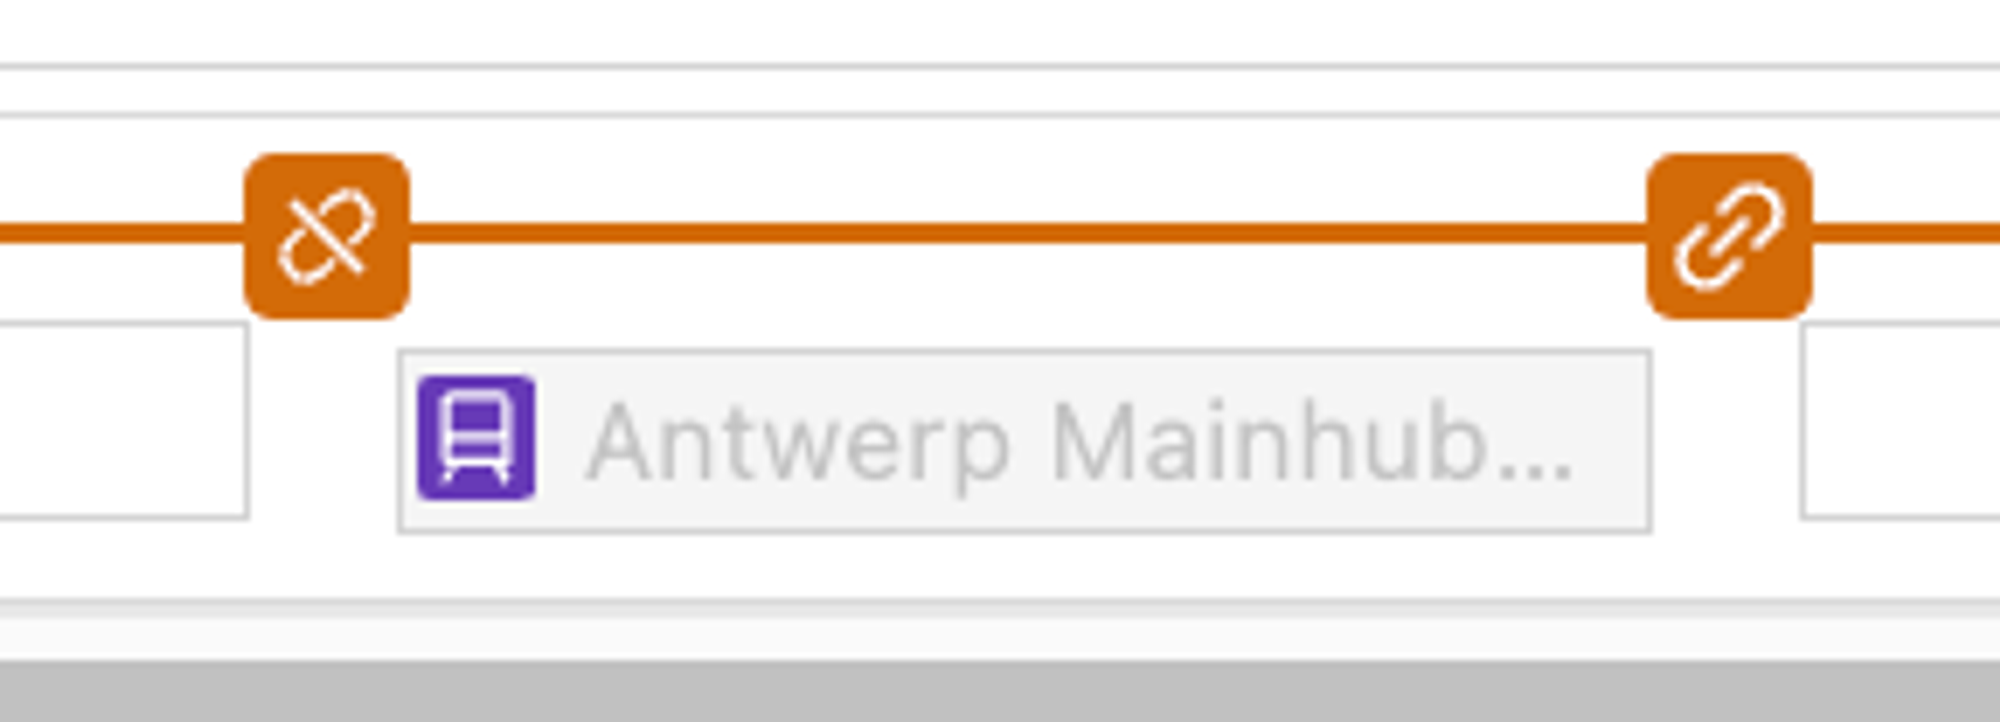
Once this option is selected, an intermodal connection that has already been configured can be added:
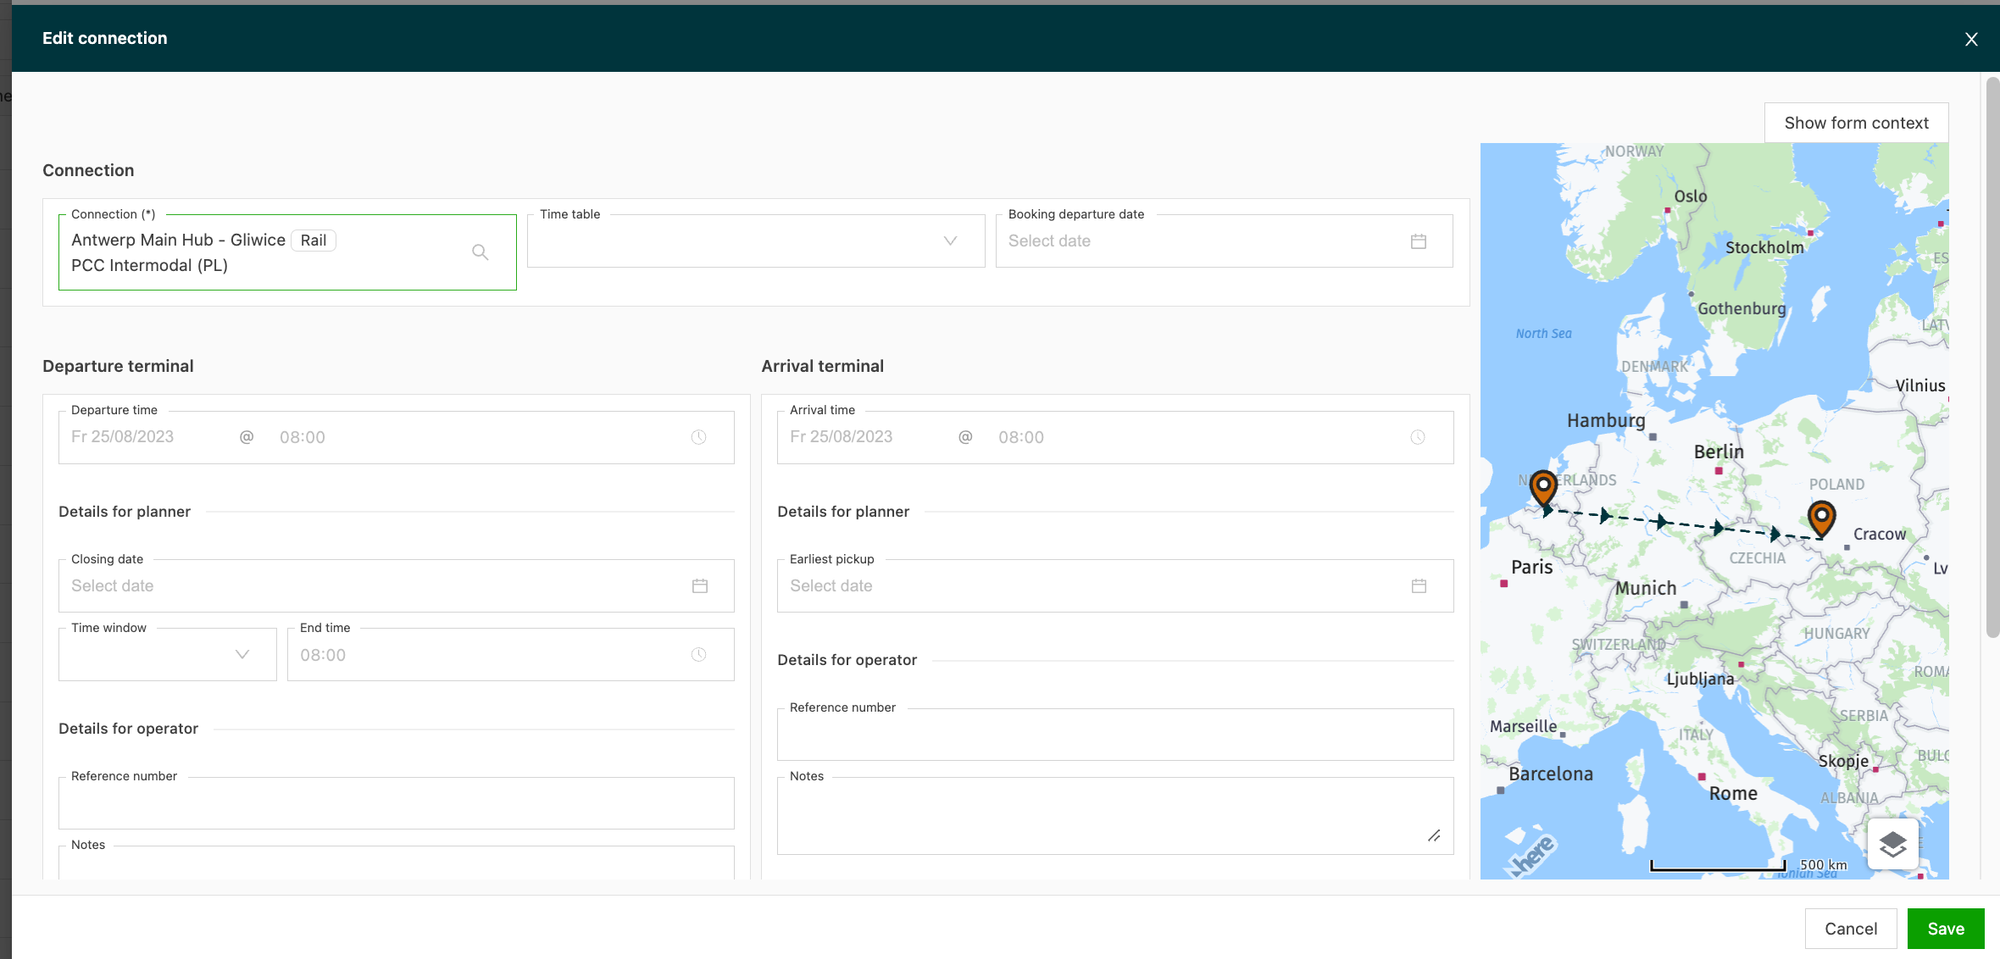
Note: An order cannot start or end with an intermodal connection. For this reason, this option cannot be selected as the first or last stop.
If the intermodal location is not in the list, it is possible to create an intermodal operator.
Split order
When orders need to be consolidated at a terminal, this stop must be added to the order. It can be added before or after dispatch, provided the delivery of the load has not been completed. This is called a ‘split order’, because the order is ‘split’ at a terminal location.
The “Split order” option is used to split the order and create a separate planned load. Different actions are possible there, for example:
- Terminal: unload + load goods
- Terminal: drop + pick up container
- Parking: drop + hook trailer
- Parking: drop + hook chassis
- End + start day
Add a split to an order:
To split an order, use the ’+ icon’ linked to the route on the order.
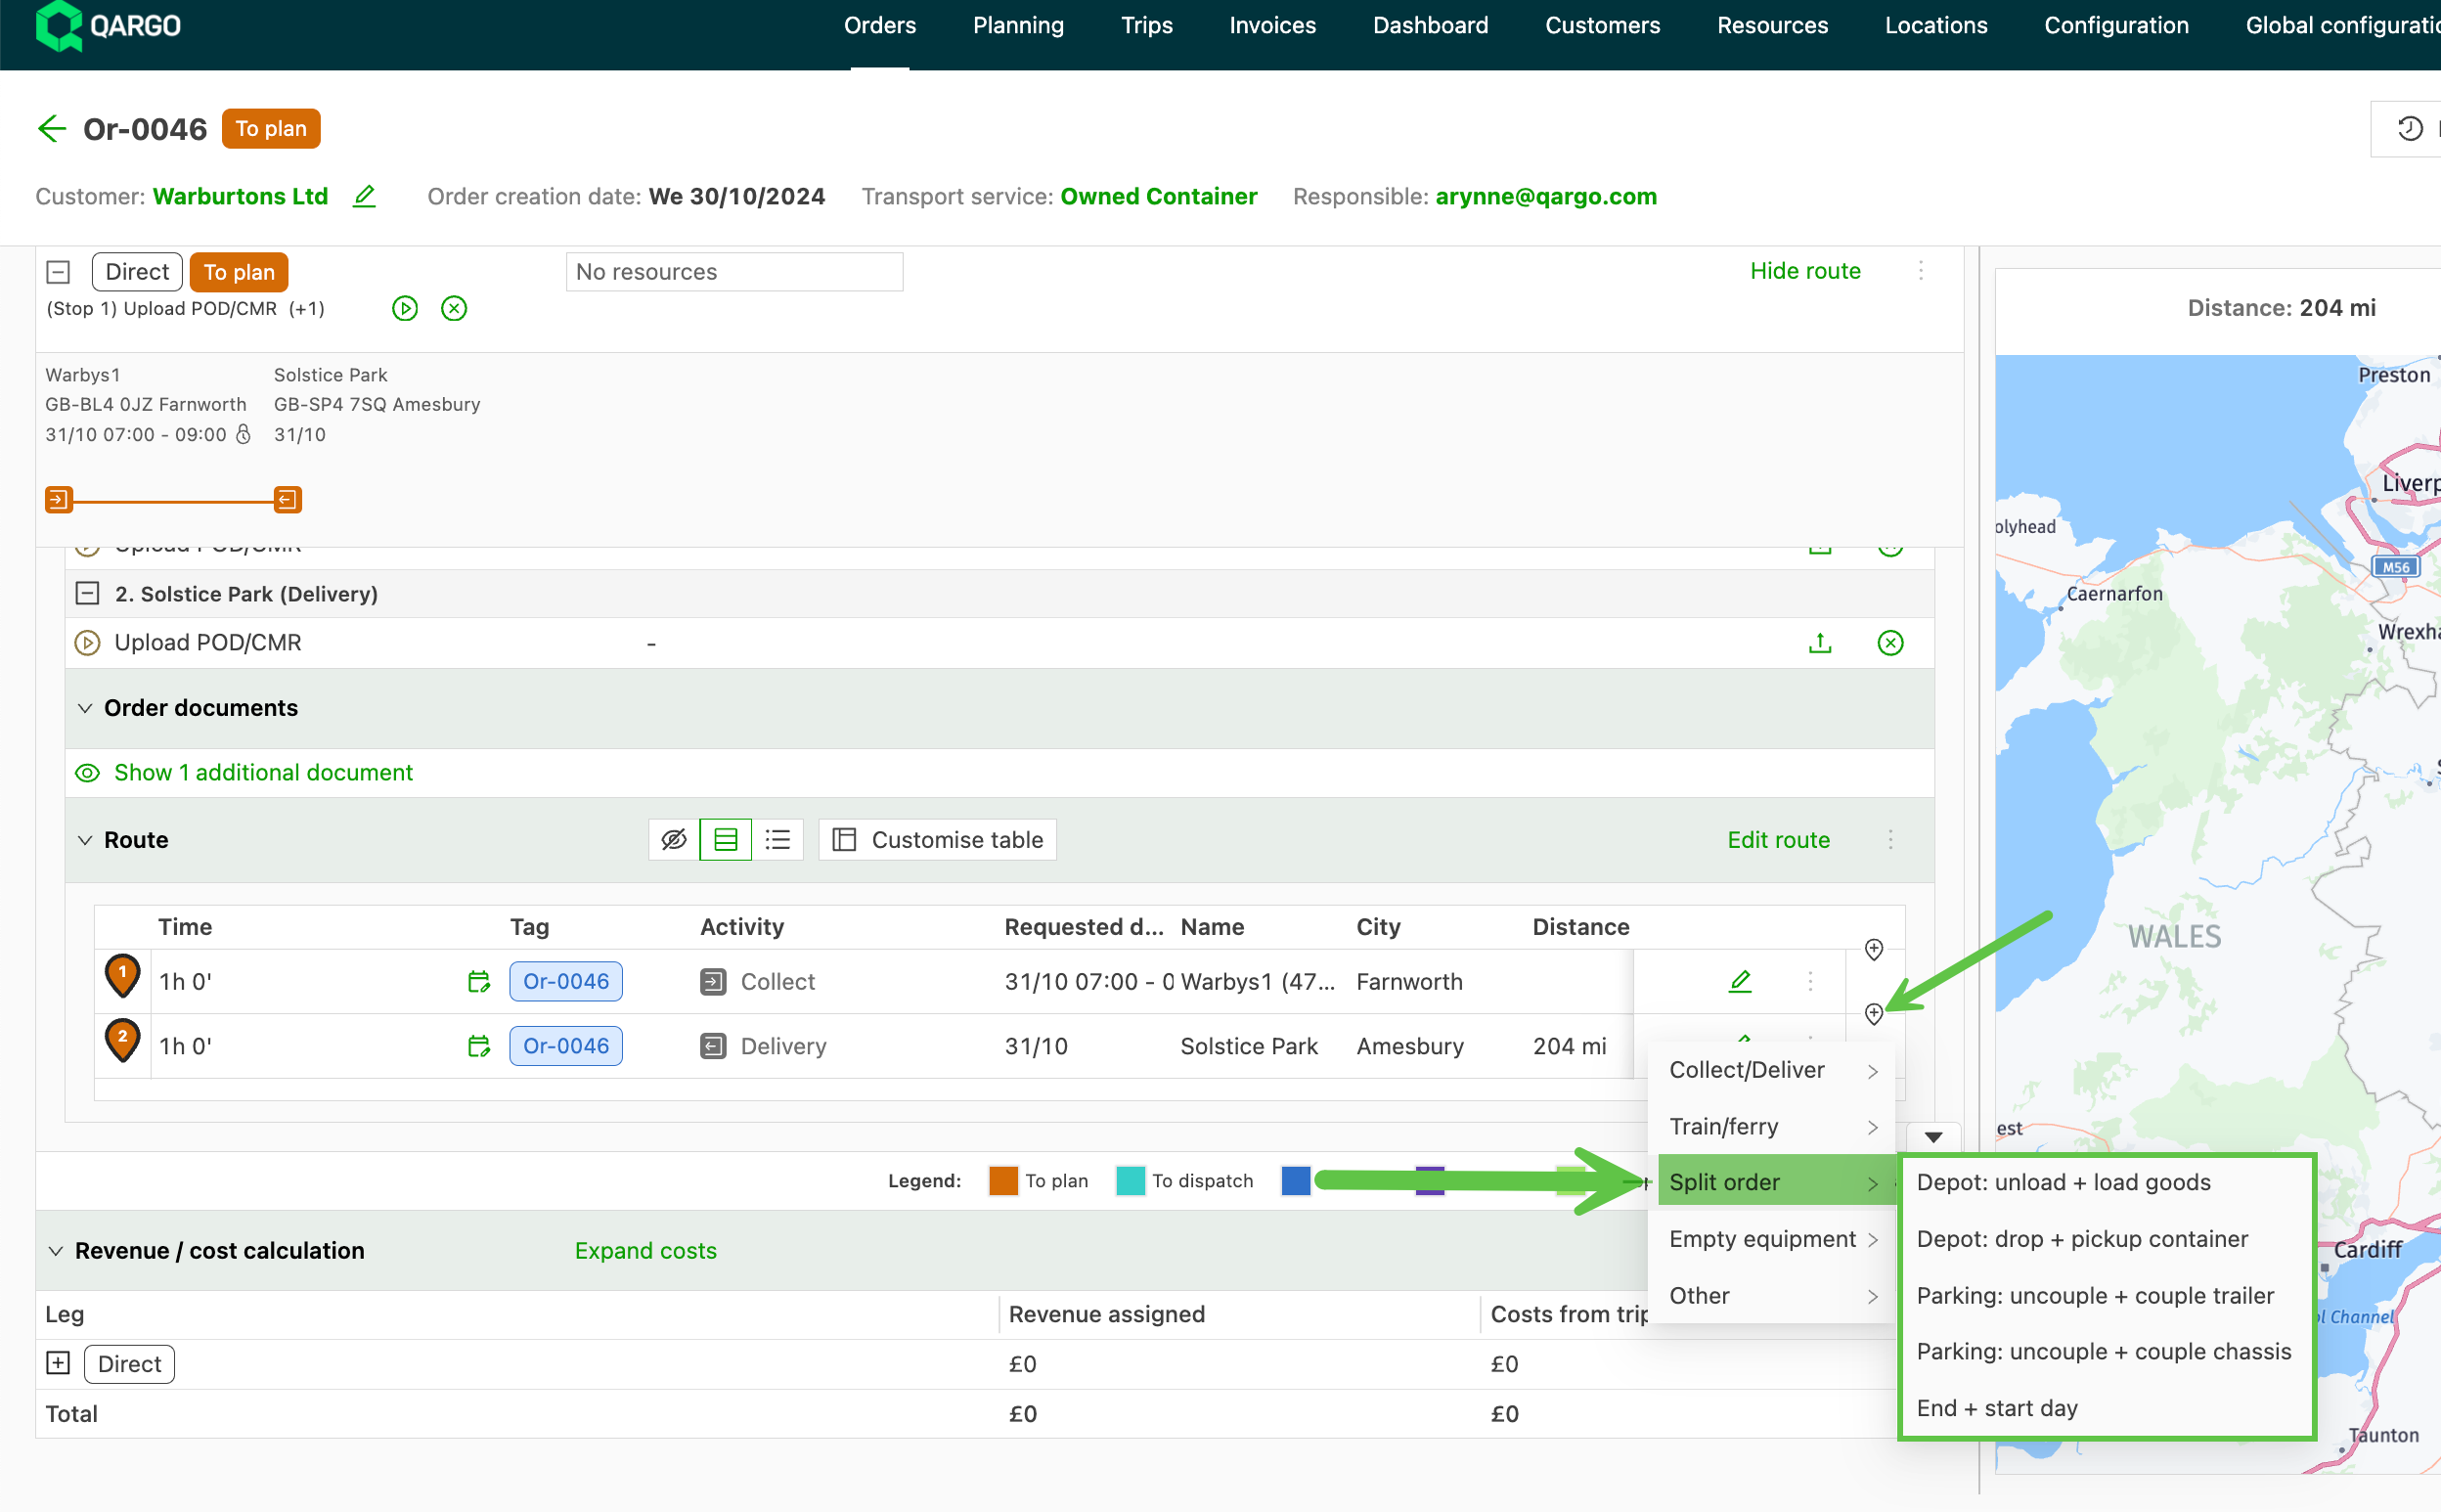
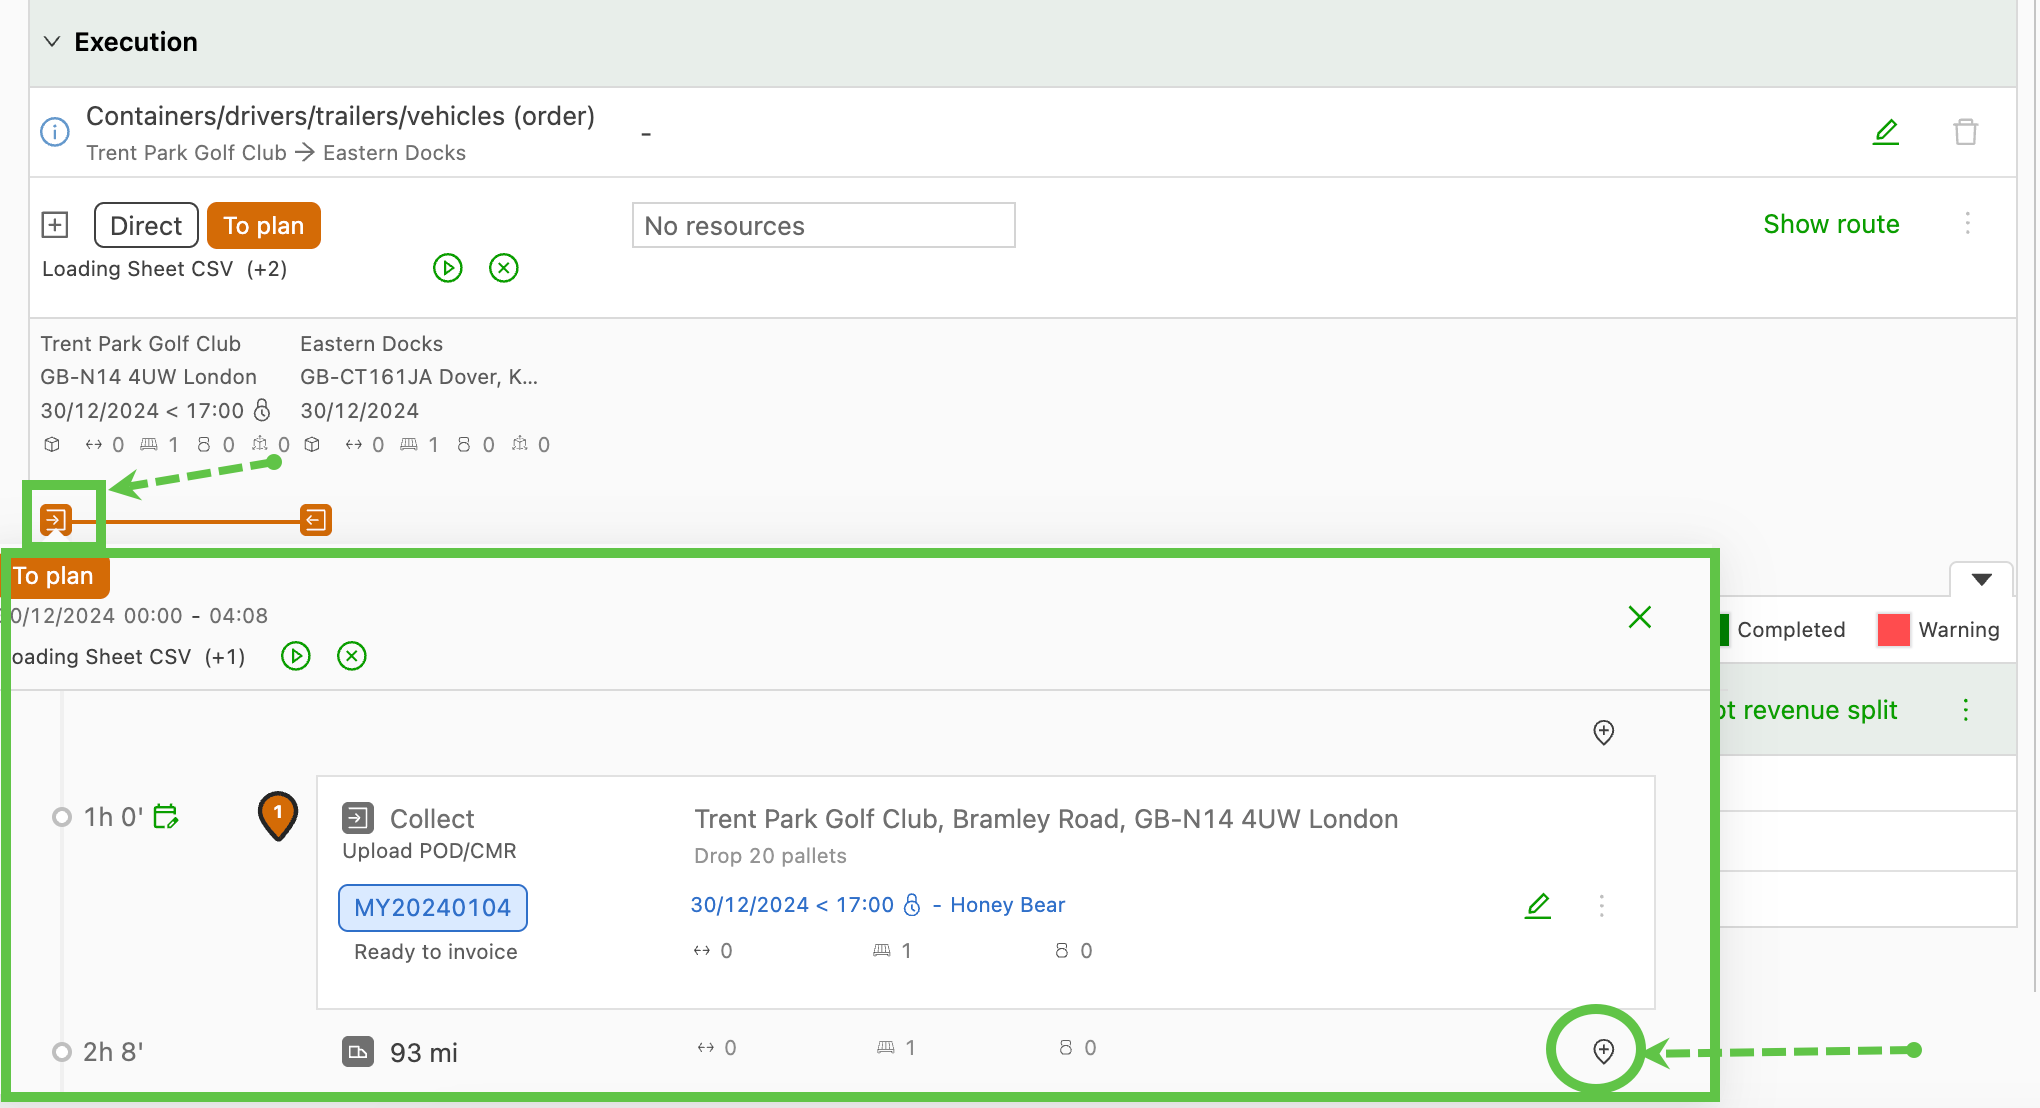
Click the icon to add the split. The example below adds a terminal stop:
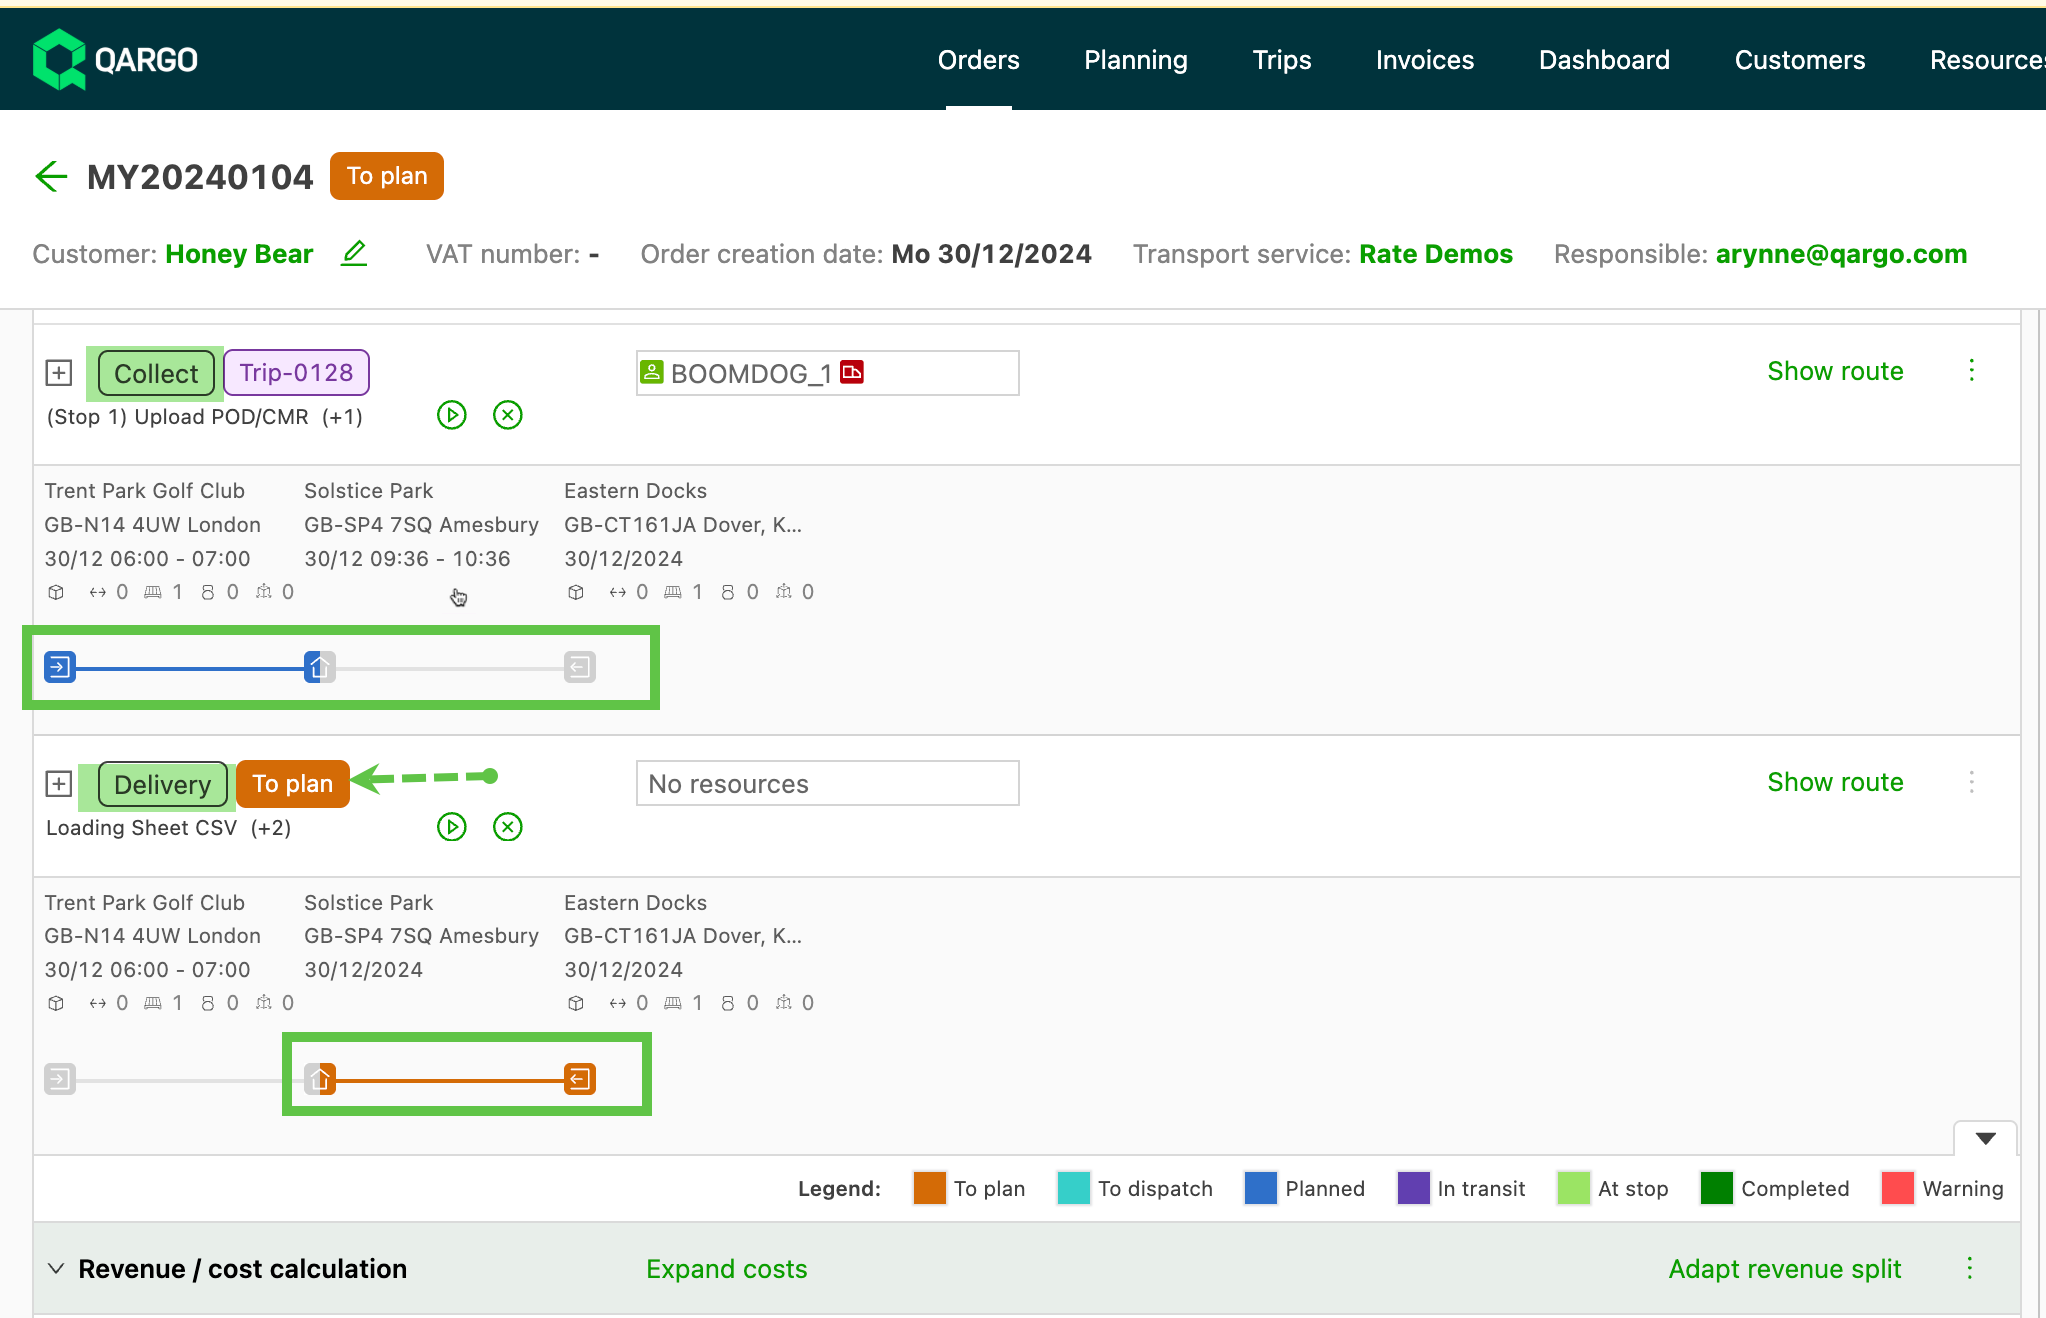
Once a split has been added to the order, the order is divided into legs:
- Pickup: Pickup - Terminal
- Delivery: Terminal - Delivery
If the order was dispatched before the split, only the first leg (pickup) remains dispatched to the resource. The second leg (delivery) is set to a ‘To plan’ status. This allows another resource to be planned on the load. The same resource can still be dispatched on the delivery leg if required.
Remove a split:
If an order has a split that is no longer required, it can be removed in a few clicks.
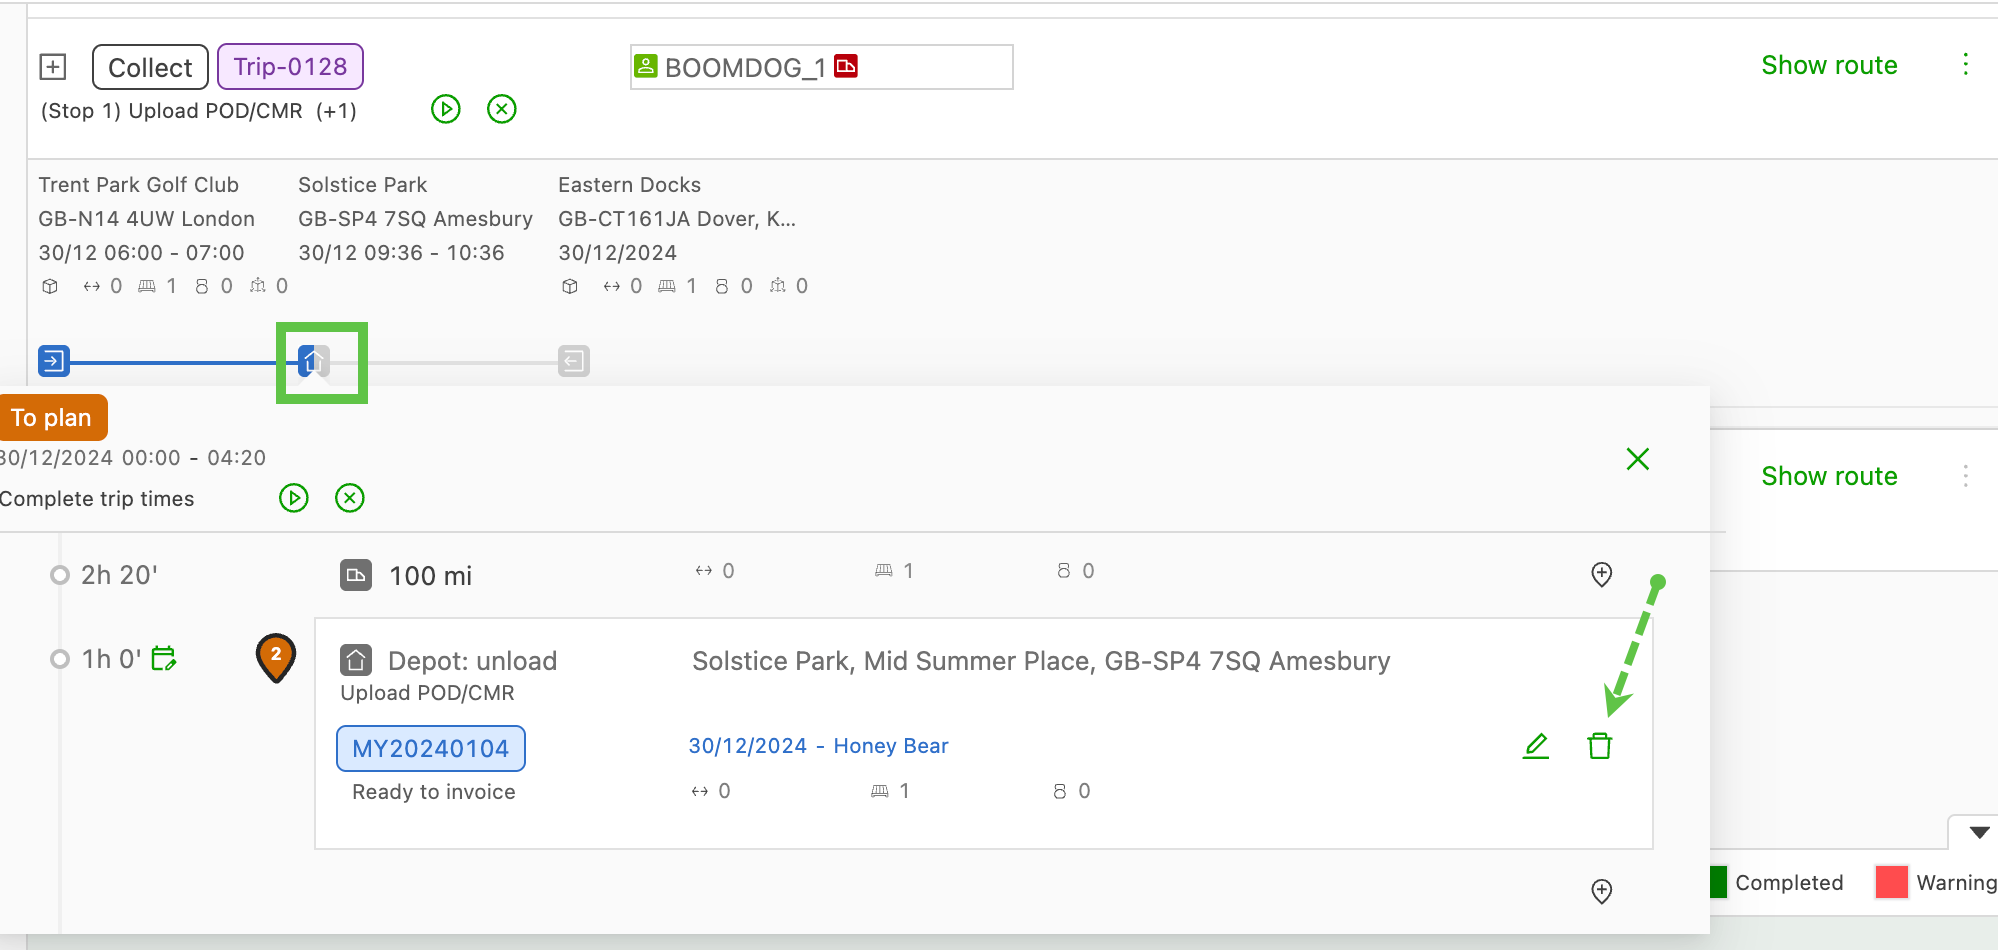
Using the same ’+ icon’, click the terminal stop in the route. This opens the summary window for the stop. Click the ‘Trash’ icon to remove the stop.
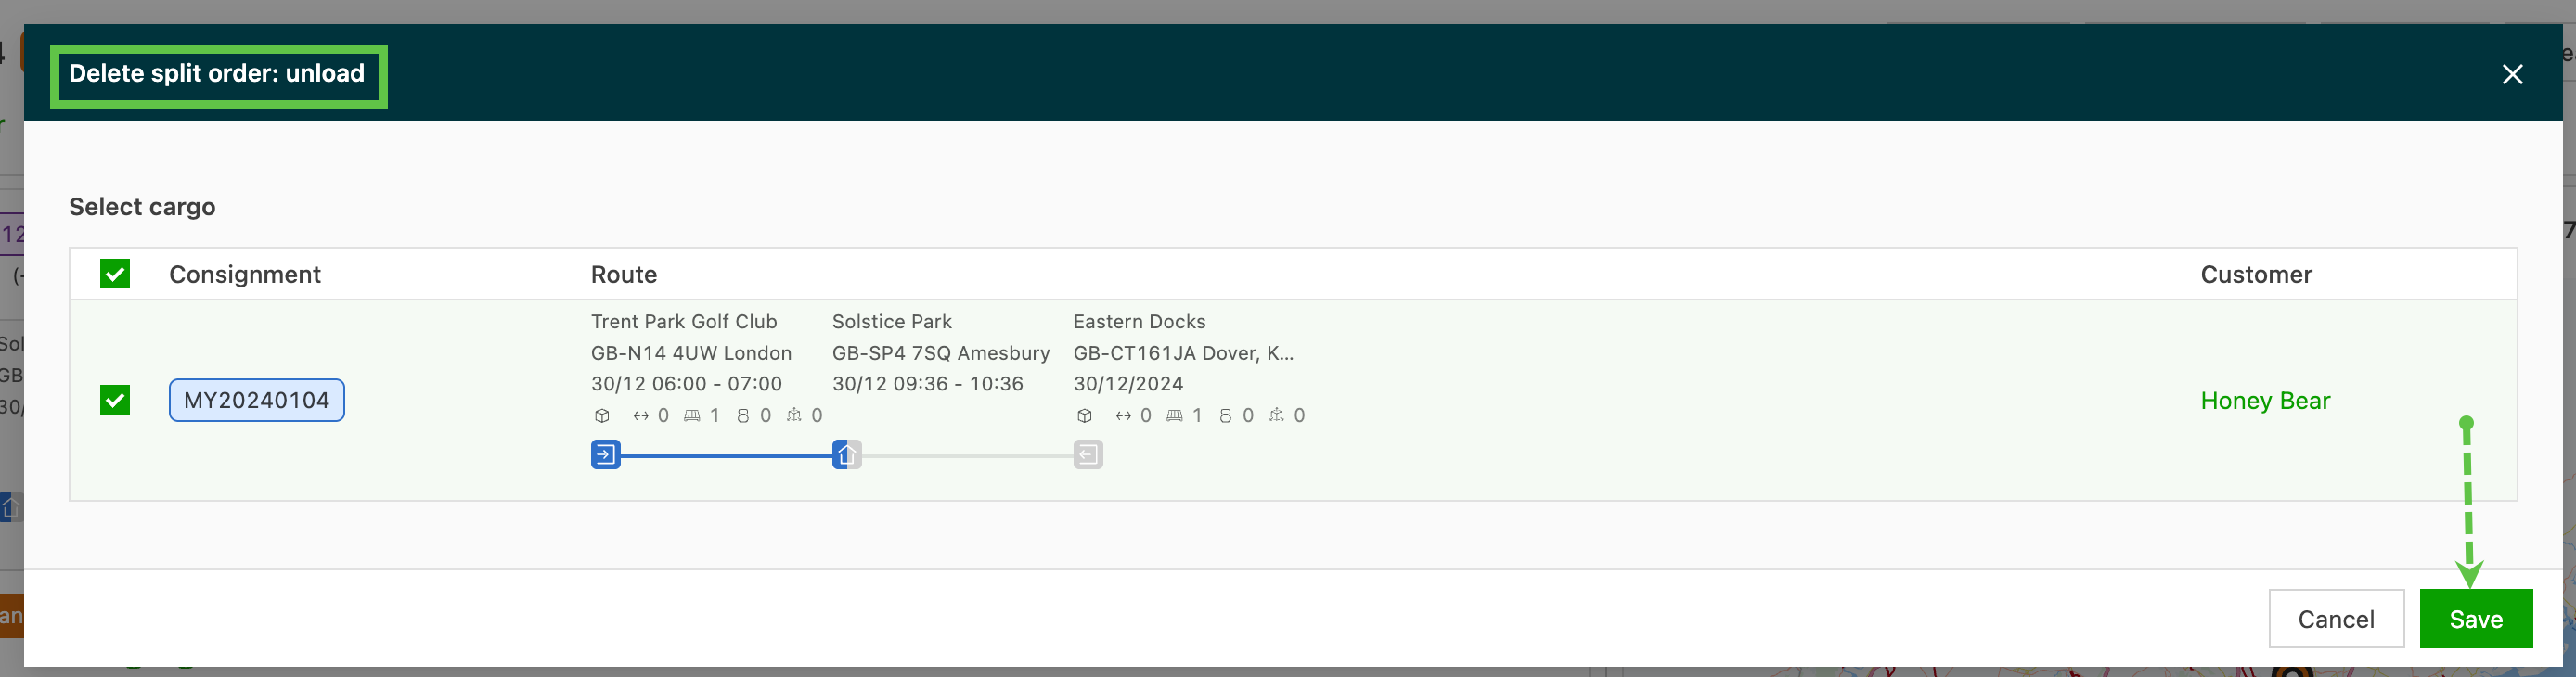
This opens the new Delete split order window. Select the shipment (or all of them, if removing the split entirely) and save.
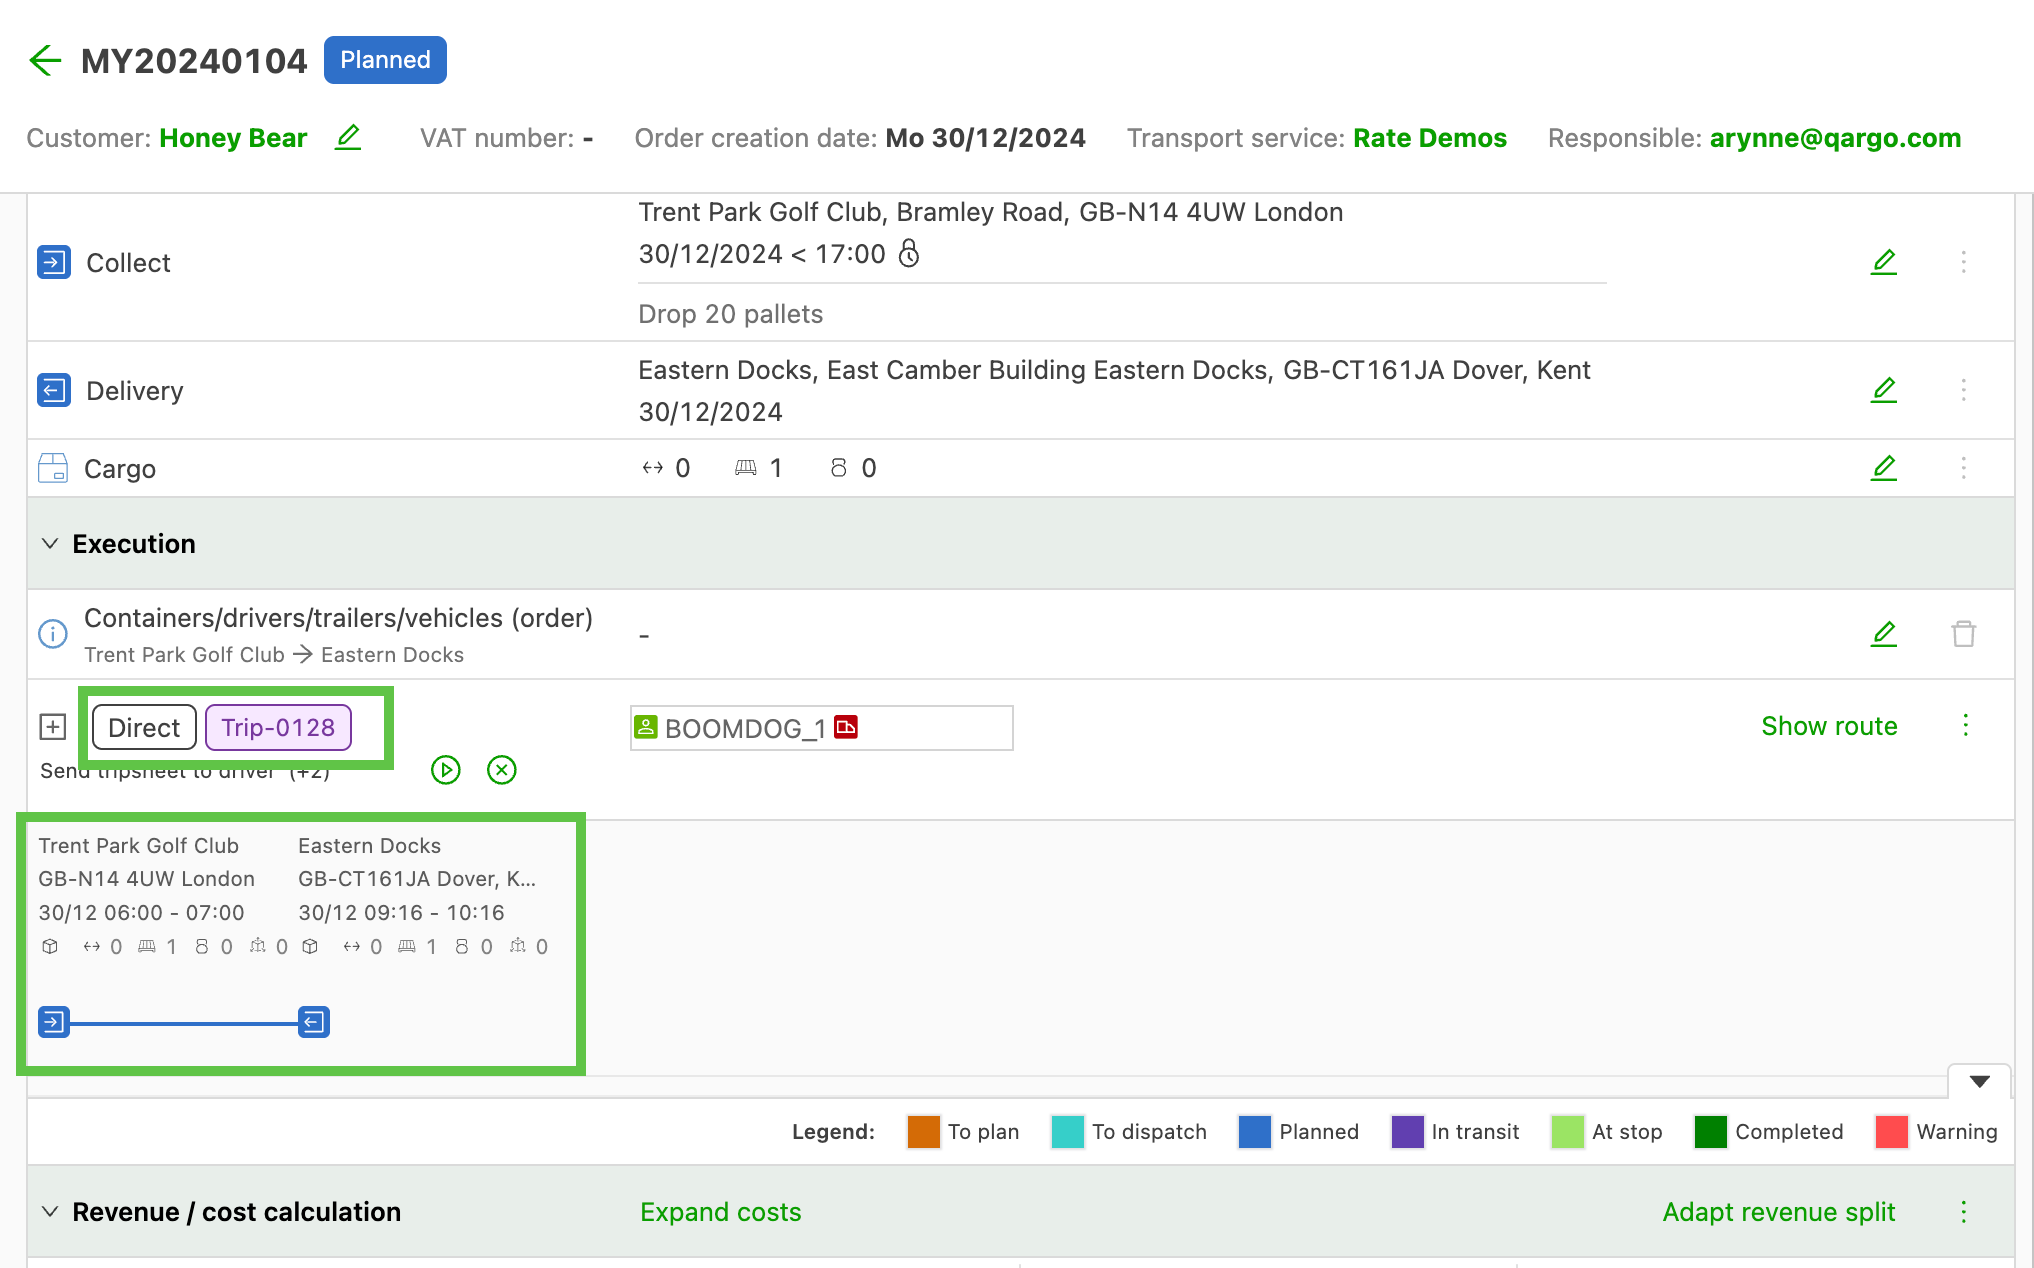
The split is removed. In the example below, the pickup leg was already planned, so the direct load remains in a planned status. If no load had been planned yet, the status would revert to ‘To plan’.
Empty equipment
Used for actions such as hooking or dropping trailers, or picking up or dropping containers, depending on the transportation service used.
Other
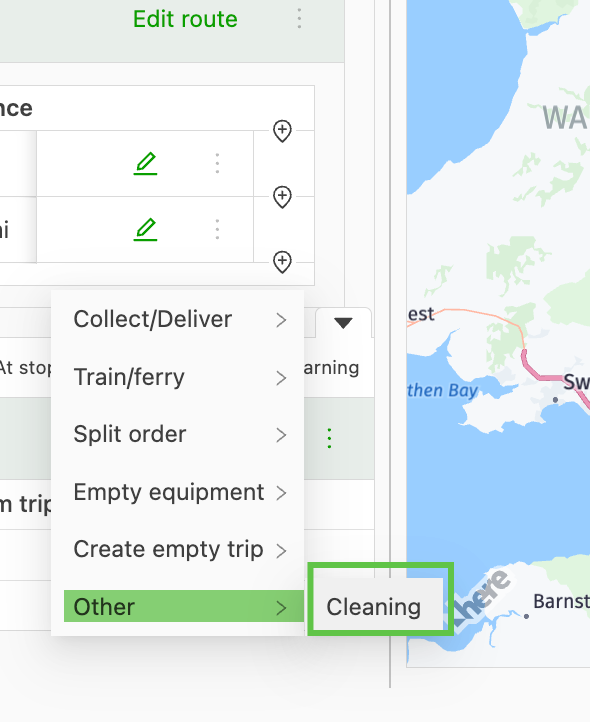
If applicable, a company can choose to configure other stop actions in Locations. These actions are then shown in the “Other” dropdown menu.
To include an intermediate stop (e.g., for refueling, using a weighbridge, or other needs), follow these steps:
- Go to Locations > Internal stop actions.
- Select Add stop action.
- Create a new stop action that describes the activity (e.g., “Refuel stop” or “Custom stop”).
- When planning a delivery job, choose this stop action under the Other category to designate it as an intermediate stop.
This ensures efficient route management tailored to operational needs.
Details of extra stop
When an option is selected, all necessary information must be filled in, such as the location, the date and the status of the stop.
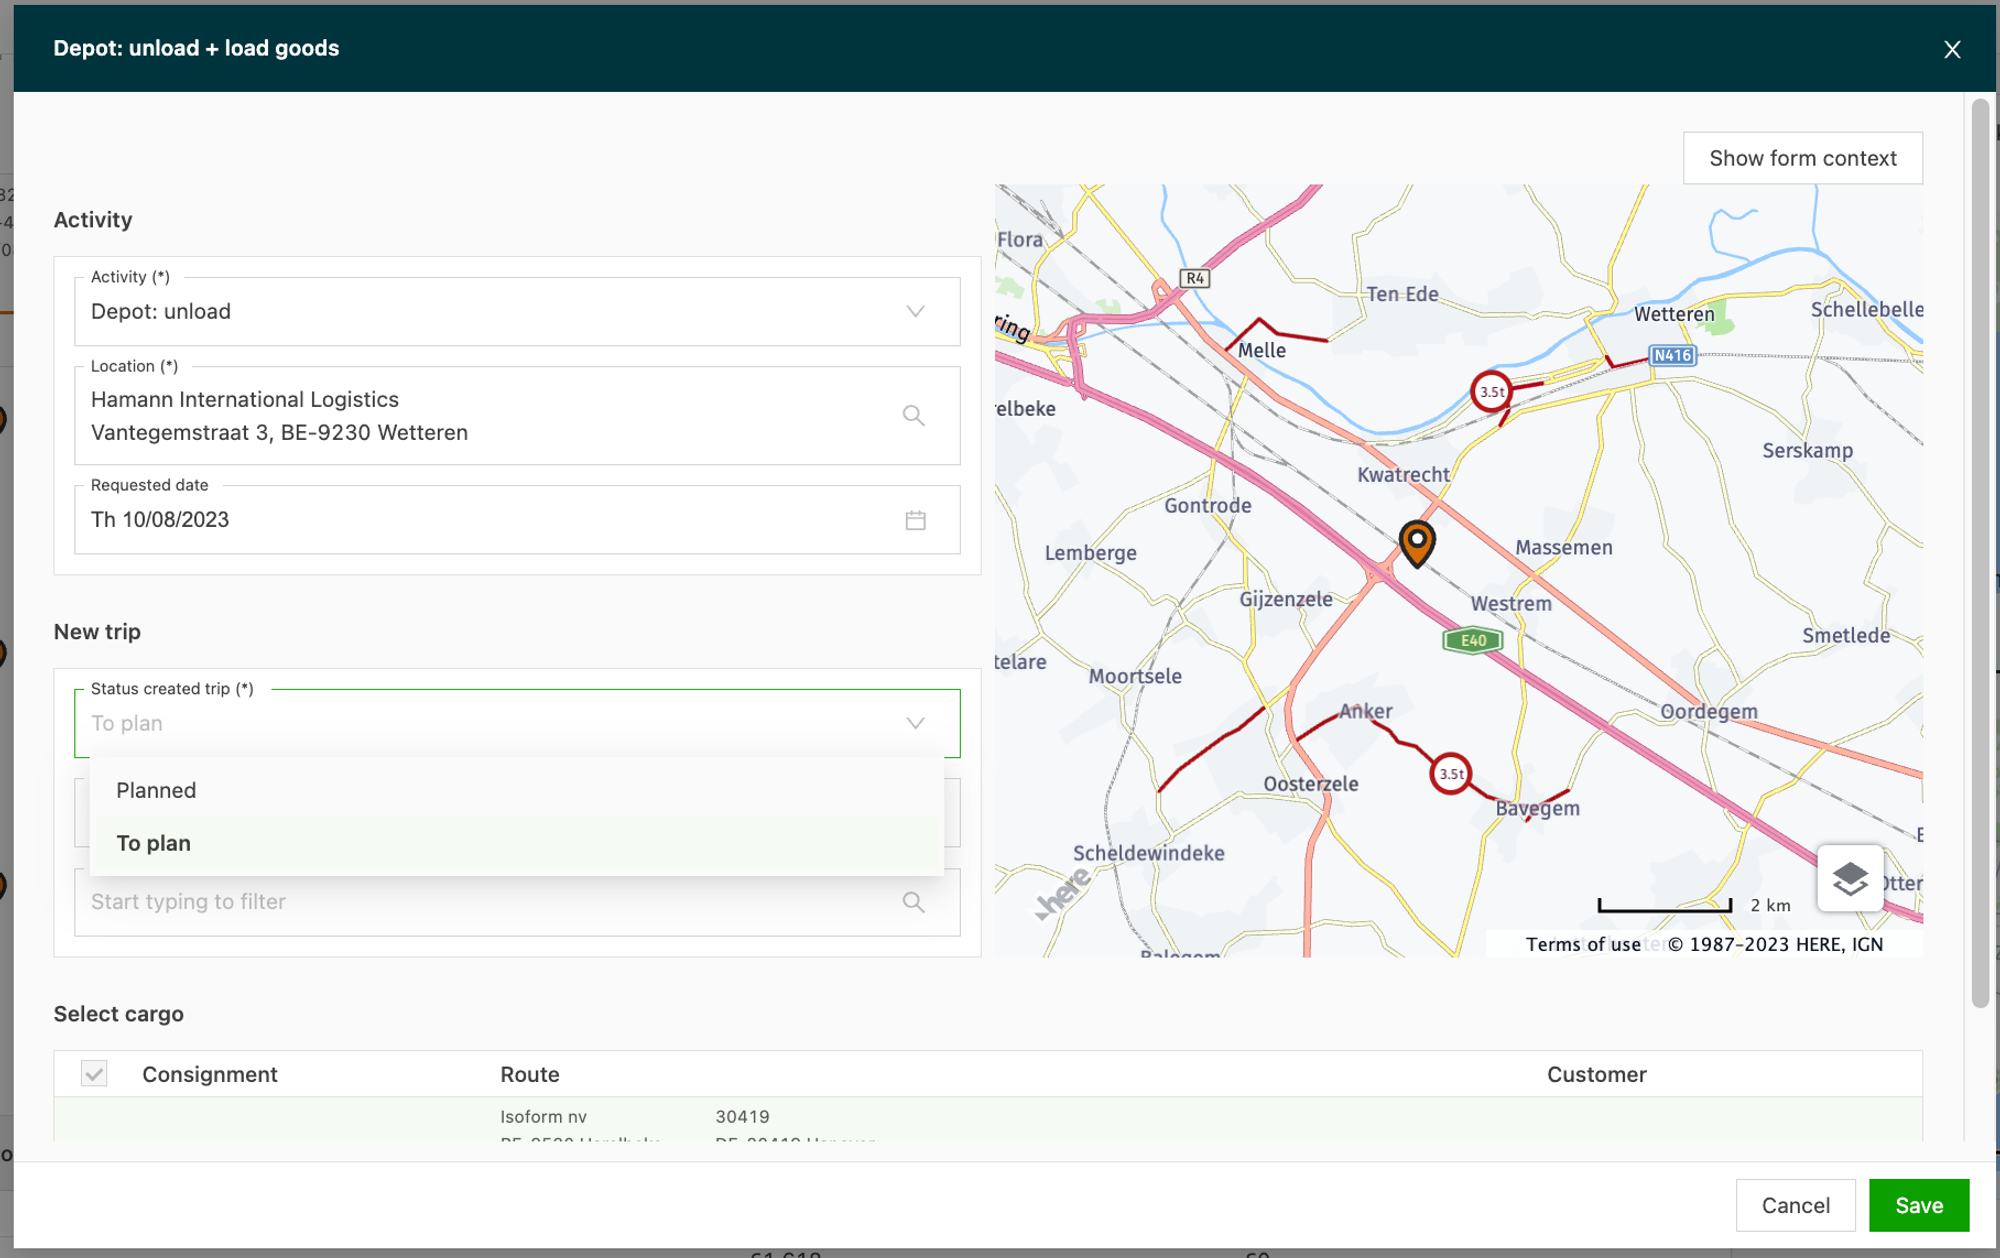
Note: If the selected location does not exist yet when filling in the details below, it is possible to create a location.
Edit the order of a stop
Once a stop has been added, the order of stops can still be edited if required.
Standalone stops (Owned/Seacontainers only)
If the selected transportation service is Owned or SeaContainer, standalone stops can be added during order creation. These can be used for standalone stops that may be billable, such as customs clearances.

Users can add custom stops to the shipment and define where in the load the stop should be added:
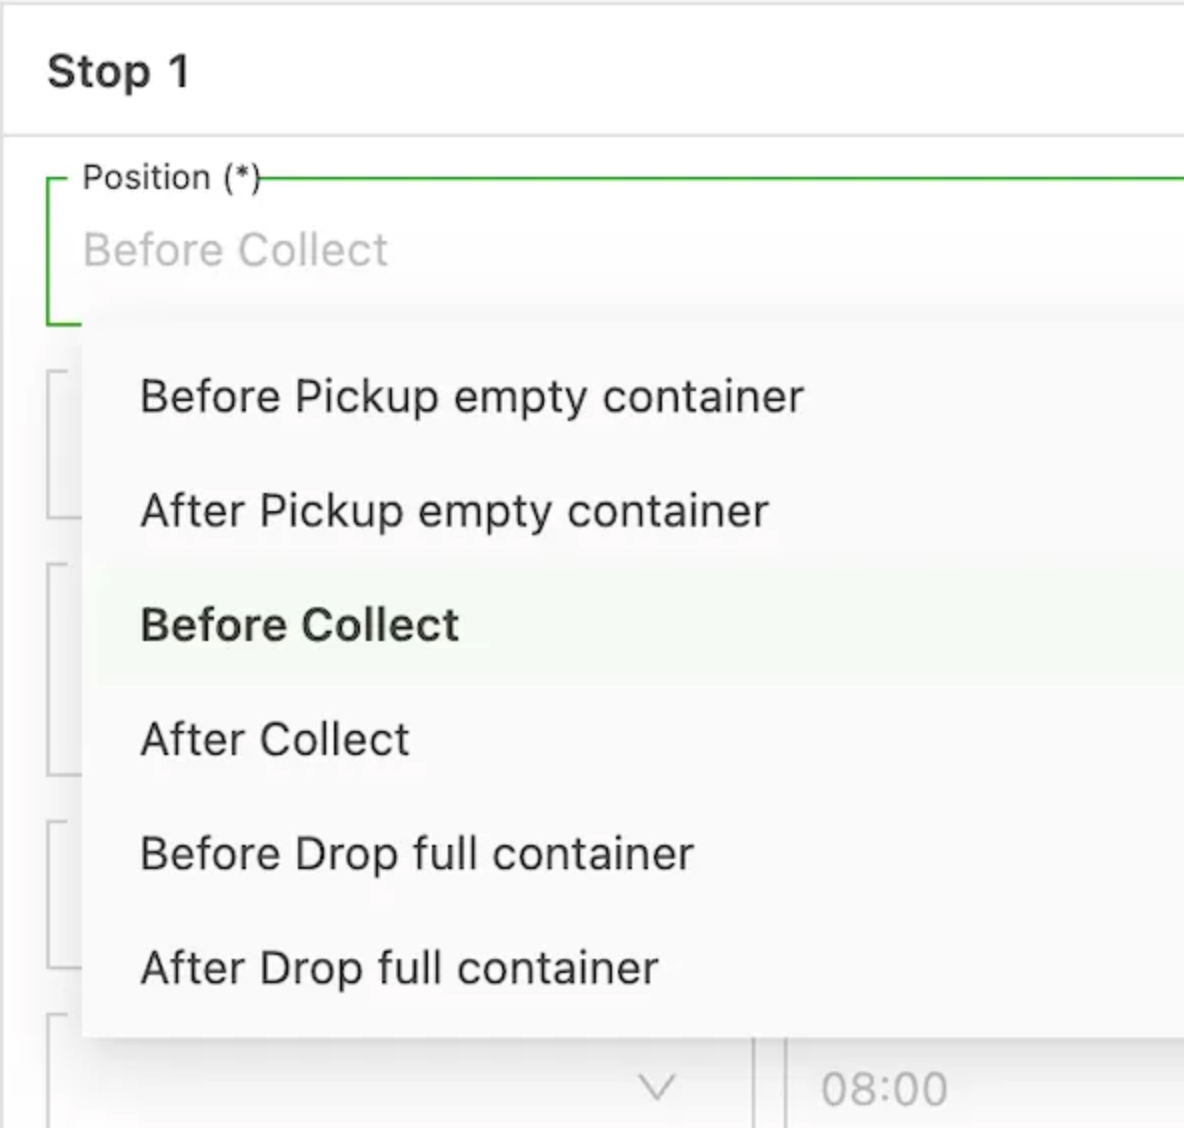
Multiple stops can be added to the shipment. Please note, this feature has some limitations.
- Only applicable to container orders (Owned / Seacontainer)
- Not applicable to transport network orders
- Not compatible with creating multiple legs, i.e.: drop chassis with container
Add activities in bulk
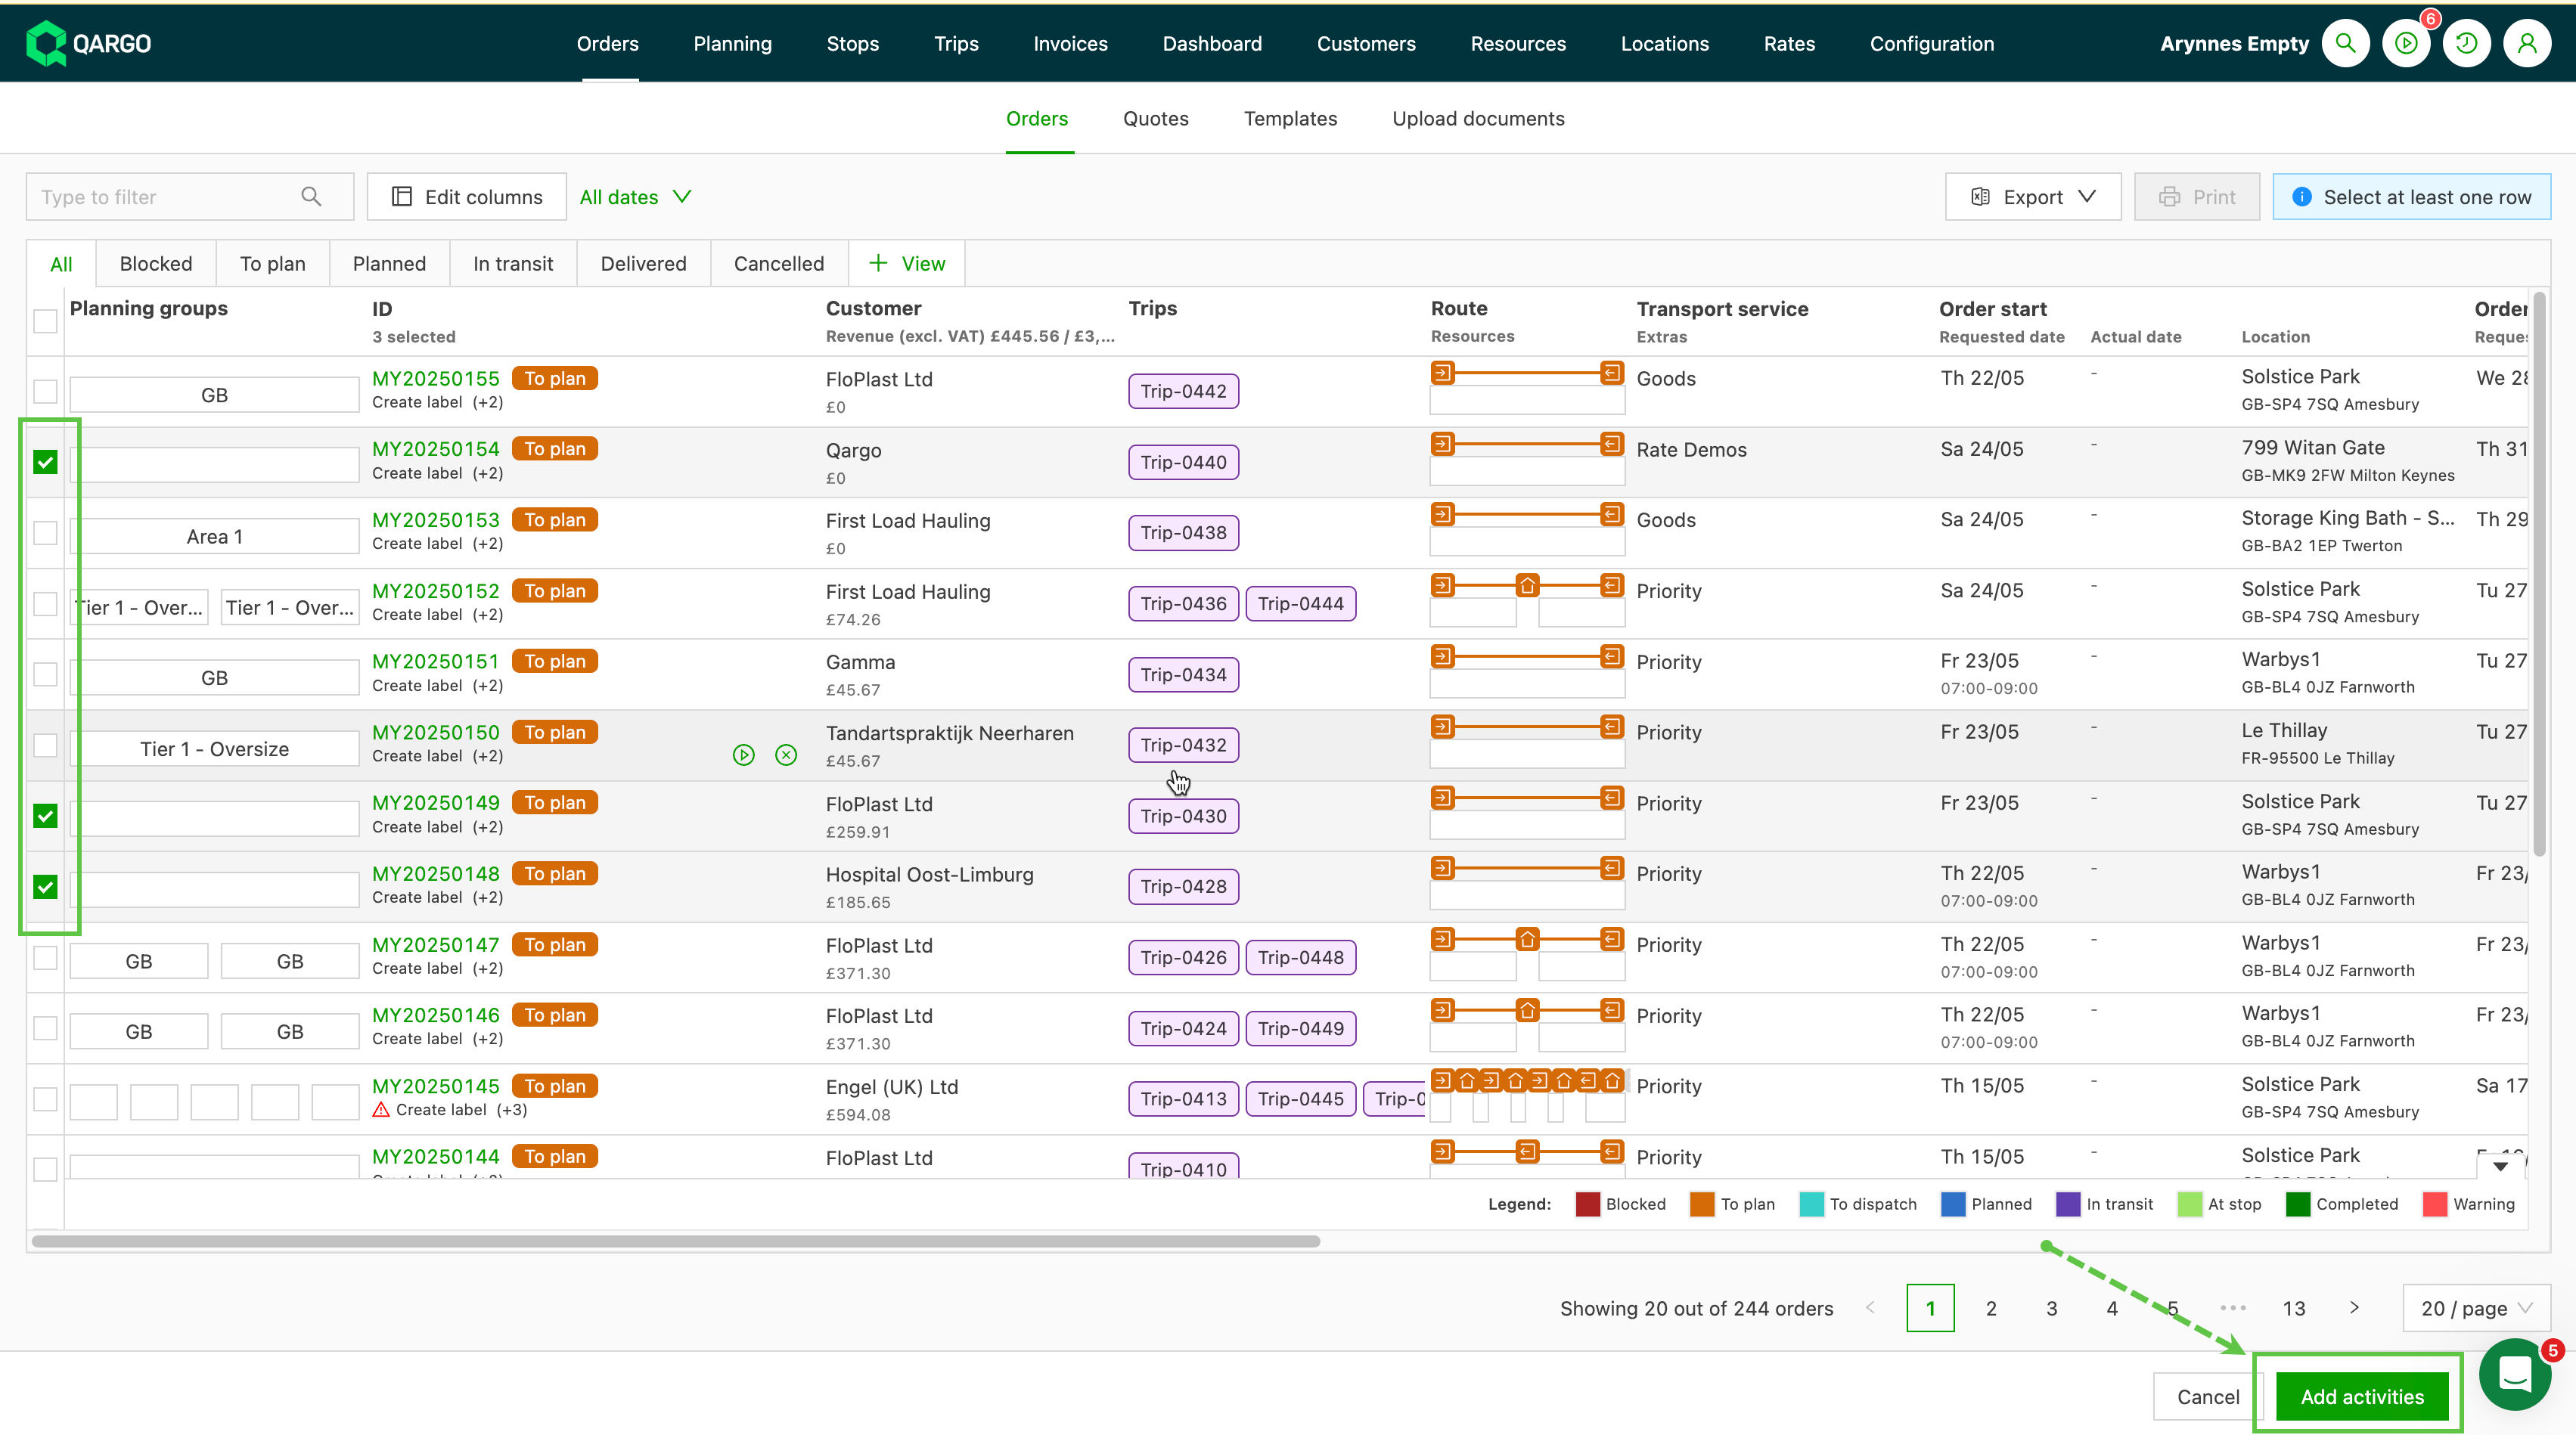
Users now have a new option under ‘Quick actions’ to add extra stops or split loads in bulk.
When an order has multiple shipments, the way the stop is added depends on the type of stop being added:
- Intermodal stops: The stop is added per order. When intermodal stops are added in bulk, the stop is added only once to the order, regardless of the number of loads on the order.
- Empty: Equipment/Driver: The stop is added per load. When this stop type is added in bulk, the stop is added to each load. If all shipments are merged on one load, the stop is added only once. If each shipment is on a separate load, the stop is added multiple times (once for each load).
- Split order and Other stops: The stop is added per shipment. When these stop types are added in bulk, the stop is always added to each shipment in the order.
Using the quick action
-
From the orders list page, click the quick actions function and select ‘Add activities’
-
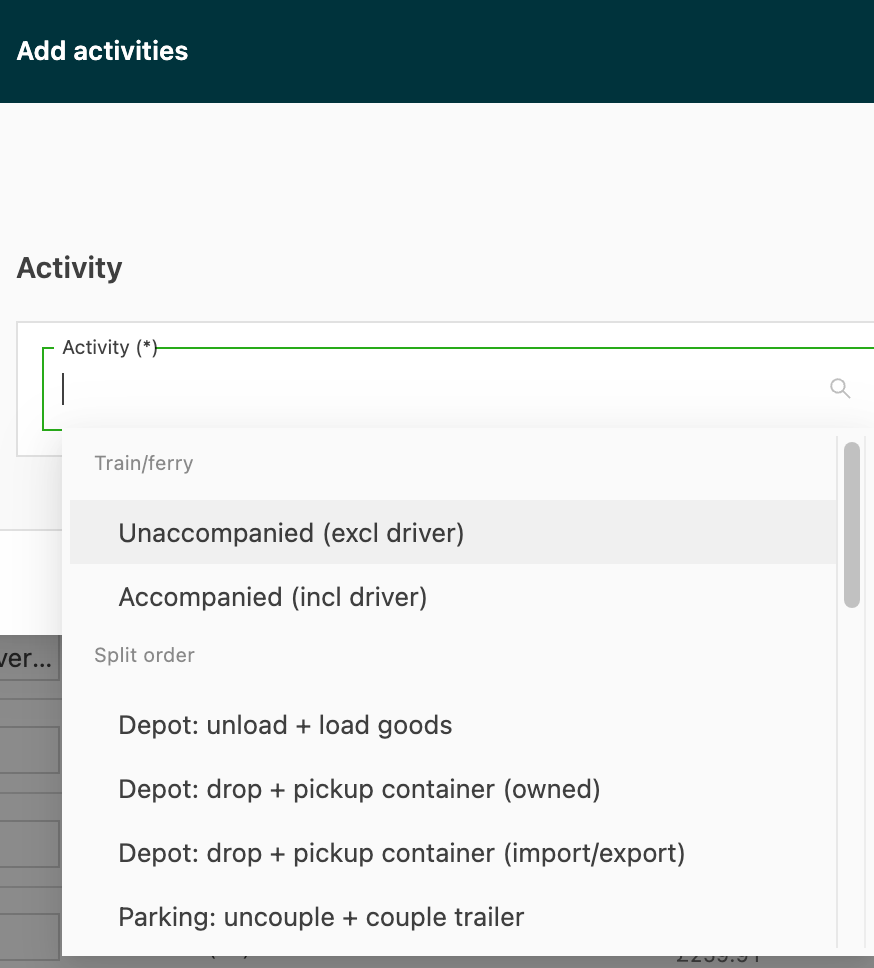
From the ‘Activity’ dropdown, select the option that applies
-
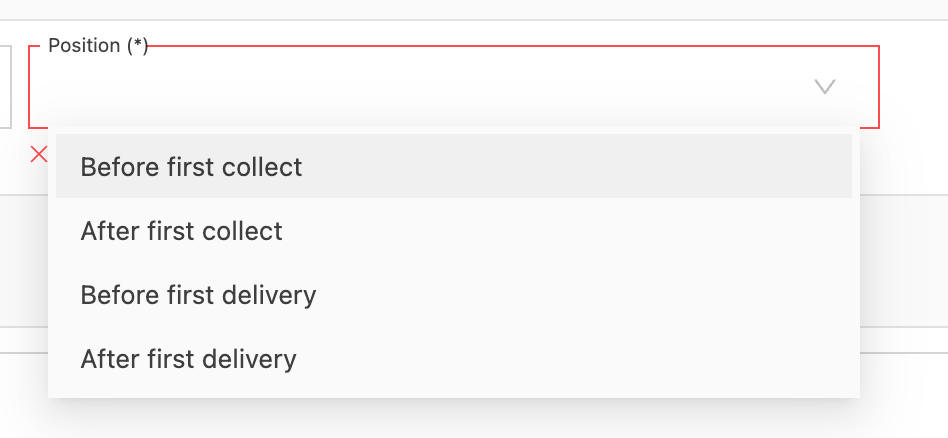
From ‘Position’, select where the new stop or split should be placed
Driver visibility after rescheduling with an incident
When a delivery job is rescheduled after an incident, the following applies:
- The Qargo driver mobile app does not display failed (incident) stops.
- Only the updated delivery stop or location is visible to the driver.
- Incident-related data is automatically recorded in the order for back-office and billing purposes.
- An incident stop does not need to be marked as completed, as it is already recorded as a failed stop in the system.
By keeping the driver’s view simple, Qargo improves focus and reduces potential confusion.
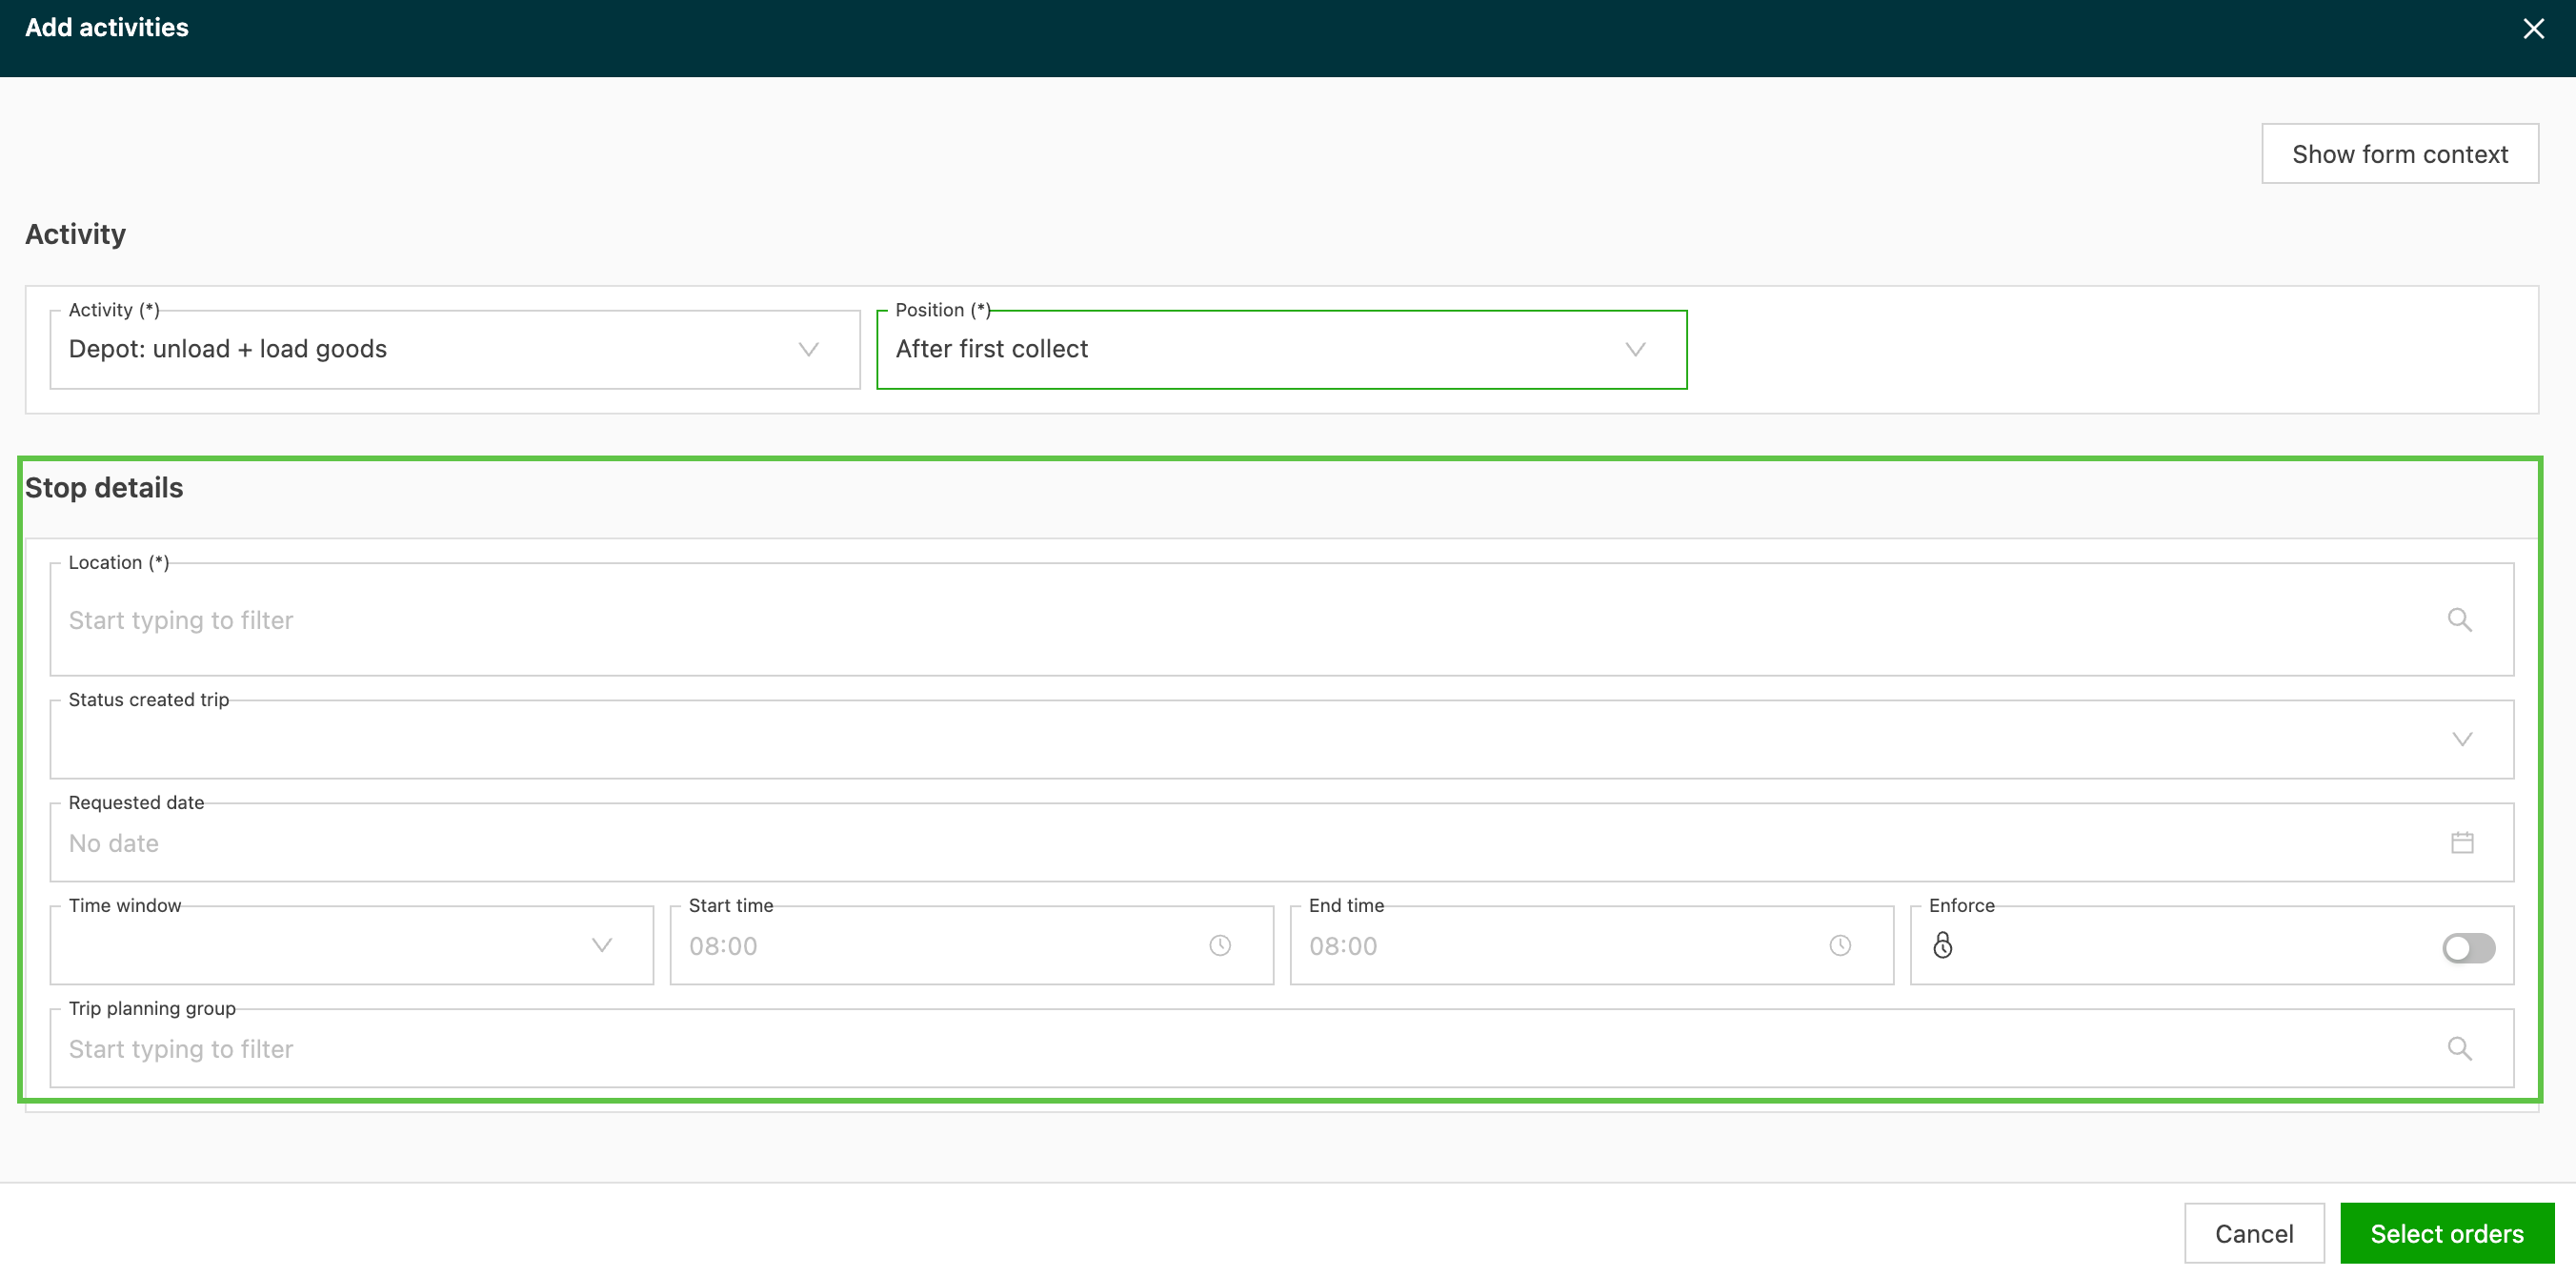
- Complete the stop details. The options in this section differ depending on the activity.
-
Click ‘Select orders’ to select the orders in the main list view that this activity applies to.
-
Click ‘Add activities’ to complete the action.