
Add extra shipments to an order
This article covers the different options available when creating orders that include multiple shipments.
Table of contents
In Qargo, each shipment represents exactly one pickup and one delivery, and goods are always attached to shipments. This structure clearly links pickups to deliveries and allows for precise stop sequence configuration.
There are multiple options to add shipments to an order.
Add shipments when creating an order
- If an order needs multiple pickups and/or deliveries, specify them when creating the order.
- It is also possible to specify a planning preference:
- Merge shipments on one load
- One load per shipment
- Note: If the transportation service uses a default transportation network or the order type is set to ‘Groupage,’ the ‘Multiple pickups and deliveries’ options are unavailable. Switching to a Dedicated order type can enable these options.

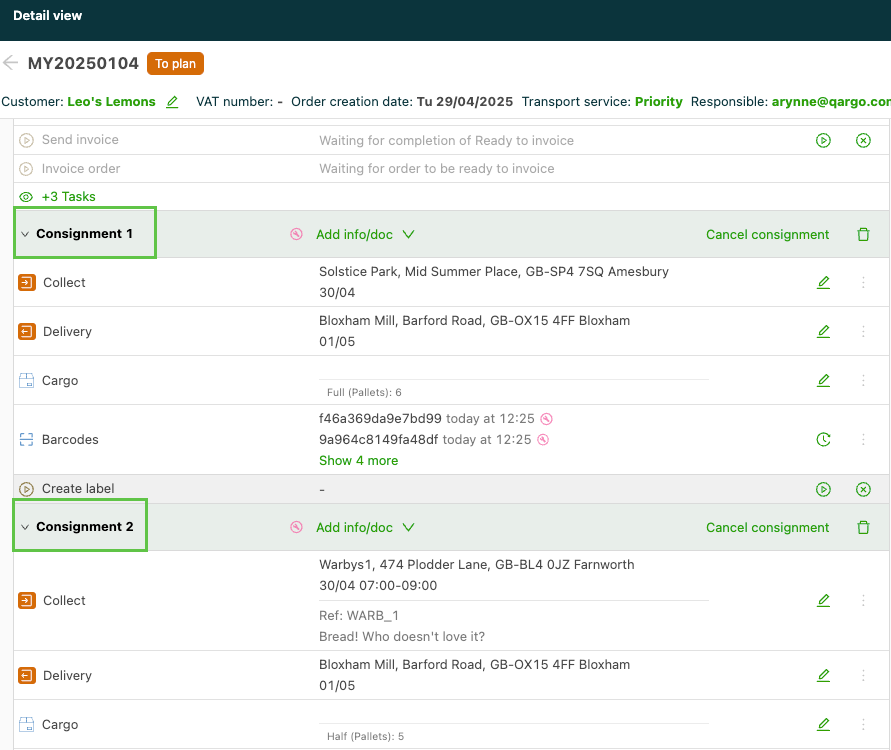
- When an option with multiple pickups and/or deliveries is selected, additional locations can be added after entering the first pickup and delivery location. An additional Add shipment button then appears at the bottom of the entry screen.
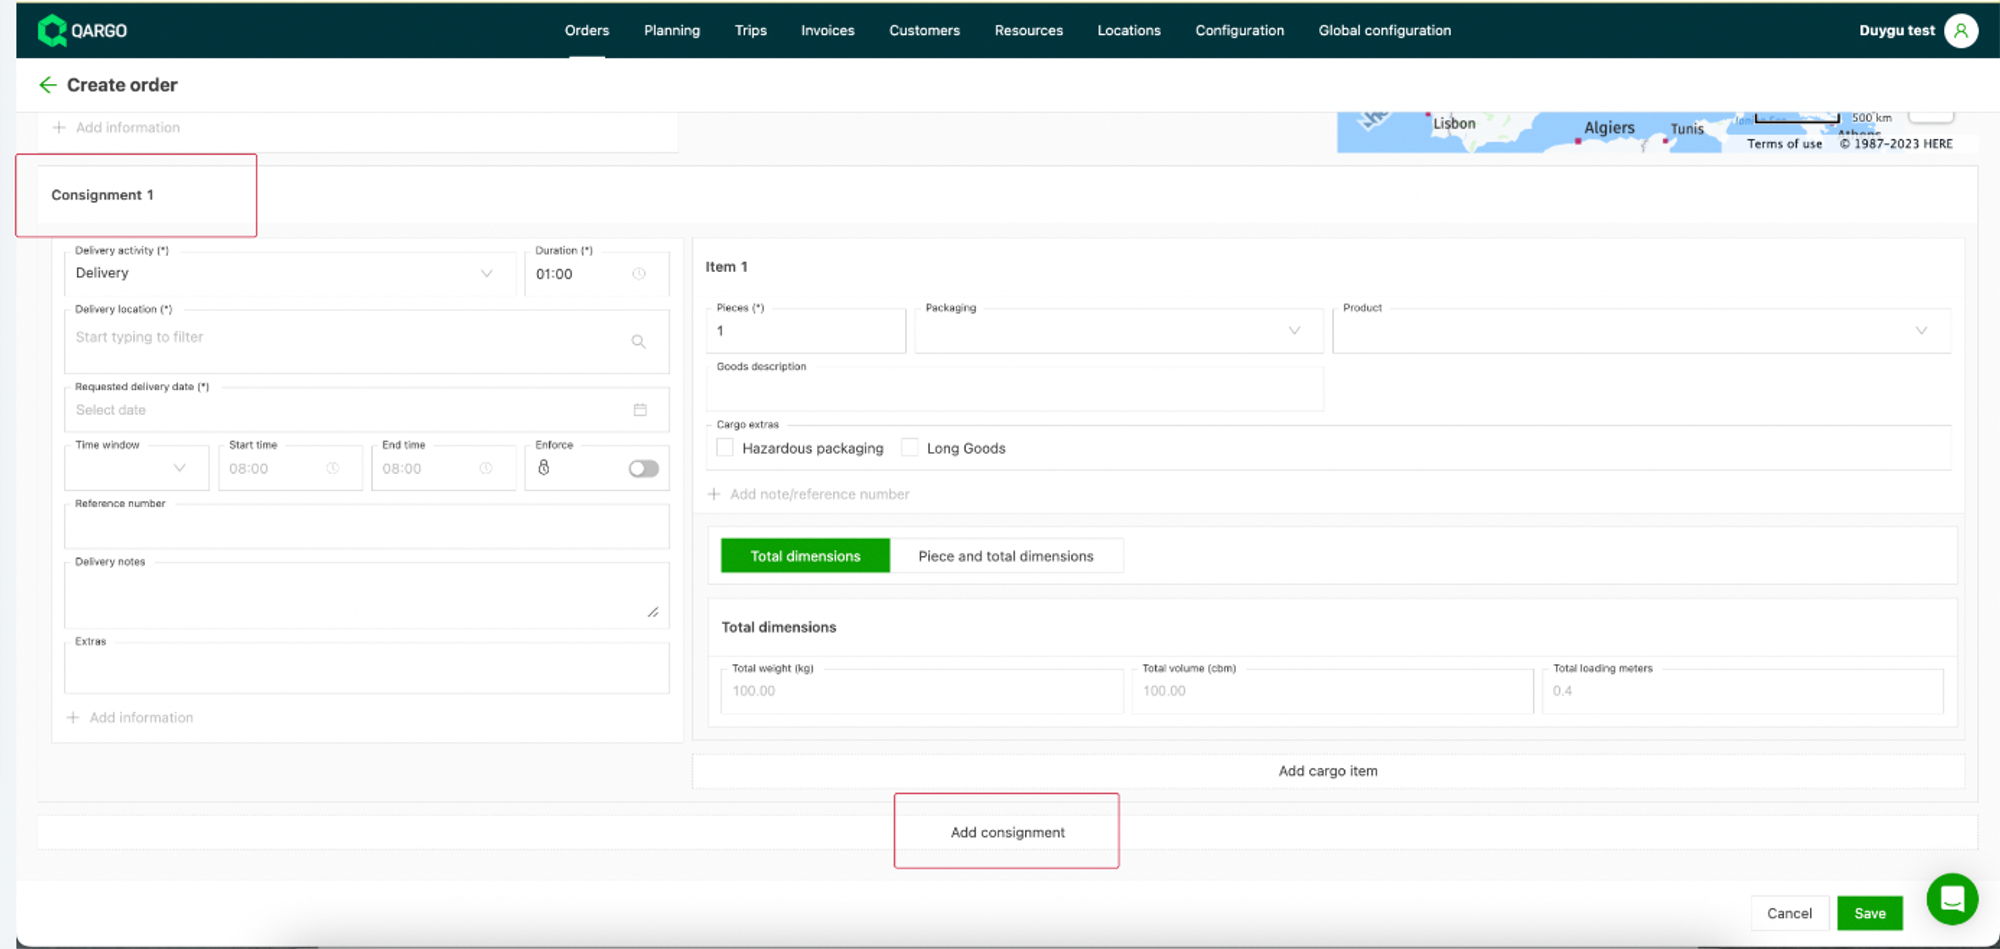
- Selecting Multiple deliveries allows additional delivery locations to be added after entering the first pickup and delivery location. Use this option when picking up from a single location and delivering to multiple locations (milk runs).
- Selecting Multiple pickups allows additional pickup locations to be added. This makes it quick to create multiple pickups on one order.
To add an additional pickup or delivery after the order has already been created, click Edit order to return to editing.
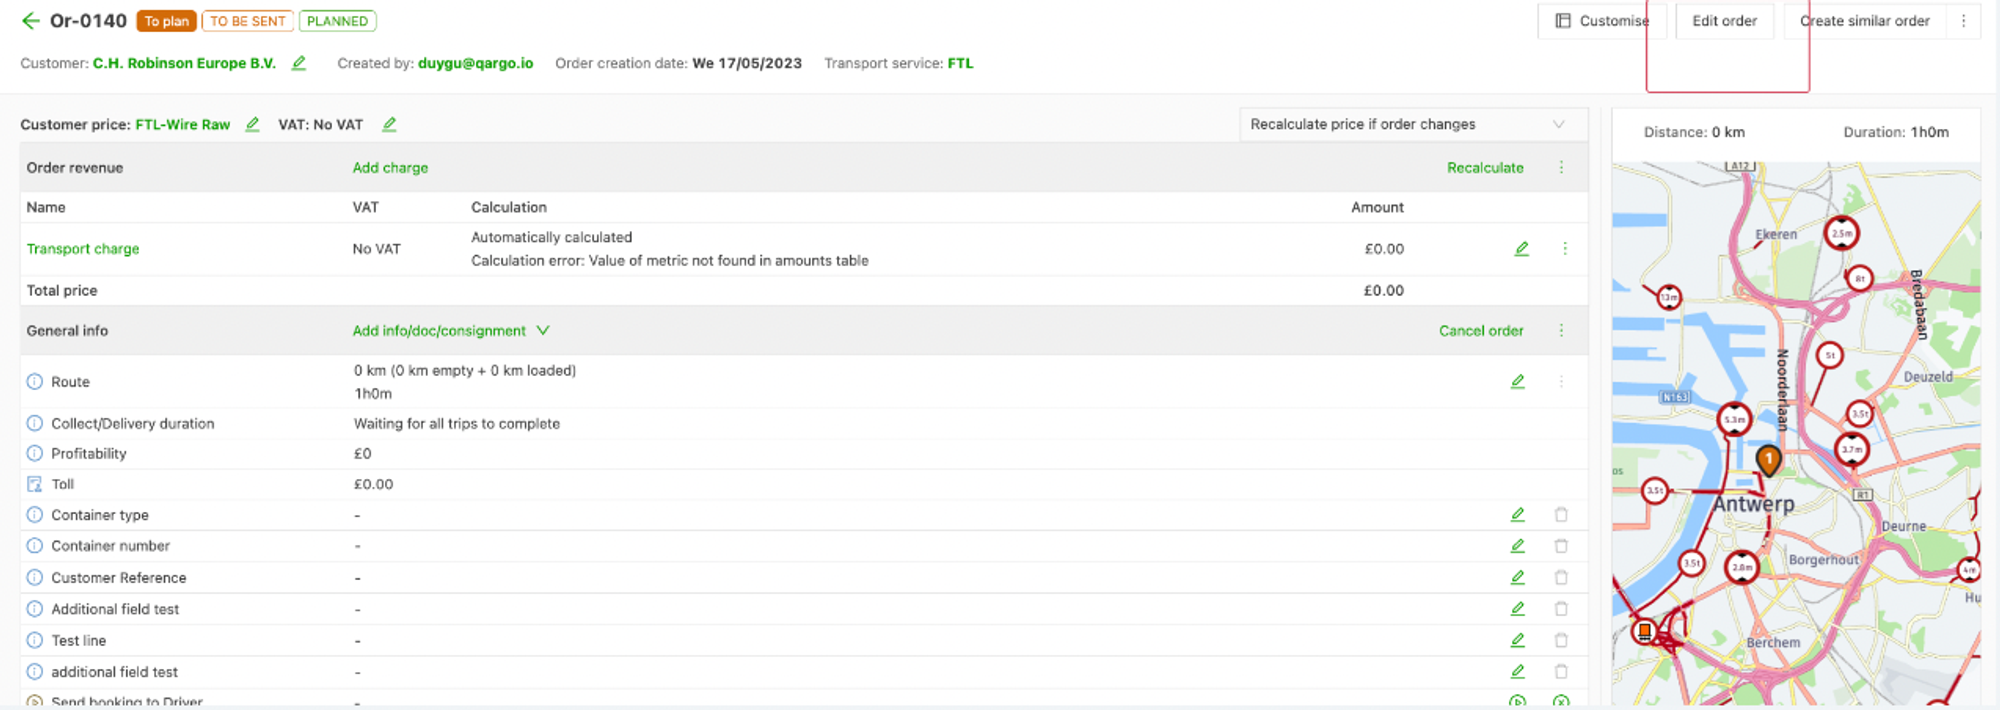
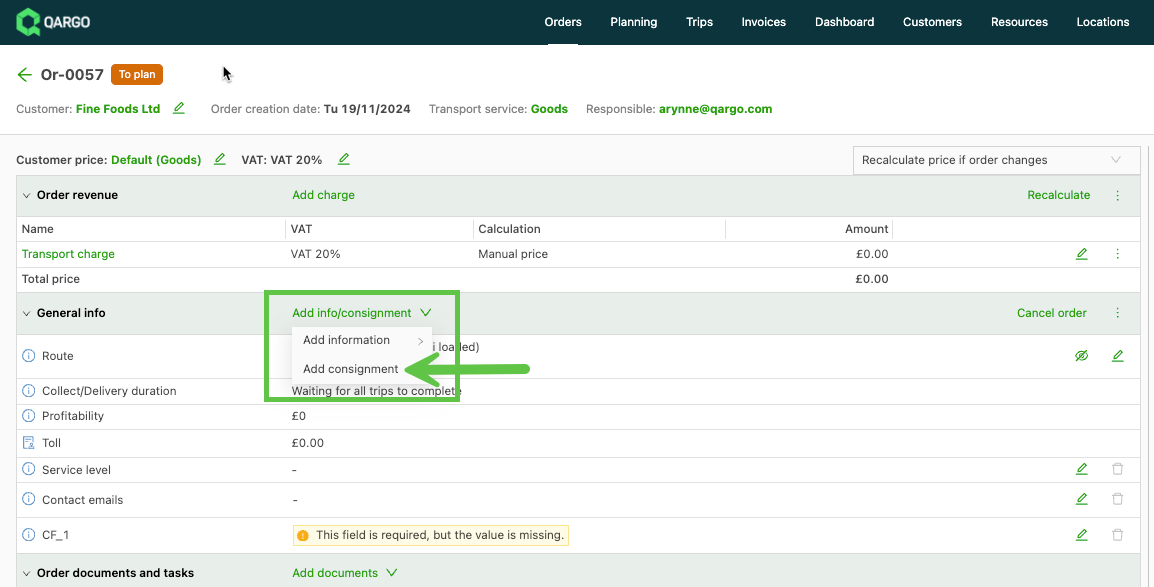
Add a shipment after creating an order
If the order has already been created and new shipments need to be added, open the Add info/shipment dropdown to add additional shipments.
Add a shipment from the overview page
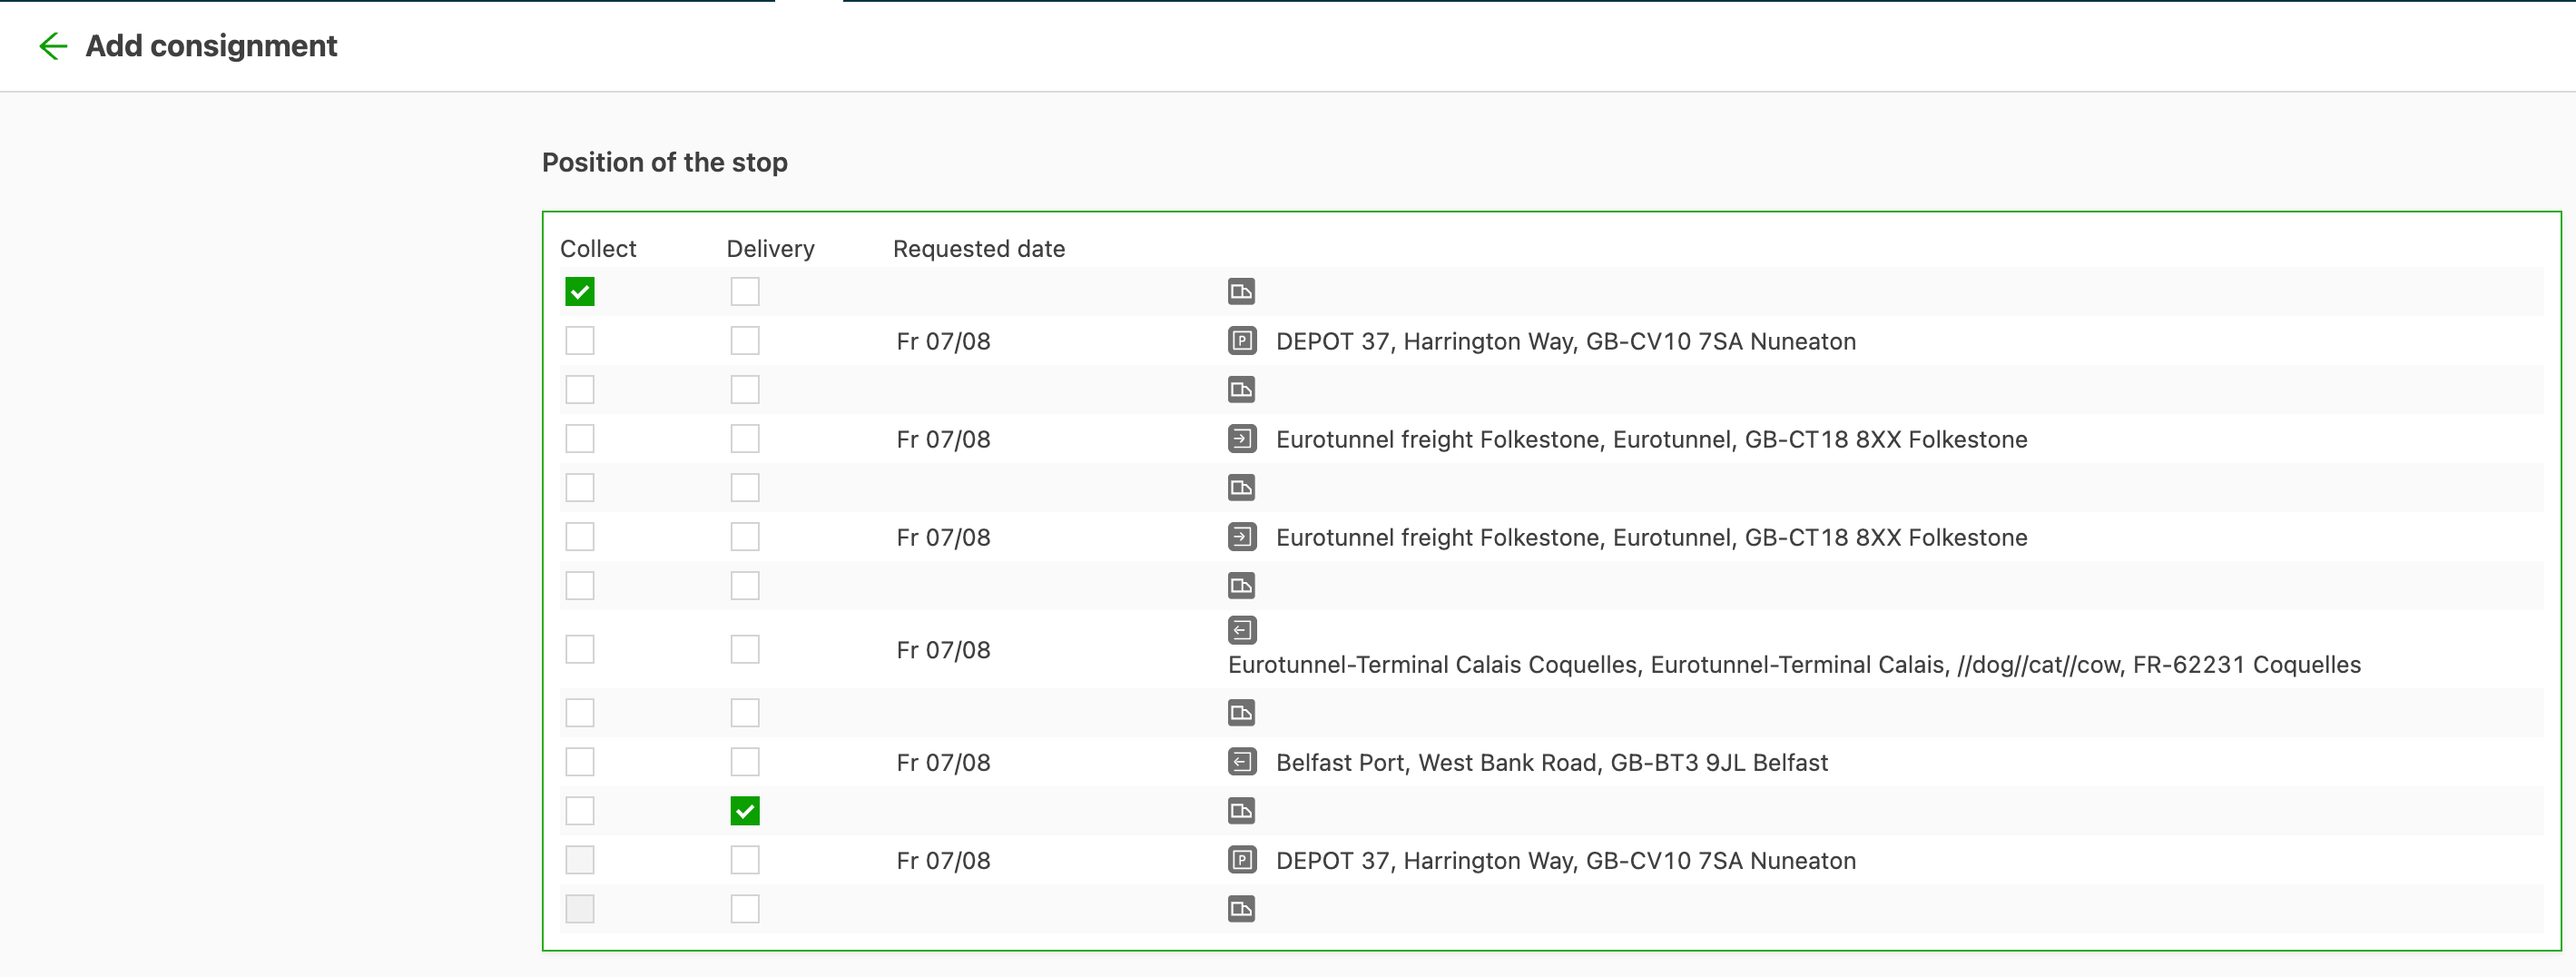
The Route overview of the order shows a ”+” icon to add extra shipments or stops to the order. Select the Pickup/Delivery option. This opens the Add shipment screen, where the position of the stop to be added can be set.
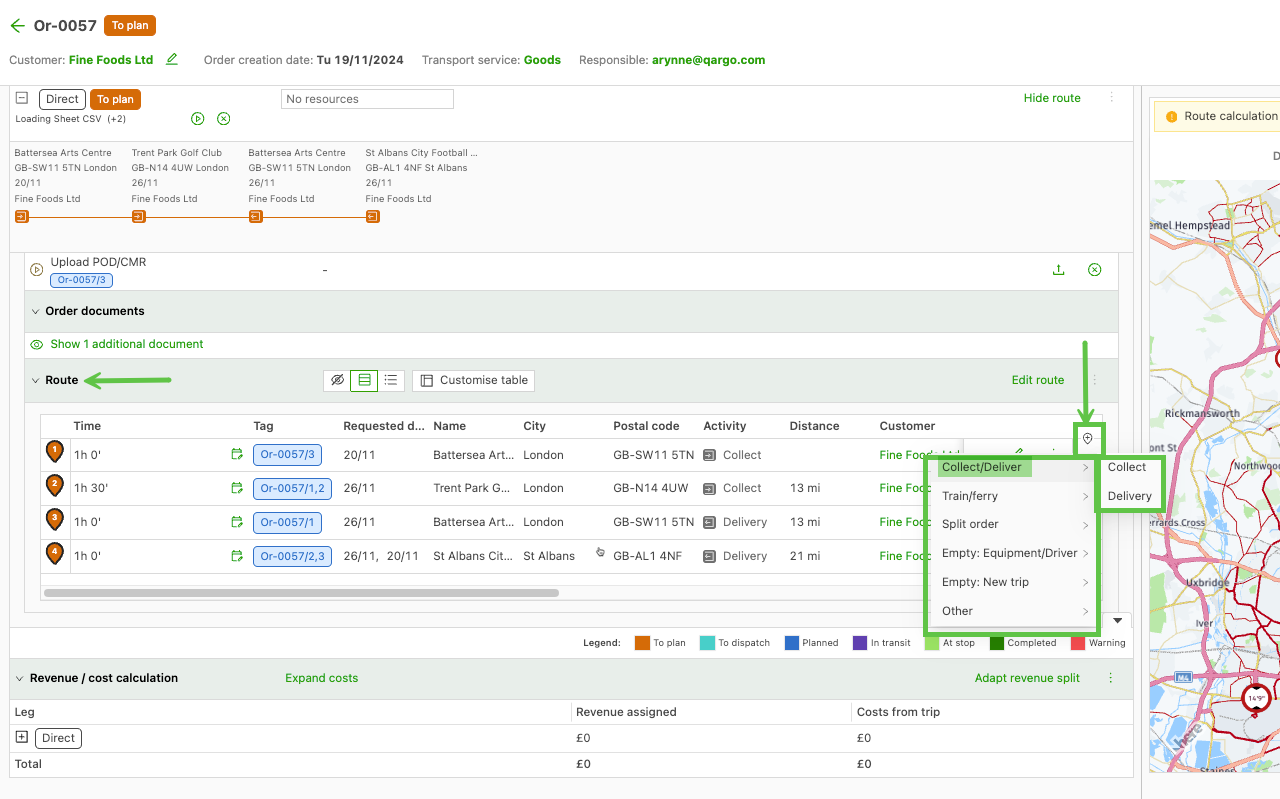
Adding a shipment: step by step
- Open the order to which the shipment must be added.
- Select Add shipment from the General info panel
- Review the stop-positioning screen: the requested date and time for each existing stop is now displayed, allowing the new pickup and delivery to be placed in the correct position.
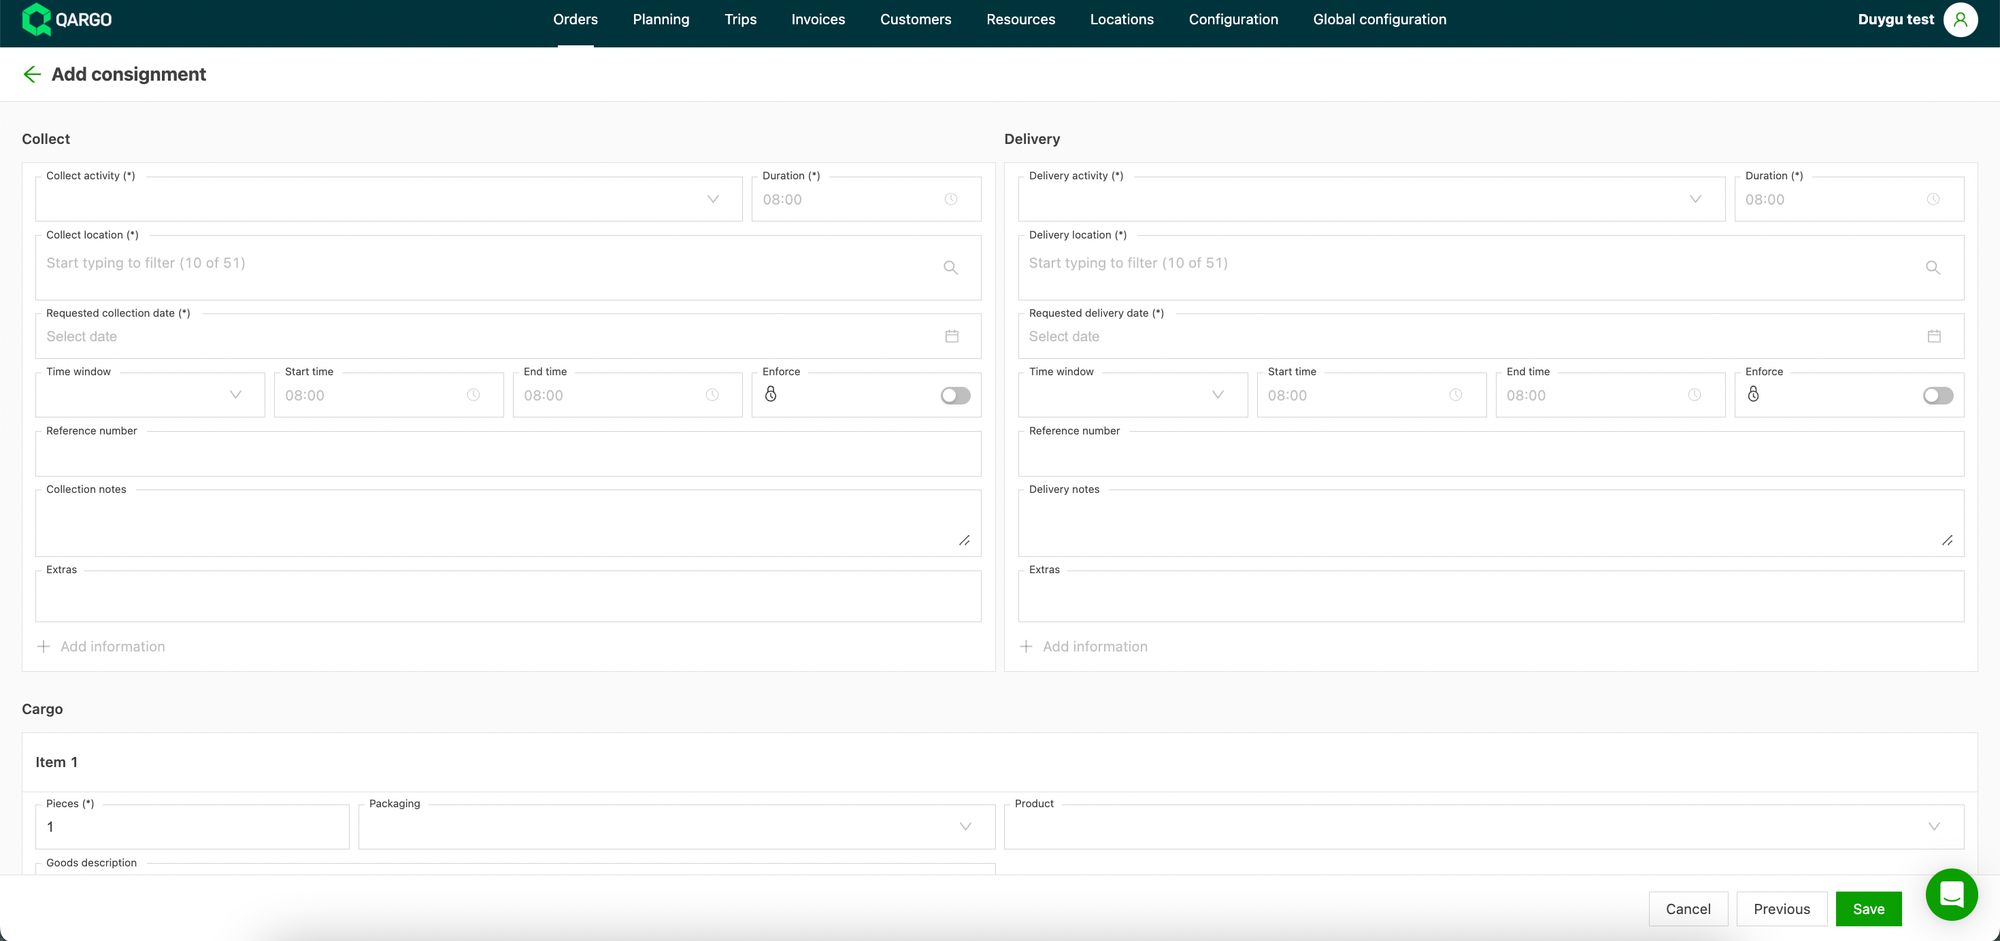
- Complete the shipment details (pickup address, delivery address, goods information).
- Confirm the shipment to save it to the order.
Why do stops look out of order on the planning board?
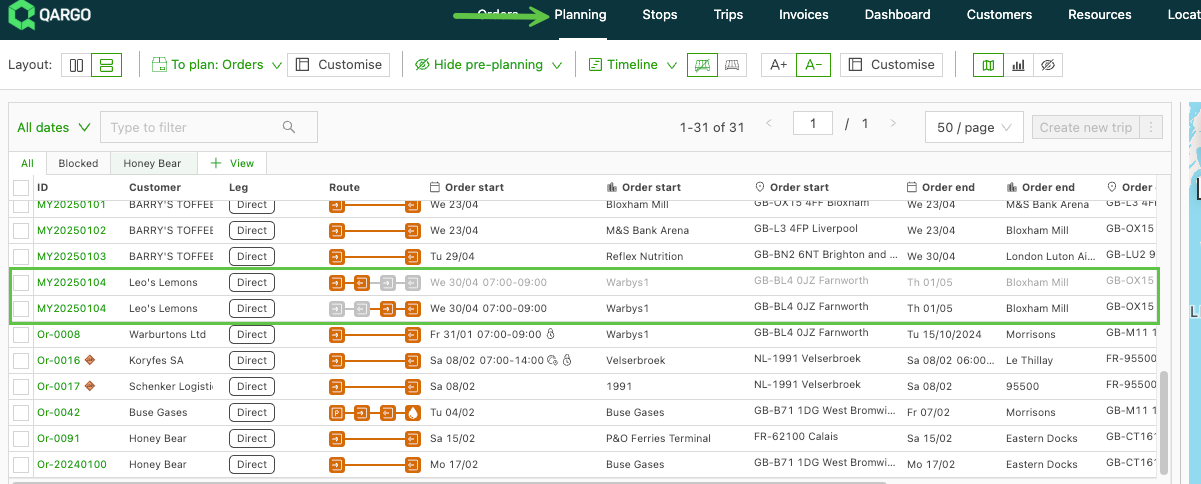
When an order has more than one shipment, the stop sequence on the planning board may look different from the shipment list in the order. This is normal. Here is why.
Shipment numbers vs. the planned route
When an order is created, each shipment gets a number (C1, C2, C3…) based on the order in which it was added. These numbers don’t change once the order is created.
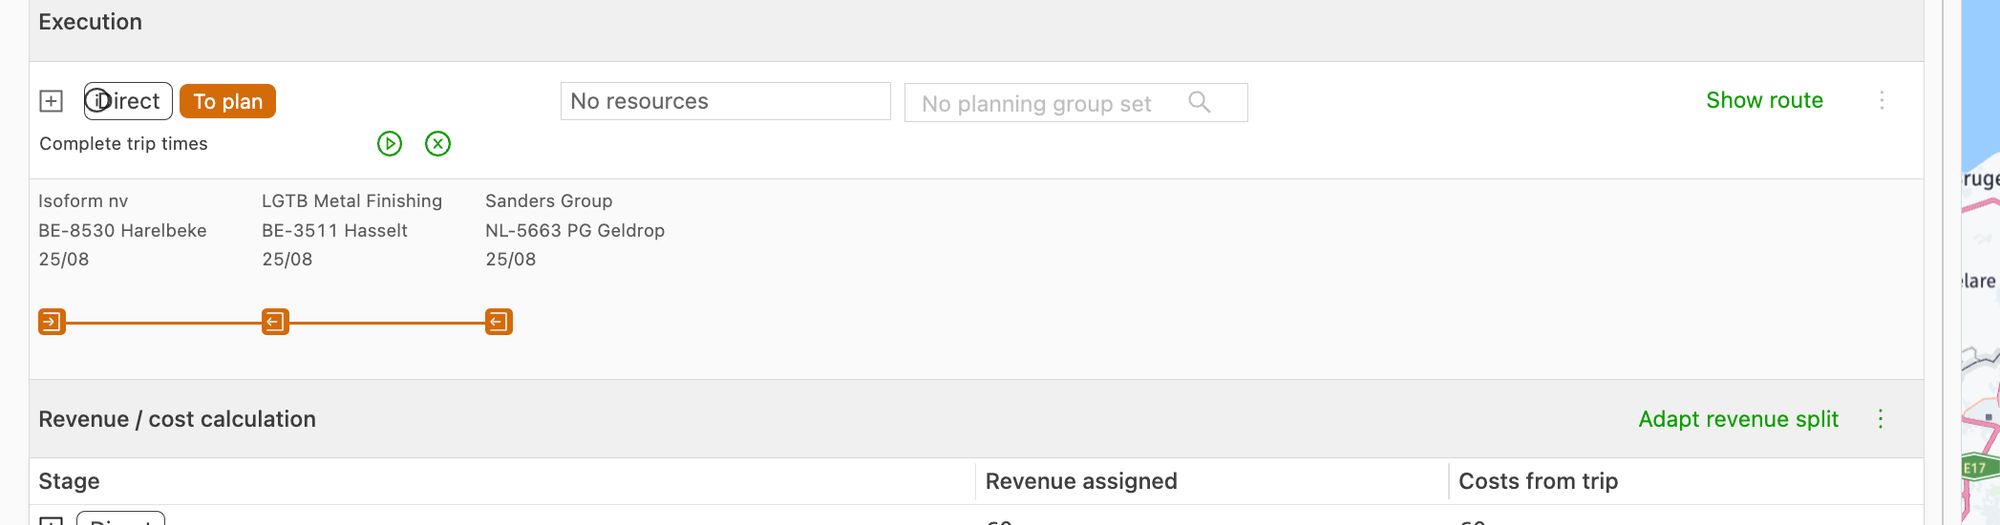
When the order is planned on the planning board, the stops are arranged in the route that makes sense for the driver. That sequence is independent of the shipment numbers: Qargo doesn’t automatically renumber shipments to match the route.
💡 Think of it this way: shipment numbers are like ticket numbers at a counter. They reflect when someone arrived, not the order in which they will be served.
Why can’t Qargo just match them up automatically?
It gets complicated quickly. If there are 3 shipments but two of them are on one load and the third is on a separate load, there’s no obvious way to number them that reflects both routes at once. Rather than guess, Qargo keeps the shipment numbers fixed and allows the stop sequence to be controlled separately on the planning board.
What can be done
If the stop order doesn’t match what is needed, adjust it manually:
- For orders not yet planned: open the order, go to Operations > Show route > Edit route, then drag the stops into the right order.
- For planned loads: go to Planning, open the load, select Edit route, then drag the stops into the right order.
See Edit the stops of an order for full instructions.