Rate card: transport charges
This article gives an overview of transport charges and surcharges: what they are and how they are configured for use.
Table of contents
Introduction.
When a new transportation service is set up, a default price list is created with the line item Transport charge. The price list is a blank template that can be configured based on user requirements. The default price list ensures that a default charge applies each time the service is used. It is automatically set to apply to all customers.
The system determines which rate card applies based on the transportation service and the customer on the order. If there is no specific customer, the default price list of the transportation service is used.

The Transport charge is always shown on the invoice. All other items can be added based on preferences, but the transport charge always shows on the sales invoice. (Note: there is a configuration option to hide the charge if the invoice amount is zero.)
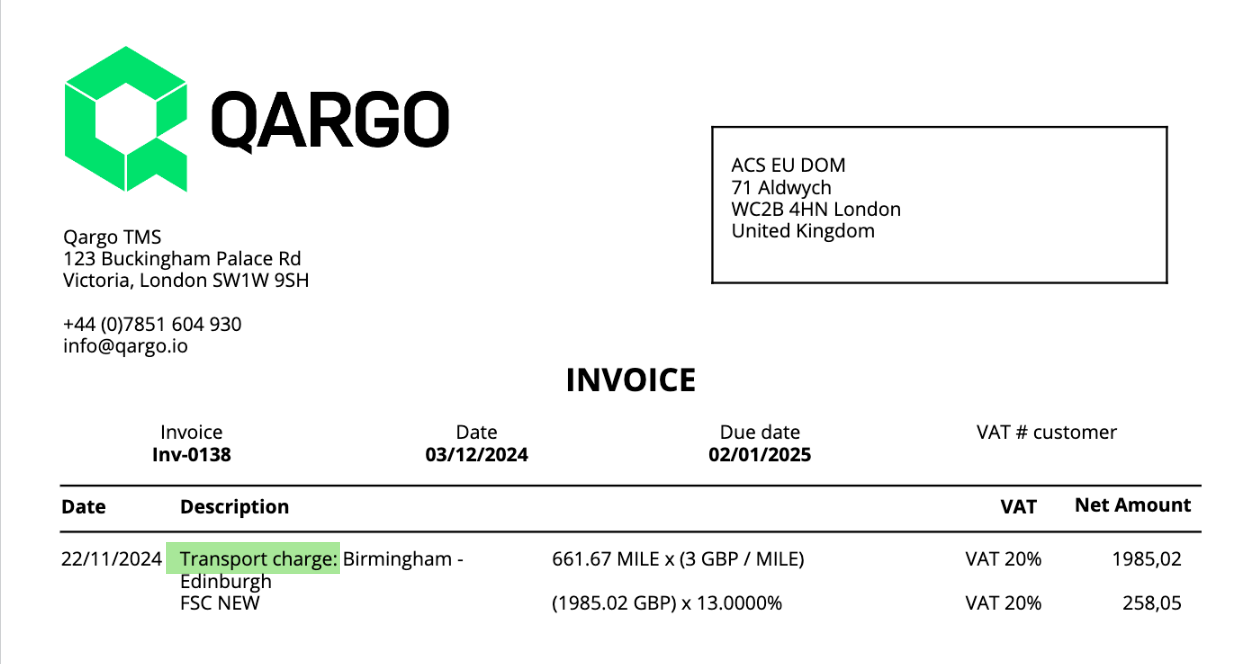
What is a transport charge?
This is a basic charge that a company applies when the specified services are used, e.g., consolidation. Users can configure a standard rate that automatically applies to every order. However, it is not mandatory. If the preference is to rate each order manually, the transport charges can be entered manually per order.
By default, this charge line always appears on the order and invoice, even if no calculations are included and the line rates as ‘0’. An option can be configured manually to hide the line if no charges apply.
What is a surcharge?
This is a charge that a company may not automatically include on each order, but it is a standard charge that often applies under certain circumstances. These may be surcharges, or additional line items that the user selects manually when they apply. Examples include a delivery requested outside regular hours, or a specific vehicle asset requirement, e.g., a liftgate.
Configuration options
When configuring a transport charge, 4 options are available to start the calculations.
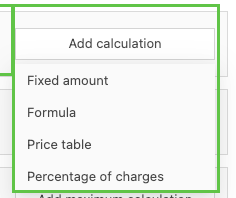
Fixed amount:
-
Add a single charge. The available options are Per freight item, Per order or Per packaging type/product.

Click here for fixed price list
Formula:
-
Add a specific charge based on a particular set of metrics, e.g., distance, goods ordered, route. Each metric has an additional set of selectable options that drive the specific rating.

Rate table:
-
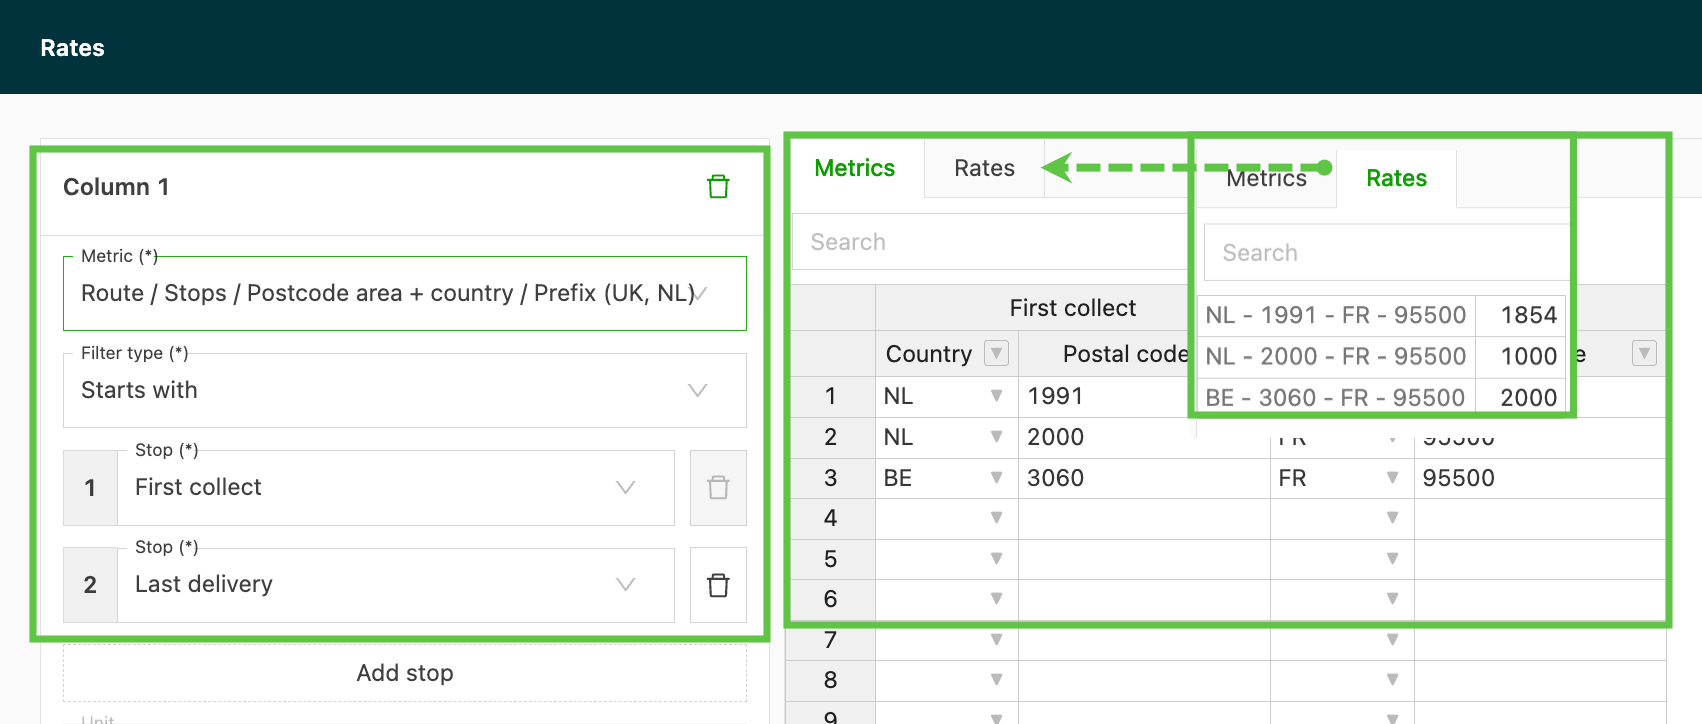
This is the most complex rating method. It involves setting up an additional rate table with its own set of metrics and rates. The rate table looks at the selected option to determine the final price. These tables are often used for rating tiers or geographic / ZIP code regions.

Percentage of charges:
-
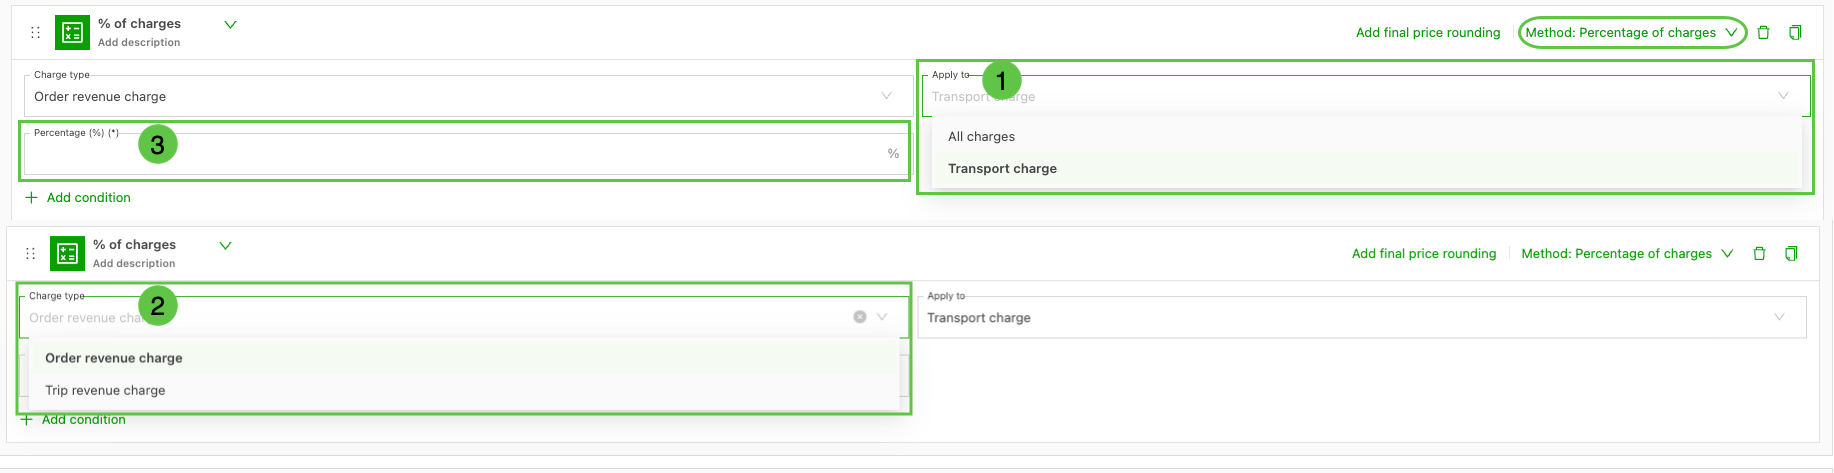
Set the percentage (%) to apply to the selected charge.
-
Select which charges the percentage applies to. Options include:
- All charges: the set percentage applies to all charge line items on the order.
- Transport charge: the set percentage applies to the transport charge line only.
-
Select which charge type the percentage applies to. Options include:
- Order revenue charges: belong to the customer order and are what the customer is charged.
- Load revenue charge: belongs to a specific load/leg and attributes revenue to how the order is executed (e.g., splitting order revenue across multiple loads/legs).
From a customer billing perspective, this usually means Order revenue charges.
From a load profitability / revenue allocation perspective, this usually means Load revenue charges.
Click here for percentage of charges
If the default rating does not meet all customer rating needs, an additional rate card is required. These are configured under ‘Rate card customers’ with the ‘Apply to all customers’ option toggled off. The rate card can then be linked to specific customers.
Click here for details on setting up customer-specific rates.

Customer price lists can be complex and often contain tiered rates that need regular updates. To help with this, a charge template can be created and associated with the price list. See the linked article for information on charge templates.
Approving charges
In some cases, charges may require customer approval before they can be applied to orders / invoices. For example, customers may require pre-approval for a detention charge applied after the free time has passed, or for a delivery requested on a specific day. Charges can be set up to show the approval requirement on the order. The order then shows the price split under 2 labels: ‘To invoice’ and ‘To approve’.
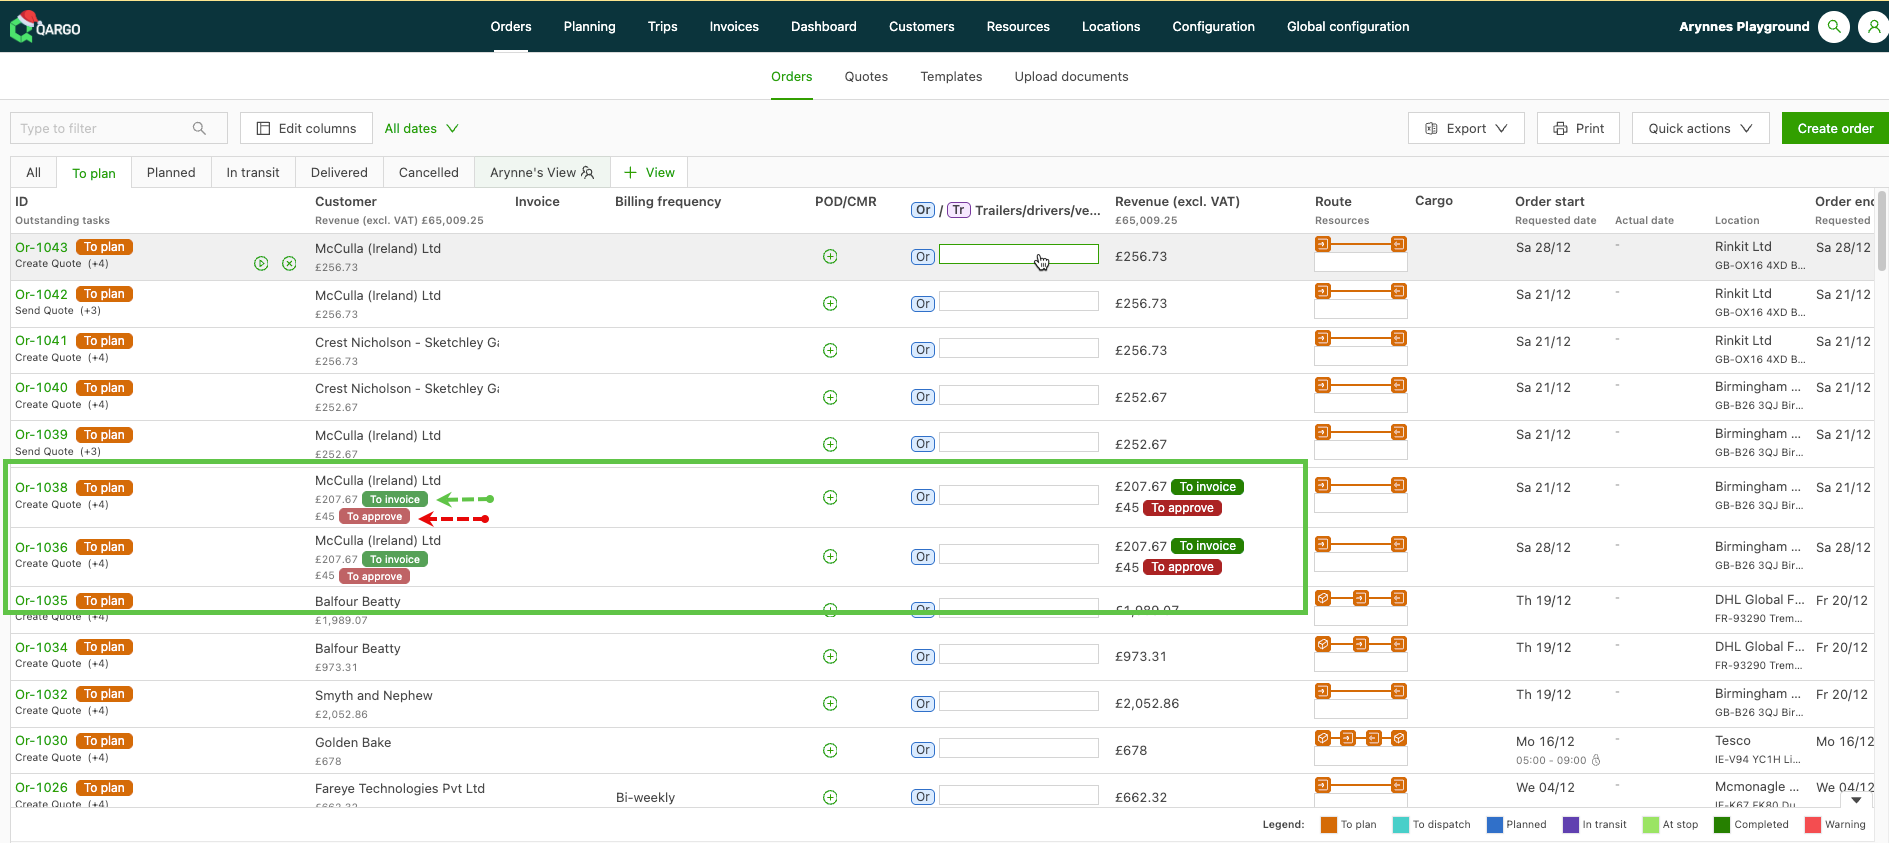
Charges marked ‘To approve’ require approval before they show in the total invoice amount. They are included in the revenue charges but are shown as omitted until approved.
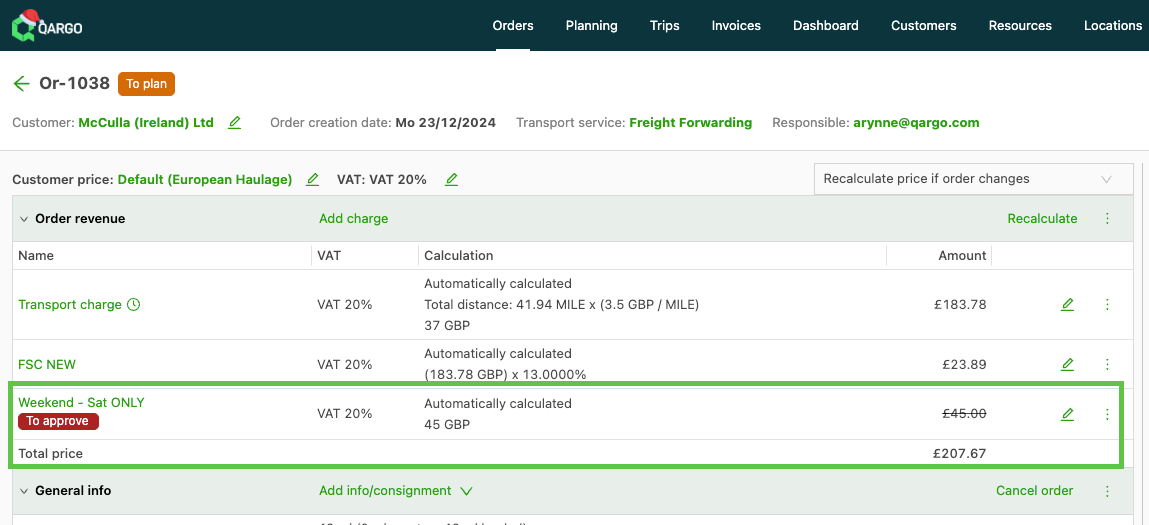
When a quote is generated, this charge is also omitted until approved. Once approved, the quote can be regenerated to include the charge. To approve the charge, click the ‘To approve’ label and select the check mark. This removes the label and the charge applies.
Setting up a charge for approval
For a charge to show up for approval, it must be set up as a charge on a price list, with 2 settings under General info:
-
‘Always add to order’: this toggle must be set to ‘on’
-
Invoice process if price 0 = set to ‘Only invoice if approved’
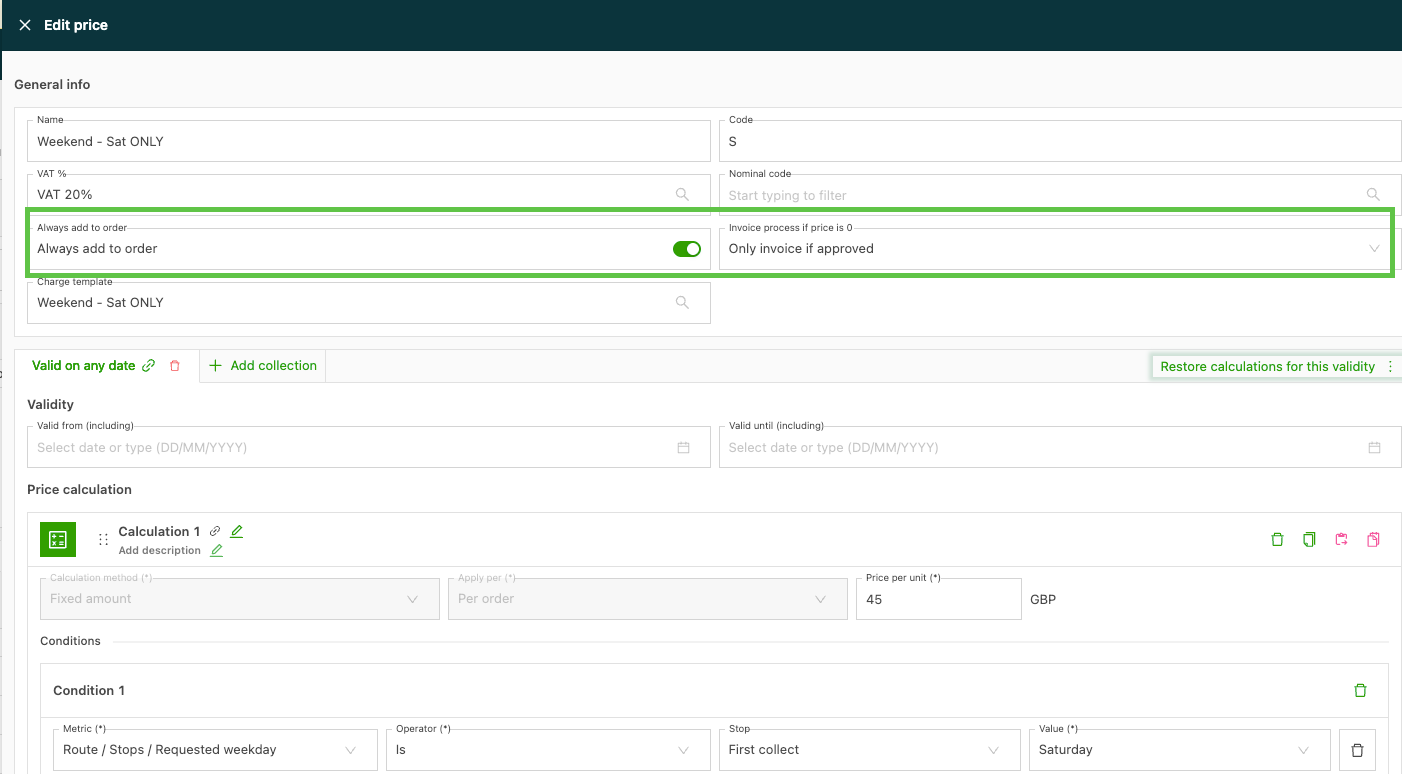
To set a charge for approval:
Once the charge is created, add it to a price list. There are 2 ways to do this.
-
From the charge.
-
From Rates > Order input, select General surcharges from the side menu.
-
Select the charge to add.
-
Select the active transportation service and click ‘Link price list’. This opens the list of available price lists for this transportation service.
-
Select the check box for each price list the charge should apply to and click Save.
-
Open the price list and select the Edit icon next to the charge. This opens the edit page.
-
Under General info, update ‘Always add to order’ and ‘Invoice process’.
-
Click Save. The next time an order is created that meets the criteria of the charge, it shows with the ‘To approve’ label.
-
-
From the price list.
-
From Rate card customers, select the price list to add the charge to. Click ‘Add charge’. A list of available charges is shown.
-
Select the check box for the charge and click Save.
-
Select the Edit icon next to the charge to open the edit page. Under General info, update the ‘Always add to order’ and ‘Invoice process’ fields, and click Save.
-
Charge invoice group: segmenting charges to separate invoices
Where charges may require approval, they can be allocated to a separate invoice group. This splits invoices so that transport charges are grouped on their own invoice and accessorial charges (e.g., extras / surcharges) are allocated to a separate group.
The invoice can be processed and revenue collected without waiting for approvals.
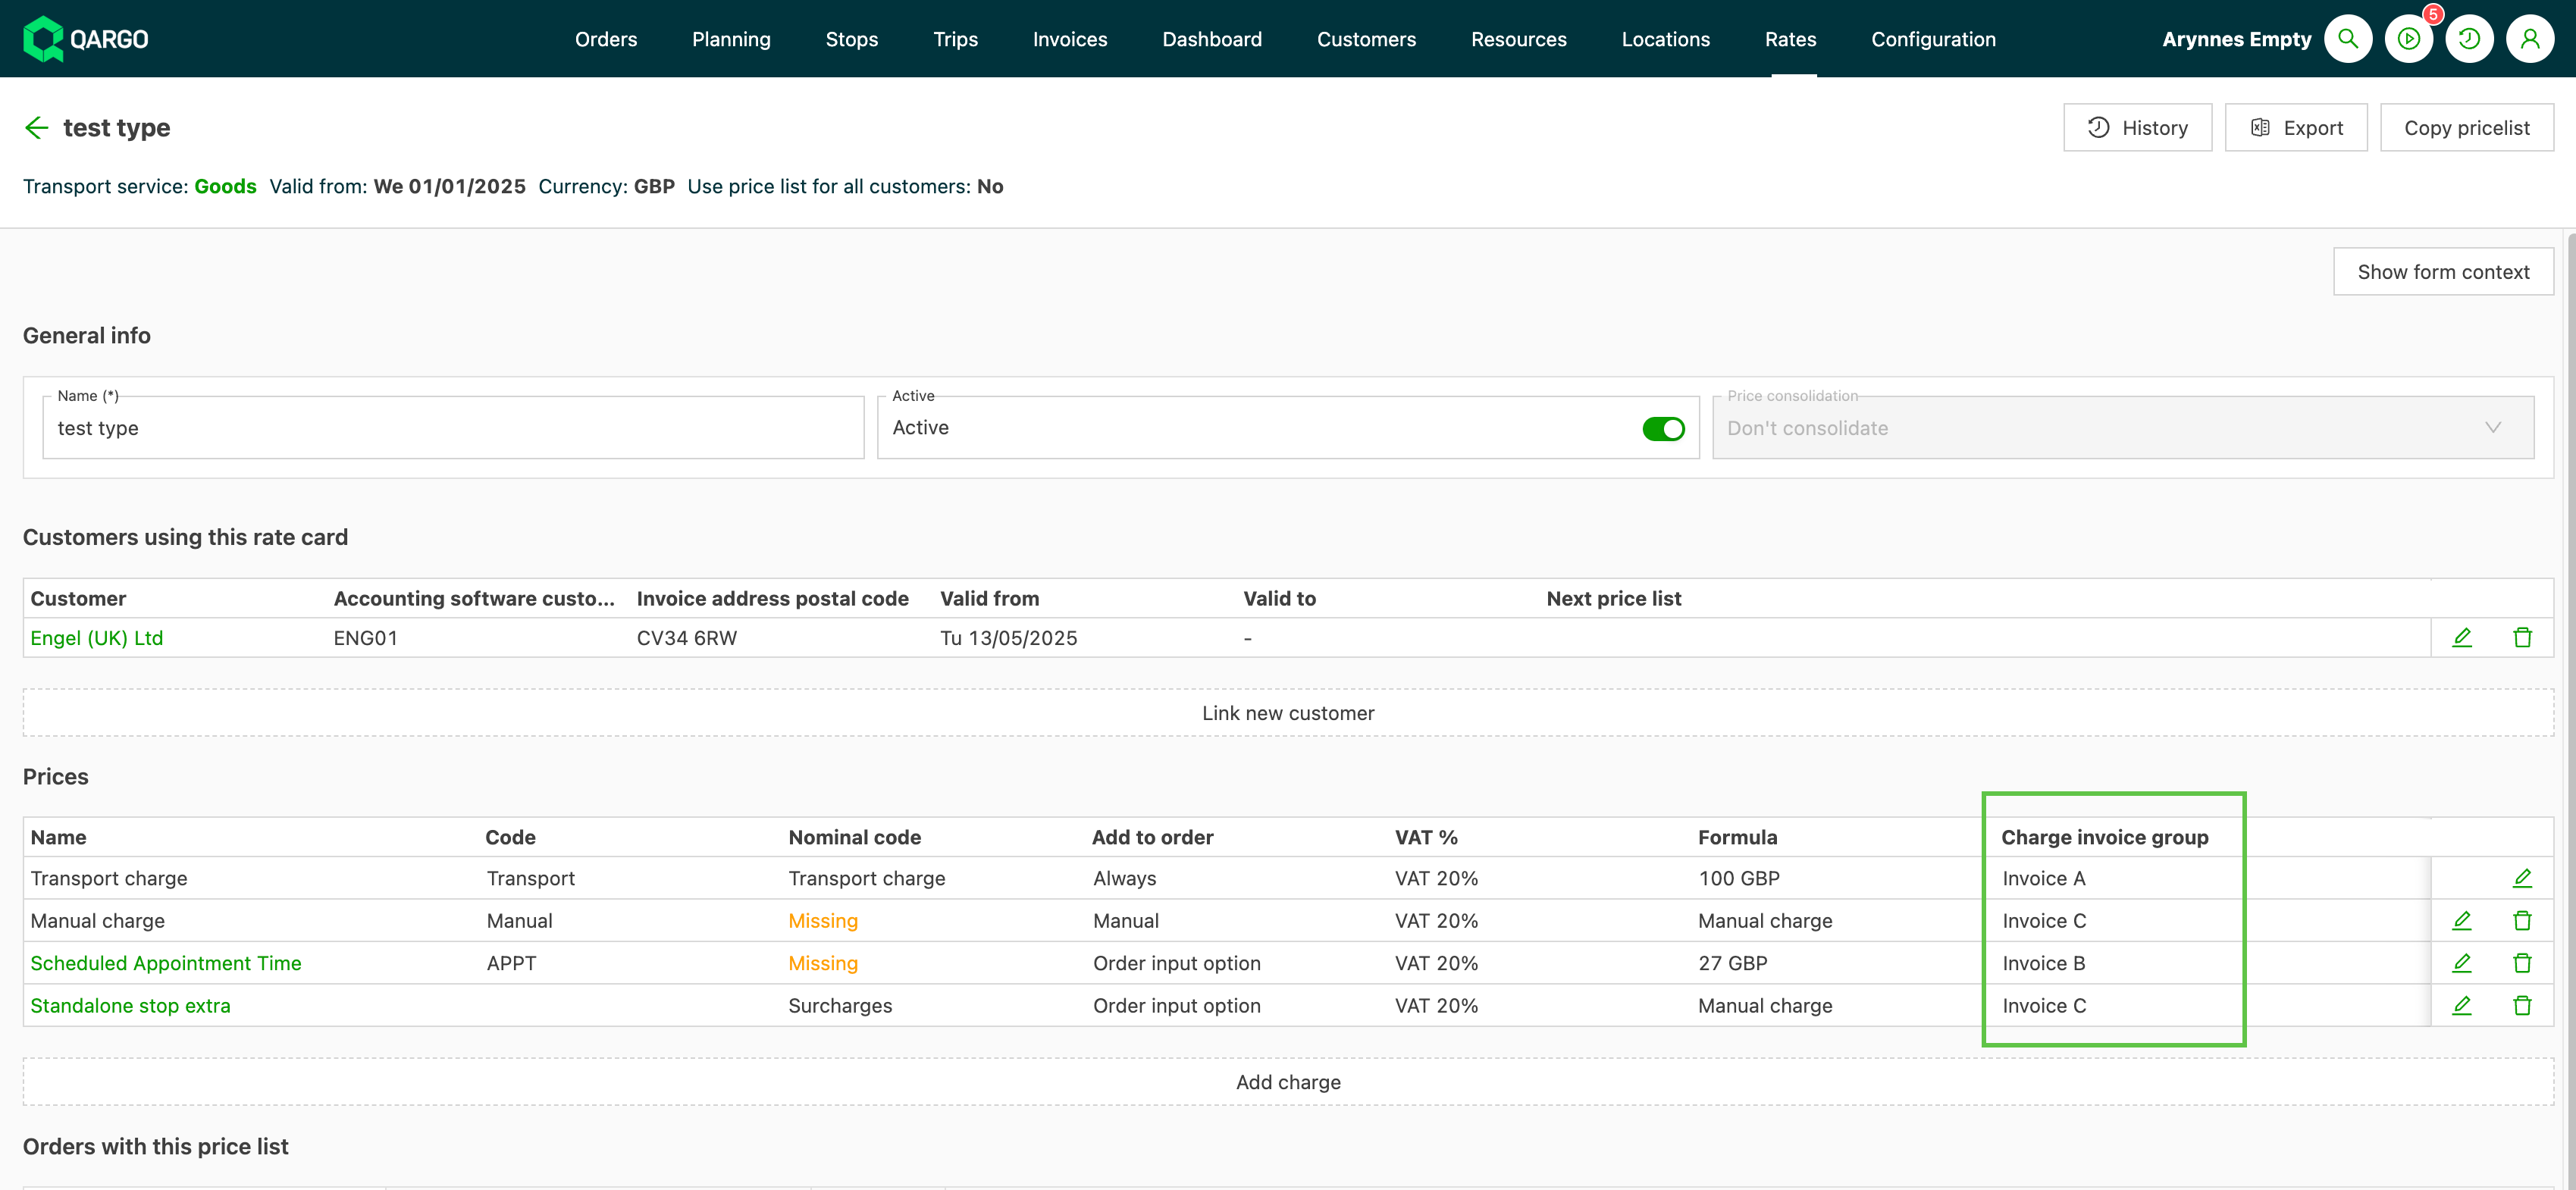
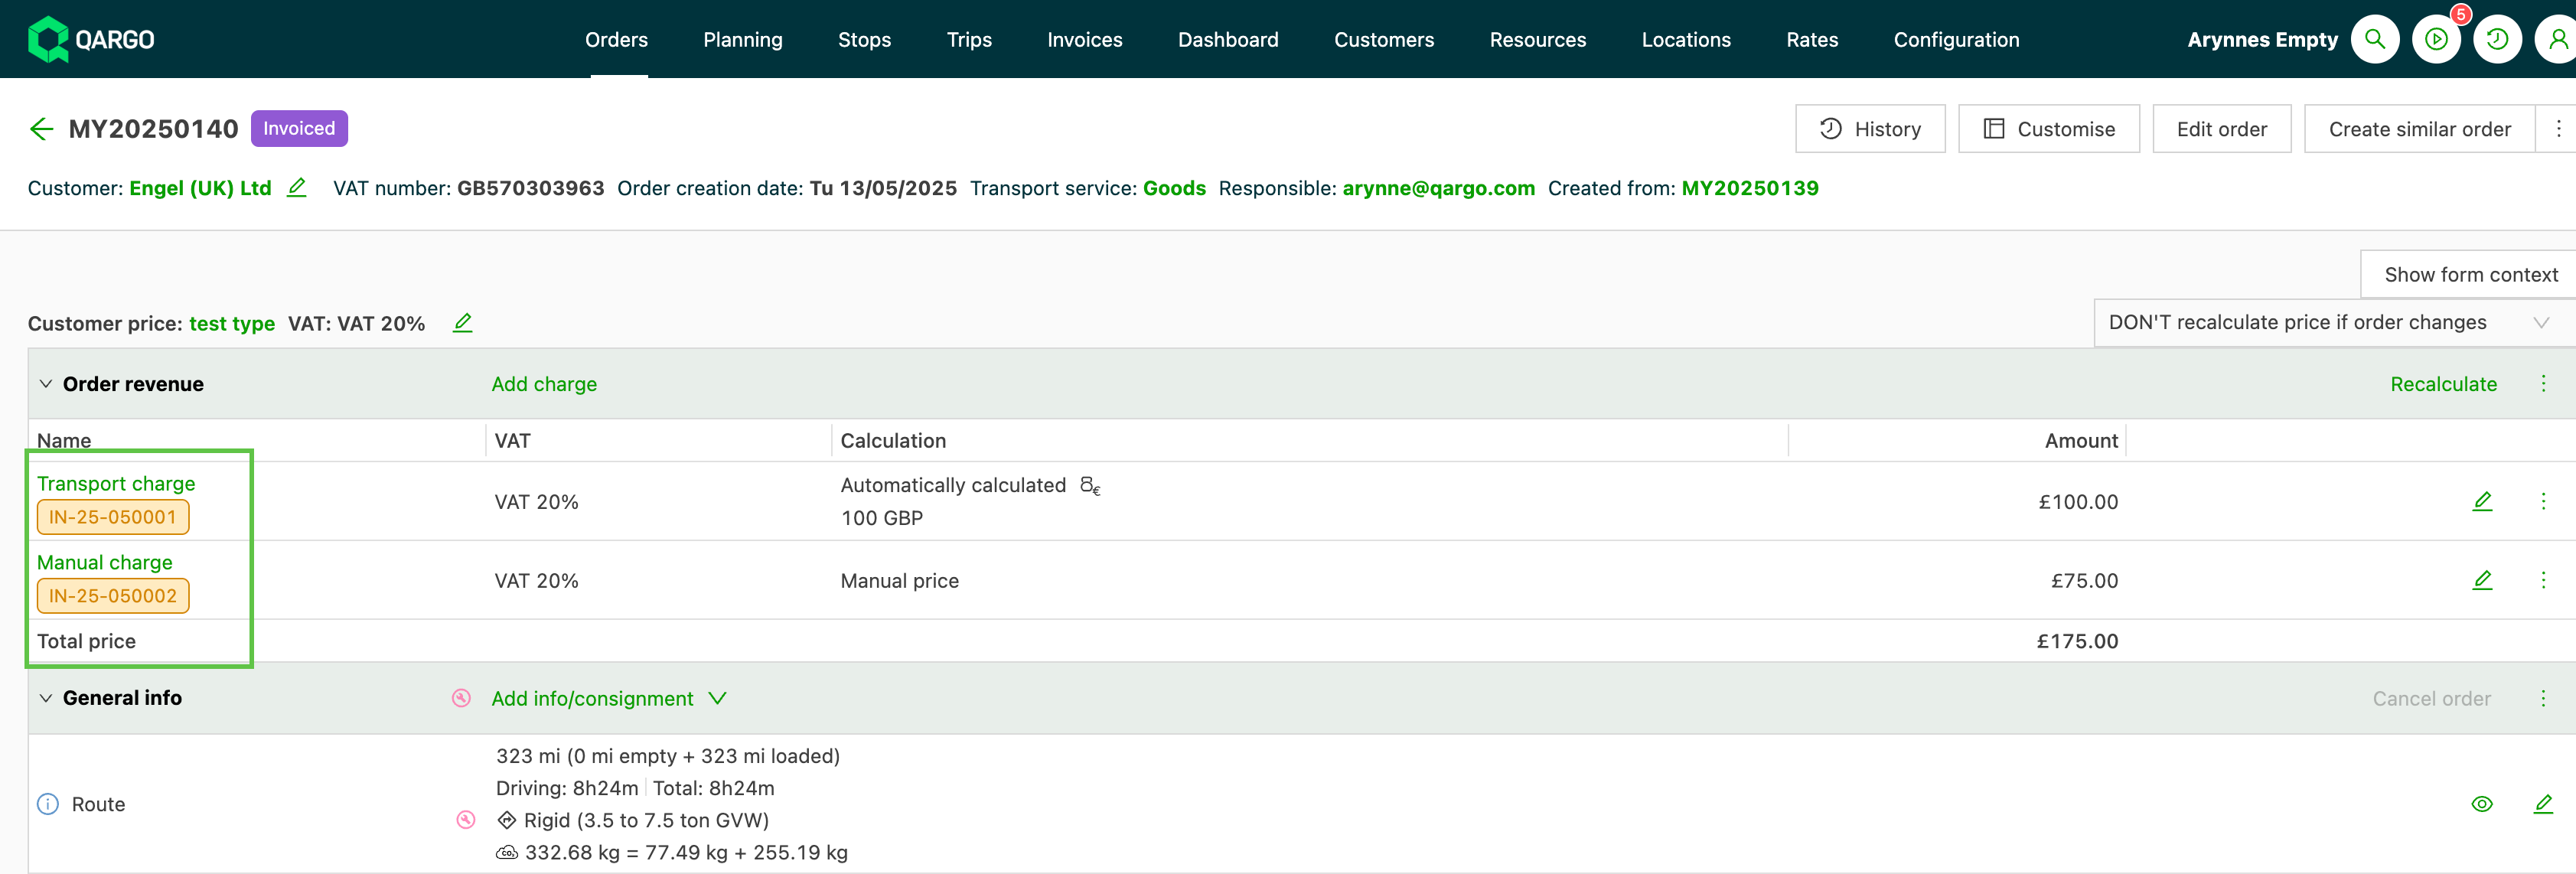
Setting up these groups does not affect the billing workflow. All charges are processed and invoiced as normal. When the invoice is created, 2 separate invoices are created for the order:
-
Invoice1: includes Option A charges
-
Invoice2: includes Option B charges
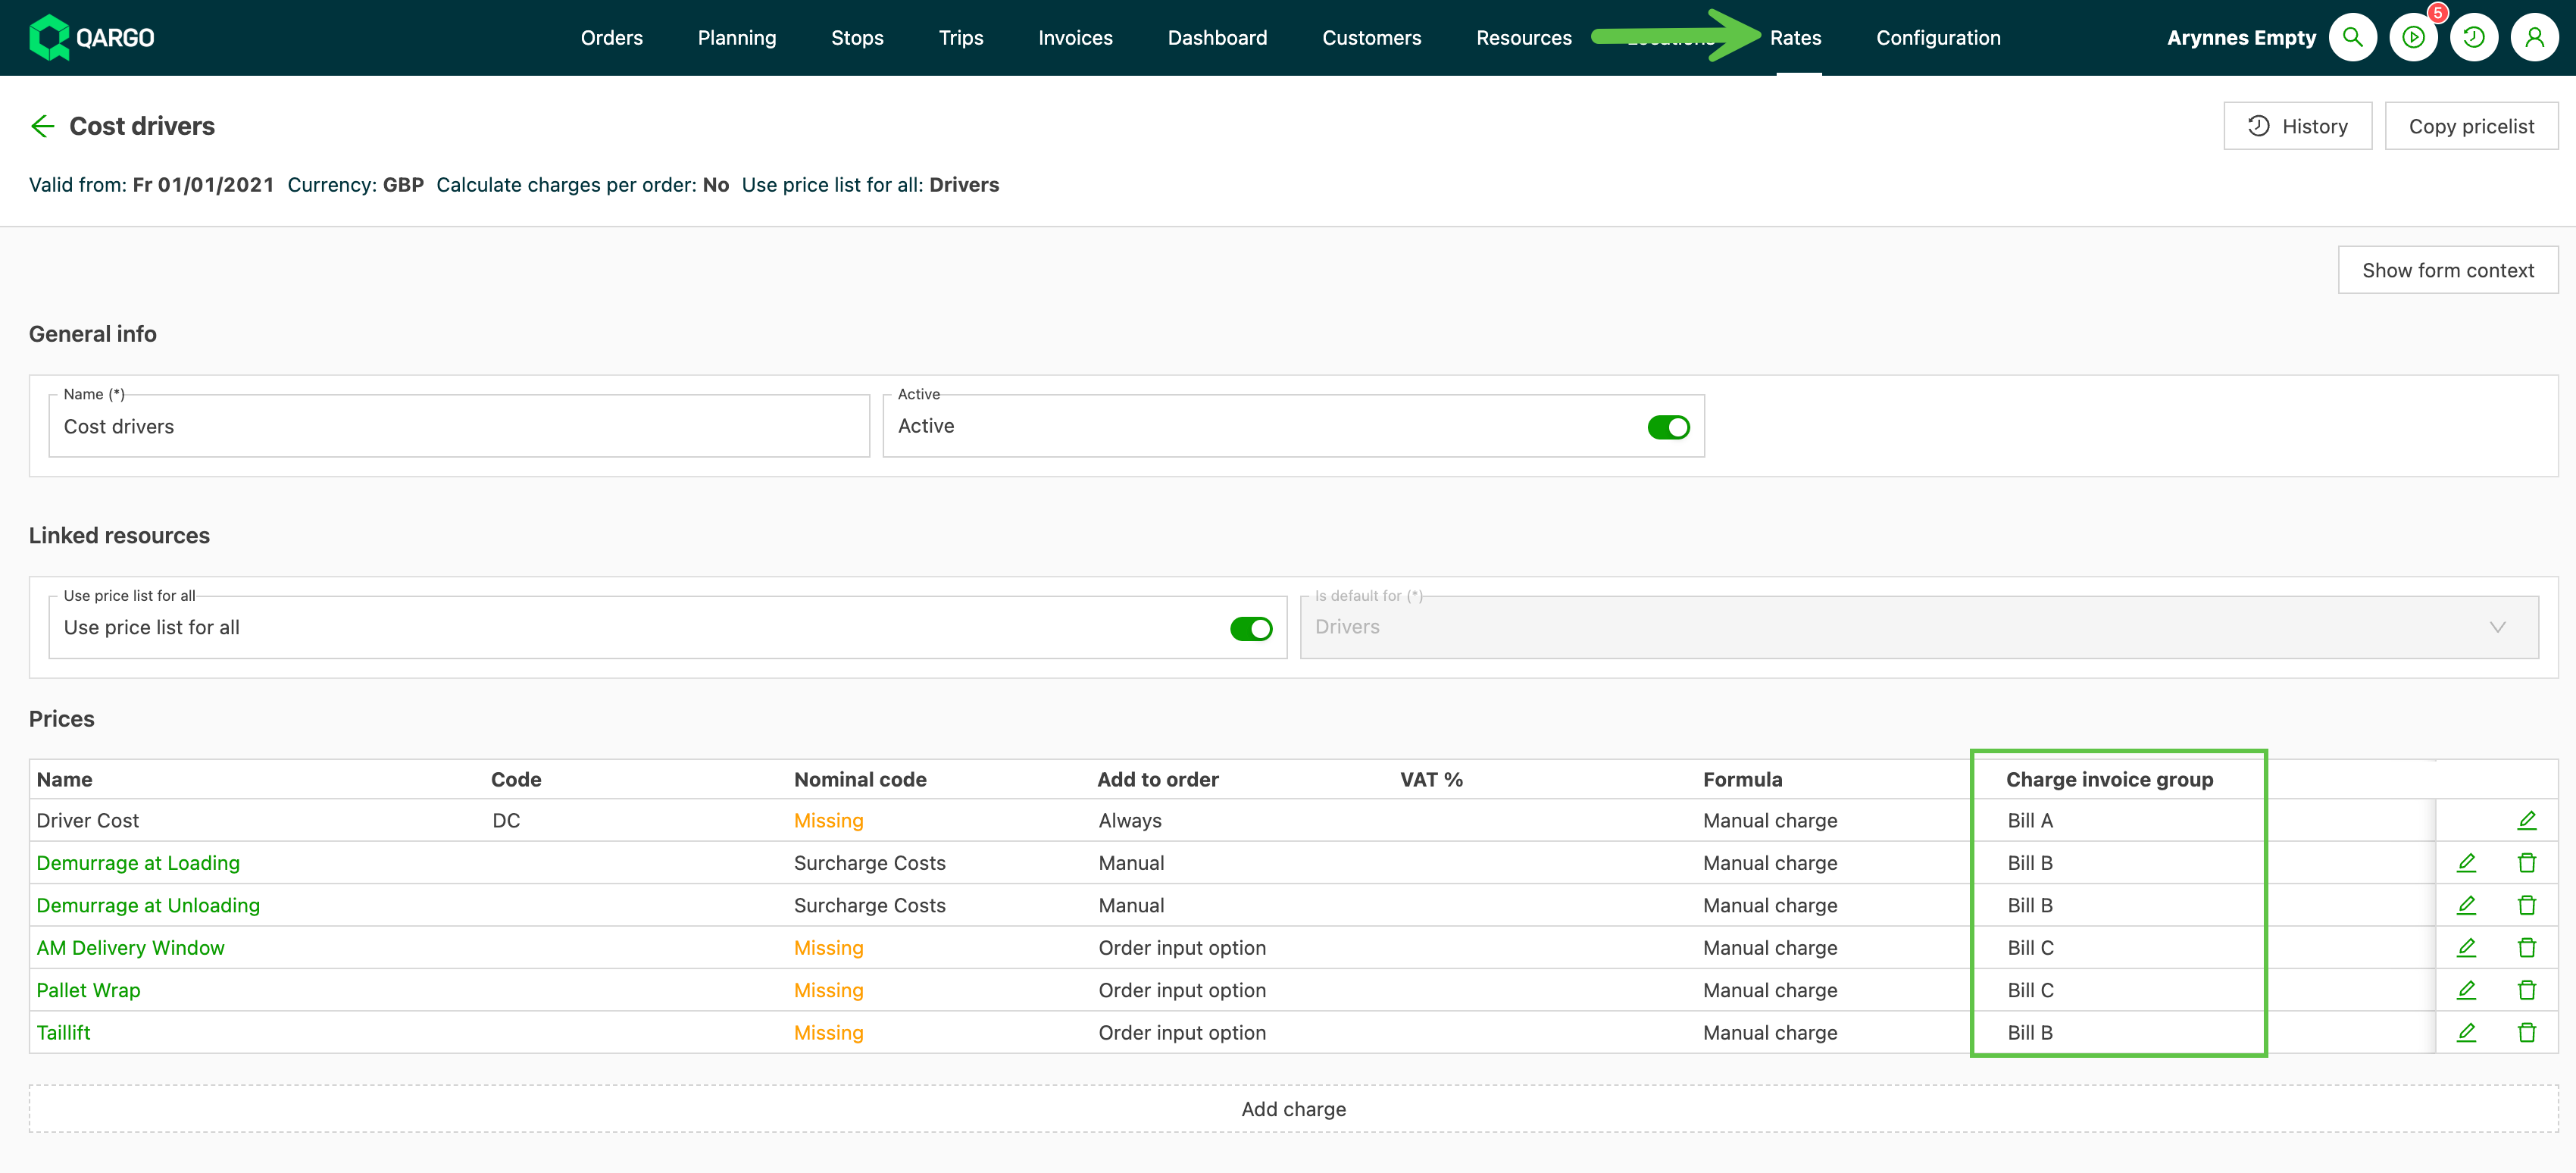
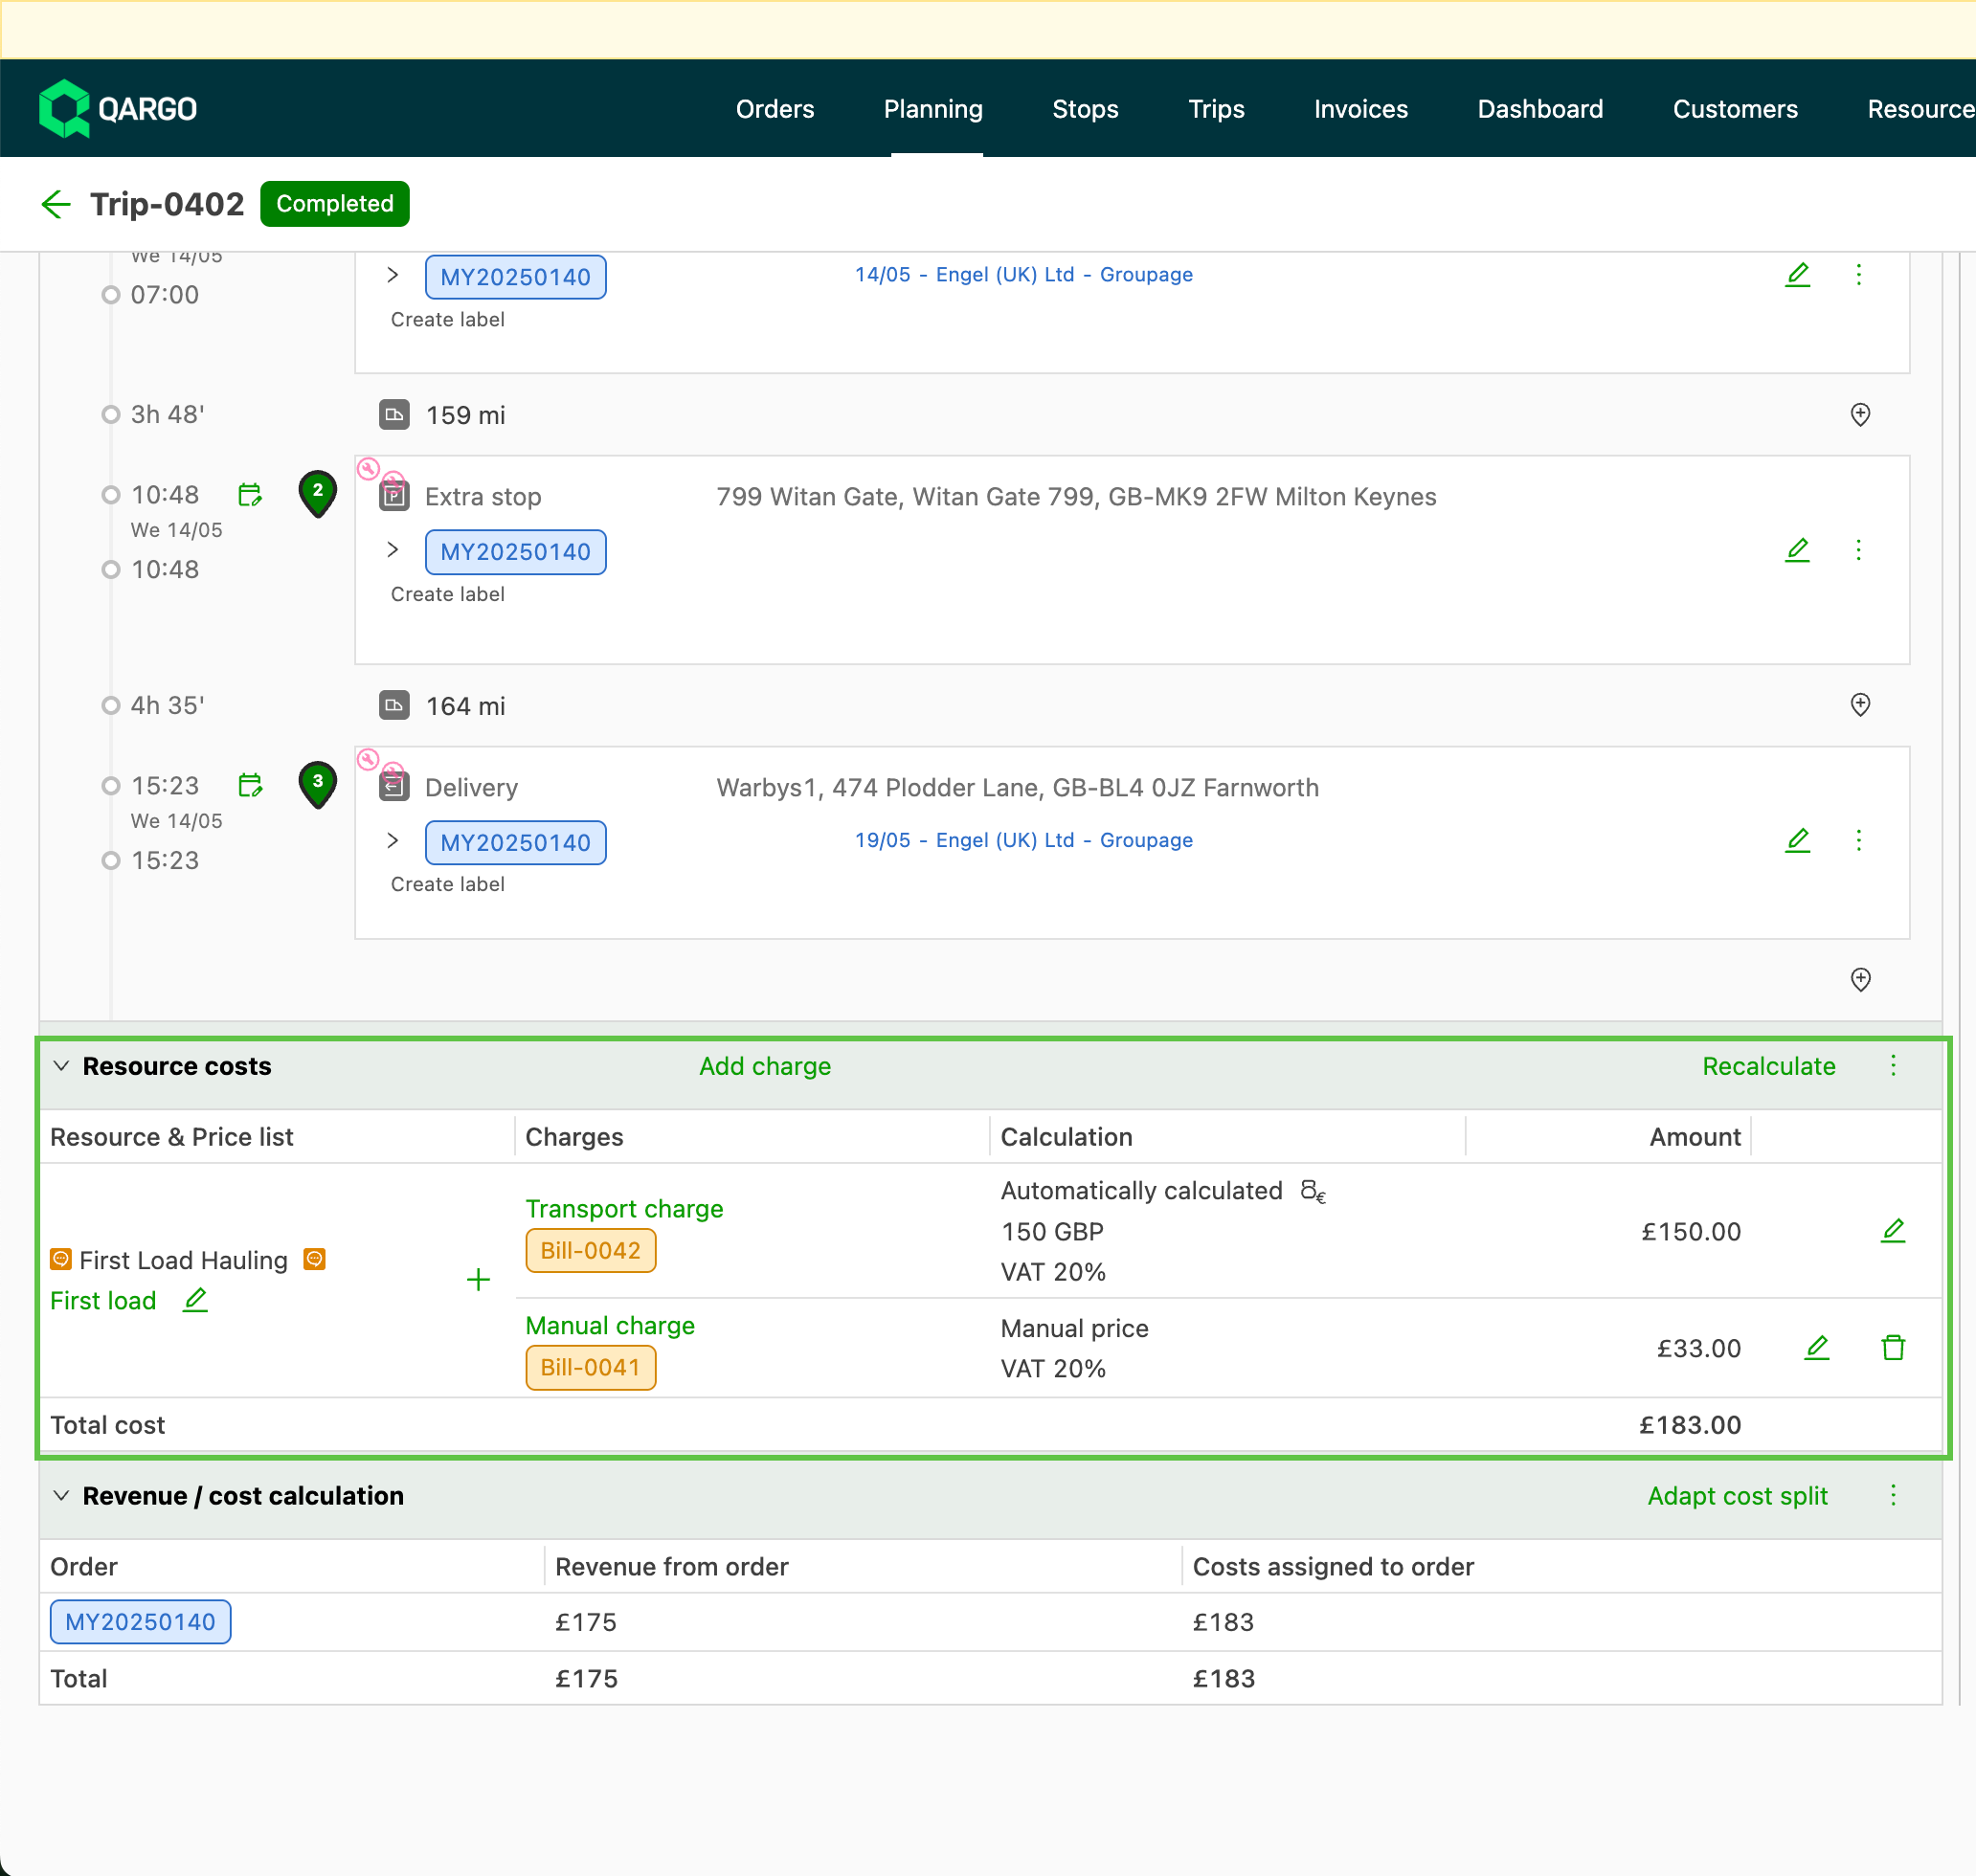
The same option is also available for costs allocated to loads. When creating a price list for costs on resources, these can also be allocated to up to 4 groups (named Bill A–Bill D).
Click here for an overview.
Export customer price lists.
Customer price lists are now more accessible with the new option to Export price lists.
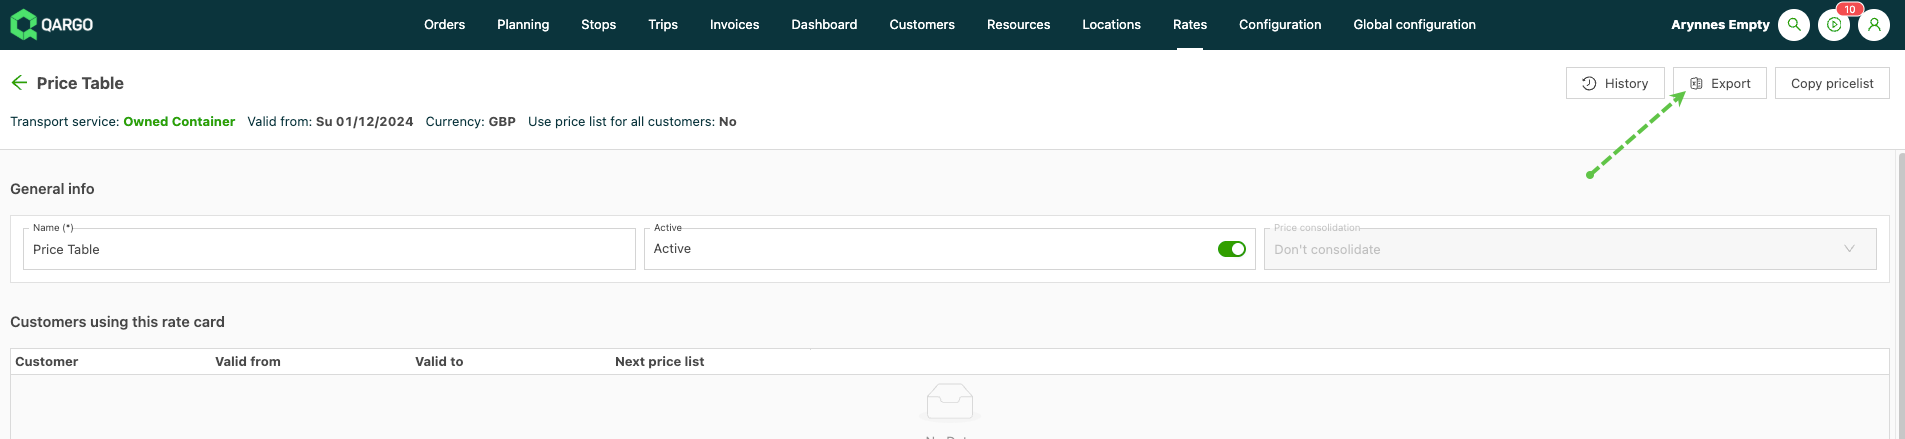
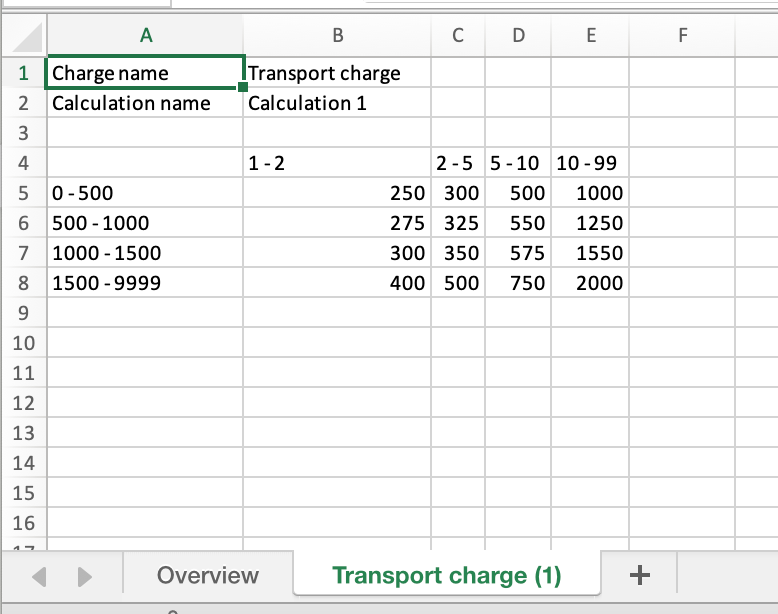
From the price list, click the Export button to generate and download an XLS file. Each download includes an overview tab with details of the transport charge and any additional surcharges in the price list.
If the transport charge includes a rate table, it is also included as a tab.