
Charge templates: introduction
This article gives an overview of charge templates in Rates: what they are and how to configure them.
Table of contents
What is a charge template?
A charge template is a standard price template that streamlines the configuration of price calculations across multiple price lists. Templates can be created for transport charges, surcharges and costs. Charge templates are a significant improvement to rate cards. They offer more flexibility and make it easier to update customer rate cards when:
- there is a set of base price calculations, where each customer may need slight adjustments to specific calculations.
- creating a template, base price calculations can be defined and used as a starting point, which makes it easier to compare template prices with customer-specific prices.
Charge template screen.
Navigate to Rates. There is a new submenu, Charge templates. The screen lists any existing charges and shows them as templates.
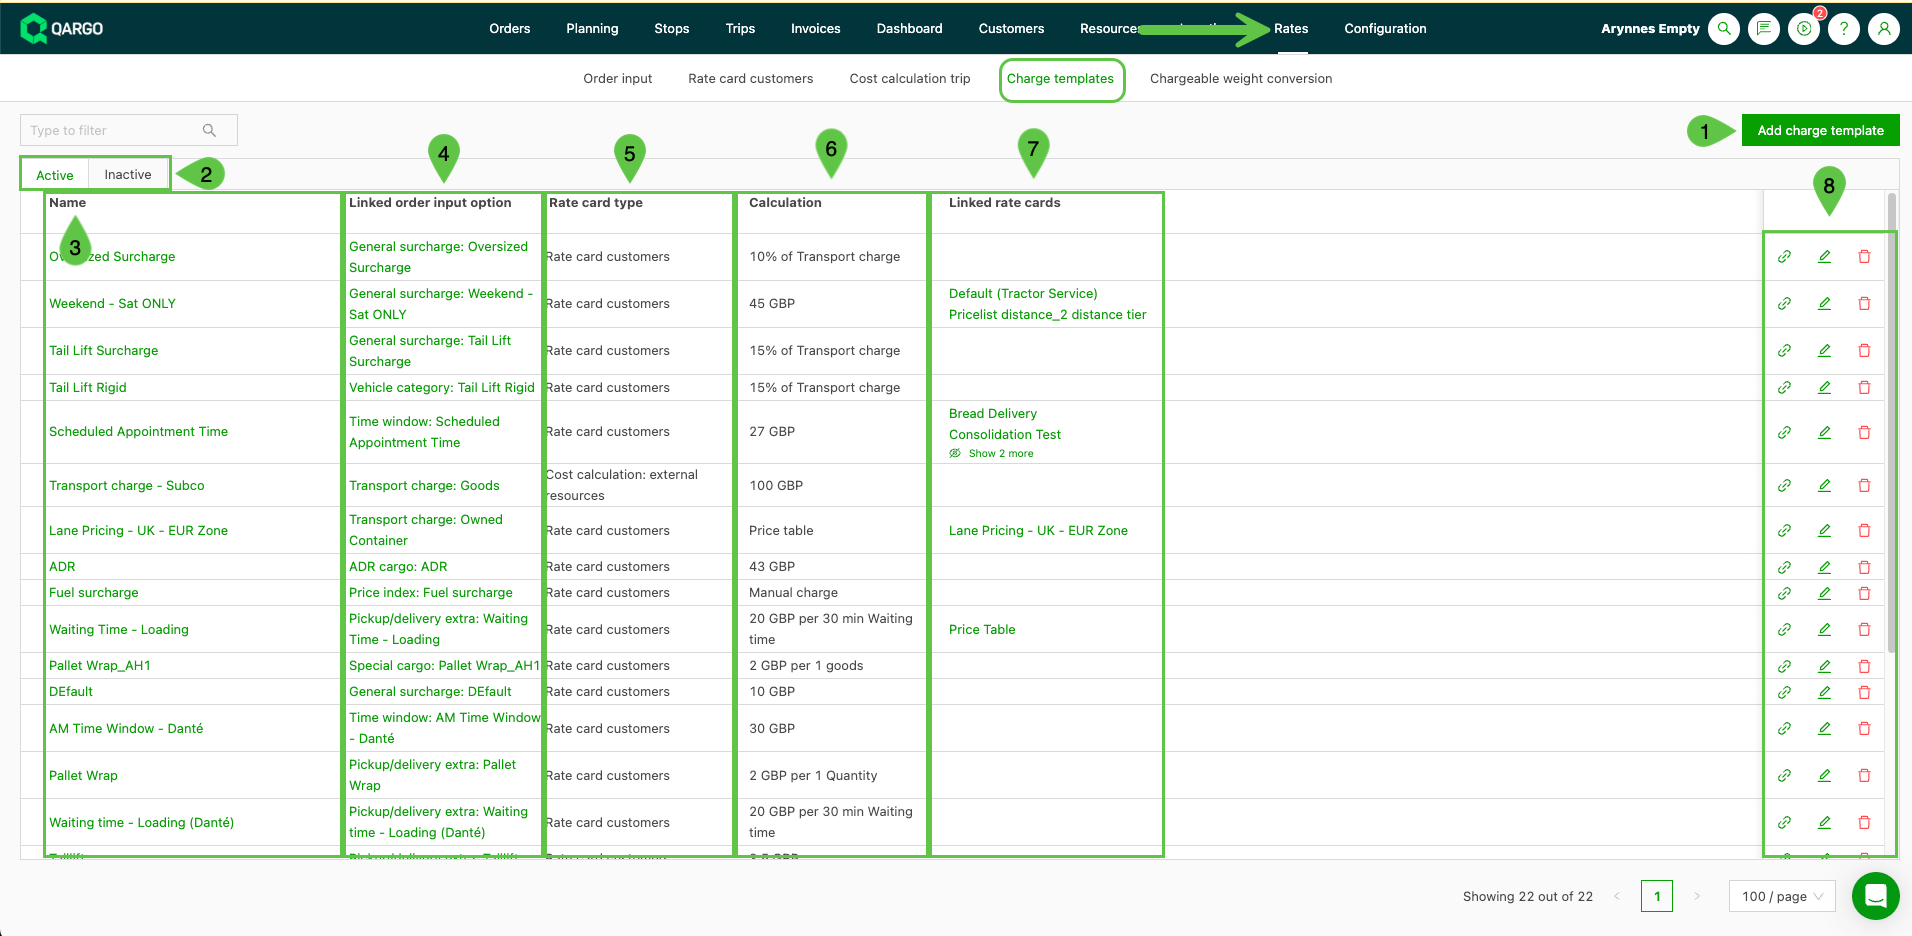
The screen displays the following:
-
Add charge template. Click here to set up a new charge template.
-
Status tabs. The default view shows active templates. To view historical templates, click Inactive.
-
Name. This is the name of the specific charge; it is added when the charge is first set up. Clicking the name opens the Charge details page. The charge details can be edited from this page.
-
Linked order input option. This shows how the charge was originally configured, i.e., under Rates > Order input: General surcharge, etc. Clicking the name opens the Charge details page. The charge details can be edited from this page.
- The linked order input option cannot be changed after the template is created, and a charge template cannot be copied to a different order input option. If a similar template is needed for a different order input option, a new charge template must be created from scratch.
-
Rate card type. This shows the type of price list (sales or cost) that the charge is associated with. ‘Rate card customers’ = sales; ‘Cost calculations’ = cost.
-
Calculation. Shows a summary of how the charge is calculated.
-
Linked rate cards. If the charge template has been linked to a specific rate card, it is shown here. When the template is assigned to multiple rate cards, the ‘eye’ icon opens the charge details to show the full list of linked rate cards.
-
Functions. ‘Chain’ = opens a list (if available) of linked rate cards to enable quick updates. ‘Pencil’ icon = opens the charge template for editing. ‘Trash’ = deletes the charge template entirely.
Set up a new charge template.
- Navigate to Rates > Charge templates.
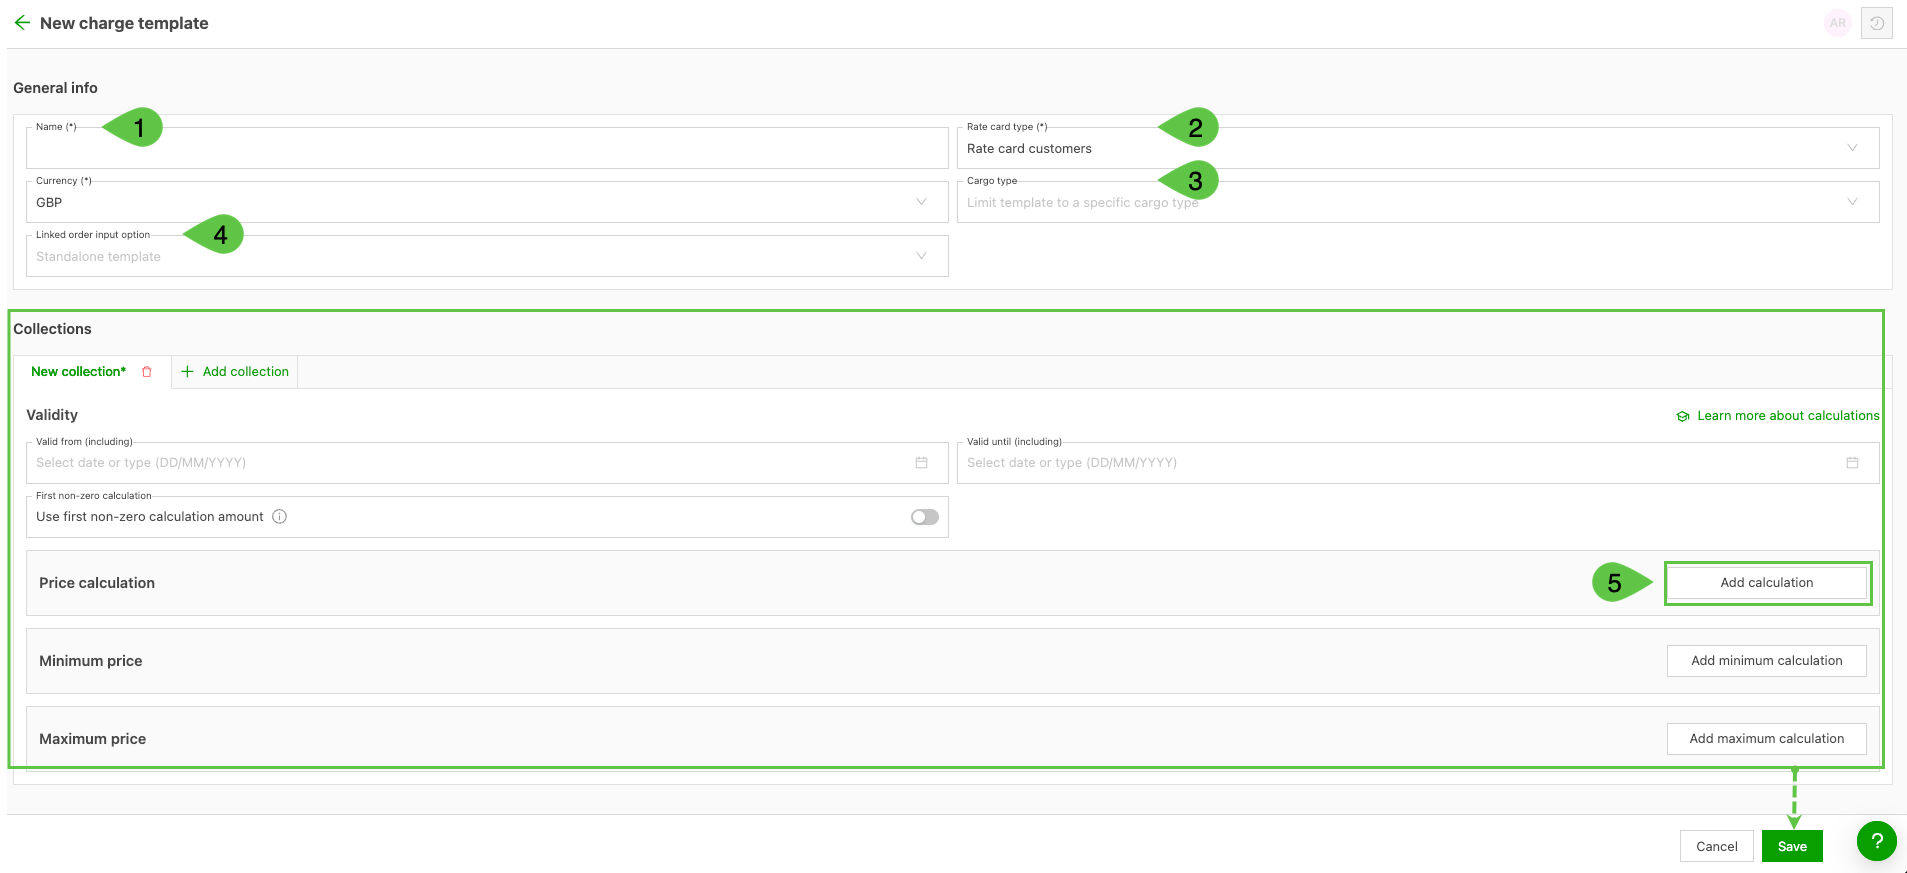
- Click Add charge template. The new charge template screen opens.
-
Name. Give the new charge template a name. Use a name that clearly identifies the charge type. If the template is assigned to a specific customer, the customer can be added to the name.
-
Rate card type. There are 3 options to select from:
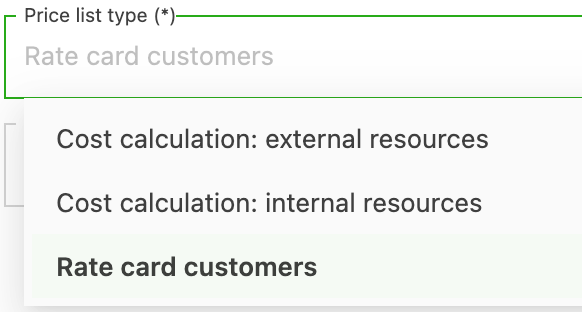
- Cost calculation: external resource. Use this when setting up a template for a cost associated with an external resource (i.e., contract carrier, etc.).
- Cost calculation: internal resource. Use this when setting up a template for a cost associated with an internal resource (i.e., driver, etc.).
- Rate card customers. Use this when setting up a template for a sales item that will be charged to a customer, generating revenue.
-
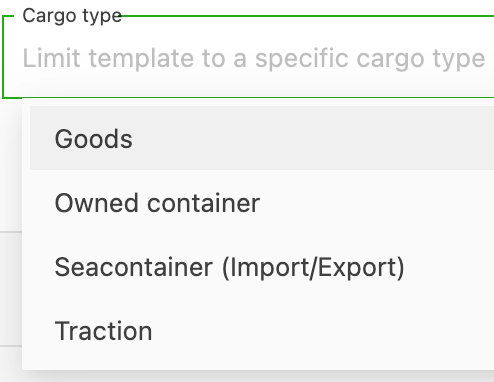
Freight type. Charges must be associated with a freight type movement.
-
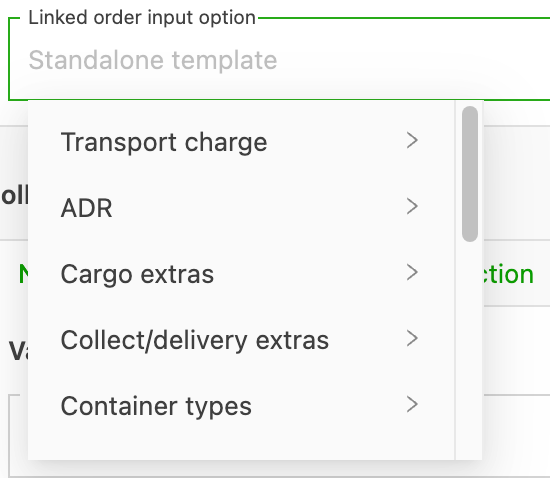
Linked order input option (mandatory). To configure the template, the charge must first be created in the general configuration / order input fields. Once the charge is added to the configuration, active options are shown in the dropdown and are associated with the template. Note that this is a mandatory field.
If a charge isn’t showing in the dropdown when adding charges to an order, the surcharge hasn’t been added to the customer’s price list yet. Charges only appear as options on an order if they already exist on the relevant rate card. First add the surcharge to the customer’s rate card under Rates > Rate card customers; it will then appear in the order dropdown.
-
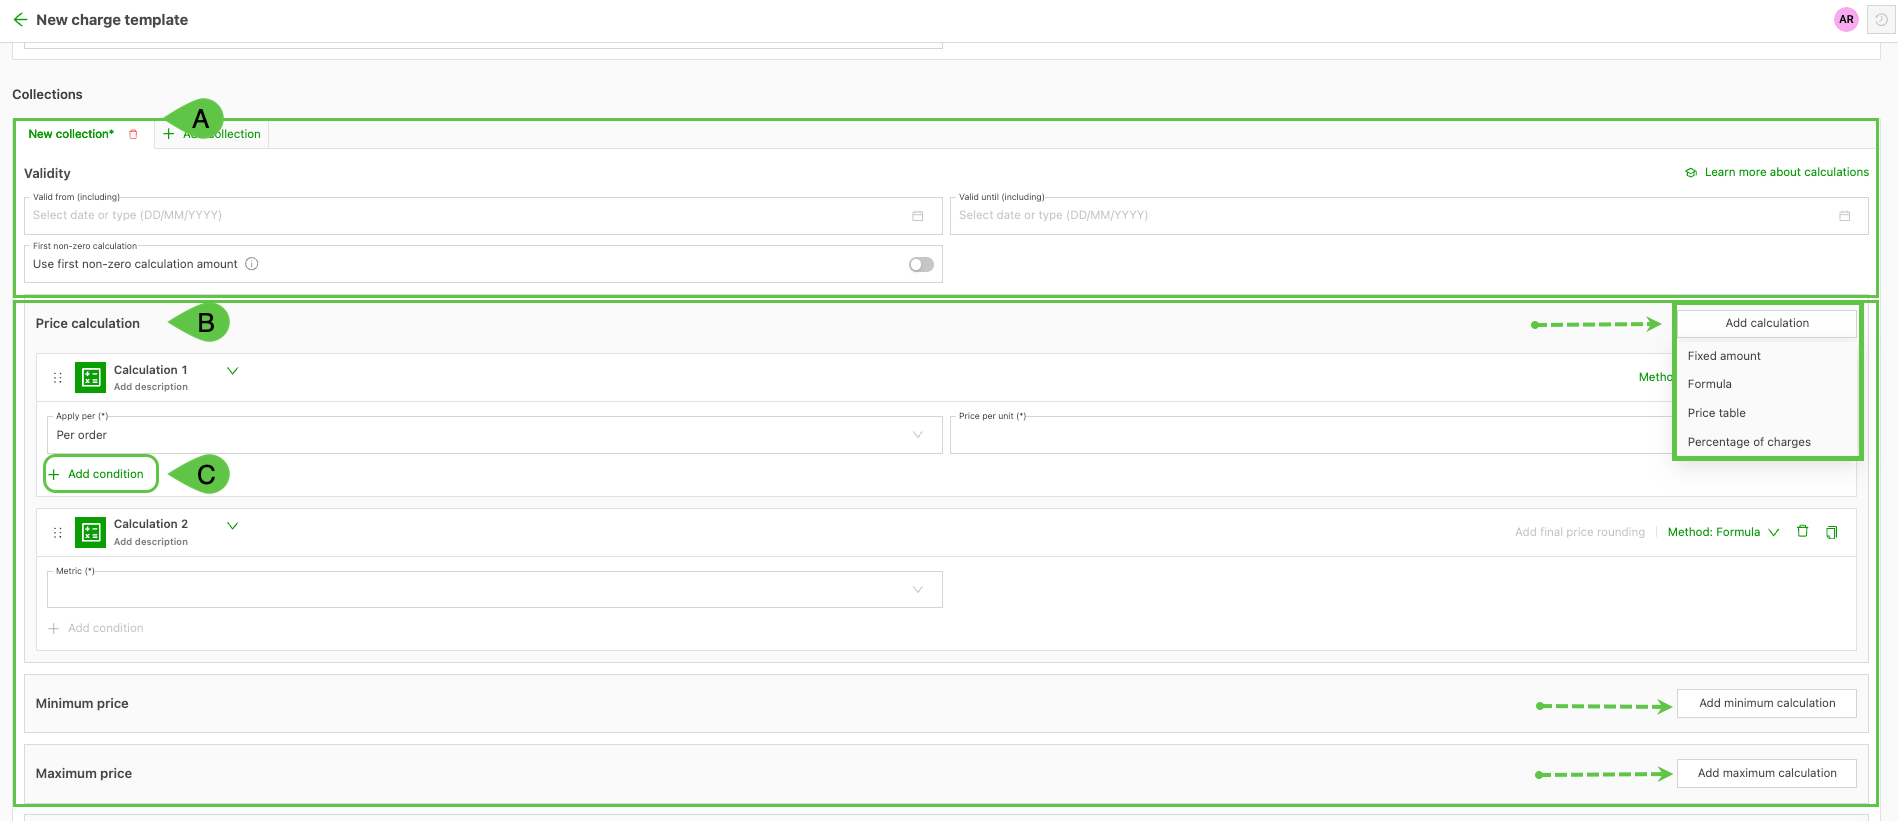
Collections: Define the template collection and add the calculation.
-
Define the collection and set the validity. Click the ‘New collection’ title. Give the collection a name that is easy to associate with the charge, customer, etc. If no name is given, the title changes automatically when the ‘Valid from’ date is entered. If no dates are entered, the collection is set to ‘Valid on any date’.
- Multiple collections can be created: click ‘+Add collection’.
- Collection valid from / to dates cannot overlap.
- Multiple calculations, each with conditions, can be created within each collection.
-
Add price calculation. Select the specific calculation metrics for the charge template from the dropdown menu.
-
Add conditions (where applicable). Click ‘+Add condition’ on the specific price calculation to add any conditions that will apply to the calculation on the charge template.
-
Click for details on how to configure the charge.
Troubleshooting
Q. Why is there a 0.01 discrepancy in the charges?
A. Qargo applies banker’s rounding (round half to even). For instance, if a charge line has an amount of 275.006, it is rounded to 275.00. This rounding method can lead to minor variances in the total amount, especially when multiple charge lines are involved.
Q. Why doesn’t the charge show in the dropdown when adding it to the order?
A. If a charge isn’t showing in the dropdown when adding charges to an order, the surcharge hasn’t been added to the customer’s price list yet. Charges only appear as options on an order if they already exist on the relevant rate card. First add the surcharge to the customer’s rate card under Rates > Rate card customers; it will then appear in the order dropdown.