
Orders - Create an order
This article covers the steps to create a single order manually and to create an order by uploading a document.
Table of contents
There are 2 ways to create a single order manually in the system. Orders are created under the Orders main menu.
Alternative order creation options:
- Order creation by copying an existing order: 👉**Click here**
- Order creation in bulk from a template: 👉**Click here**
General order creation
Step 1: Navigate to the order creation section
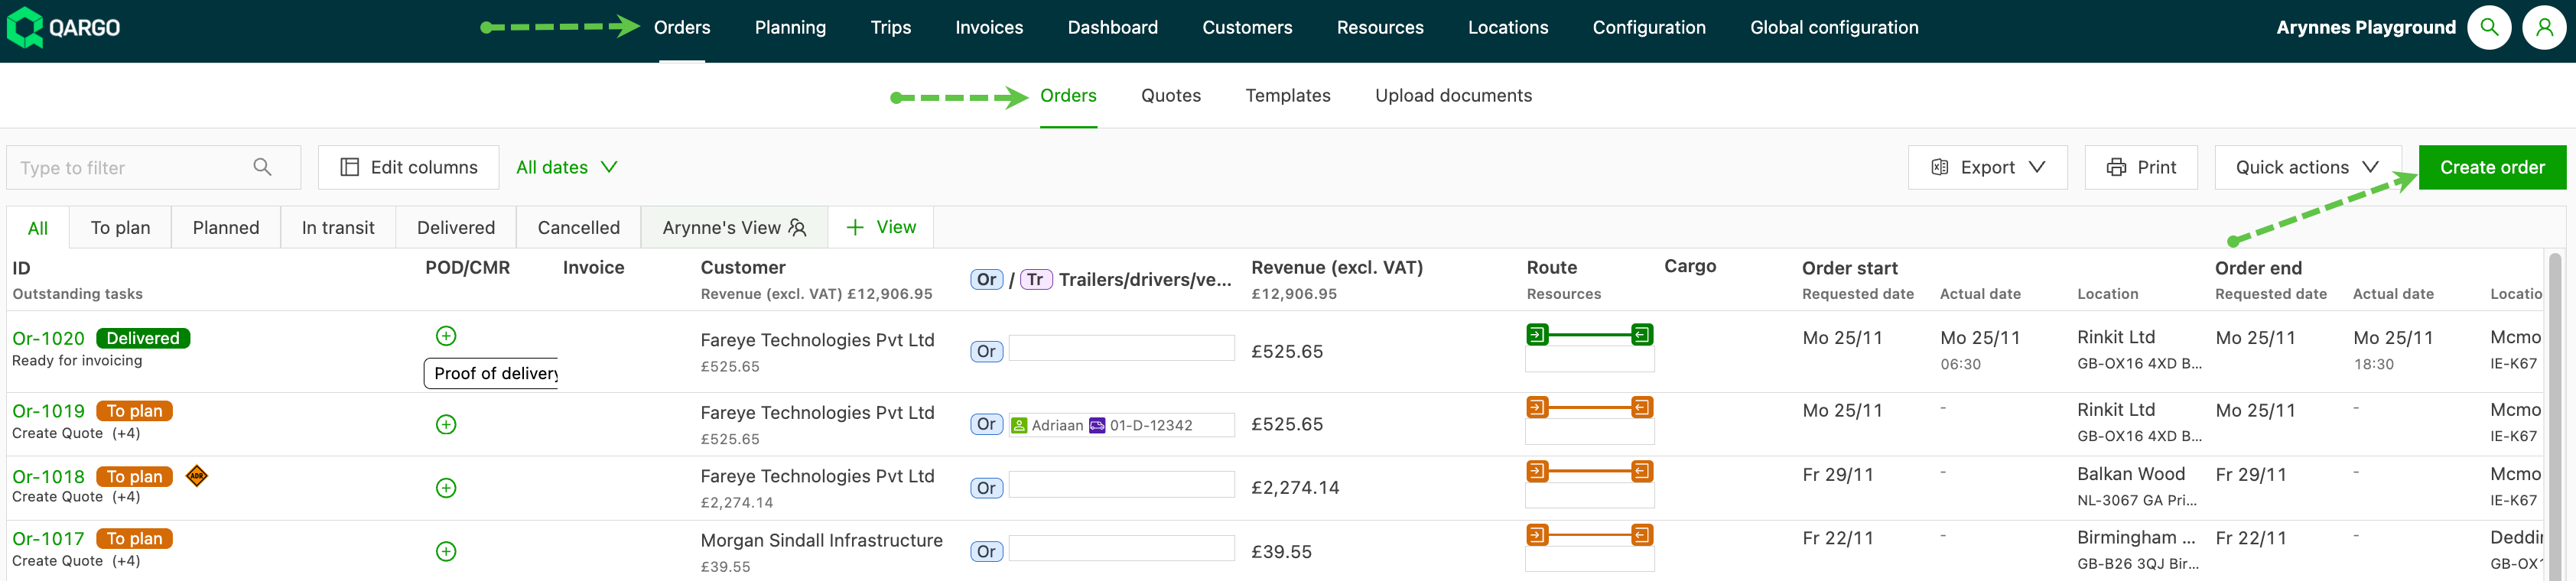
- From the main Orders menu, select the orders list.
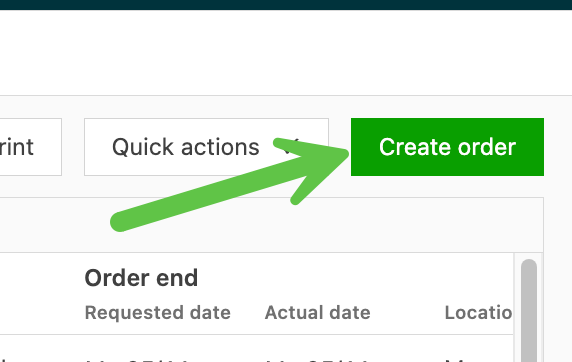
- Click the Create order button, located on the right or top of the screen.
Step 2: Fill in the order details
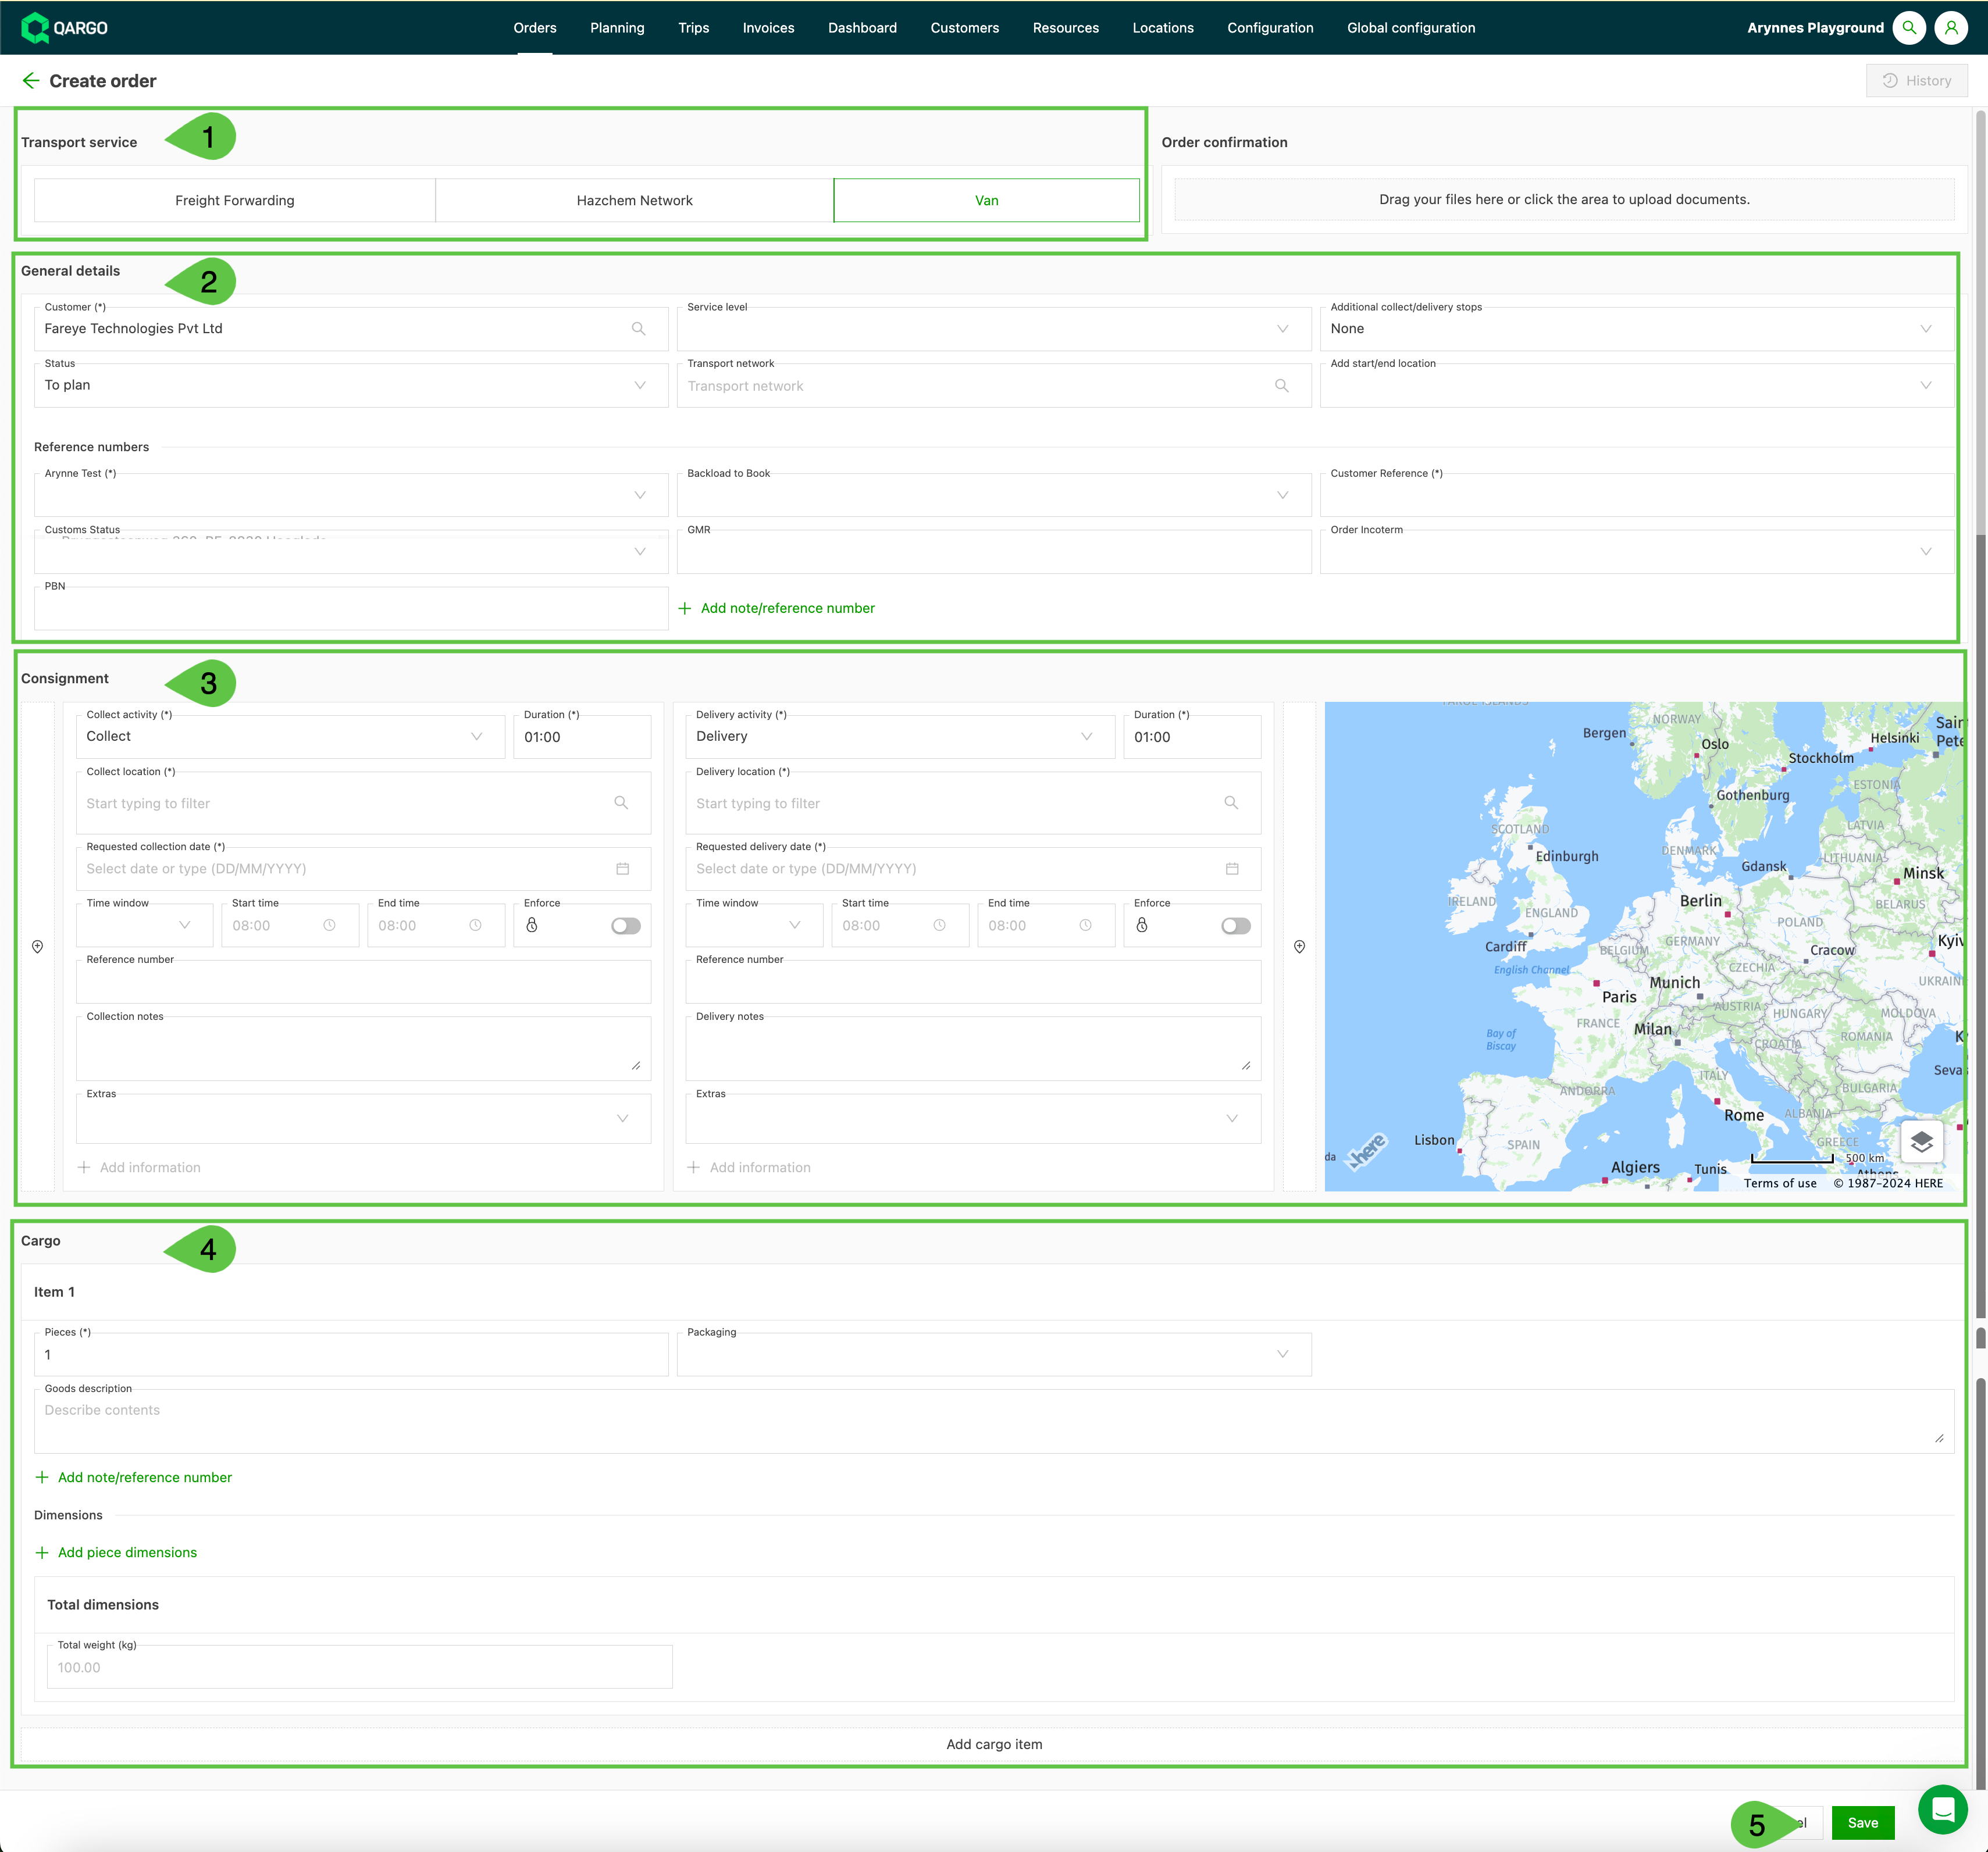
- The order creation section contains a form for entering the order details. Each section loads once the previous section is completed.
-
Transportation service. Select the transportation service for the order. Note: transportation services can affect the stop activities and order detail fields that are available on the order.

-
General details. Enter the customer name. Once it is entered, the Shipment section populates. Any order defaults associated with the customer and/or transportation services (locations, references, etc.) appear pre-filled.
If there are multiple pickups/deliveries, use Additional pickup / delivery stops to indicate what is required. The shipment count updates to ‘1’ and the option to Add shipment to the order is shown. Complete the remaining relevant and/or mandatory fields.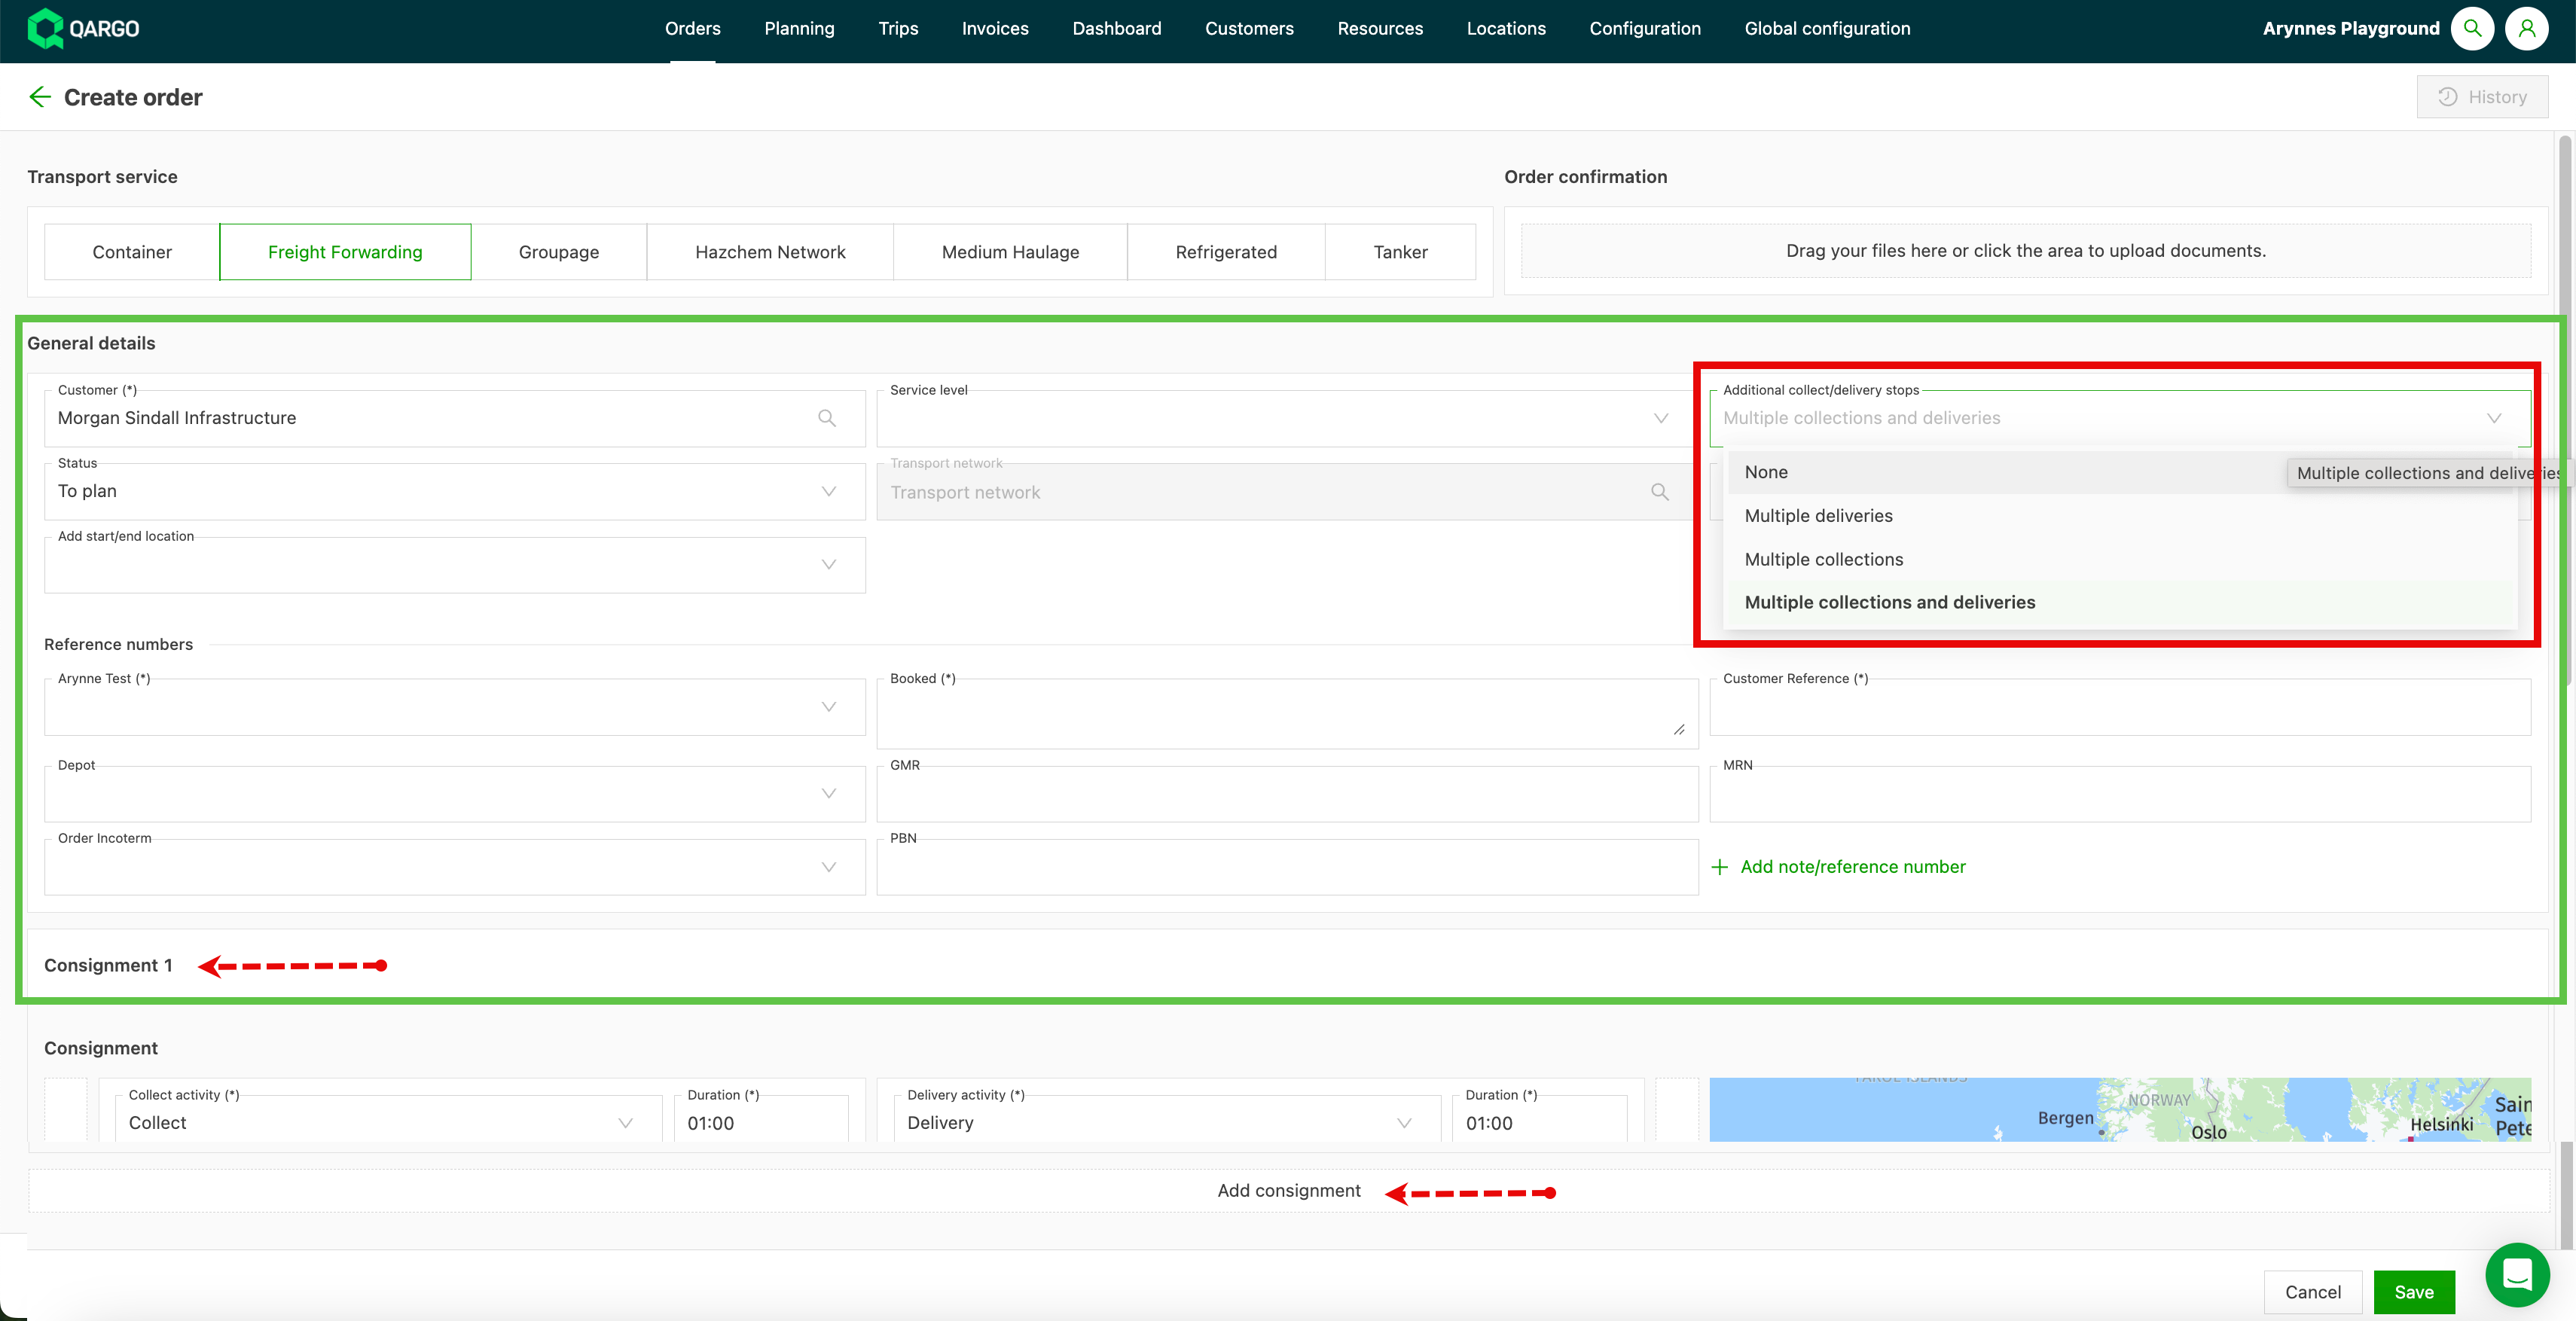
-
Shipment. The shipment section consists of a minimum of 2 sections: pickup and delivery. This may vary based on the transportation service selected; for example, ‘Containers’ may include additional sections to account for container movements. A ’+’ icon before or after a stop allows additional stops to be added to the order.
Note 1: Each stop has a pre-configured Duration: the amount of time allocated to the stop in the overall calculation of the duration of the load.
Note 2: Start / end time, with or without ‘Enforce’, is a time frame (window) in which the stop activity can start. In the example below, the pickup can begin at any time from 6 a.m. up to and including 8 a.m.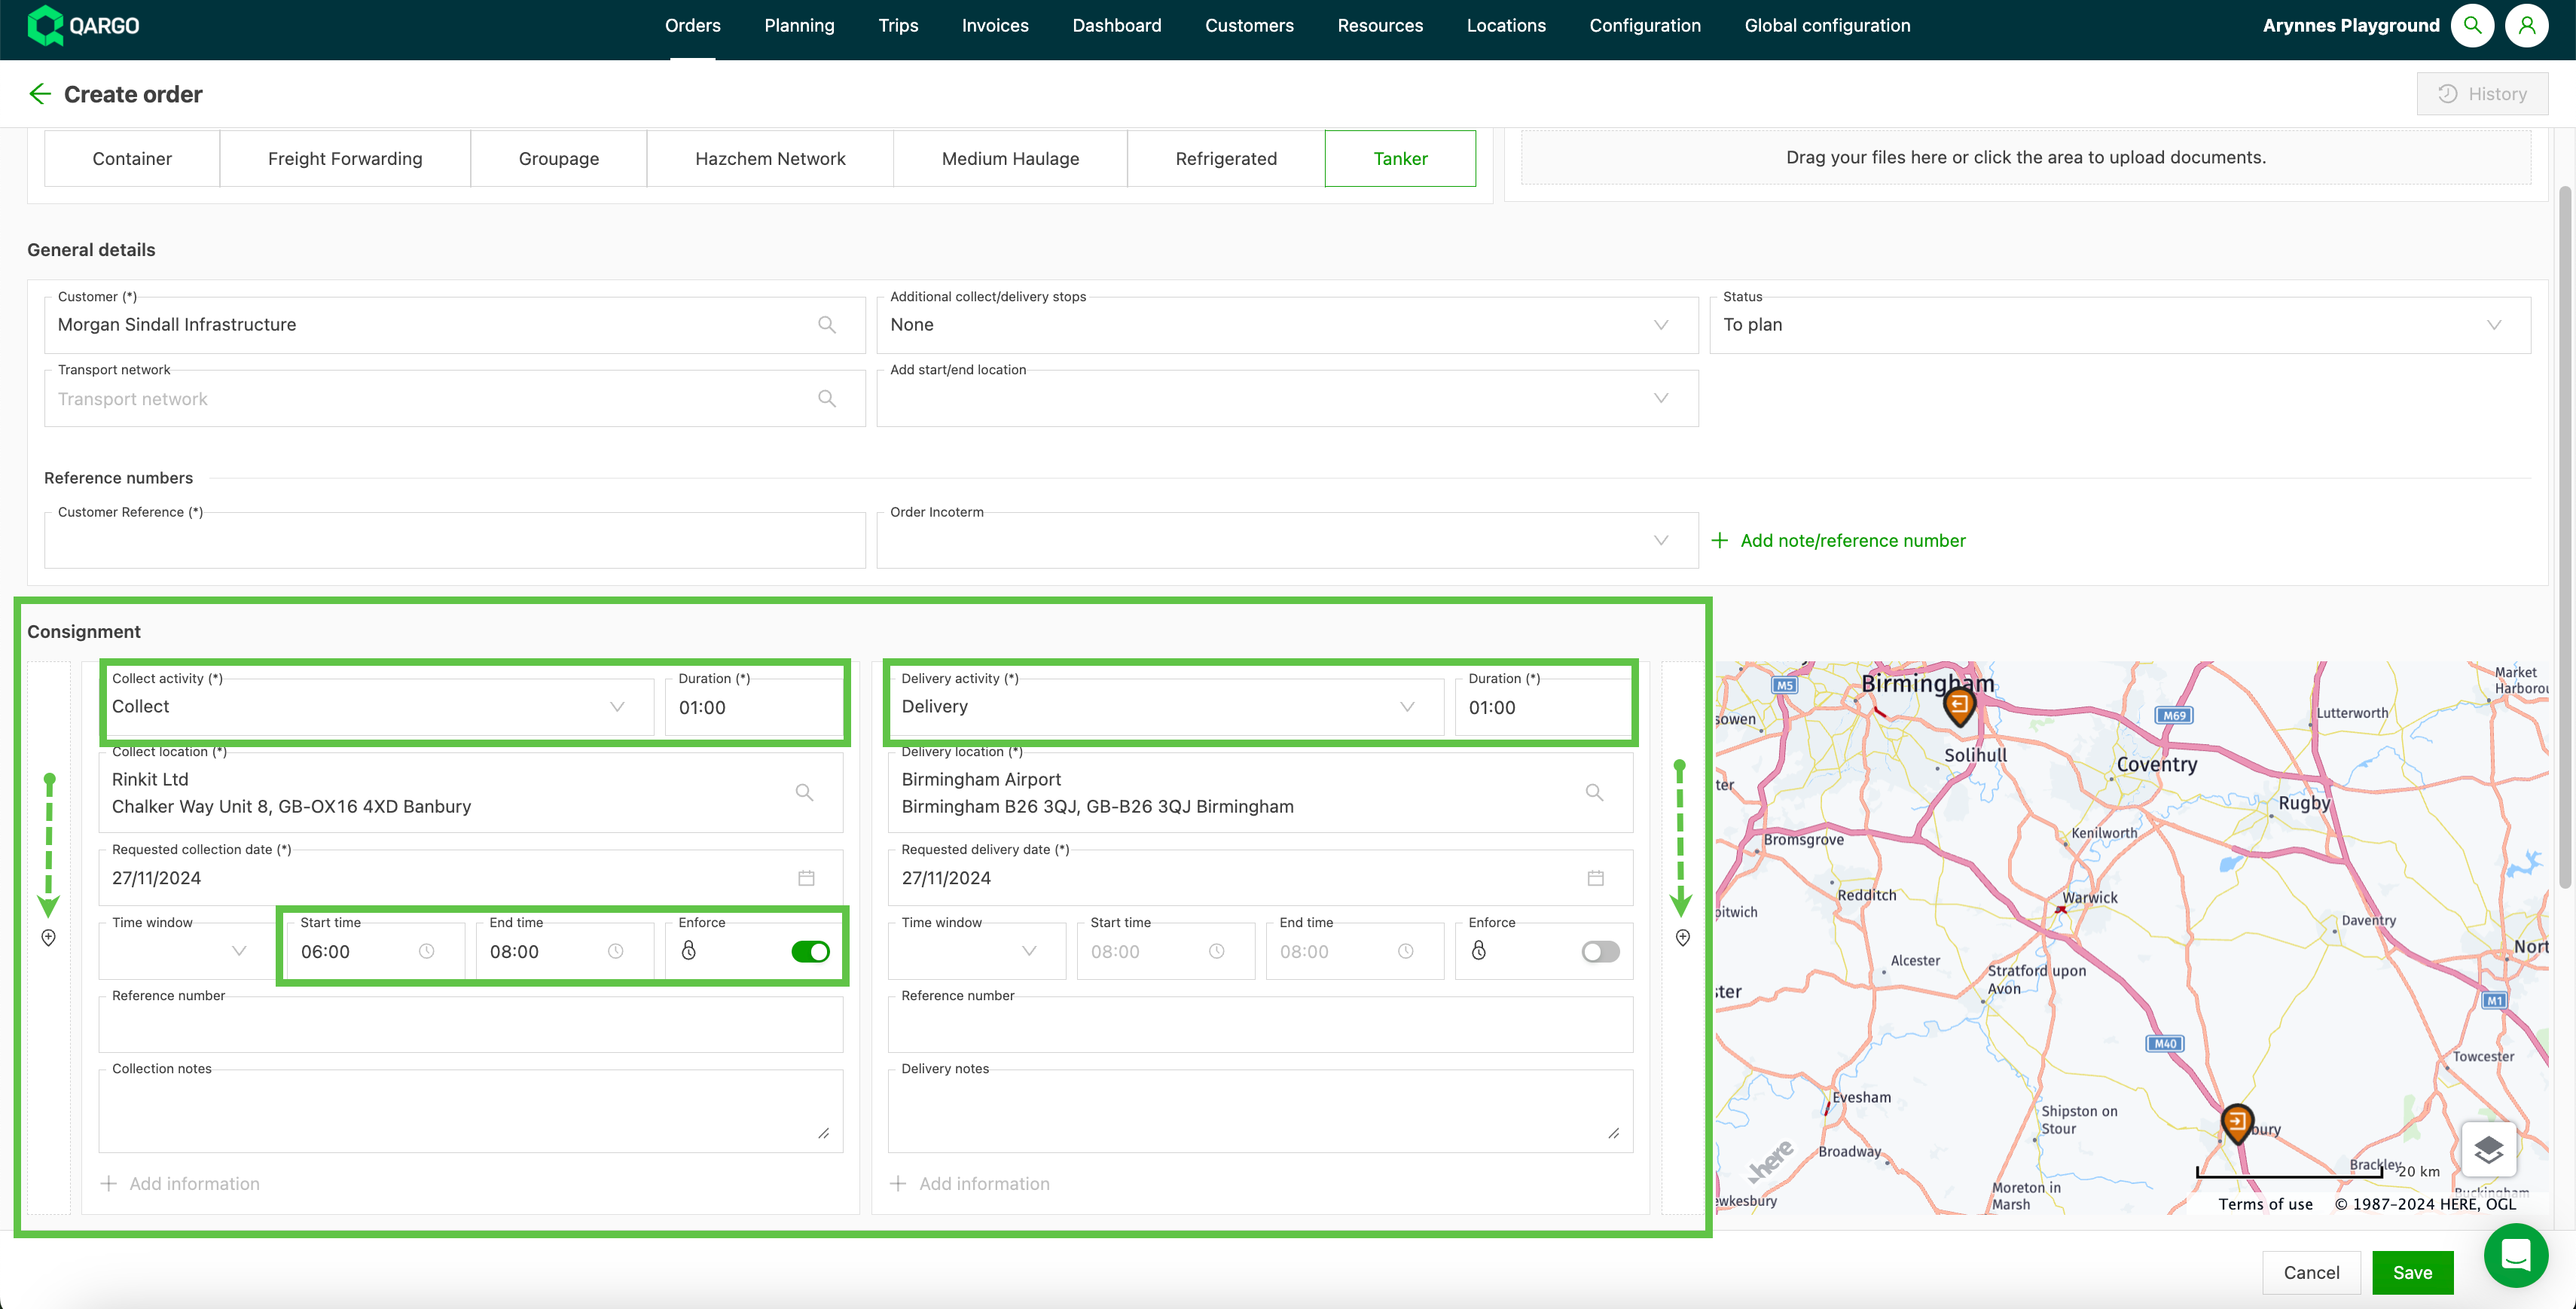
-
Standalone stops (Owned/Sea container only). If the transportation service selected is Owned or Sea container, there is an option to add standalone stops during order creation.

Users can add custom stops to the shipment and define where in the load the stop should be added:
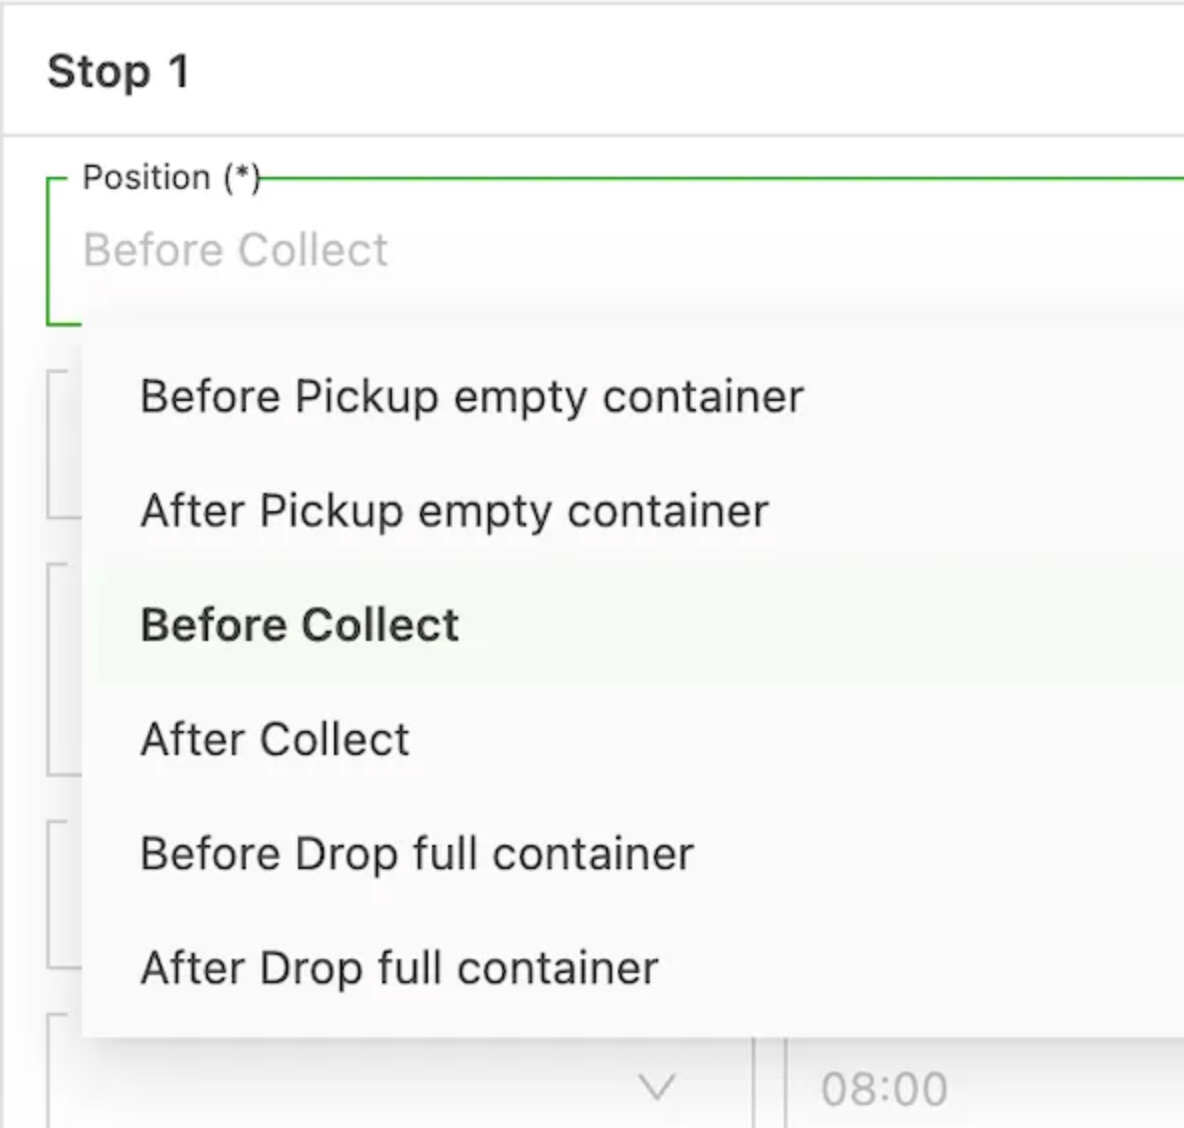
Multiple stops can be added to the shipment. Please note that this feature has some limitations.
- Only applicable to container orders (Owned / Sea container)
- Not applicable to transportation network orders
- Not compatible with creating multiple legs, e.g., drop chassis with container
-
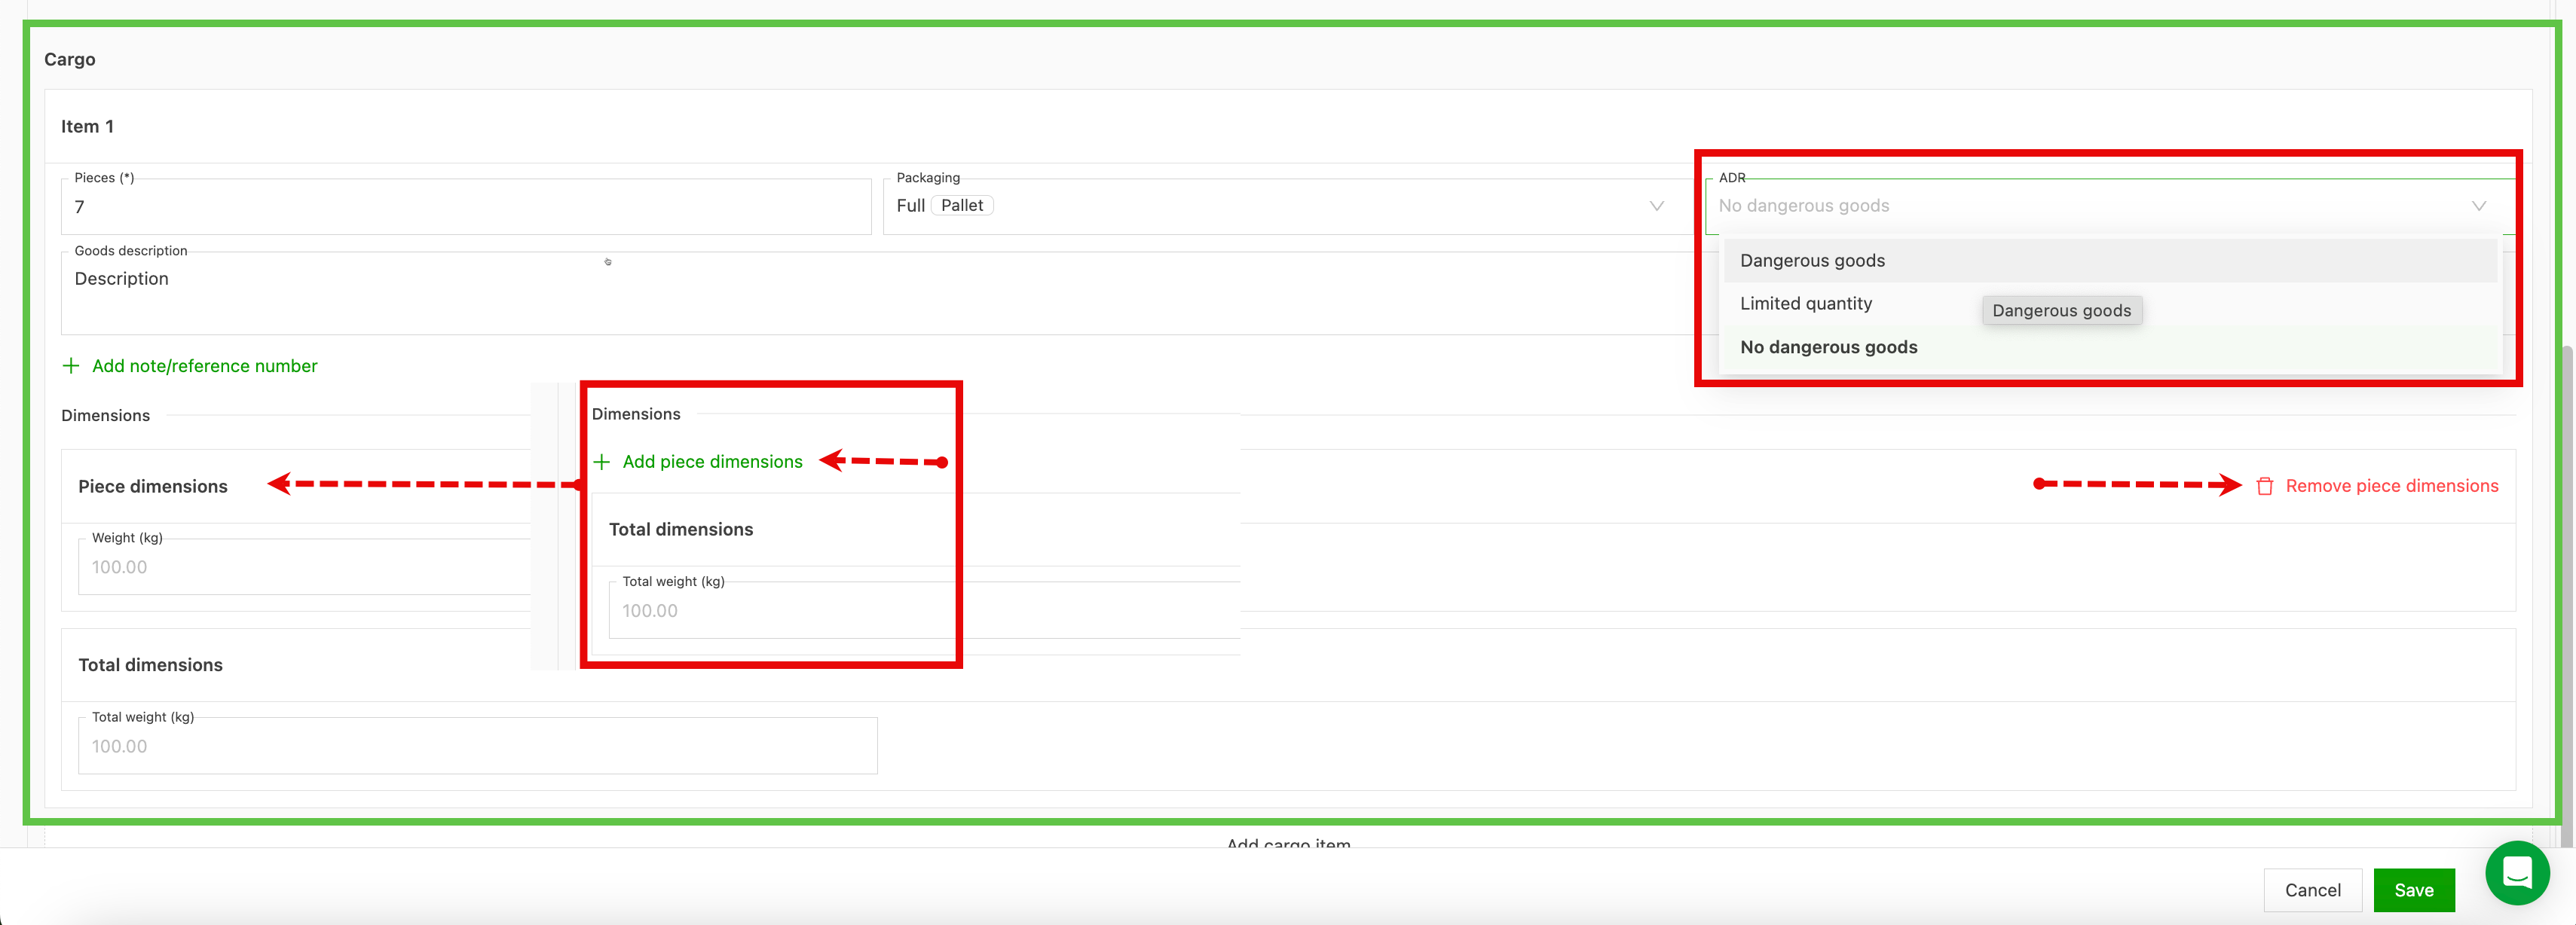
Freight. Add the goods details for each shipment. The default is to show the Total. If individual dimensions are required, they can be added by clicking Add piece dimensions and removed using Remove piece dimensions. If the freight is considered hazardous materials (HazMat), use the ADR dropdown. With ADR selected, an additional ADR section is shown that must be completed before the order can be saved.
-
Save. Review the order details to ensure accuracy and completeness. The order routing is shown on the map on the right side of the screen. Click the Save button at the bottom right to validate the order. If any errors or warnings are detected, carefully review the messages, make the necessary corrections and click the Save button again
Step 3: Validate and save the order
- Once all the necessary information has been entered, review the order details to ensure accuracy and completeness. The route can also be checked on the map on the right side of the screen to double-check.
- Click the Save button at the bottom right to validate the order.
- If any errors or warnings are detected, carefully review the messages, make the necessary corrections and click the Save button again
Step 4: Edit the order (if applicable)
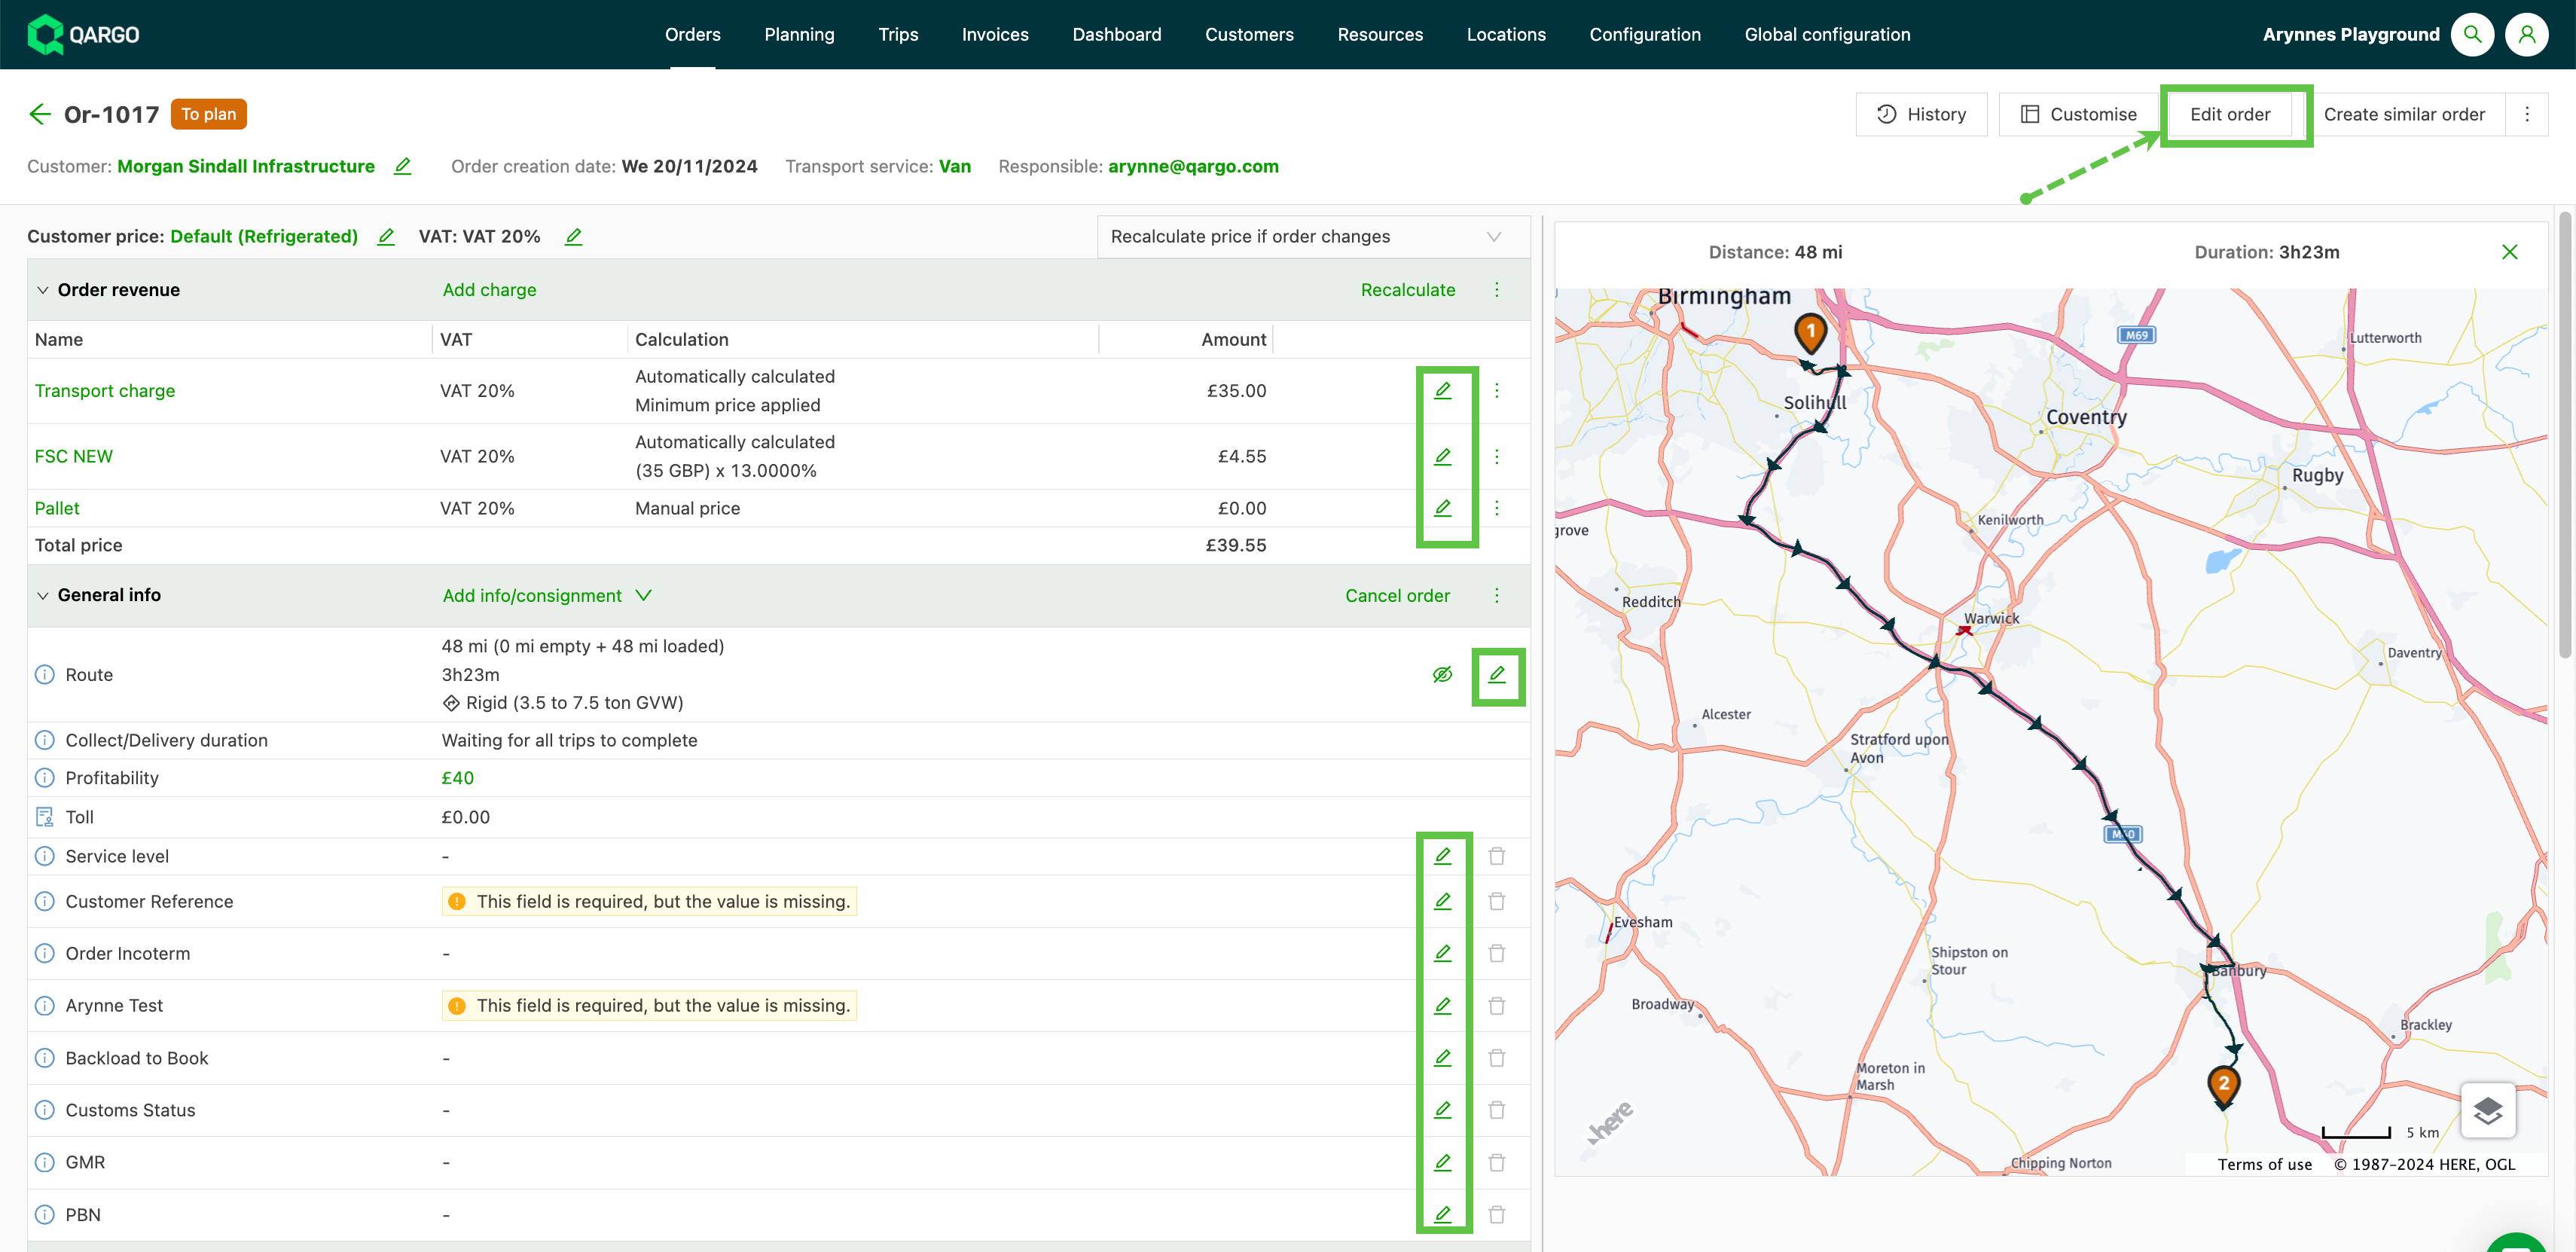
If any changes to the original order details are required, they can be made by clicking the Edit order button at the top right of the order page or via the Edit icon (pen) next to the fields in the order page view:
Edit the stops of an order. This article covers editing and re-sequencing stops on an order, including unplanned orders and orders on the planning board.
Order creation from a document
To create a new single order from an order confirmation document provided by the customer:
- Click the Create order button and choose the preferred transportation service, as in normal order creation.

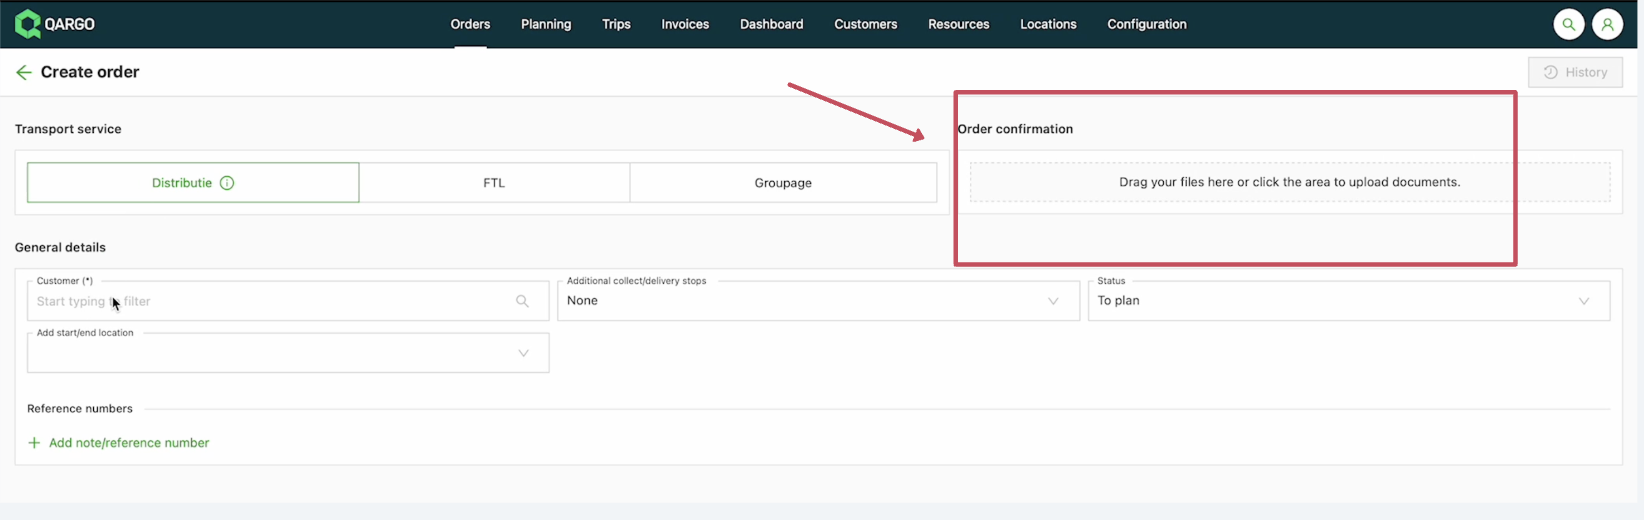
- Upload or drag in the order confirmation document provided by the customer.
-
The recognized fields include:
-
Customer by tax number (must be added to the customer profile)
-
References
-
Dates / times
- Opening times
-
Numbers
-
Addresses
-
Descriptions / additional instructions
- Pickup / delivery notes
- Goods descriptions
-
-
Click a field in the order to open a dropdown. Some options in that dropdown have the label Suggestion. This is data fetched from the uploaded document.
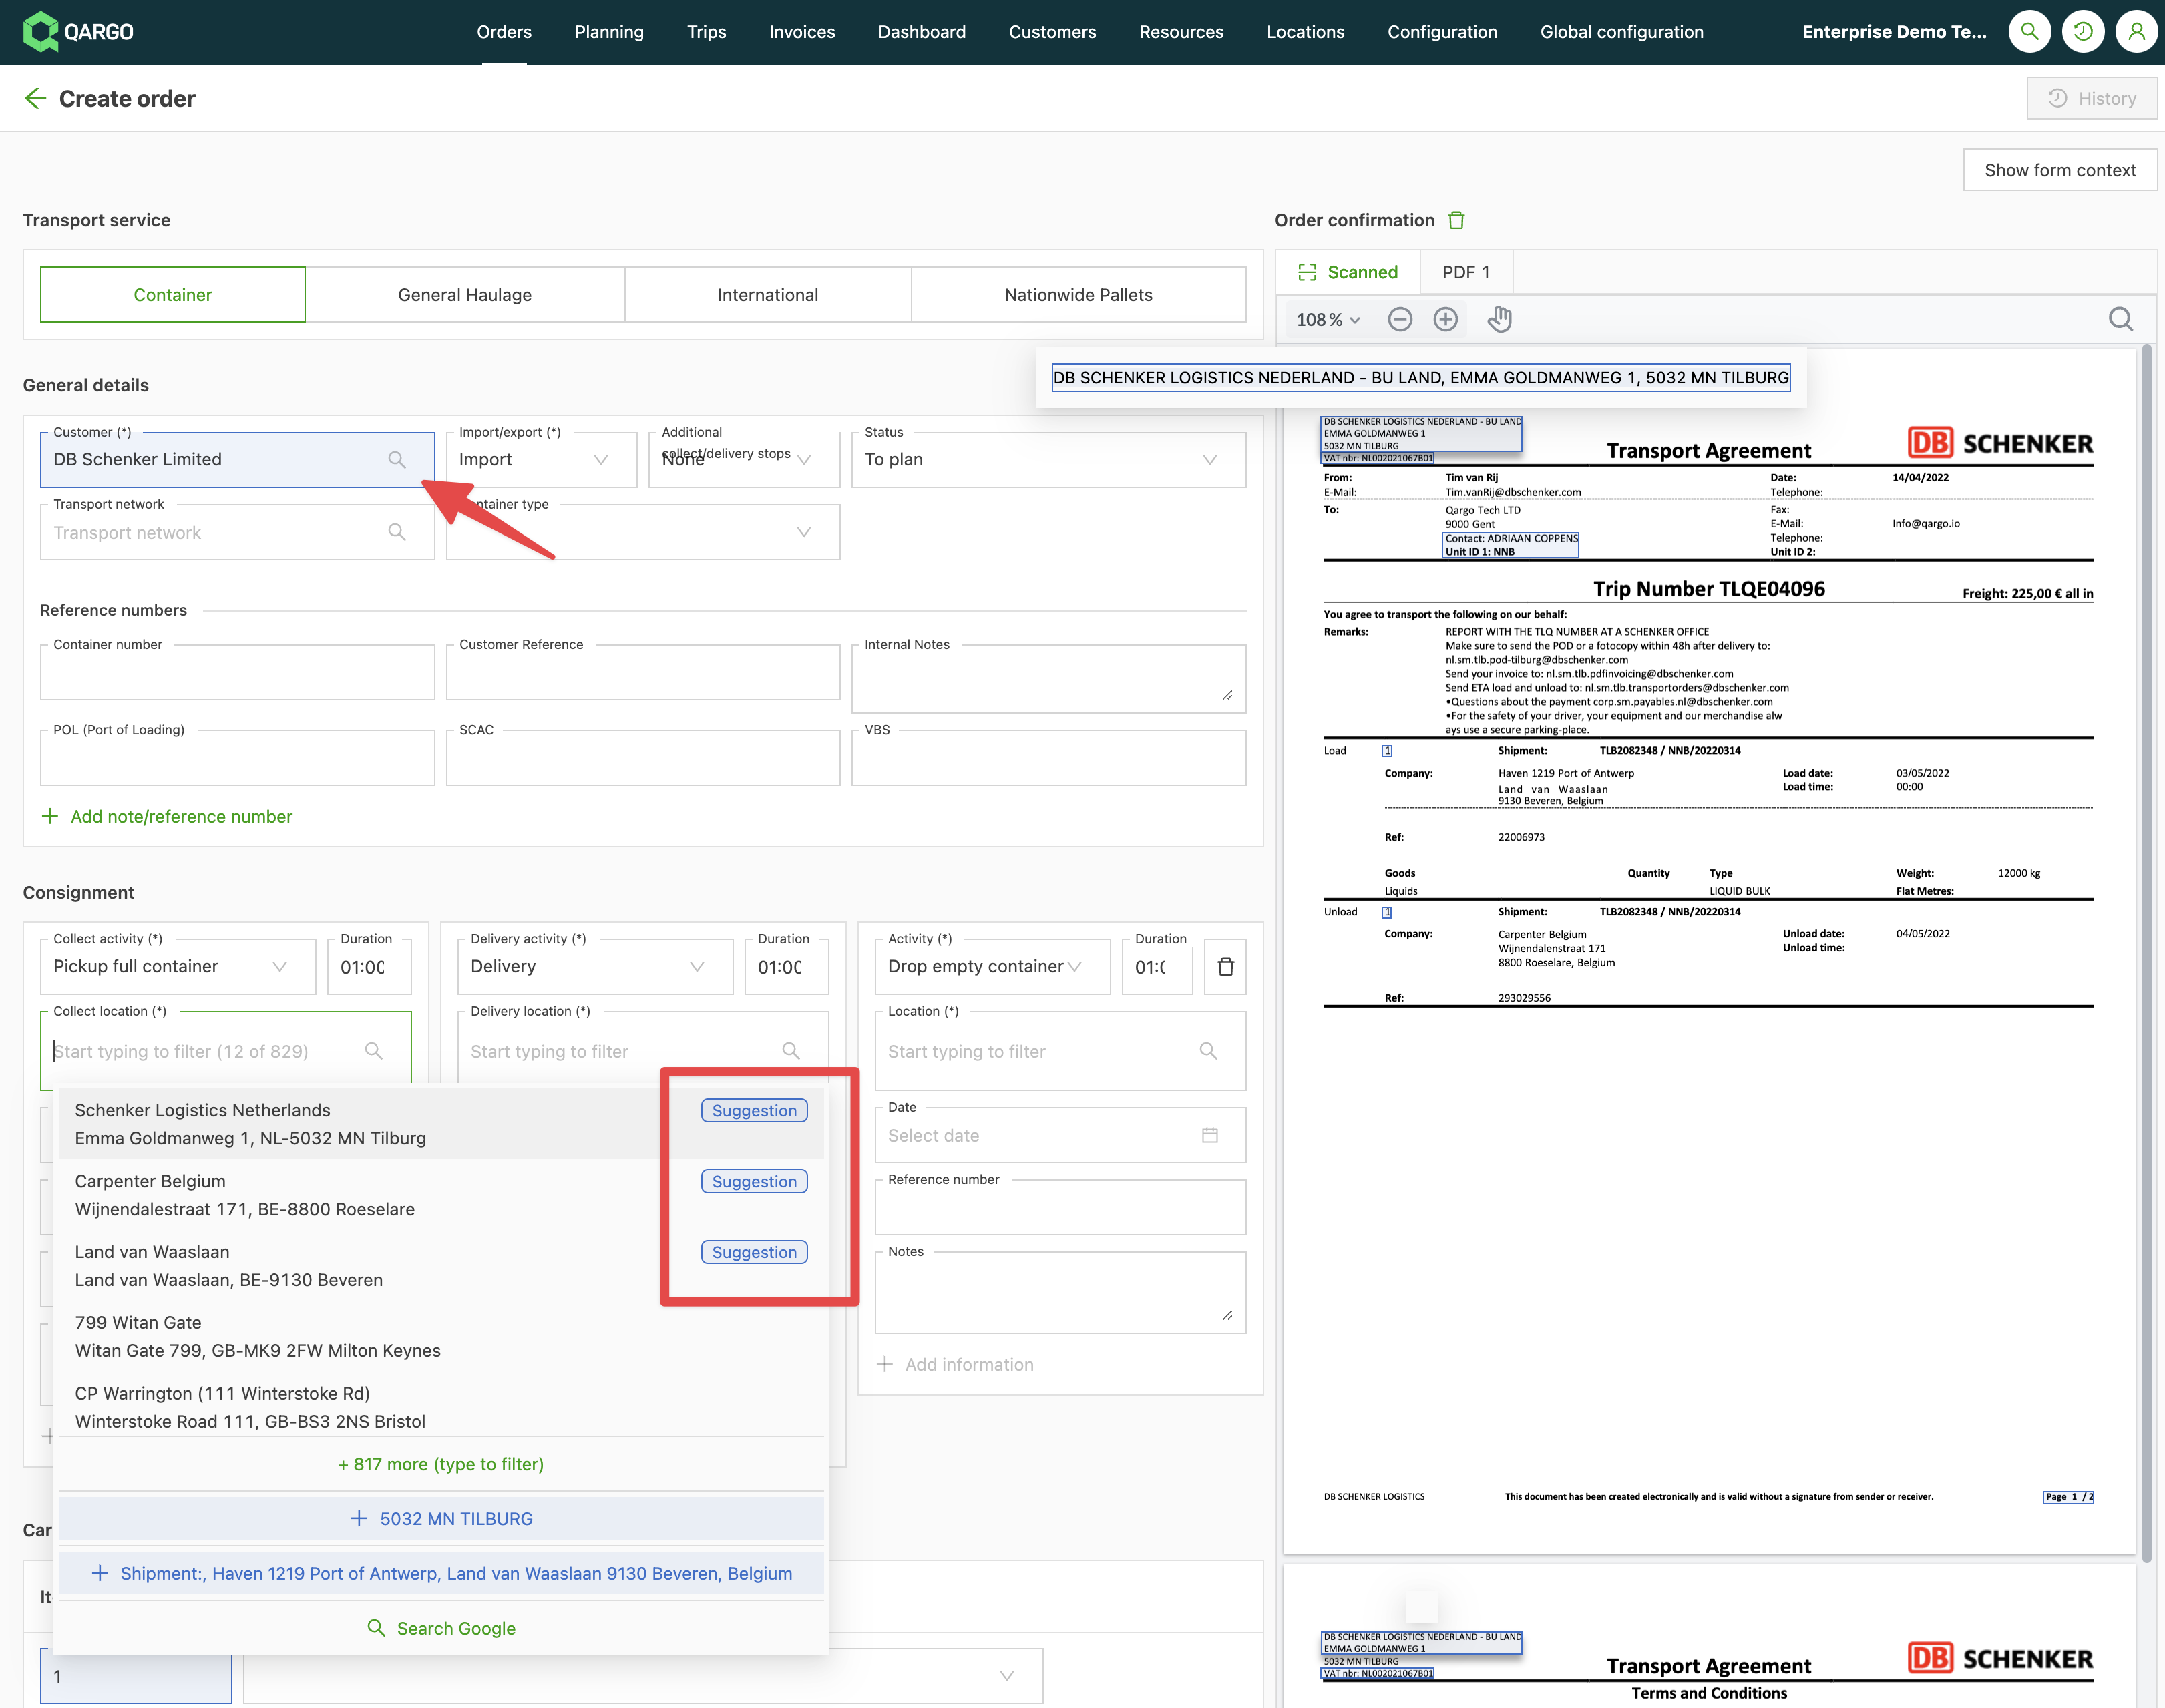
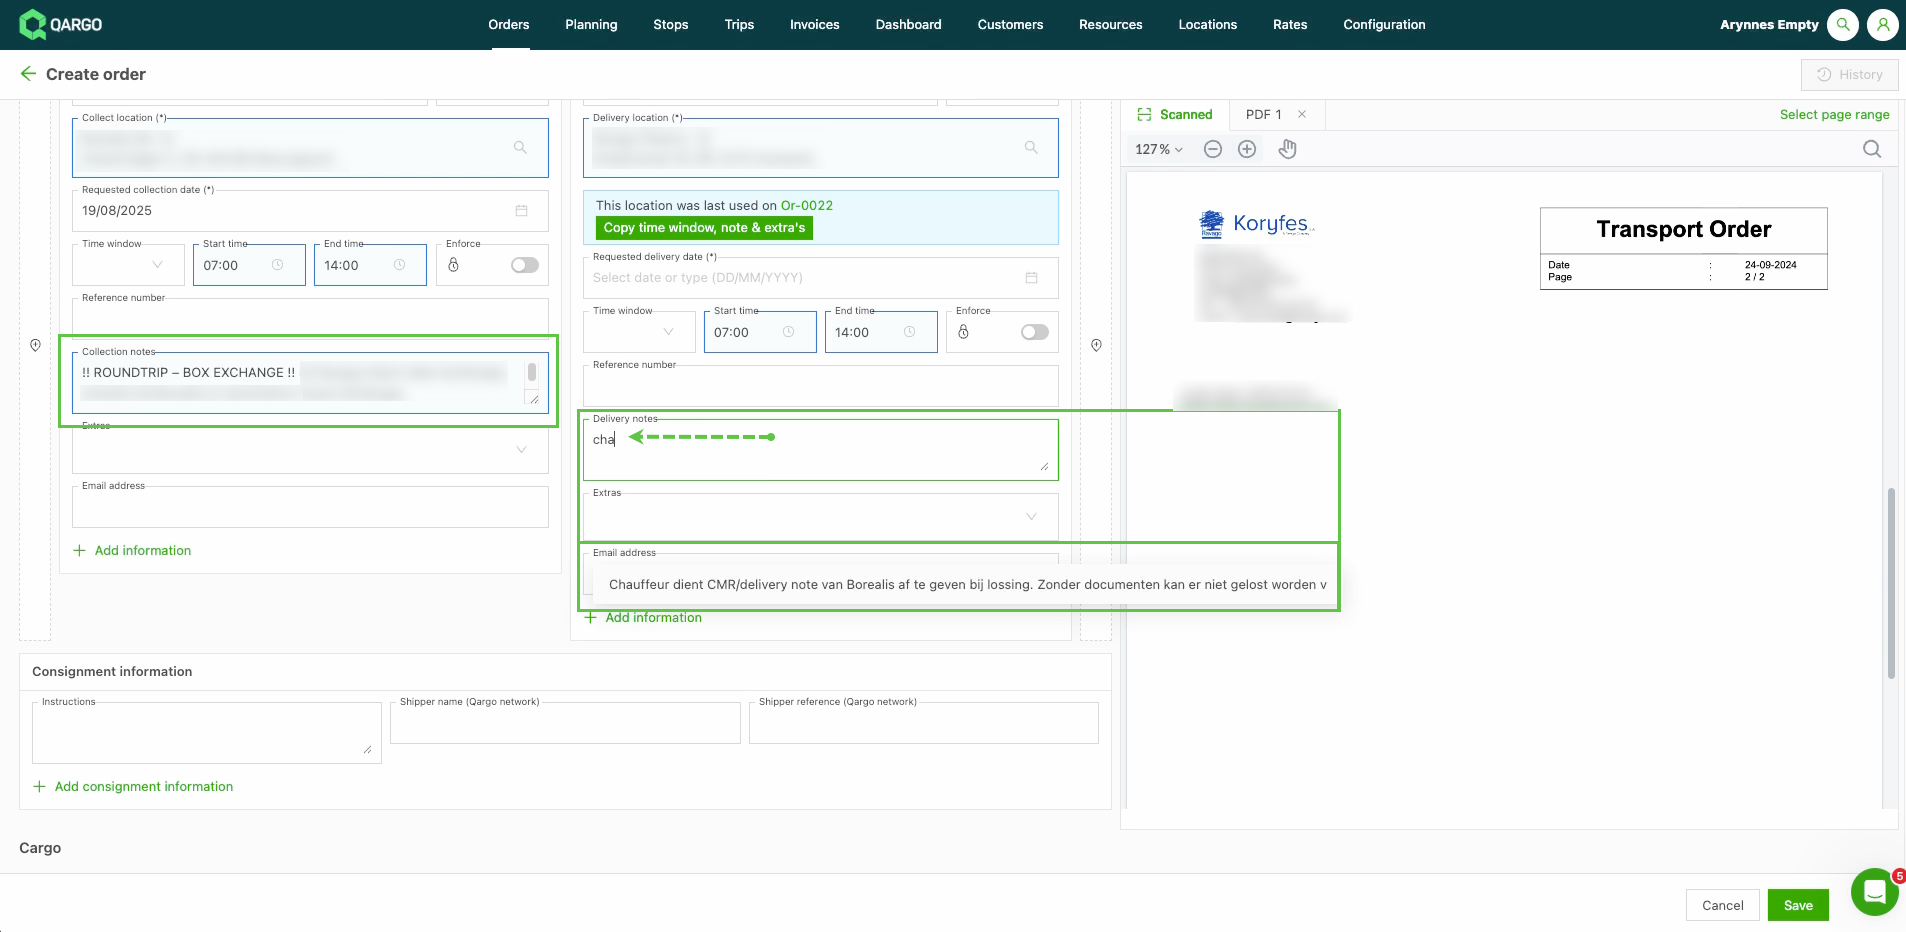
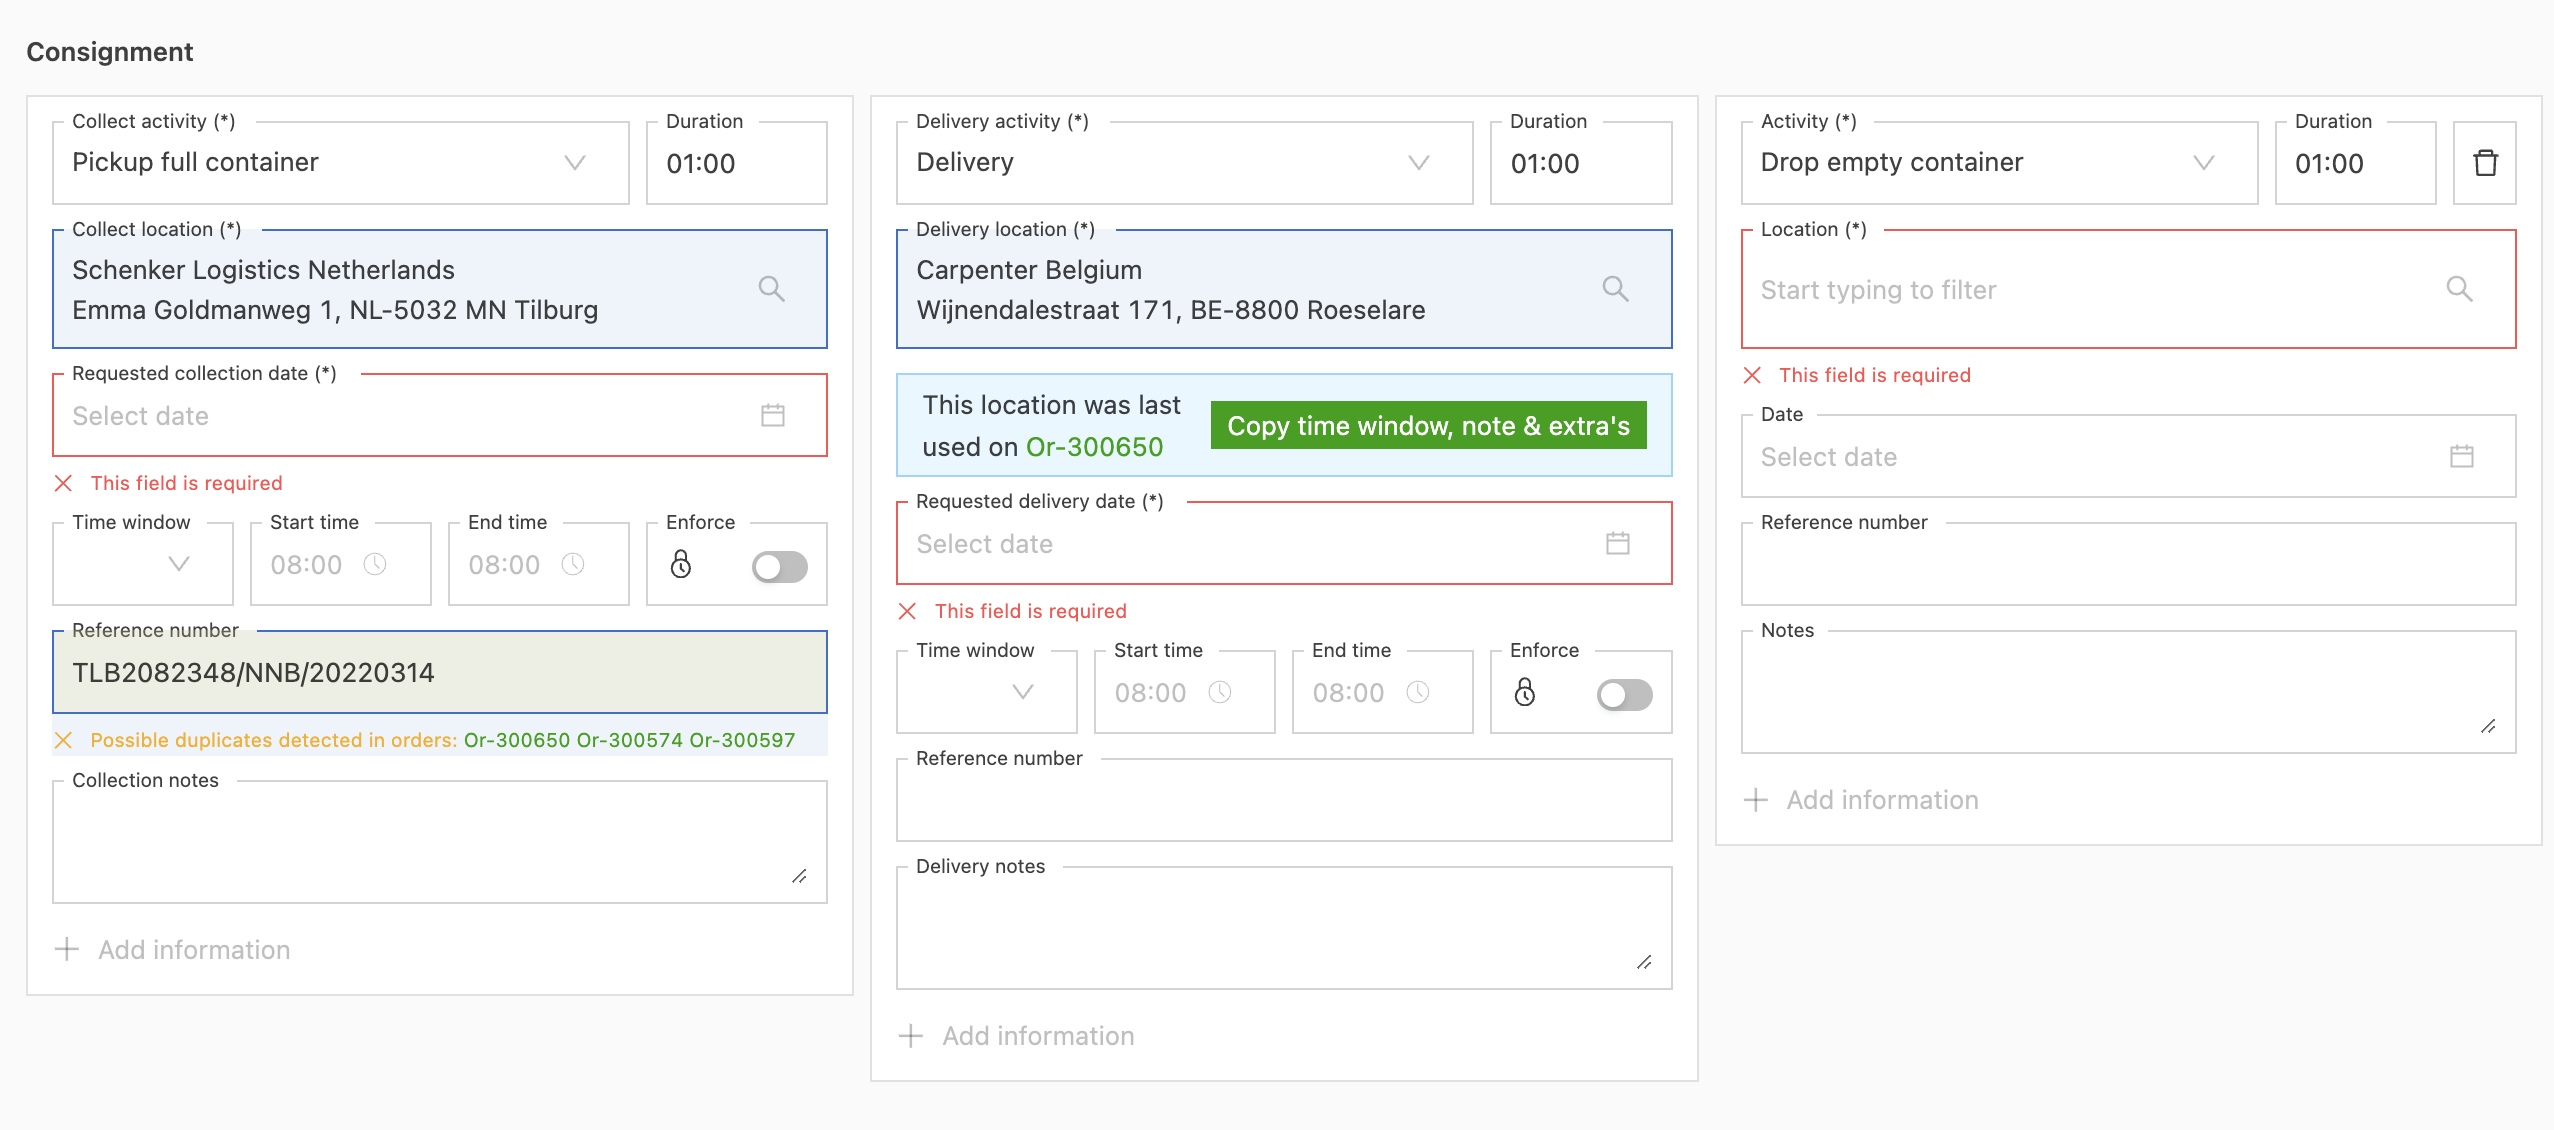
Guidance to avoid manual work is shown as additional information or a warning. Here are a few examples:
- Once a suggestion is selected, the field is highlighted in blue.
- Mandatory fields are marked with a red border.
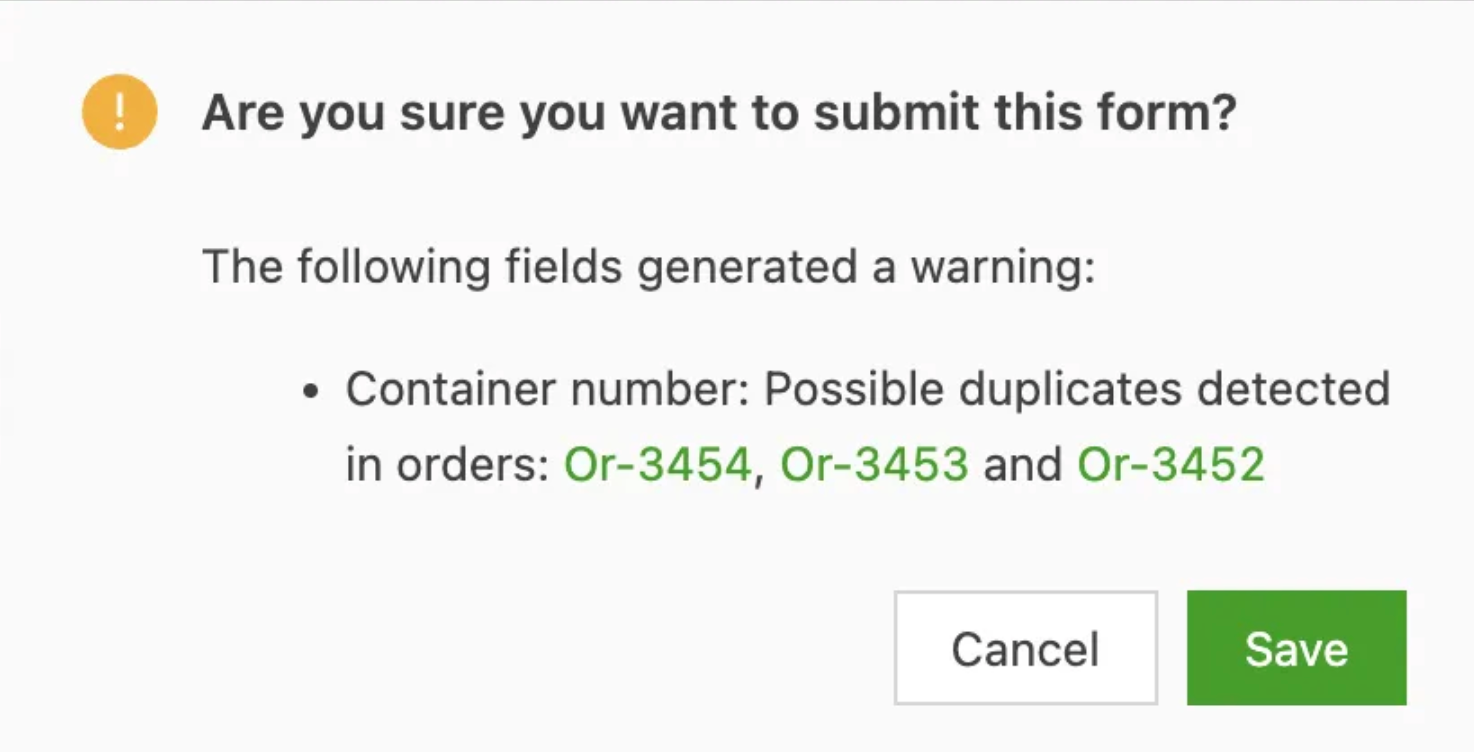
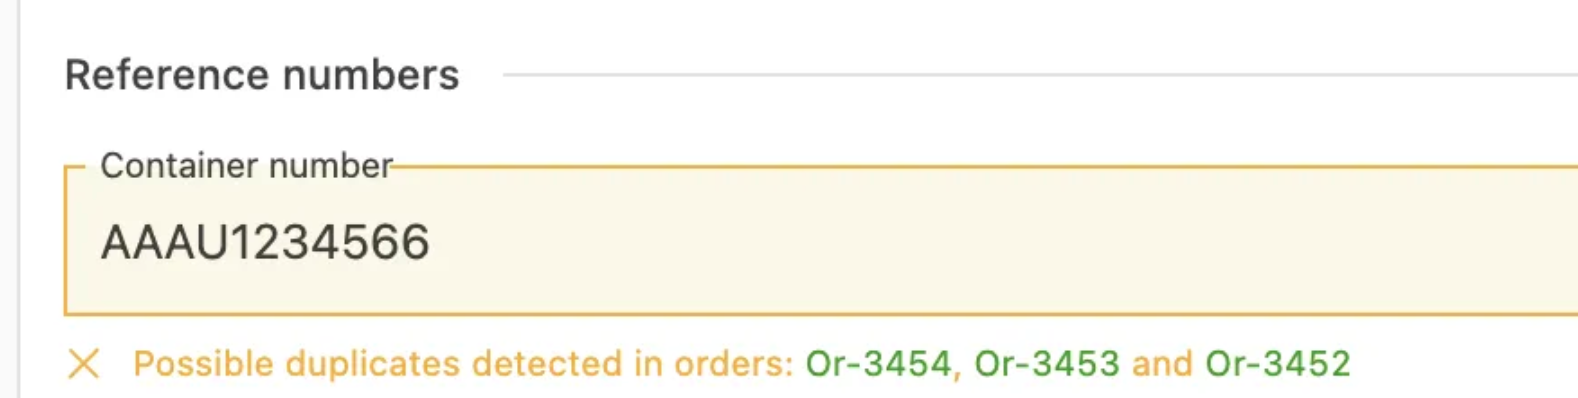
- If a reference number is chosen that is already used in a previously created order, the warning Possible duplicate detected is displayed with a reference to the orders.
- If a location is already used in a previously created order, the time windows and other important information can be copied to avoid manual input.
- Manually fill out the necessary or empty fields for the order.
- Verify the completeness and accuracy of the order details before finalizing and saving the order.
Split documents for scanning
For larger PDF documents, it is possible to select which pages need to be scanned, effectively splitting the PDF document.
When creating an order, the user can drag an email or a PDF into Qargo. This was already possible, but it is now also possible to define which pages of the PDF file(s) should be used for the order pre-fill and as the order confirmation.
Once the PDF files have been added, the user can specify which page range should be used. This range is scanned by AI and used as the order confirmation attachment in the order.
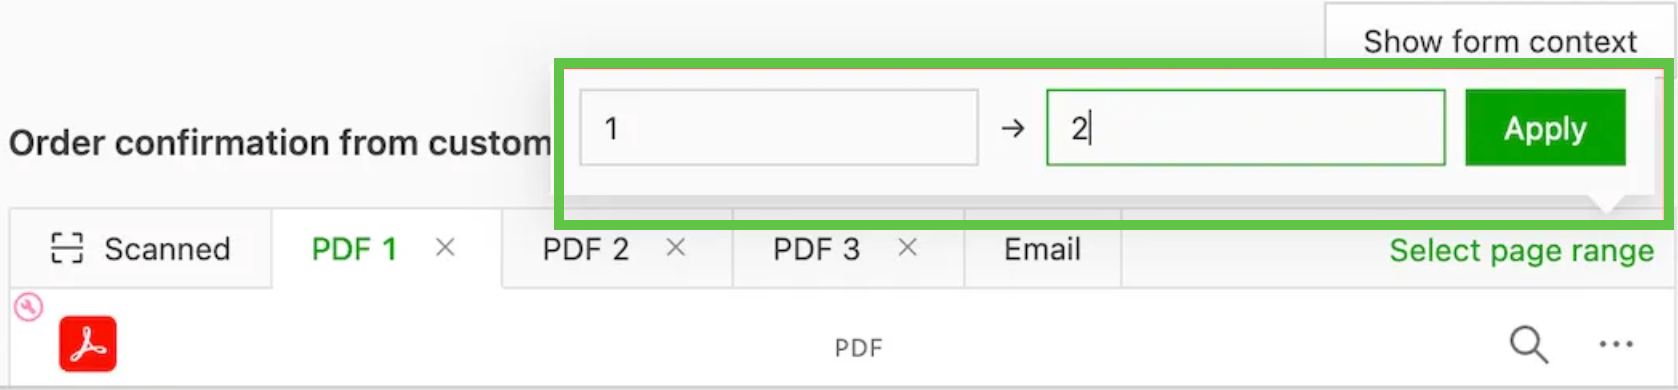
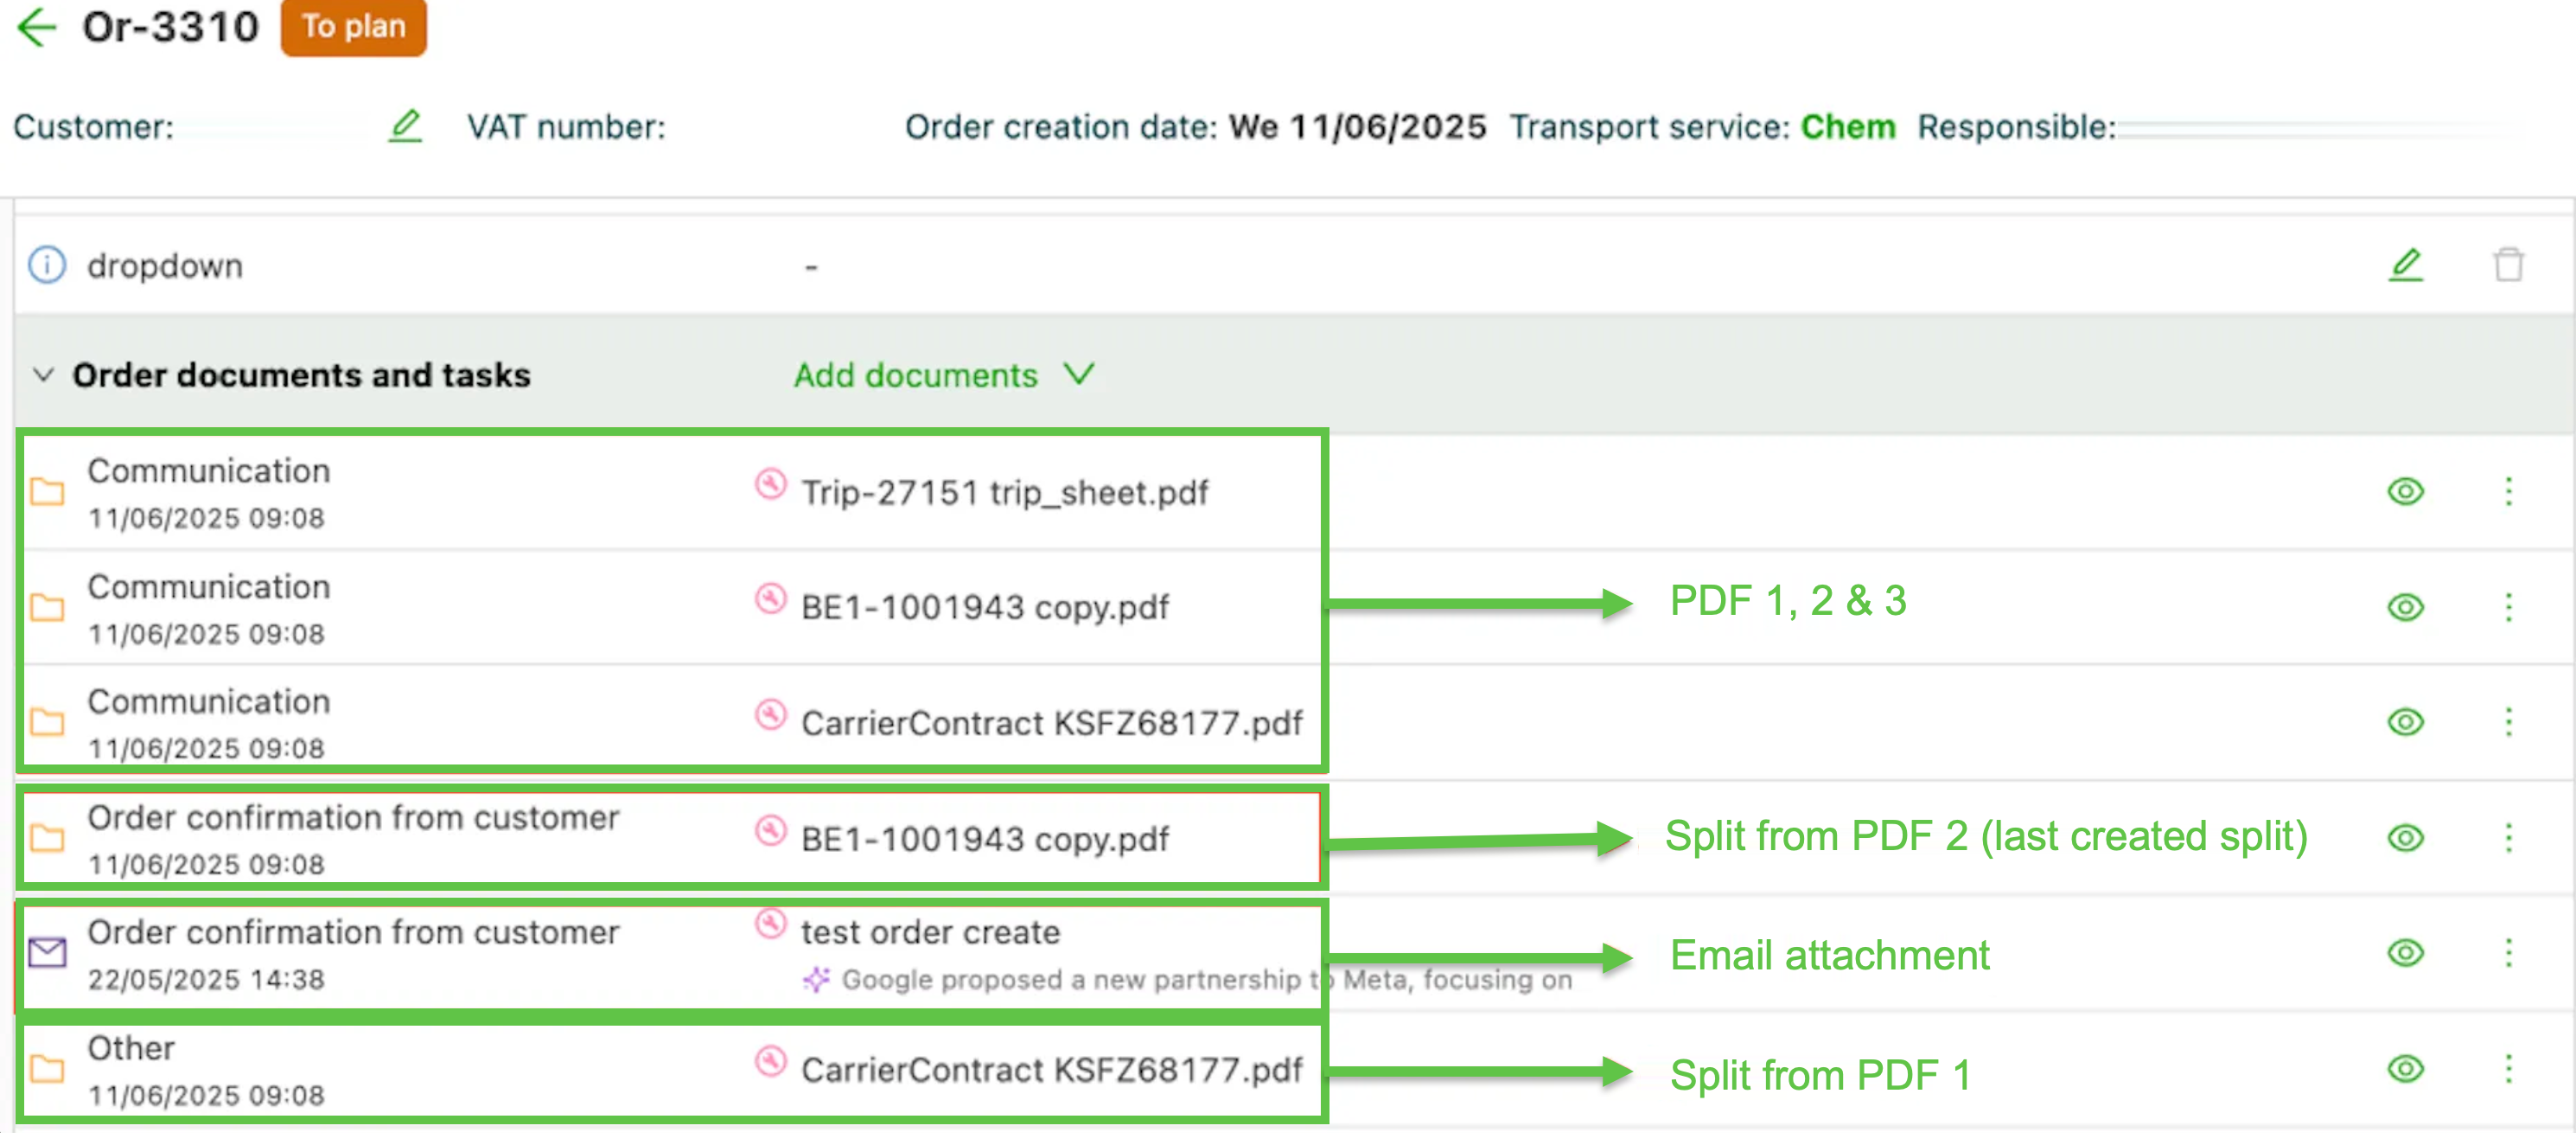
Once the split has been created, it is also visible for review. Splits can be created for each of the attached PDF files. When multiple splits are created, the last created split is used as the order confirmation. The original PDF files can be deleted or left to be attached to the order as well.

Once the order is created, the last created split is added as an attachment as the order confirmation from the customer, together with the email itself. If other splits were created from other PDF files, they are added as attachments with document type ‘Other’. Finally, the original PDF files are added with document type ‘Communication’
- Customers can now easily extract the order confirmation from larger PDF files.
- More accurate document scanning by specifying the pages to be used.
Click the link below to learn more about how to scan and validate order confirmation documents to create new orders.