
Orders – upload or link documents in bulk
Upload documents to an order in the main platform and through the customer portal. Documents can be added as an individual file or as multiple files on a single order, or in bulk across multiple orders.
Table of contents
Upload multiple documents to a single order
To upload to a single order in either the main platform or the customer portal, use the Add document link on the order details screen.
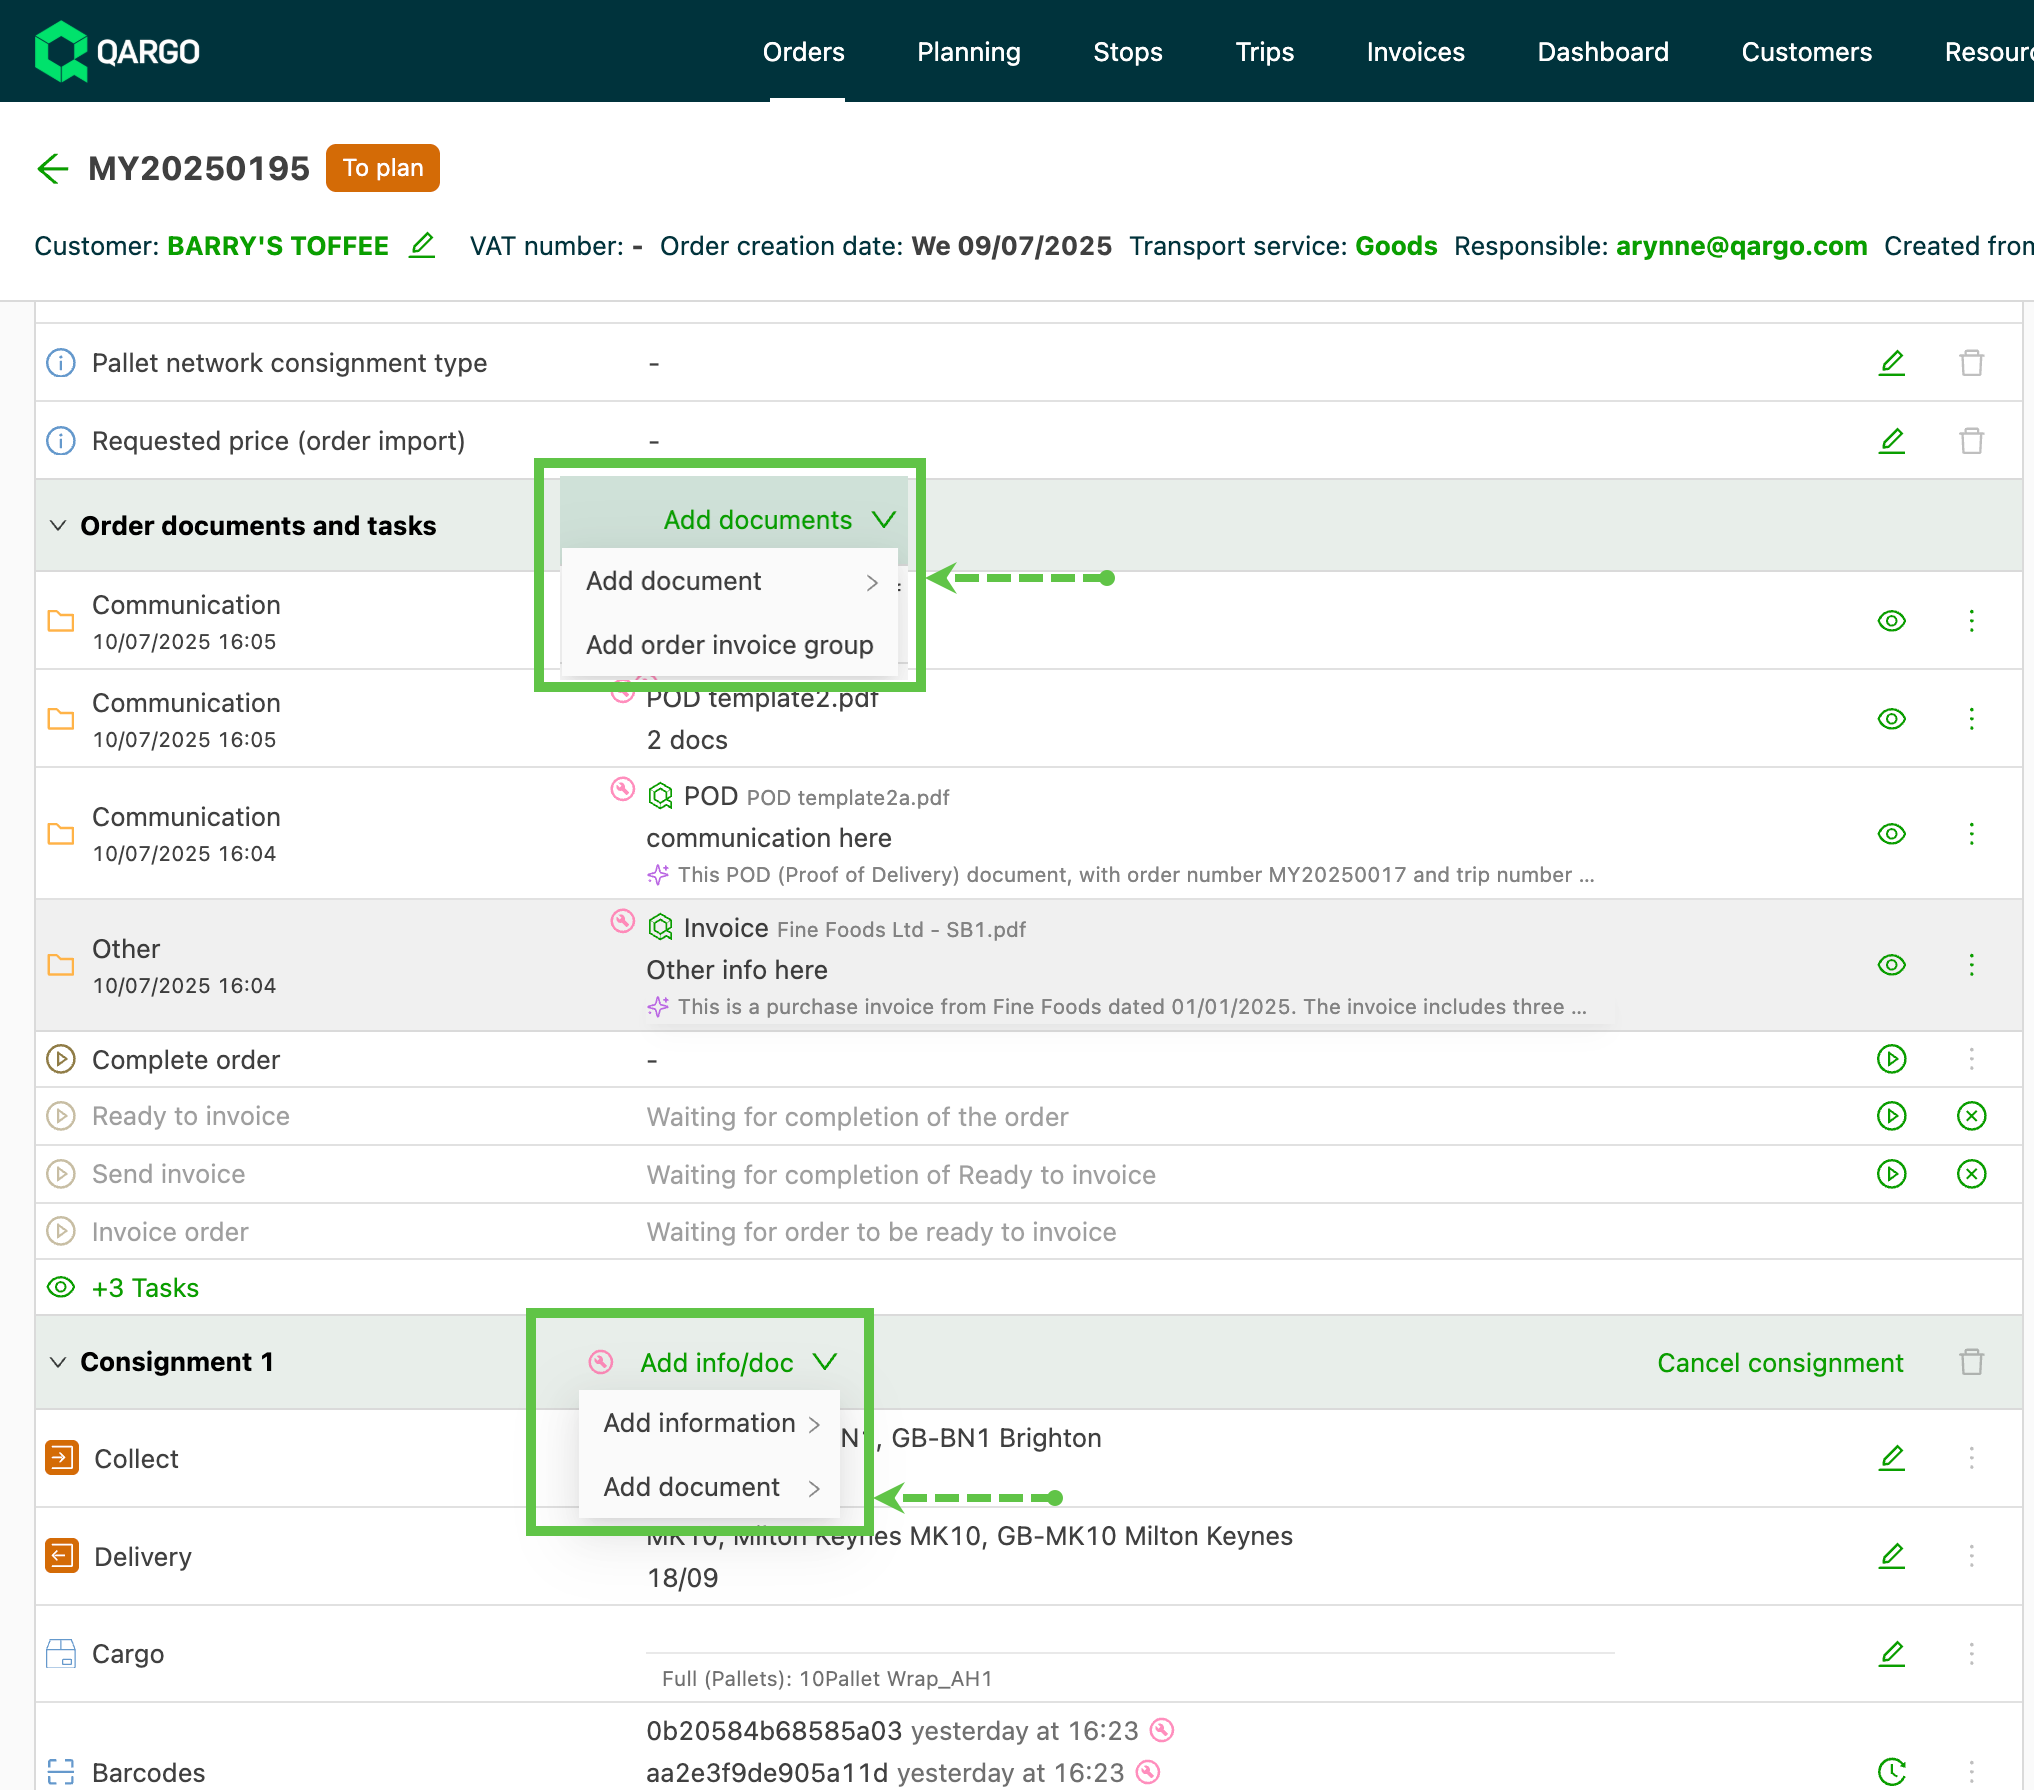
-
Select the appropriate document type from the dropdown list.
-
A new window opens where the document can be attached.
- Multiple documents can be selected (same document type)
- The description applies to all documents of the same type that are added
- A new document type can be added on the same screen
Upload documents to multiple orders
-
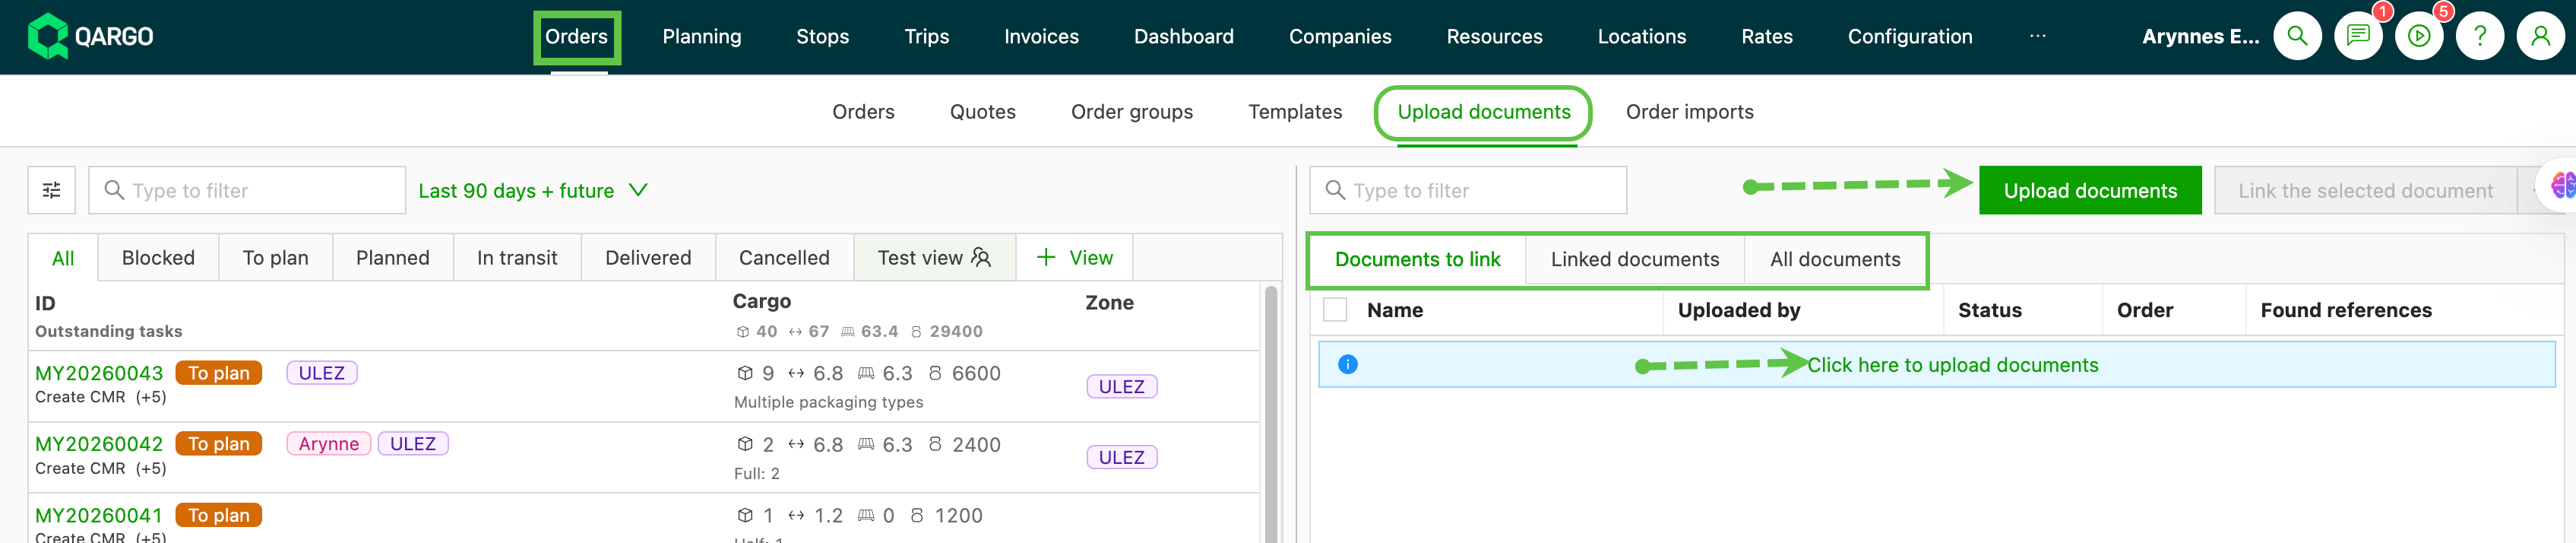
Navigate to Orders > Upload documents
-
Click the Upload documents button or go to Documents to link
- The same screen opens regardless of the option selected
-
The order list view is displayed on the left side of the screen.
-
The upload documents area is displayed on the right side of the screen.
-
Select a tab to review:
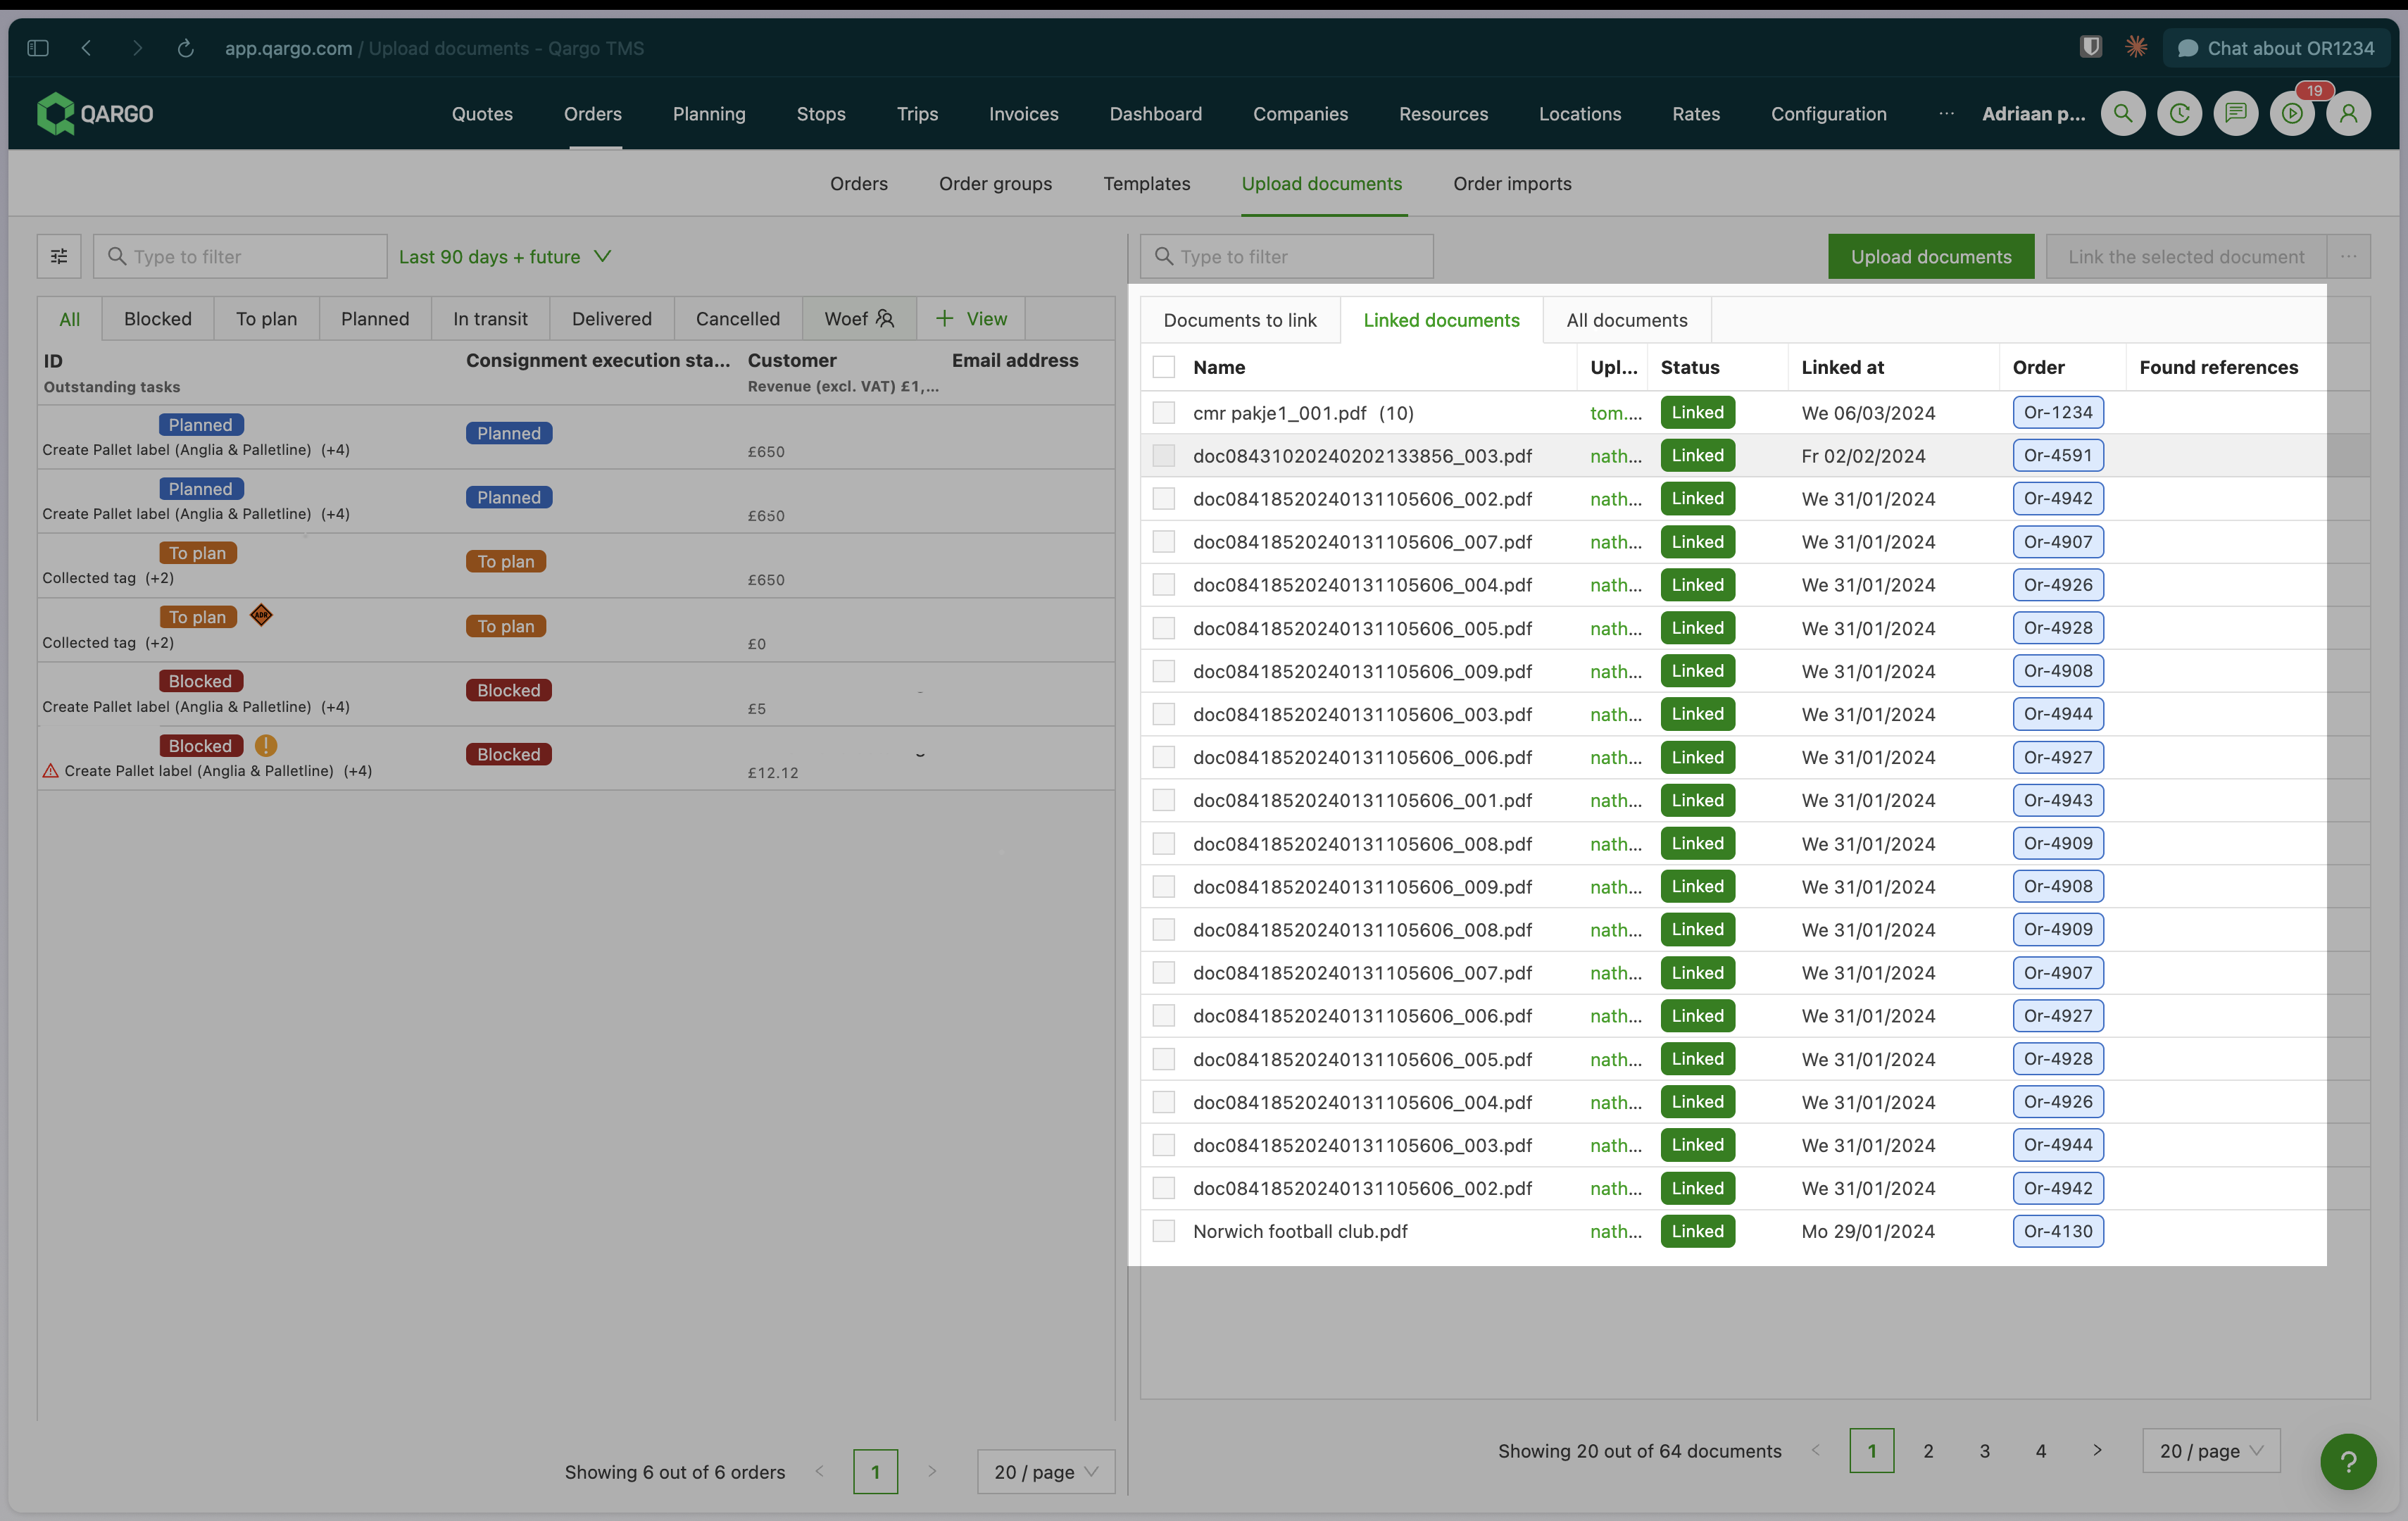
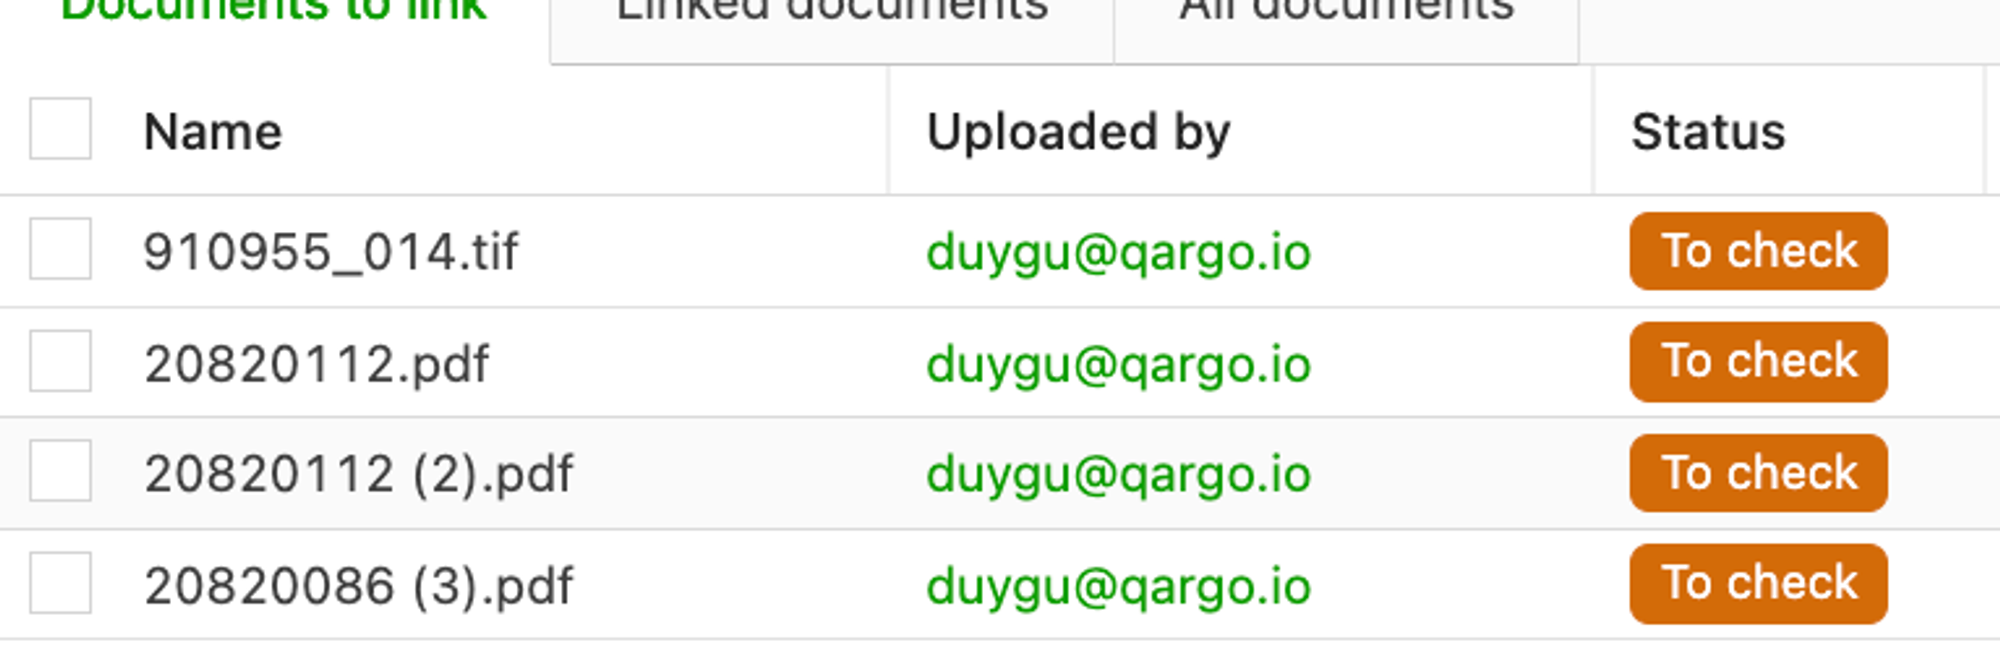
- Documents to link: upload new documents to an order
- Linked documents: shows documents already uploaded, along with the email of the user who uploaded them.
- All documents: shows all uploaded documents
-
Documents can be added to multiple orders
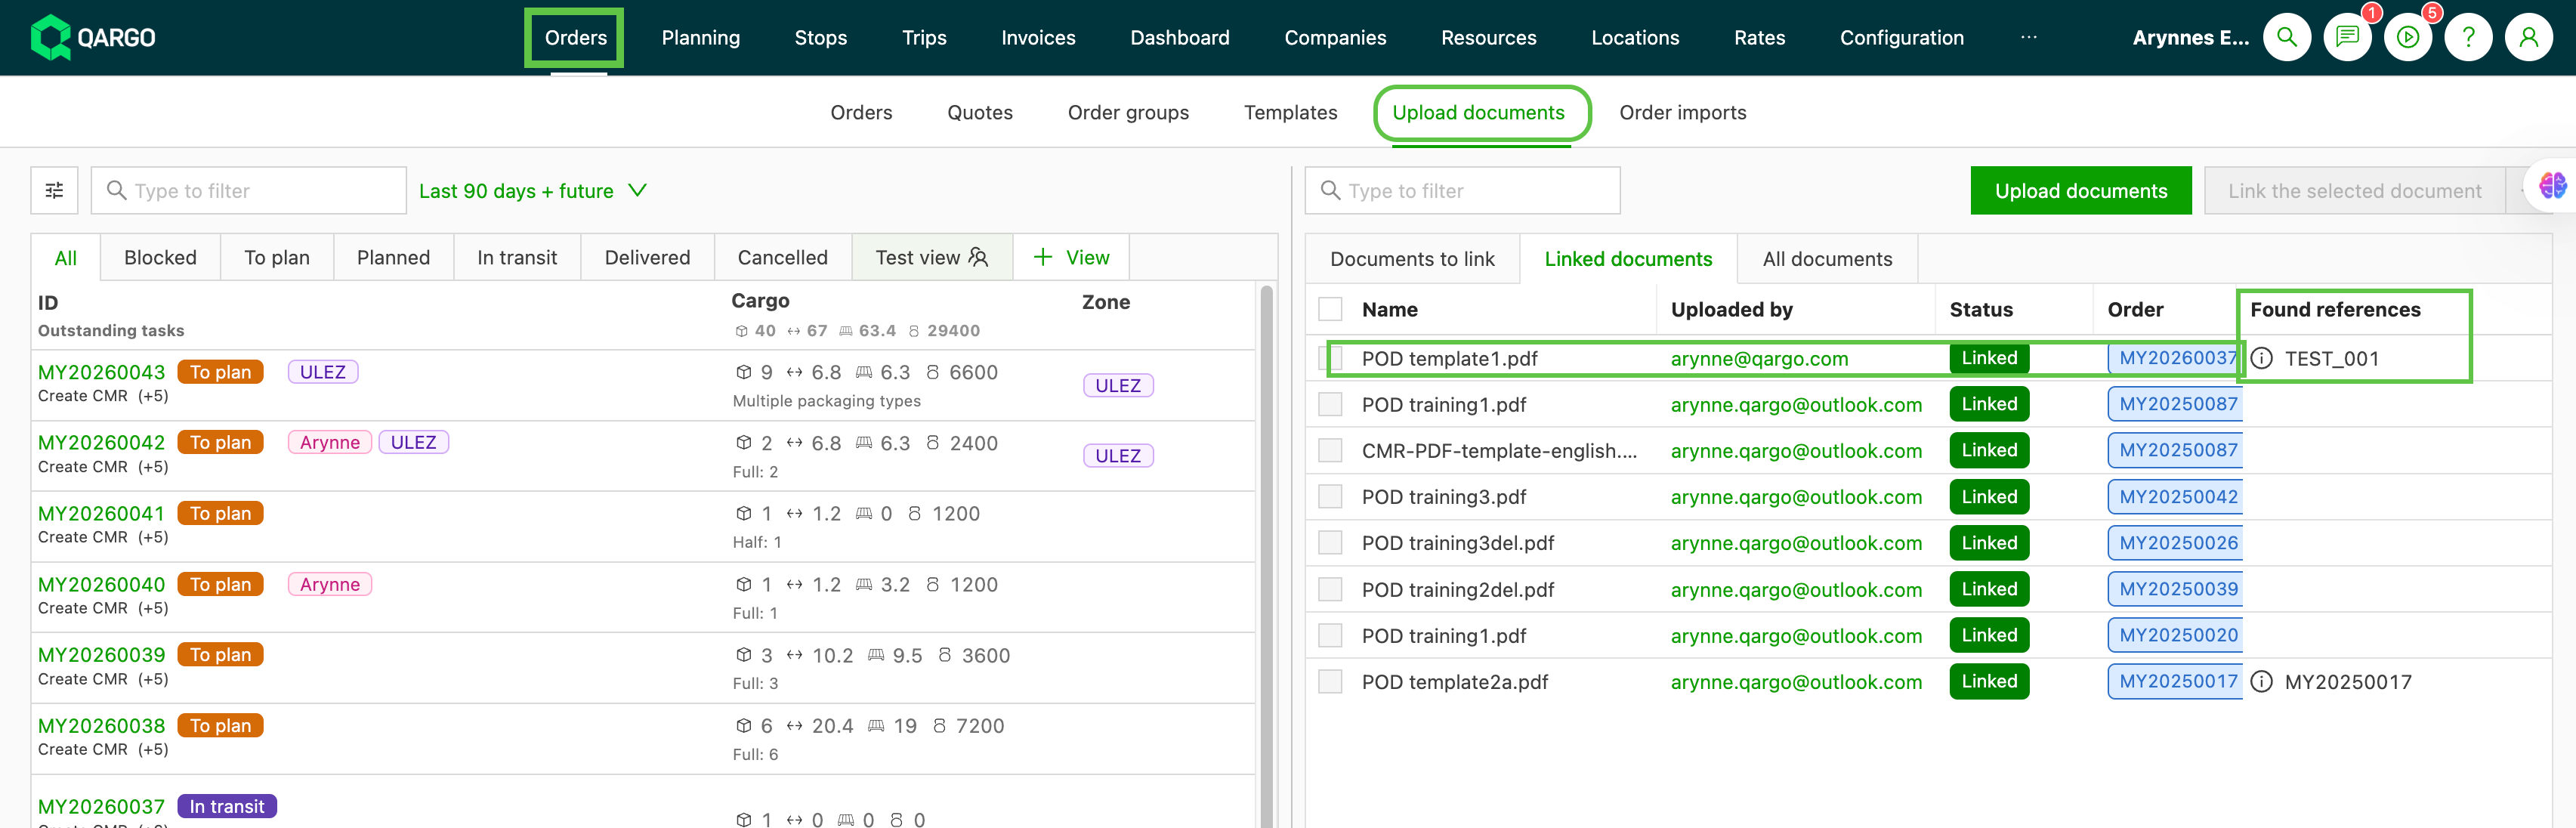
If a document doesn’t automatically match an existing order, a No matches label is displayed.
- Manually locate the appropriate order and click the upload icon to add the document to the order.
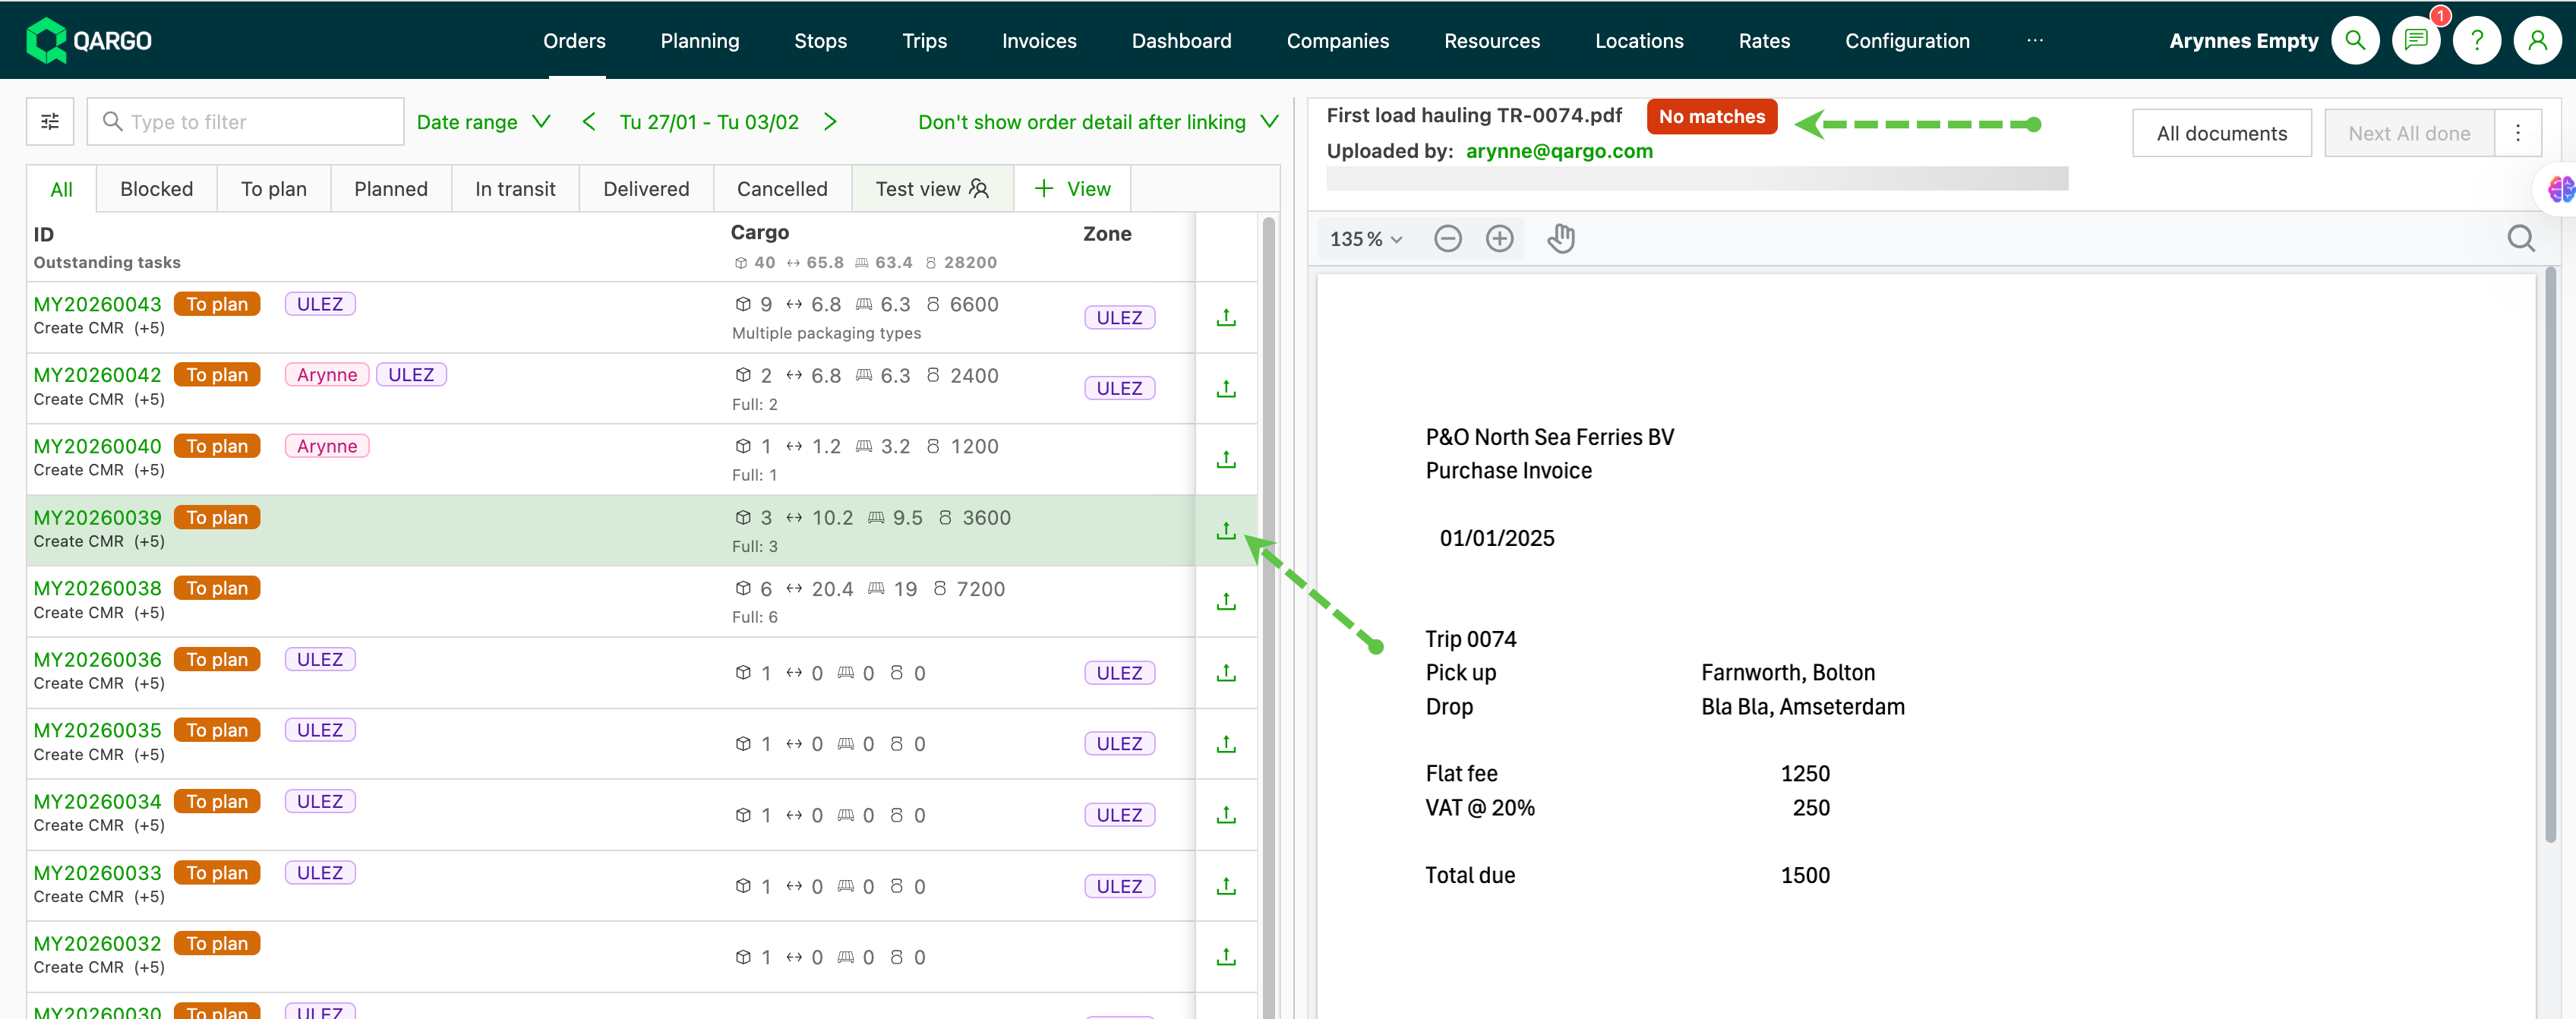
Linked date column
The Linked documents tab in Orders > Upload documents includes a Linked date column. It shows the date each document was linked to an order, so operators handling large volumes of documents can confirm at a glance when a document was linked, without opening individual orders.
- The column appears in both the Linked documents tab and the All documents tab.
- It sits between the Status and Order columns and displays the date in dd/mm/yyyy format.
- The value is the date the document was linked to the order. The column is display-only; filtering on the linked date is not available in this version.
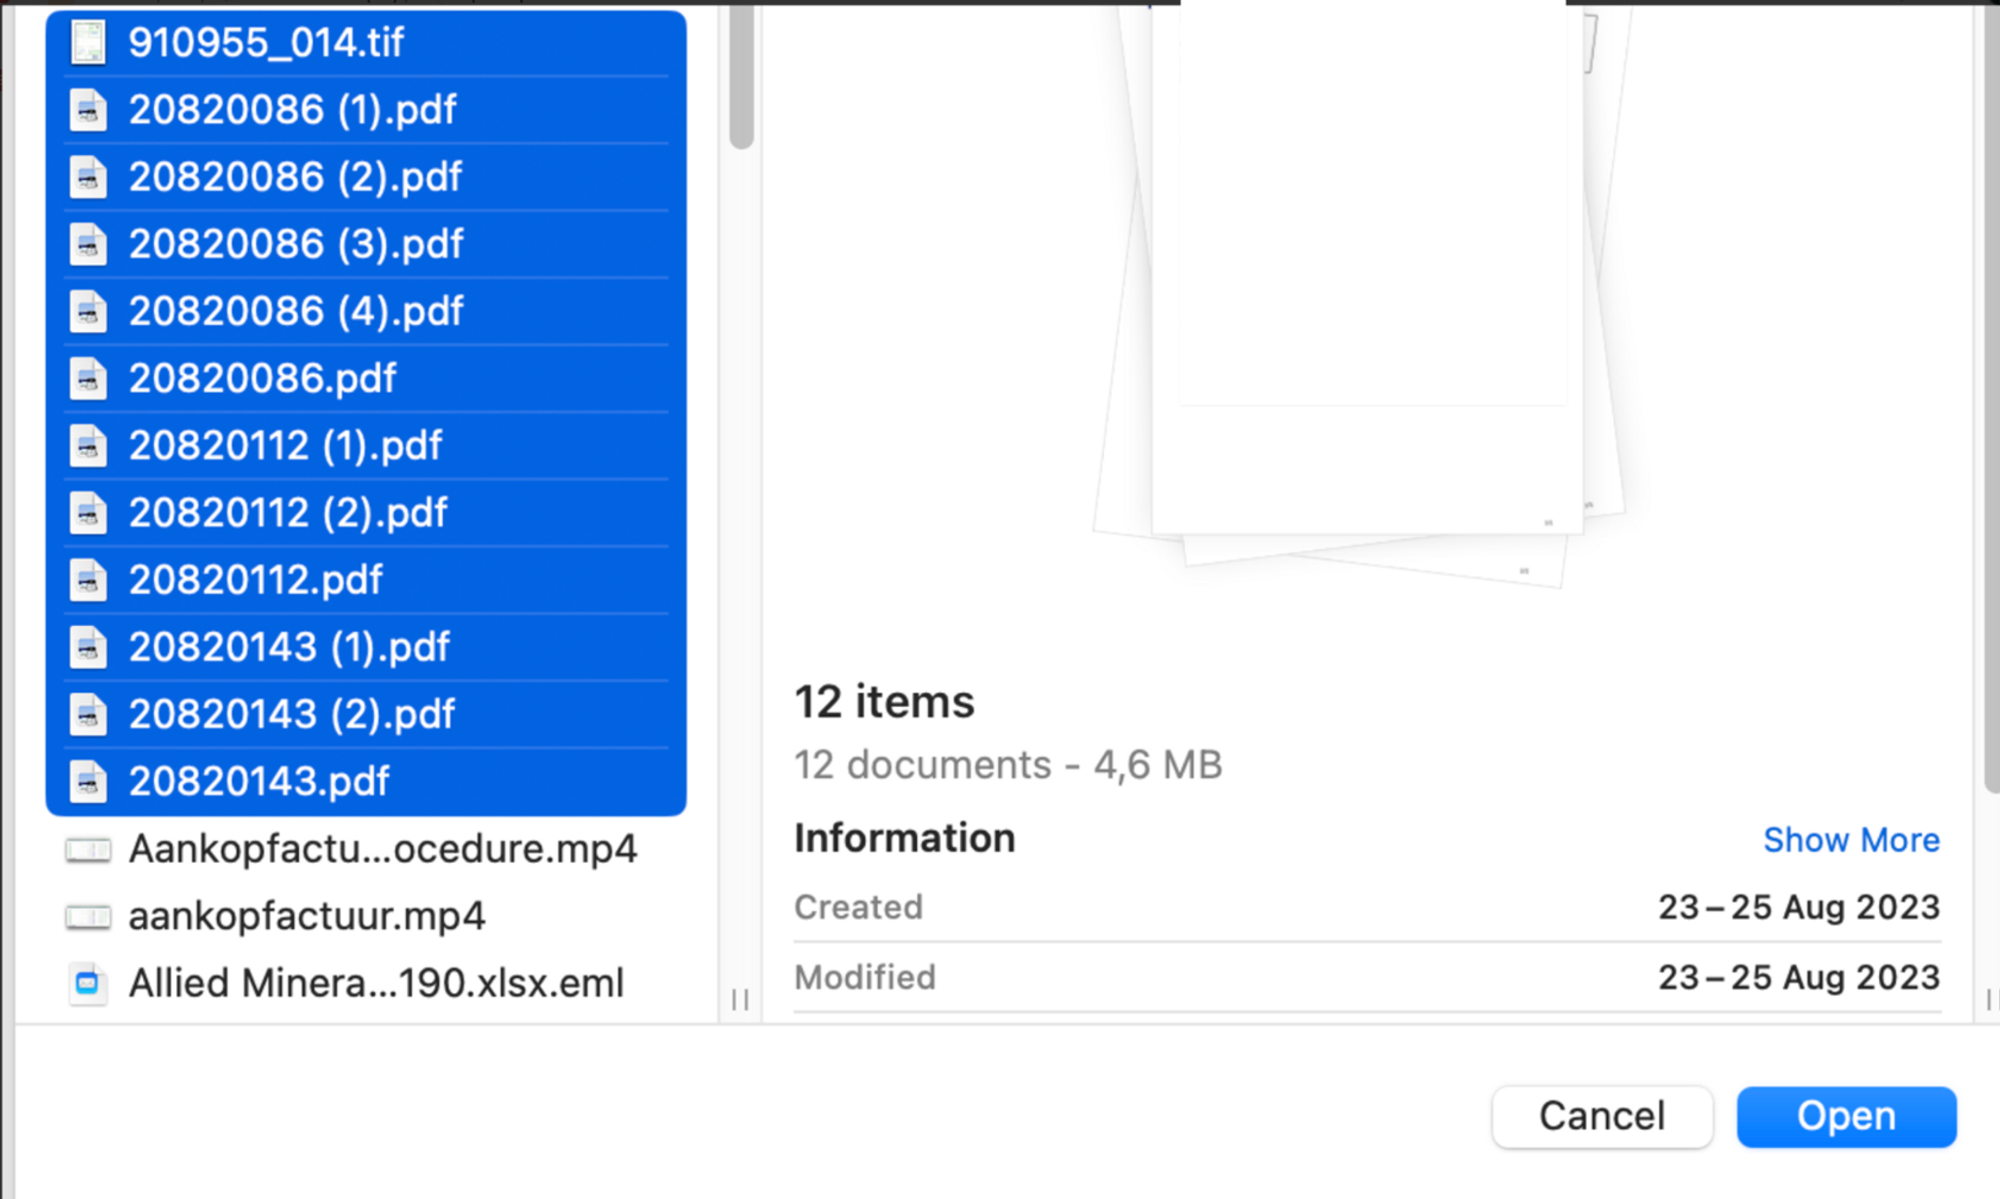
Upload documents from a computer
To upload documents, either drag and drop them or select them from a folder on the computer.
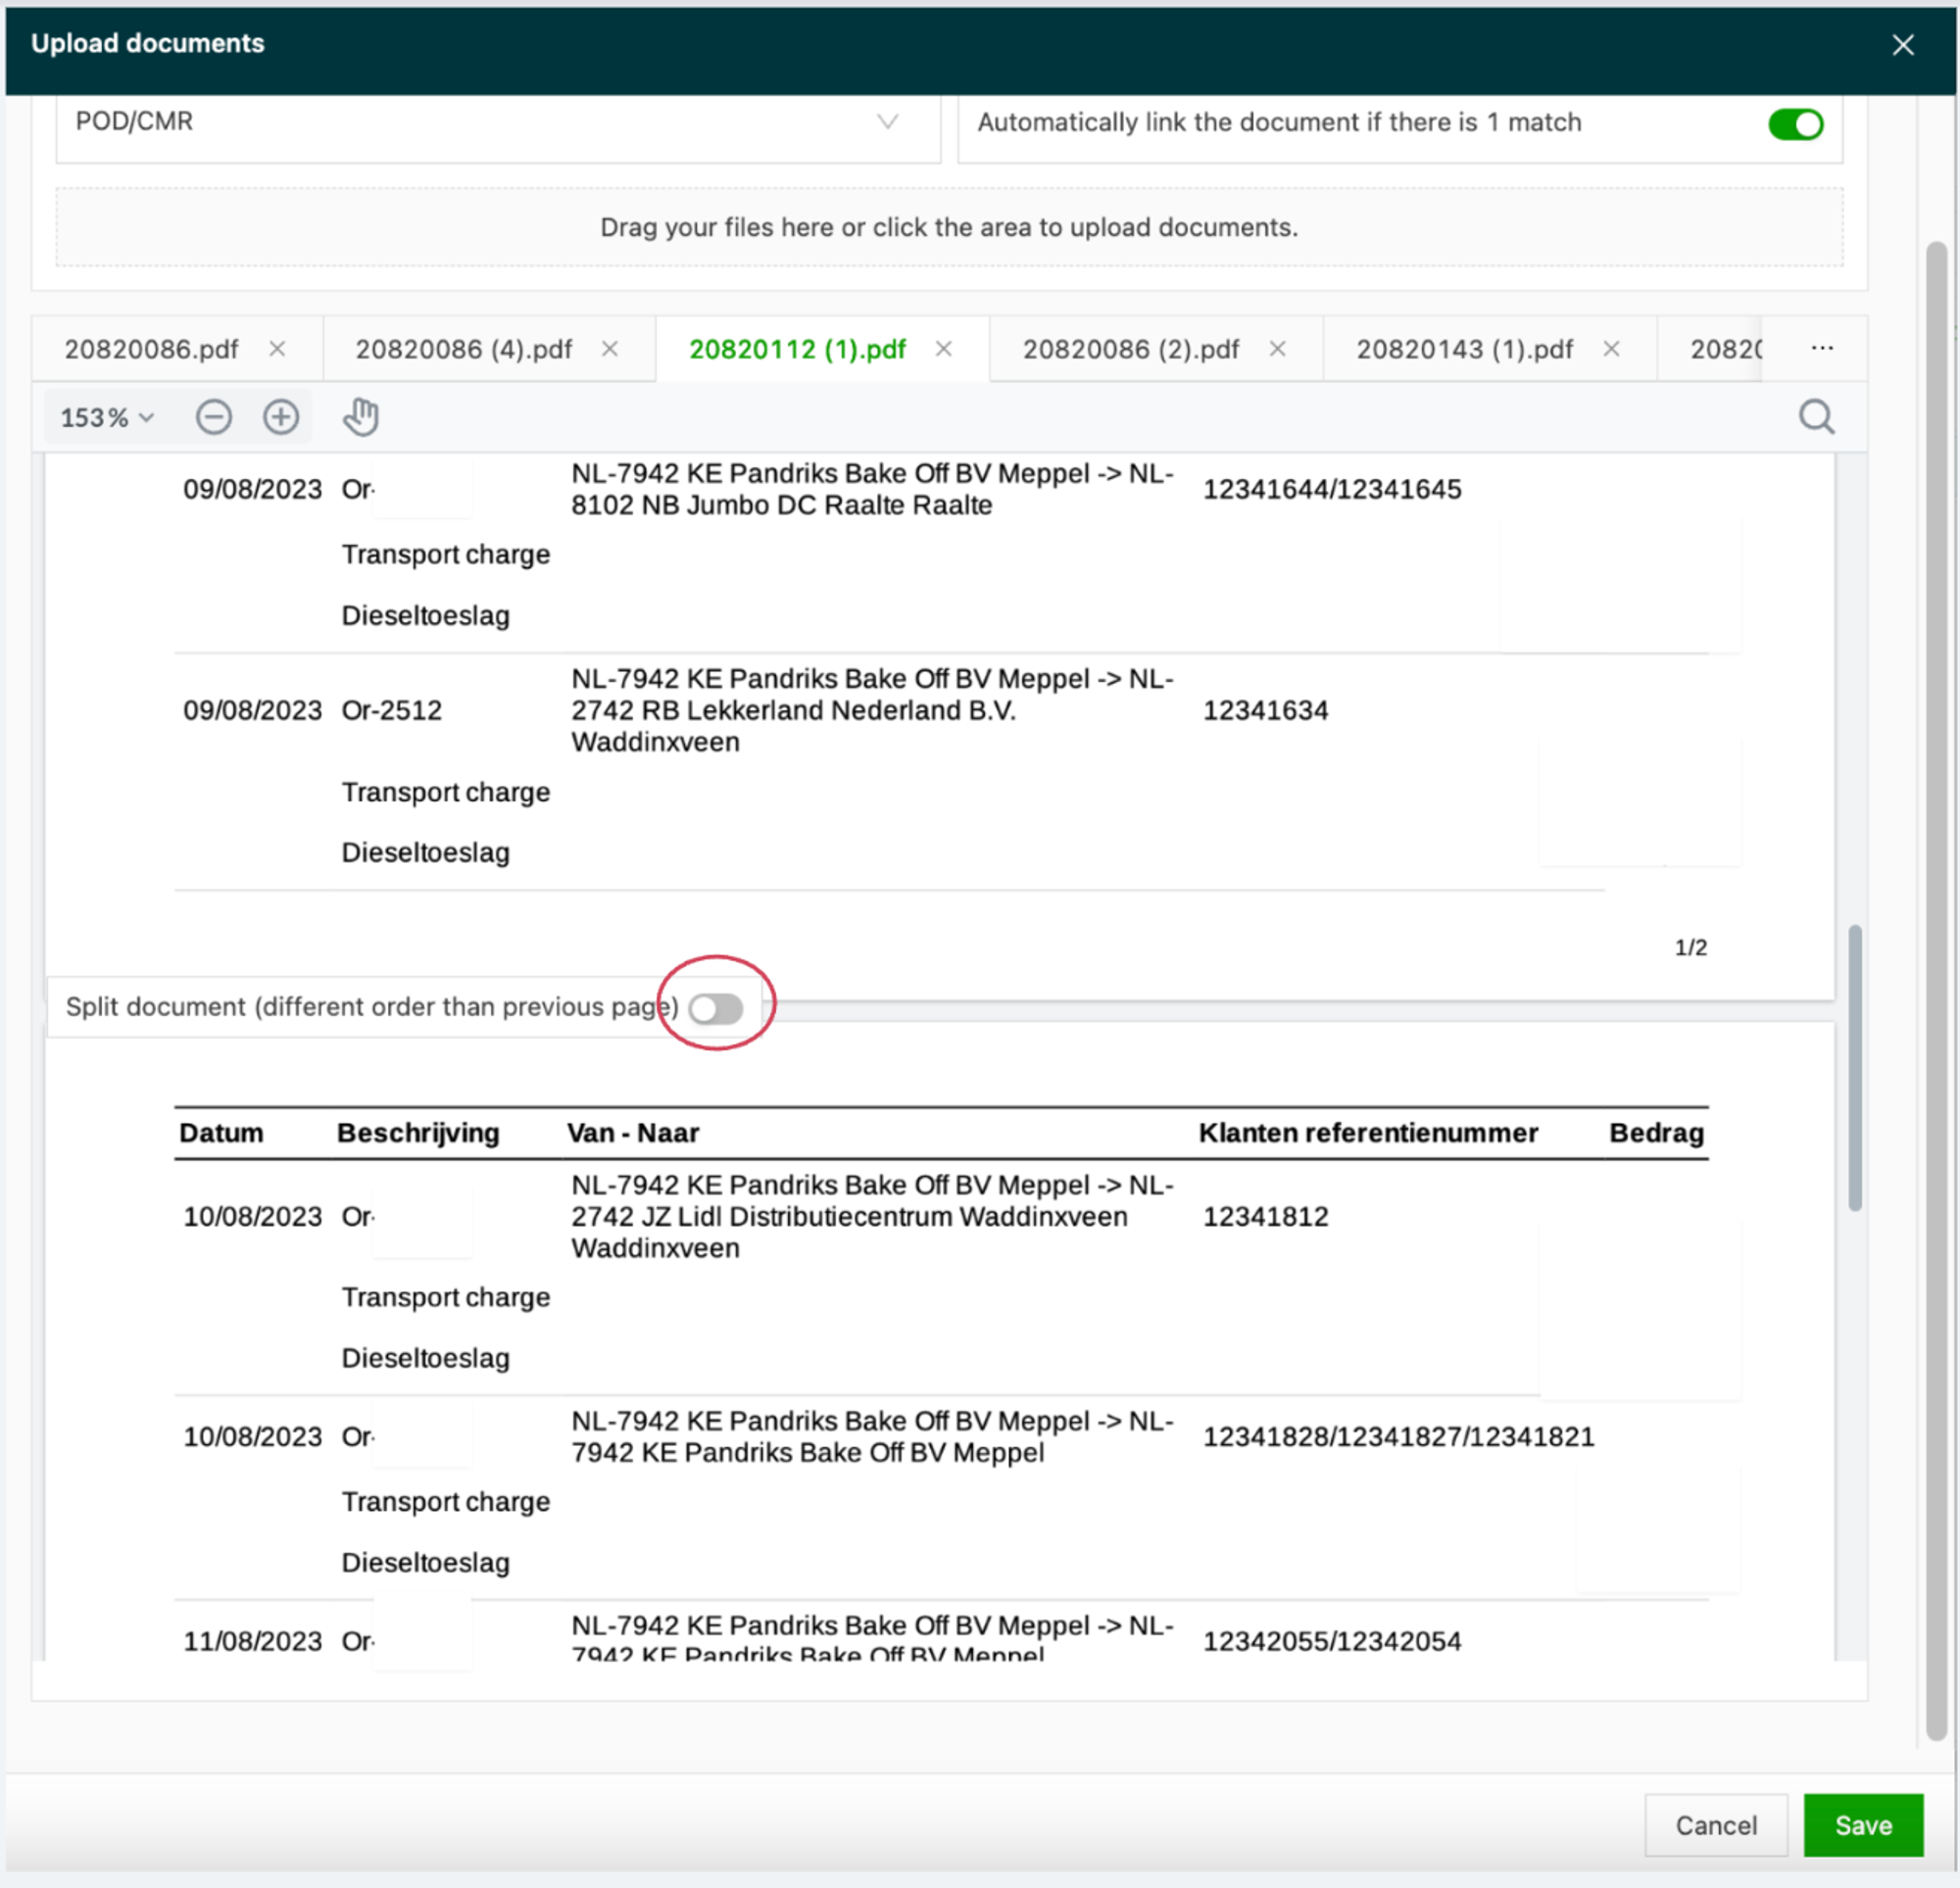
Once uploaded, each PDF document is shown in a separate tab. To split a document into two separate documents, use the Split document toggle. The document is then split and a new tab is created. Save it.
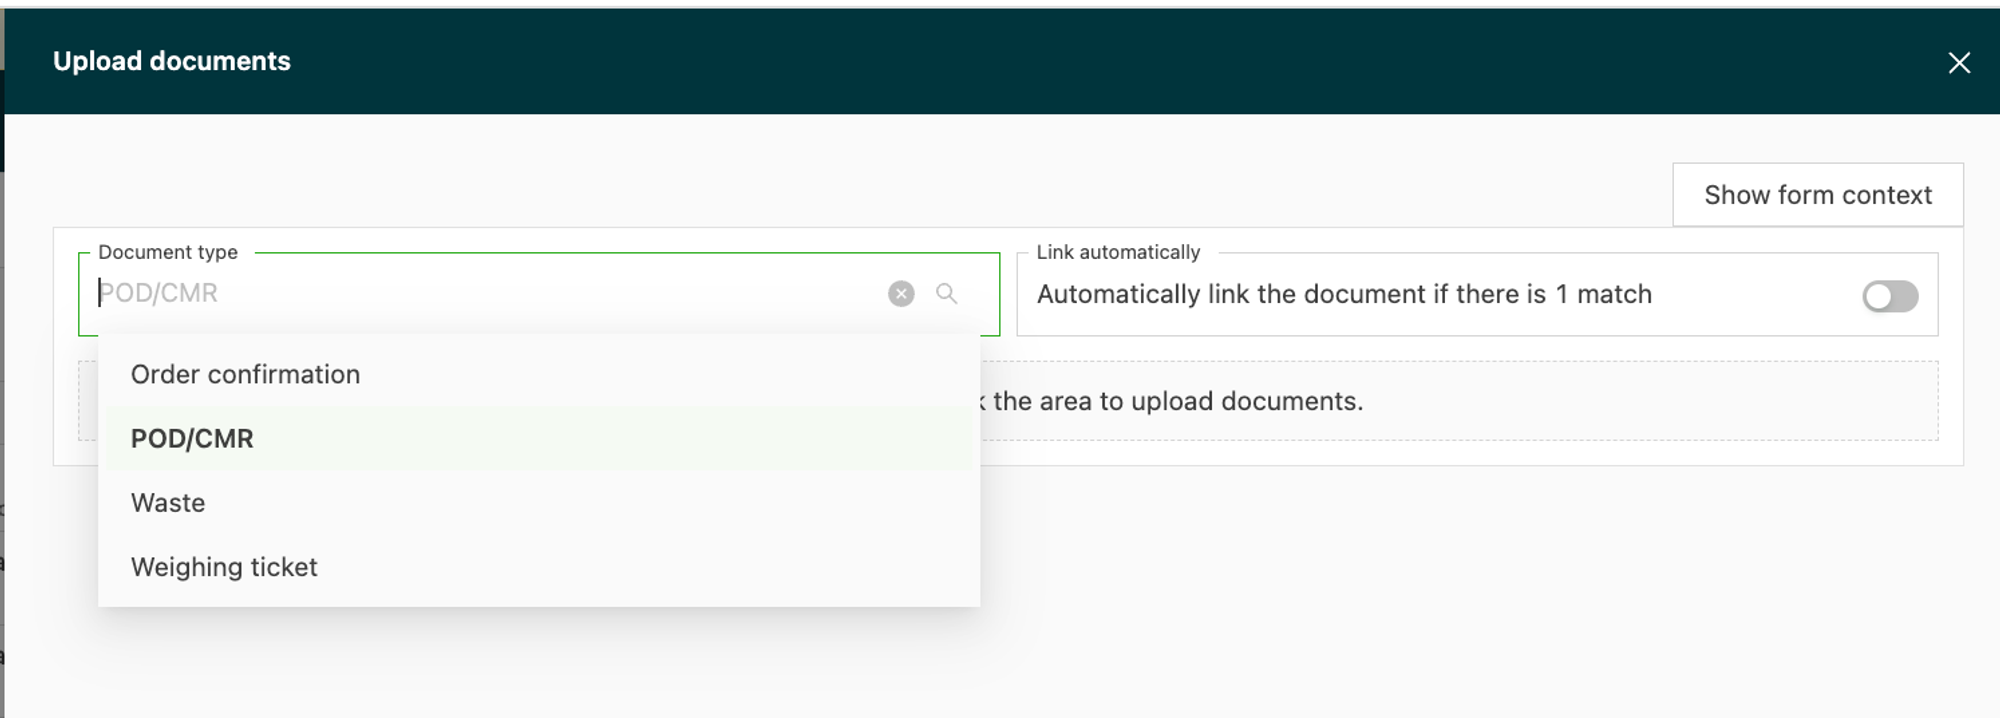
Document types to upload
There are four document types that can be uploaded:
- Order confirmation
- POD/CMR
- Waste
- Weighing ticket
Viewing documents
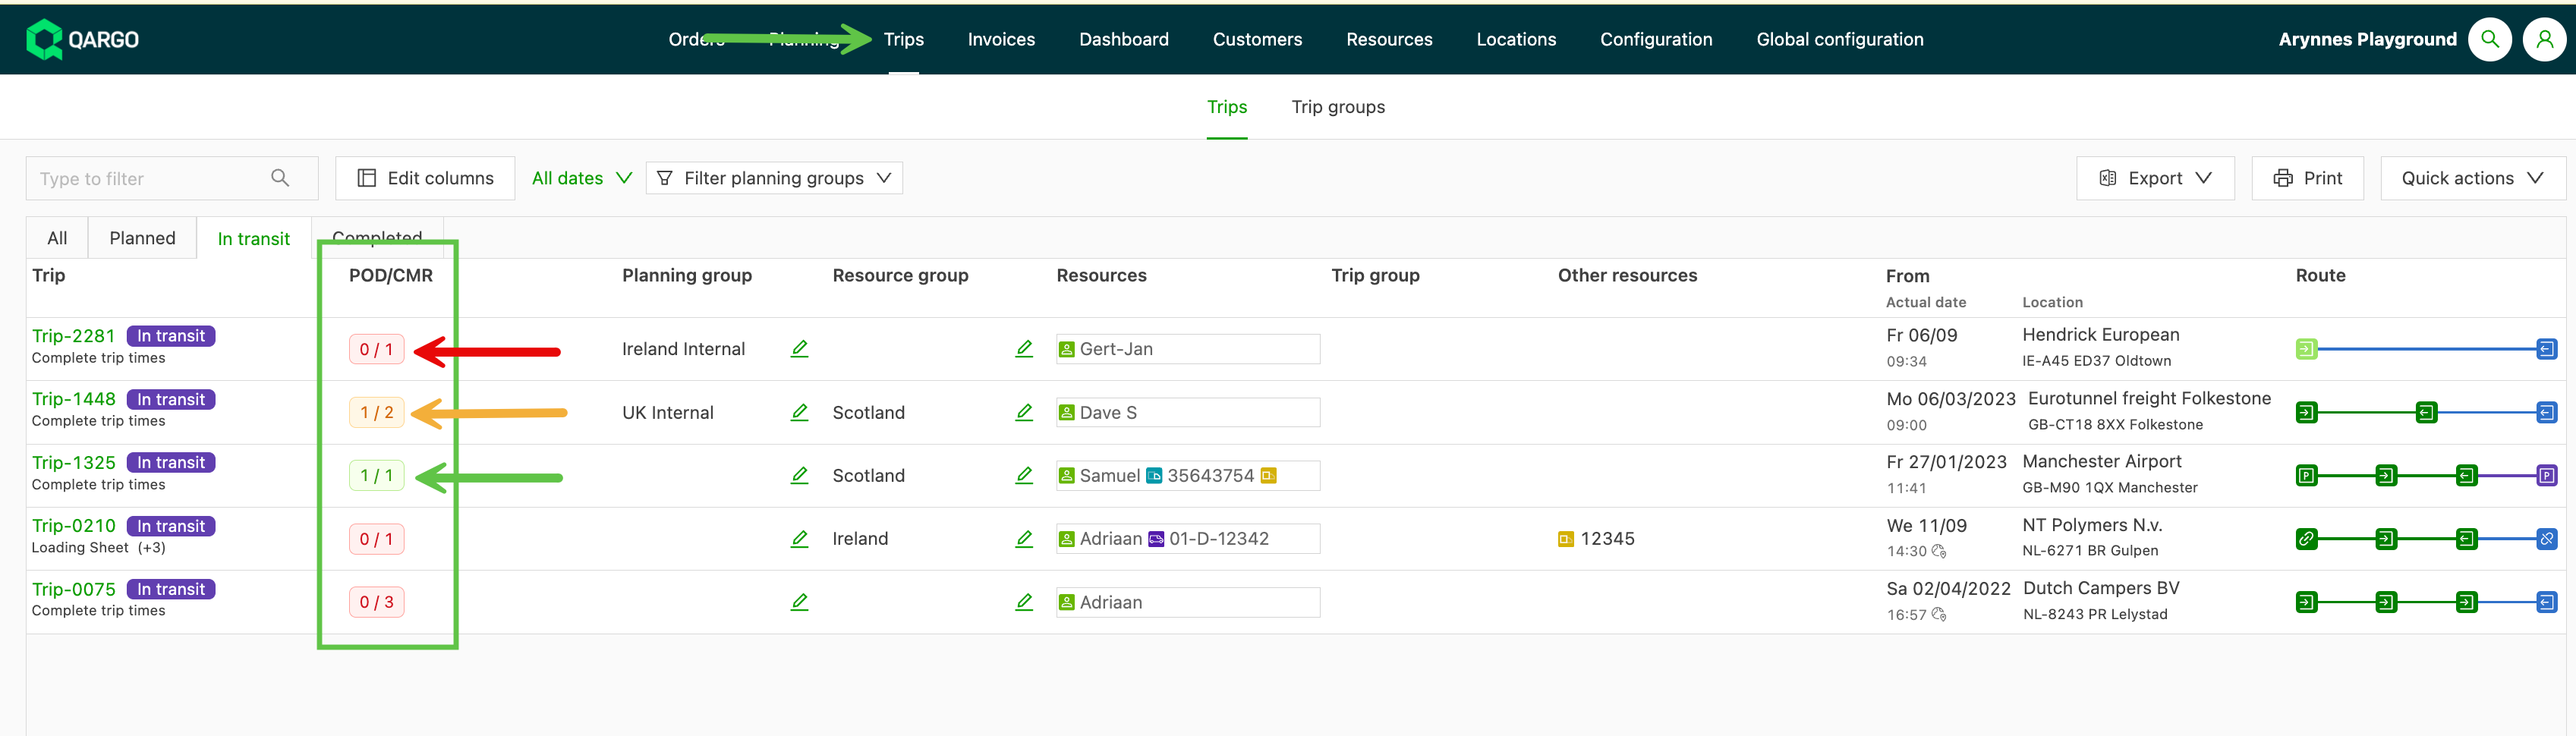
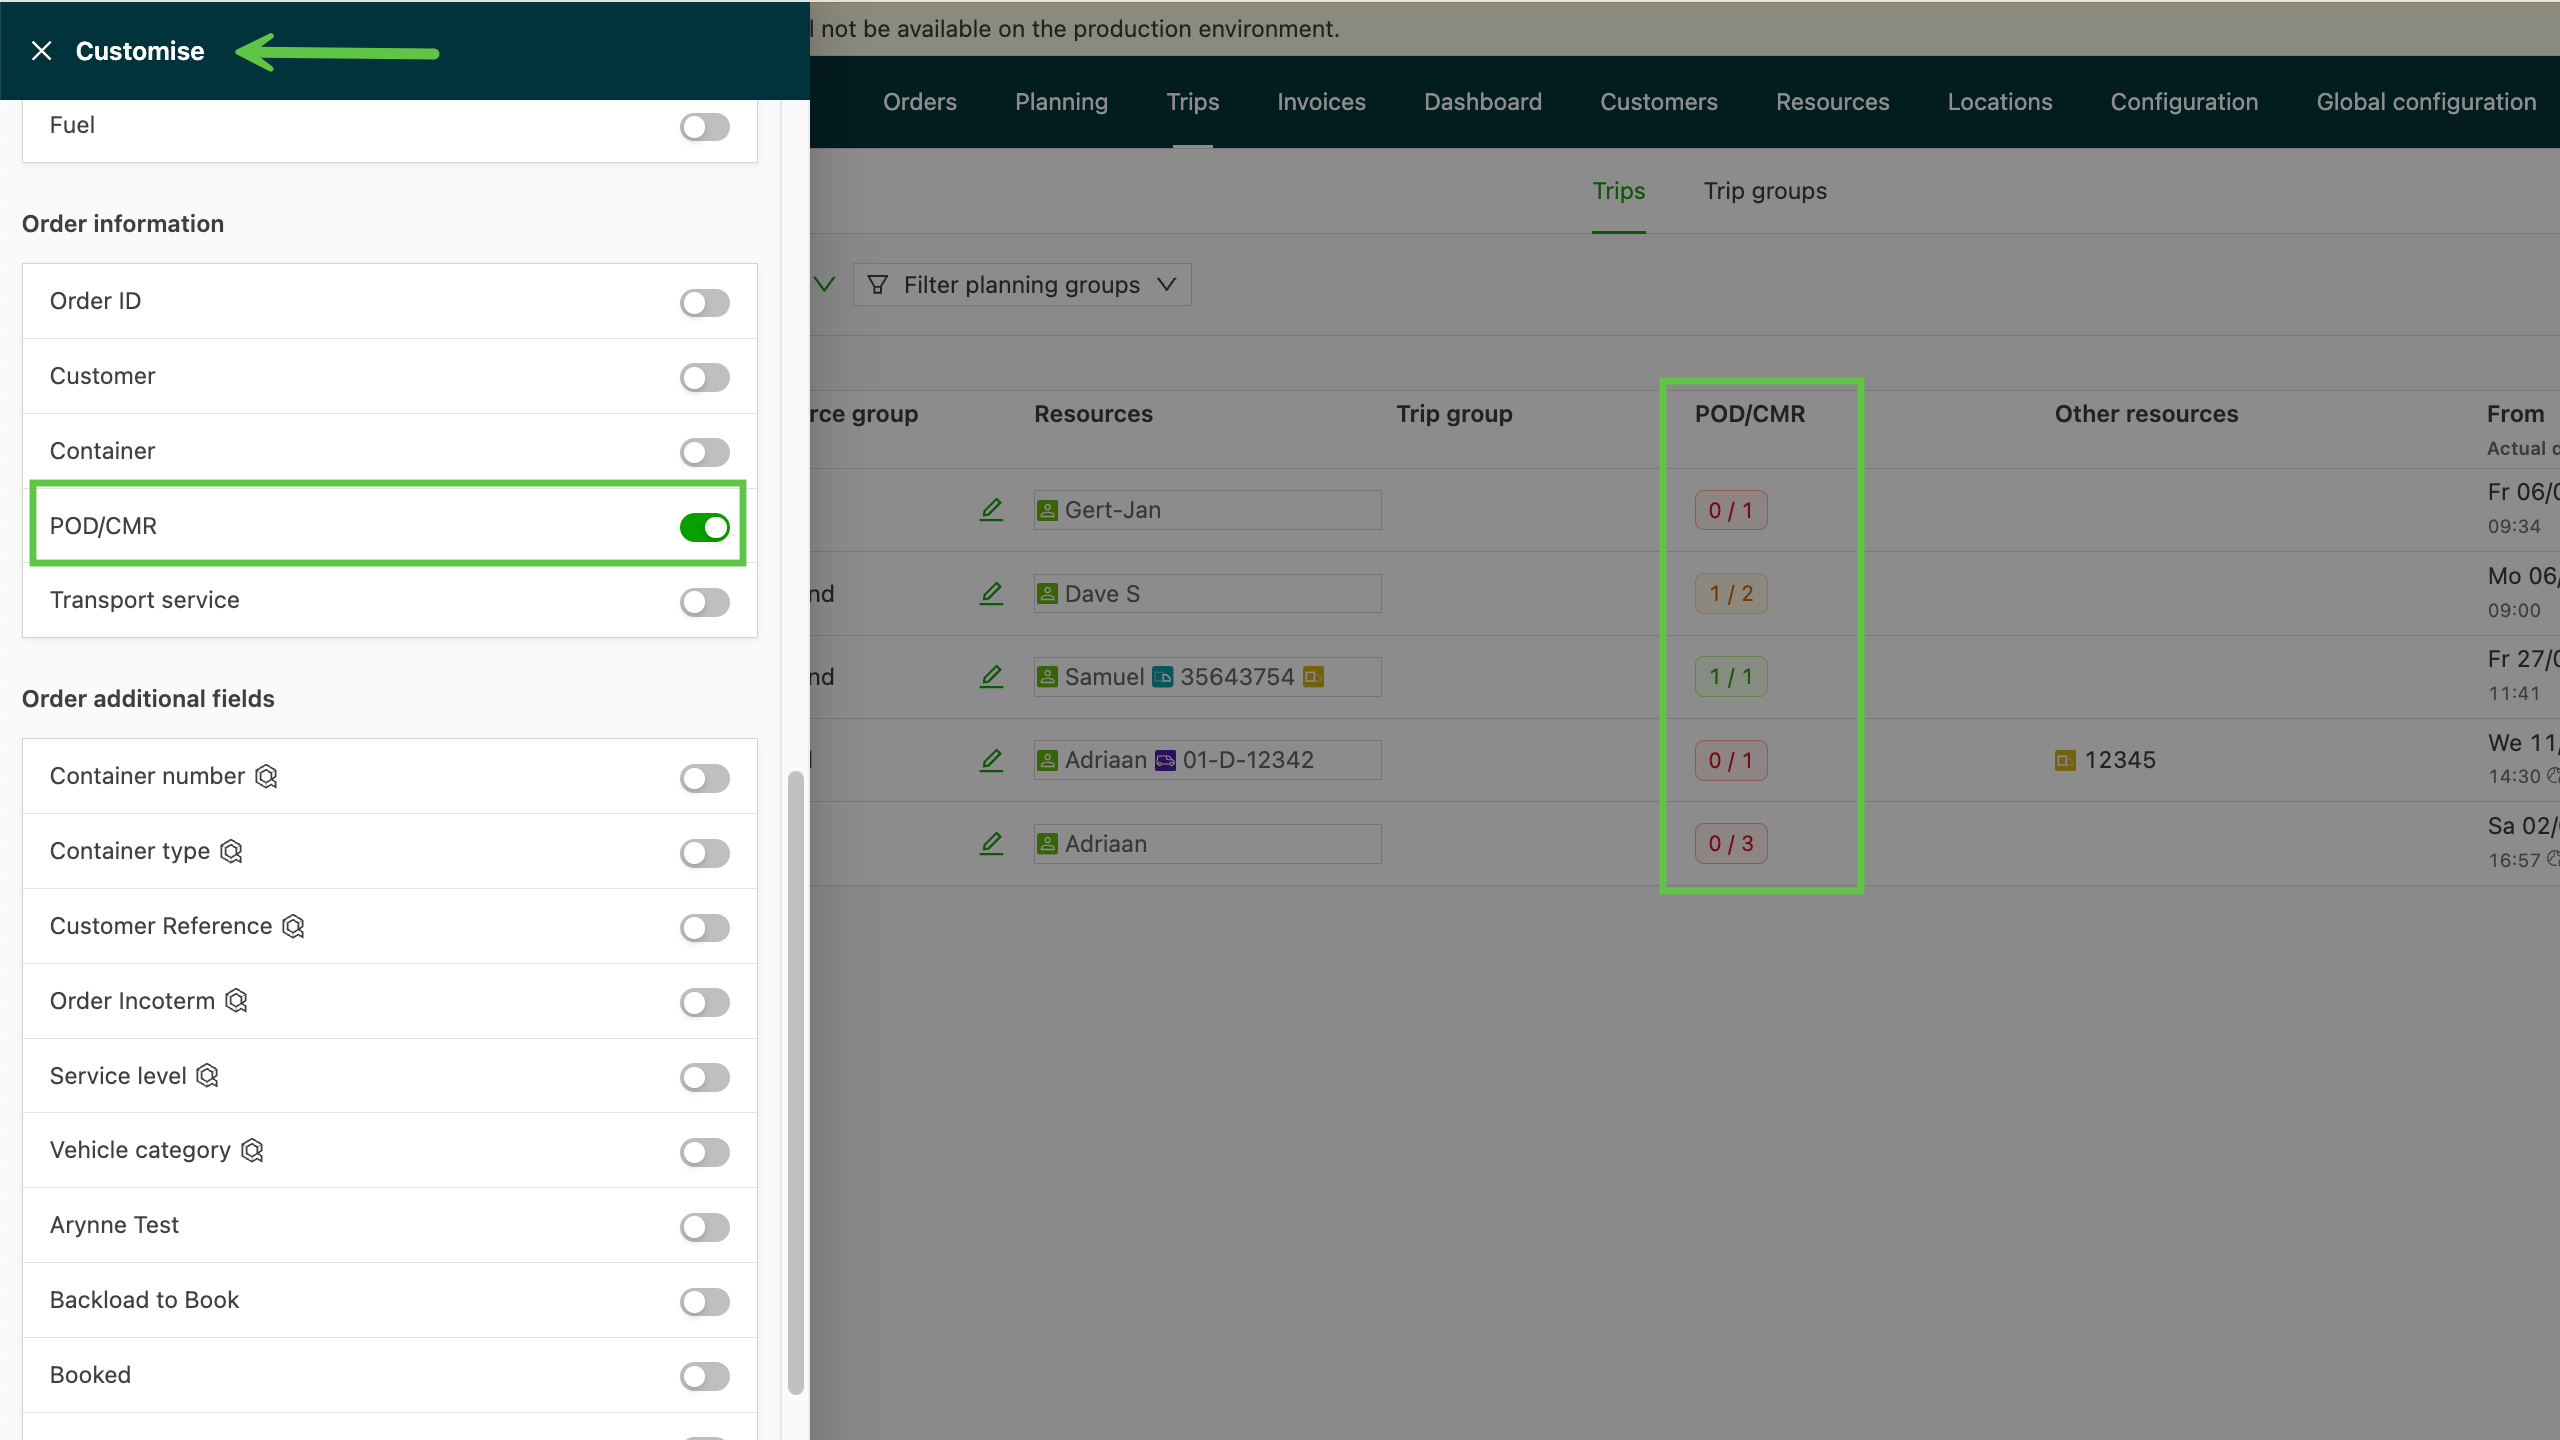
It is possible to see at a glance whether the POD / CMR has been received for an order. Where multiple documents are expected, the system compares and shows how many documents have been received vs. how many were expected. A color-coded tag makes it even easier to visually identify any orders with missing documents.
- Red: no documents received
- Orange: some documents received / documents still outstanding
- Green: all expected documents received.
Preview documents in orders and stops
- An inline document preview panel is now available on the Stops tab and the Orders list.
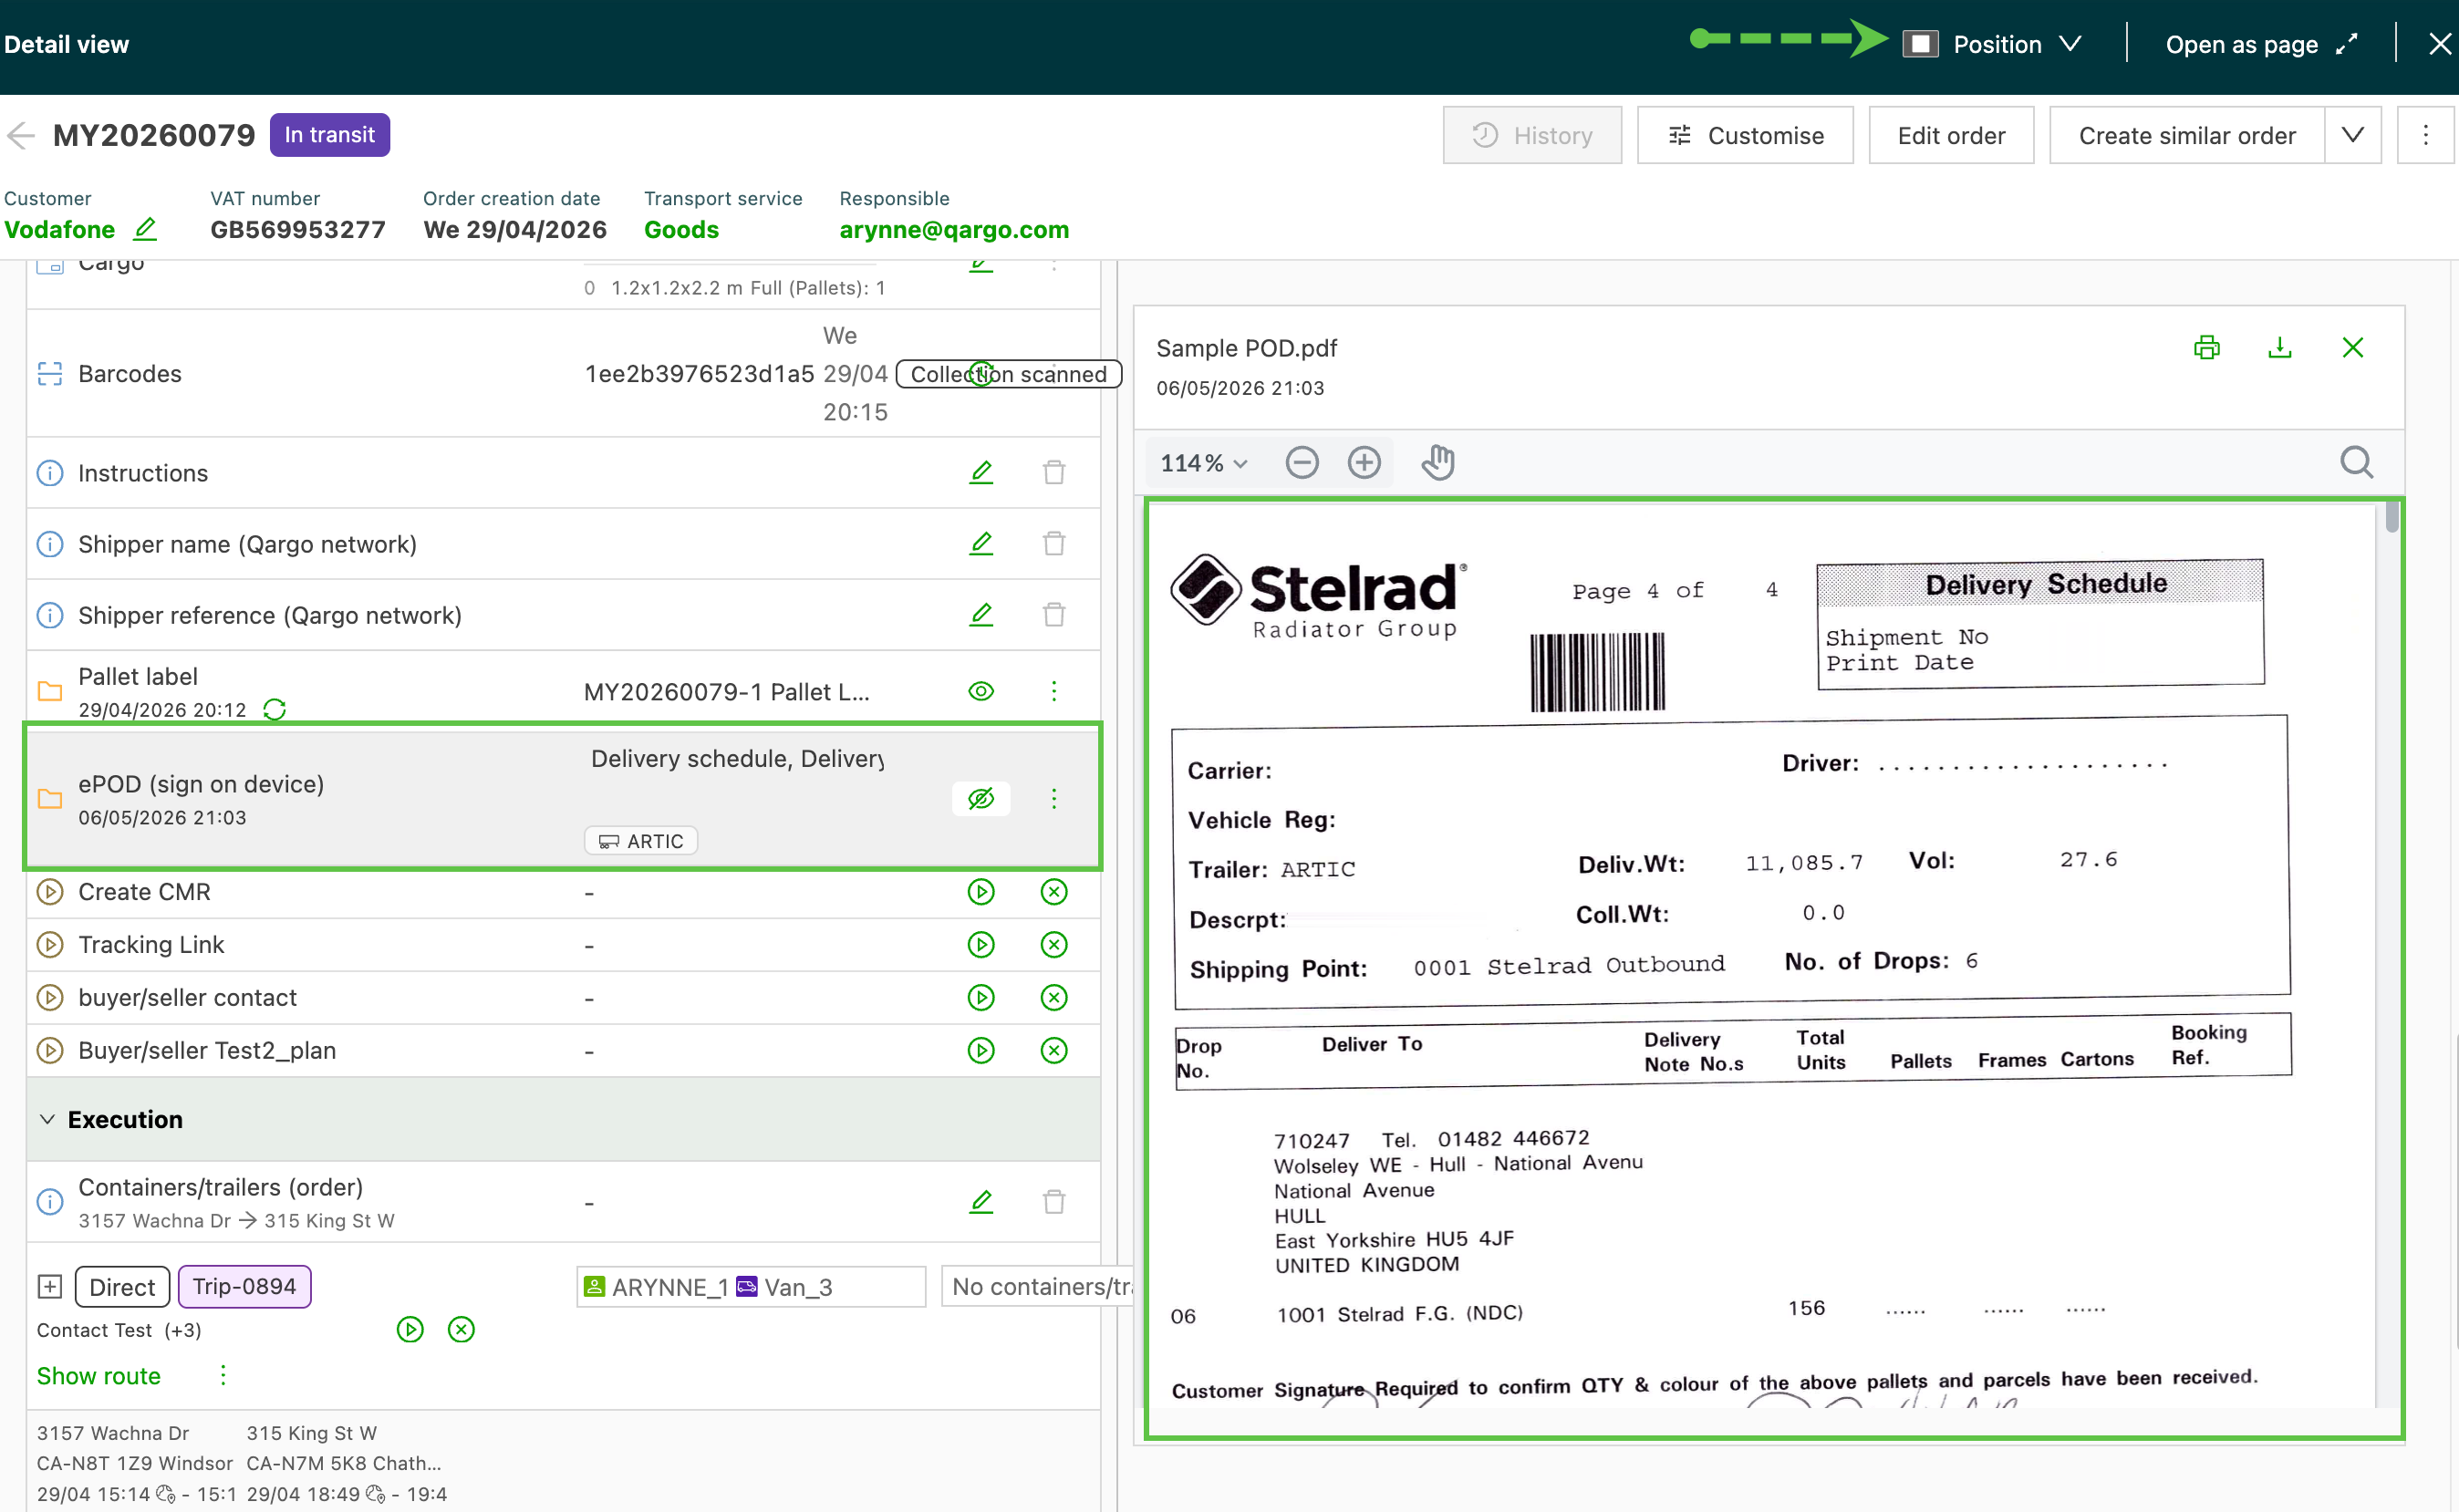
- Clicking a POD or document tag on a row opens the document in a panel beside the table, with no need to navigate to a separate page.
- The panel supports configurable dock positions: left, right, top, bottom, or split view.
- AI Document Intelligence data (signed status, ZIP codes, weight, reference numbers, document type) appears in the panel alongside the document.
- Supported file types: PDF, images, Word, and Excel. Email attachments open in the existing mail thread viewer.
Use cases
- Document verification teams checking PODs before billing can review signatures and reference numbers without losing their place in the stop list.
- Operations staff processing delivery confirmations can scan document contents and AI-validated fields in a single view.
Terminology
| Term | Definition |
|---|---|
| Inline preview panel | A resizable side panel that displays a document beside the table without requiring full-page navigation |
| Split view | A dock position that places the table and document panel side by side simultaneously |
| AI Document Intelligence | Automated extraction of document metadata (signed status, ZIP codes, weight, reference numbers, document type), displayed as validation tags |
| POD | Proof of delivery: a document confirming that goods were received at a stop |
Accessing the inline preview panel
From the orders list
-
Navigate to Orders > Orders list view
- Make sure the POD/CMR column is toggled on under Edit columns
-
Click a document tag on an order row. The preview panel opens beside the table.
-
Review the document and AI Document Intelligence data.
From the stops tab
- Navigate to Stops.
- Click a POD or document tag on any stop row. The preview panel opens to the right of the table.
- Review the document content. The AI Document Intelligence section below the document shows the extracted fields: signed status, ZIP codes, weight, reference numbers, and document type.
- Navigate between multiple documents on the same stop using the arrow controls inside the panel.
- Close the panel by clicking the X icon to return to the full-width Stops table.
Adjusting the panel position
-
Click the dock position icon in the panel header.
-
Select one of the available positions: Left, Right, Top, Bottom, or Split view.
- Split view keeps both the table and the document visible simultaneously at full width.
-
Drag the panel divider to resize the panel to the preferred width.
Troubleshooting
| Issue | Resolution |
|---|---|
| The Recently visited list is empty | No operational objects have been opened in the current browser session. Navigate to any order, invoice, or load to start building the list. |
| A recently opened object is not appearing in the list | The list holds a maximum of 20 items. Older records are removed as new ones are added. Only objects opened as drawers, modals, or full pages are tracked; quick-preview mode is not included. |
| The list does not carry over between browsers | The Recently visited history is browser-specific. Switching to a different browser shows a separate or empty history. |
| Audit log access is no longer in the top navigation | The audit log button previously located in the top navigation bar has been replaced by the Recently visited icon. Access audit logs via the User menu instead. |
Automatically link documents
When selecting the document type, there is an option to automatically link the document if there is 1 match.
Example:
- If the order number matches the document name, the document is automatically linked to that order.
- Use the toggle to activate this option.
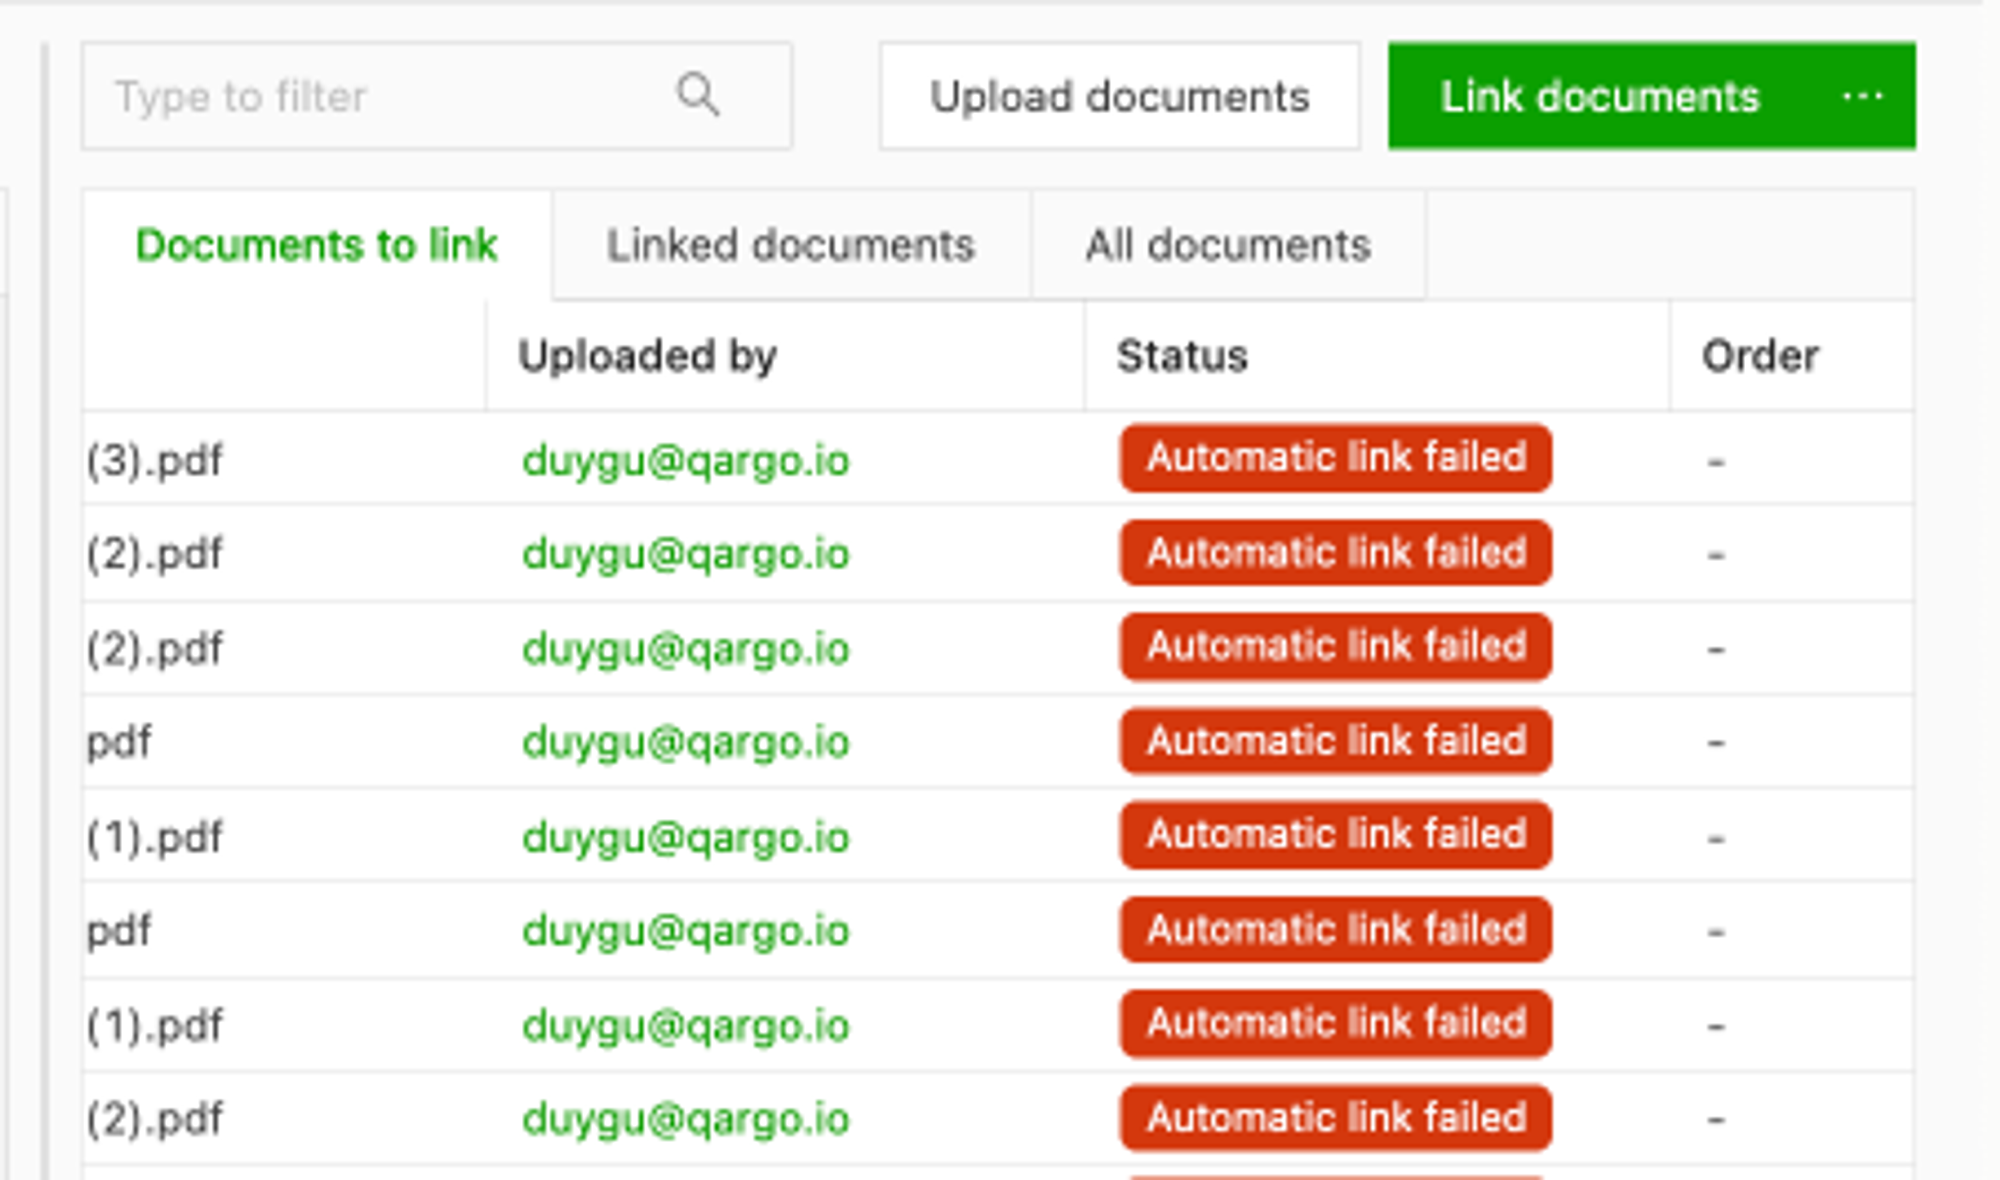
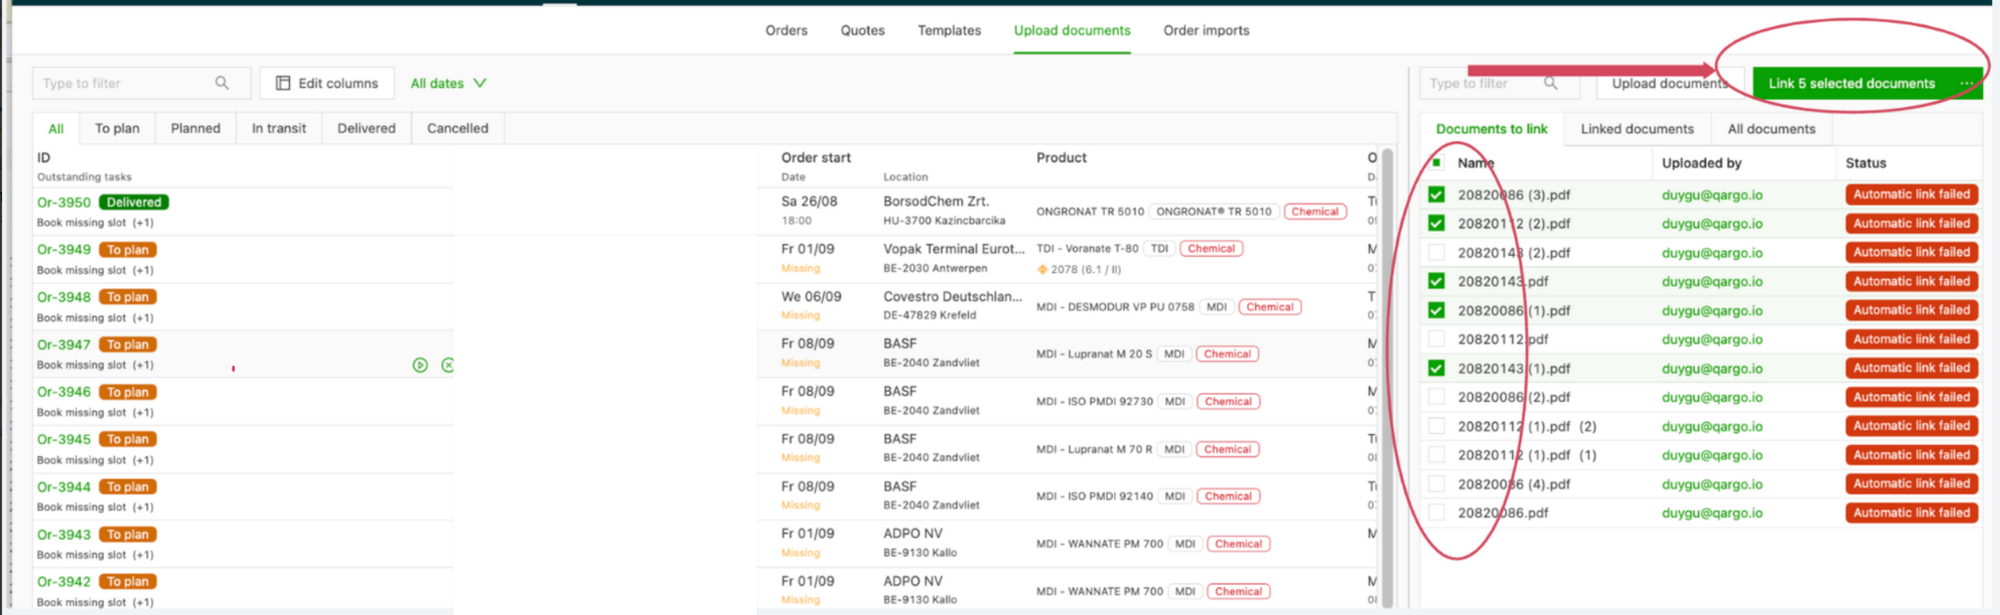
- If the automatic linking fails, the status of that document changes to Automatic link failed; link it manually.
Manually link documents
Once the documents are correctly split, they can be linked to the orders.
- Select the documents to link to one order
- Click Link the (number) documents.
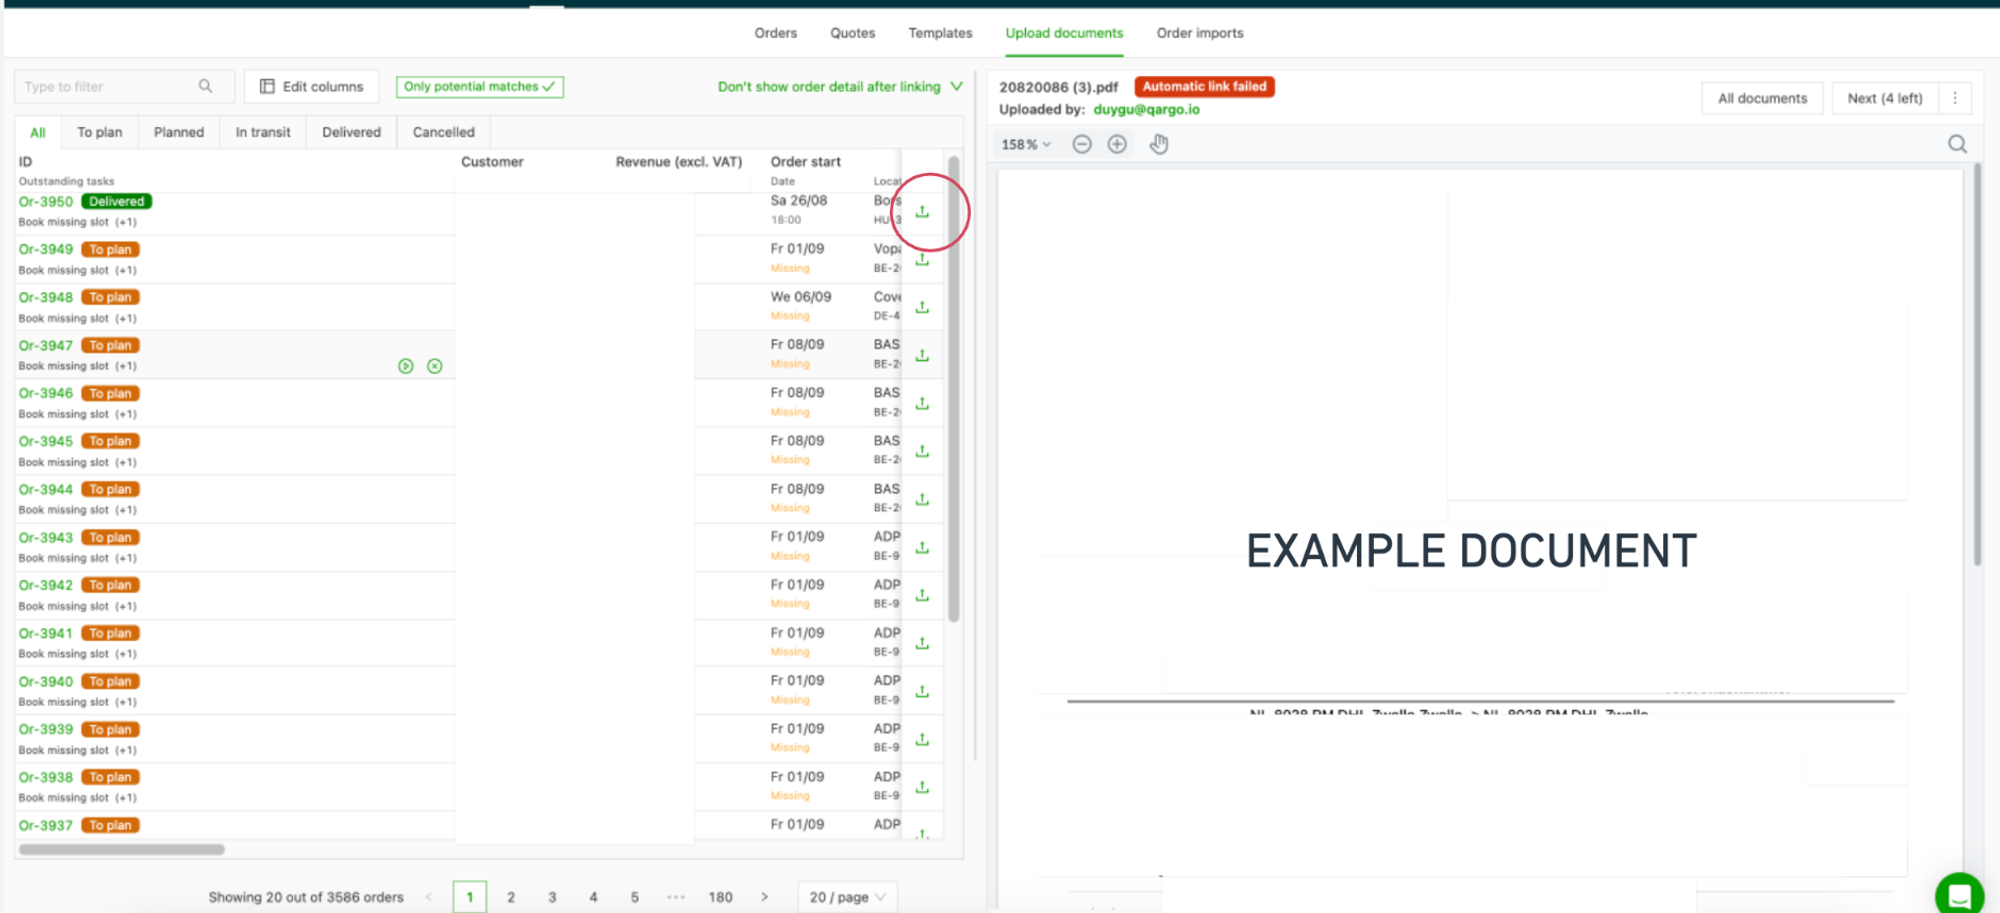
Once linked, a preview of the document and the order list are shown side by side.
Here the document can be viewed and the related order found.
- Link the document to the correct order using the upload button shown on the right side of that order line.
- Once linked, the next document appears on the preview page.
- Repeat until no documents are left to be linked. (The top right corner shows how many documents are left to be linked.)
Linked documents shows an overview of all linked documents with the necessary details (who uploaded each document, which order it is linked to, etc.).
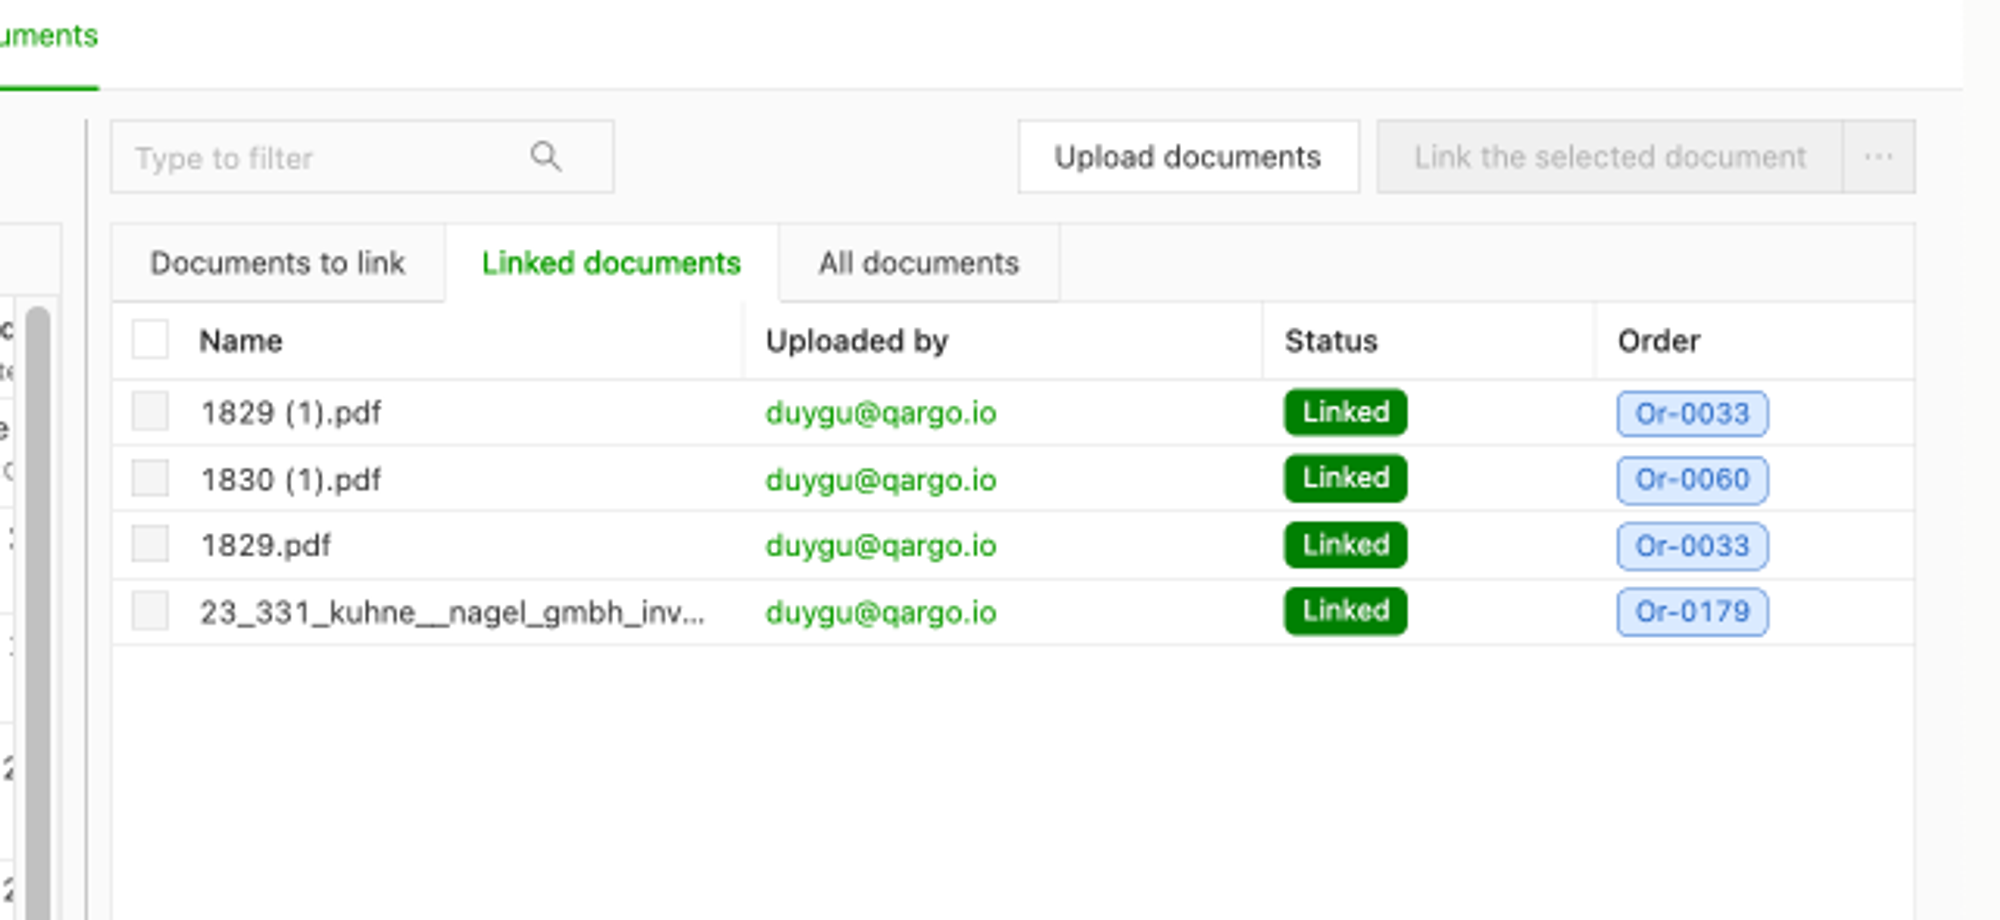
After the linking has been performed, all the linked documents and the order numbers linked to them can be viewed.
Show the order detail after linking
- Choose to show (or hide) the order detail after linking.
- Use the dropdown menu to select the option
- When the order detail is set to show after linking, the order page opens automatically once the document has been linked.
