
Orders - Order creation via order confirmation document
This article describes how to scan and validate the order confirmation document to create a new order.
The AI model learns from past orders to automatically fill in data from scanned order confirmation documents into the order form. The AI model fills in suggestions for new orders and for orders created from an existing order template. In both cases, the system scans a PDF order confirmation document and prefills any suggestions.
Below is a detailed overview of how it works and what to expect:
\
How it works {#h_e2b39ebc6c}
1. Learning process
- The AI model learns every time a user creates an order for a specific customer using a scanned document.
- Typically, the model needs about 3–5 scanned orders before it starts providing pre-fills.
2. Automatic pre-fills
- When the model is confident that a value in the document matches a field in the order form, it automatically fills in the corresponding field.
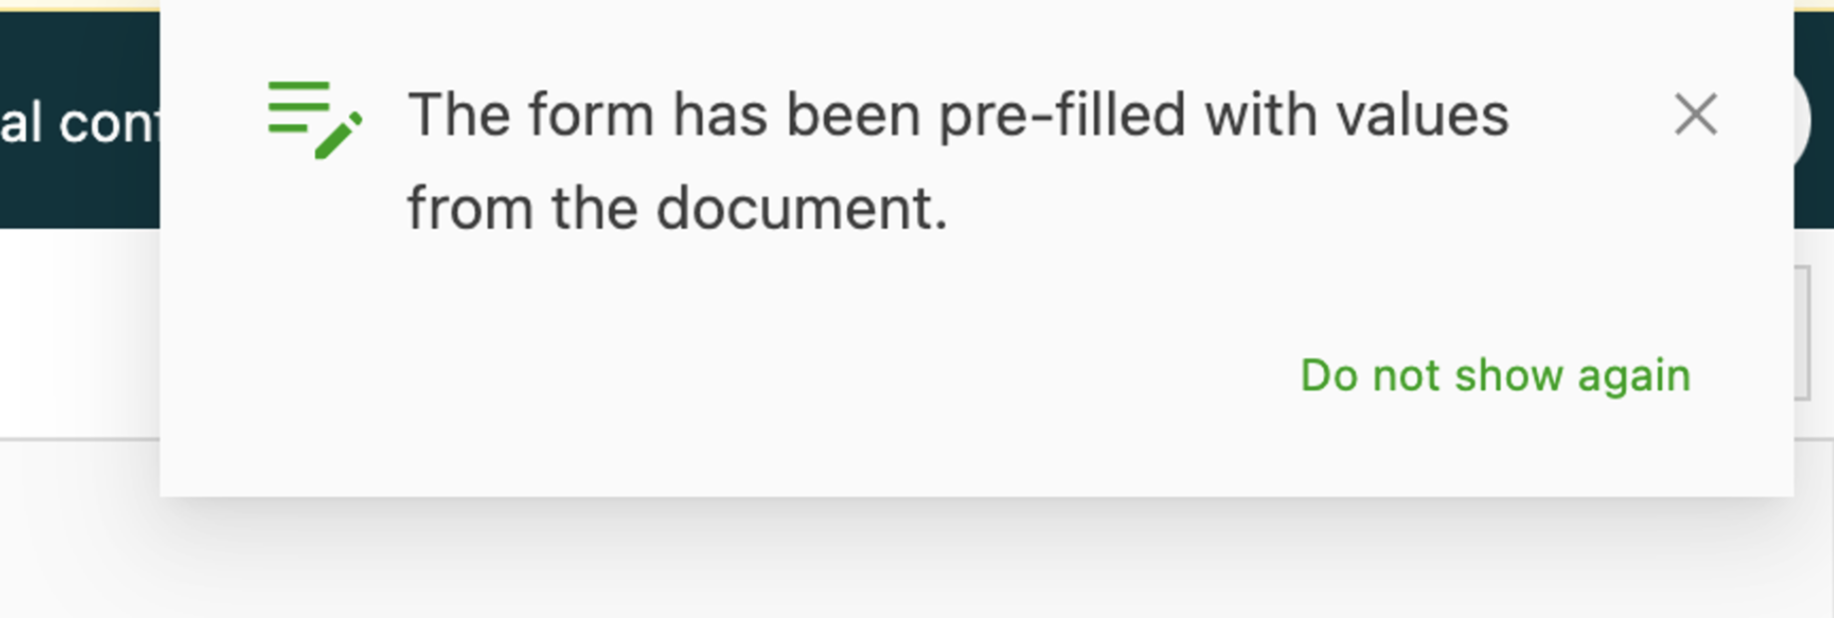
- Users receive a notification in the top-right corner of the screen when one or more fields are pre-filled.
3. User interface
-
The recognized fields include:
-
Customer by tax number: must be added to the customer profile
-
Customer name: option to create an alias with matched names
-
References
-
Dates / times
- Opening times
-
Numbers
-
Addresses
-
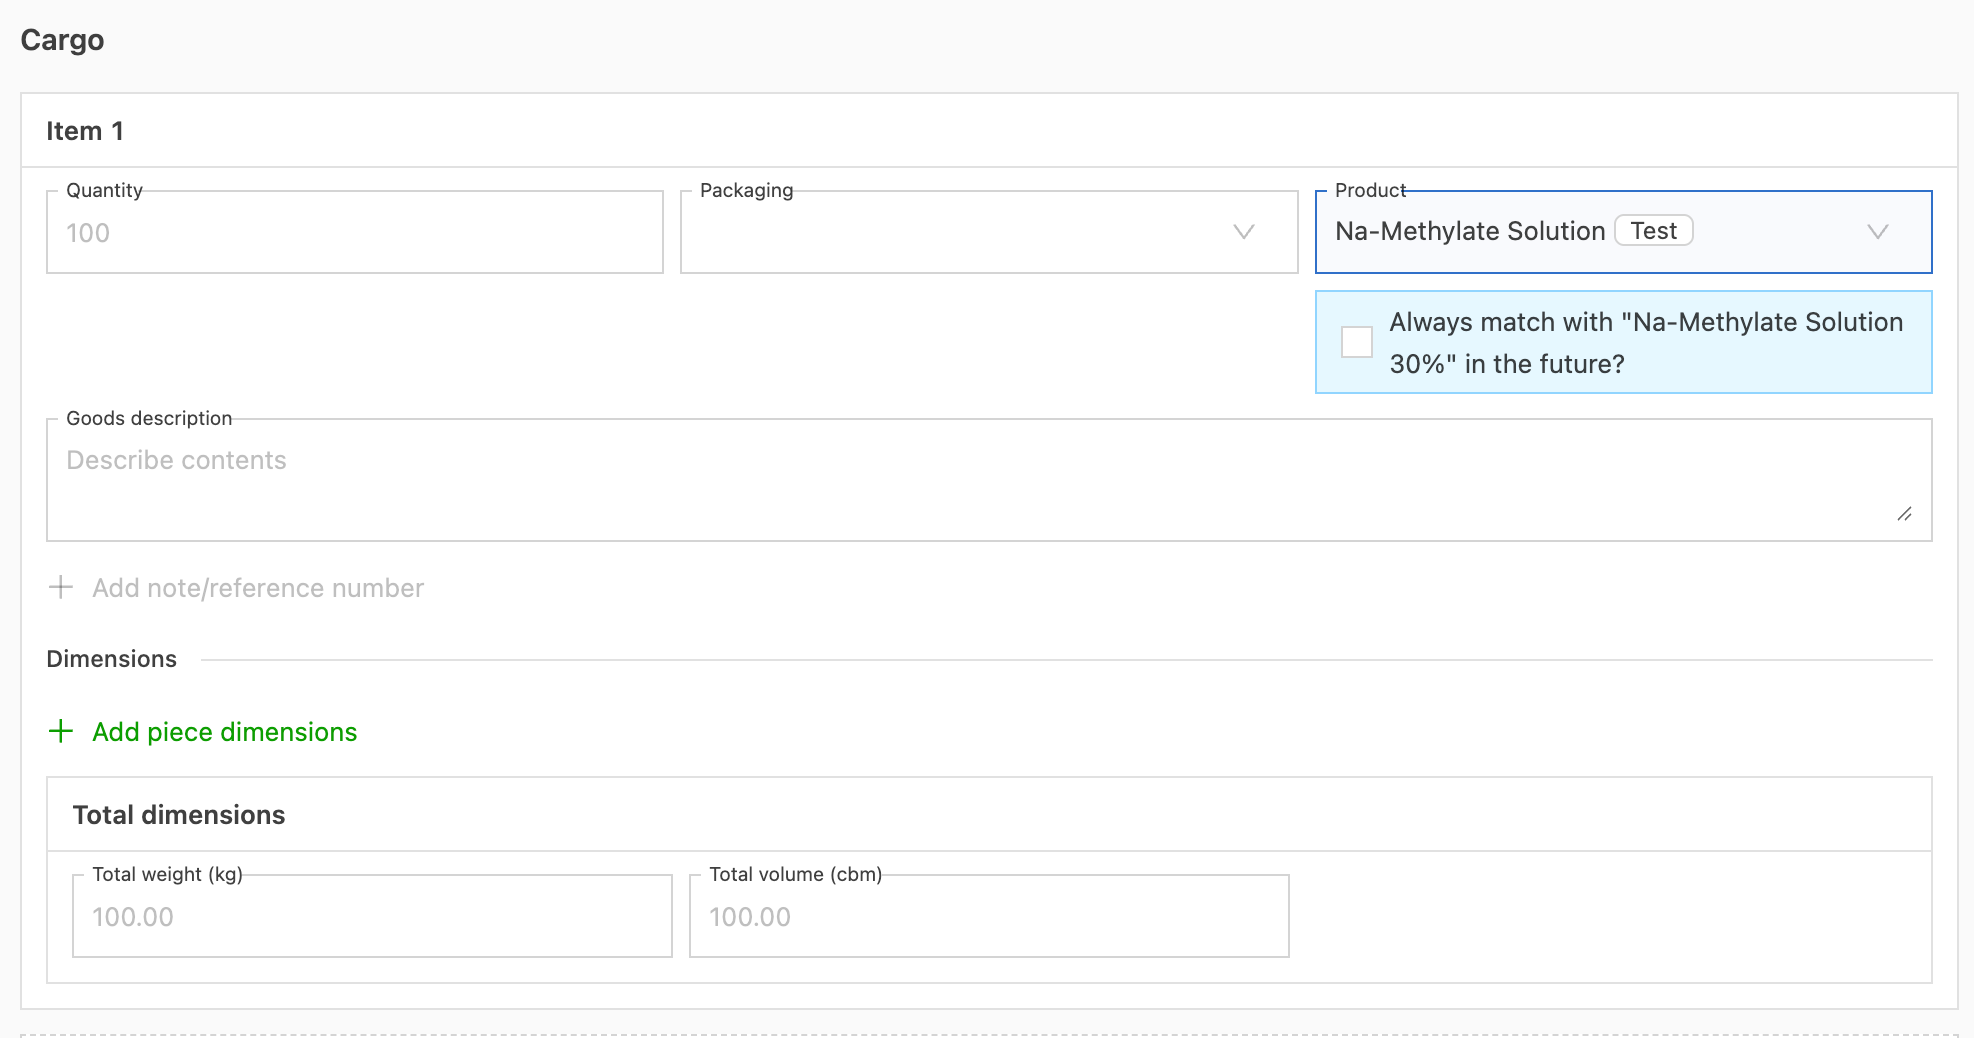
Products / packaging
-
Descriptions / additional instructions
- Pickup / delivery notes
- Goods descriptions
-
-
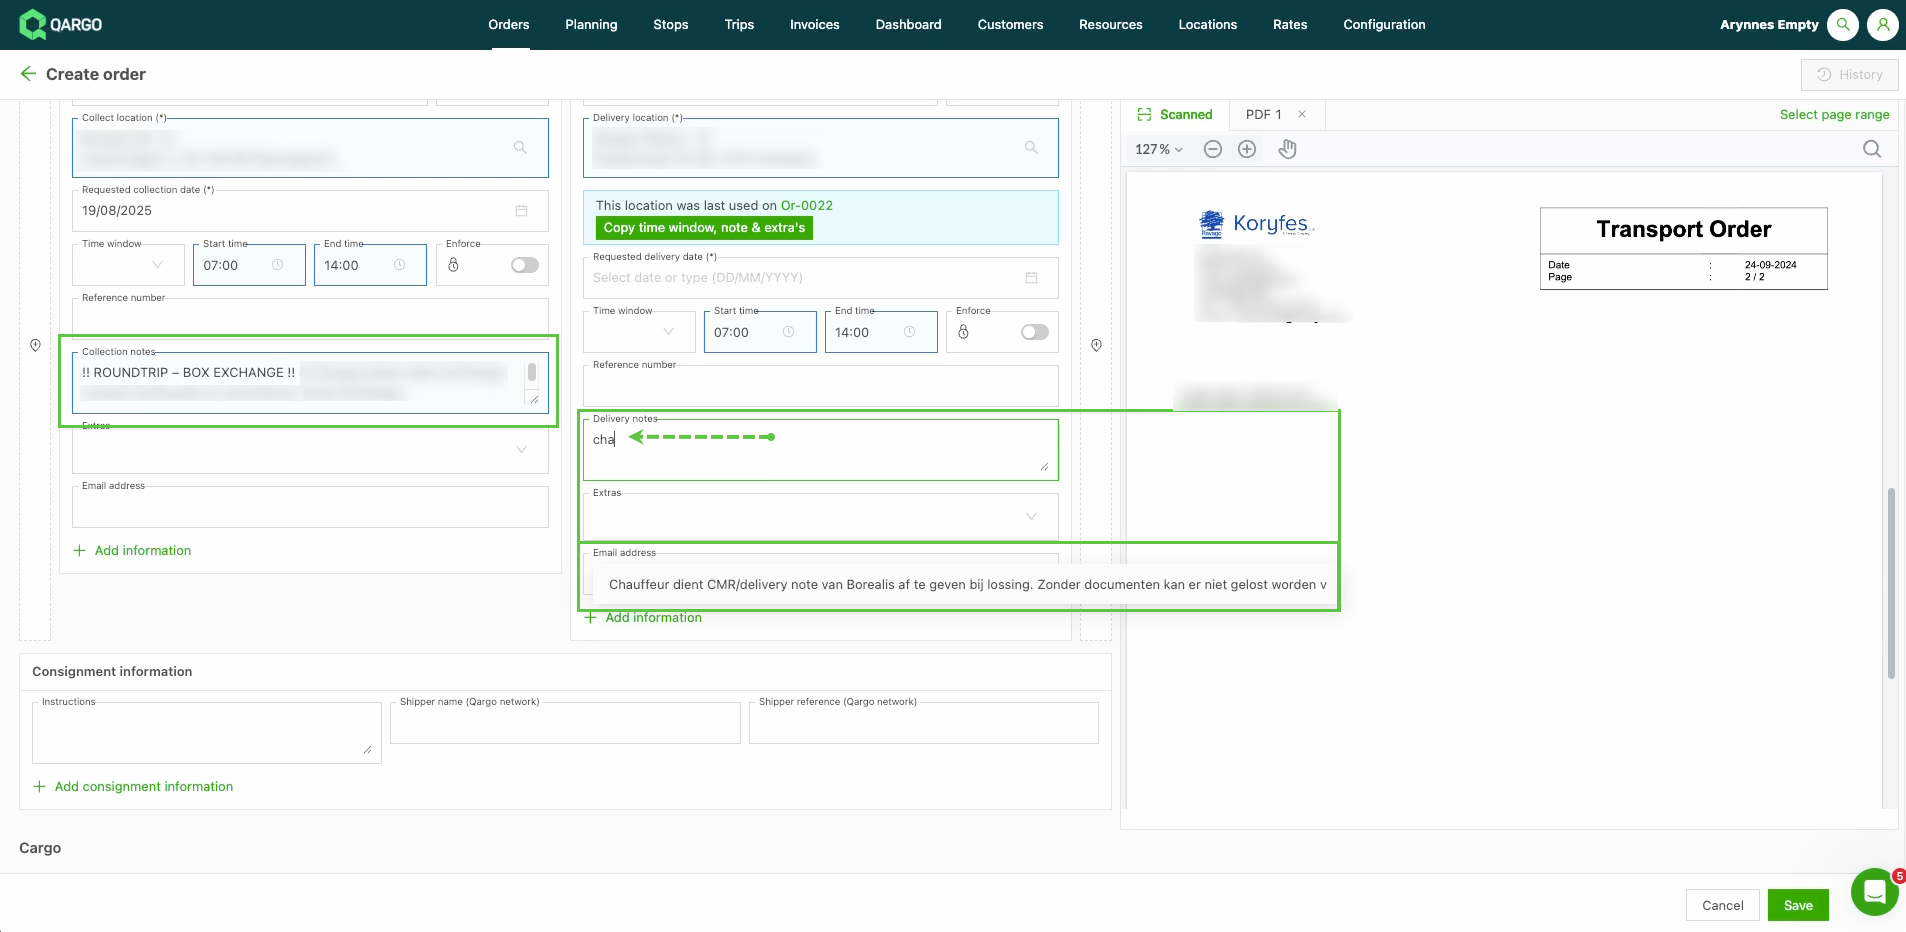
Click a field in the order to open a dropdown.
- Some options in that dropdown have the label ‘Suggestion’.
- This is data fetched from the uploaded document.
-
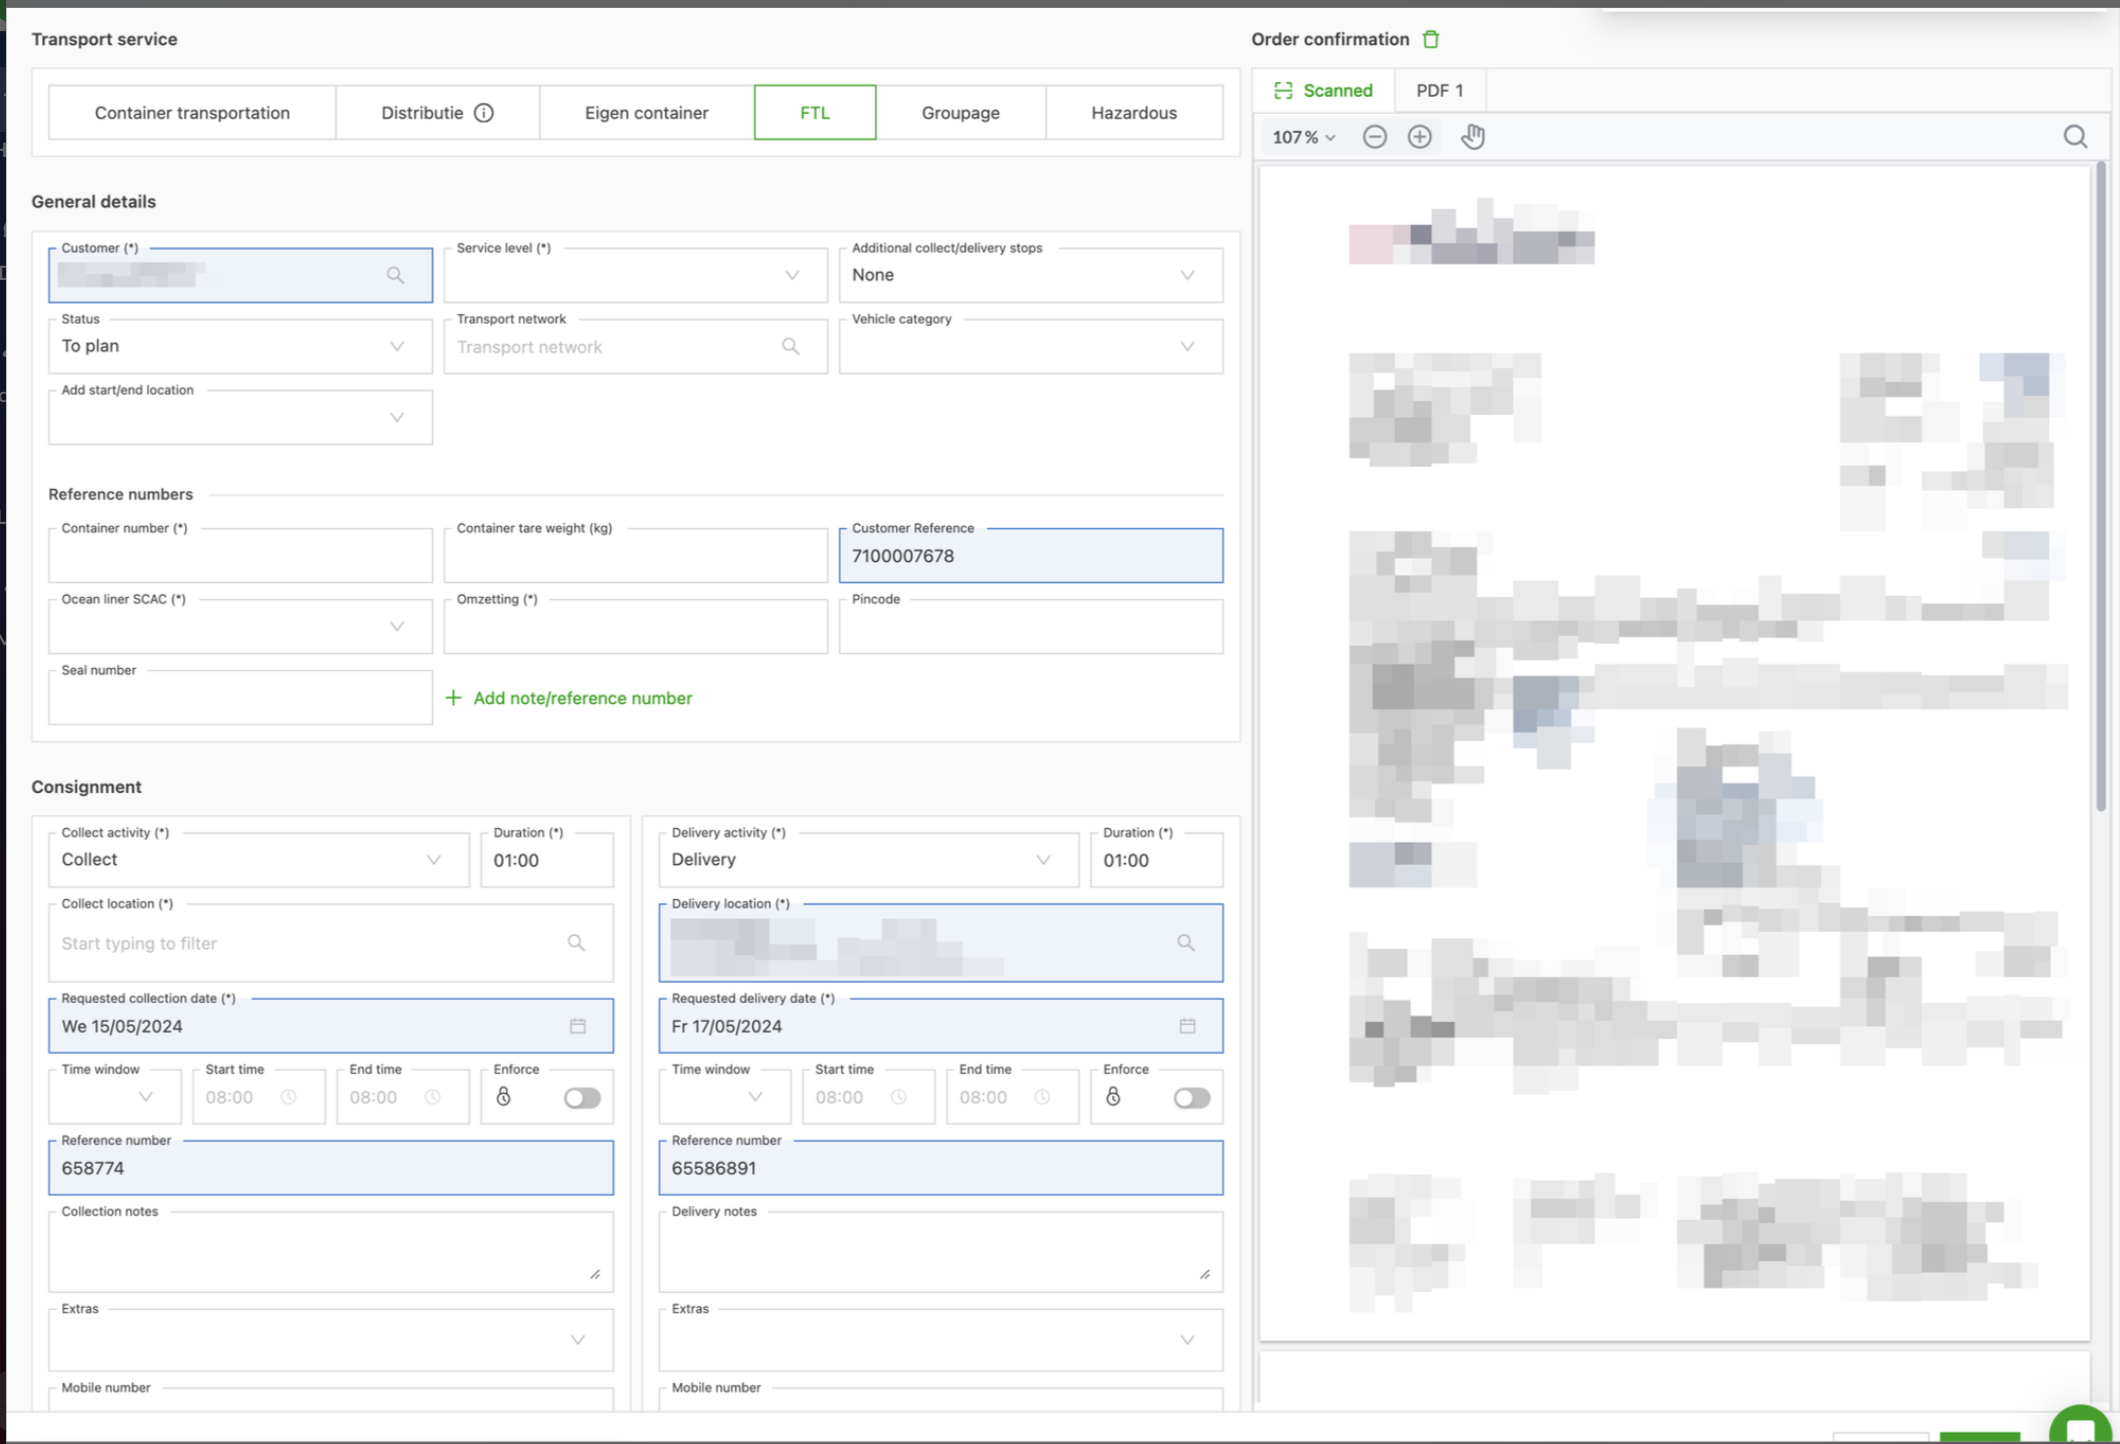
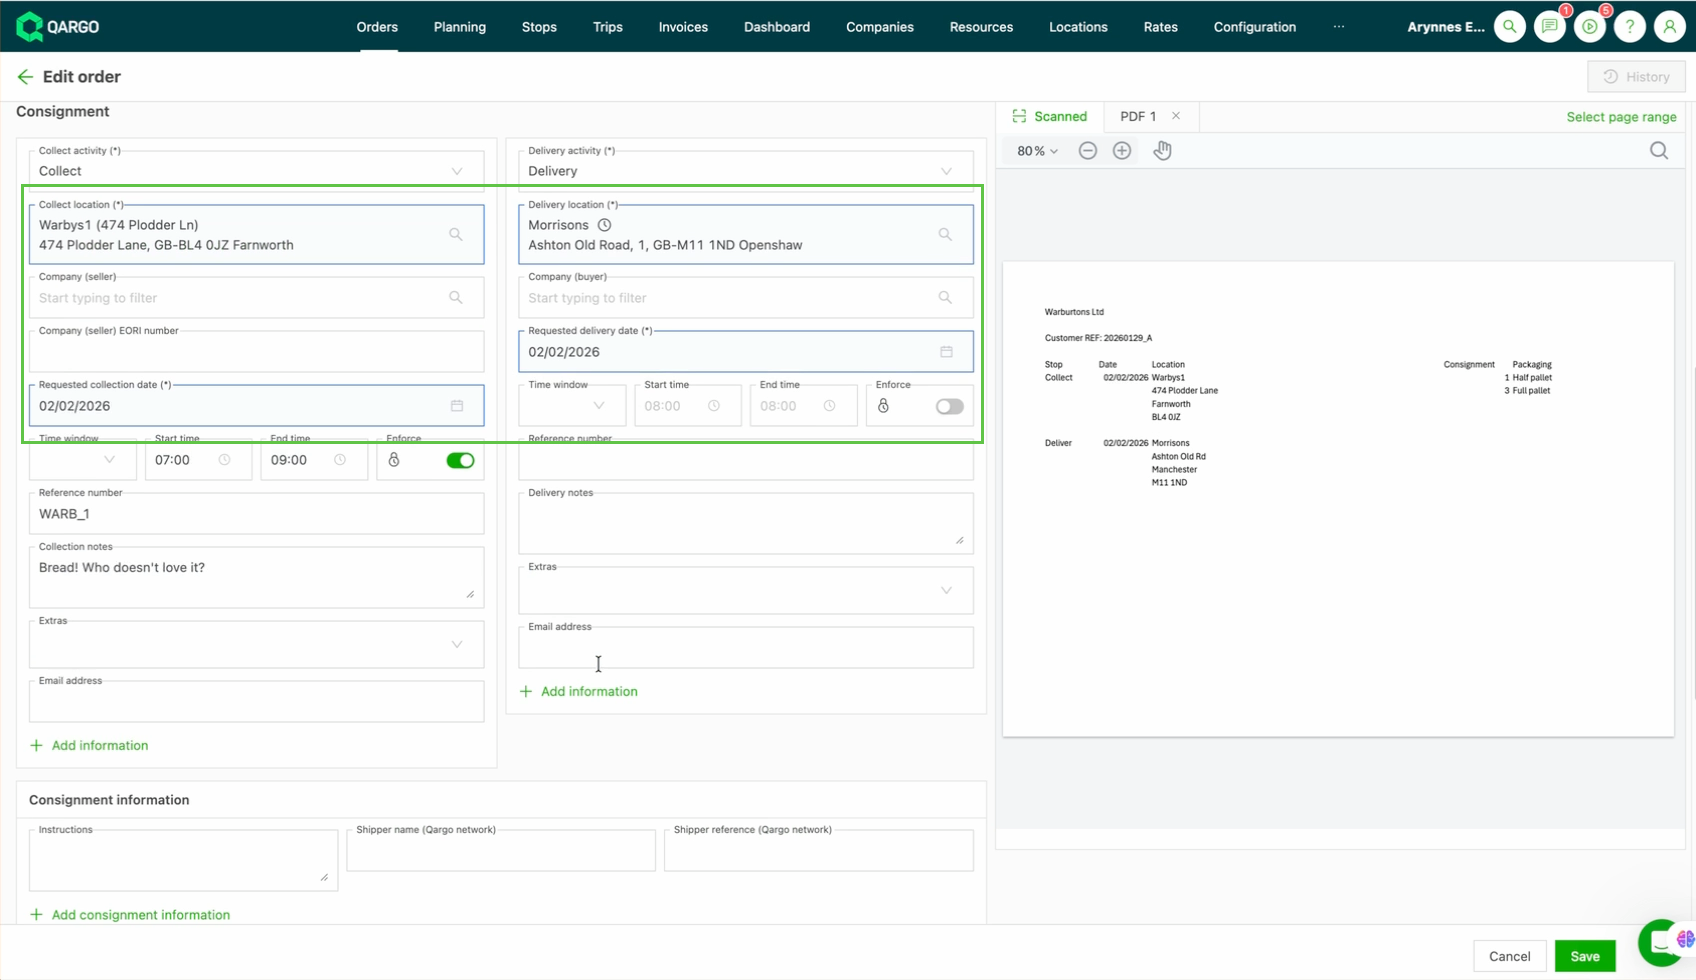
Pre-filled fields are highlighted in blue in the form, just like when users manually select a suggestion from the document.
-
Verify the accuracy of the pre-filled data and manually complete any fields that are not filled in automatically.
4. Accuracy and limitations
- The model only provides pre-fills when it is nearly 100% certain of their accuracy, to minimize incorrect pre-fills.
- Users should not expect the entire form to be pre-filled, but can expect a significant reduction in manual data entry.
Using a template order
The document scanning and prefill functions can be used together with an order template.
-
Navigate to Orders > Templates
-
Select the template to copy and click ‘Copy selected orders’
-
In the new order that is created, click ‘Edit order’
- This opens the edit order page, which includes a section with the transportation service and document upload fields.
-
In the ‘Order confirmation from customer’ section, use ‘drag & drop’ or click to upload a file.
-
The system starts scanning and adding matched suggestions, highlighted in blue.
-
Verify the copied information and enter any missing details.
-
Click Save.
Click Play👇 to watch an overview of how to use the customer order confirmation document to create a new order from a template.

Split large PDF files for scanning
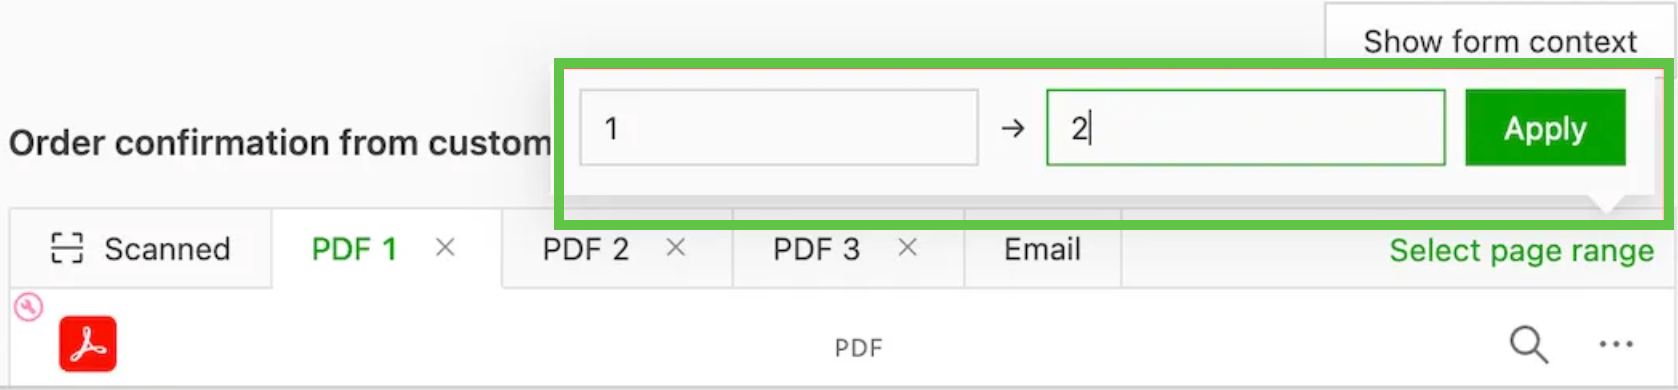
- Create an order by dragging a PDF into Qargo. It is possible to define which pages of the PDF file(s) are used for the order pre-fill and as the order confirmation.

- Users can specify which page range to use. The AI scans this range, and it is used as the order confirmation attachment in the order.
-
Once the split has been created, it can also be reviewed.
- Create splits for the different PDF files that have been attached.
- The original PDF files can be deleted, or they can be kept and attached to the order as well.

-
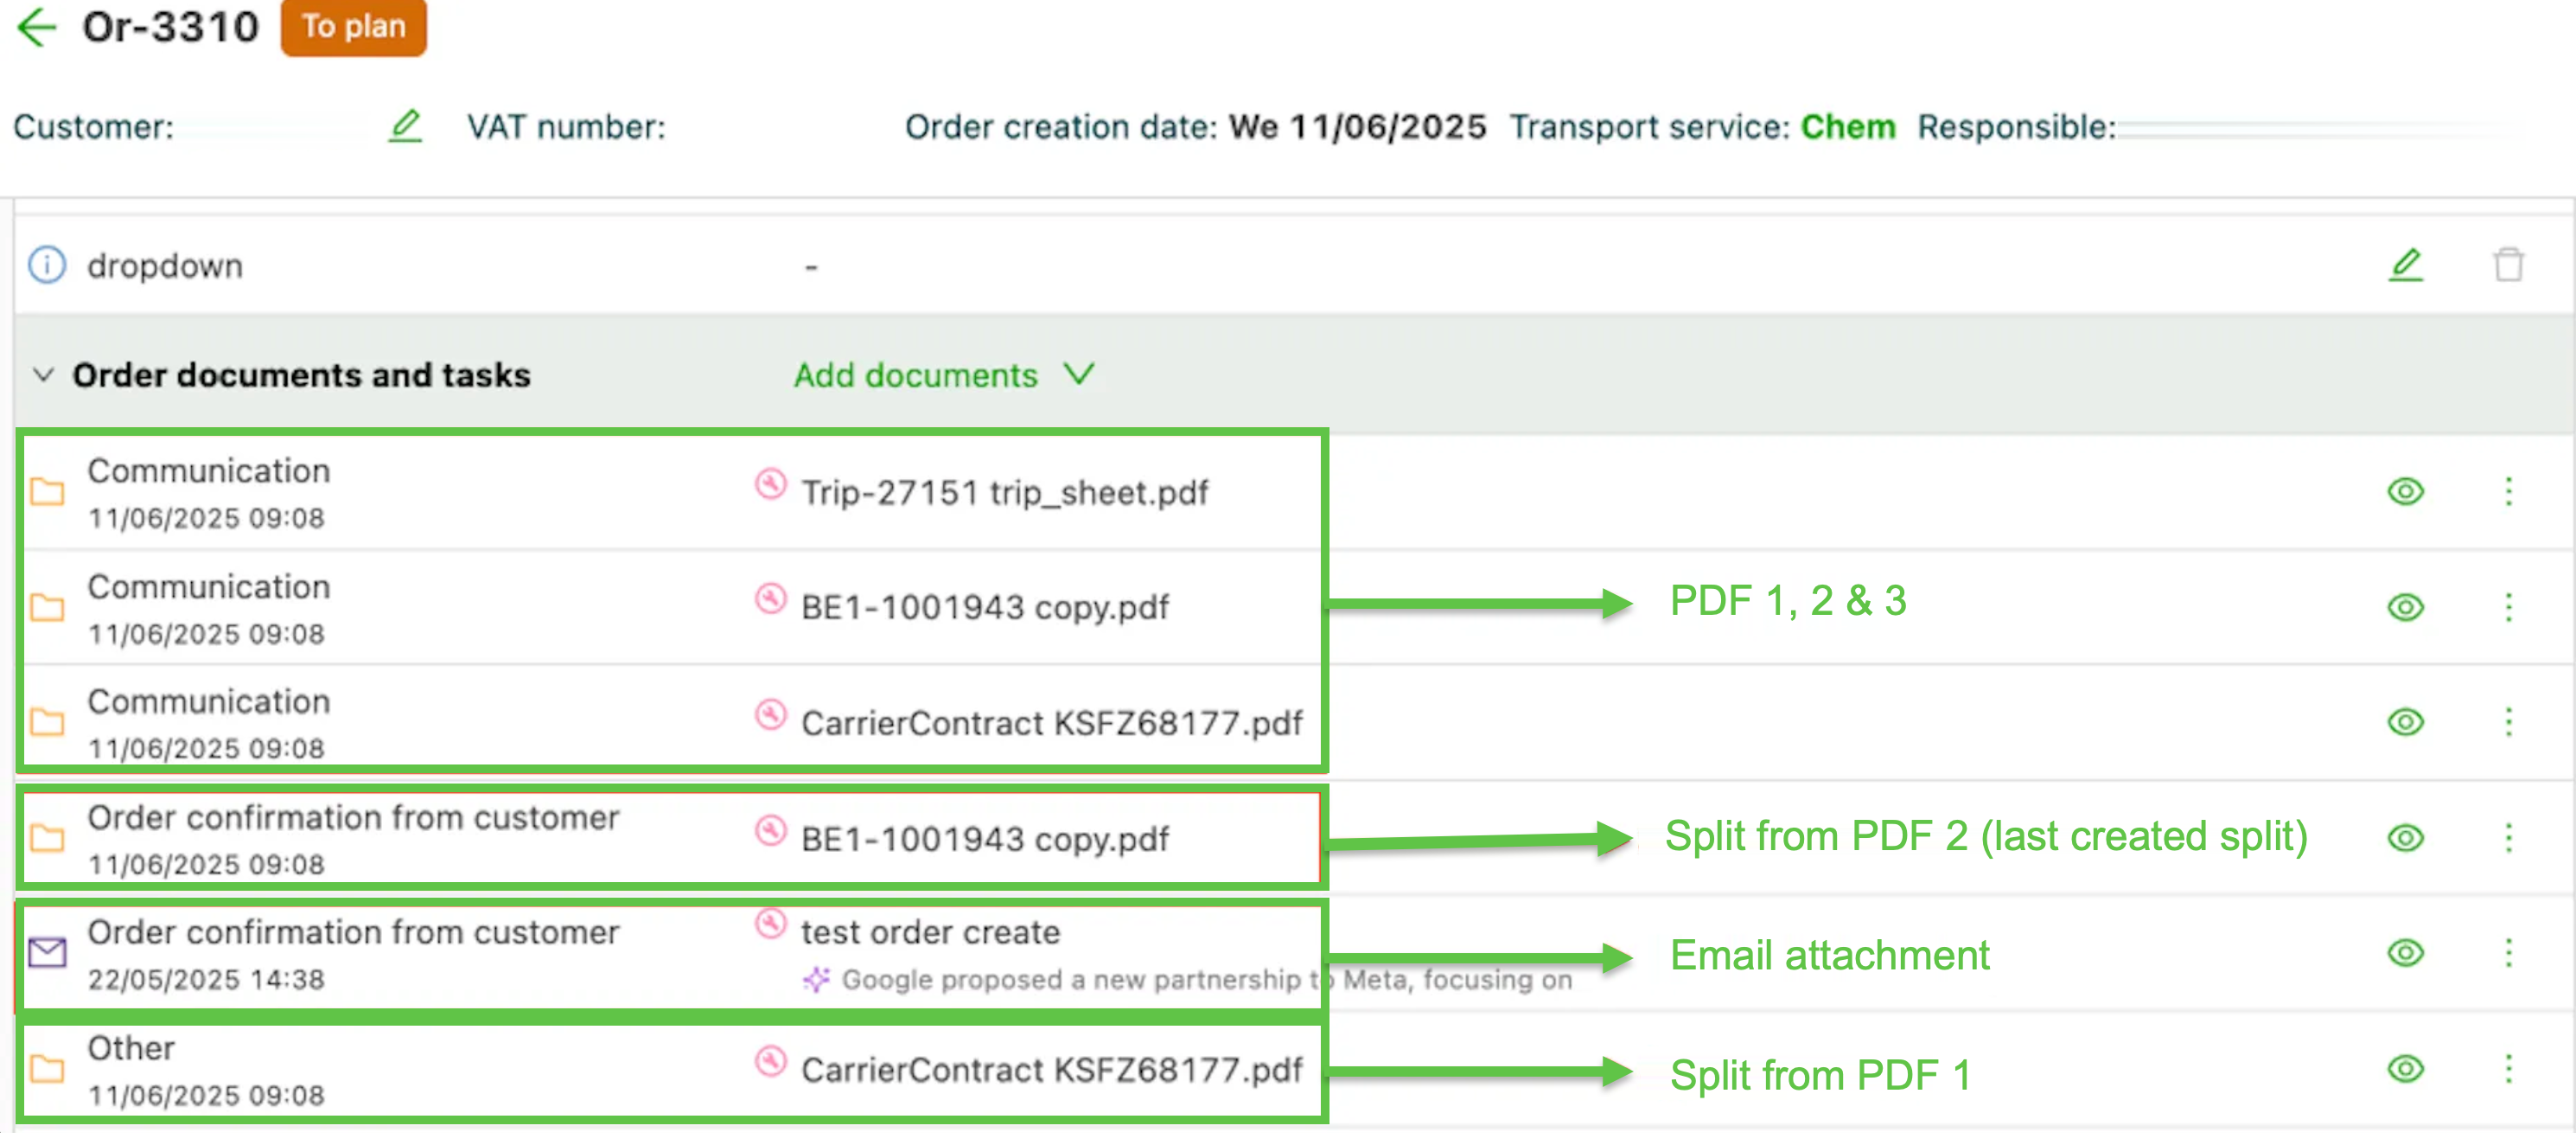
The last created split is added as an attachment as the order confirmation from the customer, together with the email itself.
- Other splits created from other PDF files are added as attachments with the document type ‘Other’.
- The original PDF files are added with the document type ‘Communication’
- Customers can now easily extract the order confirmation from larger PDF files.
- Document scanning is more accurate when the pages to use are specified.
Create multiple orders from one document
Scan one document that contains several transportation orders and get one reviewable row per order in Upload orders, without scanning again for each order.
Terminology
| Term | Definition |
|---|---|
| Upload orders | The tab in Orders where documents are scanned and reviewed before orders are created |
| Order row | One detected order from a scanned document |
| Shipment splitting | Setting that decides whether a multi-order document becomes several orders or one order with several shipments |
Prerequisites
Once it is enabled, the Shipment splitting setting can be changed to either One order per pickup/delivery location or One order per good in Configuration > Organization settings > Order confirmation scanning.
Create multiple orders from one document
-
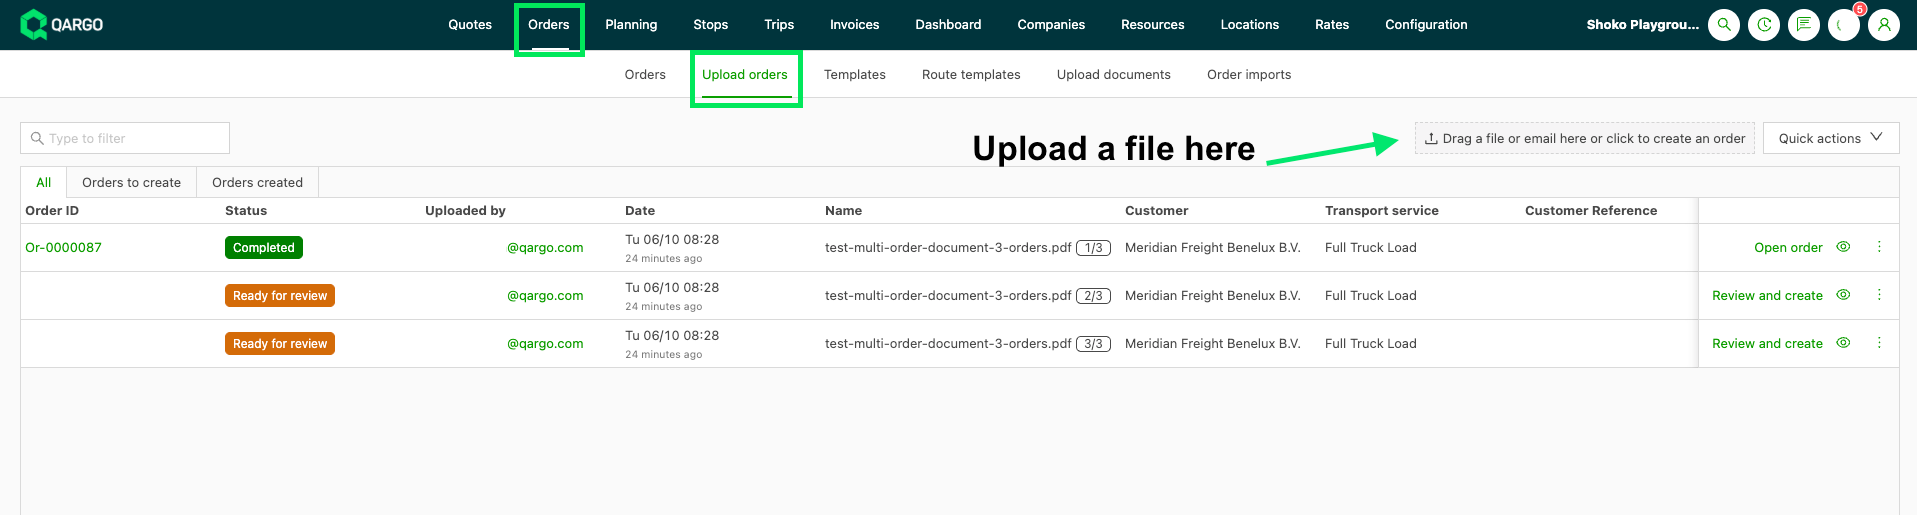
Navigate to Orders > Upload orders.
-
Drag a document file in.
-
Wait for the scan to finish.
Note: The customer and transportation service are resolved on the document first, before it is split. As a result, every order row starts with the same customer and transportation service. -
Select the missing value if prompted. When the customer or the transportation service cannot be matched, the document asks for it before any order rows appear.
-
Review the order rows. Each row is labeled with its position in the document (1/3, 2/3, 3/3), so it is clear which orders came from the same file.
-
View the source document with the Eye icon.
-
Create each order with Review and create. Rows are reviewed and created independently.

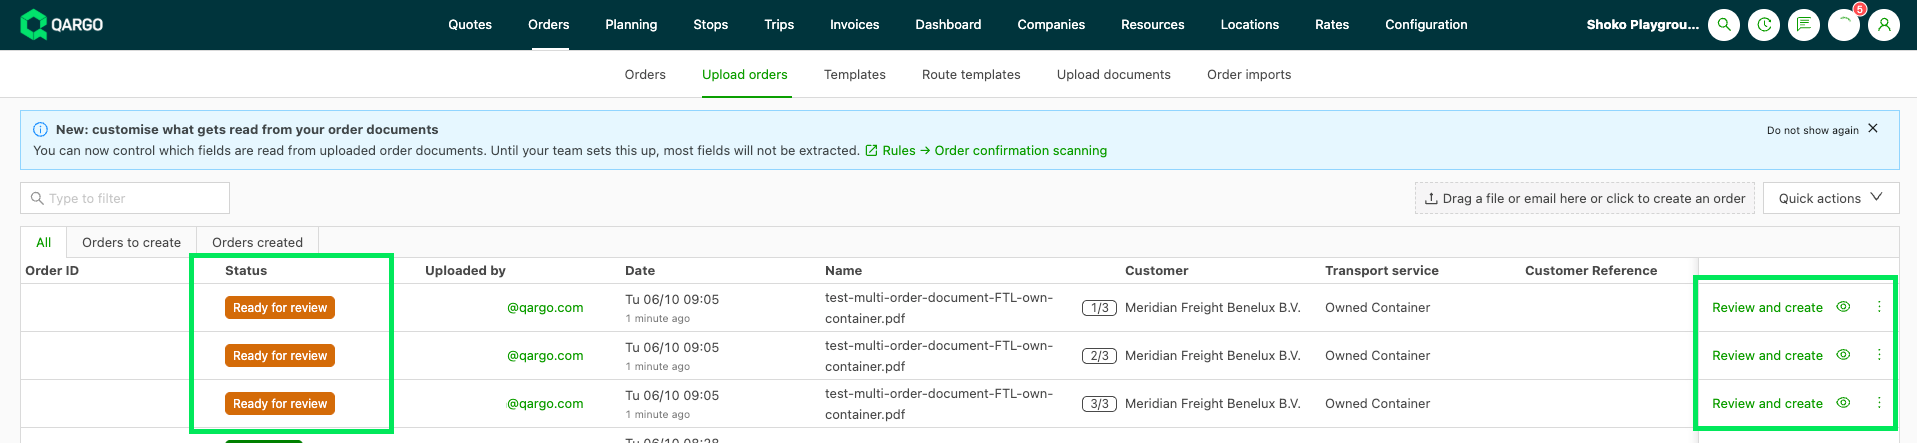
A document with only one order is shown as a normal single row, without a label.
Re-scan a full document
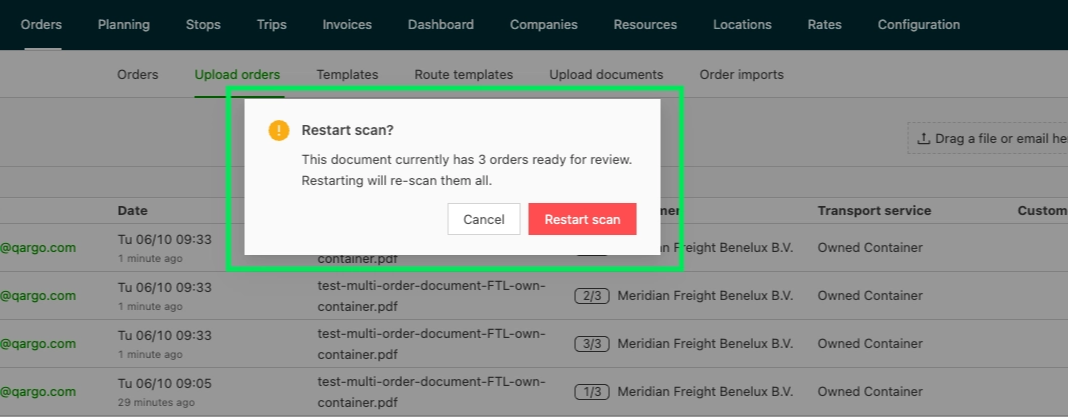
Re-scan full document replaces all order rows of that document with a new scan.
- When the document contains more than one order, a confirmation is shown first.
- Edits made to the existing rows are lost after confirming.
- A document with a single order restarts without a confirmation.
Good to know:
- Multi-order detection only runs from Upload orders. The Create order form and the Outlook add-in still create one order per scan.
- An email with several separate PDF attachments (one order per PDF) is not supported. Orders written in the email body are not detected either.
- There is no bulk create action. Each detected order is opened and created from its own row.
Troubleshooting
| Situation | Cause | Solution |
|---|---|---|
| Upload orders tab is not visible | It is not enabled | Contact the account manager to enable it |
| A multi-order document becomes one order with several shipments | Shipment splitting is set to the default value | Set it to One order per pickup/delivery location or One order per good |
| Document asks for a customer or transportation service before showing rows | Customer or transportation service could not be matched | Select the missing value on the document |
| Edits on order rows disappeared | Re-scan full document replaced all rows | Only confirm the restart when the edits are no longer needed |