Resource availability overviews
See resource availability at a glance, manage unavailabilities across planning views including Blocks, and add temporary resource combinations.
Table of contents
Several pages in the Planning module give a clear visualization of resource availability. This helps planners make planning decisions quickly and efficiently.
Resource availability overview
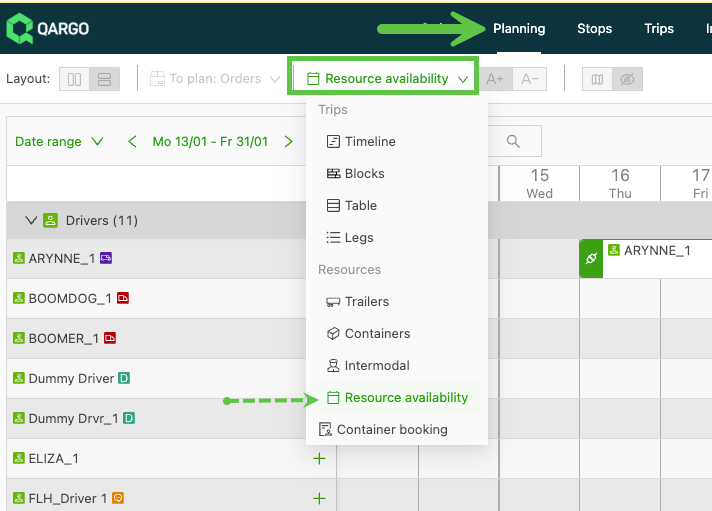
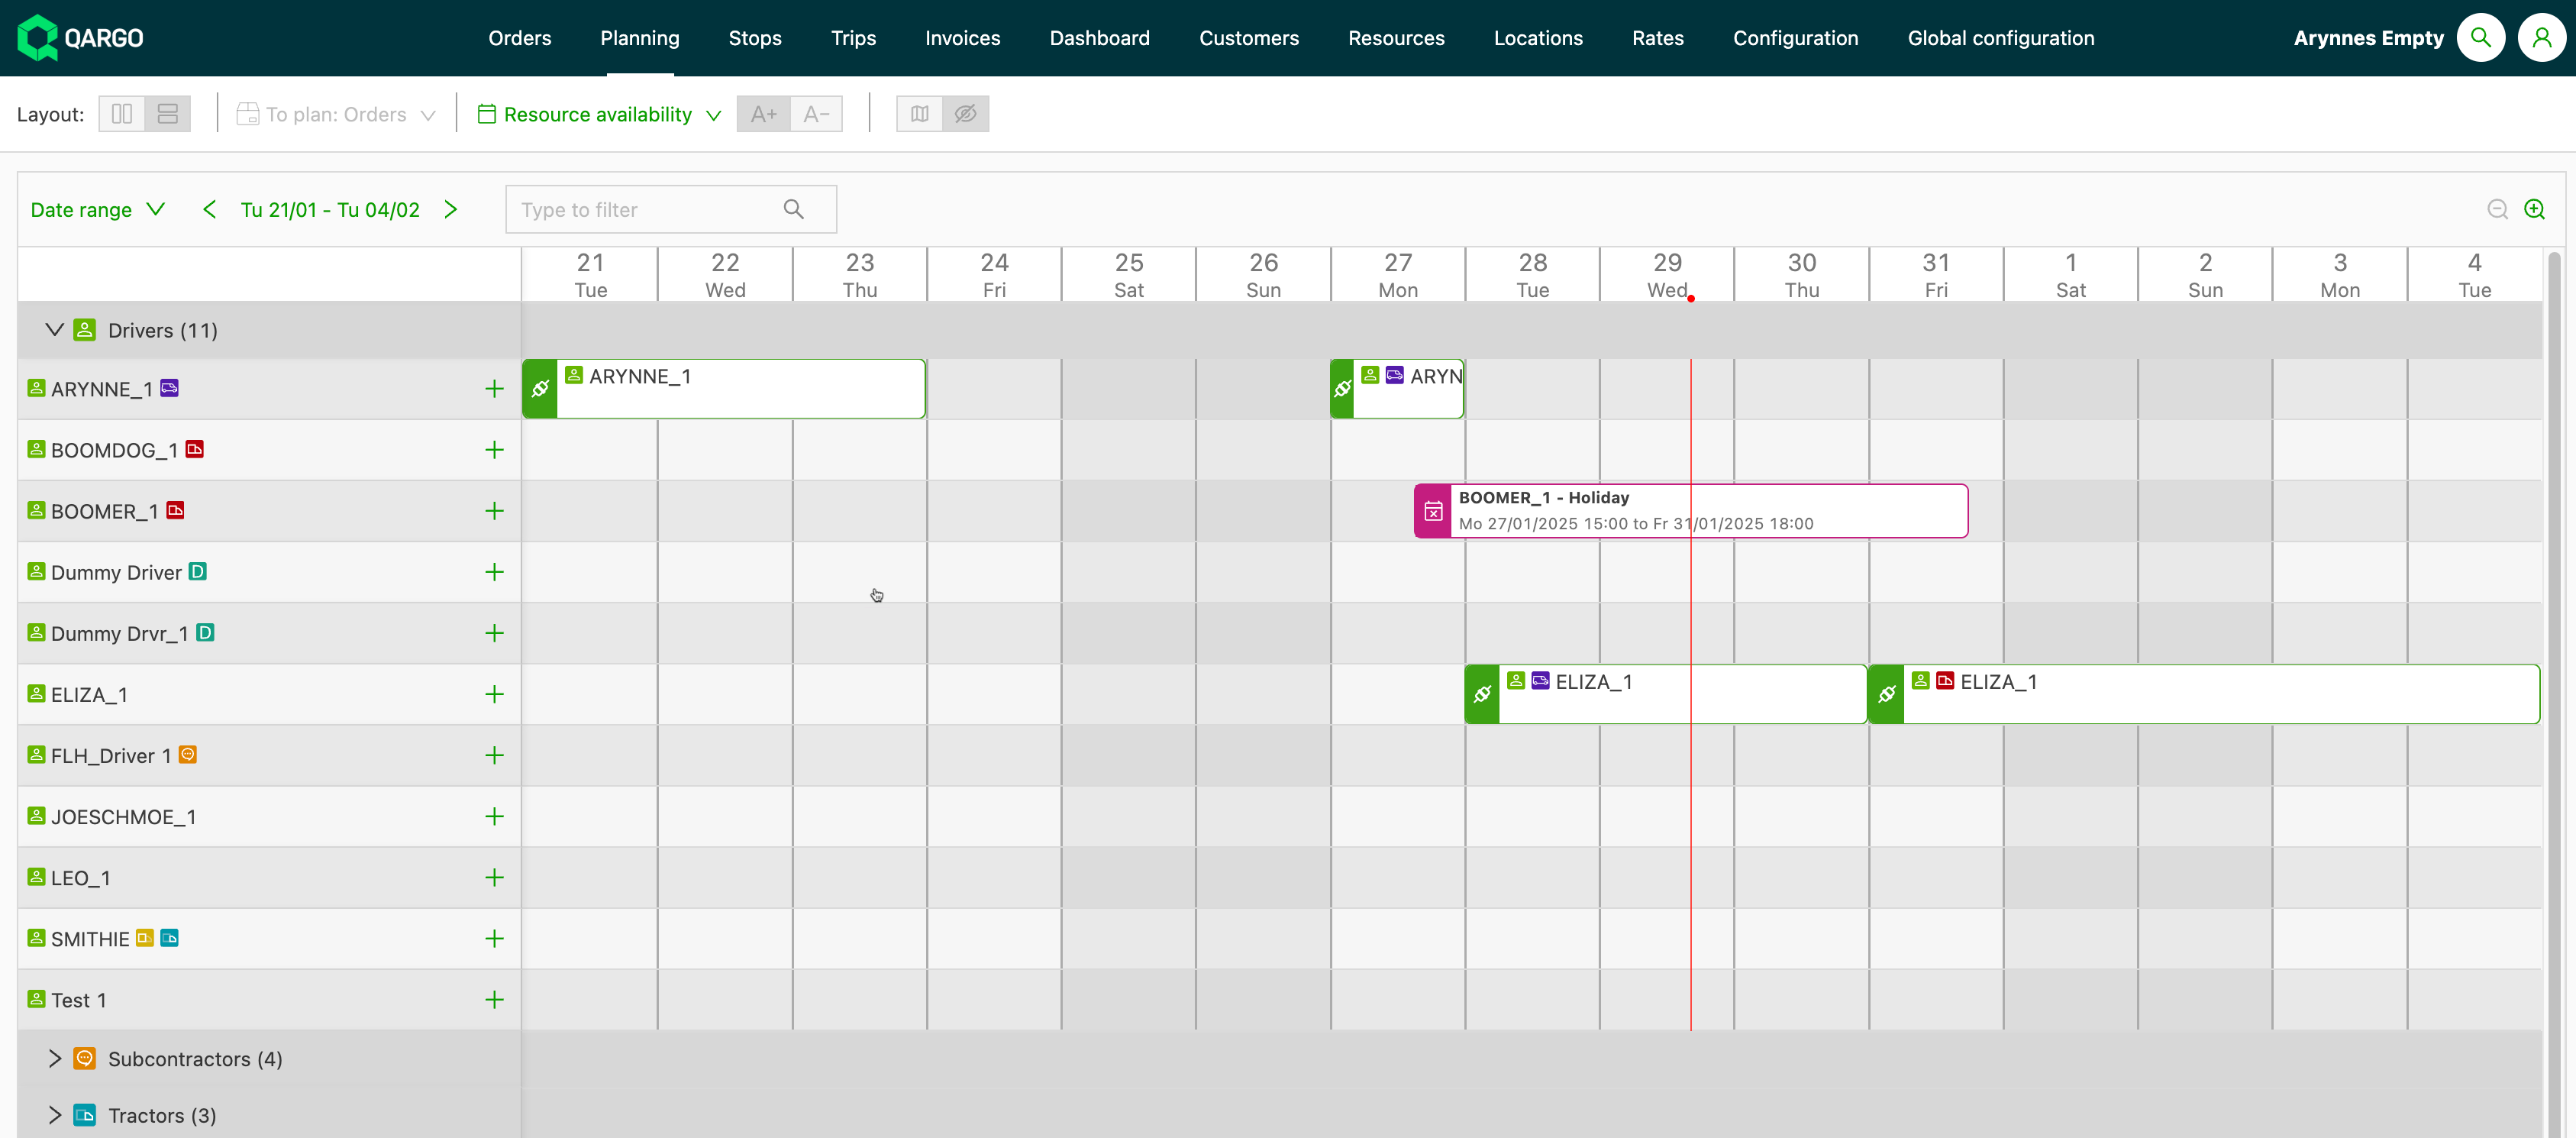
The ‘Resource availability’ view is available under the Planning tab:
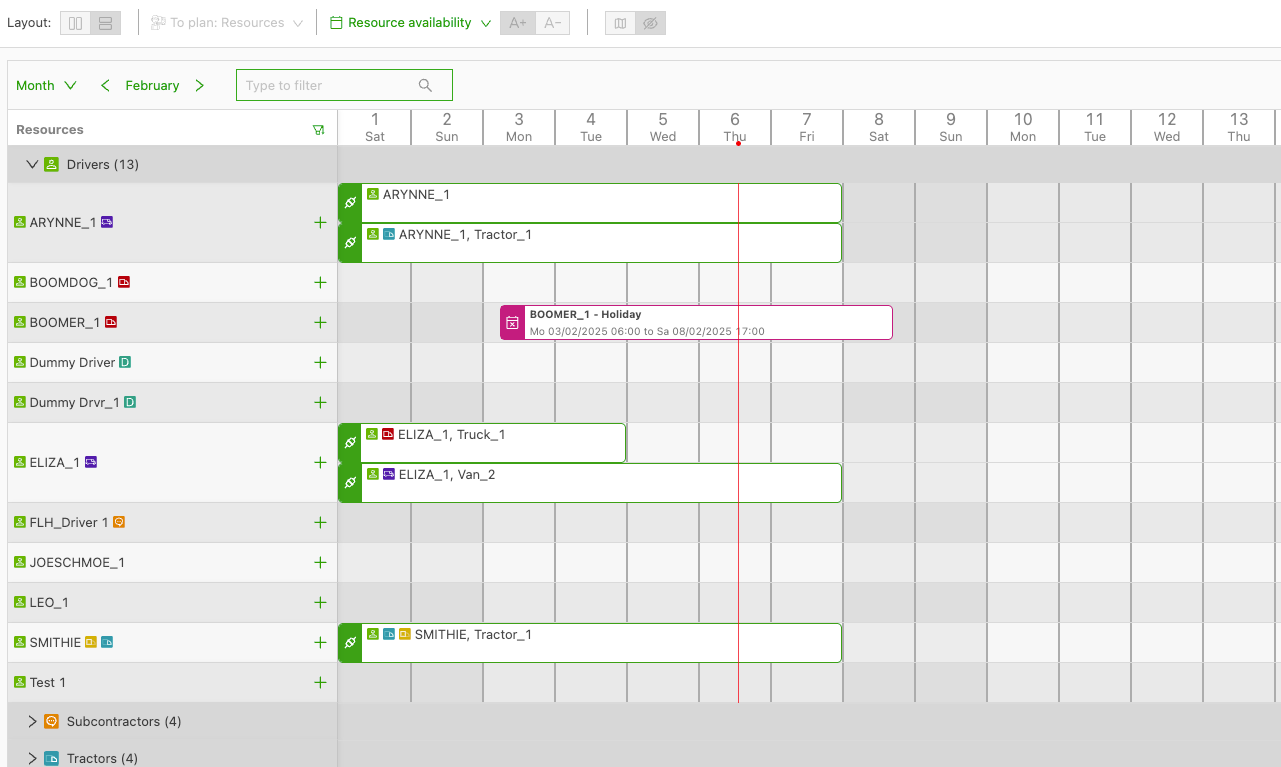
This view gives an easy overview of:
-
Unavailabilities of resources: shows when drivers/vehicles are not available due to holidays, repairs, etc.
-
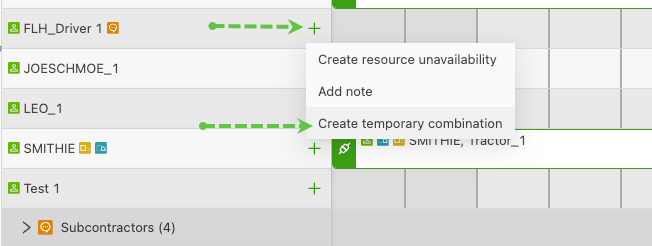
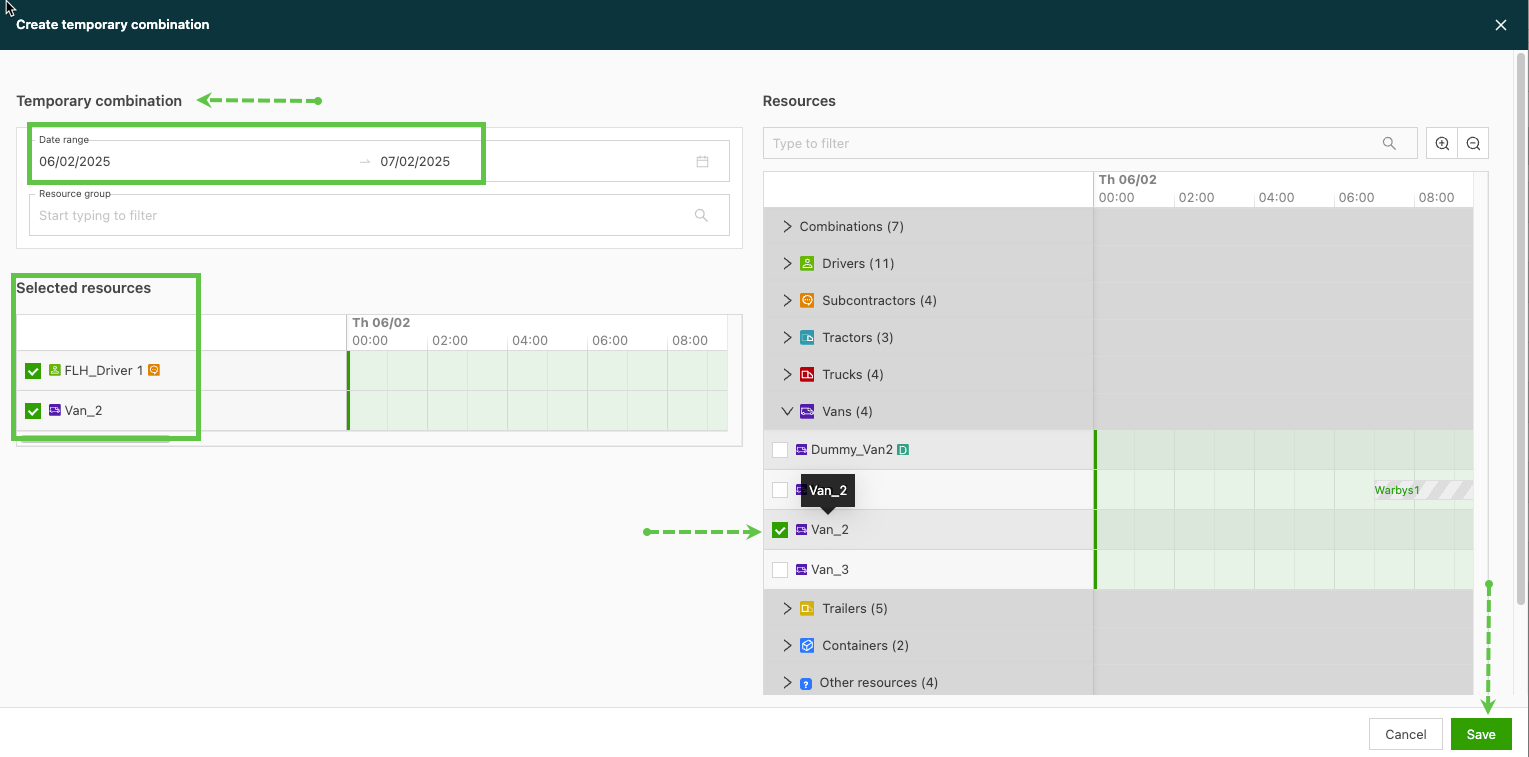
Temporary resource combinations: easily create combinations that will be used for a specific period of time:
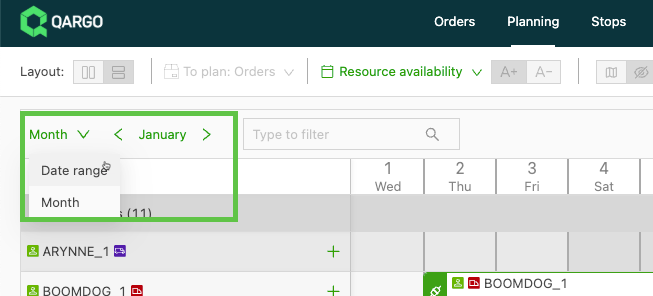
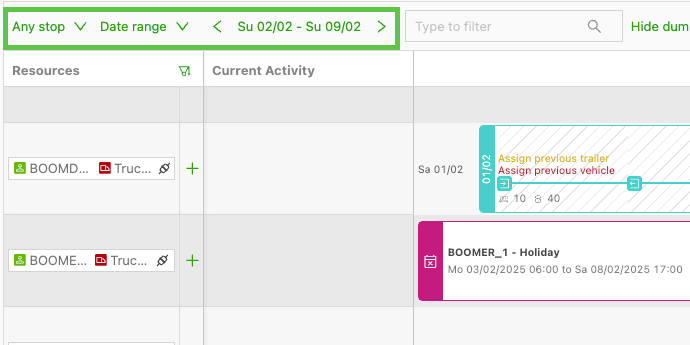
The view can show a period of:
-
1 month: use the arrows to easily move between months
-
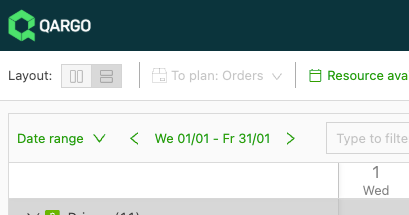
Date range: a shorter period can also be selected with the date range functionality
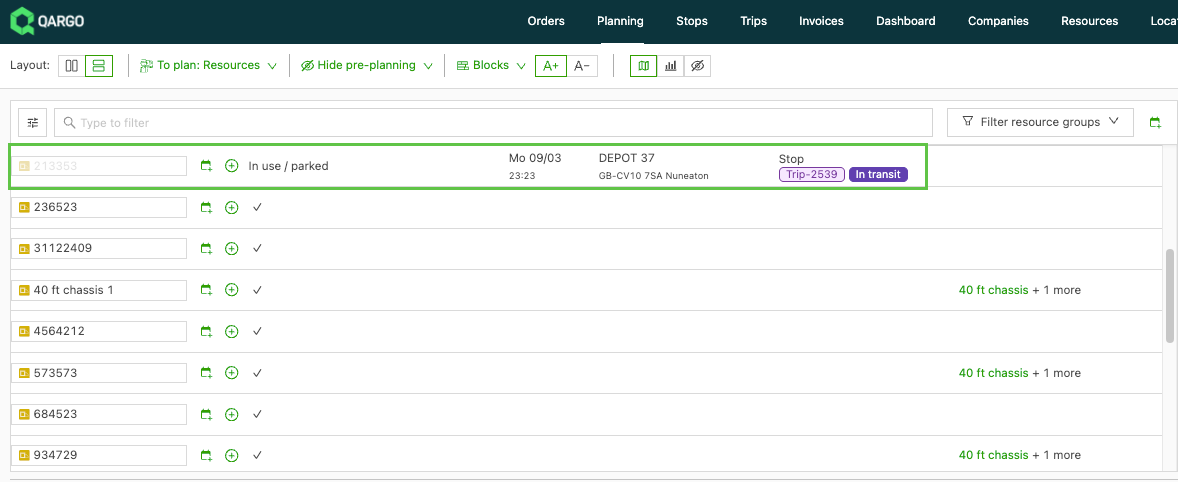
Trailer / container availability
The resource board reflects real-time availability for trailers and containers. As soon as a load is marked as completed, the linked trailer or container is immediately shown as Available. There is no need to wait until the end of the day.
How availability status works
Trailers and containers displayed on the planning resource board show one of the following statuses:
| Status | Meaning |
|---|---|
| Available | The resource is free and can be assigned to a new load |
| In use | The resource is assigned to an active (not yet completed) load |
| Parked | The resource is parked and not currently in active use |
Status update on load completion
Previously, a trailer or container stayed marked as In use or Parked for the rest of the day, even after its load was completed. This made it unclear whether a resource was actually free for reassignment.
Now, the availability status updates immediately when a load is completed:
- As soon as a load is marked as completed (via the driver mobile app or manually by a planner), the linked trailer or container switches to Available on the resource board
- Planners can reassign the resource to a new load right away
Temporary resource combinations
Qargo uses the concept of combinations, which means drivers/vehicles that operate together. There are:
- Fixed combinations: these are configured in the resource configuration, which means those resources are always together on the planning board. See this help article for more information.
- Temporary combinations: these are combinations for a limited period of time, e.g., a day, a week, etc. Temporary combinations could already be created, but there was no good overview of which temporary combination was active on which days. The resource availability view now solves this.
Example – Eliza: Eliza is not in a fixed resource combination but has been added to a temporary one (VAN) from January 28 to January 30. On January 31, Eliza is driving a truck.
There are 2 ways to create a temporary resource combination:
-
Resource availabilities view: Click the + icon and select Create temporary combination. Enter the:
-
Date range in which the temporary combination is active
-
Resource group it belongs to
-
Resources that are in the combination
-
-
Timeline/block planning view: Dragging a resource from the resources to plan onto a resource on the planning automatically creates a temporary resource combination for the selected dates. This is much faster, but the resource group and the duration of the temporary combination cannot be changed.
Availability visibility
When resources are shown in the planning view (see more details in 👉Customize planning view), the Availability is shown based on the date range selected in the planning table.
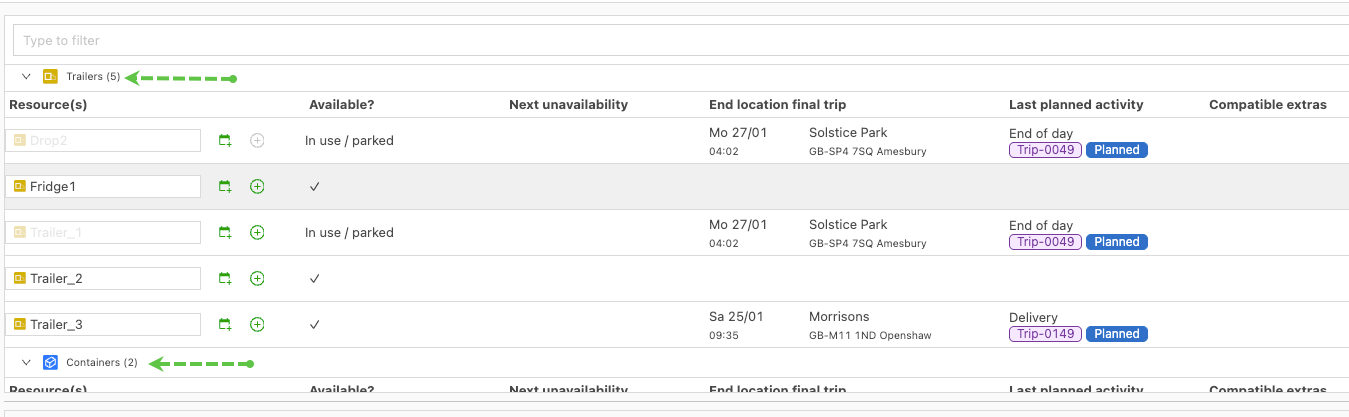
The Pre-planning view (panel at the top of the screen) shows the resources grouped by combination, drivers, vehicles, etc. Both trailers and containers can now be seen in this view.
The ‘Available?’ column shows the current status of the resource. The ‘Next unavailability’ column shows any current or upcoming unavailabilities. This gives users a clear view of the resource availability now and of anything that could affect upcoming planning.
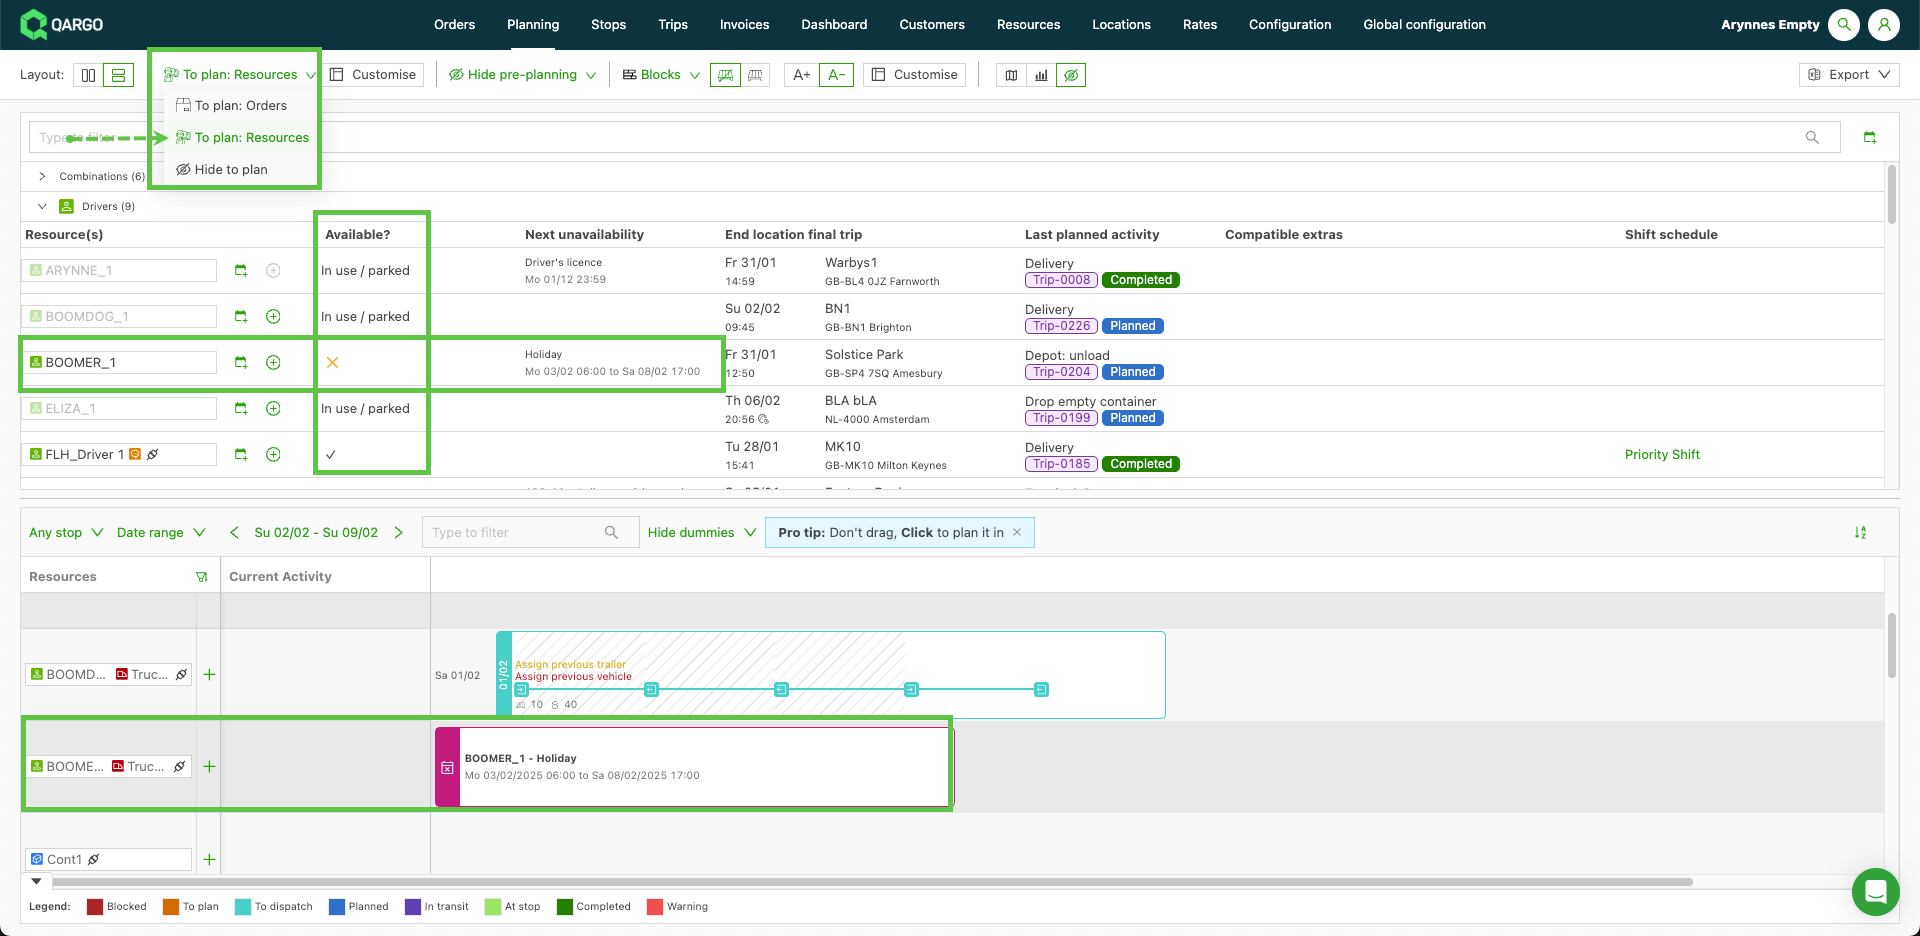
There are 4 status options available:
- Available – Indicated by a check mark. The resource has free time in the selected range and can be planned.
- Outside shift schedule – Every day in the selected range is a rest day in the resource’s shift schedule.
- Unavailable – Indicated by X. The resource is unavailable for planning due to a logged unavailability, i.e., holiday or maintenance.
- In use / Parked – The resource is already in use on planned loads, parked (trailer / container) or at end of day (driver).
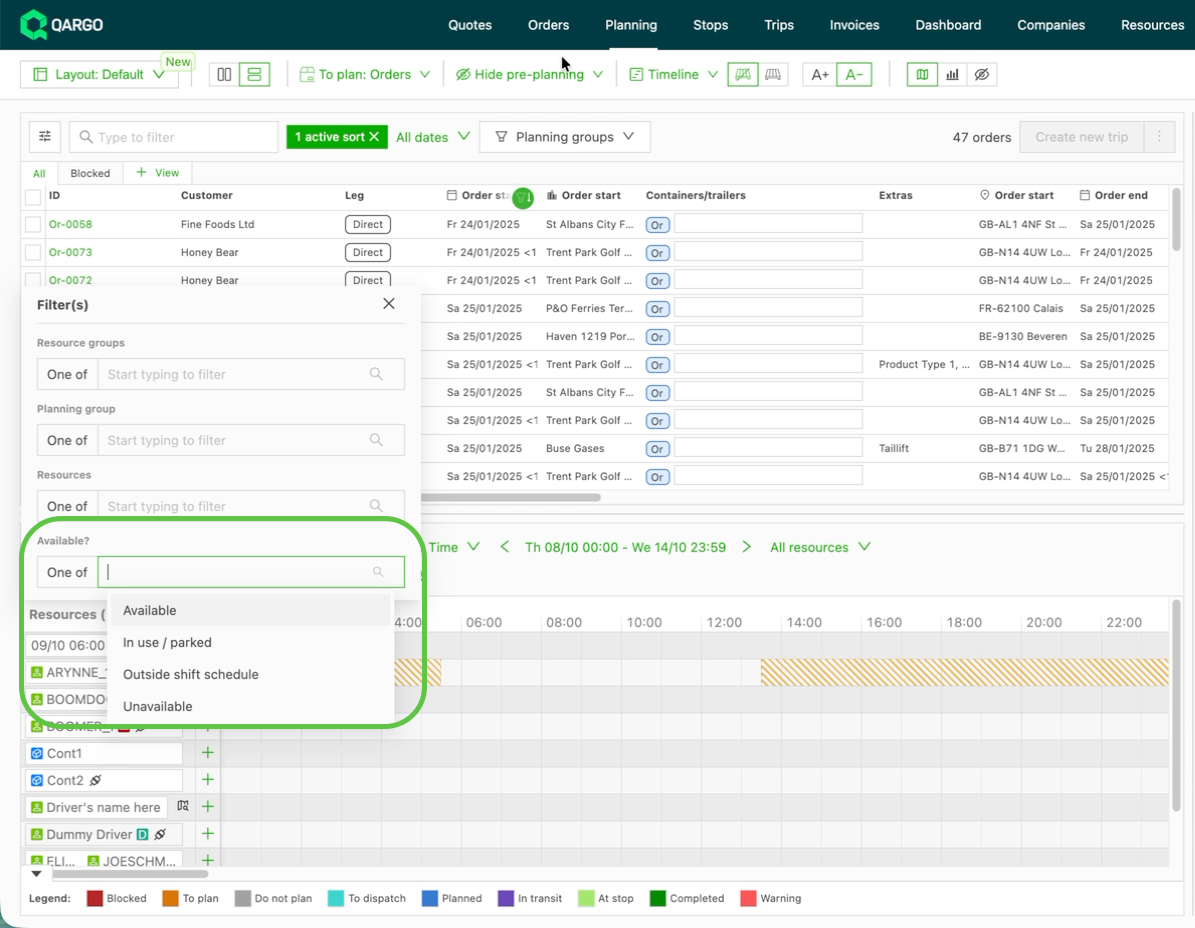
This column can be filtered by selecting any of the statuses. More than one status can also be selected.
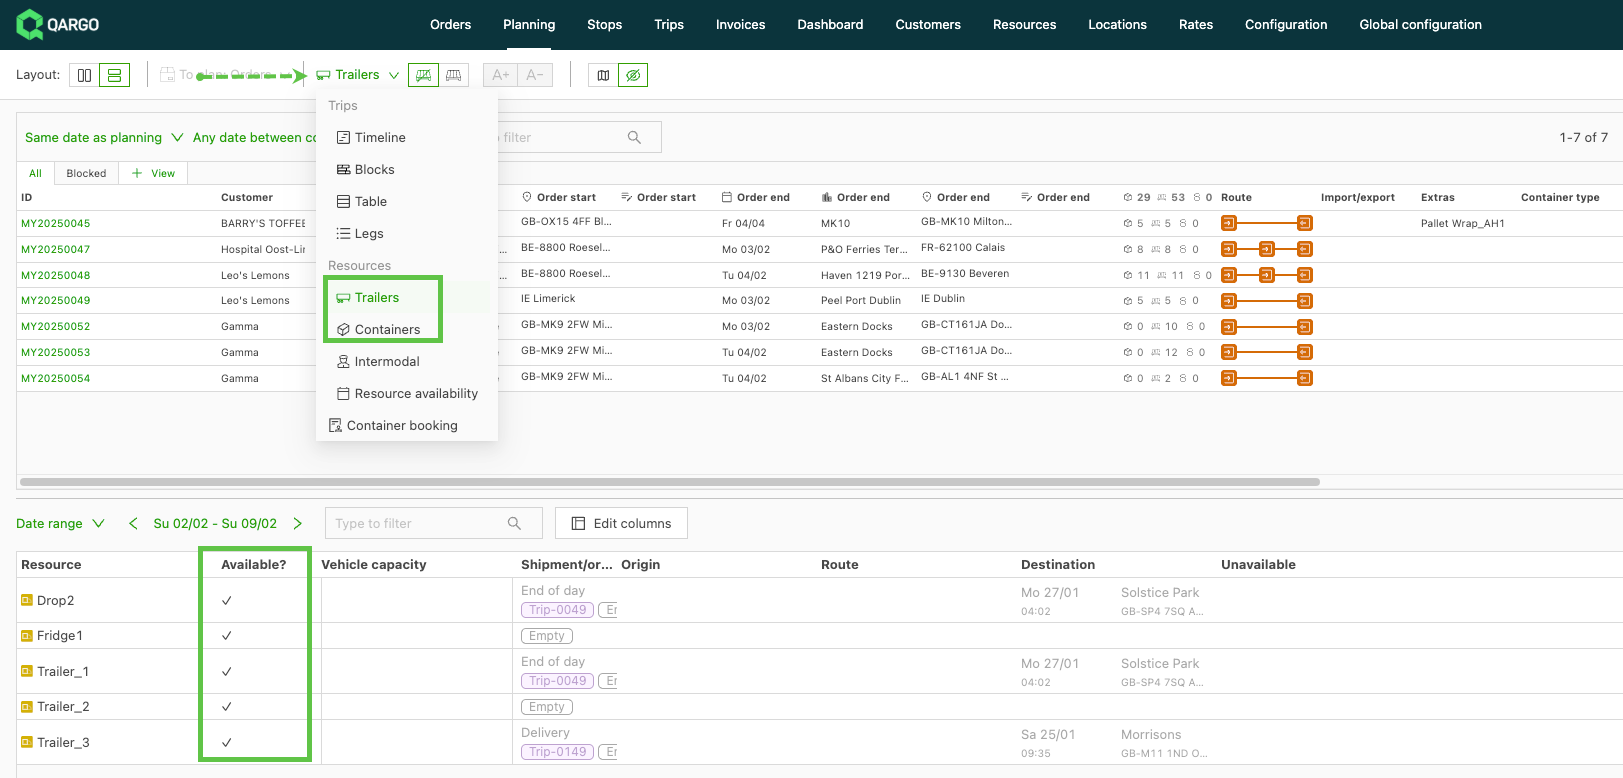
Trailers / containers view:
The ‘Available’ column also shows in the planning table when looking at planning for both trailers and containers:
Unavailabilities in the Blocks view
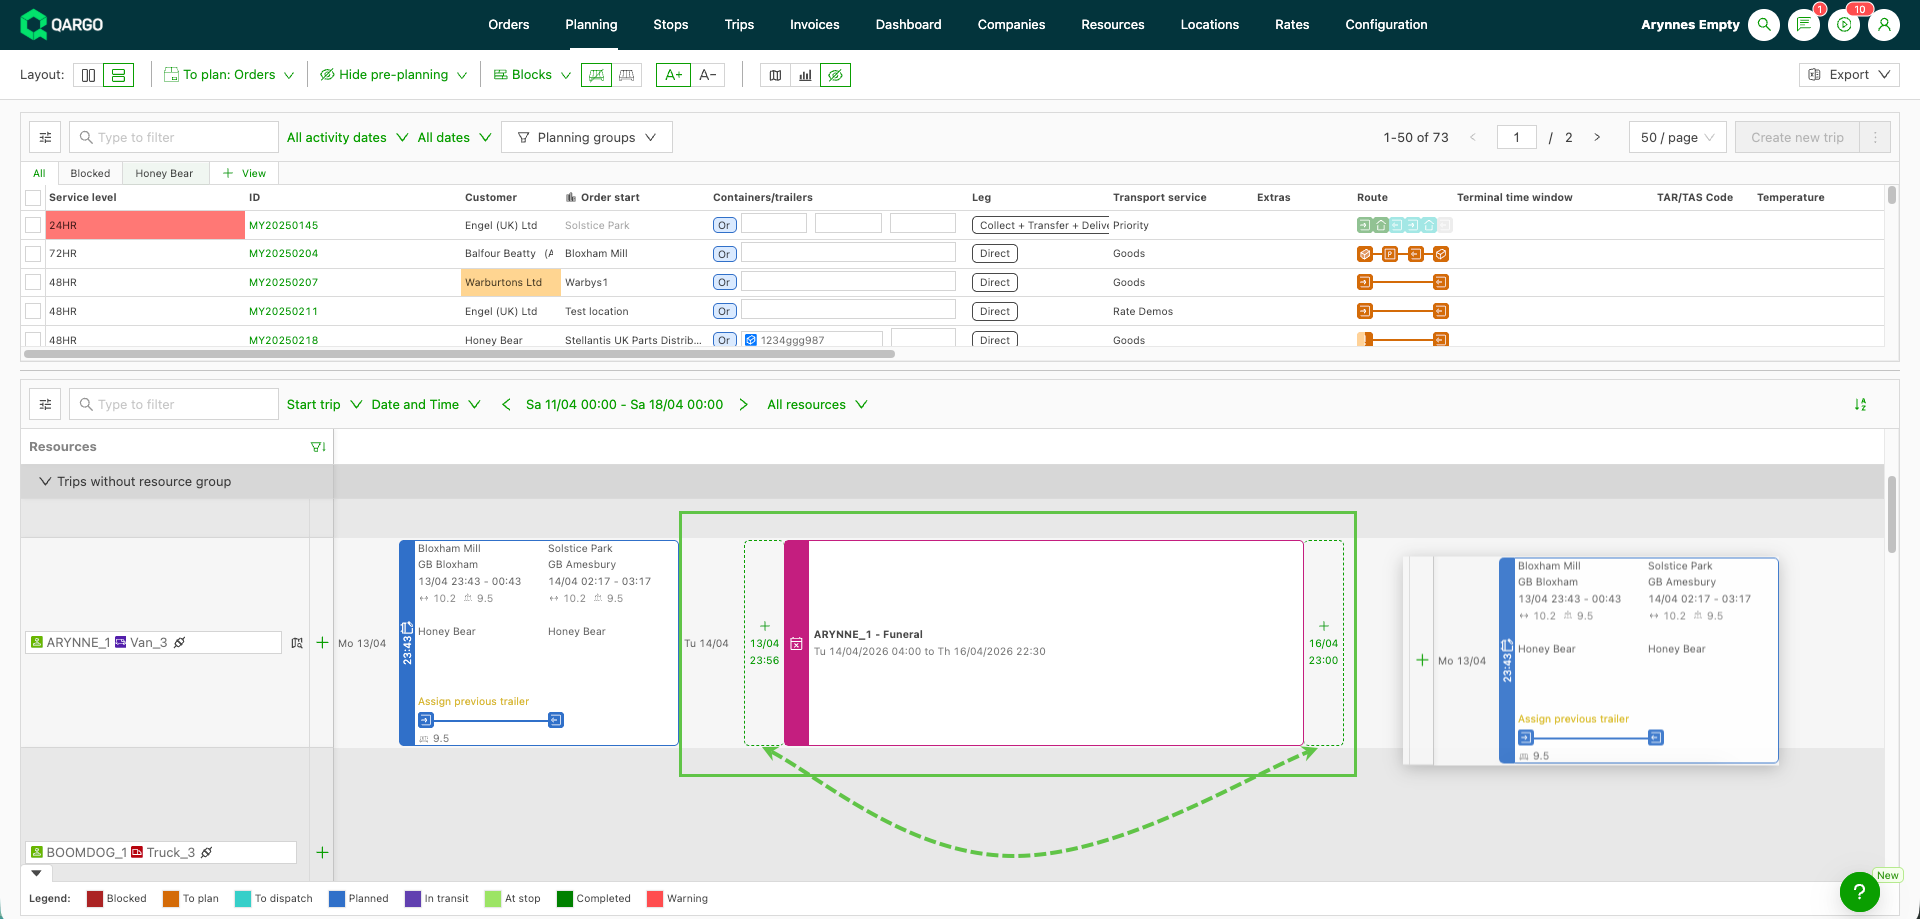
Resource unavailabilities (holidays, sick days, shift schedule absences and notes) are now always visible in the Blocks planning view, even when loads are already assigned to the same resource row. This keeps planners fully informed of scheduling constraints without switching to the Timeline view.
**[Screenshot: Blocks view showing a resource row with both a planned load and an unavailability indicator visible side by side]**
How unavailabilities are displayed
Unavailability indicators appear directly on the resource row in Blocks view in all of the following states:
- Empty row: the unavailability is shown on its own, with a drop zone available for assigning a new shipment
- Row with loads assigned: the unavailability indicator remains visible next to the planned load(s), sorted by start time
- Row with loads and multiple unavailabilities: each unavailability keeps its own position in the row, sorted by start time, with individual drop zones where applicable
Planning shipments next to unavailabilities
In Blocks view, a shipment can now be dragged and dropped directly next to an unavailability or a note (provided the unavailability or note has an end date set). The system automatically calculates the shipment start time based on the position of the unavailability.
1. Navigate to the planning board and select Blocks view from the view selector
2. Locate the resource row containing the unavailability
3. Drag the unplanned shipment from the *To plan* panel and drop it in the drop zone next to the unavailability indicator
4. Confirm the load is planned with the correct start time relative to the unavailability
Limitations
| Limitation | Description |
|---|---|
| Timeline view behavior unchanged | This improvement applies only to the Blocks view. The Timeline view continues to behave as before. |
| ‘Used on other load’ indicators | Indicators showing that a resource is allocated to a load in a different planning group may not display in Blocks view if they are rendered through a separate mechanism from standard unavailabilities. |
| Notes without an end date | Notes with no end timestamp do not generate a right-hand drop zone, as the system cannot calculate a start time for the adjacent shipment. |
Viewing resource availability in the 👉BI dashboard
Navigate to the Dashboard > Resource expiration tab to access the extended list of unavailabilities.
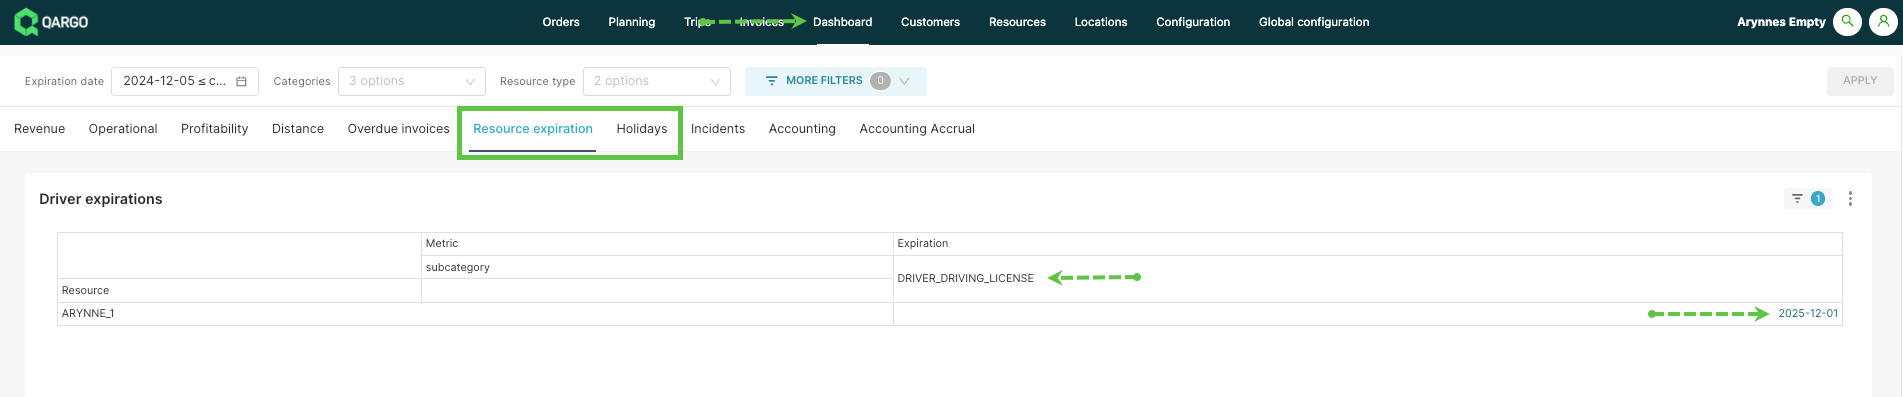
Apply the date range filter and click Apply
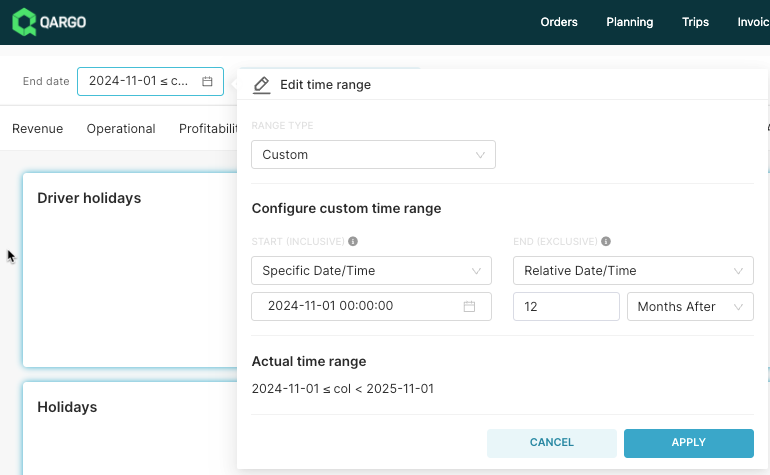
Click the Apply field, also located on the right side of the page

Select the category and resource type if applicable, and apply the changes:


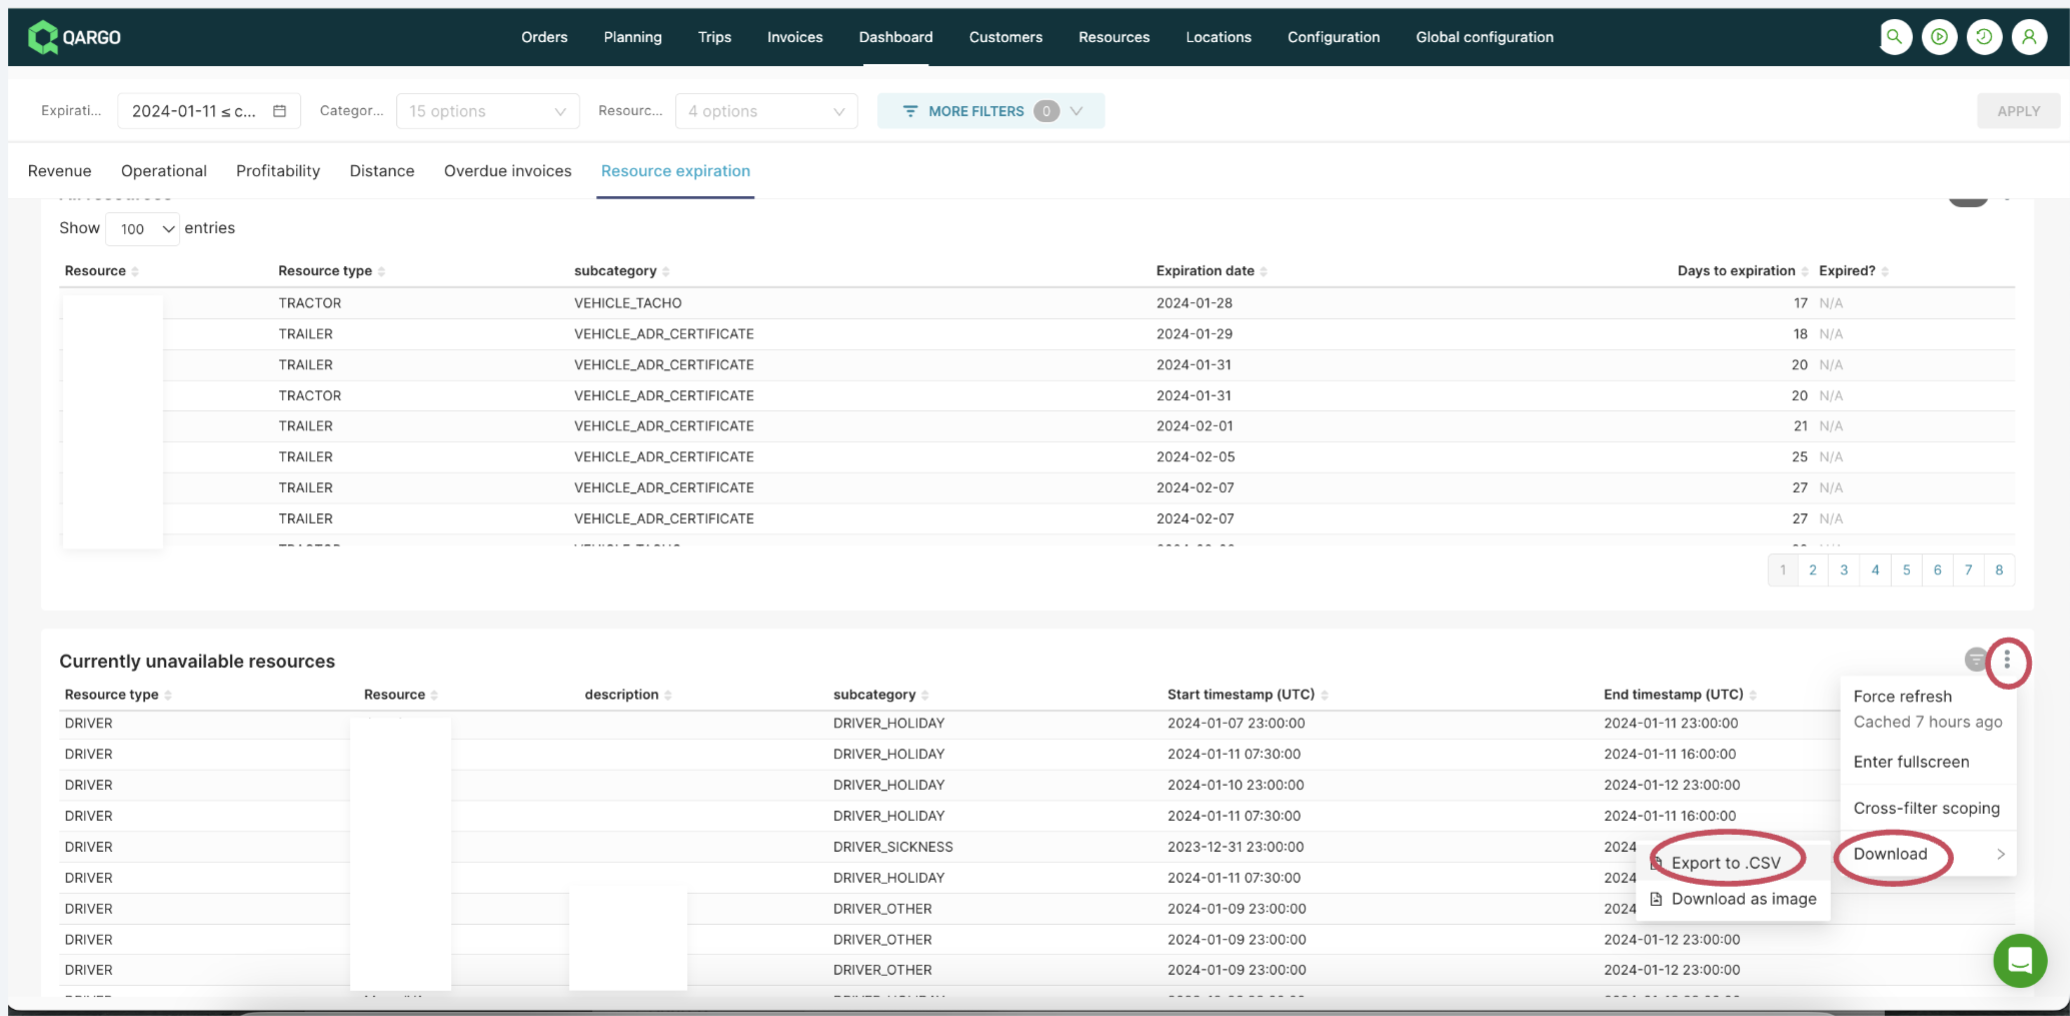
Scroll up and down to locate the data to view, and export the data of the desired view: