
Setting resource availability
Set resource (driver/vehicle) availability in the resource profile so only available resources are planned on loads.
Table of contents
Registering resource availability (unavailability)
To update availability, go to the main Resources tab and select the resource category (drivers/vehicles) to update. On each resource page, click the name/ID of the resource to update it.
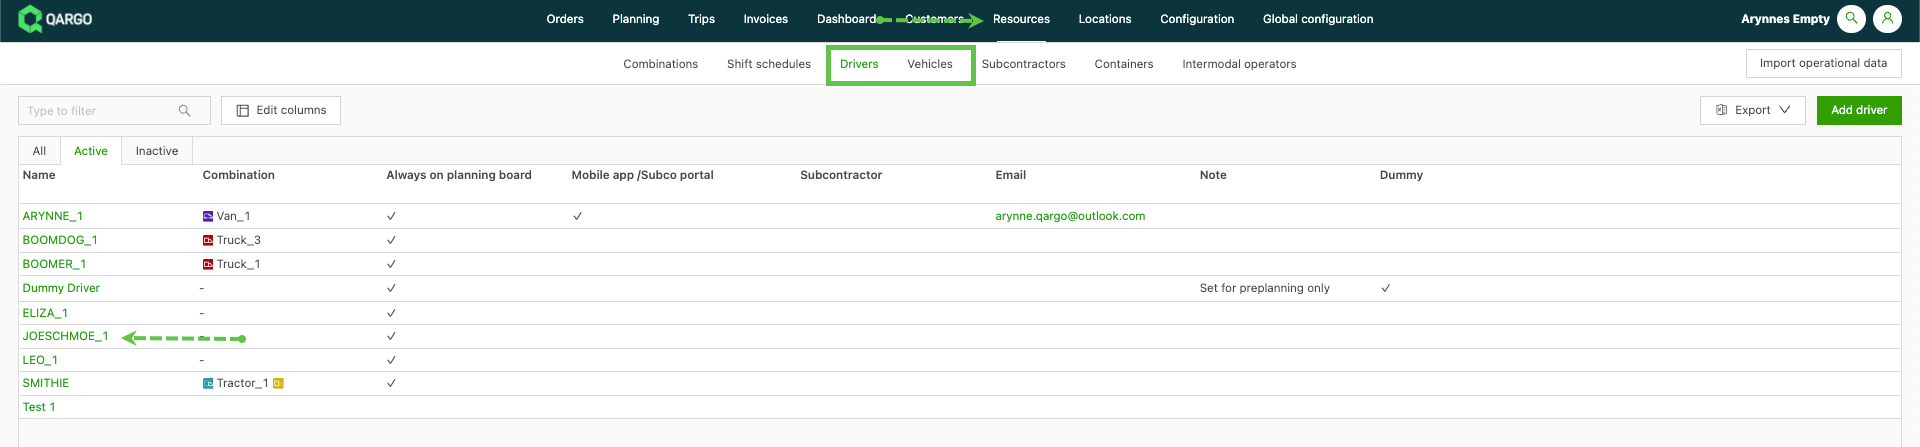
In the resource profile, find the section ‘Dates when resource is not available’.
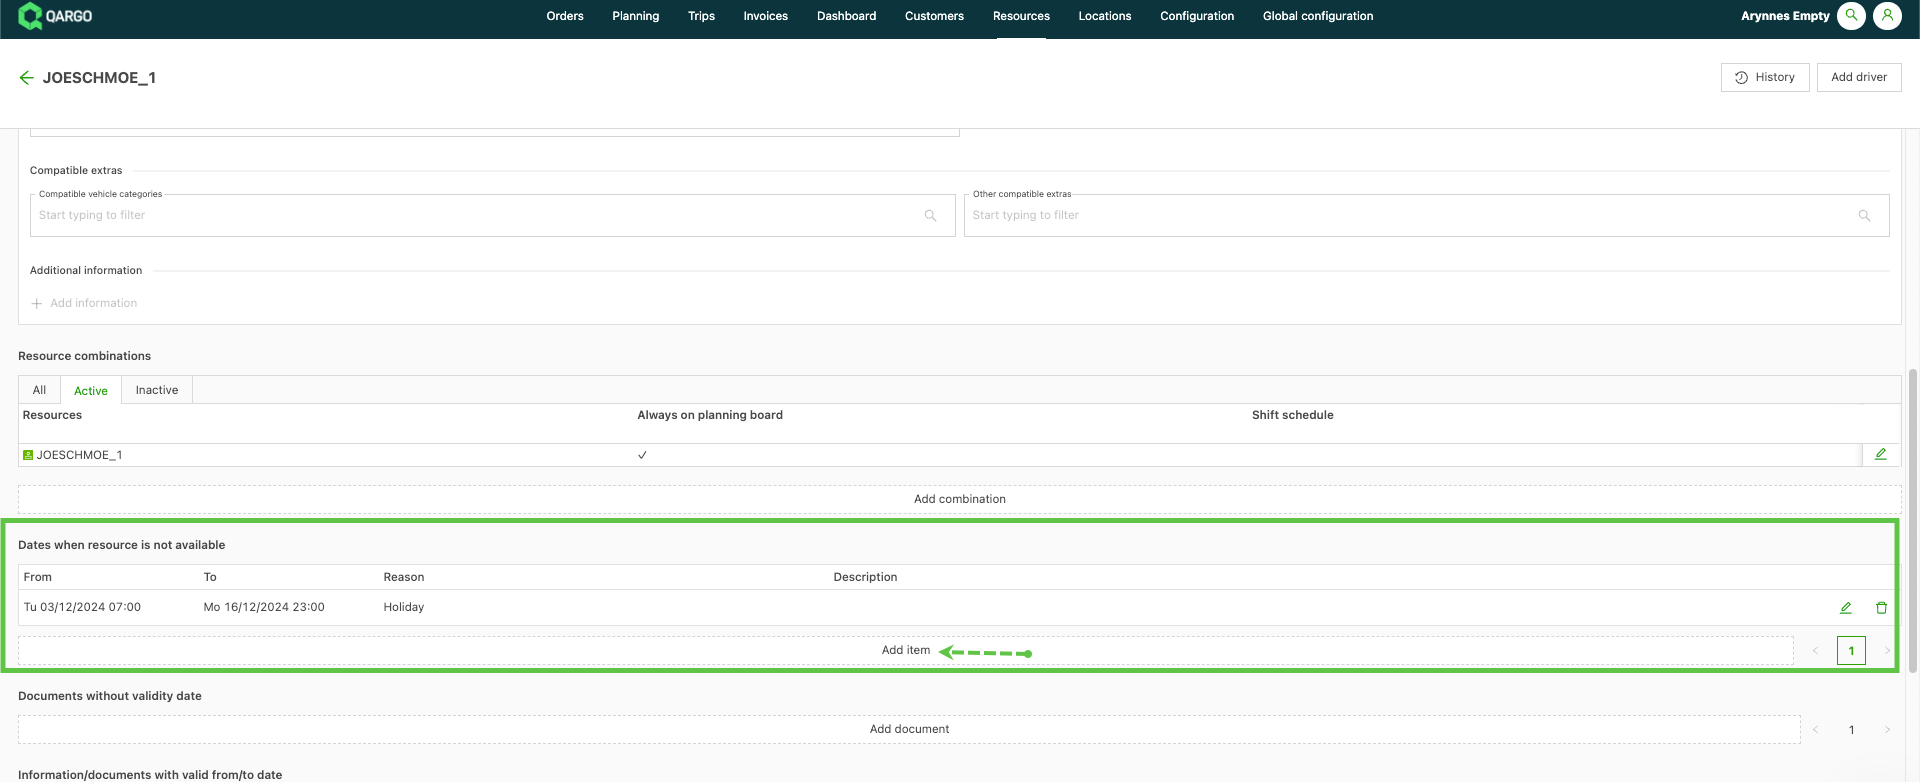
Click the ‘Add item’ link to open the ‘Create resource unavailability’ page. There are 2 options for entering availability.
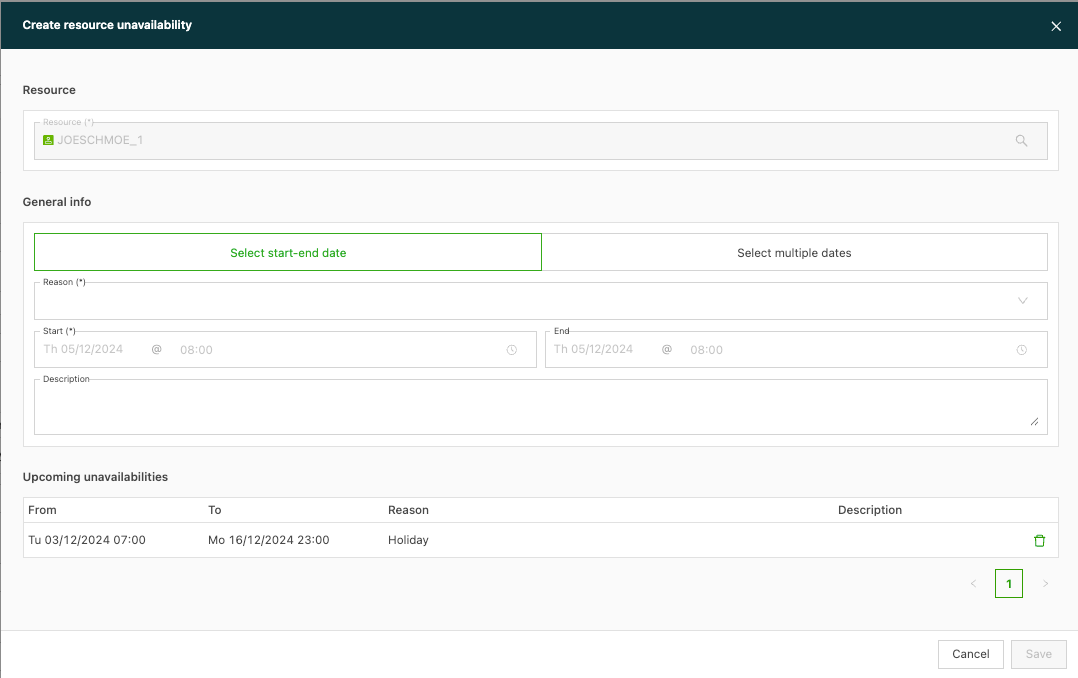
There are 2 options for setting the dates when the resource is not available.
-
Select a start and end date. This covers a single period of time, set over the selected start/end date and time.
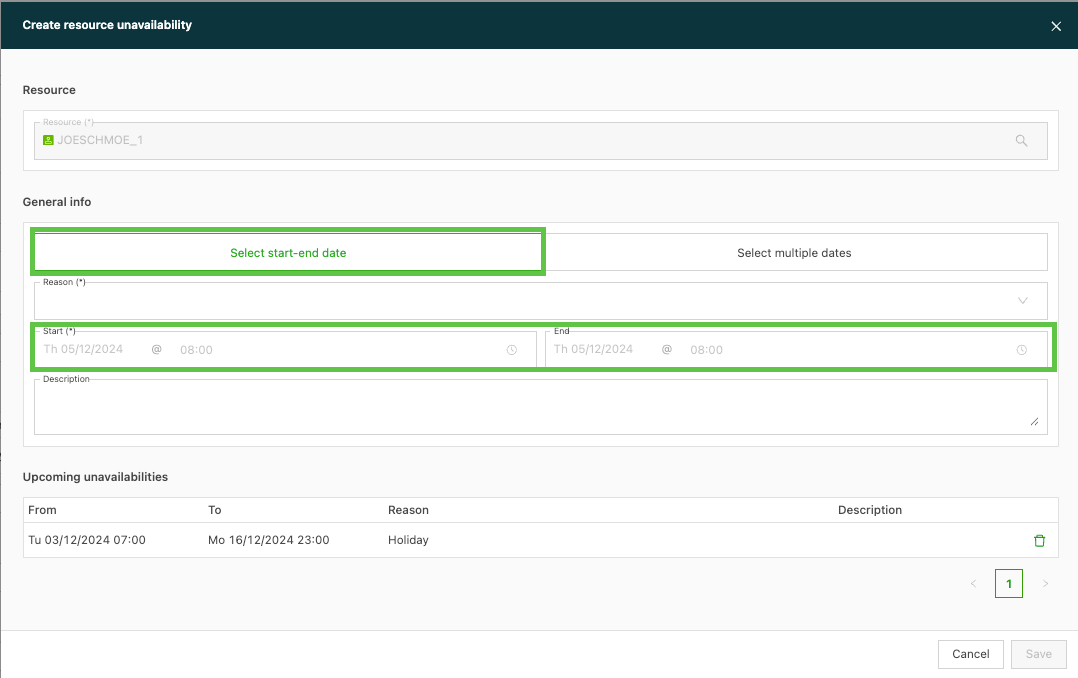
-
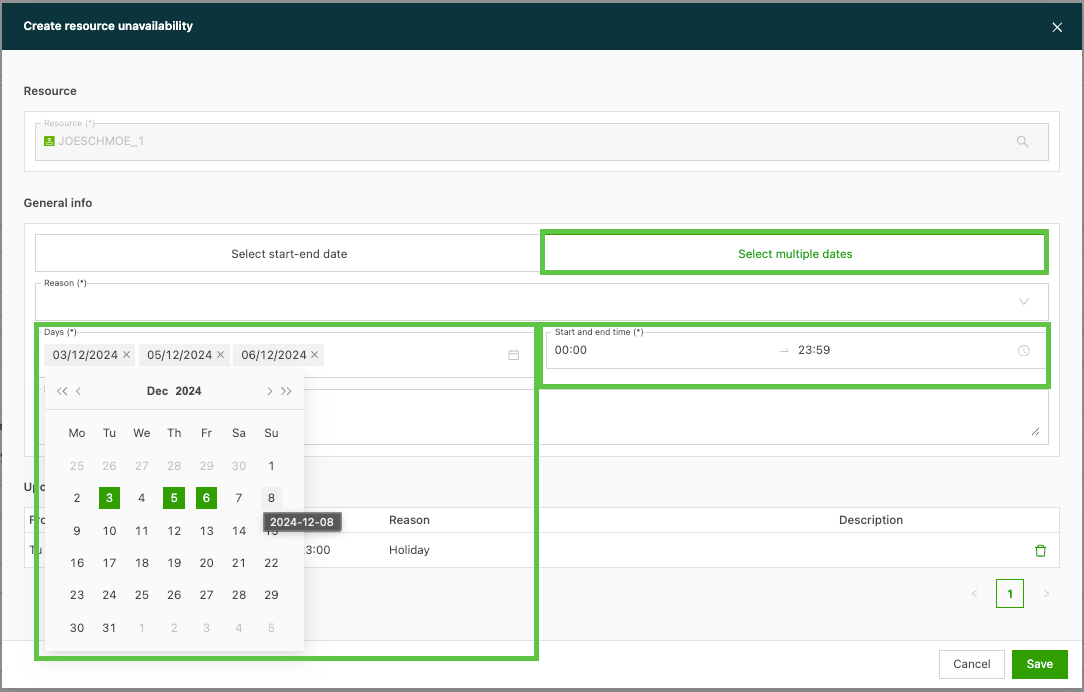
Select multiple dates. This allows multiple dates to be selected from a calendar, with start/end times that can be set. Note: the times will be set for all the selected dates. Use this option for regular recurring time off.
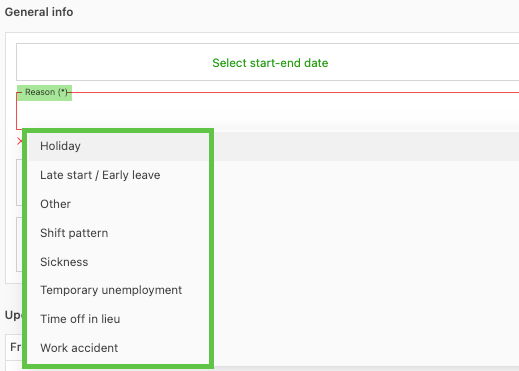
When setting the availability, select the reason for the absence (required). A list of options is available in the dropdown menu.
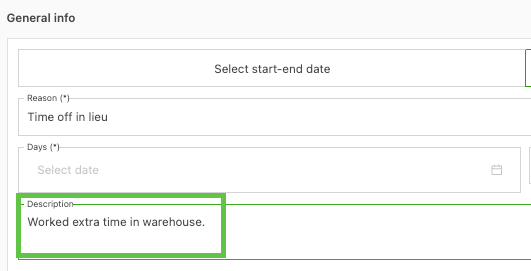
If more details are needed, use the ‘Description’ field to enter additional information.
All dates when the resource is not available are shown under ‘Upcoming unavailabilities’.

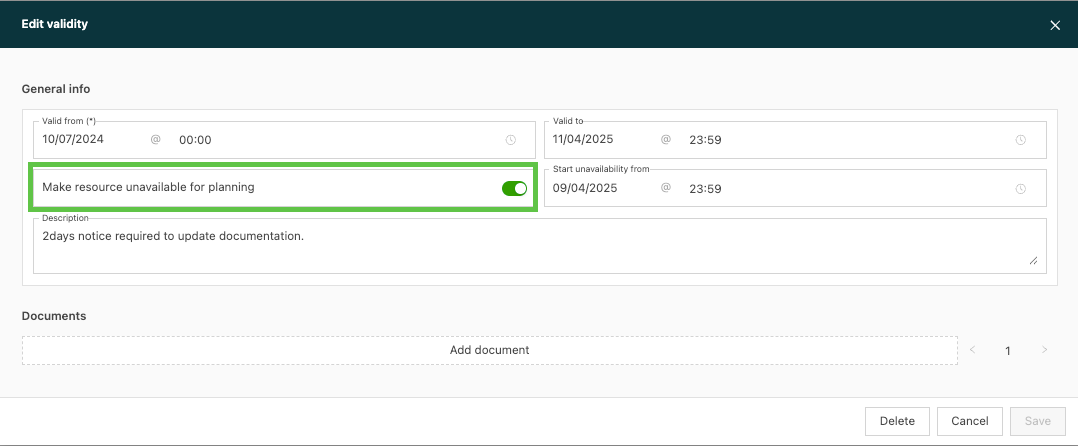
It is also possible to upload documents with validity dates to the system. This makes it possible to specify the date from which a resource should be marked as unavailable for planning purposes:

Select the document type from the dropdown menu.
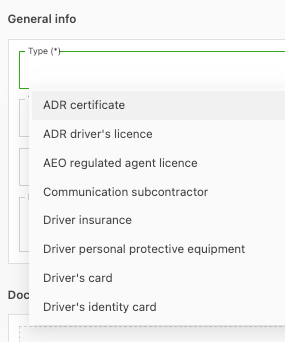
Select the valid from/valid to dates of the document and turn on the “Make resource unavailable for planning” toggle. There is an option to select the date from which the resource should be considered “unavailable”:
If there are any files, drag them to the area shown above or click the area to upload them to the system, then save the changes.
**Note:** Document storage and validities on resources are also handled via this field. For more details, see 👉Storing/validities on resources.
__
If the resource is set to ‘Always show on planning’, the dates when the resource is unavailable are shown on the planning board for full transparency.
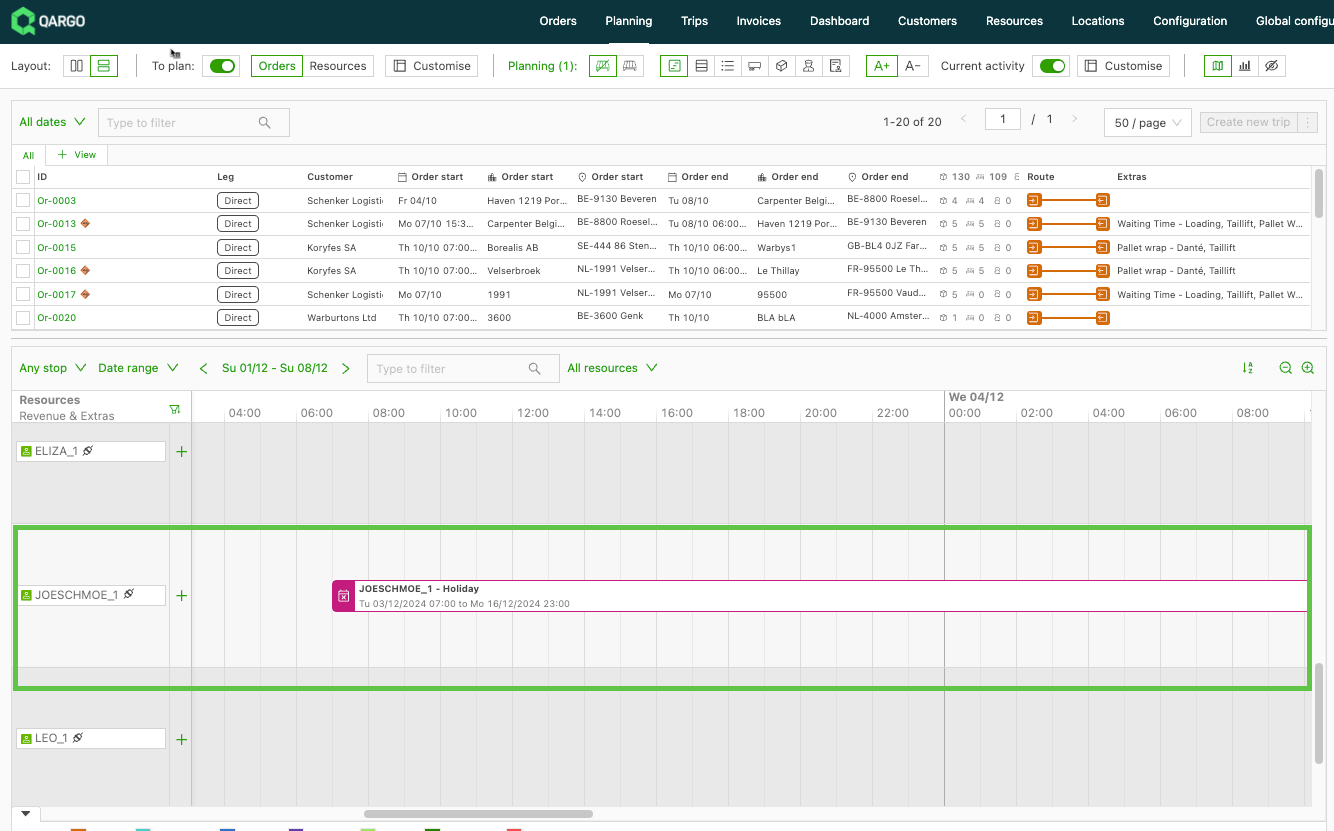
When there is an end date, the calendar icon is displayed next to the resource. Hover over the icon to see the unavailability details.
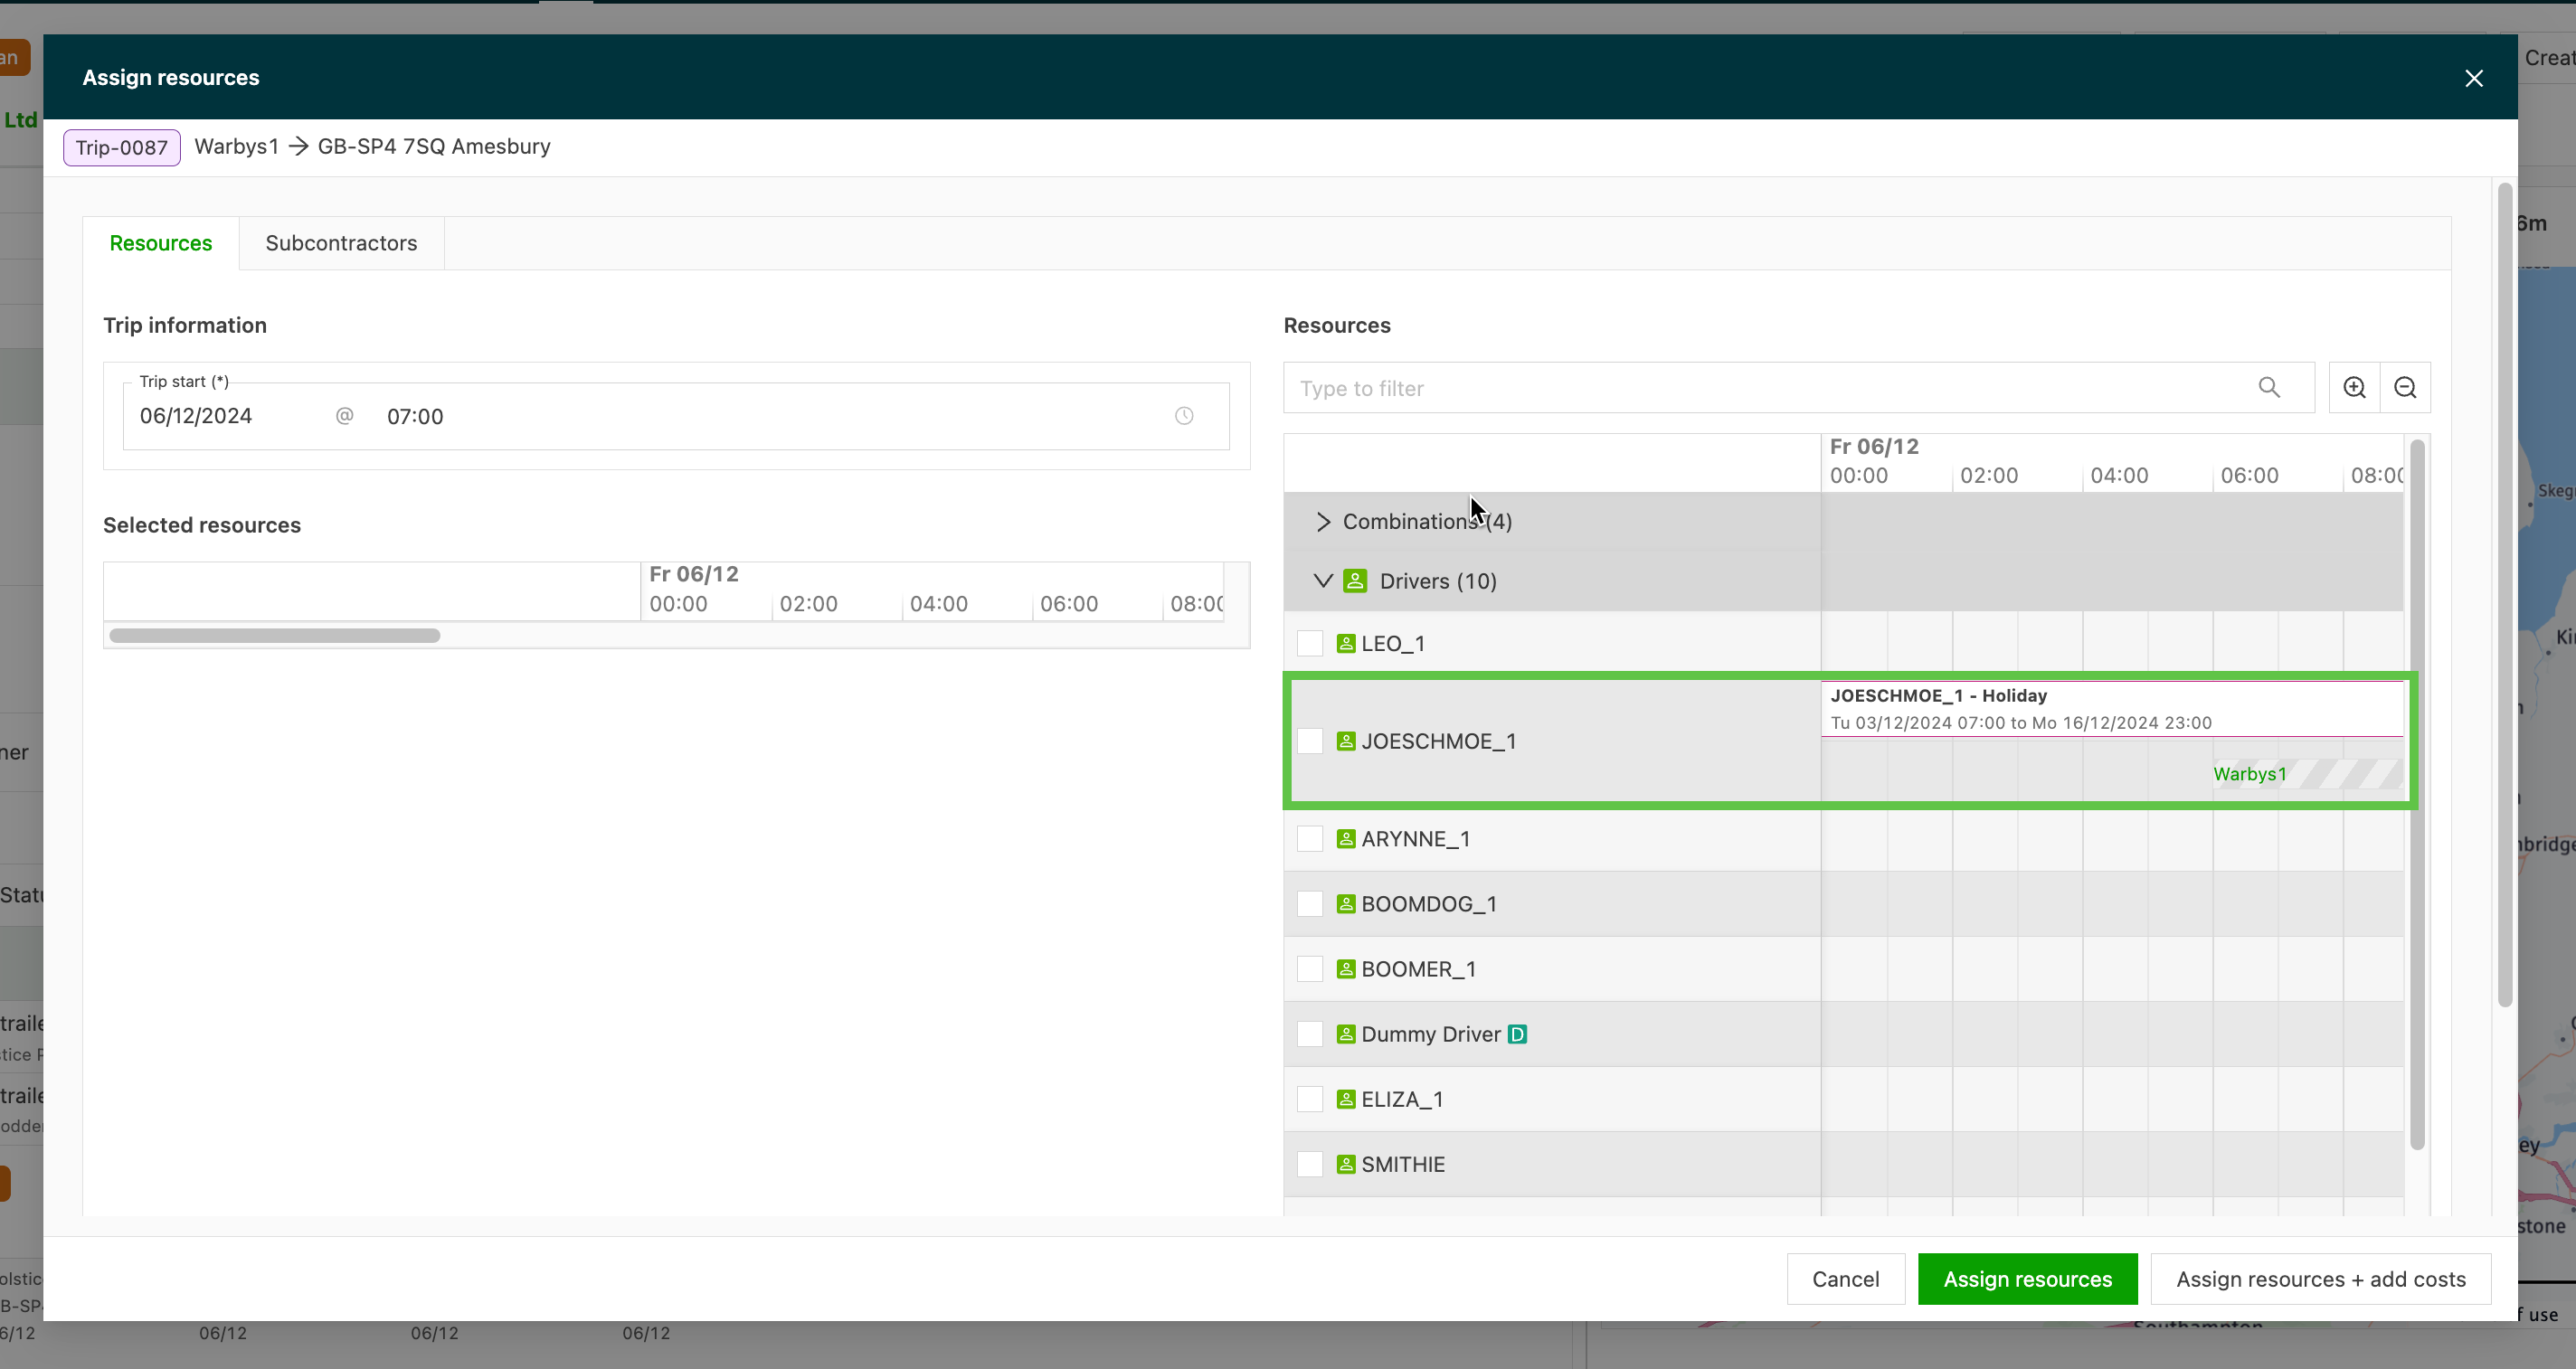
Resource availability is also shown when assigning resources directly from the order via the ‘Assign resource’ screen. This visibility makes planners more efficient and helps reduce errors from planning unavailable resources.
Setting availability from the planning board
-
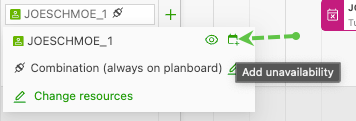
Click the driver
-
Click the calendar icon
-
Choose the option “Select start + end date” or “Select multiple days”
-
Add the reason for the unavailability
After selecting “Select start + end date”, fill in the start date in the “Start” input field. Filling in an end date is optional.
After selecting “Select multiple days”, multiple days can be selected in one go, with an optional start and end hour for these days.