Adding documents to resources
This article shows how to add and update documents for drivers, vehicles, and contract carriers, including validity dates when required.
Table of contents
Documents with or without a validity date can be added to resources, including drivers, vehicles, and contract carriers.
When adding a document, a document type can be chosen from the drop-down list. Select the document type and complete the required fields. Some examples of documents that can be added are:
- Driver’s licenses
- Certificates
- Technical inspections
- Insurance policies
To add or update existing documents on resources:
- Navigate to Resources
- Click the resource type in the header (Driver / Vehicle / Contract carrier)
- Click the specific resource to add or update.
- Documents without a validity date: click Add document.
- Information/documents with a valid from/to date: click Add item.

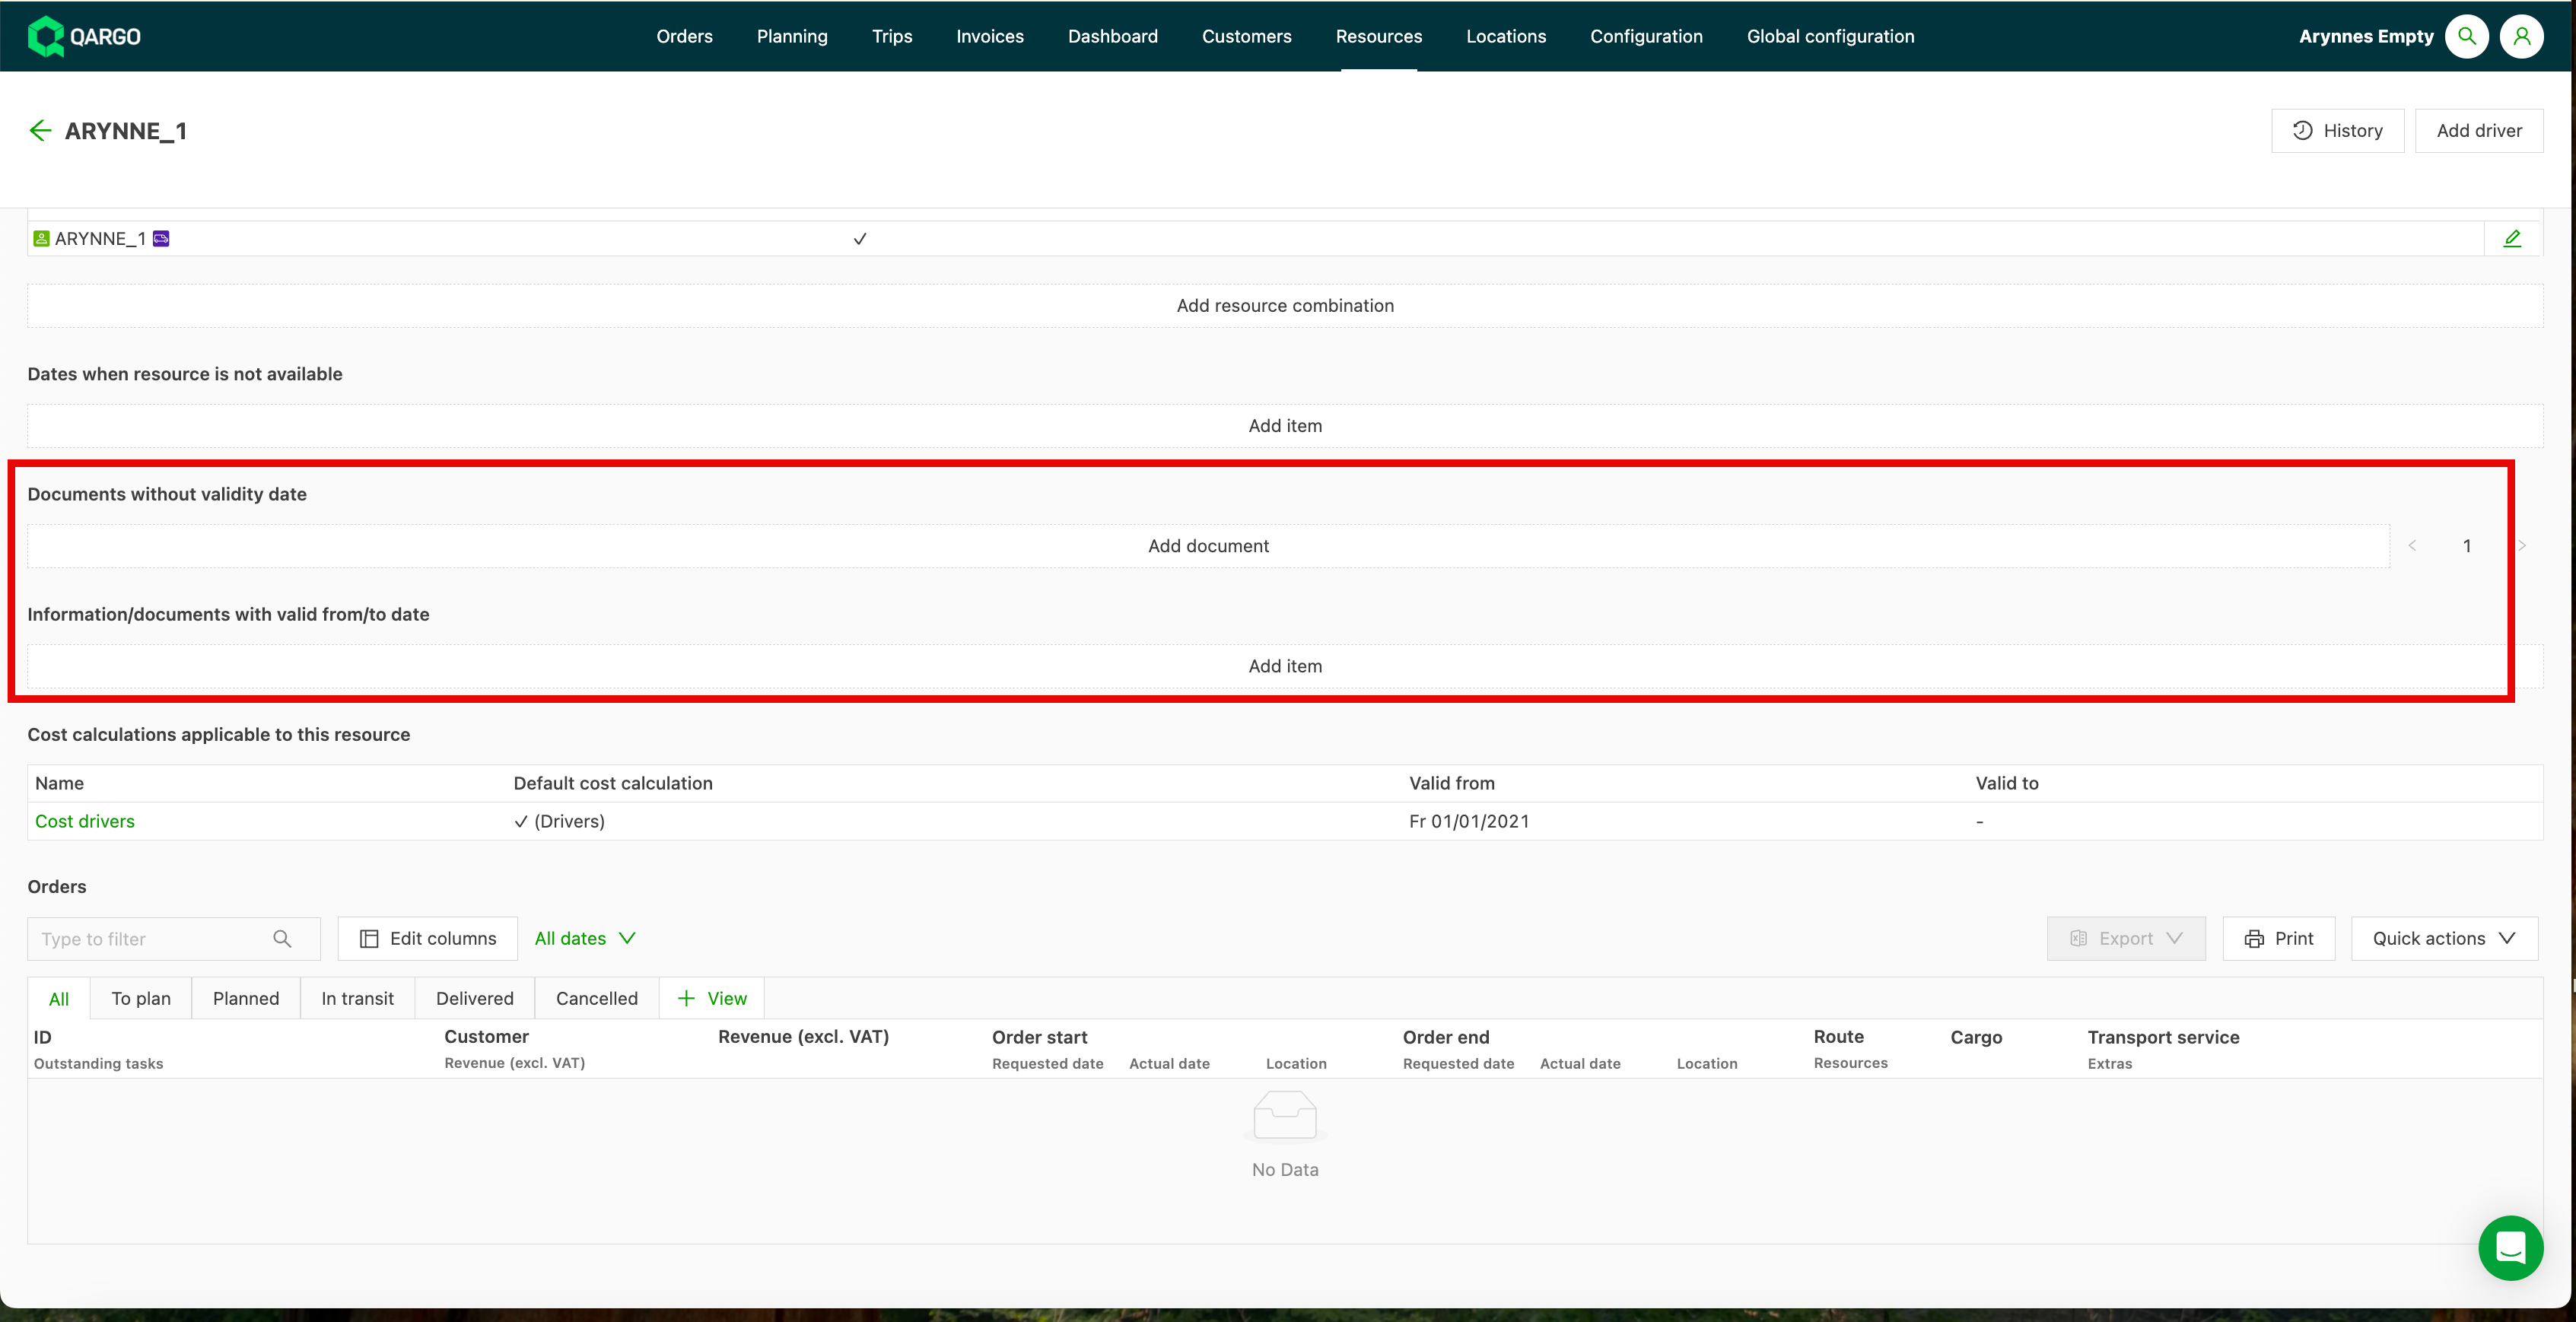
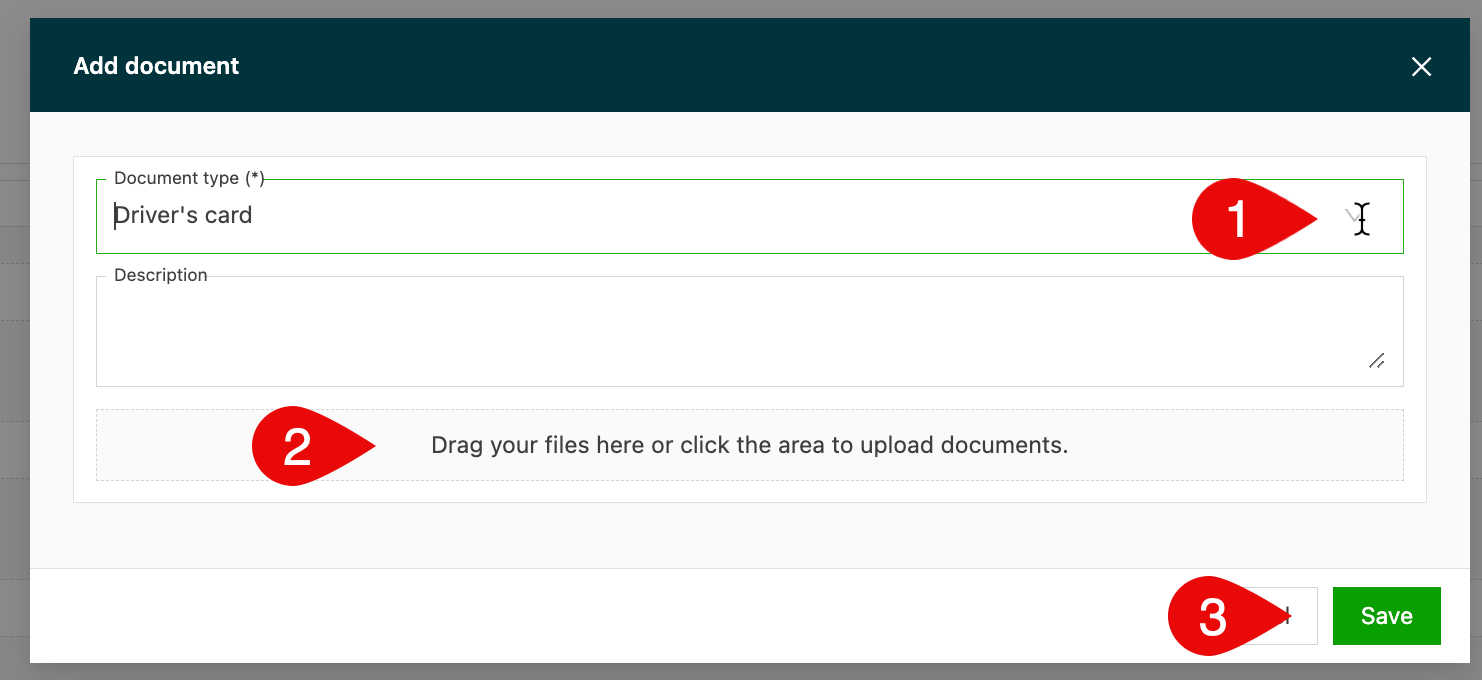
Add a document without validity dates: click Add document
- Select the document type from the drop-down menu, and provide a description if required.
- Drag or upload a copy of the document. Note: this is required.
- Save the record.
Add a document with a validity date: click Add item
- Add the document type and the Valid from and Valid to dates.
- A toggle can also be switched on so the resource becomes unavailable once the date has expired (for example, of a driver’s license).
To update existing documents
For documents without valid from/to dates:
- Options are View / Download / Add a note / Delete
- To add a note, click the Edit function, indicated by the pencil icon. This opens a text field where a note can be added
- Click the Save icon.


For documents or items with a valid from/to date:
- To update the dates or change the Unavailable setting, click the Edit (pencil) icon.
- This opens the Edit panel, where the dates can be updated
- Click Save.
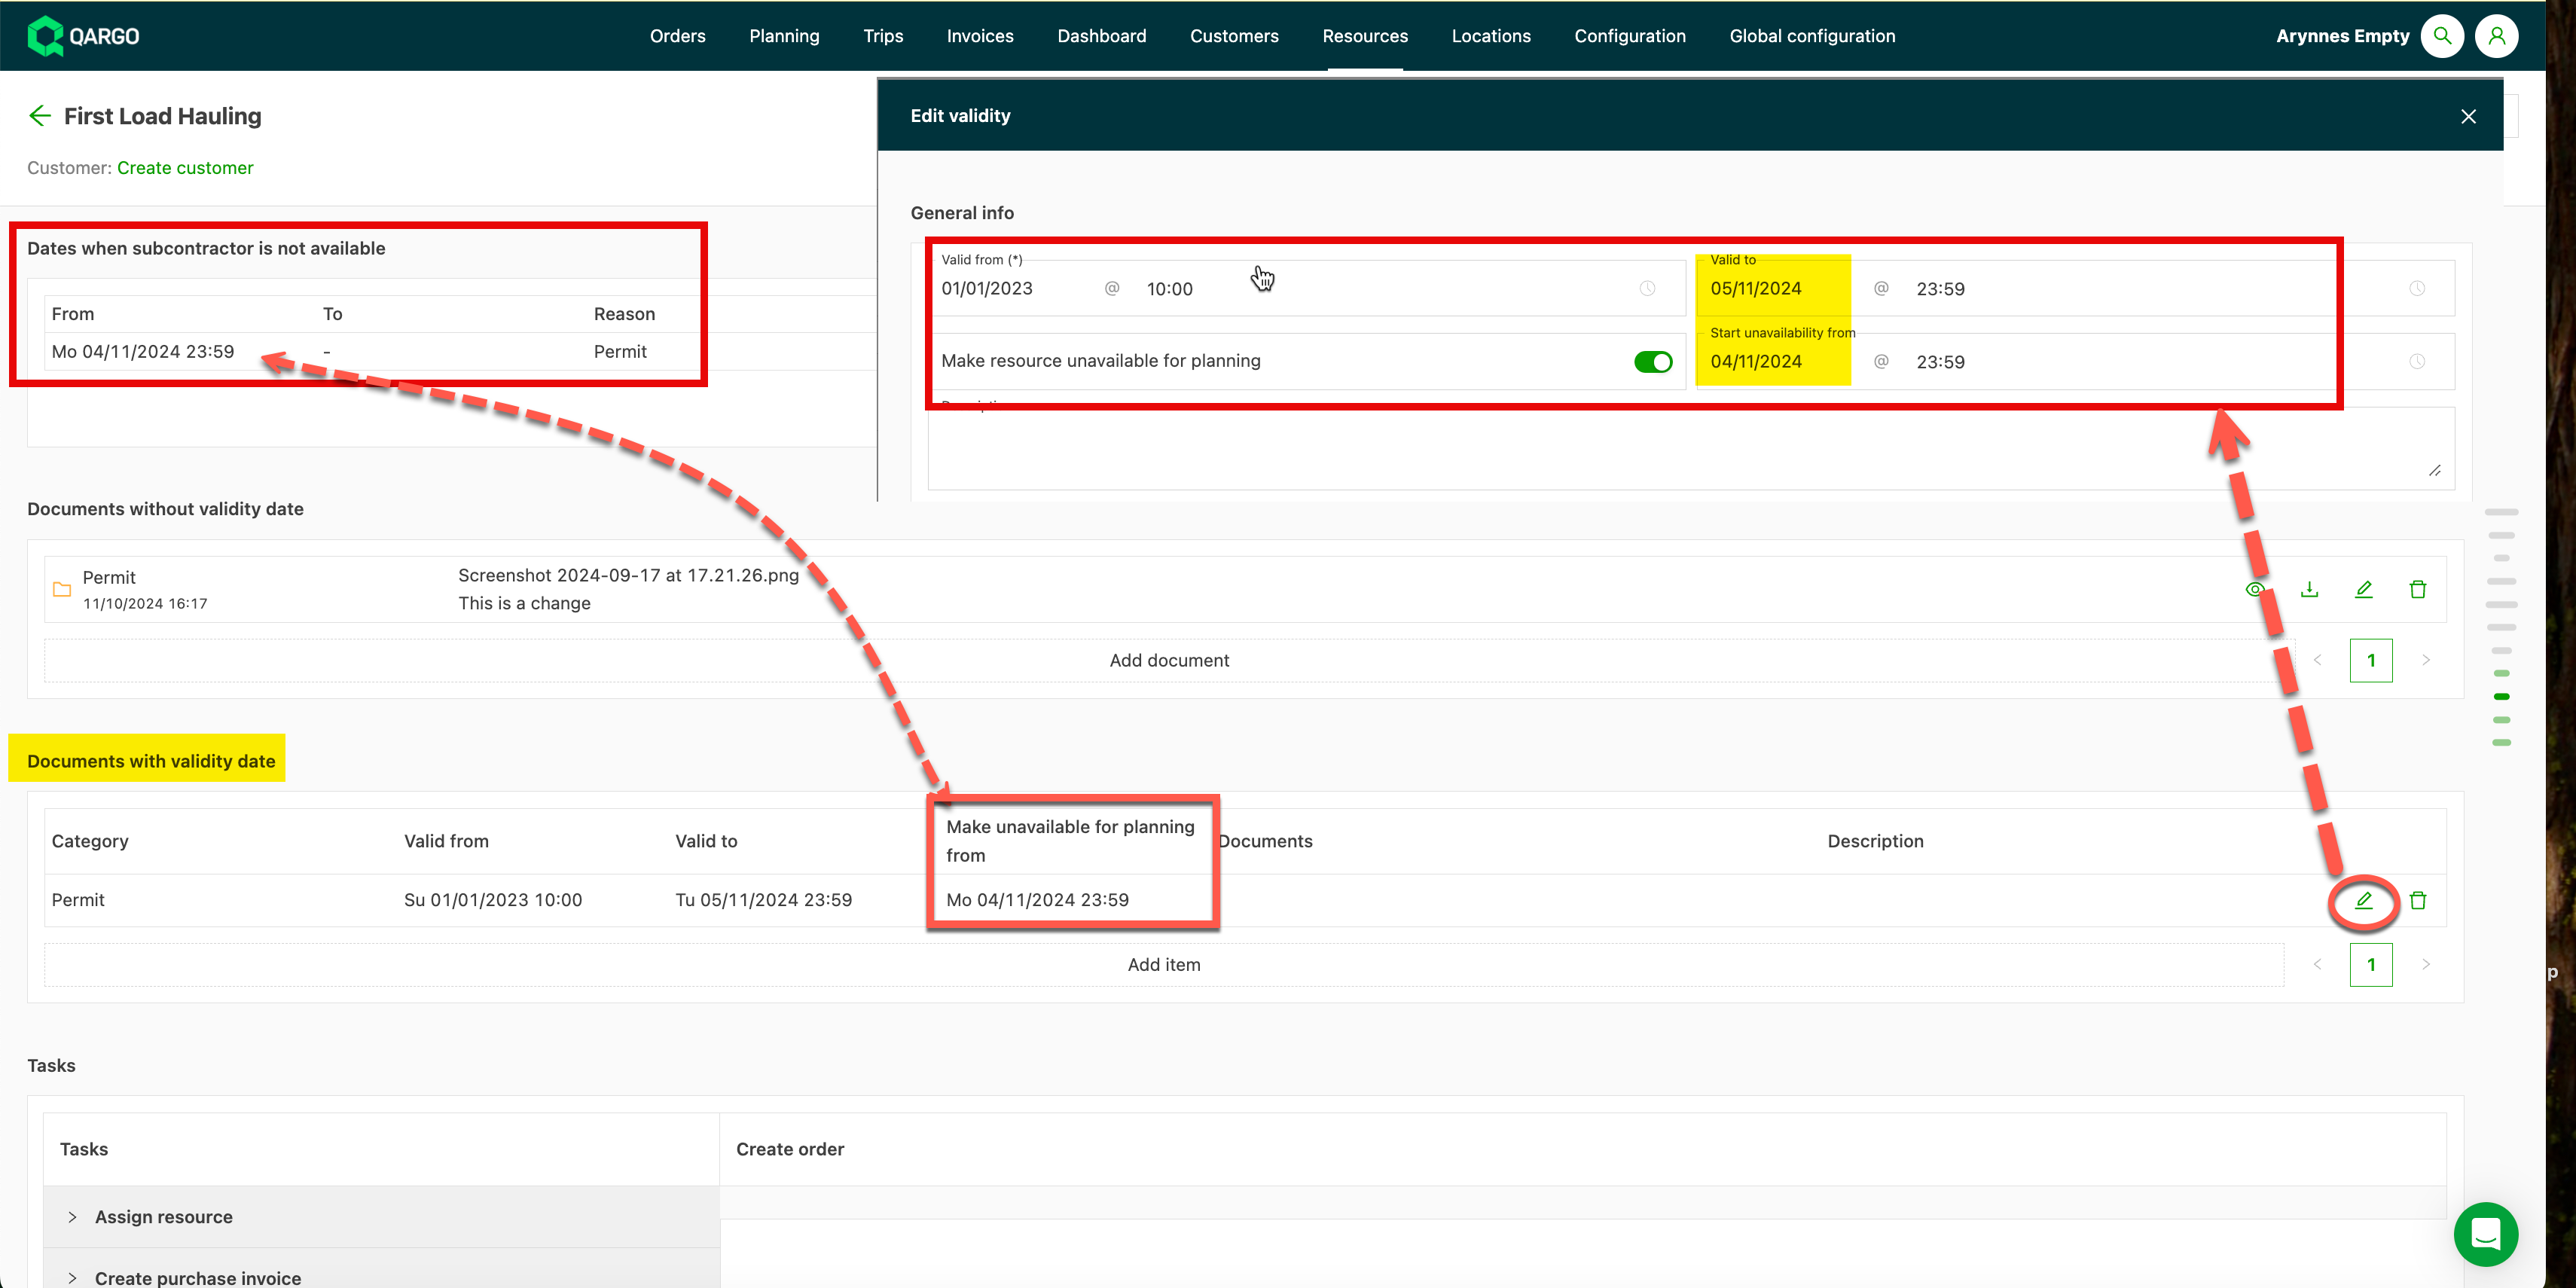
Tip: When the Valid from / Valid to dates are used together with the Make resource unavailable toggle, Qargo automatically adds this to the Not available schedule. The Unavailable date can be set manually ahead of the Valid to date to provide a window before the expiration dates and avoid any potential planning issues. Otherwise, the Unavailable date defaults to the Valid to date.
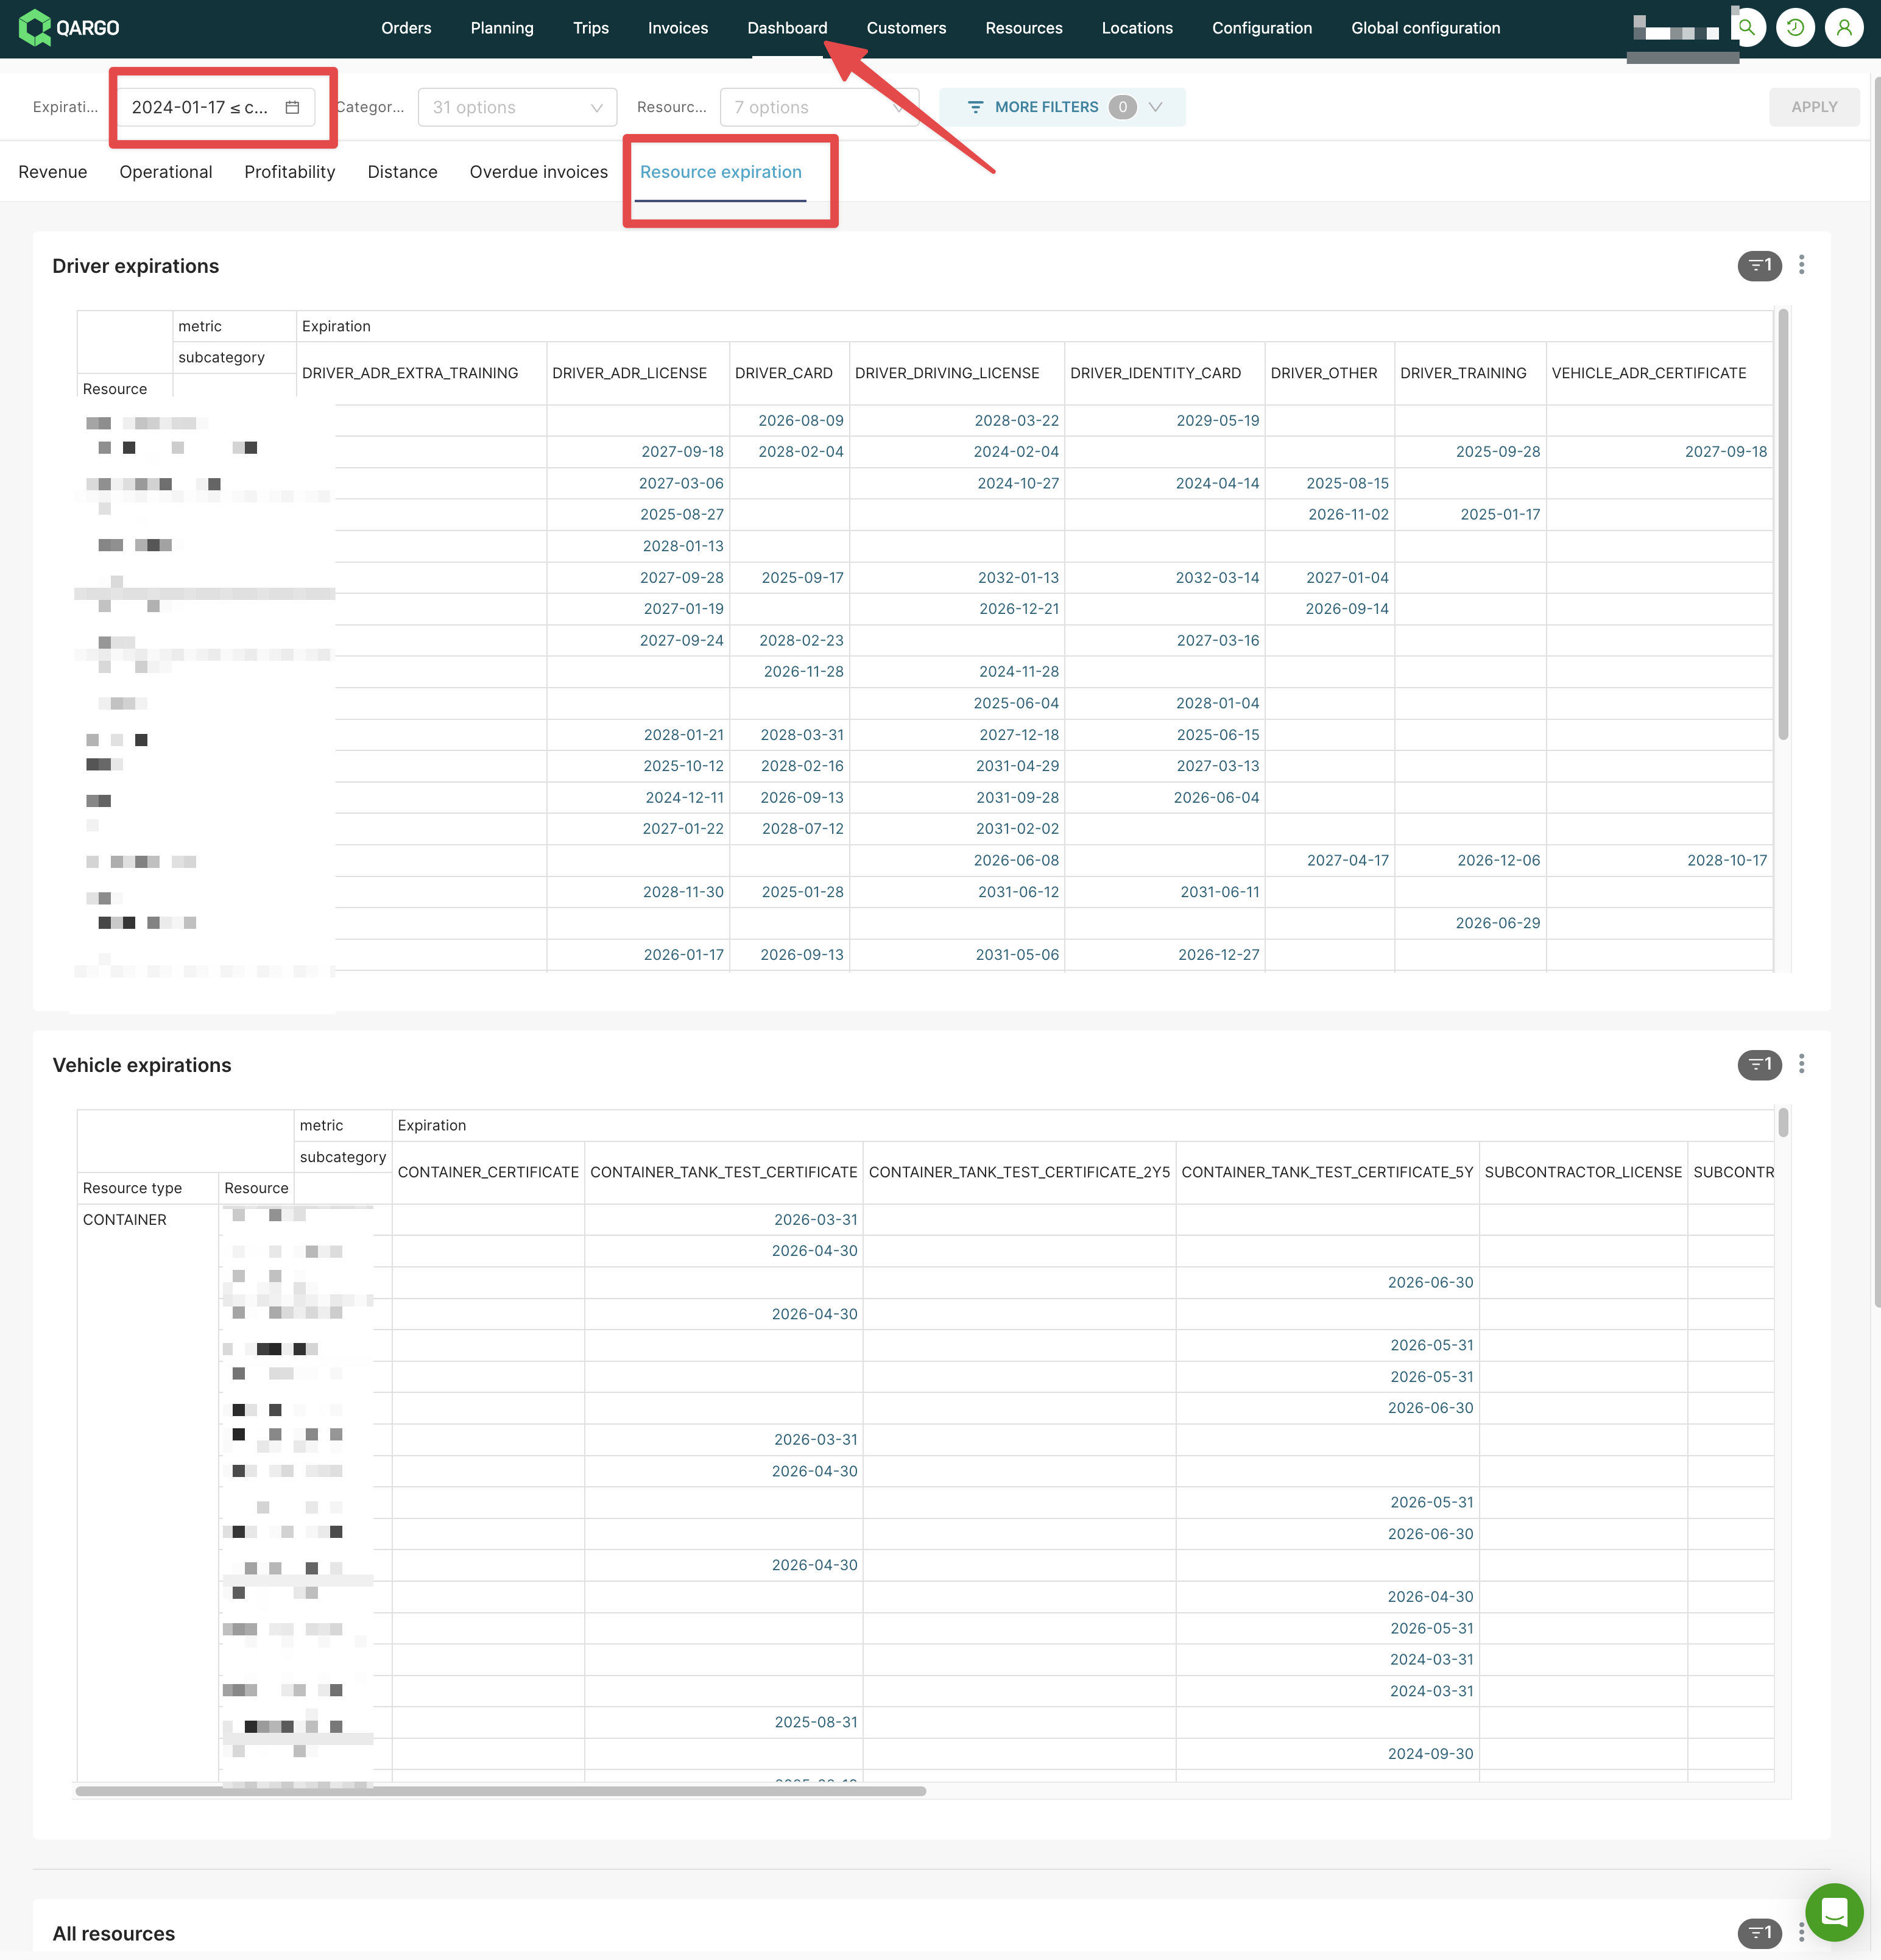
Visualize the expiration date in Dashboard
In addition, Dashboard can be used to search for documents that will expire.
- Navigate to Dashboard.
- Click Resource expiration in the header.
- Choose a date.