FAQ: Setting insurance limit values
Table of contents
Q. Is it possible to see the insurance value for the freight on an order? How can a user make sure that the contract carrier in use has valid insurance that covers the value of the freight?
A. Yes! It is possible to set an insurance value for the freight on an order. It is also possible to add contract carrier liability insurance details on the contract carrier profile. This is where the validity dates and the total amount of coverage can be added.
Adding contract carrier insurance details
-
Go to the contract carrier profile (Resources > Contract carriers)
-
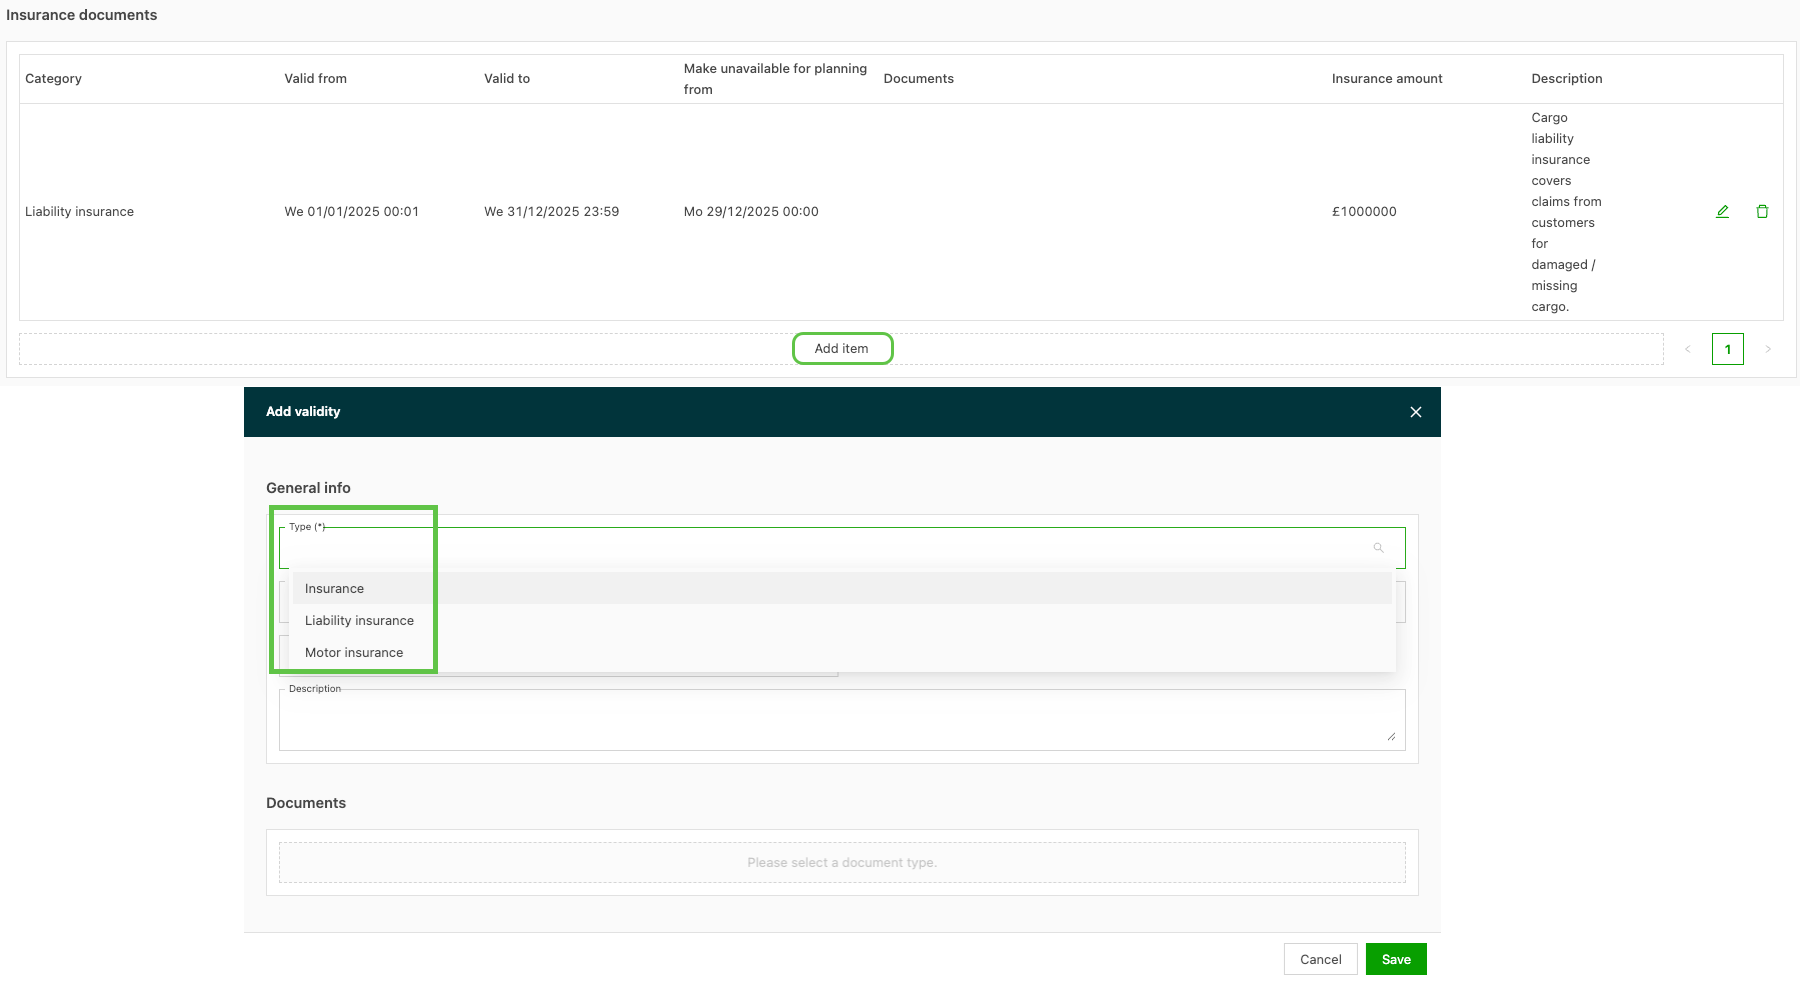
On the contract carrier profile, scroll to the bottom and locate the Insurance documents panel
-
Click Add item to add the details of the insurance document being uploaded.
-
Select the correct insurance Type
-
Add the valid from and to dates
-
(Optional) Turn on unavailability to restrict planning of the resource if the insurance is not within the validity date range
- Set the date to make the resource unavailable
-
(Optional) Add a description to show what the insurance covers
- This is displayed on the main panel for easy visibility
-
Drag or click to add the electronic copy of the insurance document
-
Adding a freight insurance value to an order
-
Enable additional fields so they show in the freight section of the order form
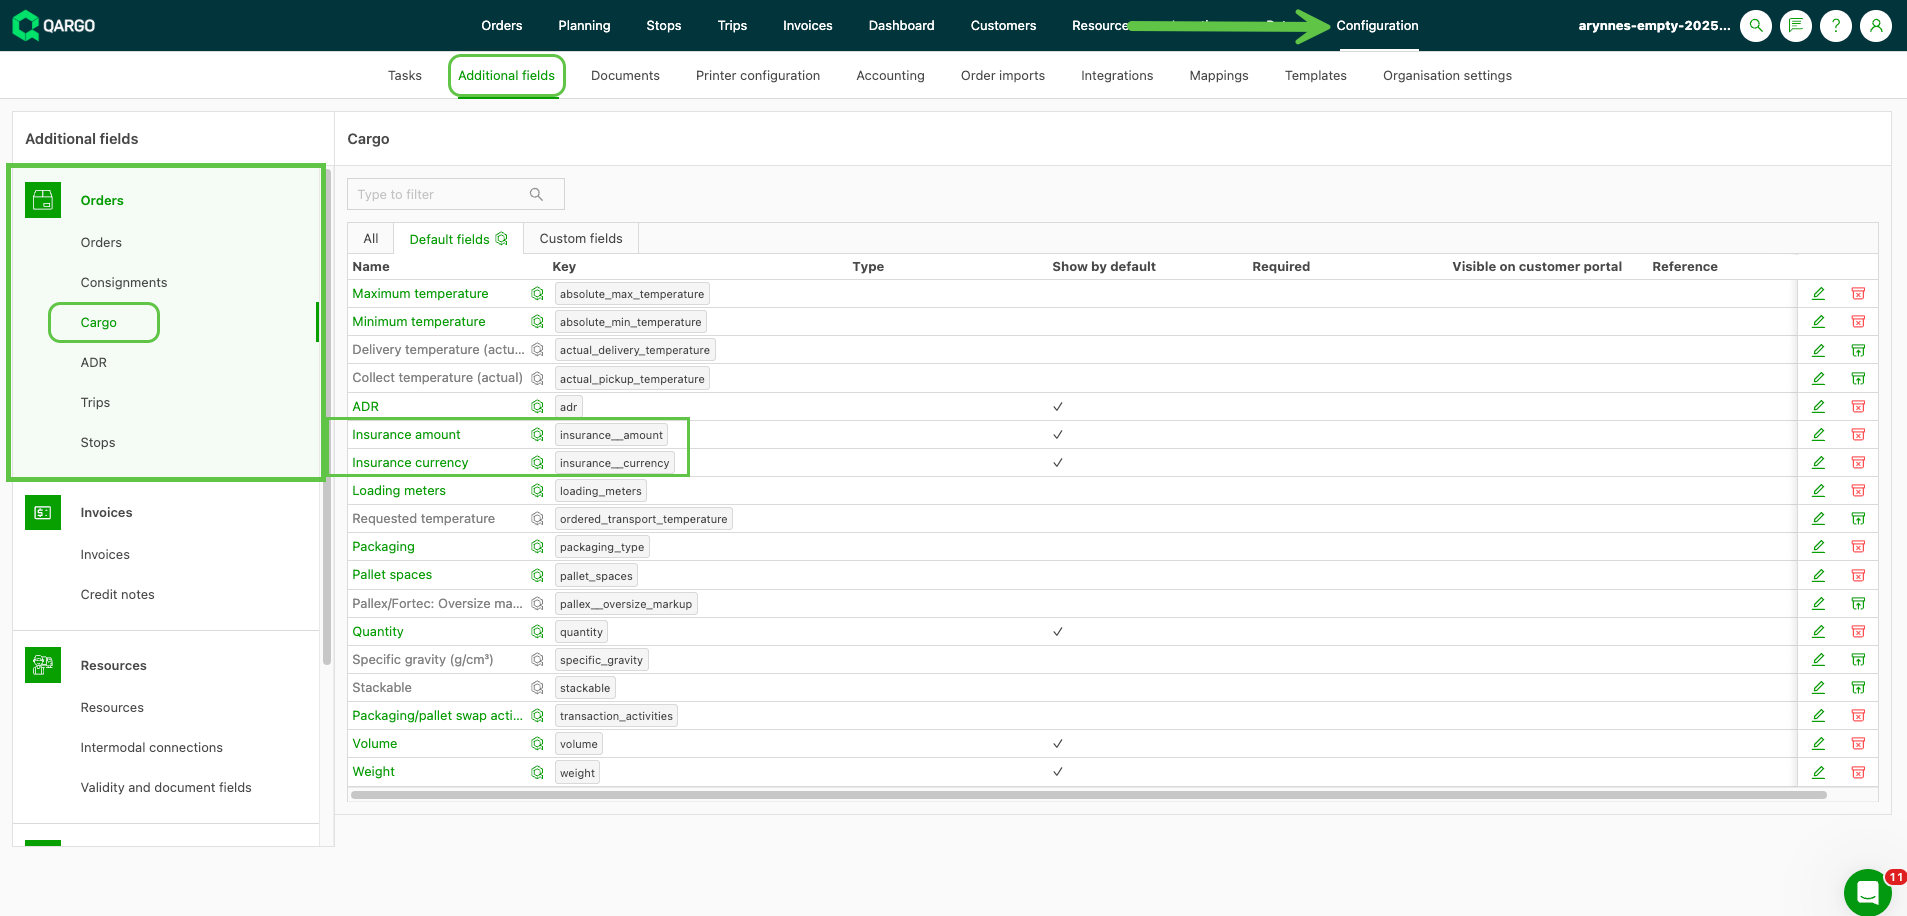
- Go to Configuration > Additional fields (admin users only)
- In the left-side menu, under Orders, select Freight.
- Under Default fields, select Insurance amount and Insurance currency and set them to active for the appropriate transportation services
-
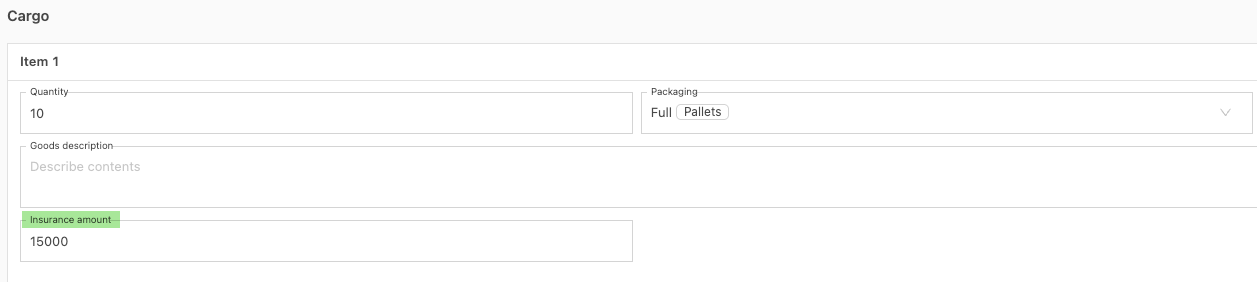
Once enabled, the Insurance amount option shows in the Freight panel of the order form.
-
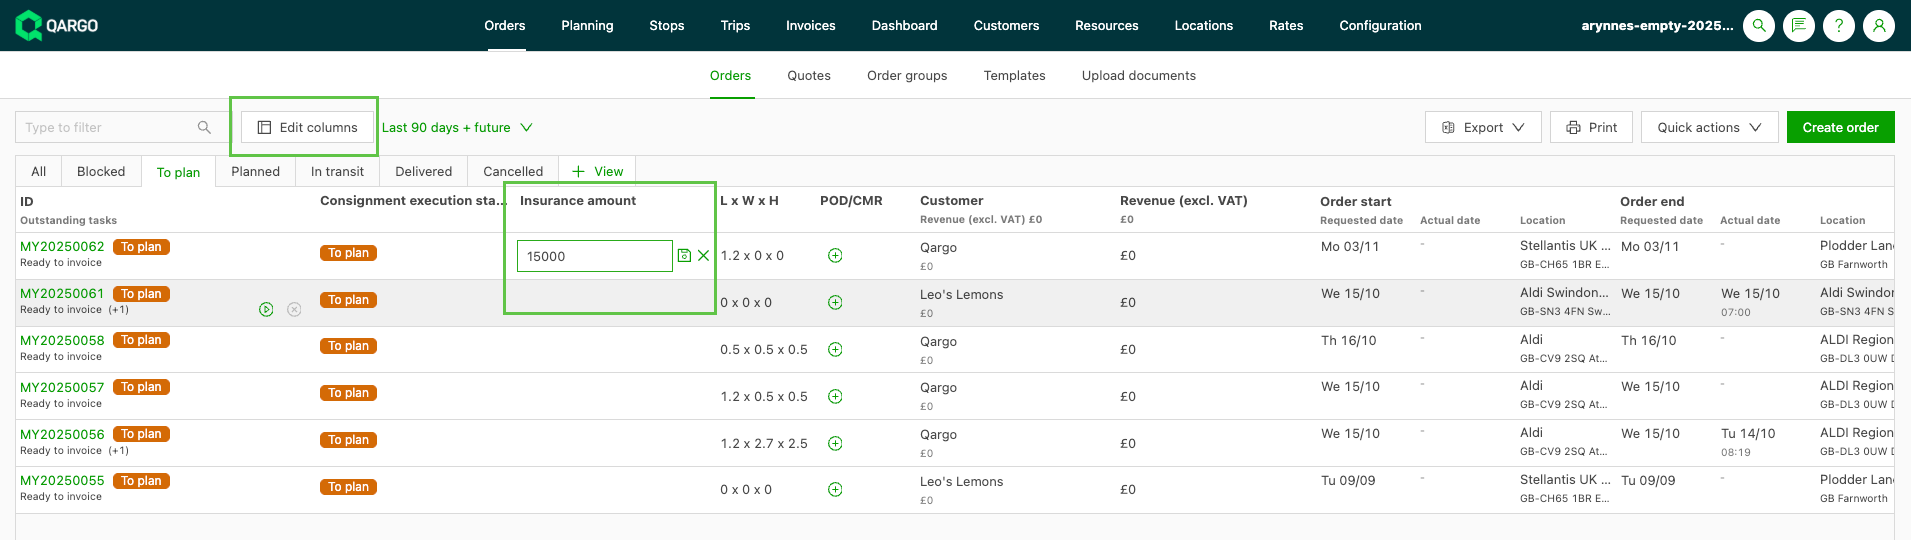
To see the freight value directly in the order list view, use Edit columns to turn on Insurance amount (and/or the currency if required).
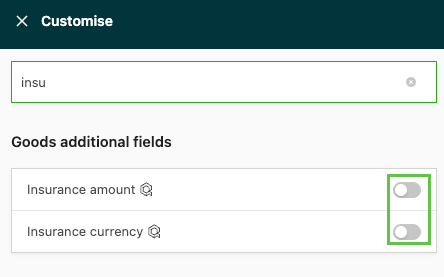
- Once it is on, drag the column to the preferred position in the table.
- The insurance amount value can be edited directly in the table view.