Planning: plan resource to order
Assign resources to orders, manage removal warnings, sort loads by planned start time on the planning board, and assign trailers to specific stops on a load.
Table of contents
Summary
What: Resources (drivers, vehicles, trailers, containers) can be assigned directly from an order, so loads stay visible and manageable on the planning board. A sort option lets planners keep loads in their originally planned position, even when actual operations times differ.
Why: Planners need a reliable way to assign resources without leaving the order. They also need the planning board to stay stable when loads start later than planned. This prevents missed or overlooked work.
How: Open an order, assign resources from the resource panel, then view and manage the load on the planning board. Use the sort menu to switch between sorting by actual start time and sorting by planned start time.
Terminology
| Term | Definition |
|---|---|
| Resource | A driver, vehicle, trailer, container, or chassis assigned to a load. |
| Resource line | A row on the planning board that represents a single resource. |
| Planned start time | The start time set when the load was last manually planned (created or moved on the planning board). |
| Actual start time | The operations start time tracked by the system, based on driver activity or status updates. |
| Load | A journey created from one or more orders and assigned to resources on the planning board. |
Assign resources to an order
Resources can be assigned directly from an order without going to the planning board.
- Open the order.
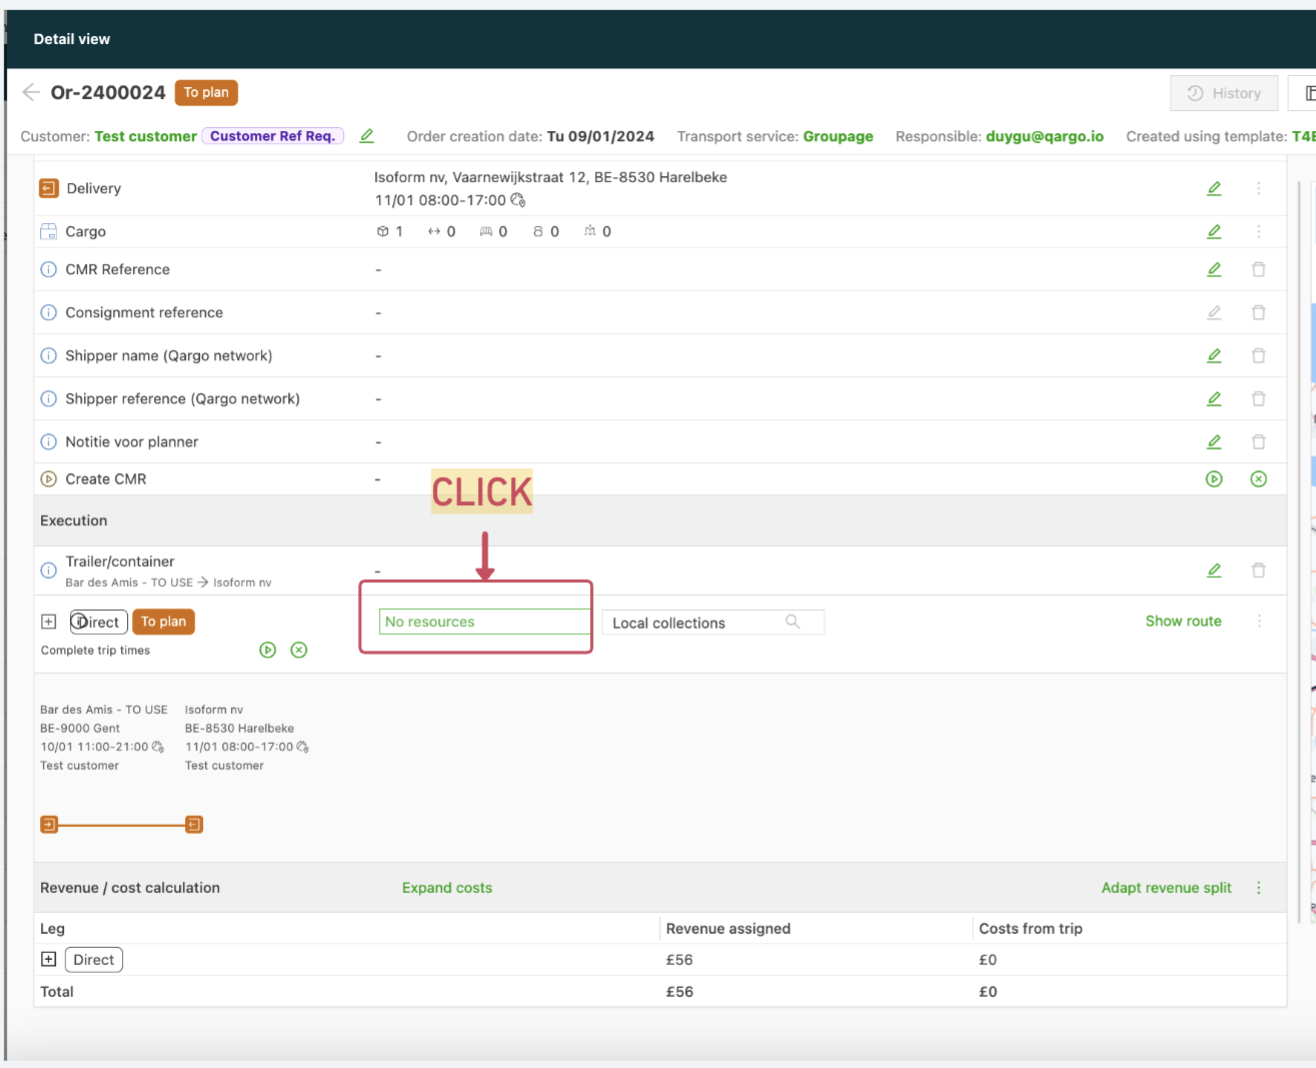
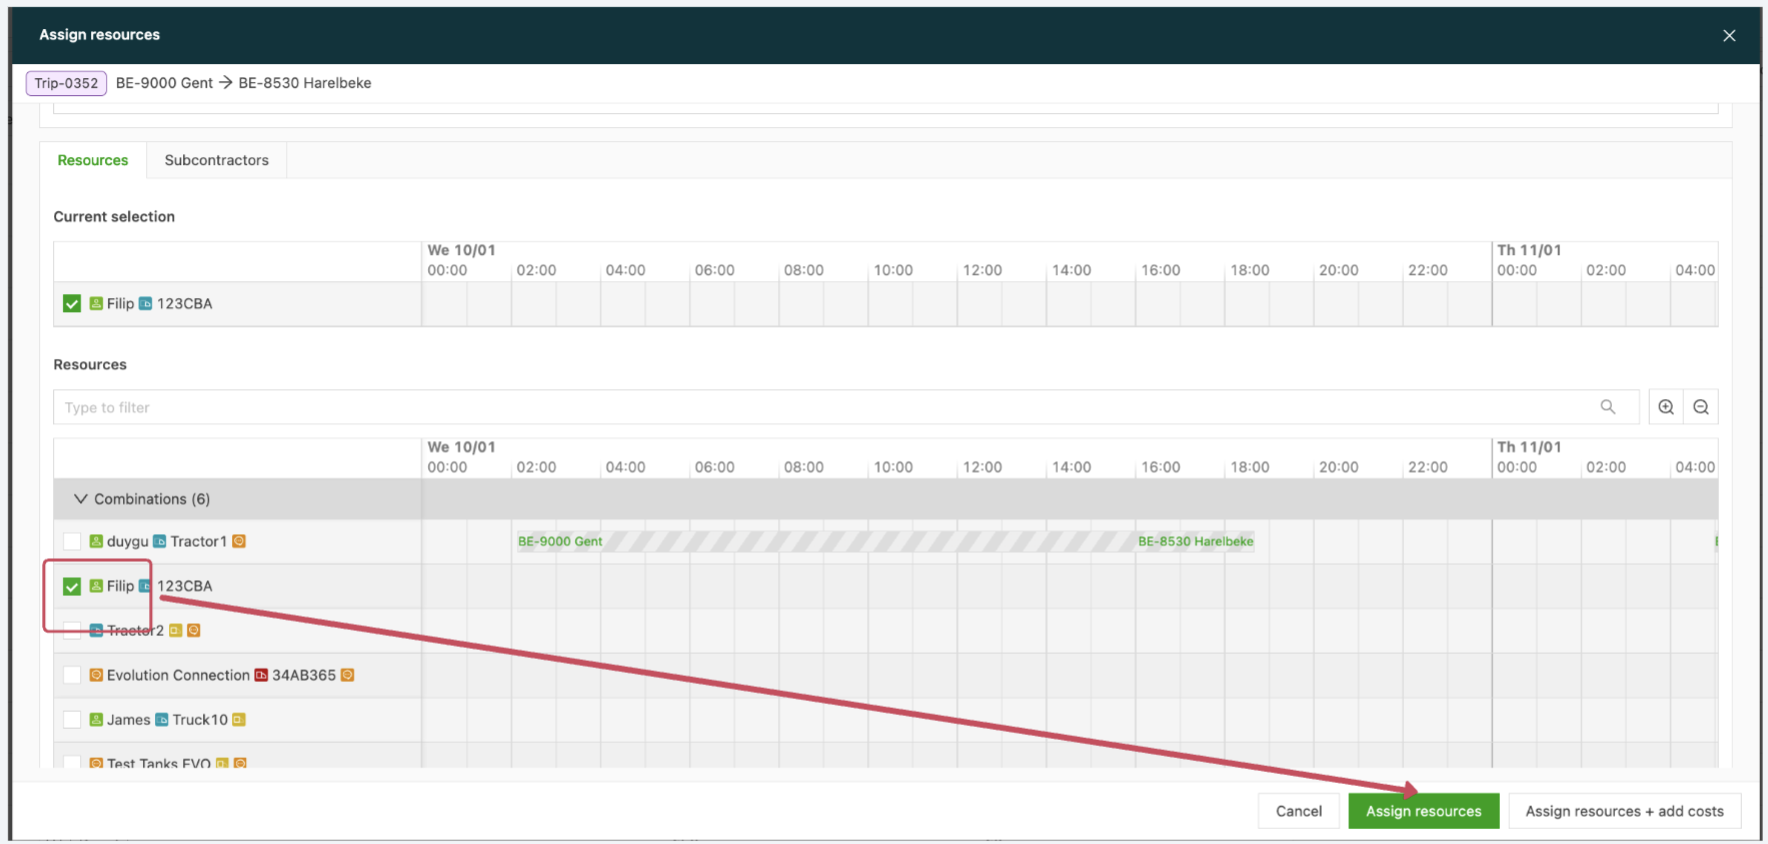
- Select the resource fields (driver, vehicle, trailer, container) in the order detail panel.
- Assign the relevant resources.
- Navigate to the planning board to view the planned load on the resource line.
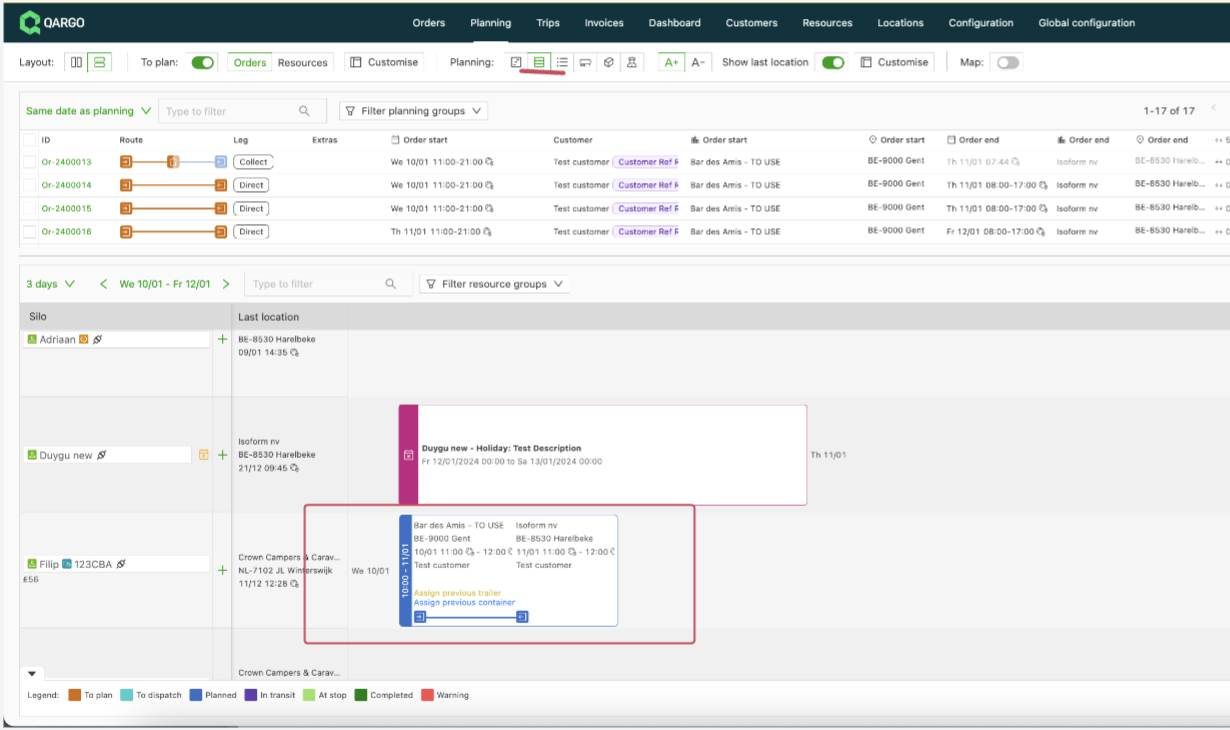
- All planned loads are also visible in the Loads list view, where columns can be customized and data can be exported.
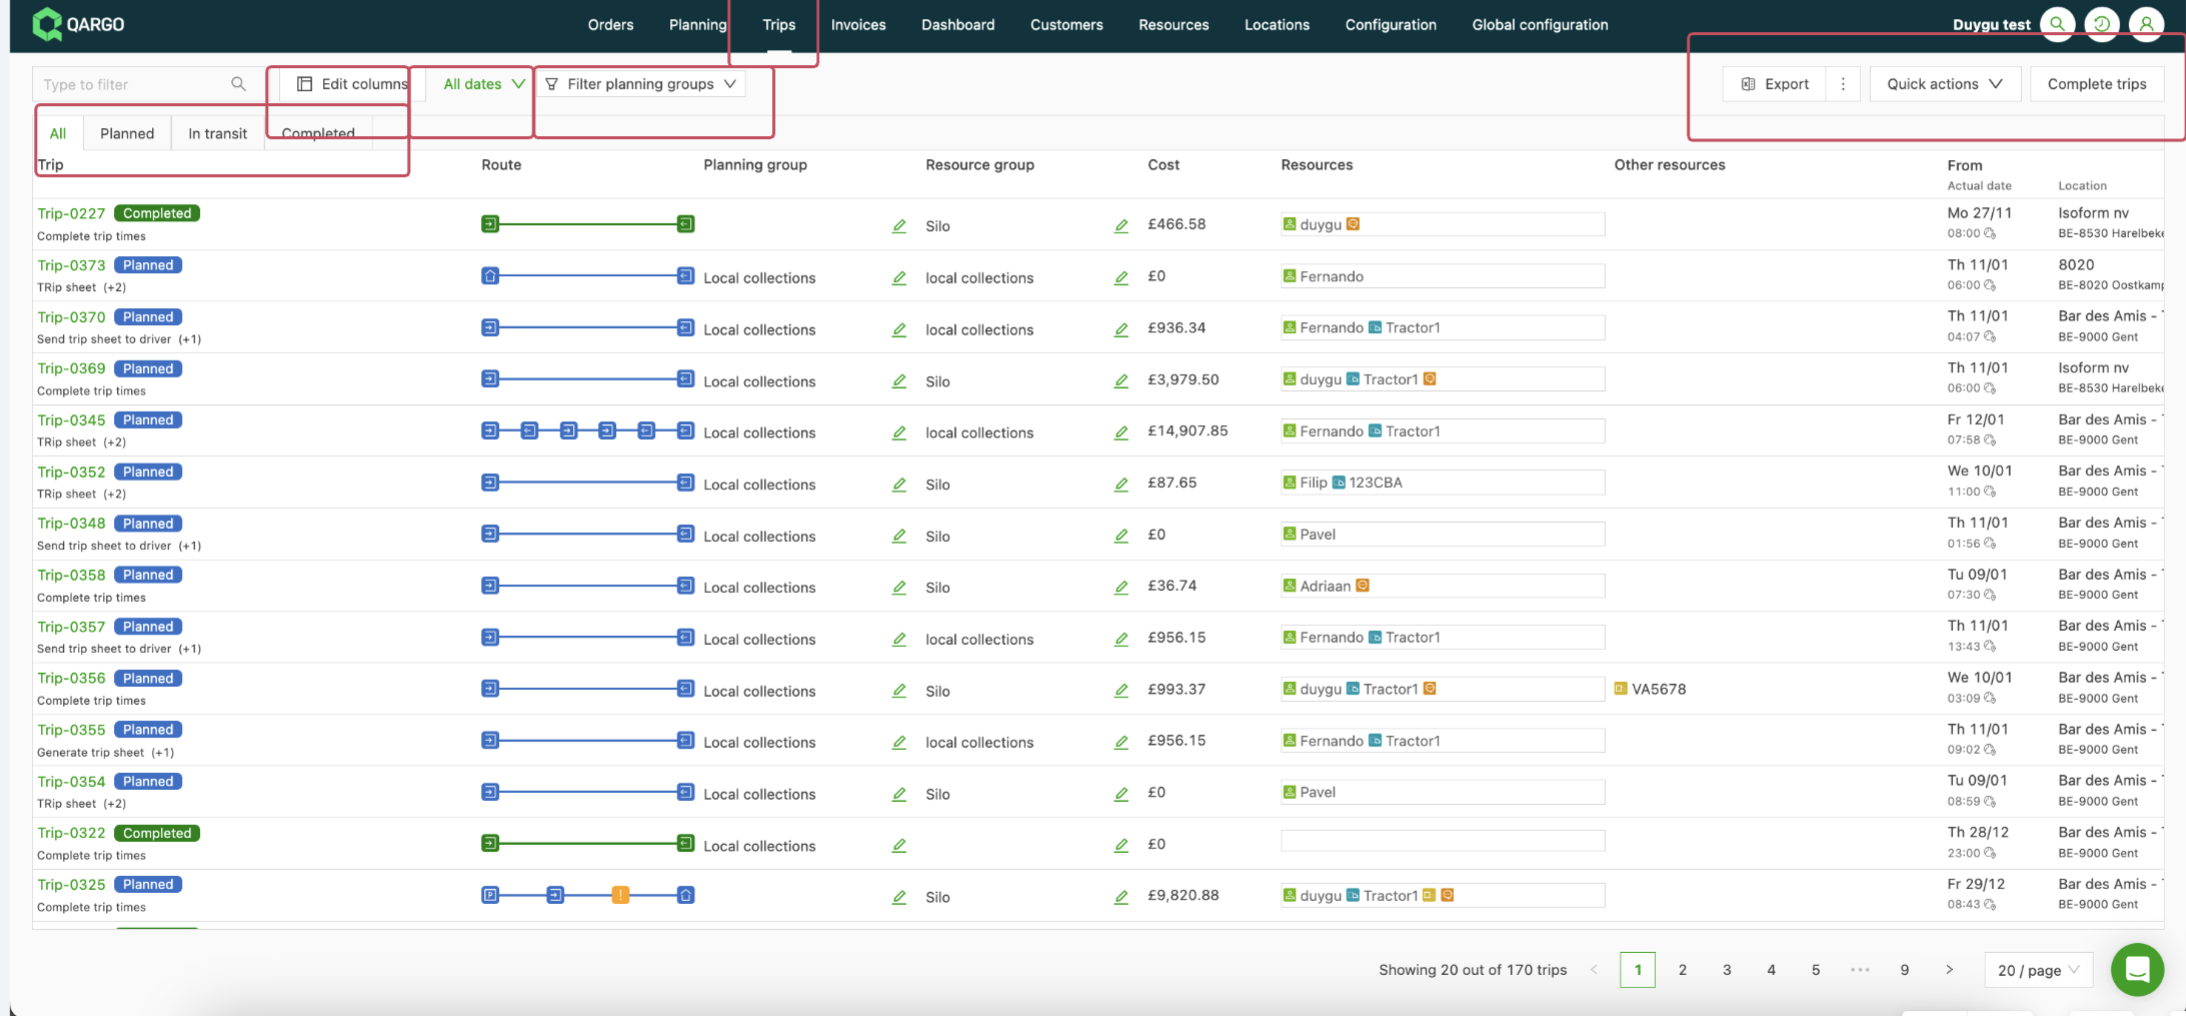
Warning when removing resources
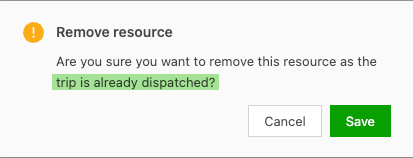
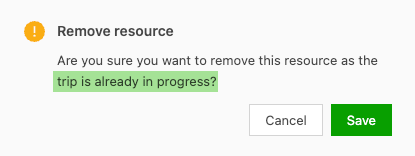
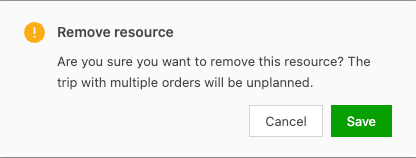
When a resource is removed from a load, a warning appears if:
-
The load is already dispatched.
-
There are multiple orders on the load.
Sort loads on the planning board
A sort option keeps loads in their originally planned position on a resource’s row. This way, loads do not jump around when actual operations times differ from planned times.
Why this matters: When loads reorder automatically based on actual start times, a load that has not been completed yet can appear to have moved forward. Planners may then assume it is already done. Keeping loads in their planned position prevents this confusion.
Steps to apply the sort
- Open the planning board.
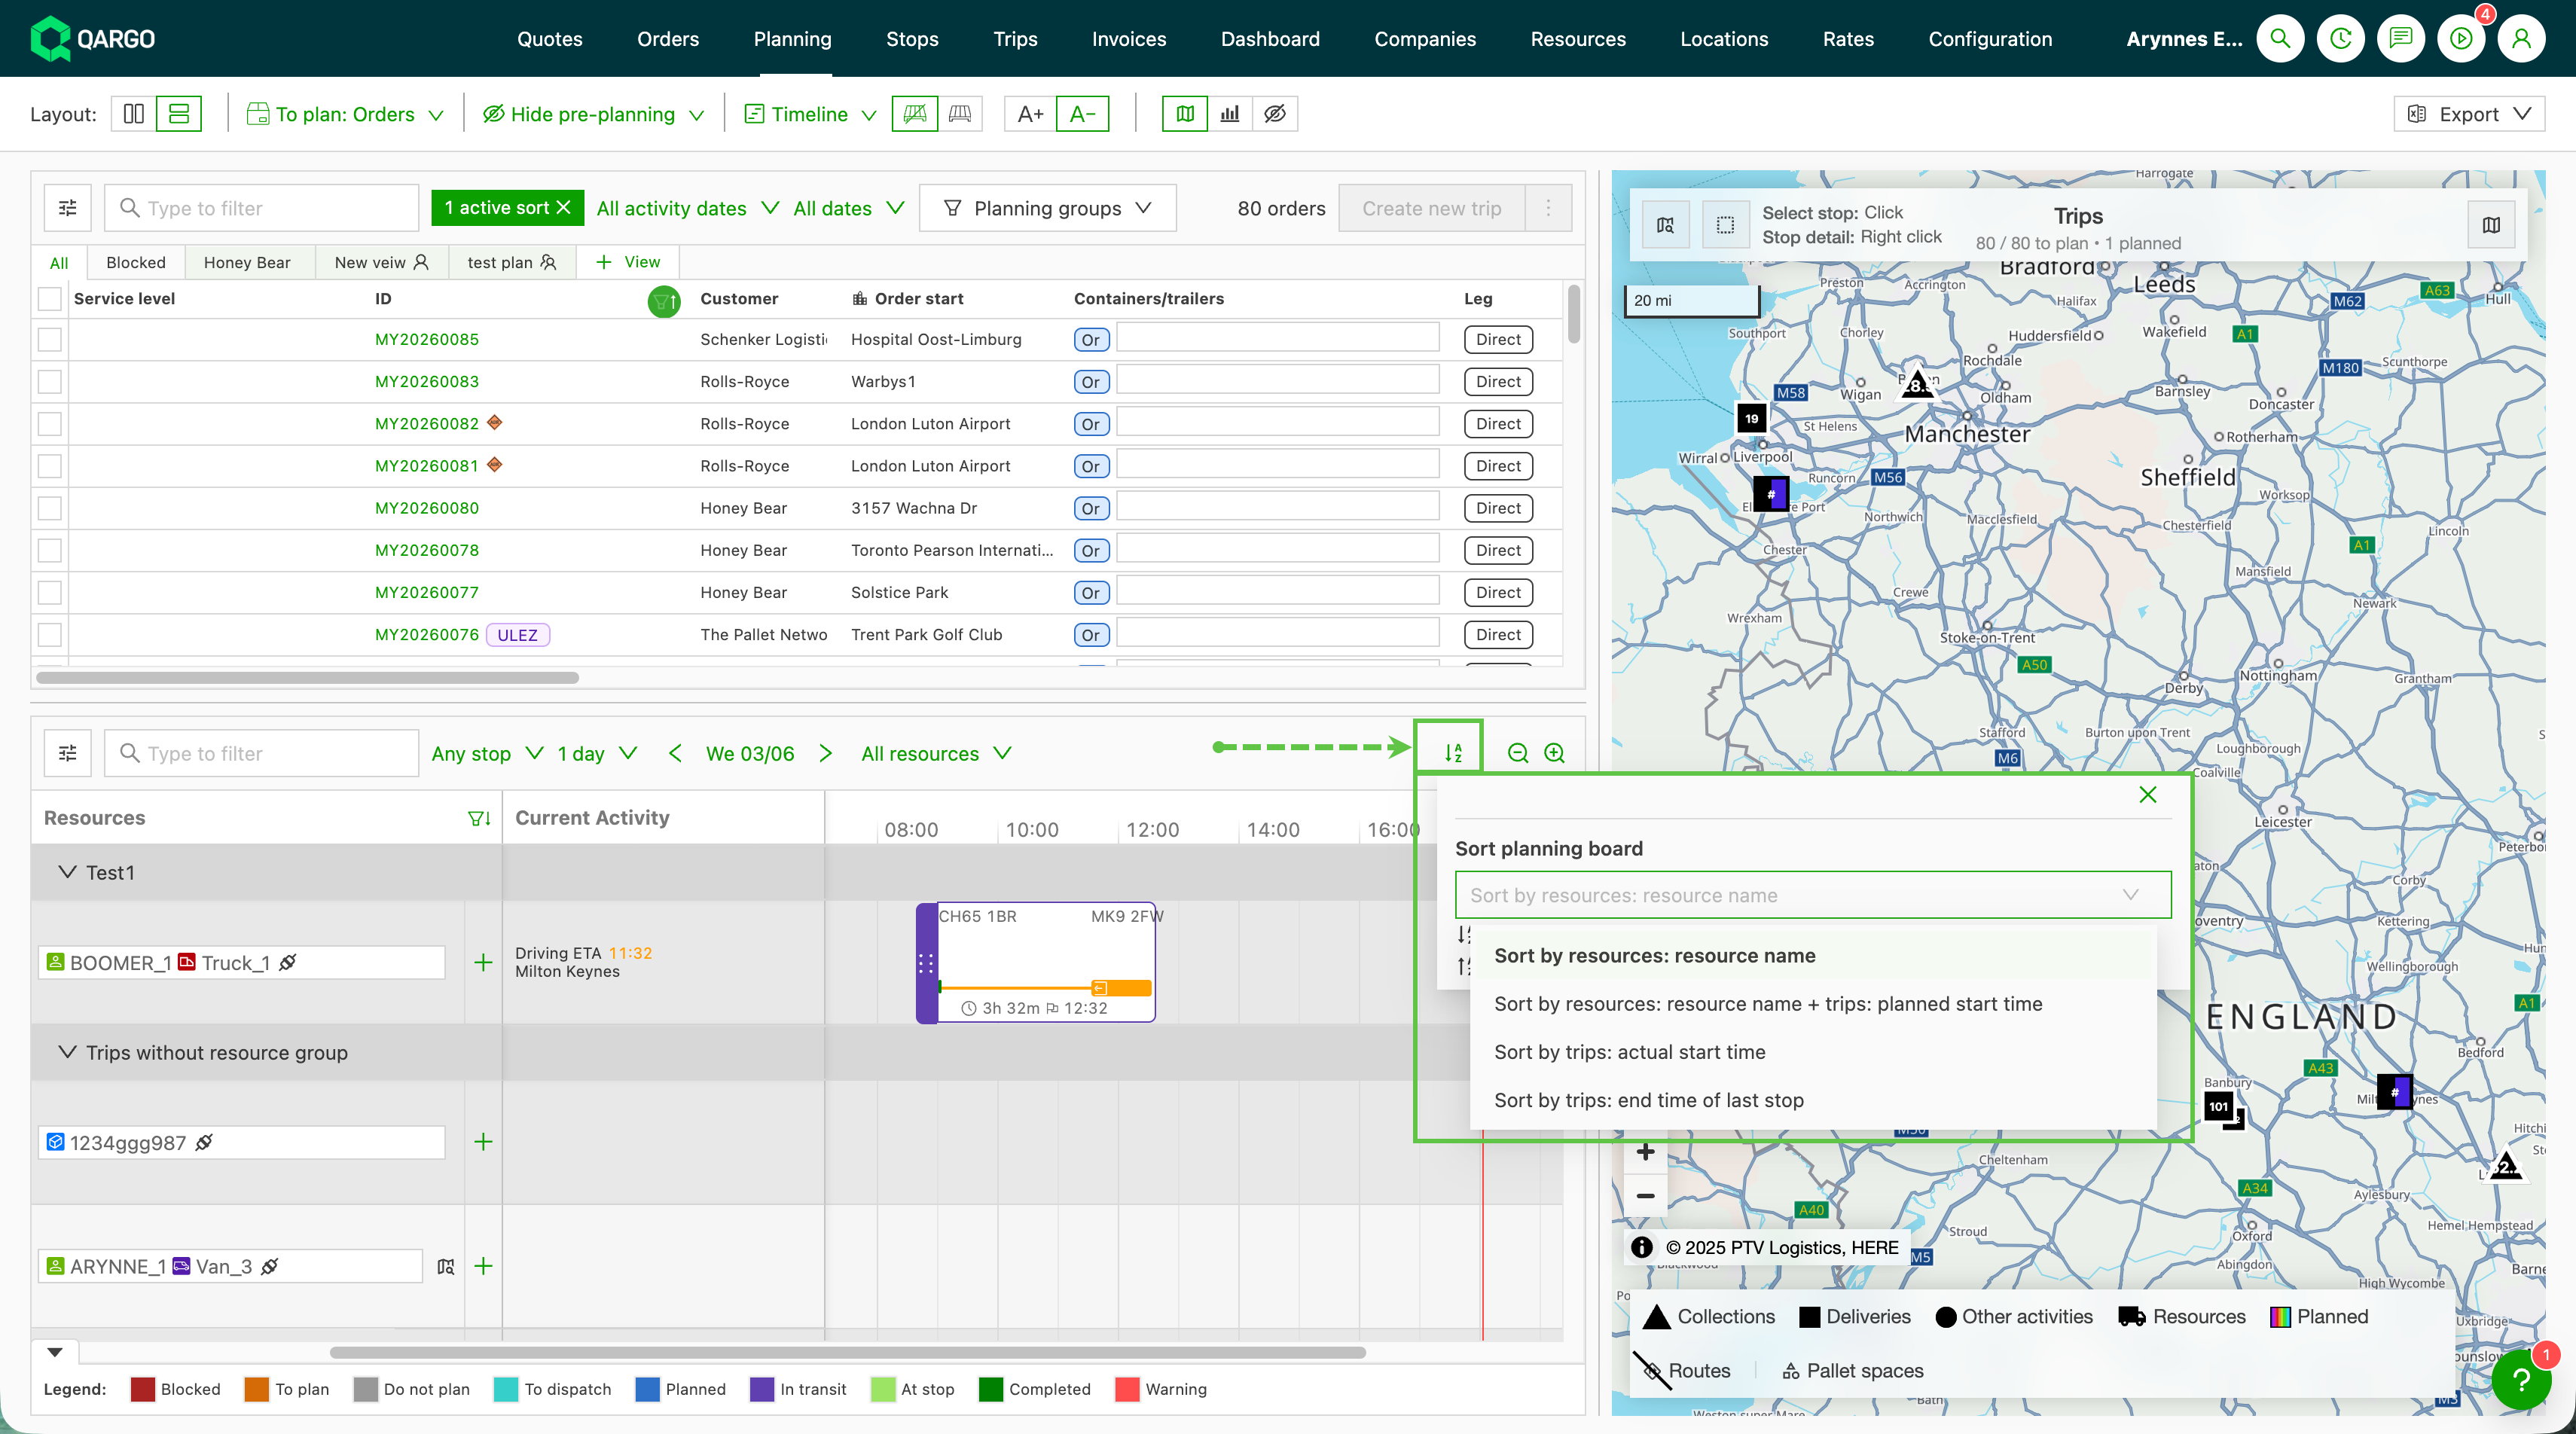
- Click the sort menu in the toolbar.
- Select Sort by resource: resource name + loads: planned start time under the load sort options.
- Loads inside each resource row now stay in their planned order, even when actual start times differ.
- The default remains Sort by actual start time and can be changed at any time.
Assign a trailer, container, or chassis to specific stops
Trailers, containers, chassis, and third-party costs can be assigned to cover specific stops on a load, instead of the full load by default. This applies only to trailers, containers, chassis, and third-party costs. General resources such as drivers and trucks are not affected.
There are three ways to open the assignment window:
-
Drag a trailer, container, or chassis from the resources panel onto a load on the planning board.
-
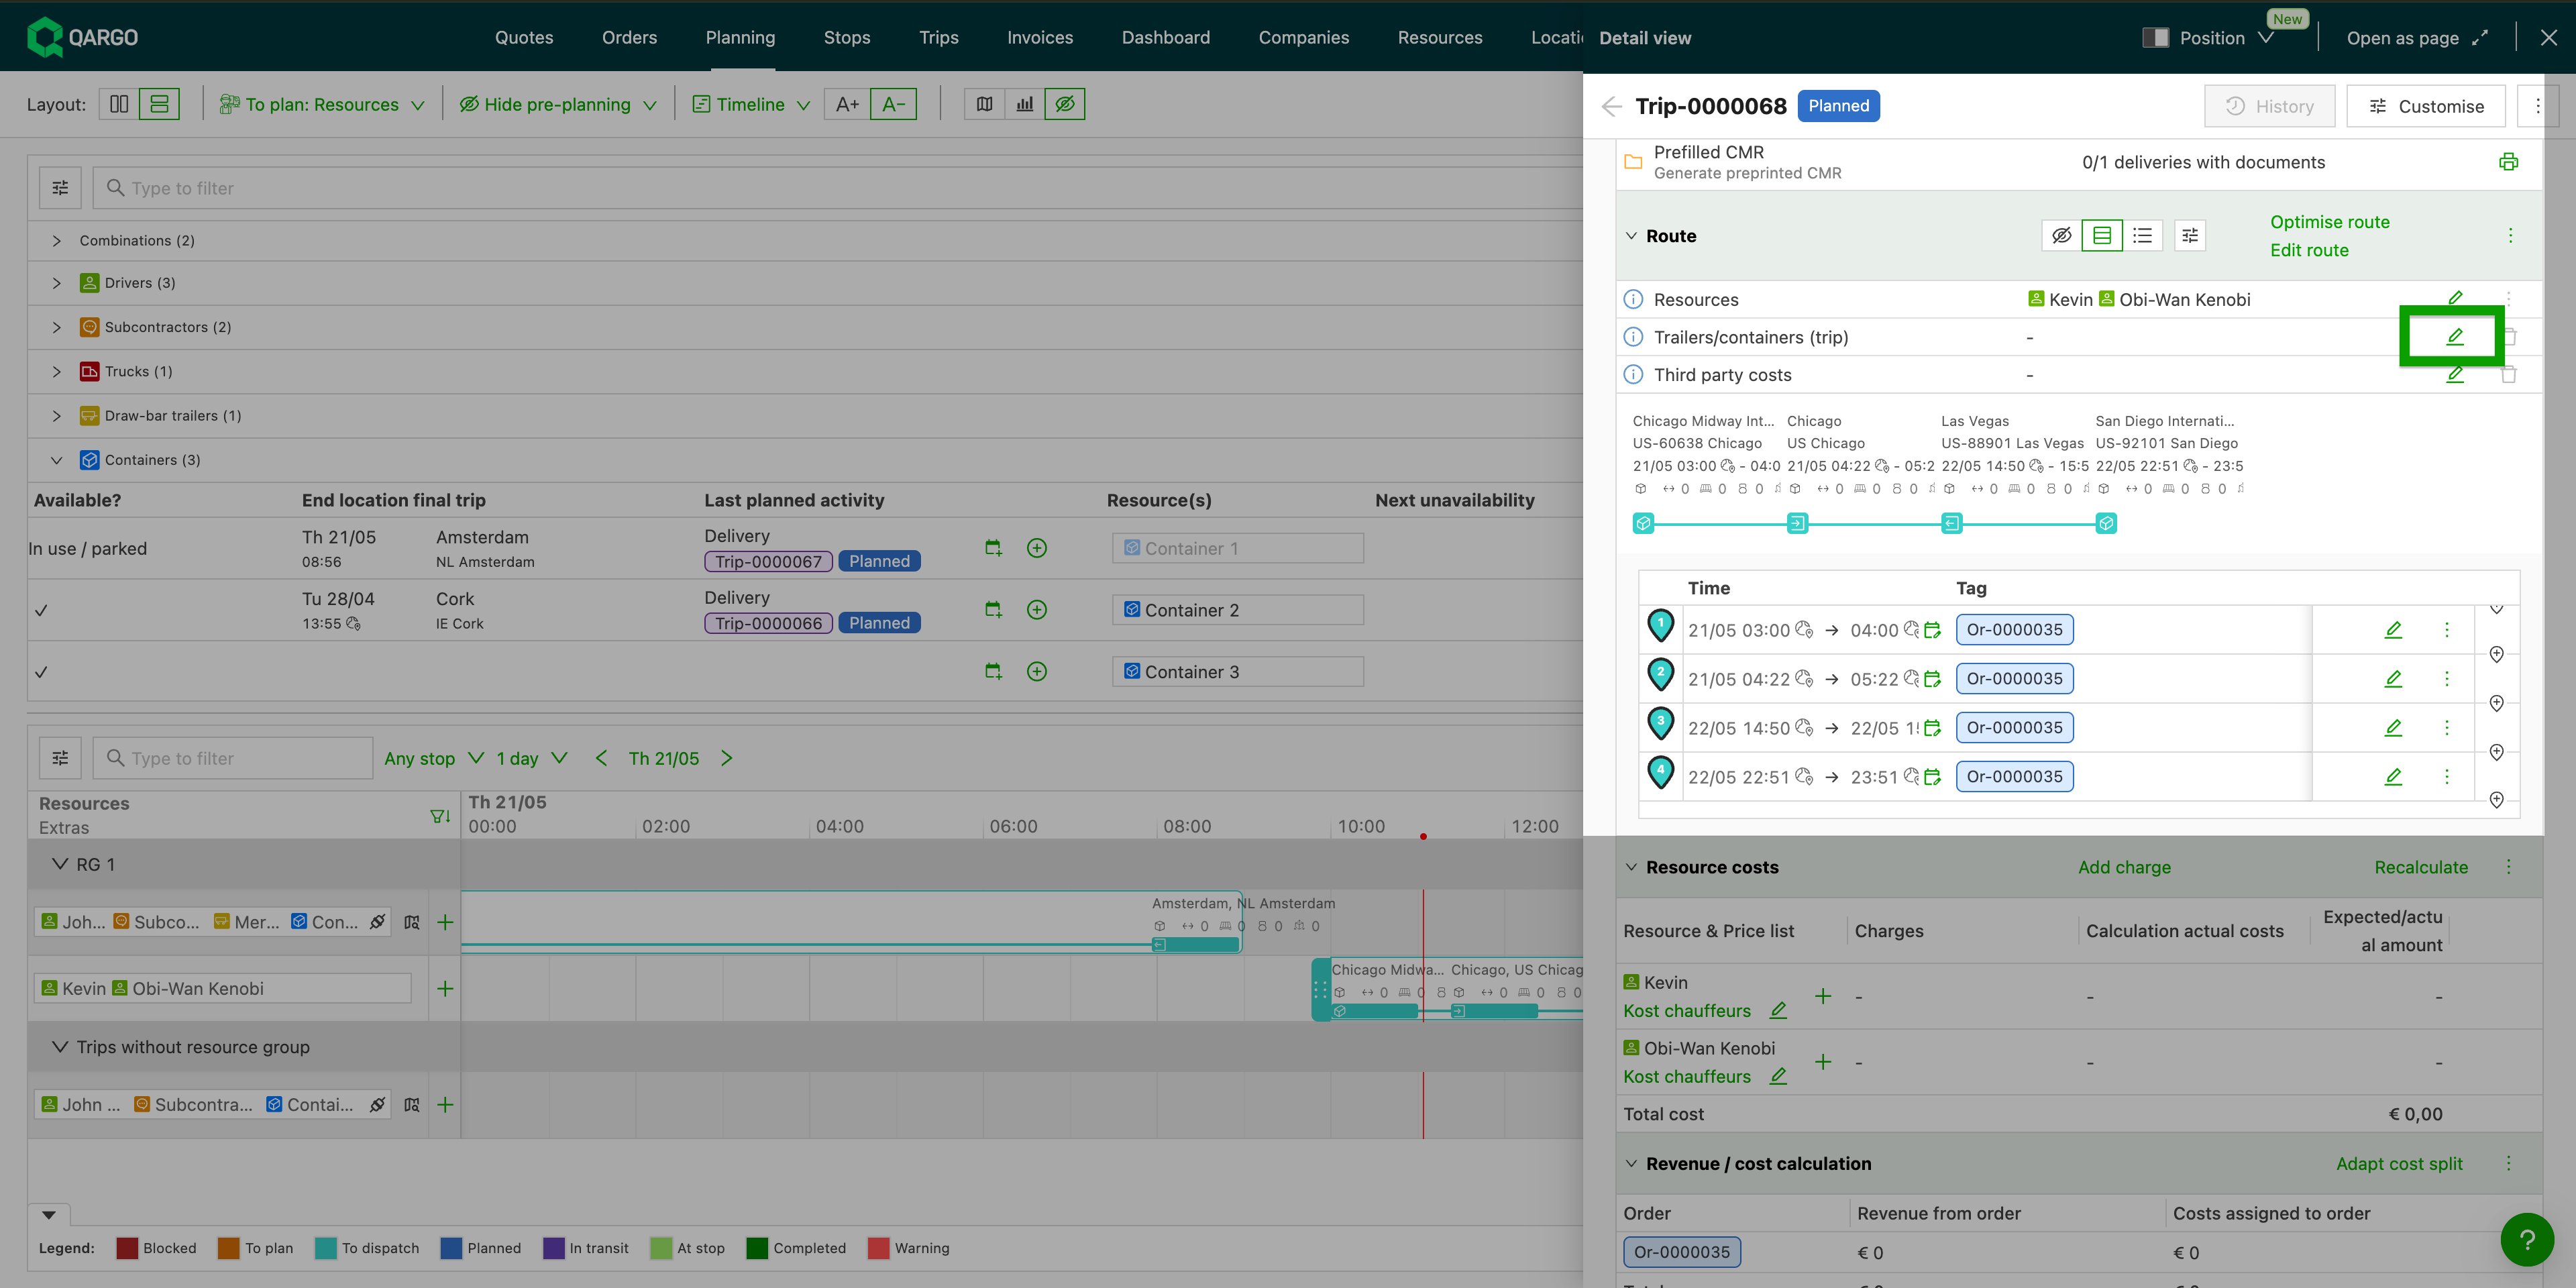
Click the edit icon next to Trailers/containers (load) in the Route section of the load detail.
-
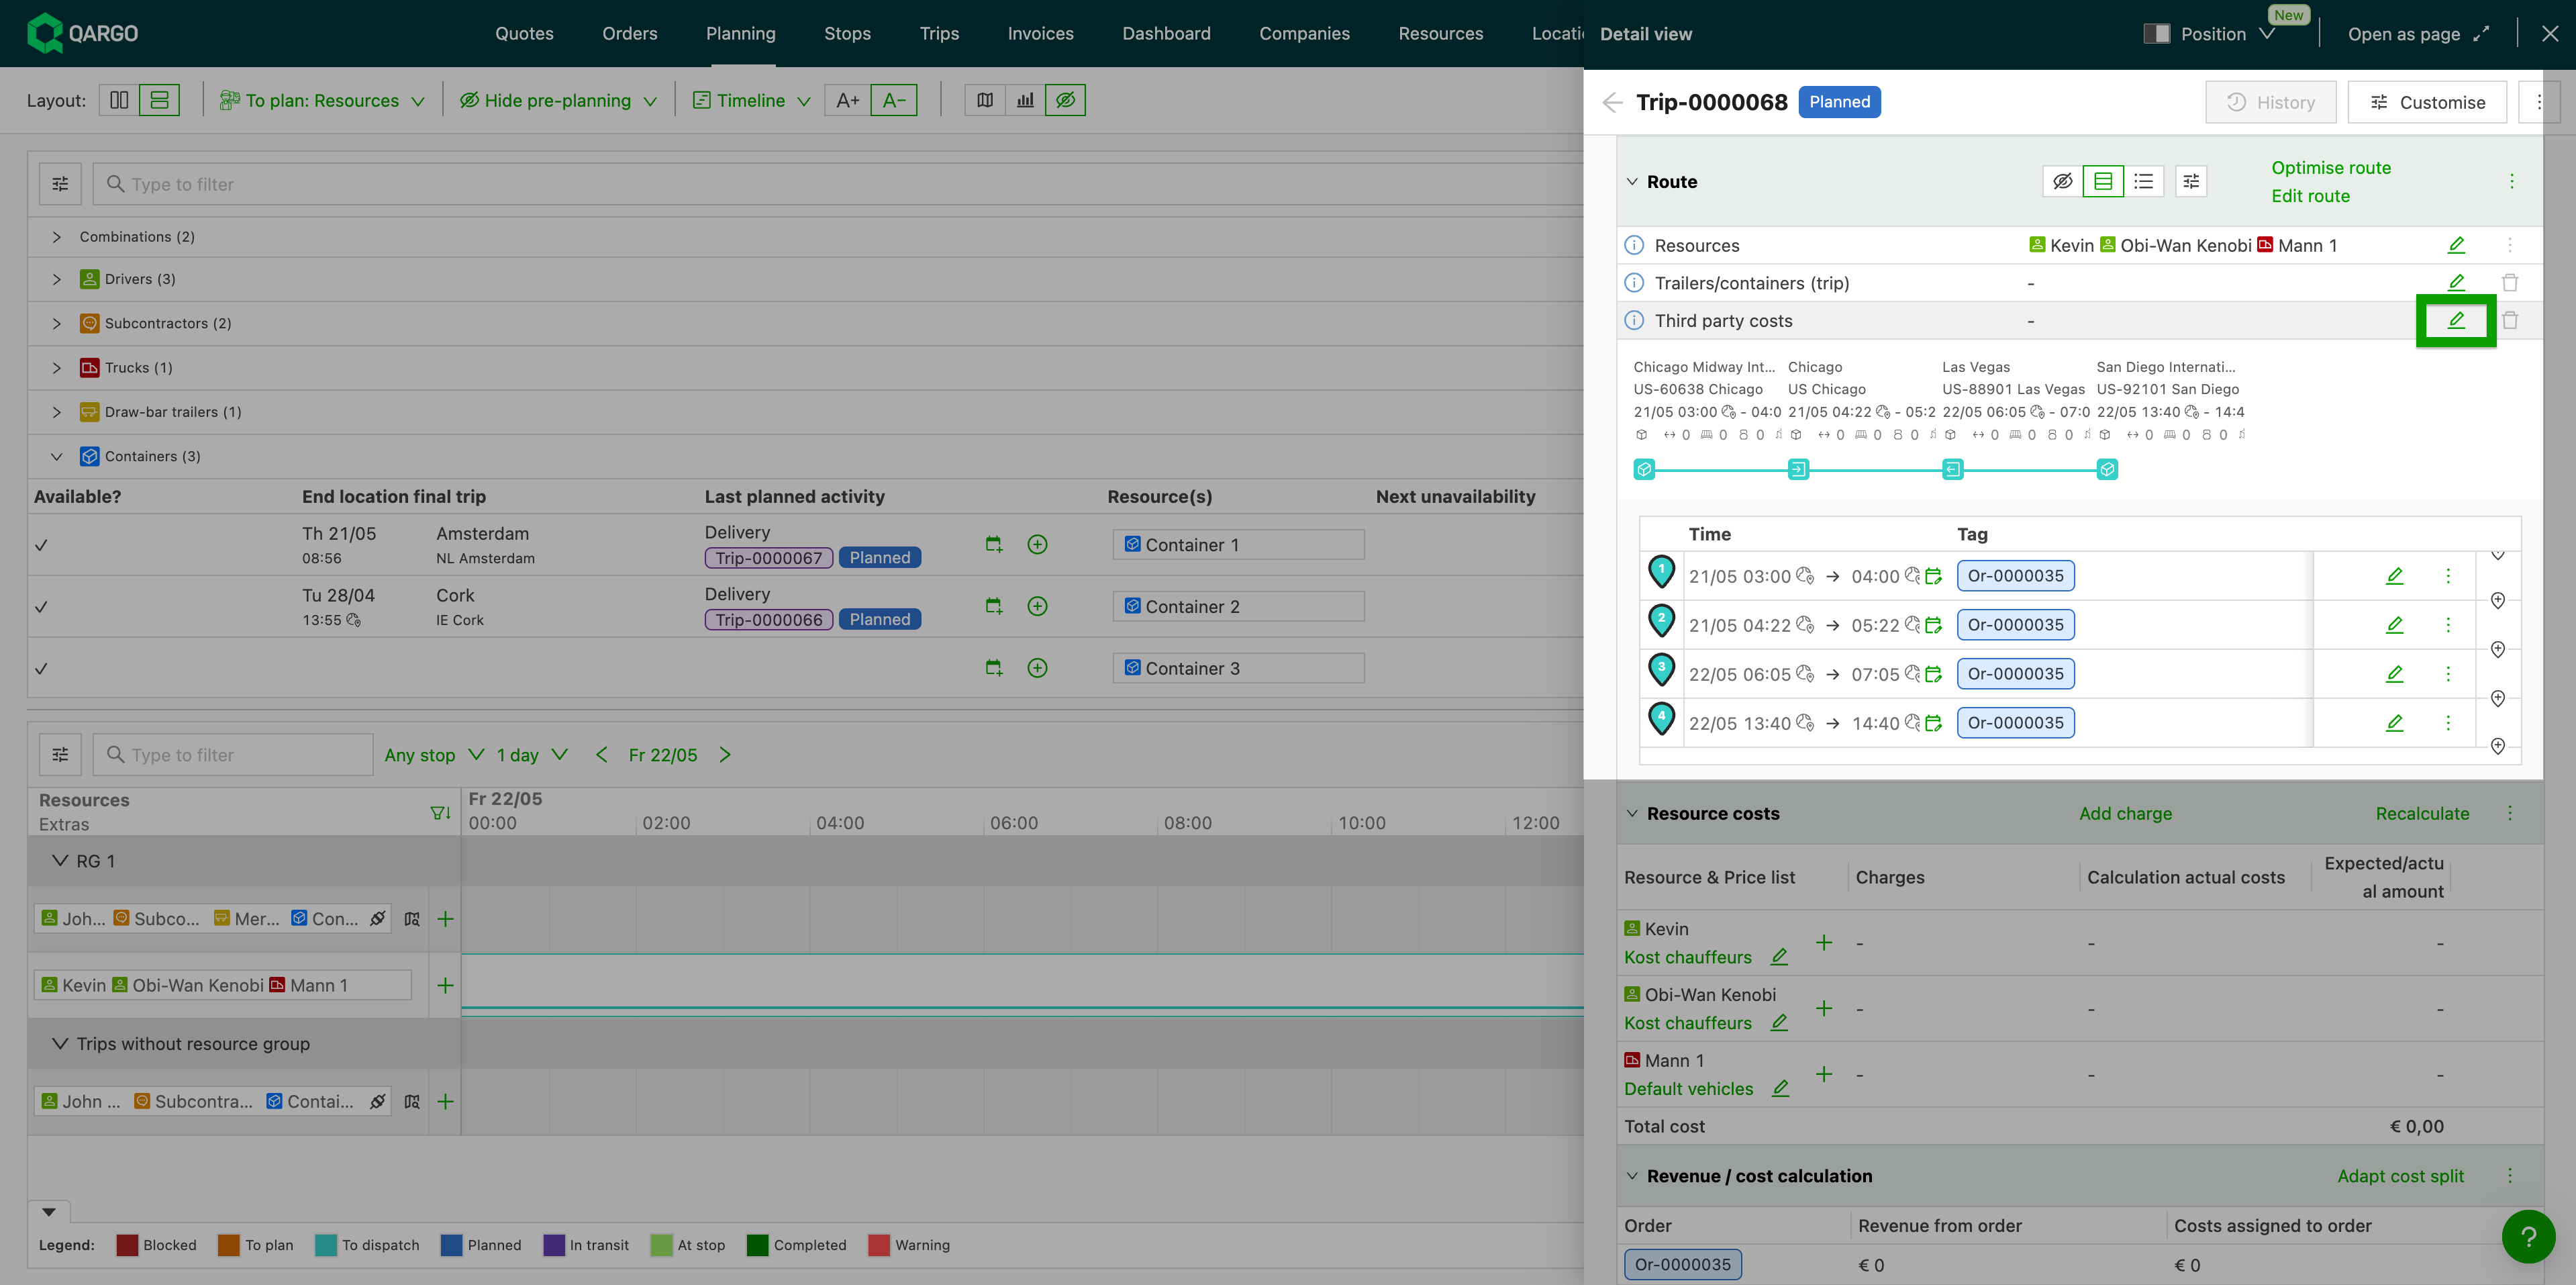
Use the Third-party costs section in the Route section of the load detail.
Set the start location
Use the Start location dropdown to choose where the assignment begins:
- Start load (default): assigned from the load’s first stop.
- Select stop on load: choose an existing stop as the starting point.
- Add new start stop to load: adds a new stop. Fill in Stop action, Duration, and Location to define it.
Set the end location
Use the End location dropdown to choose where the assignment ends. The options work the same way:
- End load (default): assigned until the load’s last stop.
- Select stop on load: choose an existing stop as the end point.
- Add new end stop to load: adds a new stop using the same inline fields.
Troubleshooting
| Issue | Solution |
|---|---|
| Load moved unexpectedly on the planning board | Switch to Sort by resource: resource name + loads: planned start time to keep loads in their planned positions. |
| Warning shown when removing a resource | Check whether the load is dispatched or has multiple orders. Confirm the removal only if it is intended. |
| Trailer/container covers the full load instead of specific stops | Use the edit icon next to Trailers/containers (load) to set specific start and end stops. |
Show final location in the Planboard location column
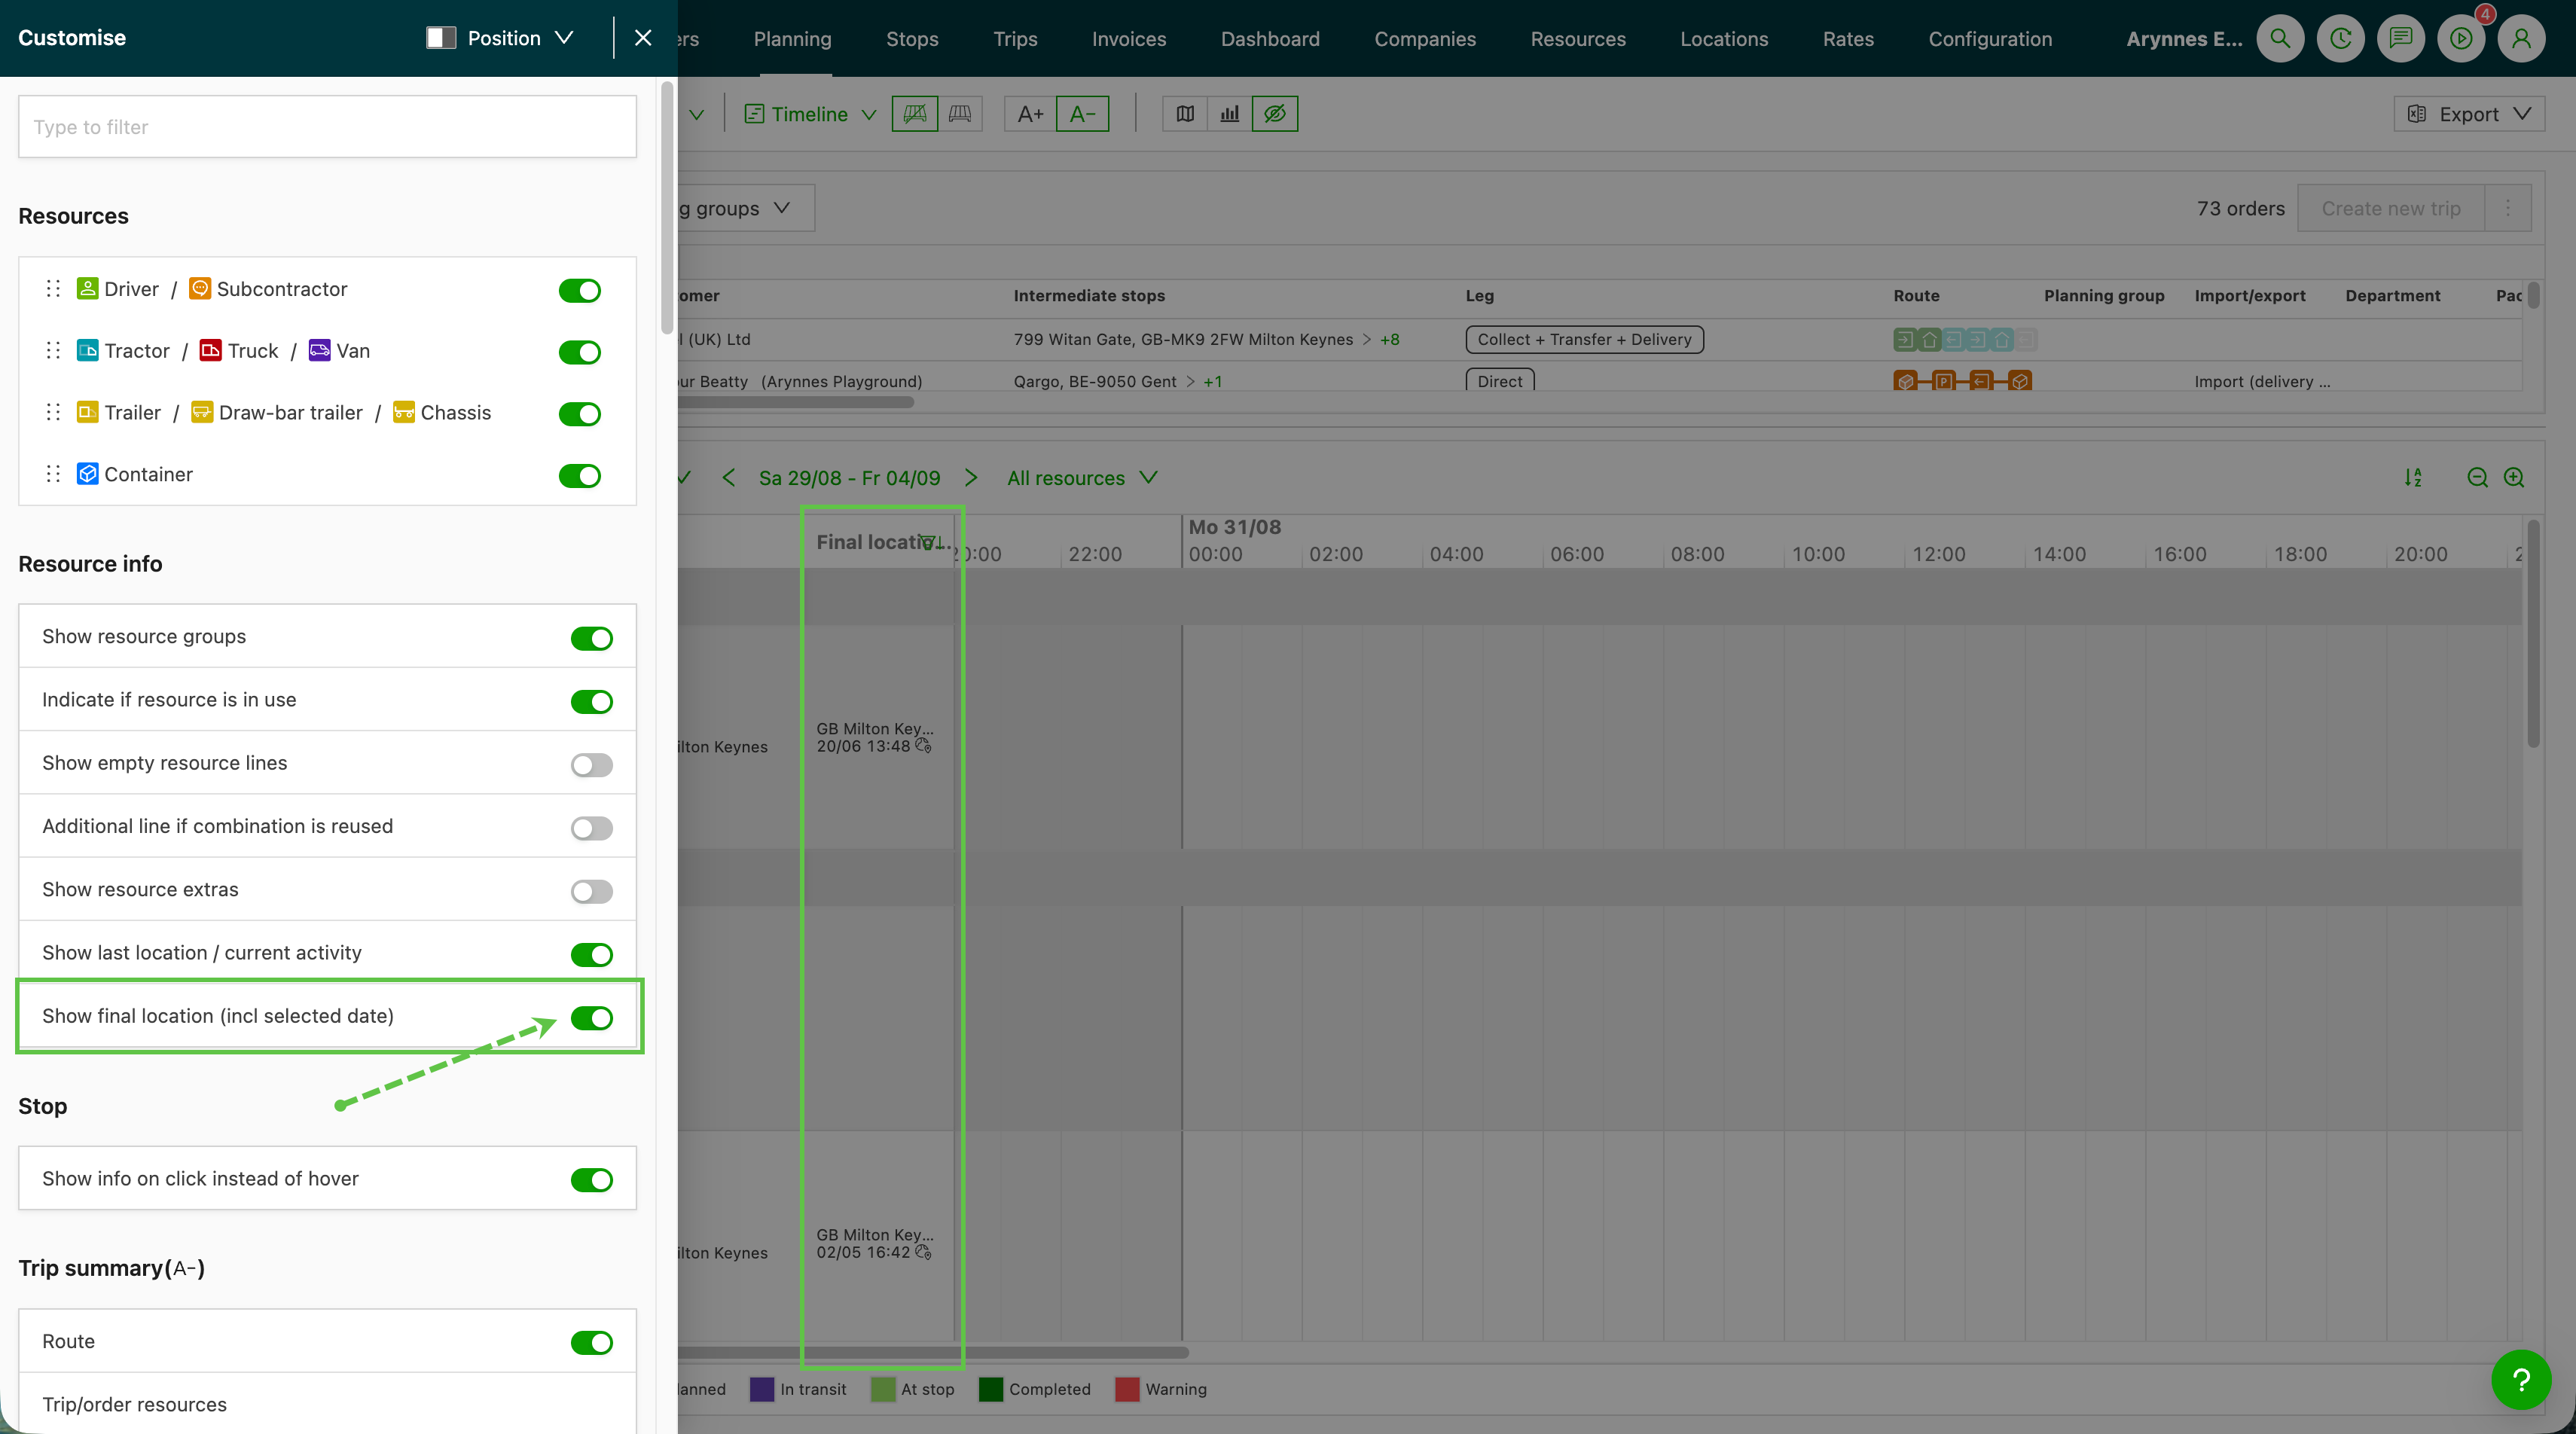
The Planboard location column can now show a driver’s final planned location for the selected day. Planners can then plan follow-up work from where the driver will actually finish.
Use cases
- Planners who open the day’s board first thing in the morning want to see where each driver will end up once the planned loads are taken into account, not only the current activity or last known location.
- When a driver has no load planned for the selected day, the column falls back to the last known location instead of staying blank. The driver’s position is always visible.
What the location column shows
The location column has two modes, selected per user in the Planboard customization panel:
- Show last location / current activity: the existing behavior. It shows the current activity for today and the last known location for future dates.
- Show final location: the new mode. It shows where the driver ends up on the selected day, taking the planned loads into account. If a load is planned in the selected period, the column shows the final planned location of those loads. If nothing is planned, it falls back to the last known location from before the period.
The column header also shows the date the location refers to (for example, before 3/17 or incl 3/18). Planners can see at a glance which day the displayed location applies to.
Set the location column mode
-
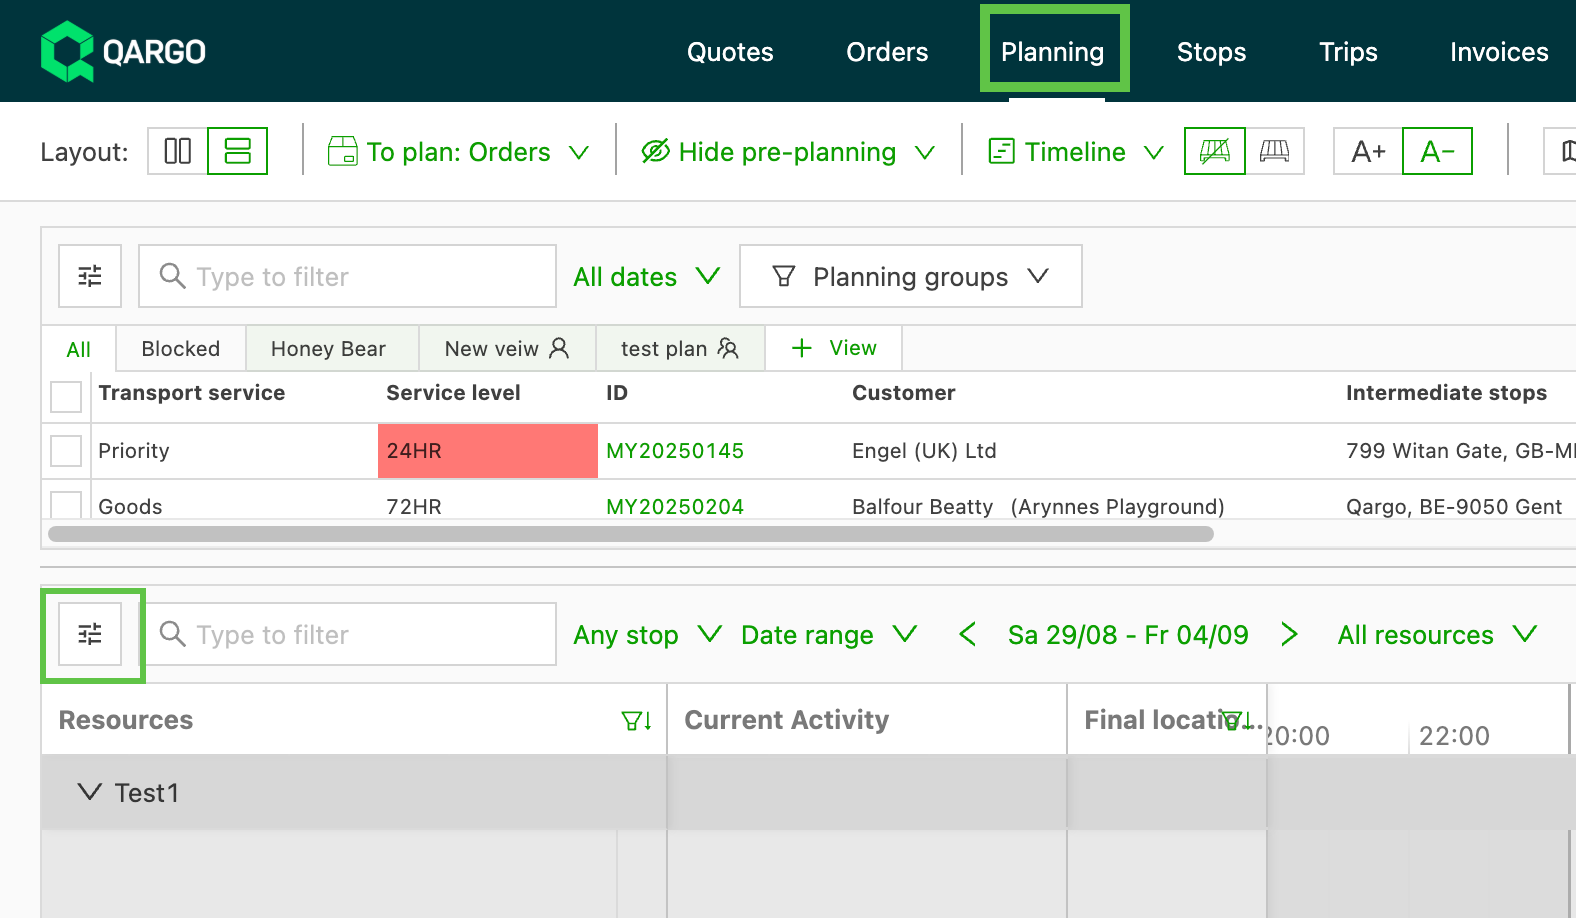
Navigate to the Planboard under Planning.
-
Open the customization panel with the Customize icon in the resources view, then go to Resource info.
-
Select the location column mode from the dropdown: Show last location / current activity or Show final location.
-
Review the location column and its header on the Planboard to confirm the selected mode and the date the location refers to.
The selected mode is saved per user, so each planner keeps their own preference.
Troubleshooting
| Issue | Resolution |
|---|---|
| The location column is blank in Show final location mode | No load is planned in the selected period and no last known location is available before it. Check that the driver has a planned load or a recorded previous location. |
| The mode change is not visible in other views | The mode applies only to the Planboard resources view. The location displays in the shipment list and timeline are unchanged. |
Auto-filled pickup location when adding a start stop
When an owned container or trailer is added in the Assign resources window, Qargo now fills in the pickup location: the place where that container or trailer was last dropped off. Users no longer have to look it up and type the address. The location appears as soon as the user picks the container or trailer, and it can always be changed, for example if the container needs to go to cleaning first. Users still choose where it is going, because that is usually the loading address.
Auto-fill in the load-level Assign resources window
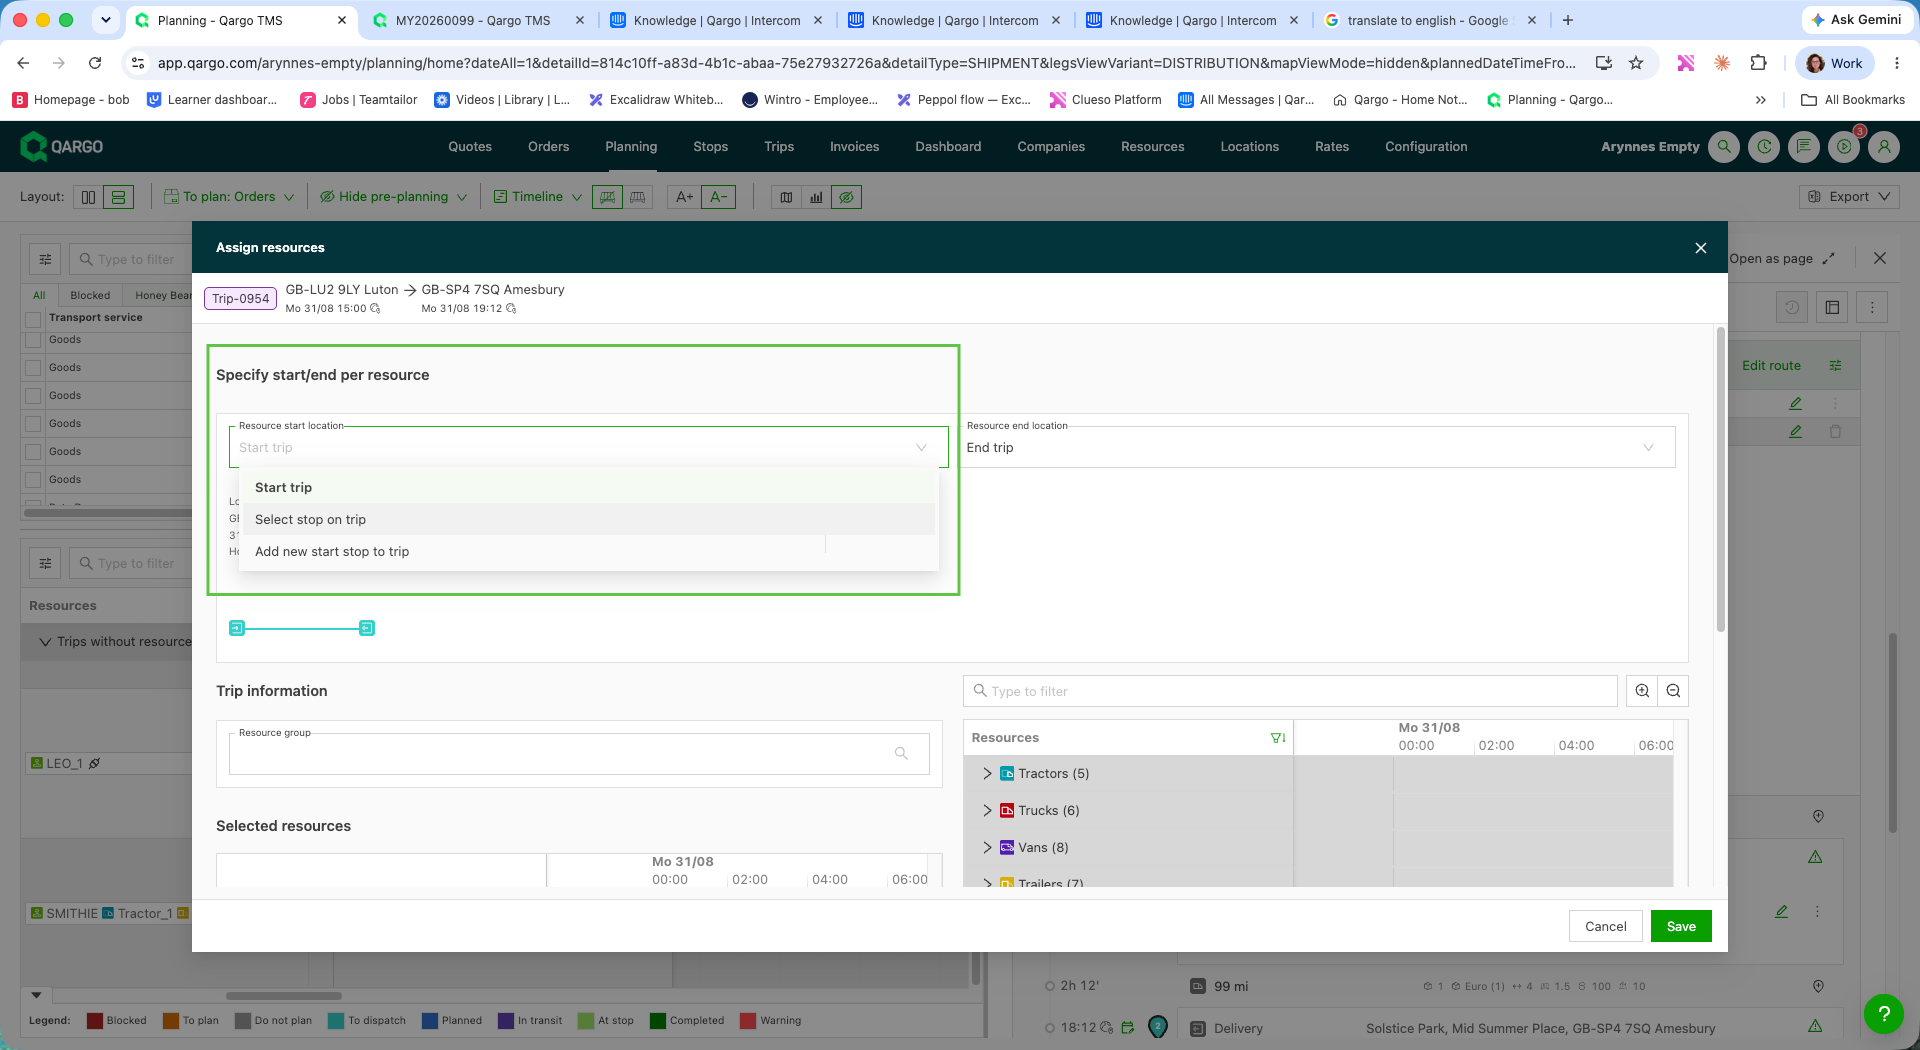
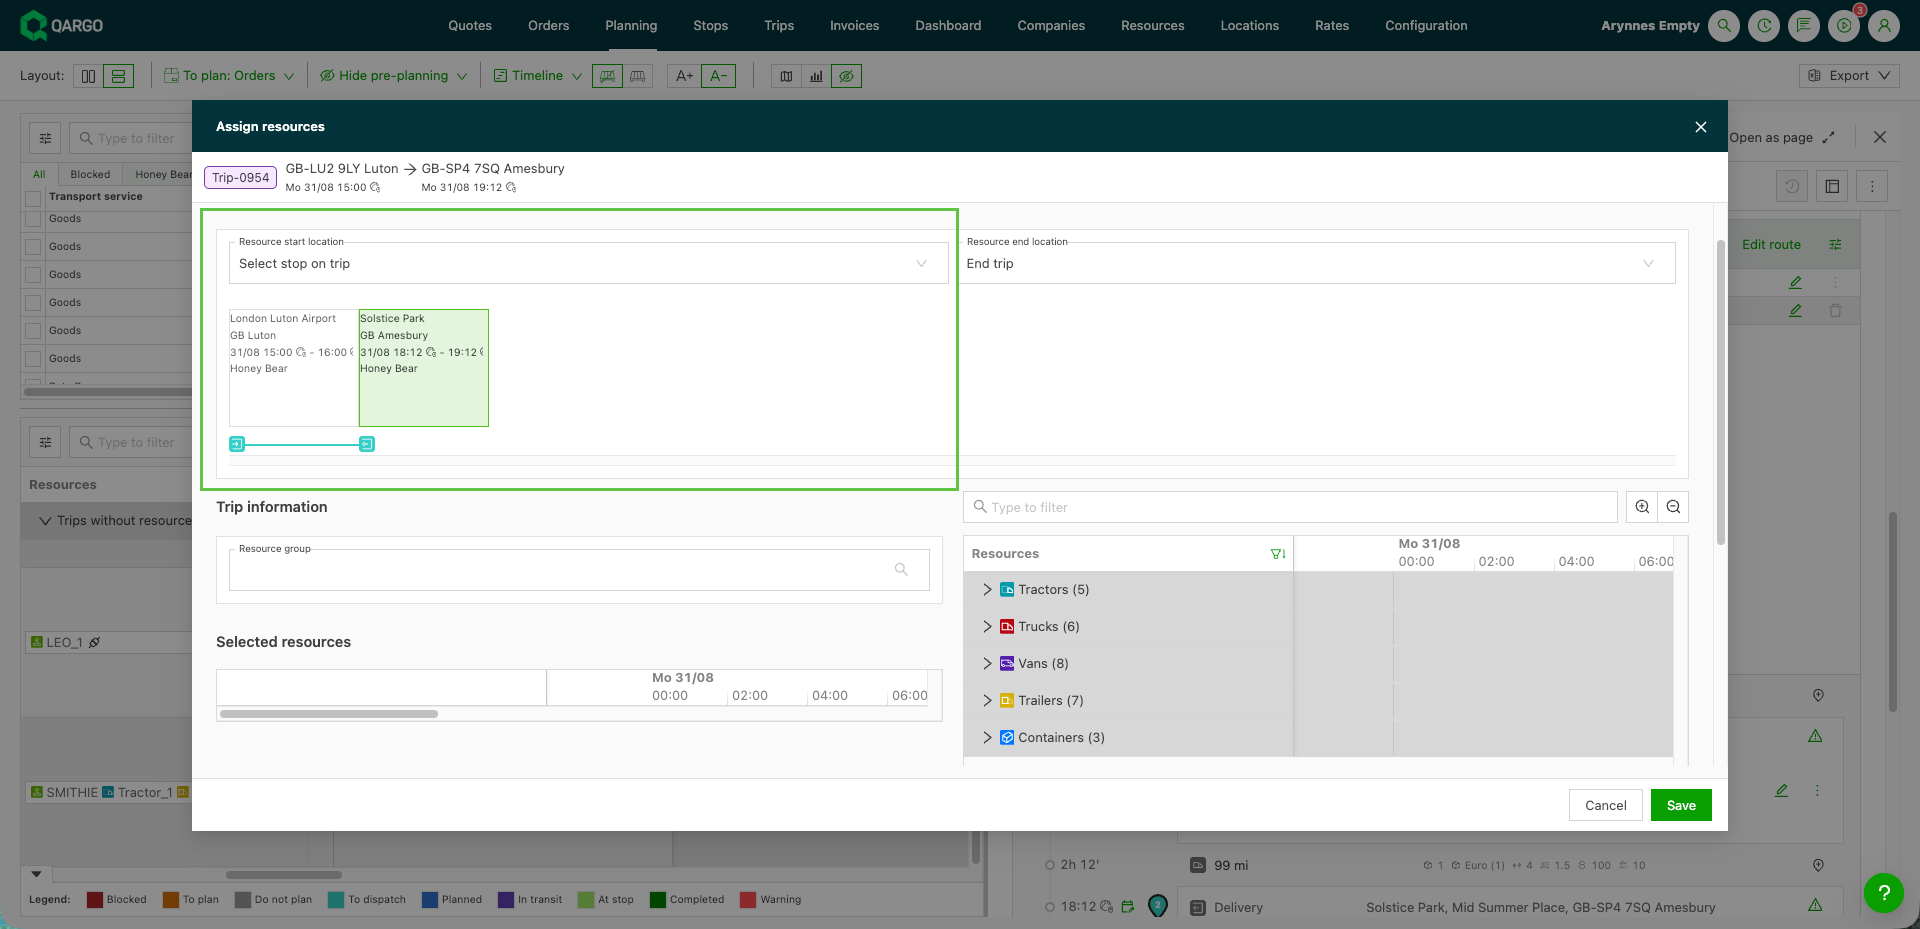
Resource start location offers Start load, Select stop on load, and Add new start stop to load.
- Open the Assign resources window on the load.
- Select Add new start stop to load in the Resource start location dropdown. The stop form opens with Location still empty.
- Select the container or trailer in the Resources list on the right. Qargo fills in Location with that resource’s last drop-off location.
- Check Activity, which defaults to Hook empty trailer, then confirm the proposed Location, or change it if the resource needs to go somewhere else first, for example to cleaning.
- Save the window.
Auto-fill in the order-level Assign resources window
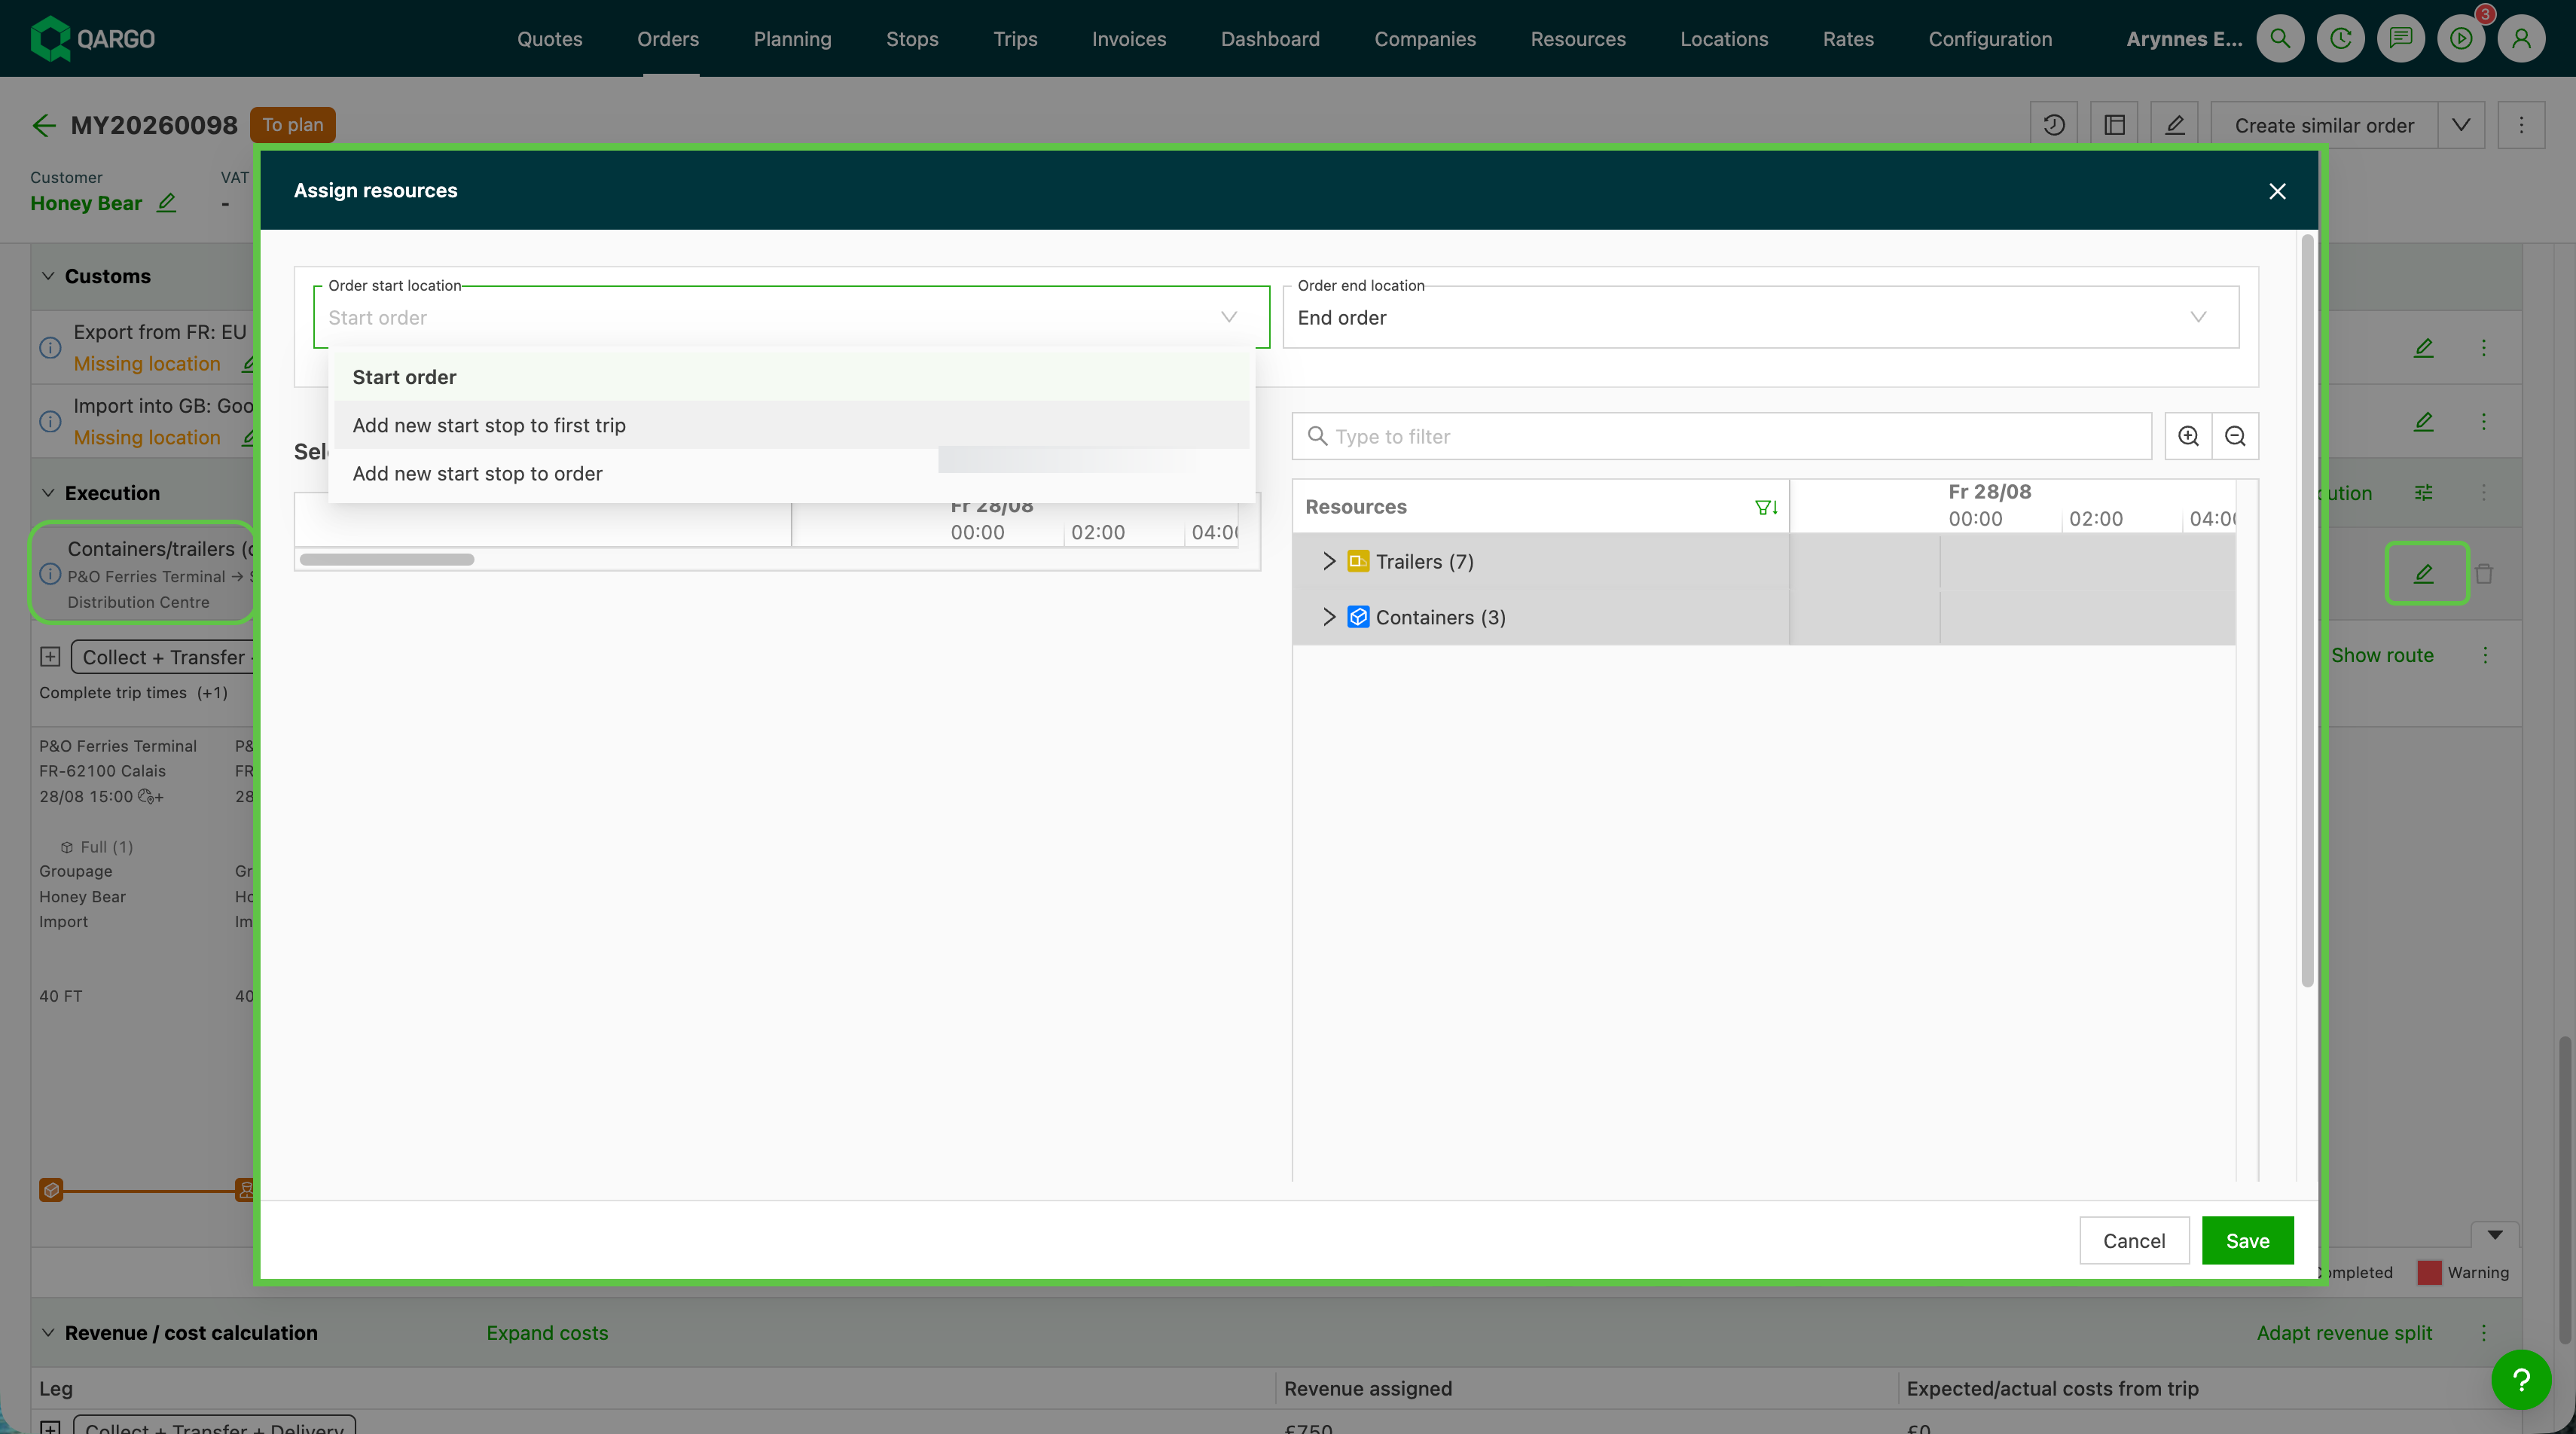
The order-level Assign resources window now includes Order start location and Order end location dropdowns, alongside the equivalent dropdowns in the load-level window. The options differ slightly, because an order can contain more than one load.
-
Order start location offers Start order, Add new start stop to first load, and Add new start stop to order.
-
Order end location offers End order, Add new end stop to last load, and Add new end stop to order.
- Open the Assign resources window on the order.
- Select Add new start stop to order in the Order start location dropdown. This adds the pickup stop to the start of the order’s first load. The stop form opens with Location still empty.
- Select the container or trailer in the Resources list. Qargo fills in Location with that resource’s last drop-off location.
- Check Activity, then confirm the proposed Location, or override it as needed.
- Save the window.