
1. Configuring Email Intelligence in Qargo.
Set up linked mailboxes in a Qargo tenant, including individual and shared mailboxes, and distribution lists.
Table of contents
This article explains how to configure Qargo to send emails from a company’s own domain/mailbox instead of no-reply@qargo.com. Once the mailbox is linked, the system automatically detects it when completing email tasks. It then sends the emails from that mailbox. A mailbox can only be linked to one tenant at a time.
The configuration differs depending on the type of mailbox in use. Click the relevant mailbox type for more details.
- Individual (normal) mailboxes
- Shared mailboxes – connect directly
- Shared mailboxes – with forwarding
- Distribution lists
Individual mailbox.
-
Go to User Settings in the user configuration section.

-
Go to Linked Mailboxes.
-
Click Link New Mailbox.

-
Qargo then asks for the email address to add. Currently, only Microsoft 365/Exchange (Outlook) mailboxes can be linked (not Gmail).
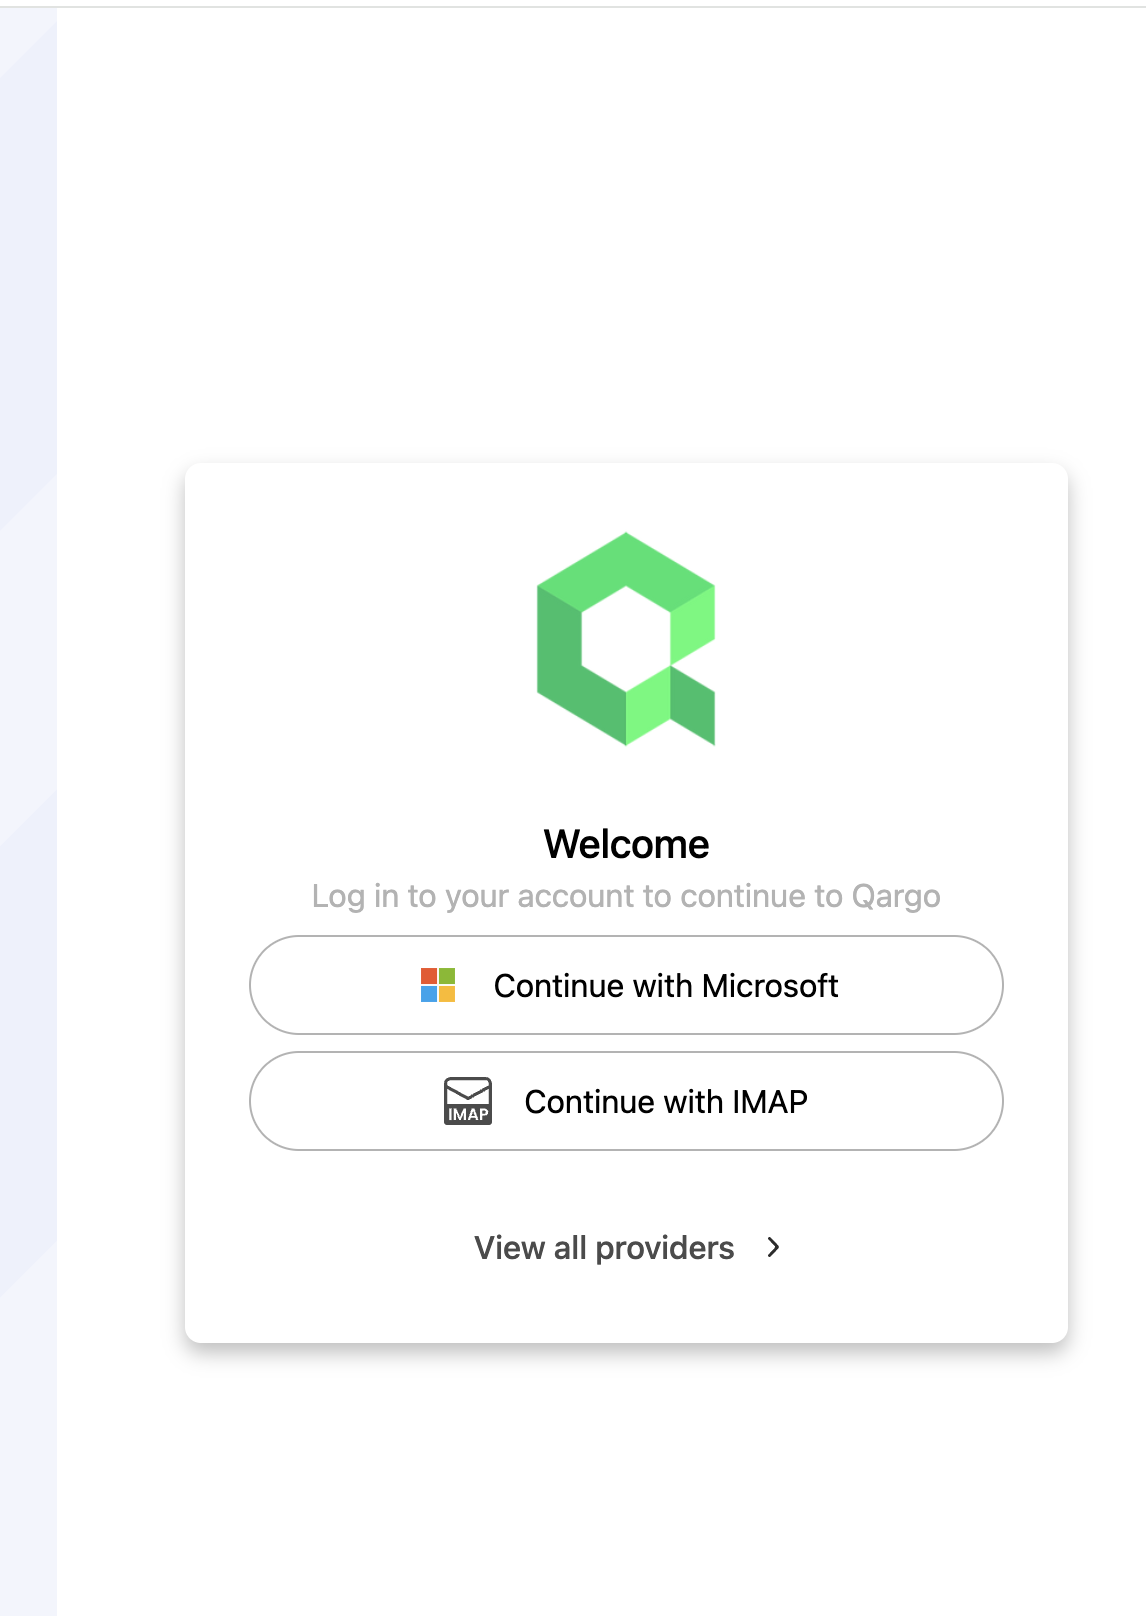
5. Confirm any permissions required by the email provider. This authorizes the Qargo API to use the mailbox. A login screen may appear and ask for credentials.
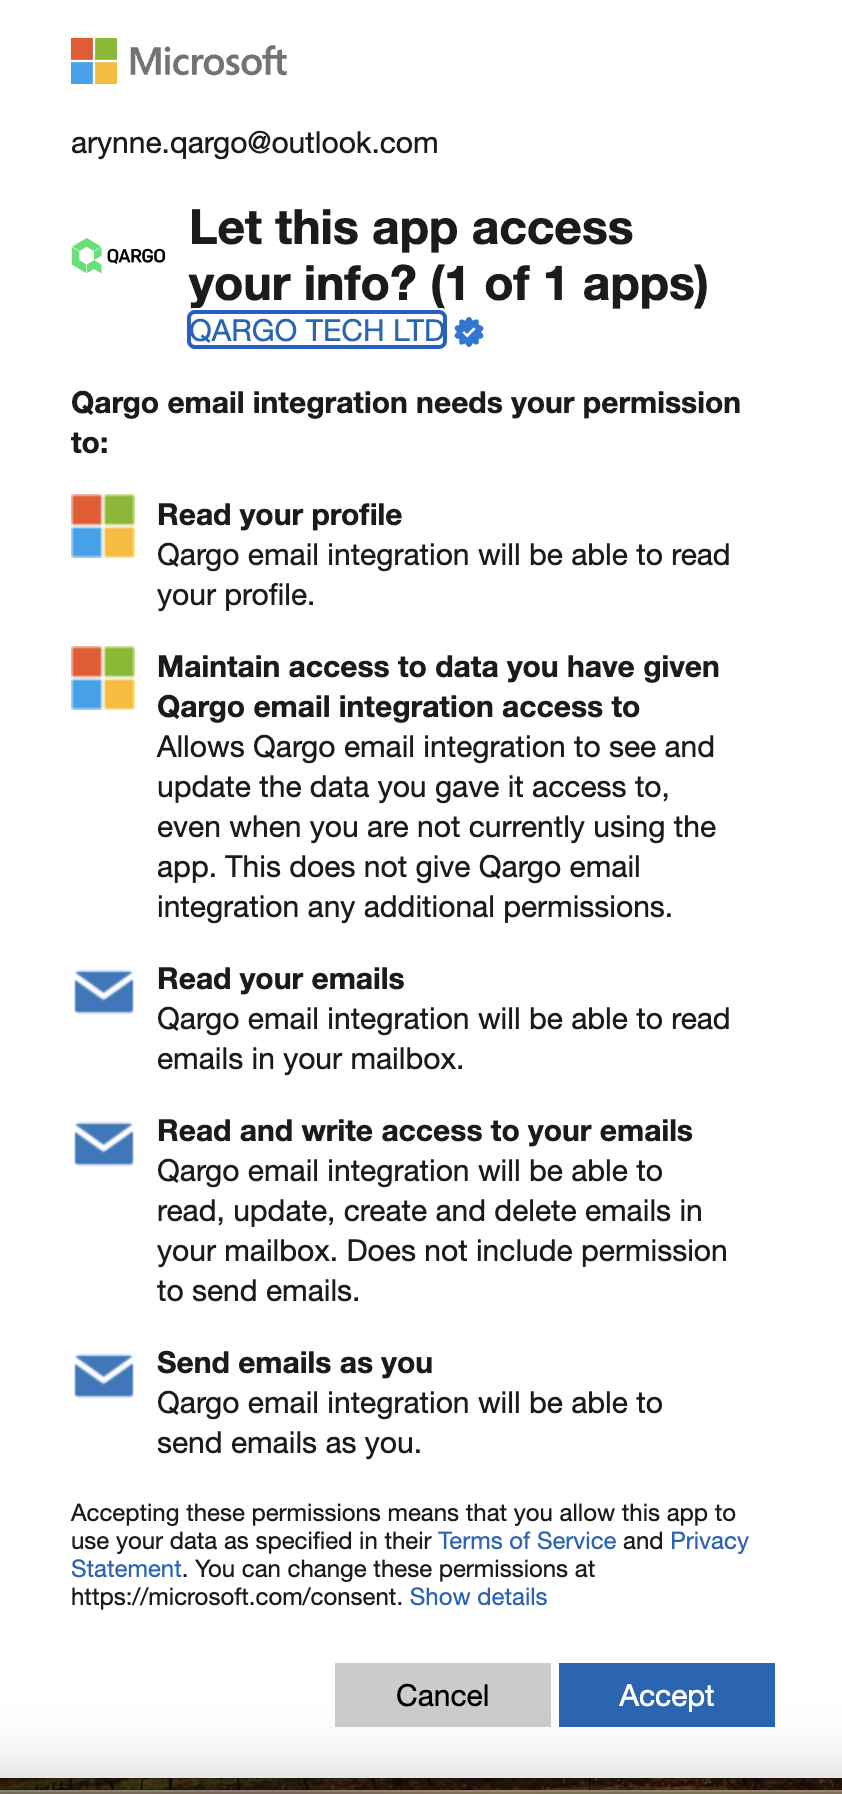
Once authorized, the user is redirected back to Qargo, and the email address appears in Linked Mailboxes. The API Link Status should be highlighted green: ‘Linked’.

Next steps:
Verify the email configuration for tasks. Click here.
Download the Outlook extension. Click here.
Create and link orders from emails. Click here.
Shared mailbox: connect directly
1.) Follow the steps above to link the new mailbox.
2.) Create a password for the shared mailbox by clicking the reset password button.
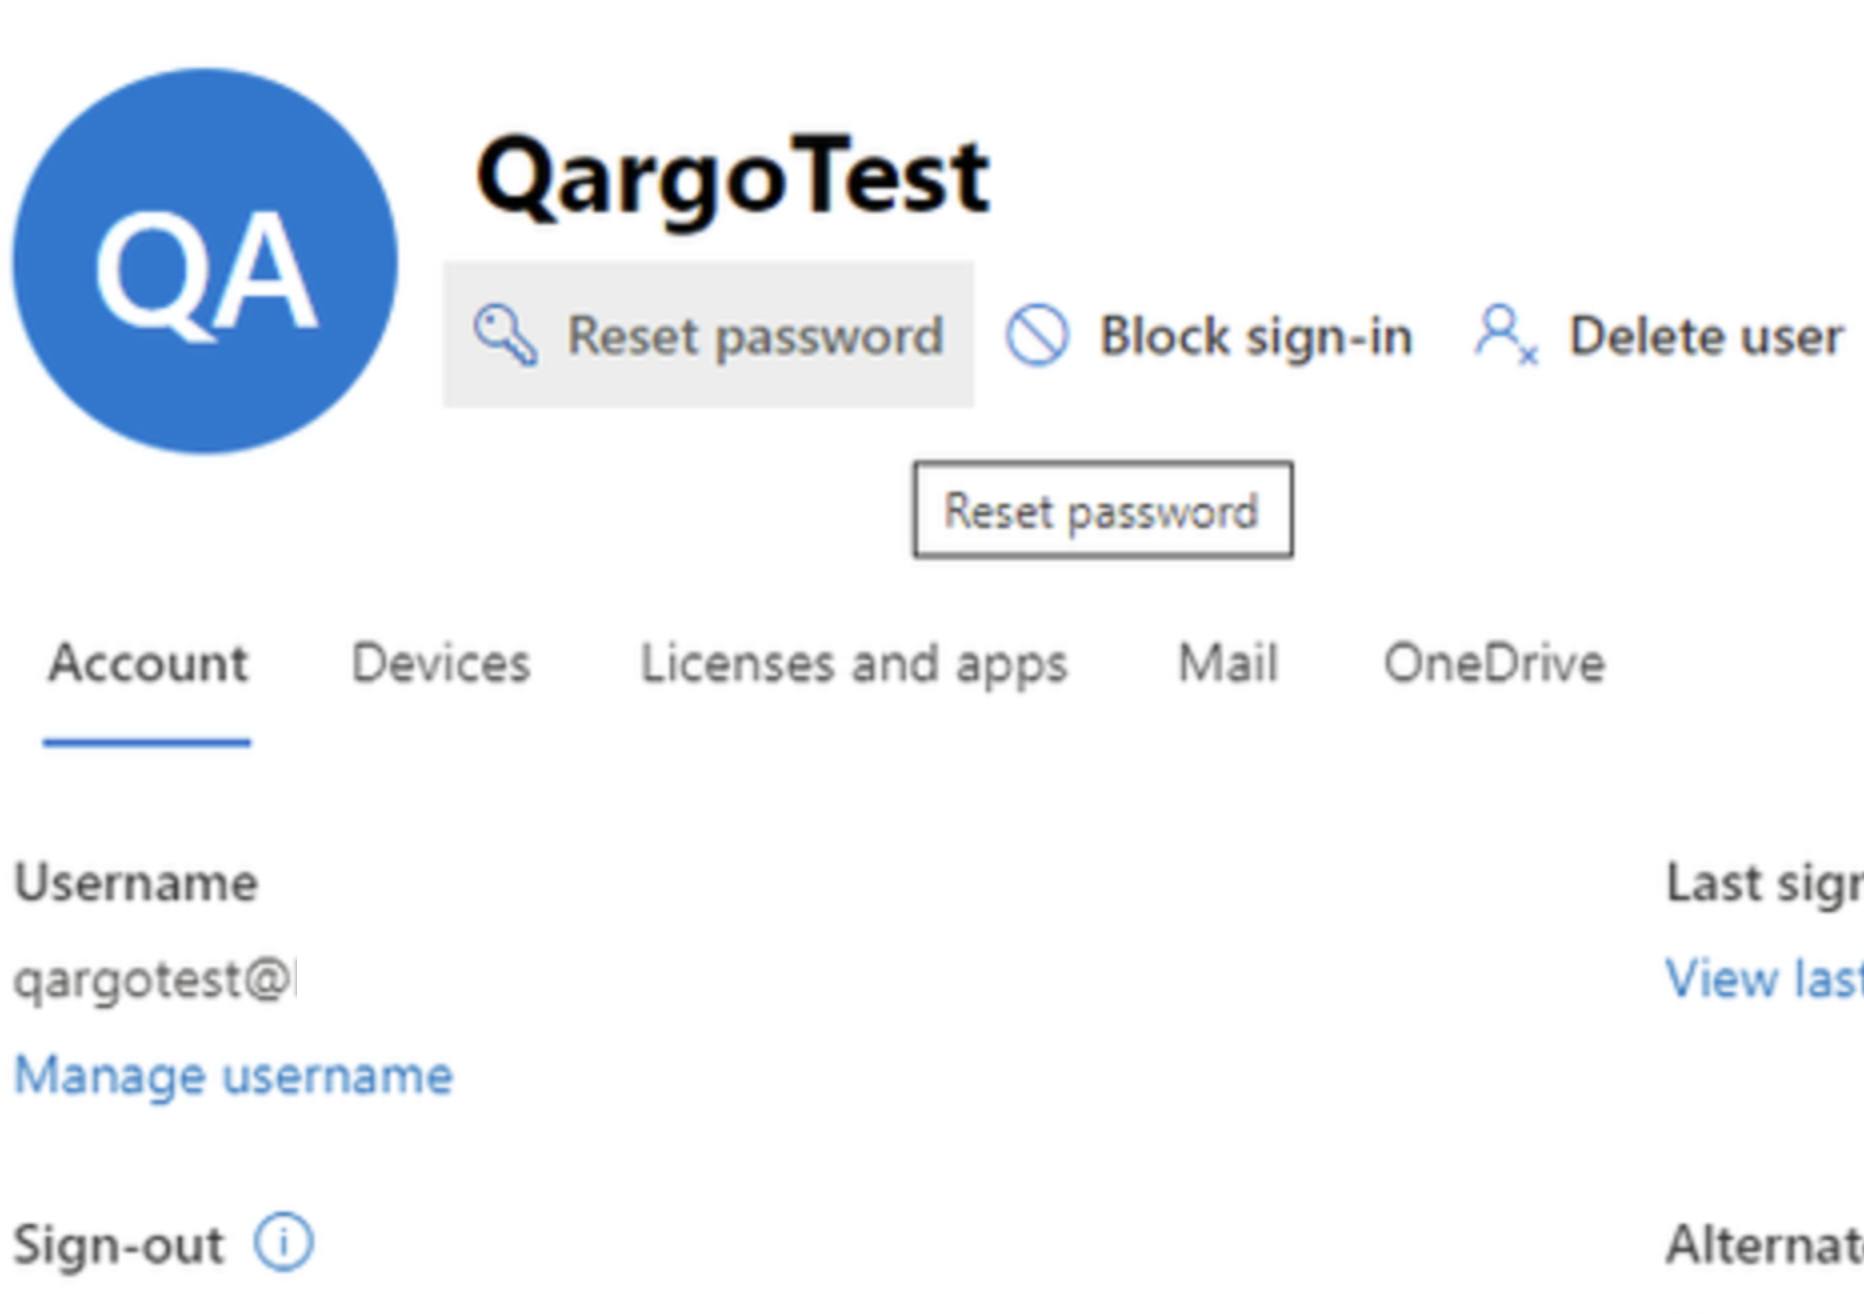
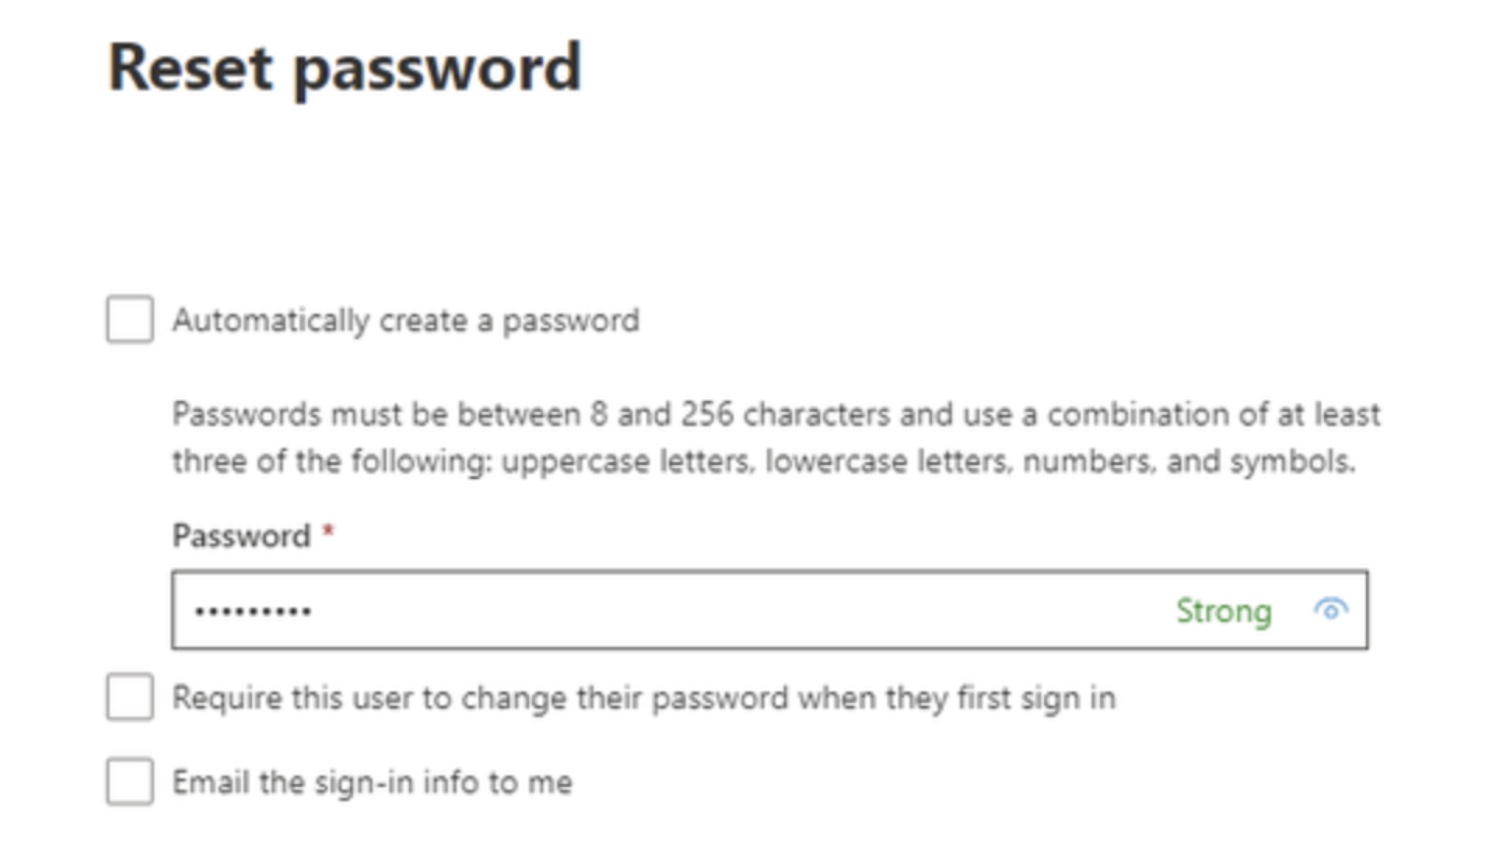
Link the mailbox in Qargo:

Select Delegation, click edit for ‘send as’, and add the mailbox to use as a sender.
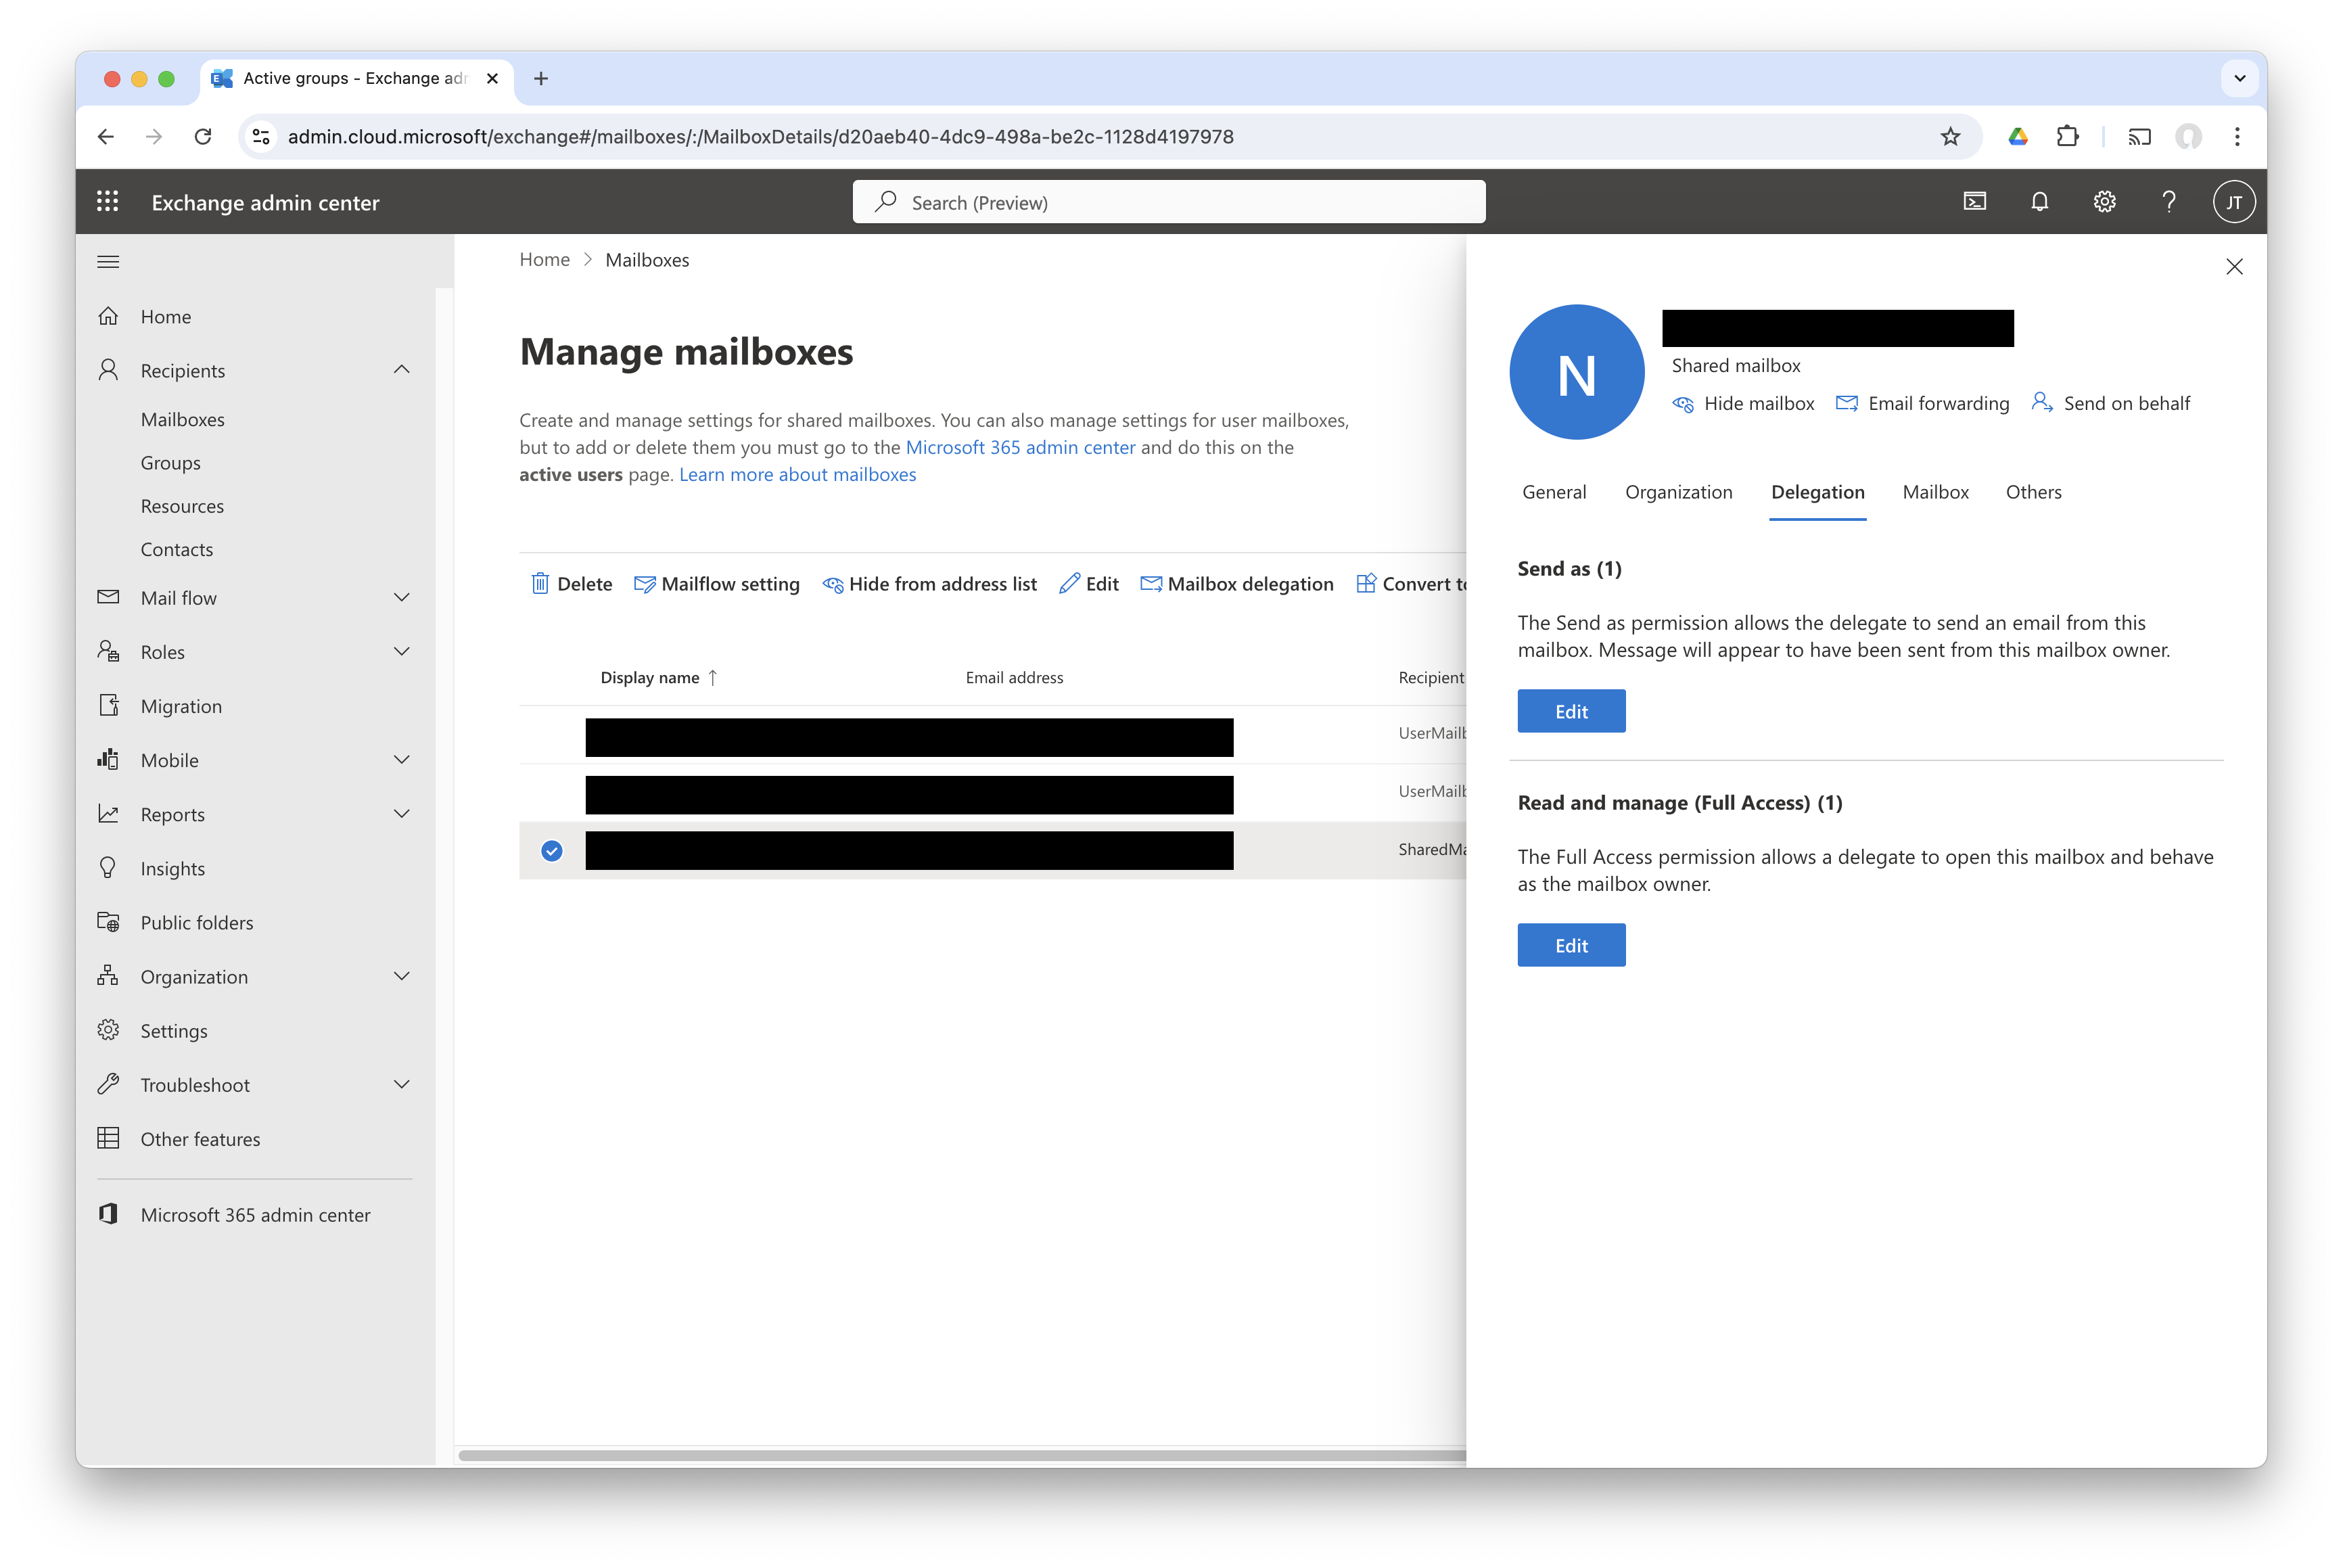
Next steps:
Verify the email configuration for tasks. Click here.
Download the Outlook extension. Click here.
Create and link orders from emails. Click here.
Shared mailbox: work with forwarding
To avoid connecting directly to a shared mailbox, set up an individual mailbox to link with Qargo.
Go to the shared mailbox settings in the Exchange admin console. Select Delegation, click edit for ‘send as’, and add the mailbox as a sender.
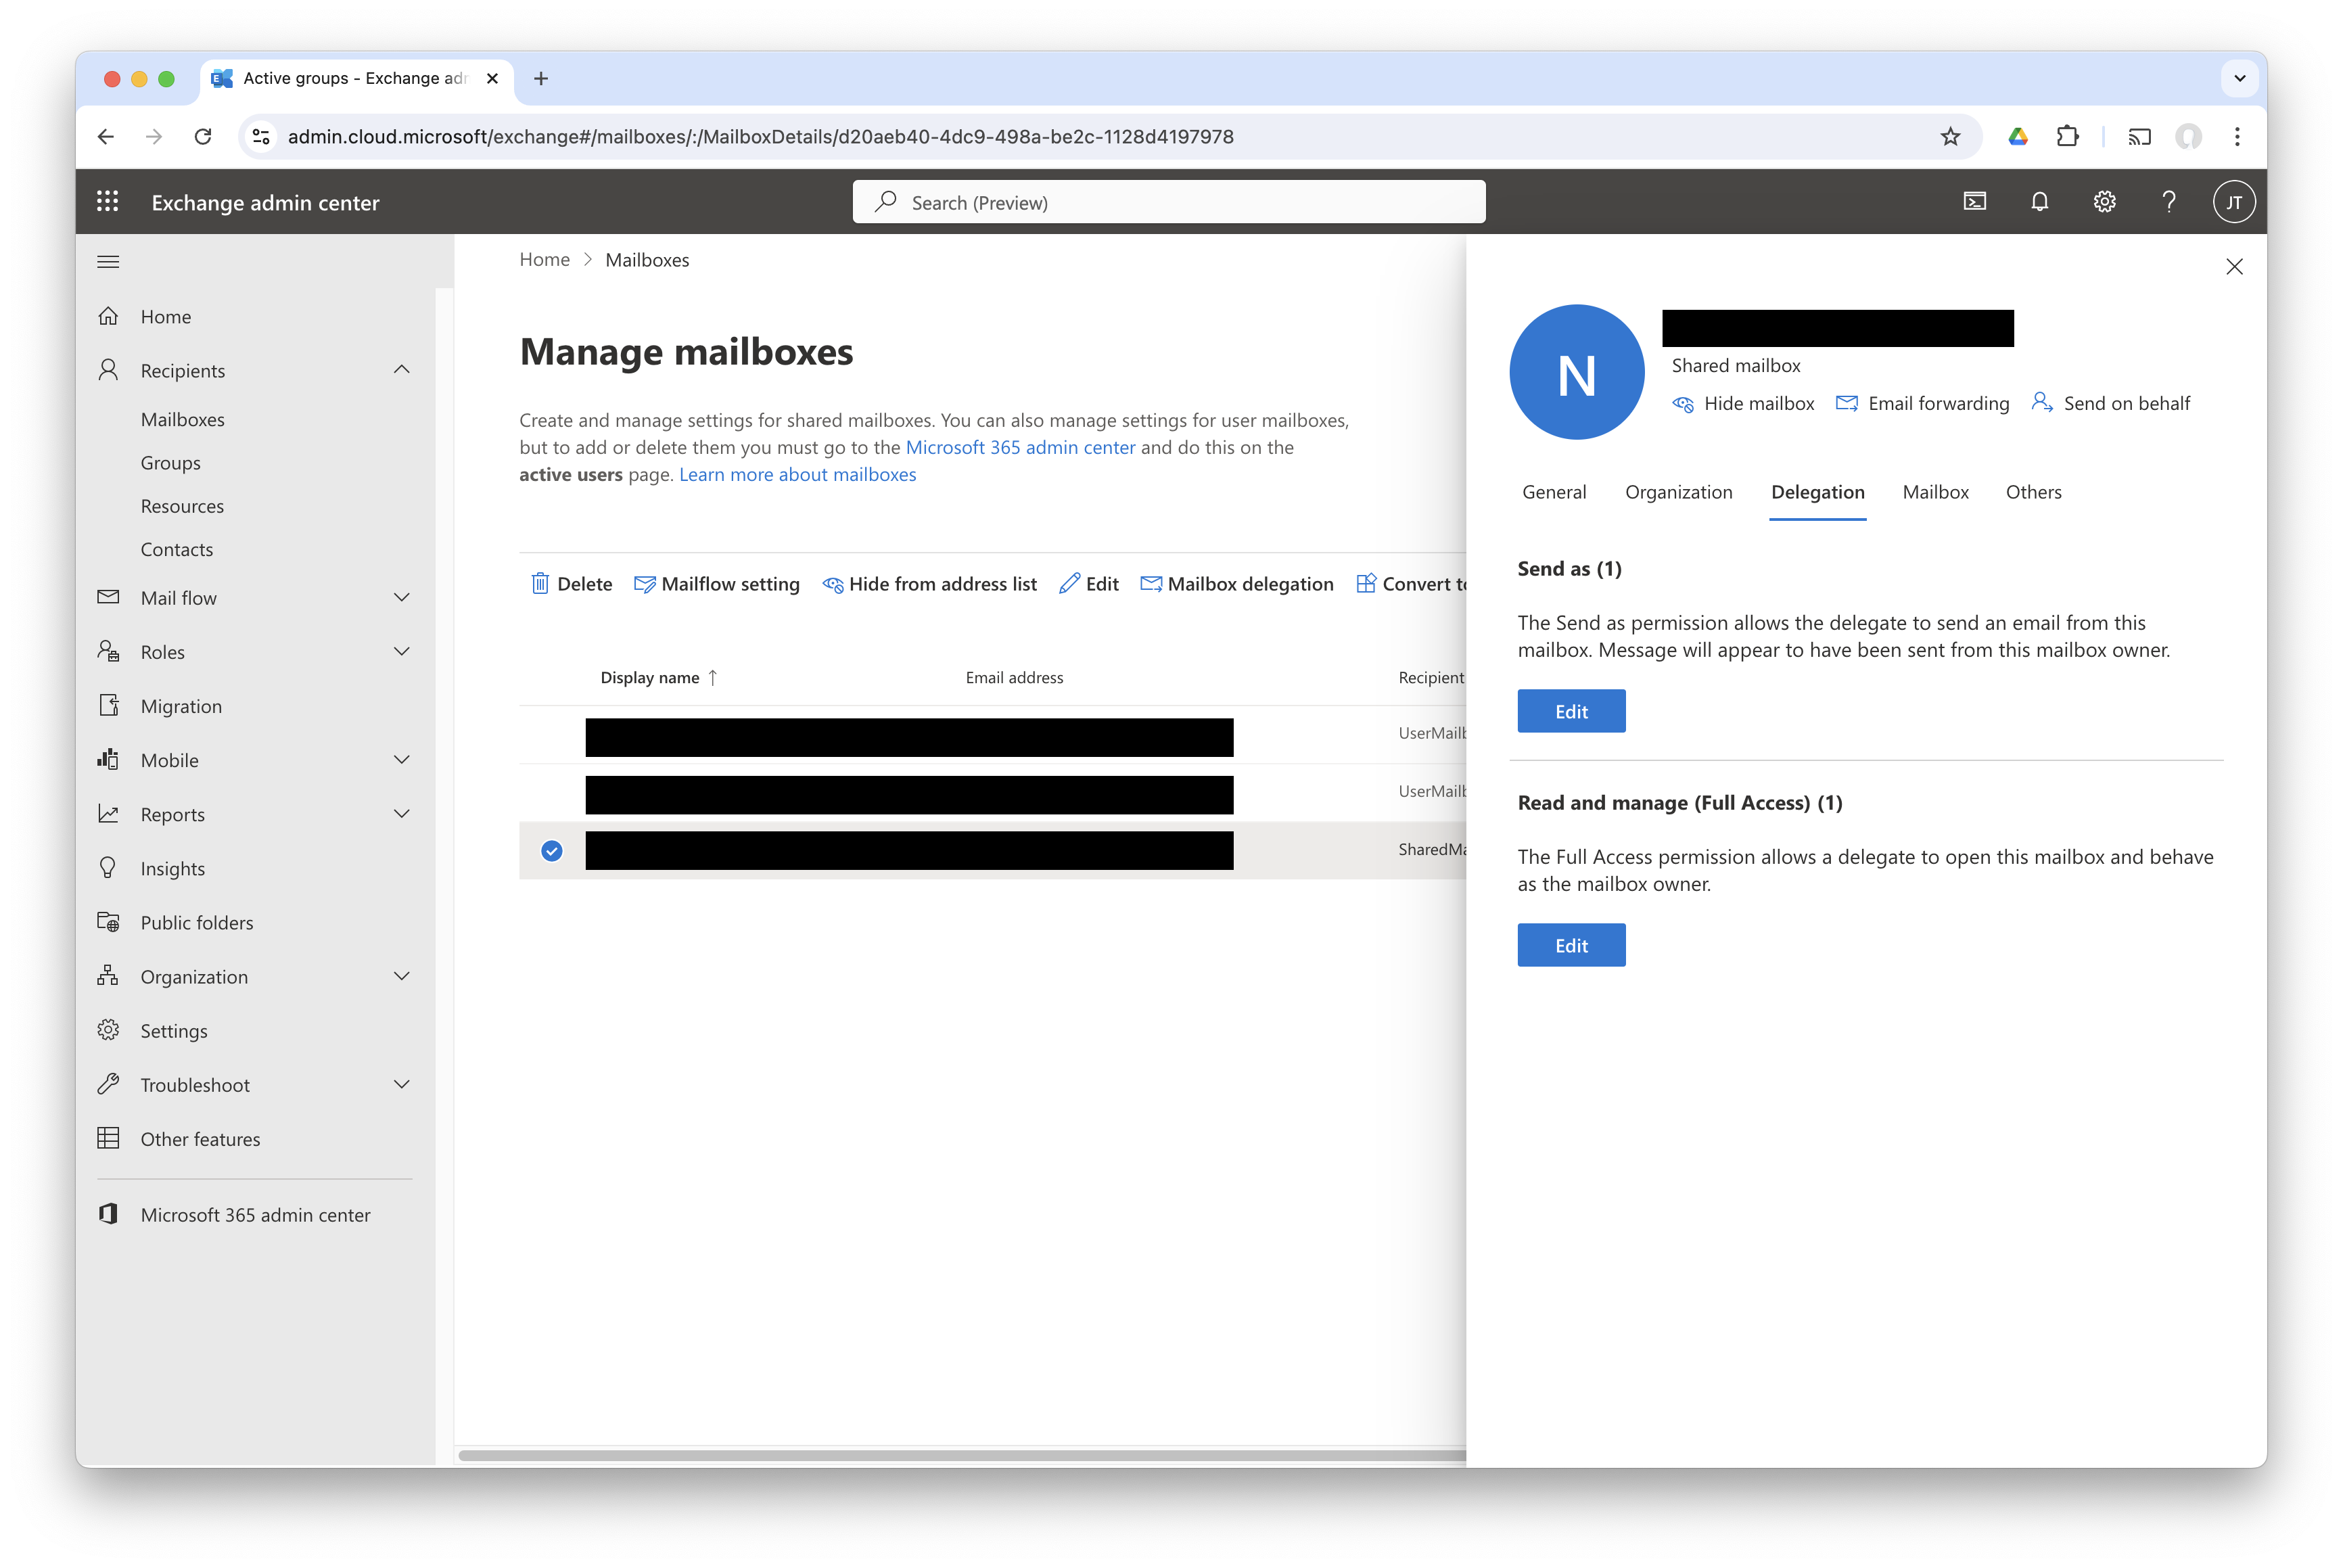
Also make sure incoming emails to the shared mailbox are forwarded to the individual mailbox:
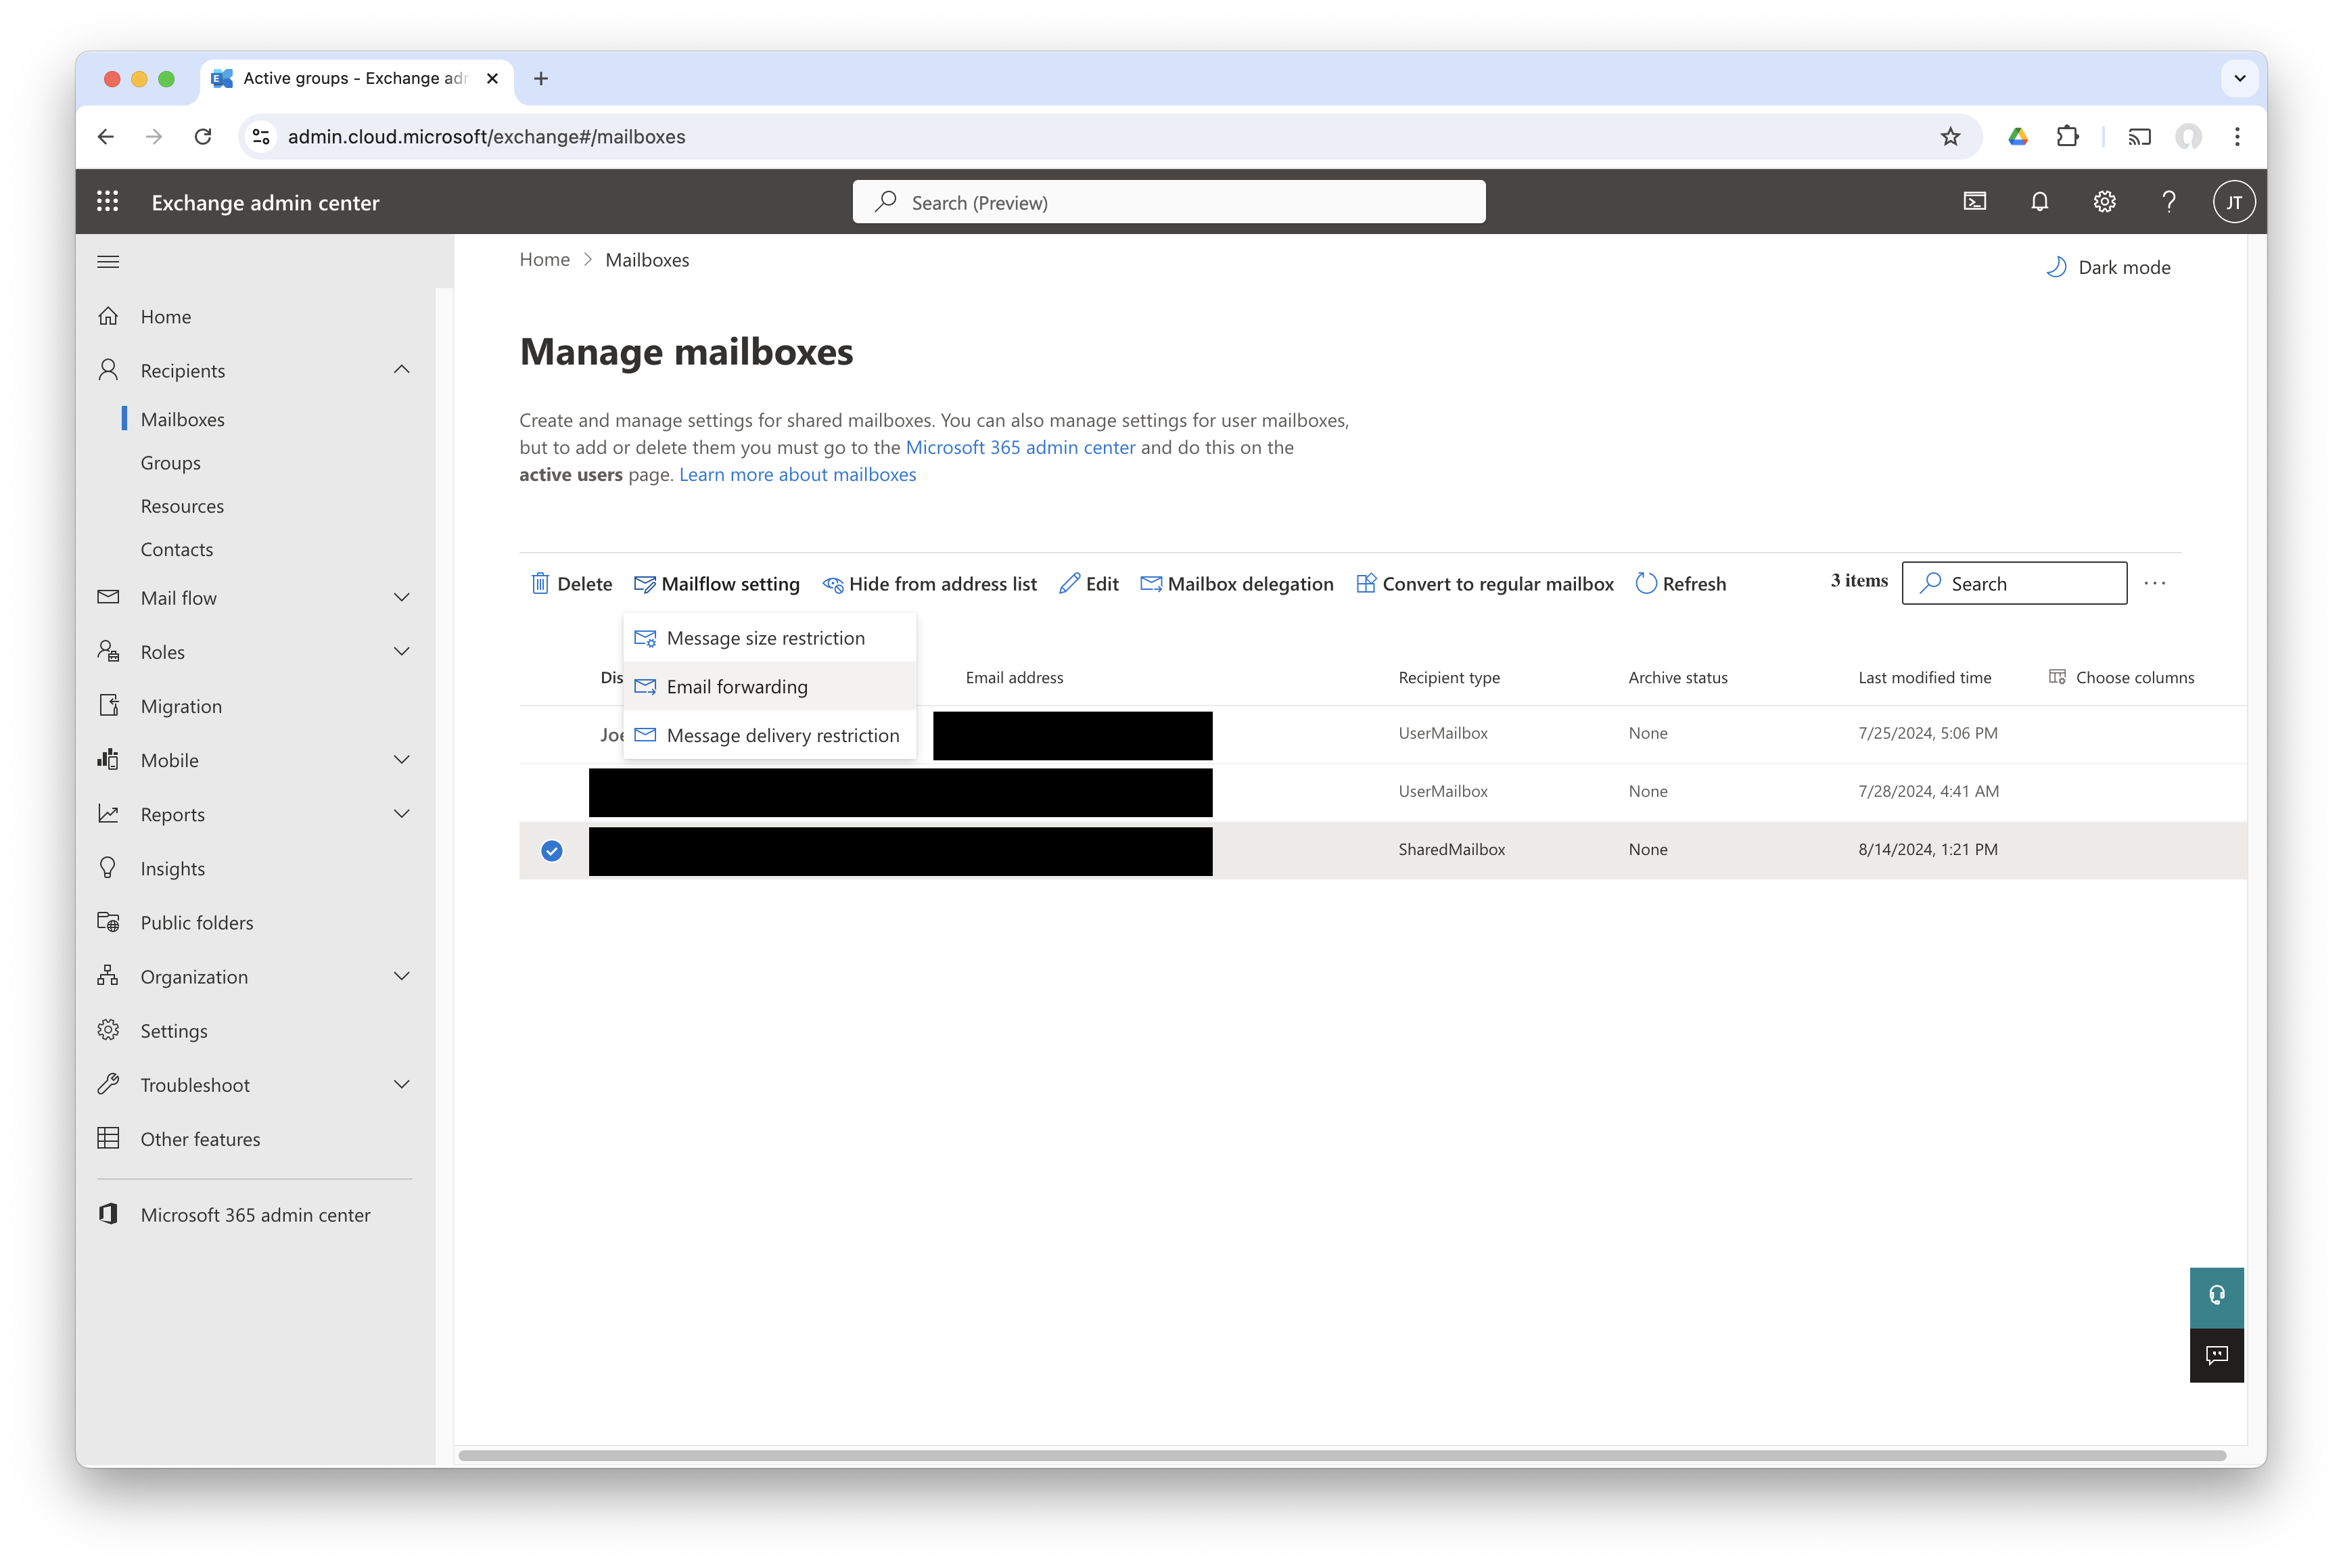
Click Mailflow settings, then Email forwarding. Enable forwarding and click Search email under Forward to internal email address. Select the mailbox.

In Qargo, add the shared mailbox email address to Other senders and click the save button.
Next steps:
Verify the email configuration for tasks. Click here.
Download the Outlook extension. Click here.
Create and link orders from emails. Click here.
Distribution list
Connect an individual mailbox and make sure it is a member of the distribution list.
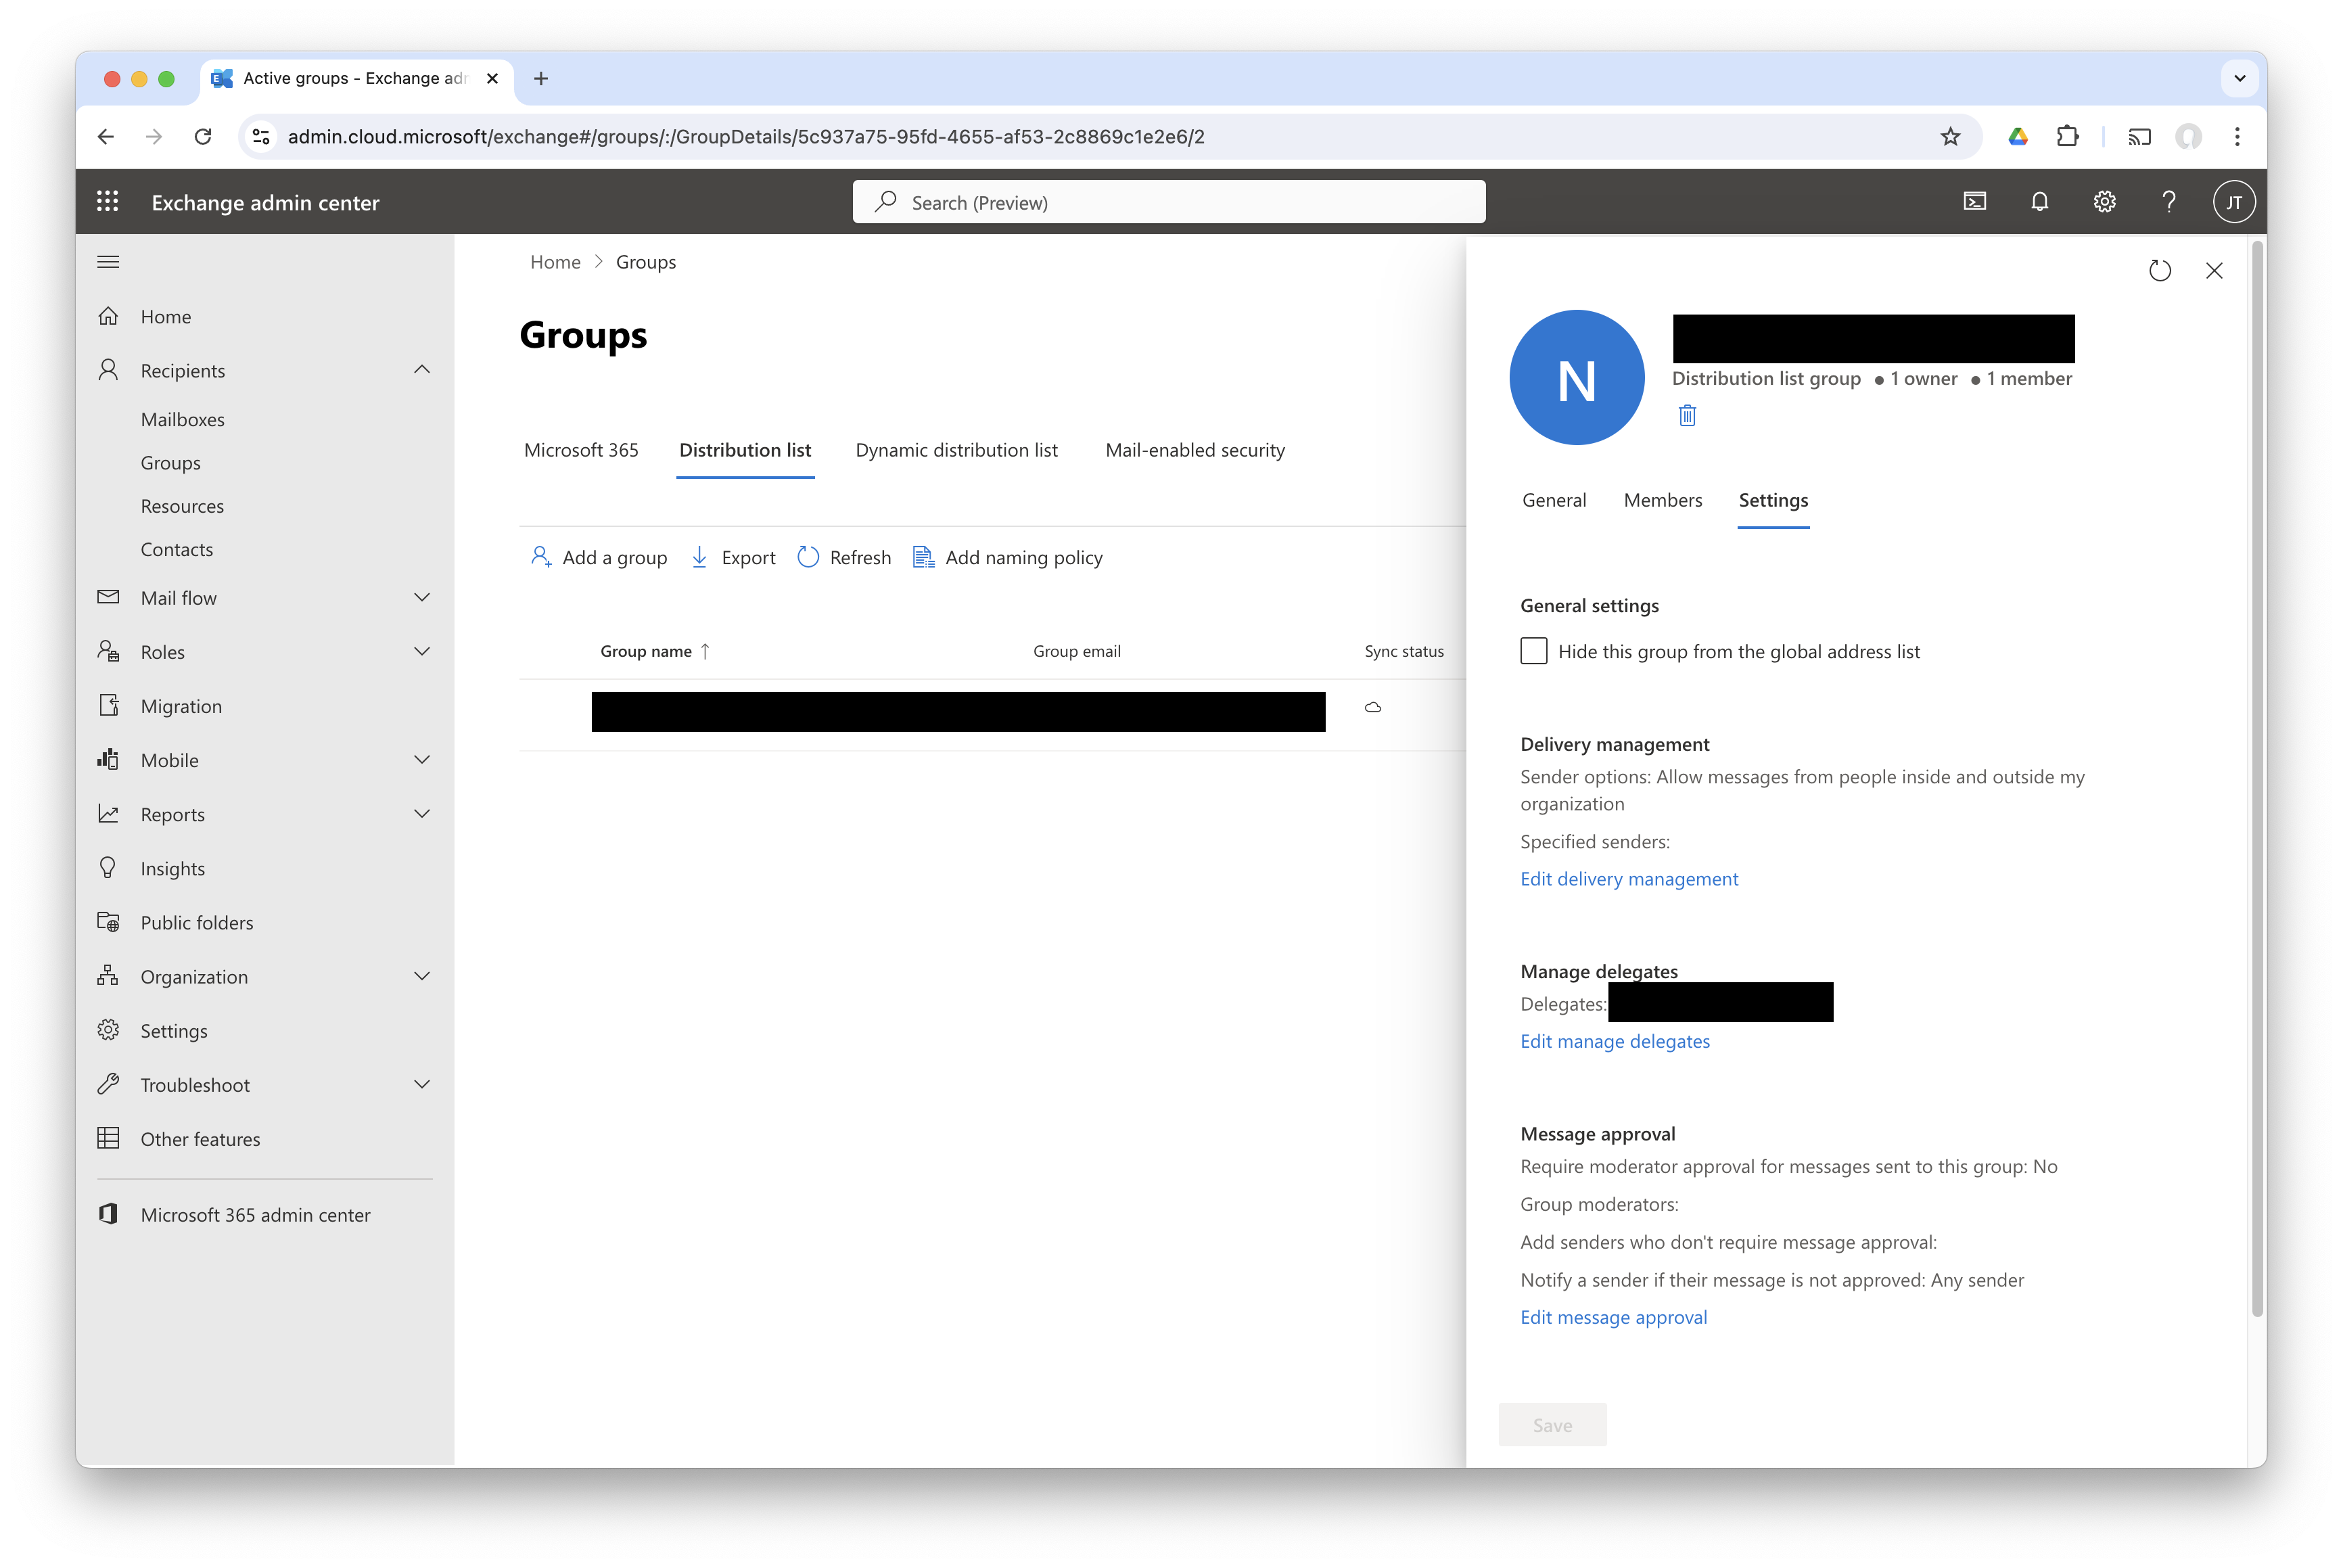
Go to the Settings tab and click Edit manage delegates. Search for the individual mailbox and make sure it has Send as permissions.
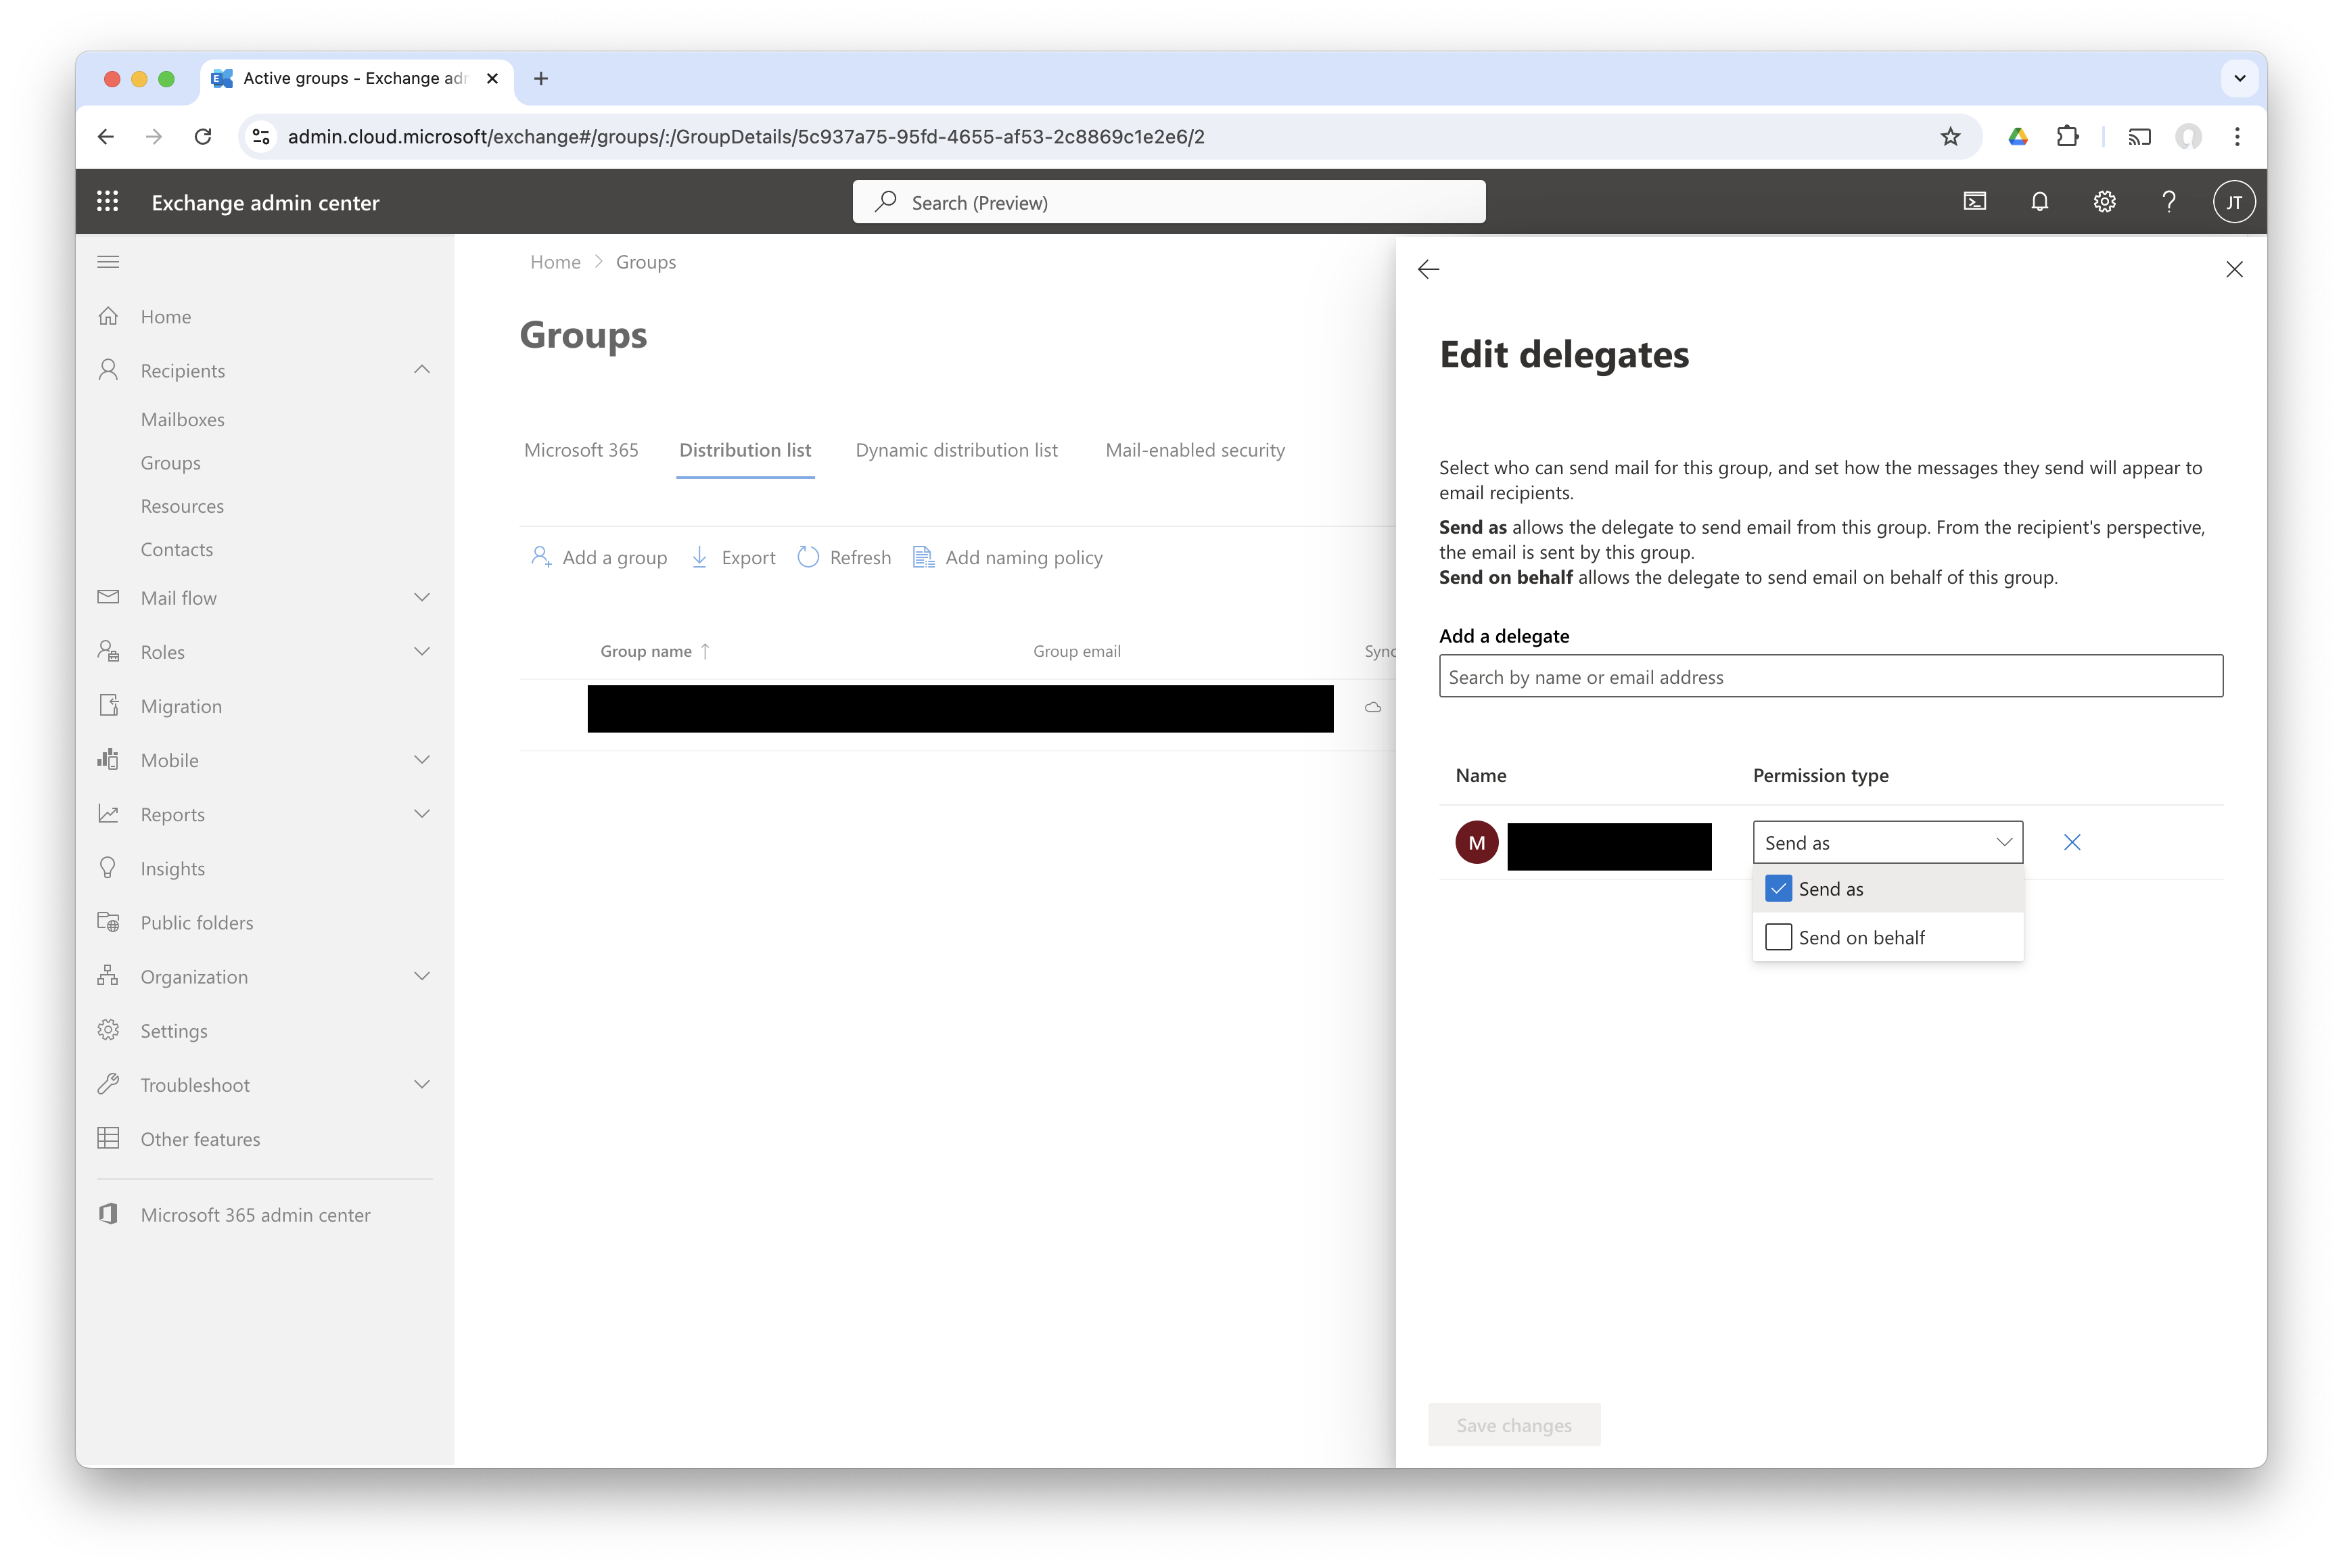
Add the distribution list email address to Other senders and click the save button

Next steps:
Verify the email configuration for tasks. Click here.
Download the Outlook extension. Click here.
Create and link orders from emails. Click here.