
FAQ: How does the QZ printer function work in Qargo?
Qargo now supports direct printing. Configure local printers, set different printers for document types, and print from lists and orders.
Table of contents
Q: Can documents be printed directly from Qargo? Each time a document needs to be printed, it downloads to the computer and has to be printed from there. Is it possible to print directly from the platform?
A: Printing directly from the Qargo platform is possible. This feature allows local printers to be configured within the Qargo platform. Multiple printers can be added, and different printers can be set for different document types.
For example, if there is a local printer in the accounts office, it can be configured for documents that need to be printed for accounts. Documents required for the planning office can be set to print on that office’s local printer. Specifying local printers for individual documents makes printing convenient and efficient for users. There is no more need to track down printed documents across the business.
Configuration
Step 1: Download and install QZ Tray
-
QZ Tray is an application used to print from web browsers to local printers. It is required to configure printing in Qargo.
- Use this link to download it.
Step 2: Add printer configuration
-
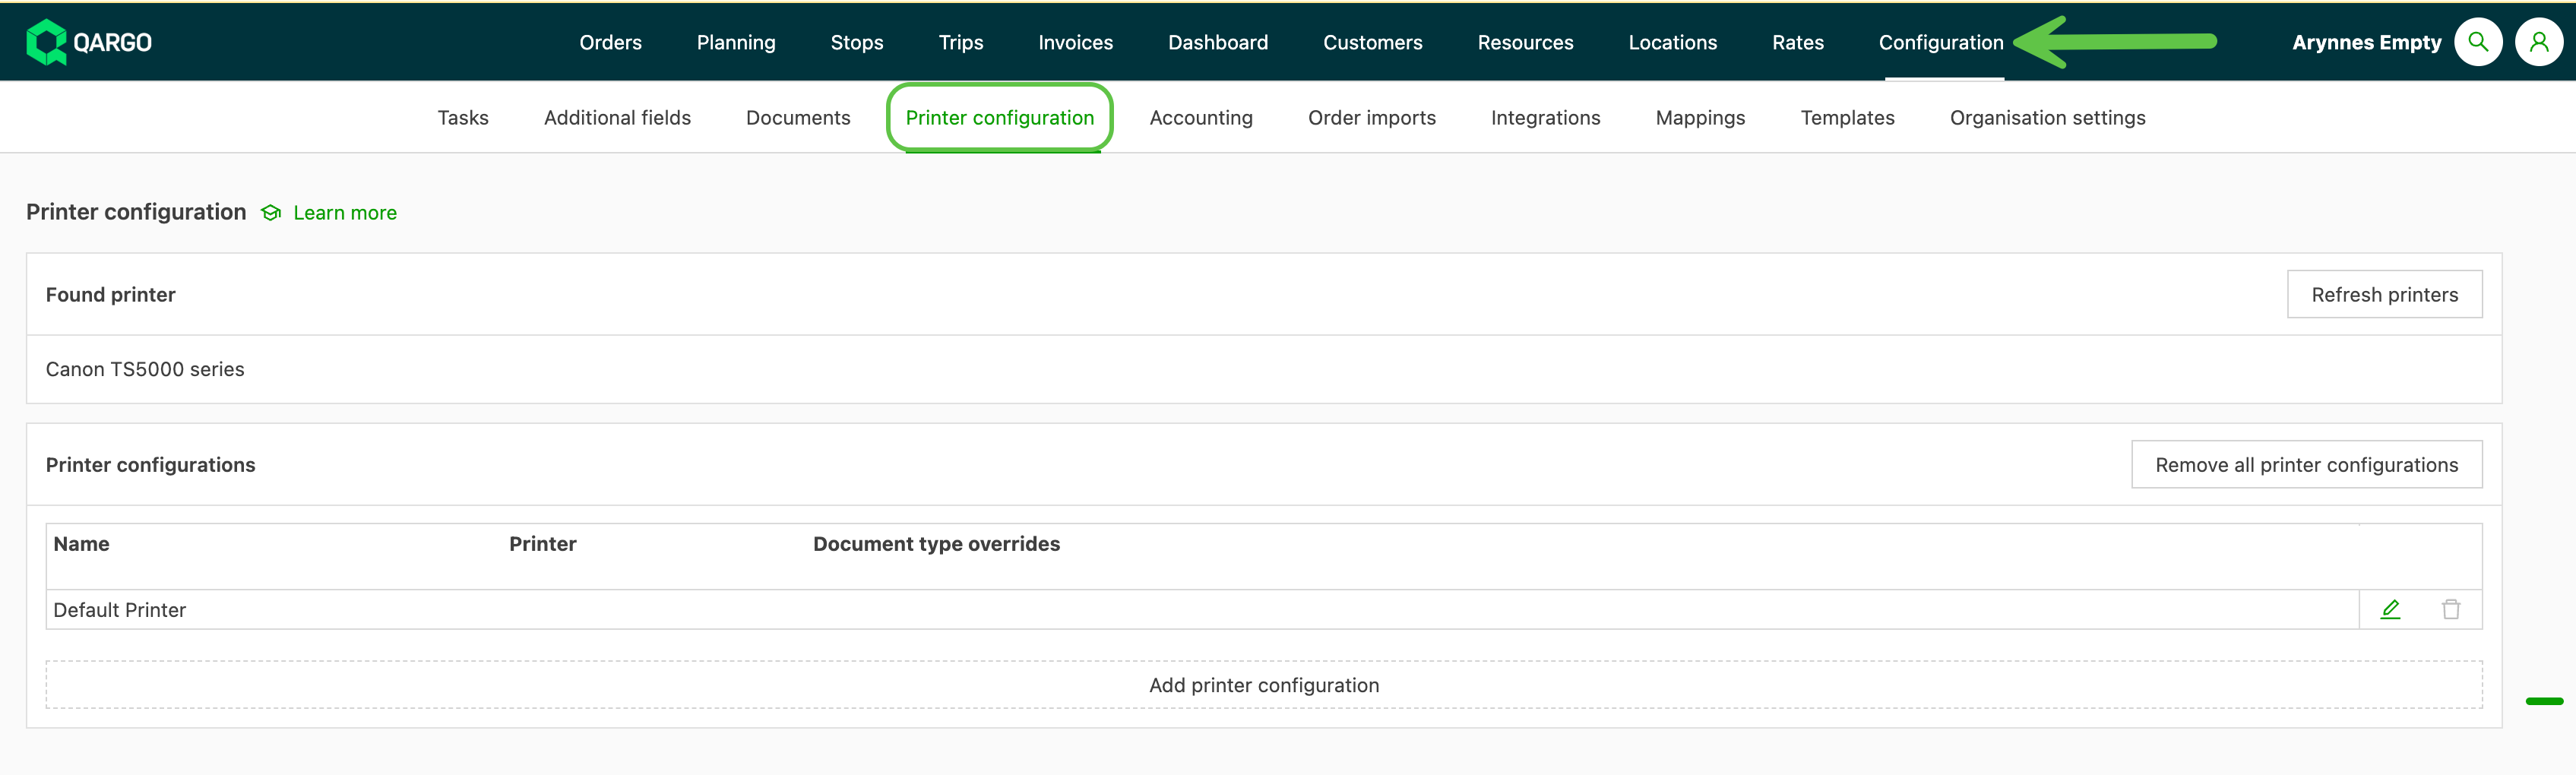
Go to Configuration > Printer configuration
-
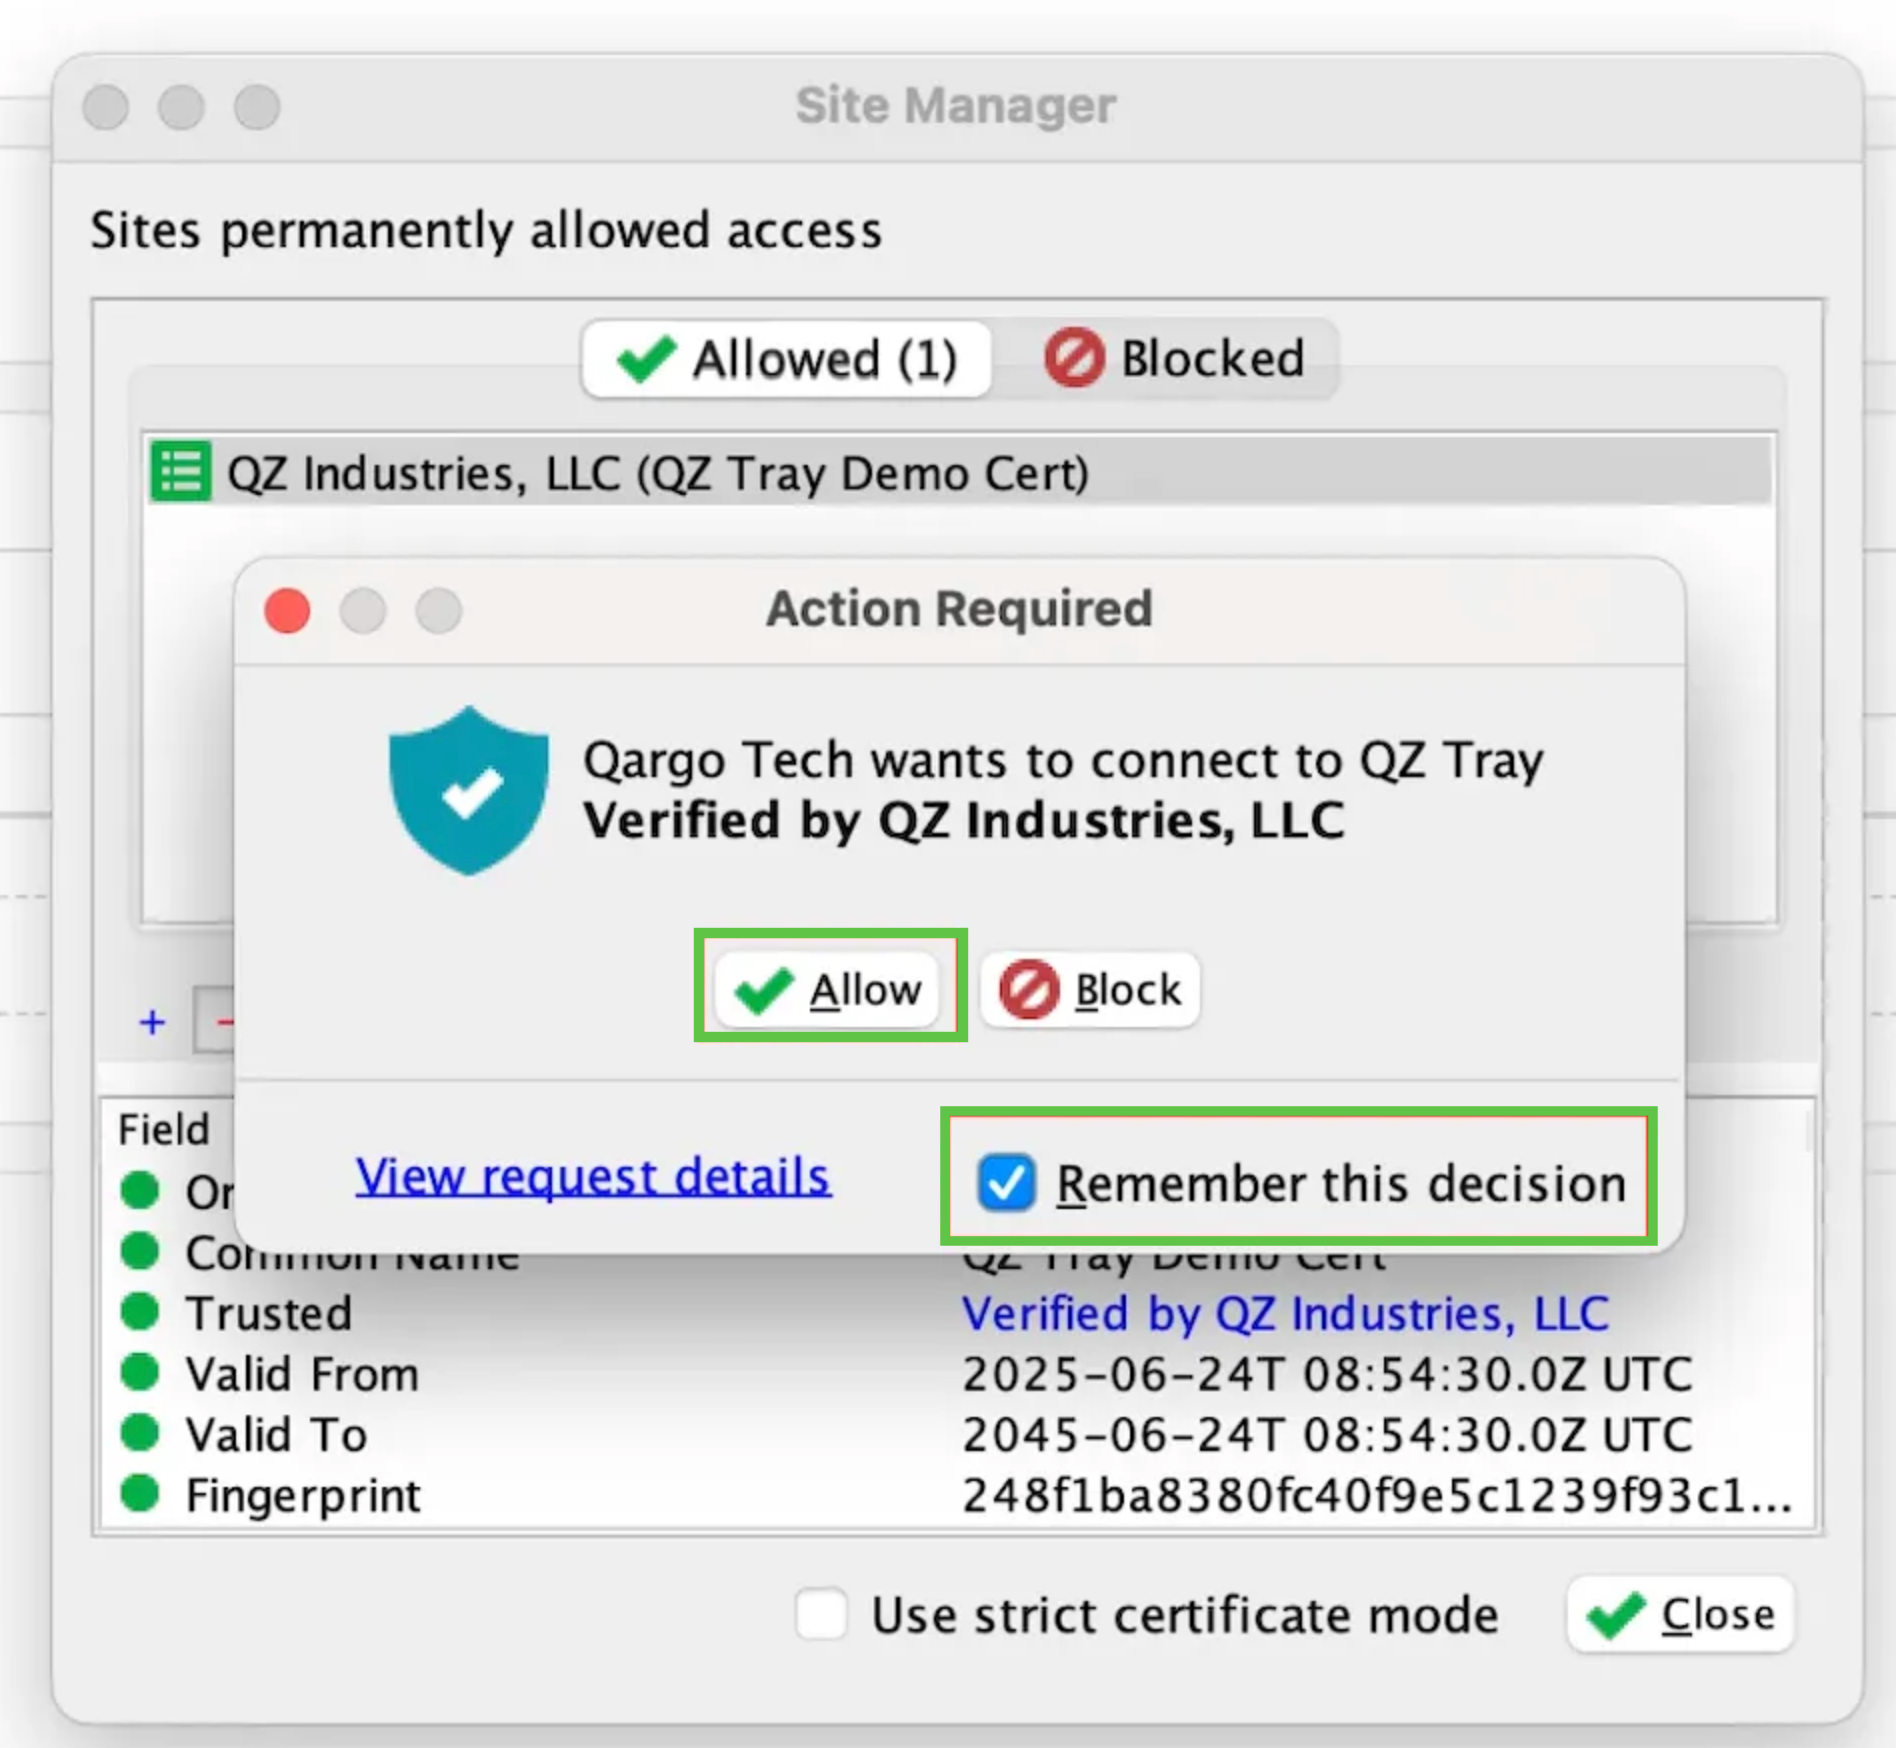
In the pop-up, allow access to connect Qargo with QZ Tray.
-
Click Remember this decision and click Allow
-
Step 3: Add or modify printers
- Required: edit the default printer. Click the edit icon to open the configuration screen.
- From the Printer field, select a default printer.
- Modify the default number of copies printed and the printing properties (color/grayscale) as preferred.
- Click Save.
-
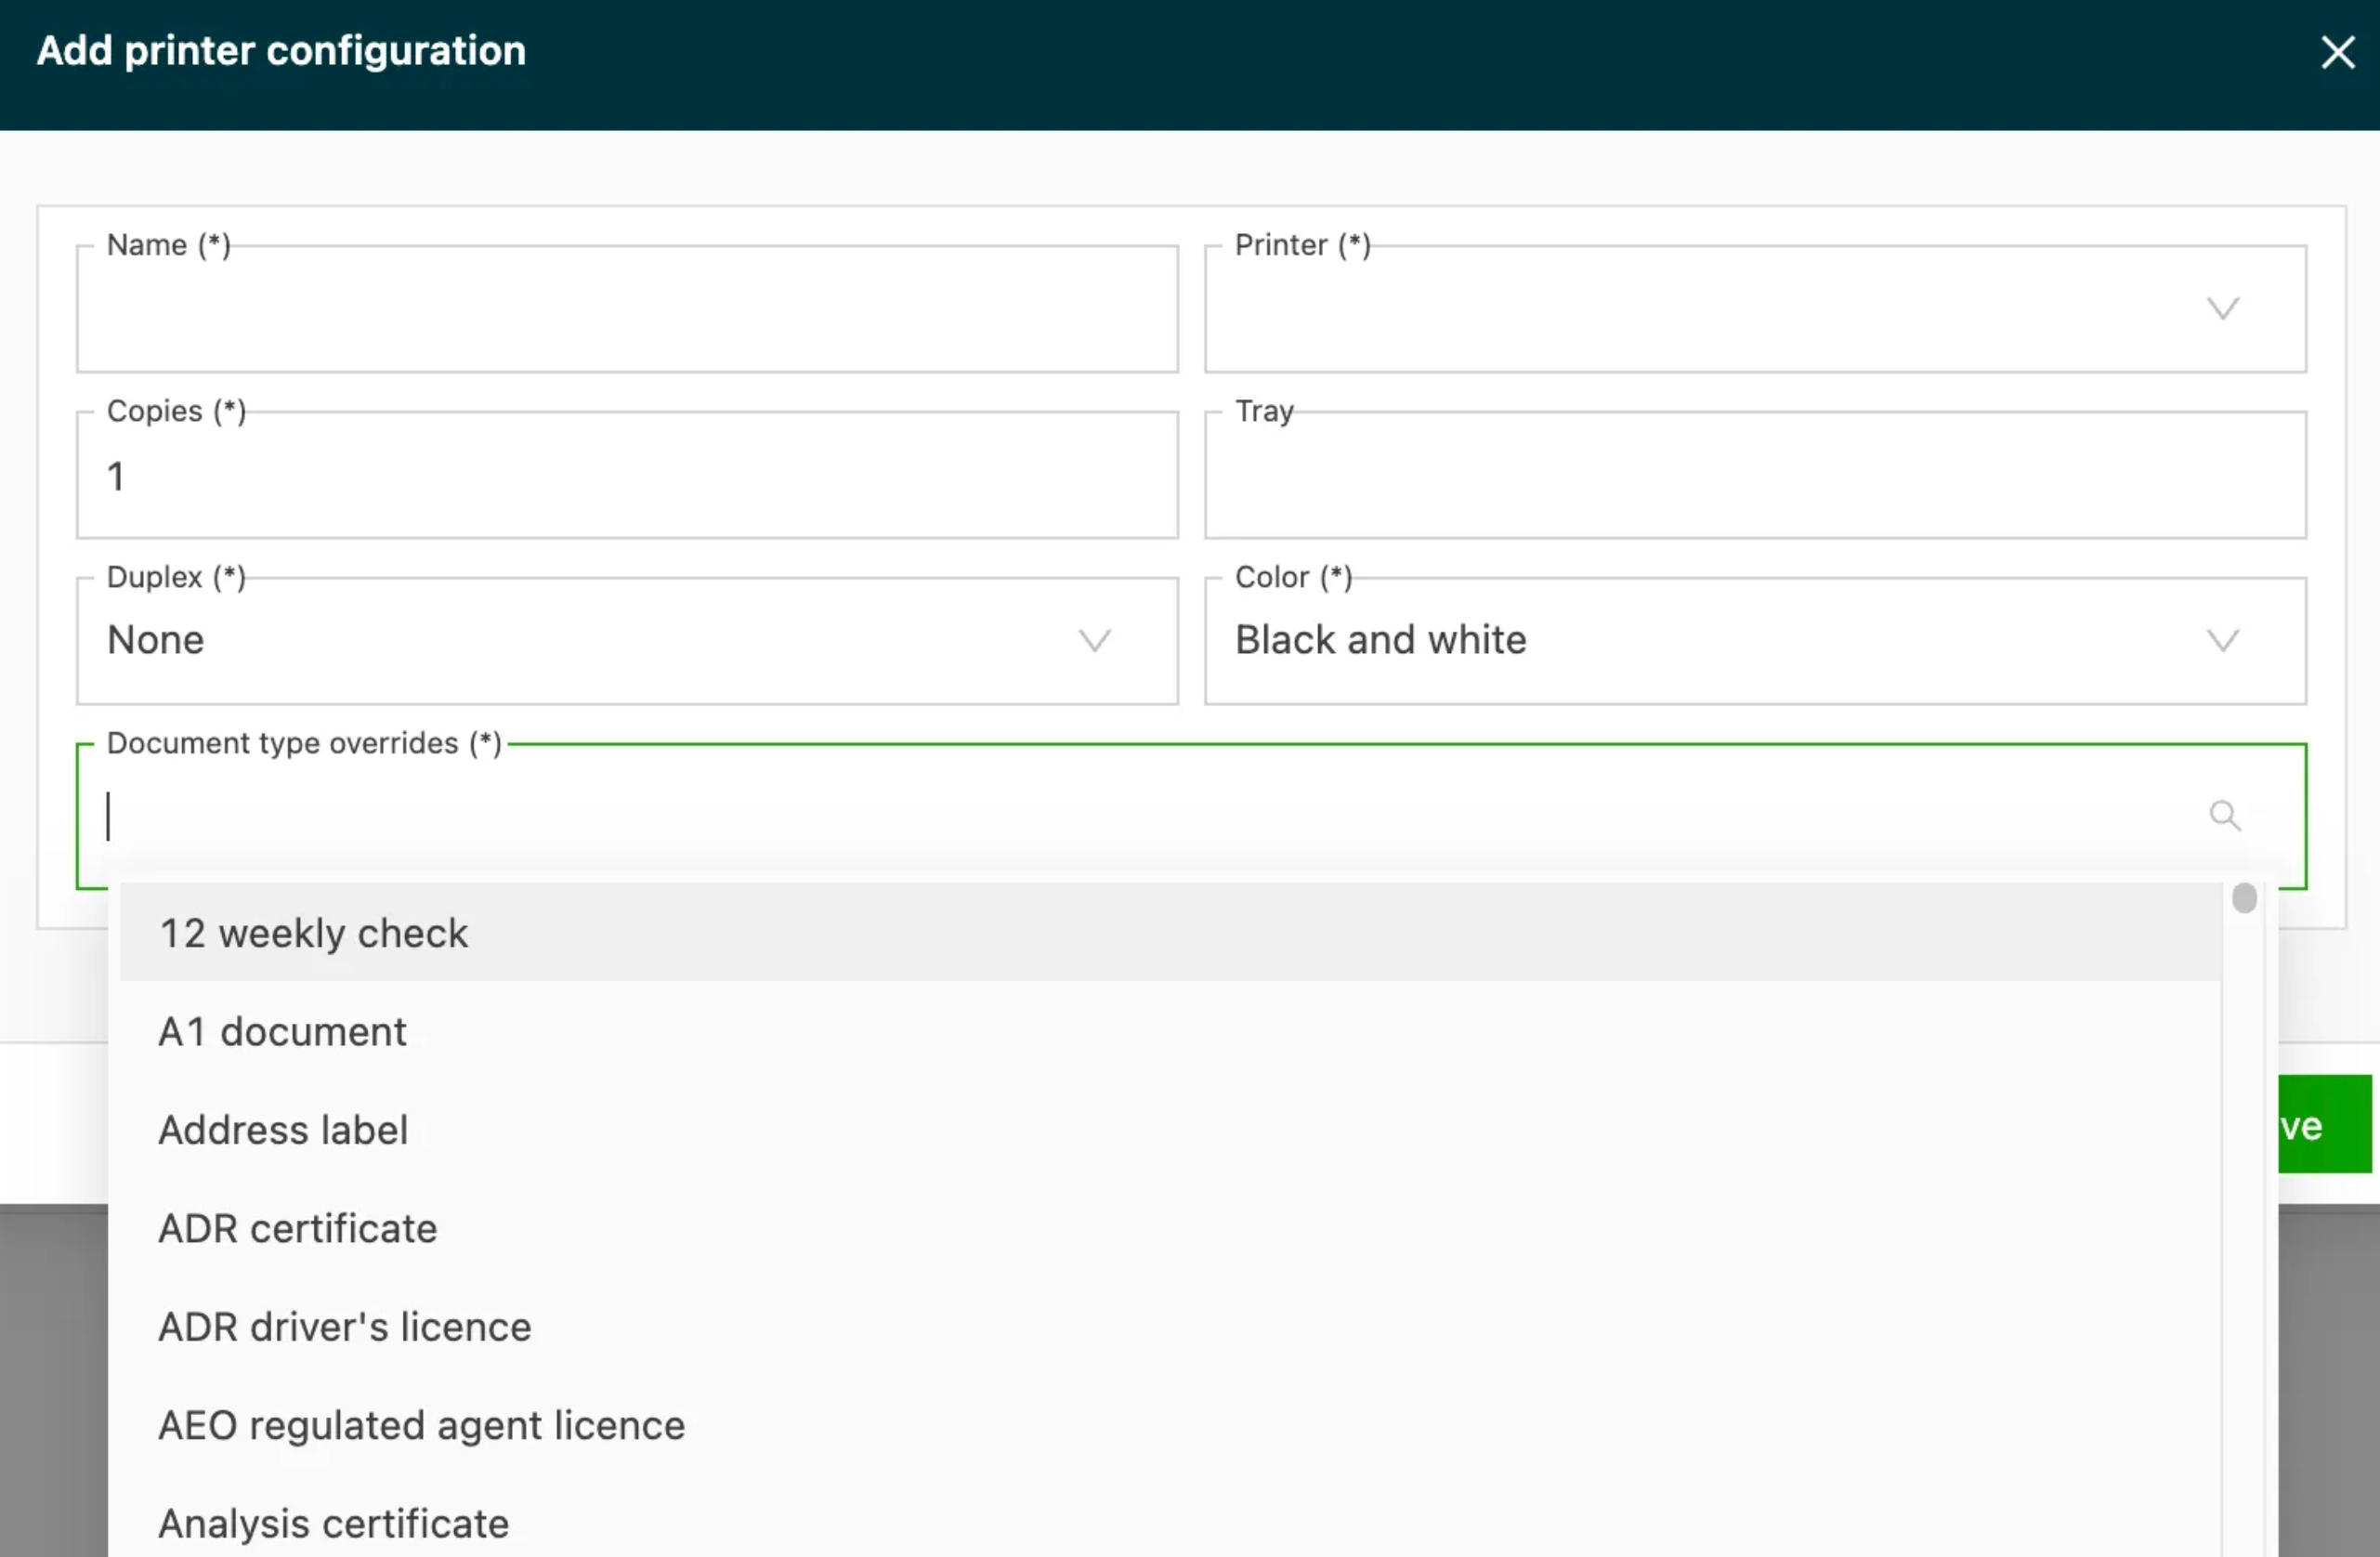
To add and configure a printer for specific documents, click Add printer configuration
-
Select a local printer for a specific document or set of documents.
- From Document type overrides, select the documents associated with the specified printer. Multiple document types can be selected.
Remove printer configuration
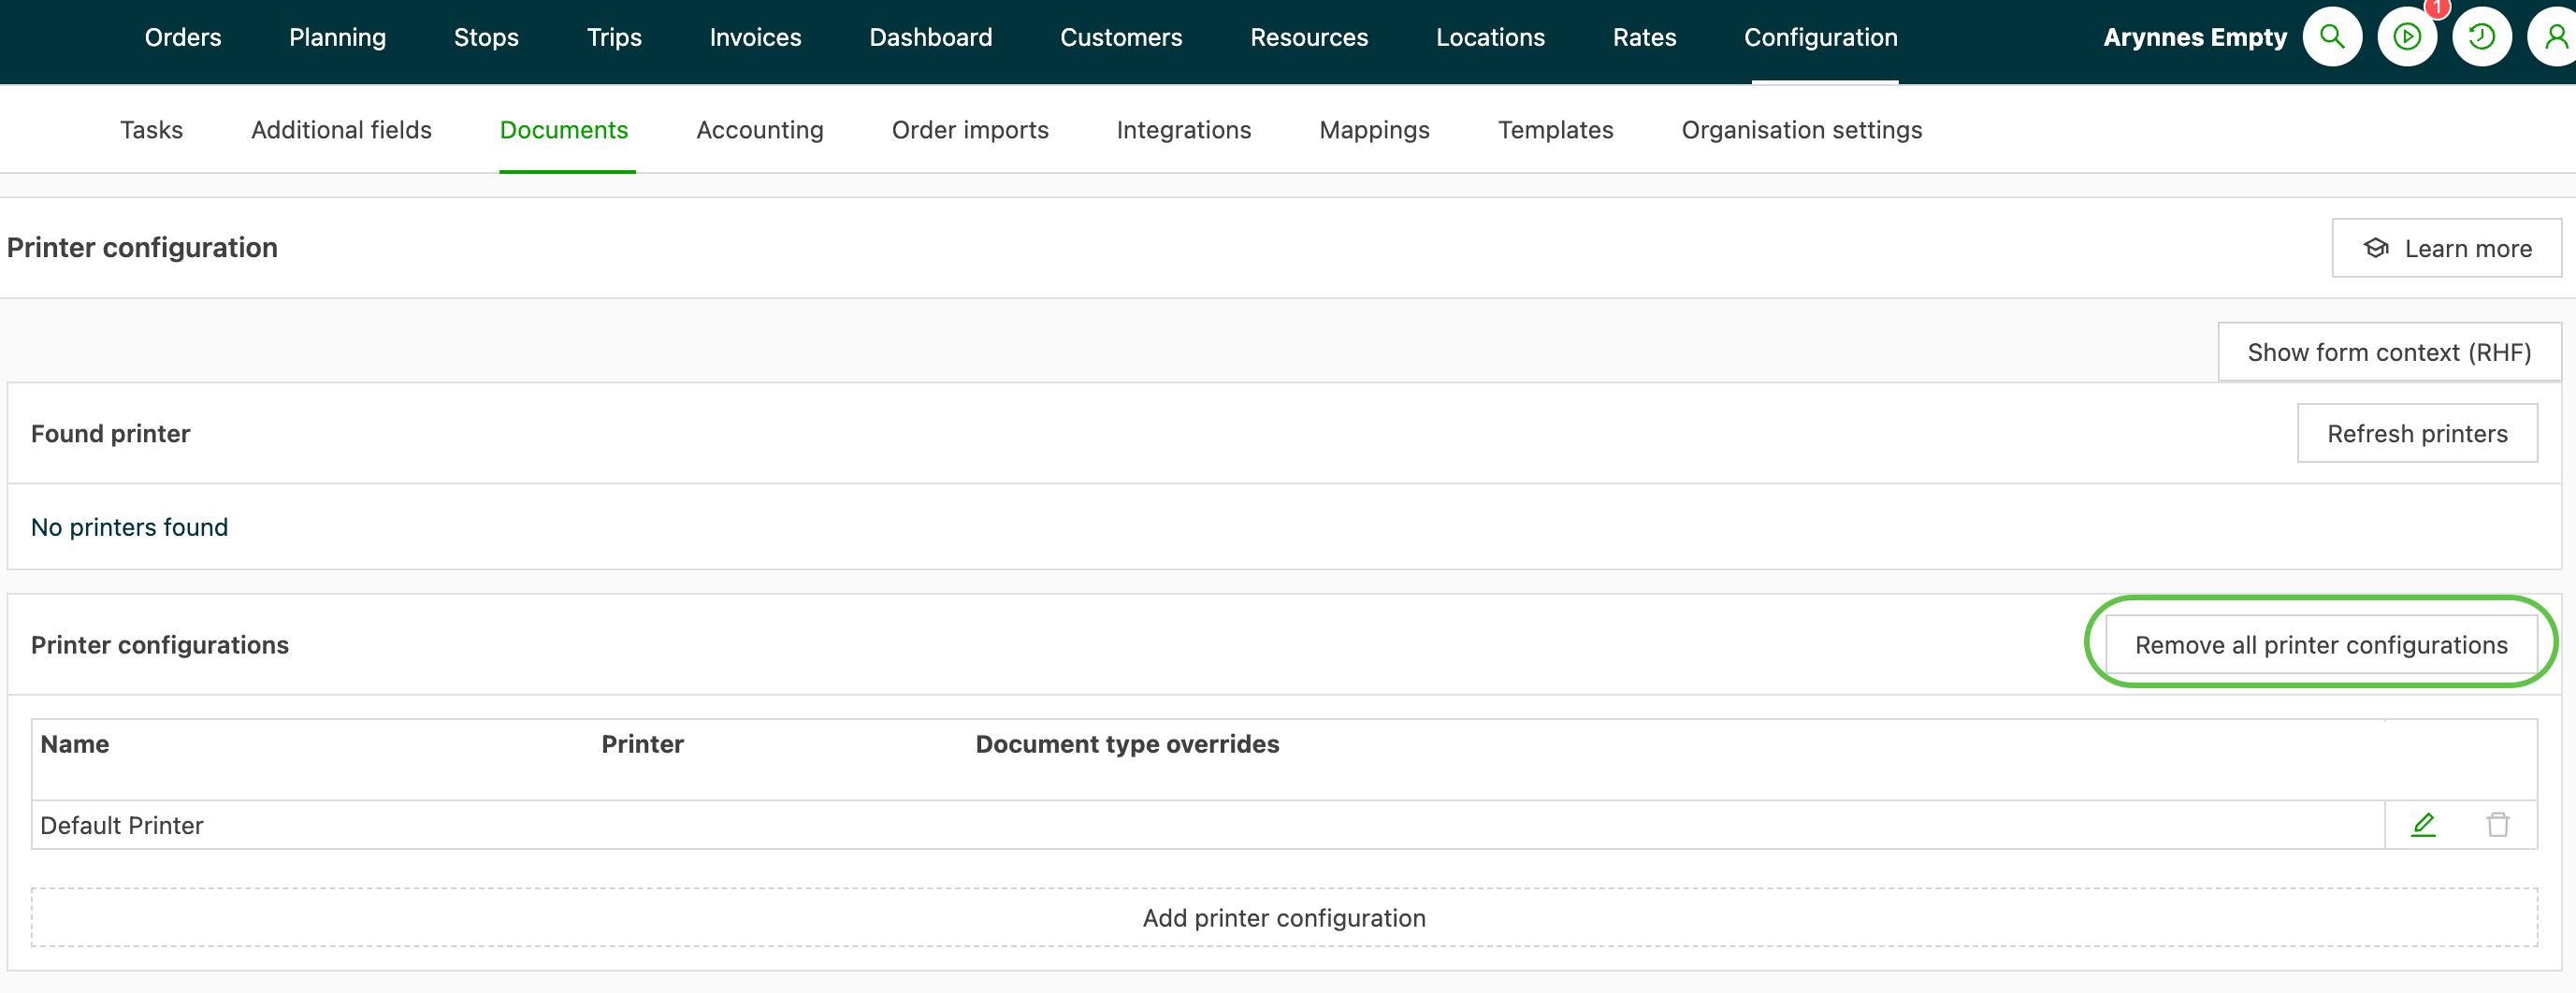
- A Remove all printer configurations button has been added so users can reset the printer configurations.
Printing documents
Auto-printing
If a workflow requires specific documents, such as labels or shipment notes, to be printed immediately after an order is created, automatic printing can be configured.
-
Go to printer configuration:
- Go to Settings
- Select Printer configuration
-
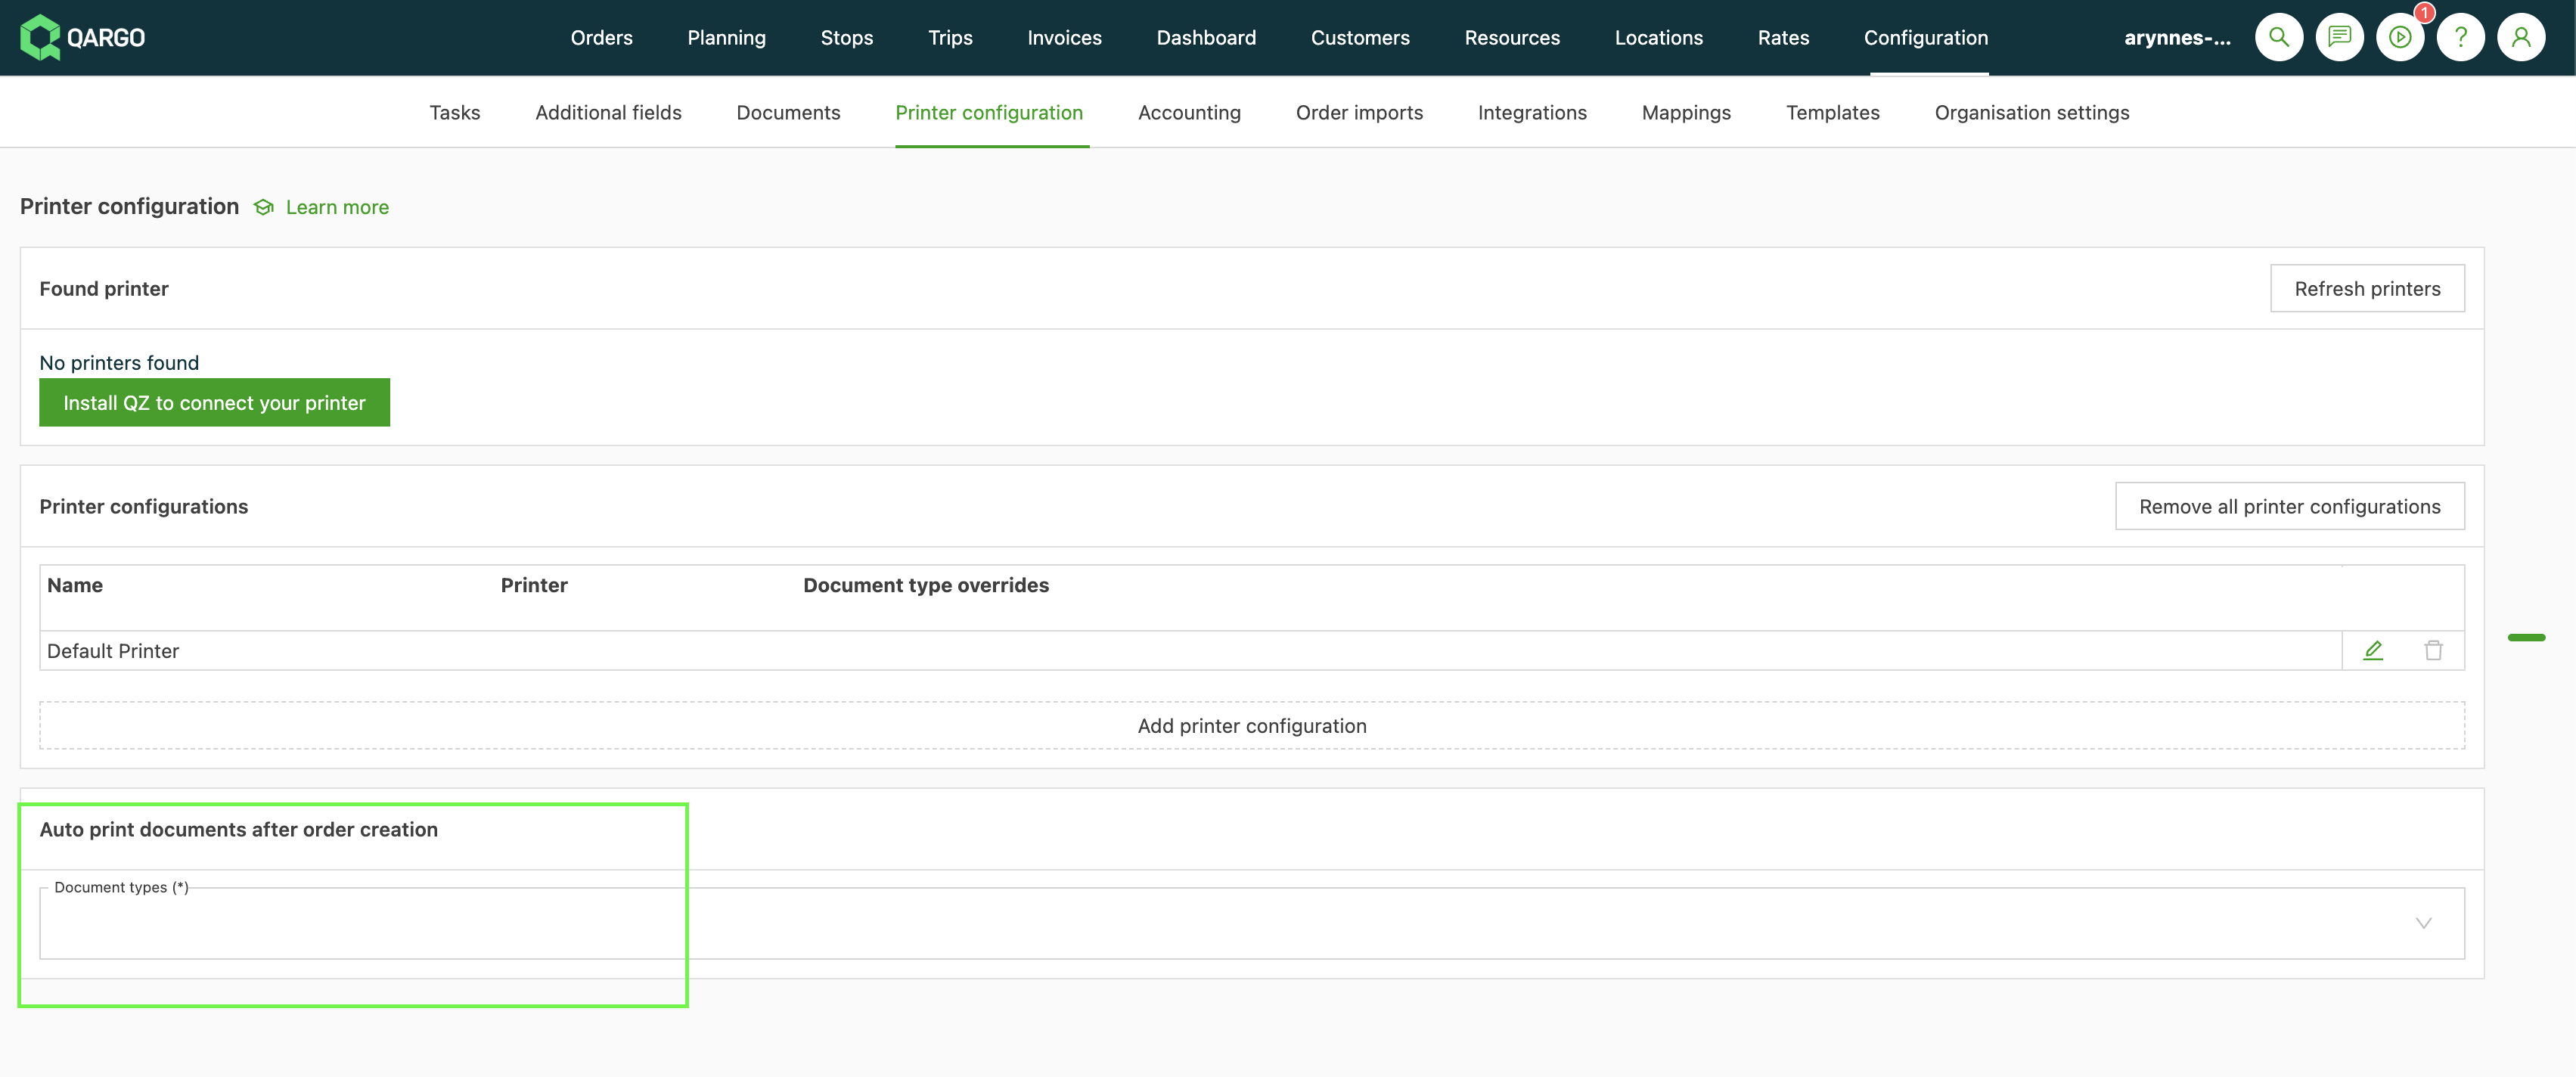
Locate the auto-print section:
- Scroll down the Printer settings page to the new section titled “Auto-print documents after order creation”
-
Add document types:
- This new section includes an option to add document types. Click the Add document button (or similar).
- A list of available document types that meet the auto-completion prerequisite appears.
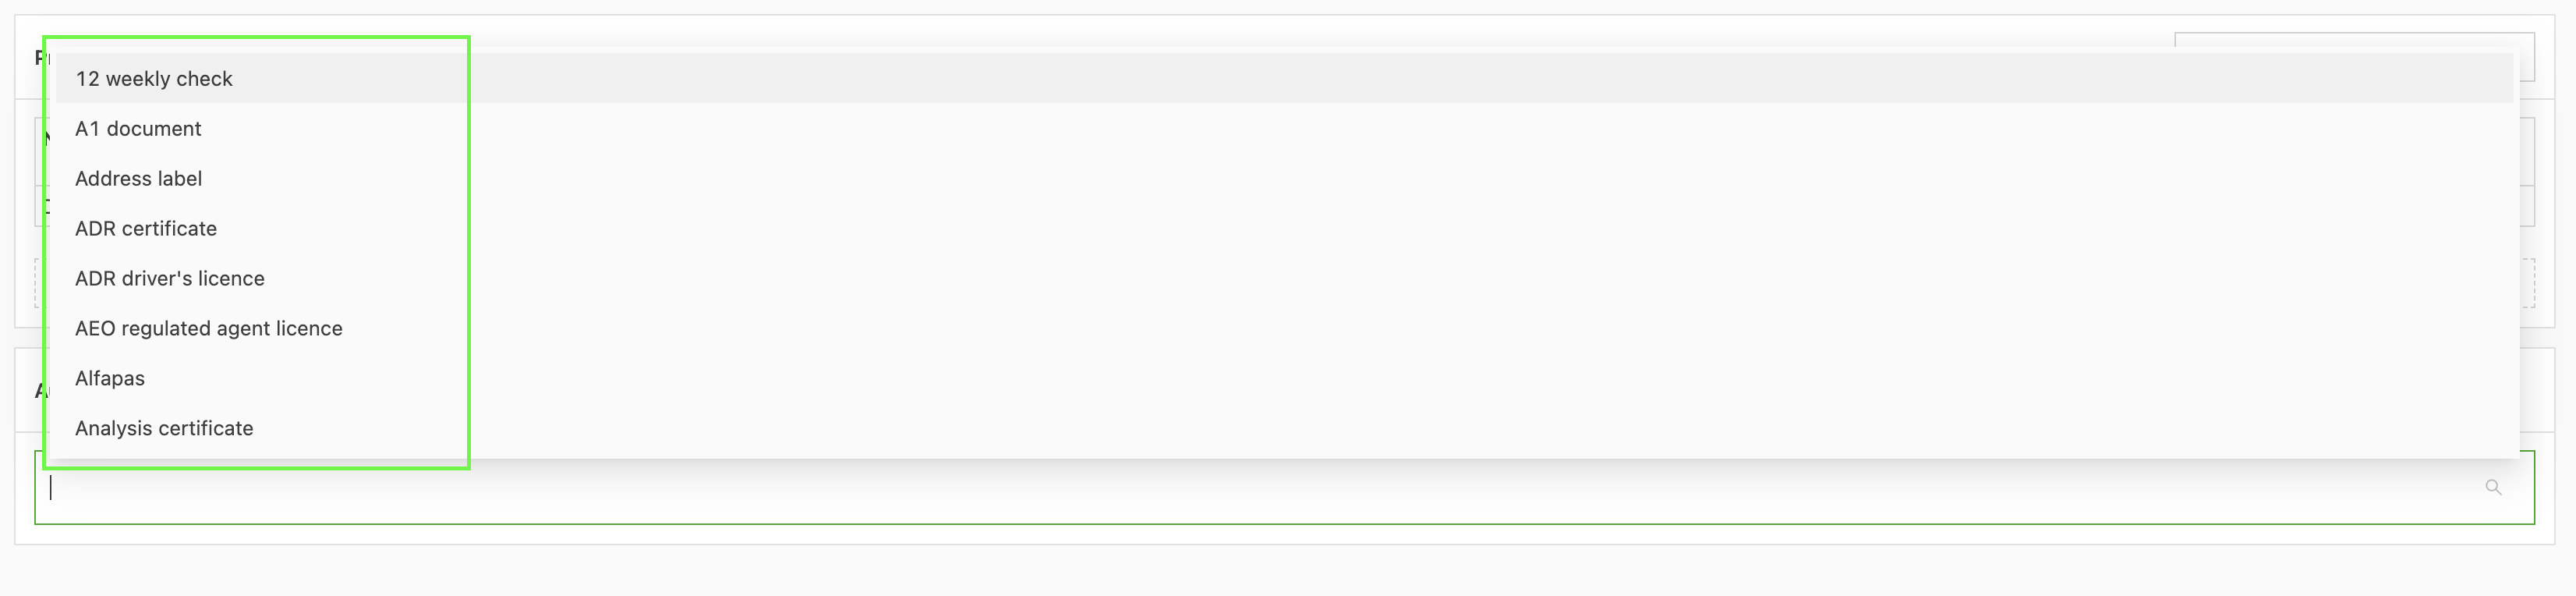
- Select the specific document type(s) to print automatically.
- Repeat this step for every document to auto-print.
Manual printing
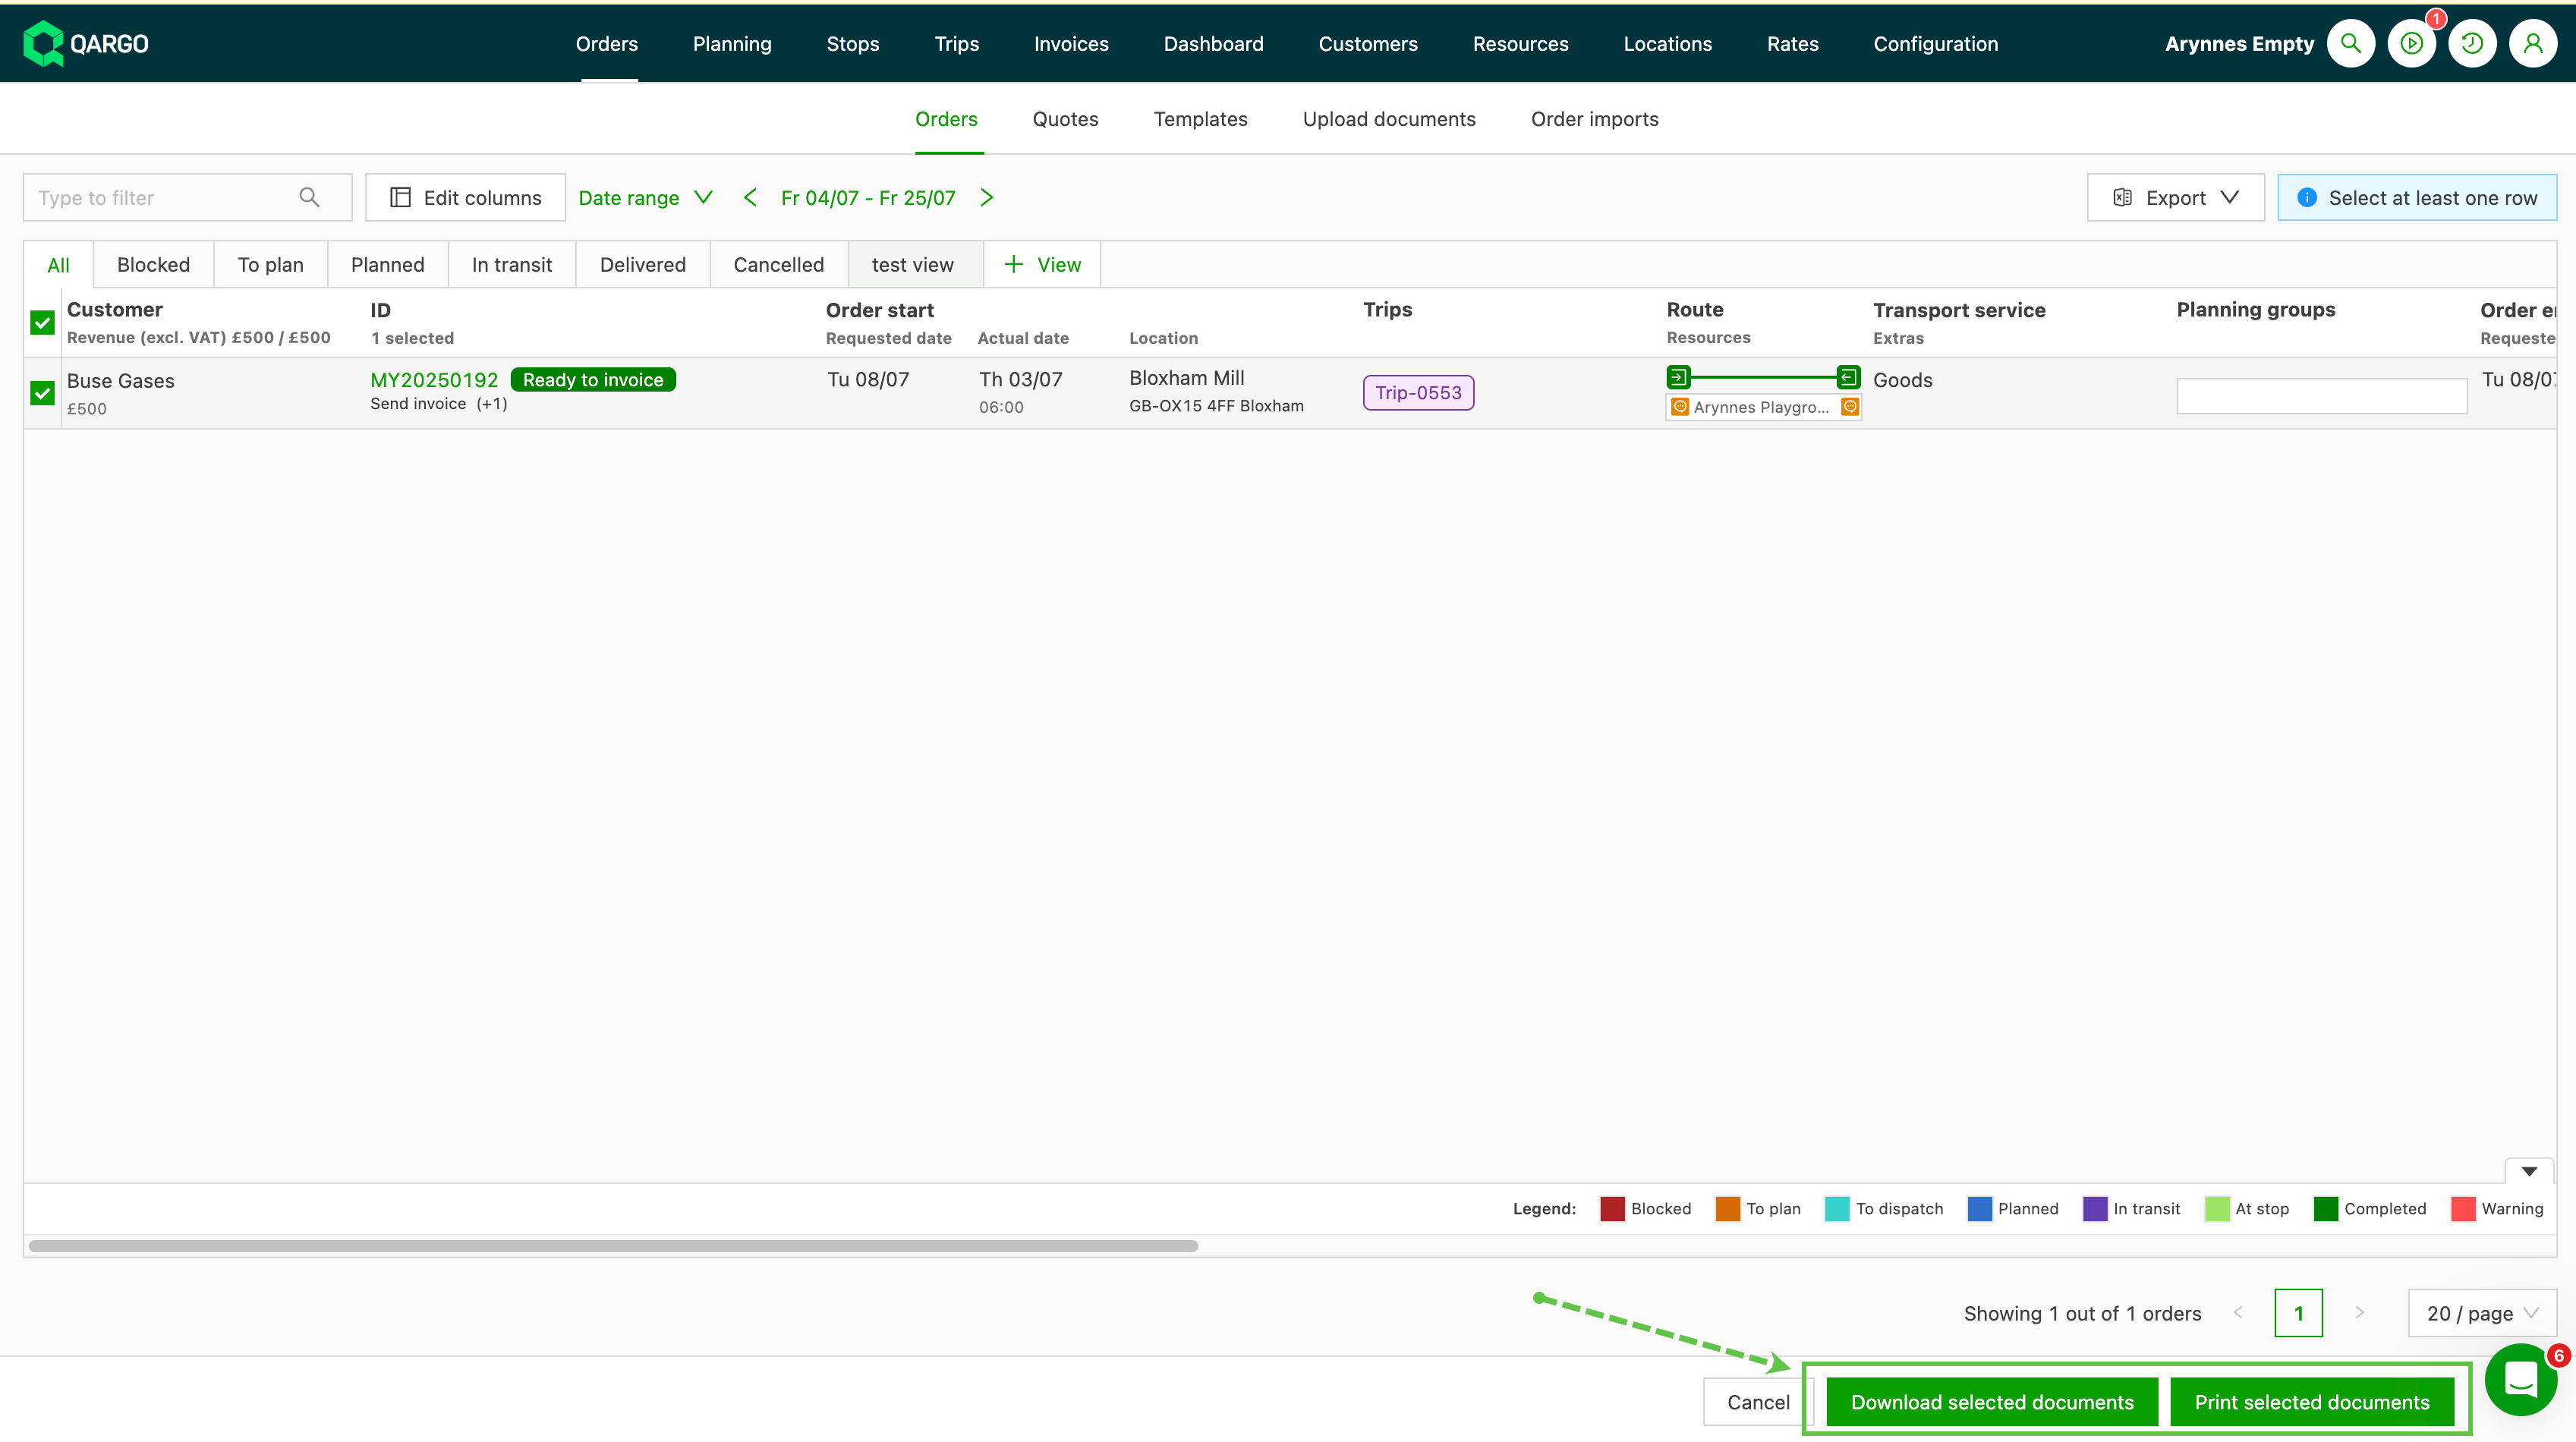
- From various list view pages, select the Print option and the document types to print (existing functionality).
- Instead of only downloading the selected documents, users can choose to download them or print them directly to the configured printers.
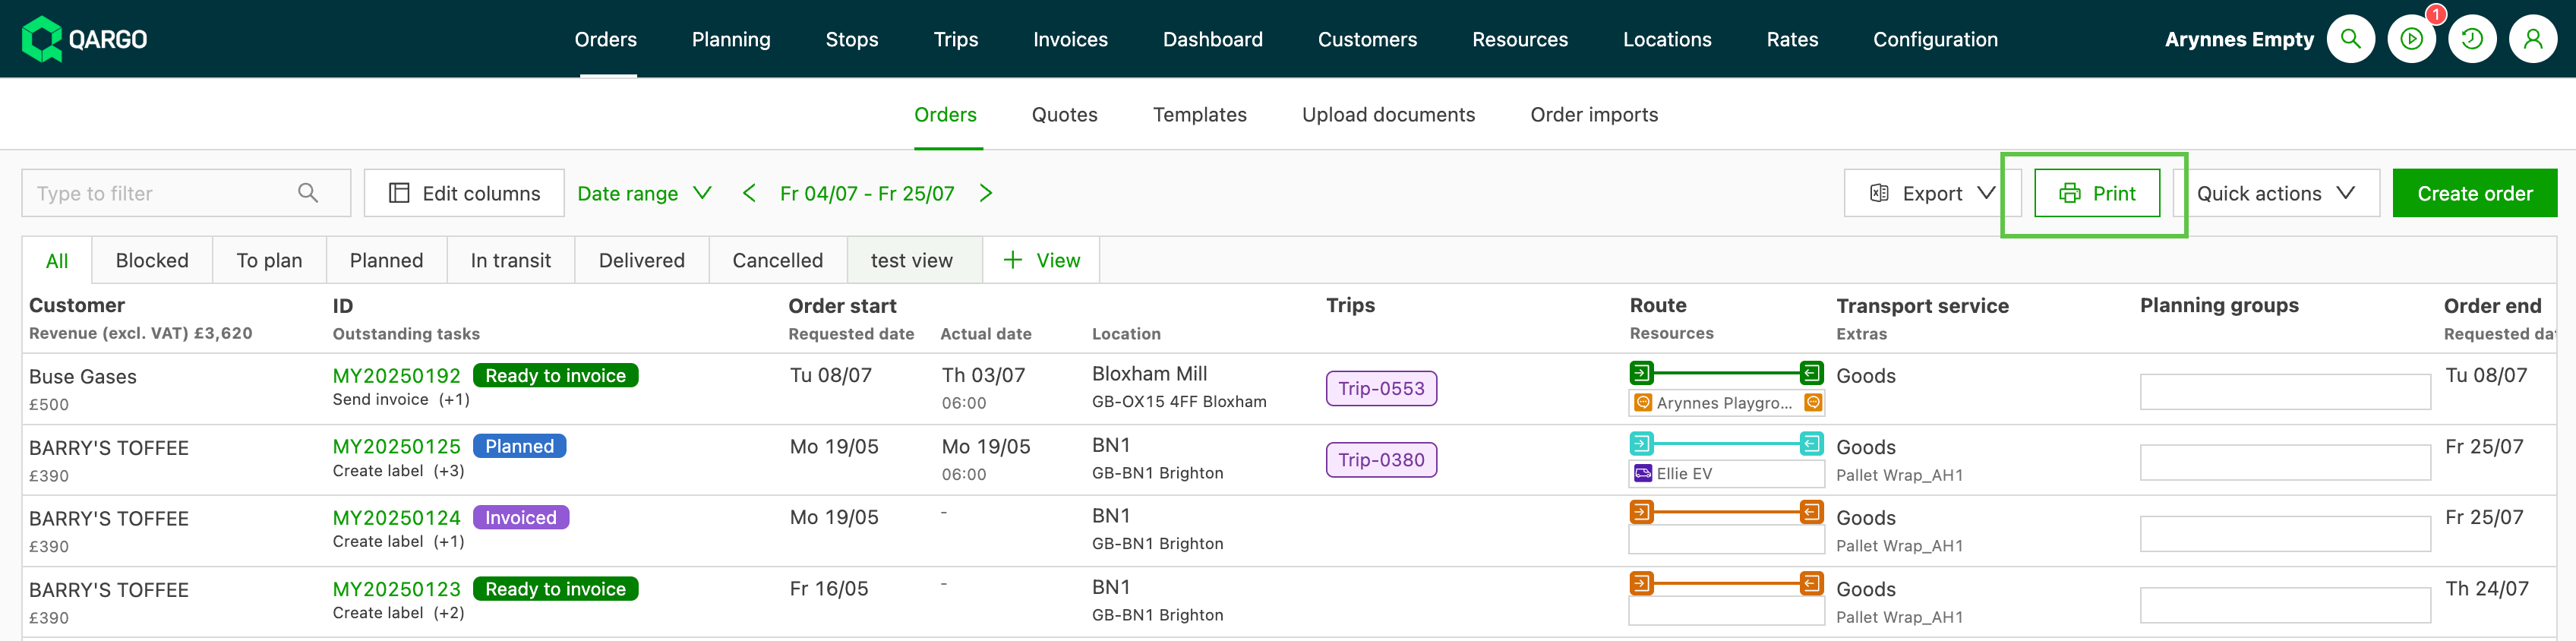
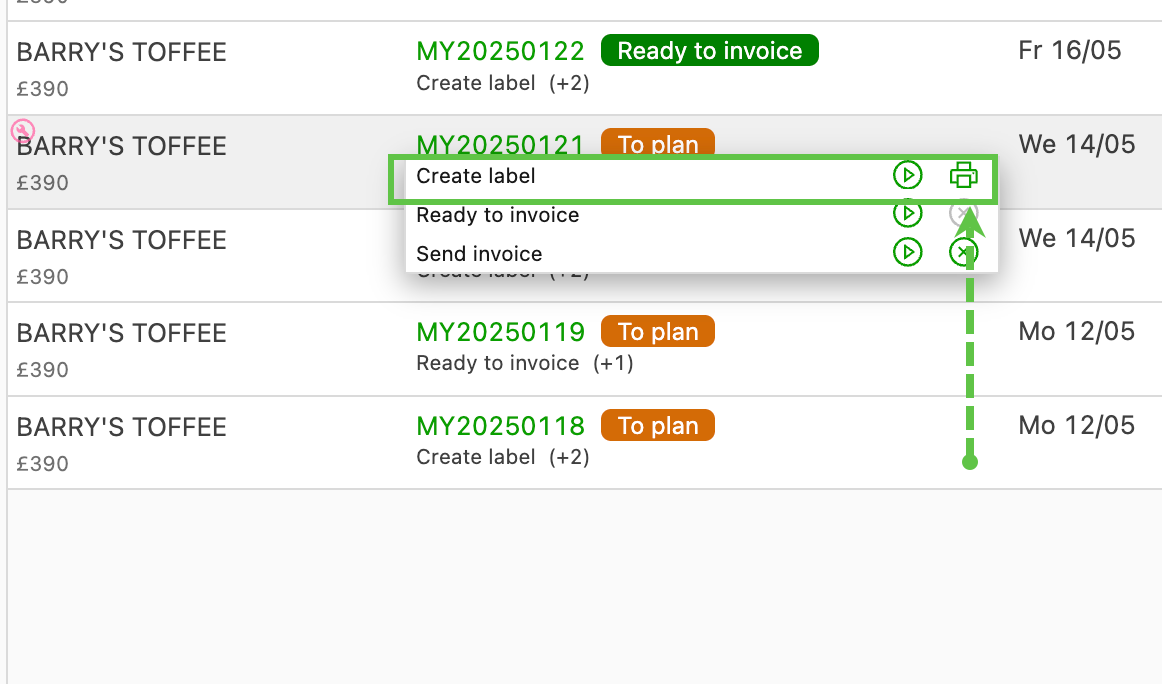
- A quick action to print the task documents is now available on the order list page:
-
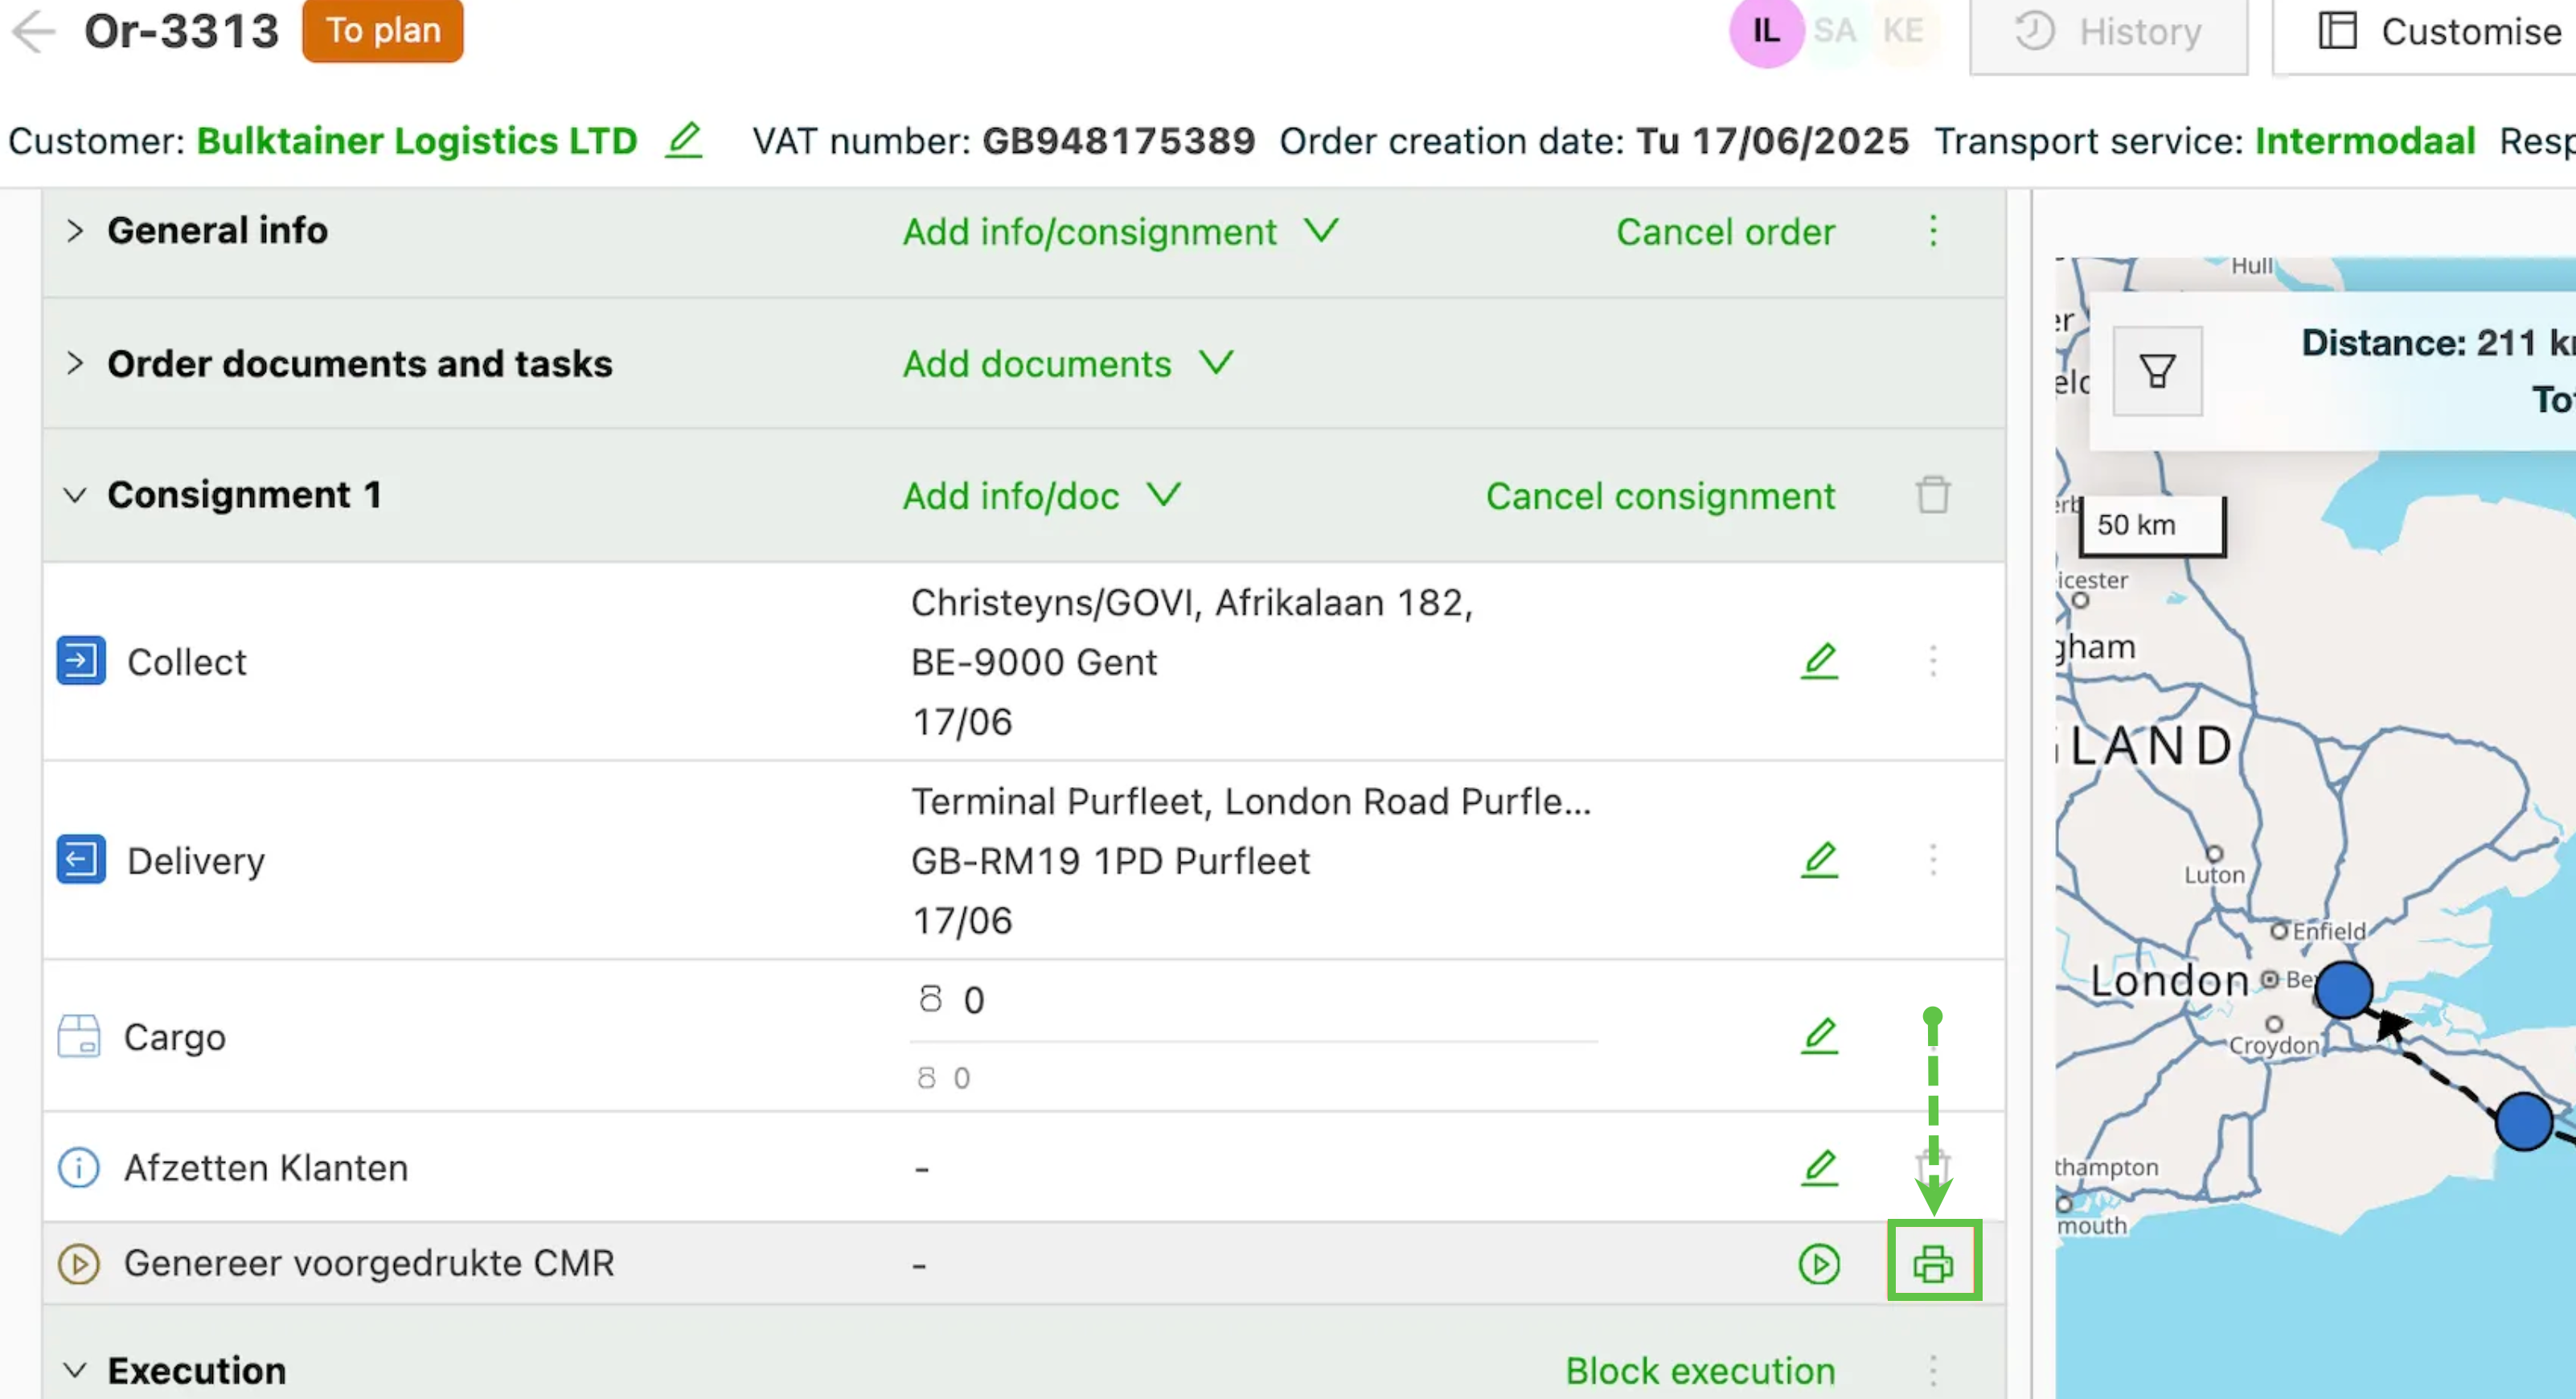
A new print icon has been added to the order details. Using the print button prints the document immediately.
- Using the execute task button only downloads the document.
-
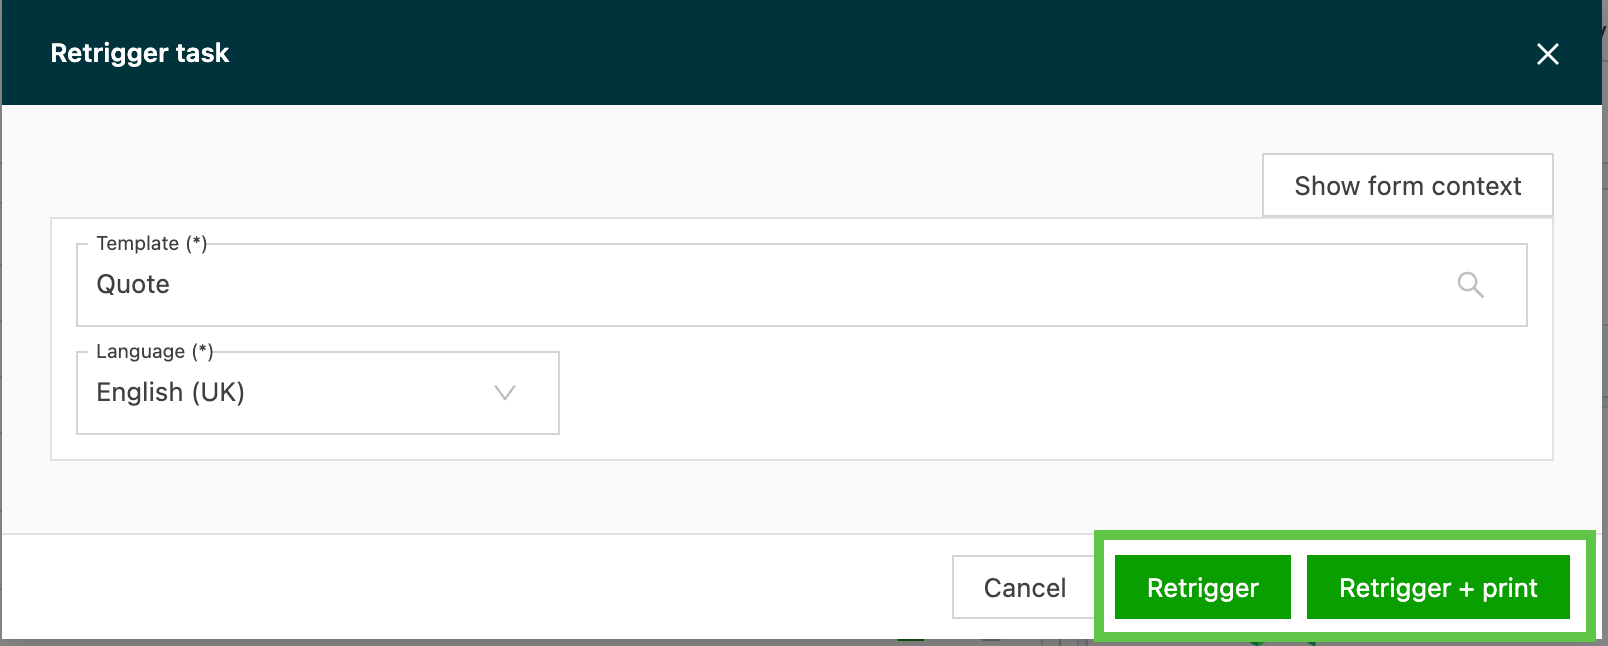
Once the task has been executed and the user tries to re-trigger it, there are 2 options:
- Re-trigger: the document is simply generated again and downloaded without printing.
- Re-trigger + print: the document is regenerated and printed again.
Troubleshooting
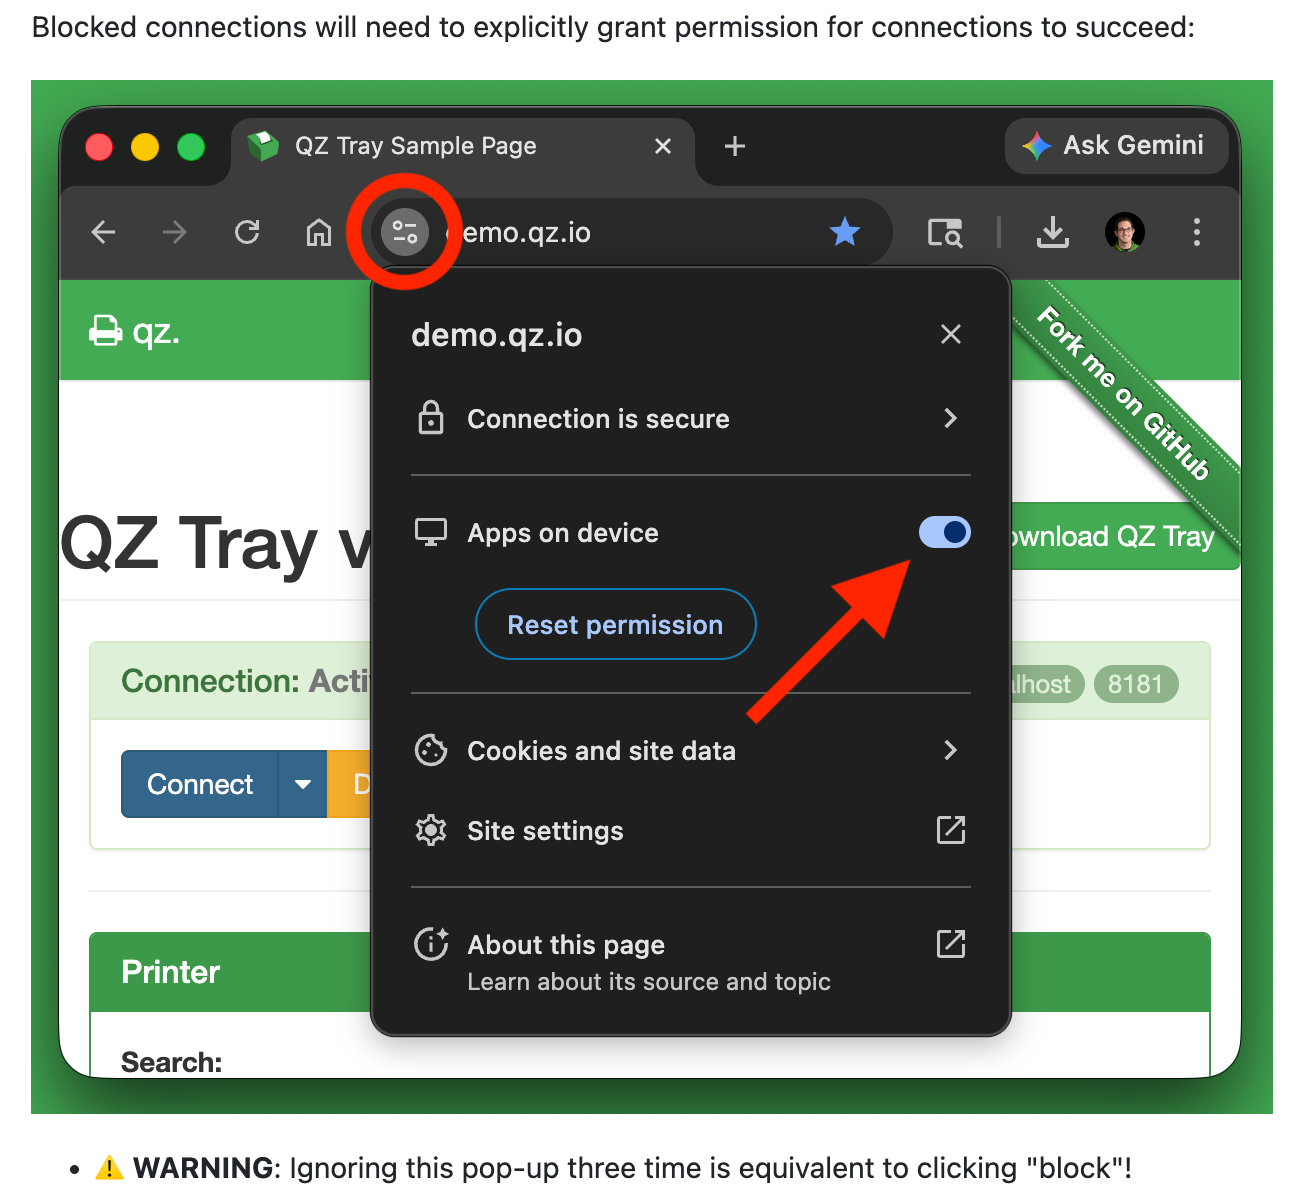
To reset permissions after the message was dismissed by mistake, use the filter icon and reset the permissions.
If documents are not printing, check the following to resolve the issue:
-
Is the QZ client installed?
-
Is the QZ client running?
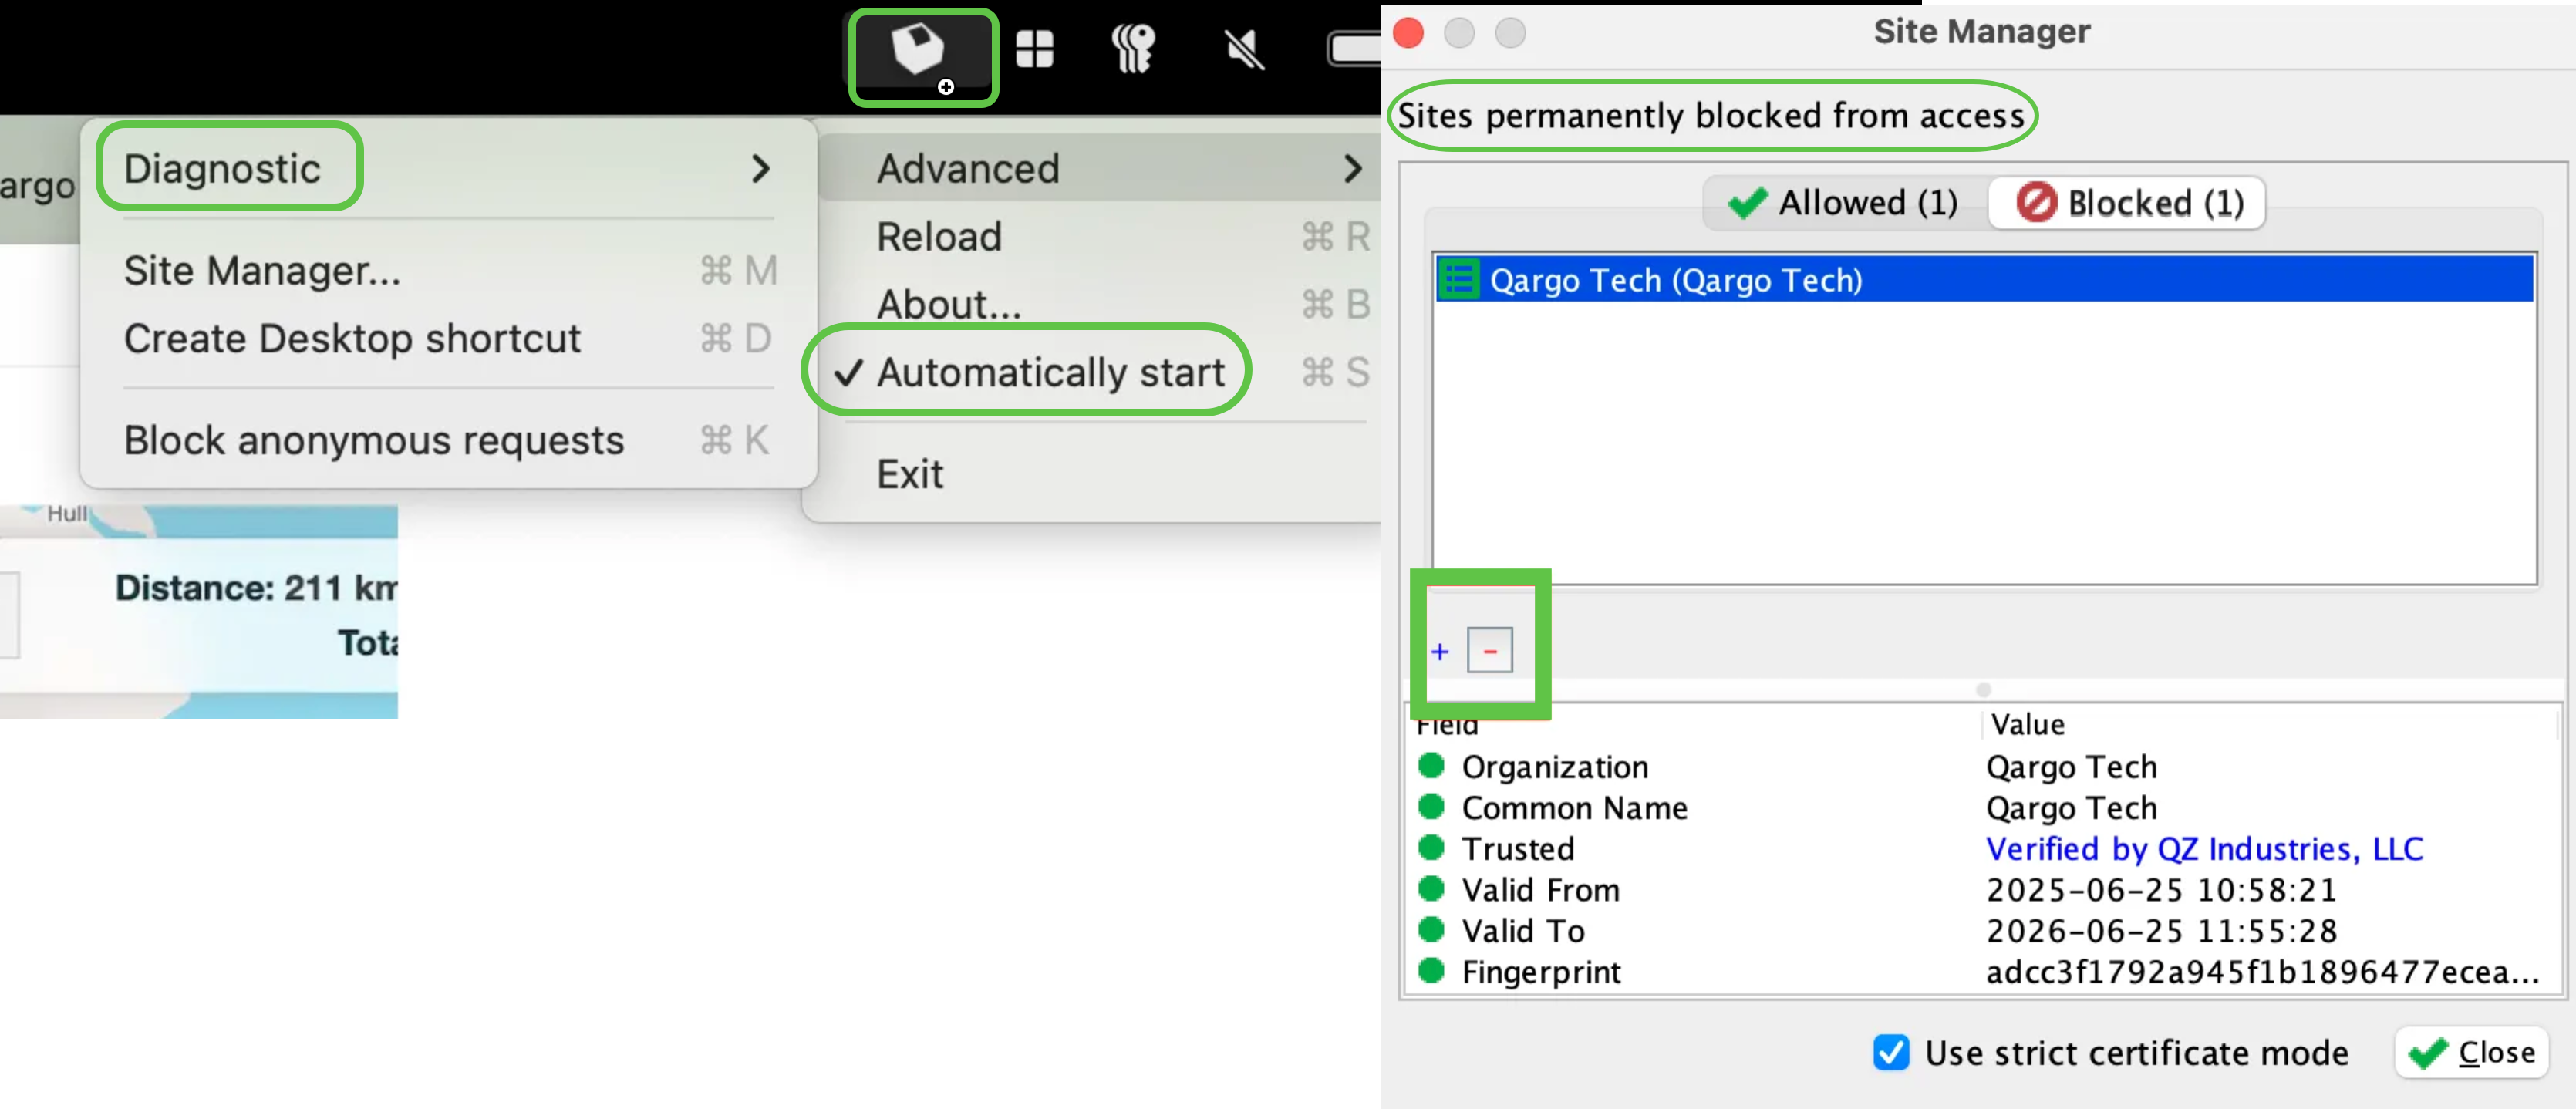
- Make sure it is set to start when the computer starts up.
-
Is Qargo allowed to connect to QZ?
-
Is a setting permanently set to Block?
- To undo the block, click the QZ menu bar icon, go to Advanced > Site Manager and remove the Qargo entry.
-
-
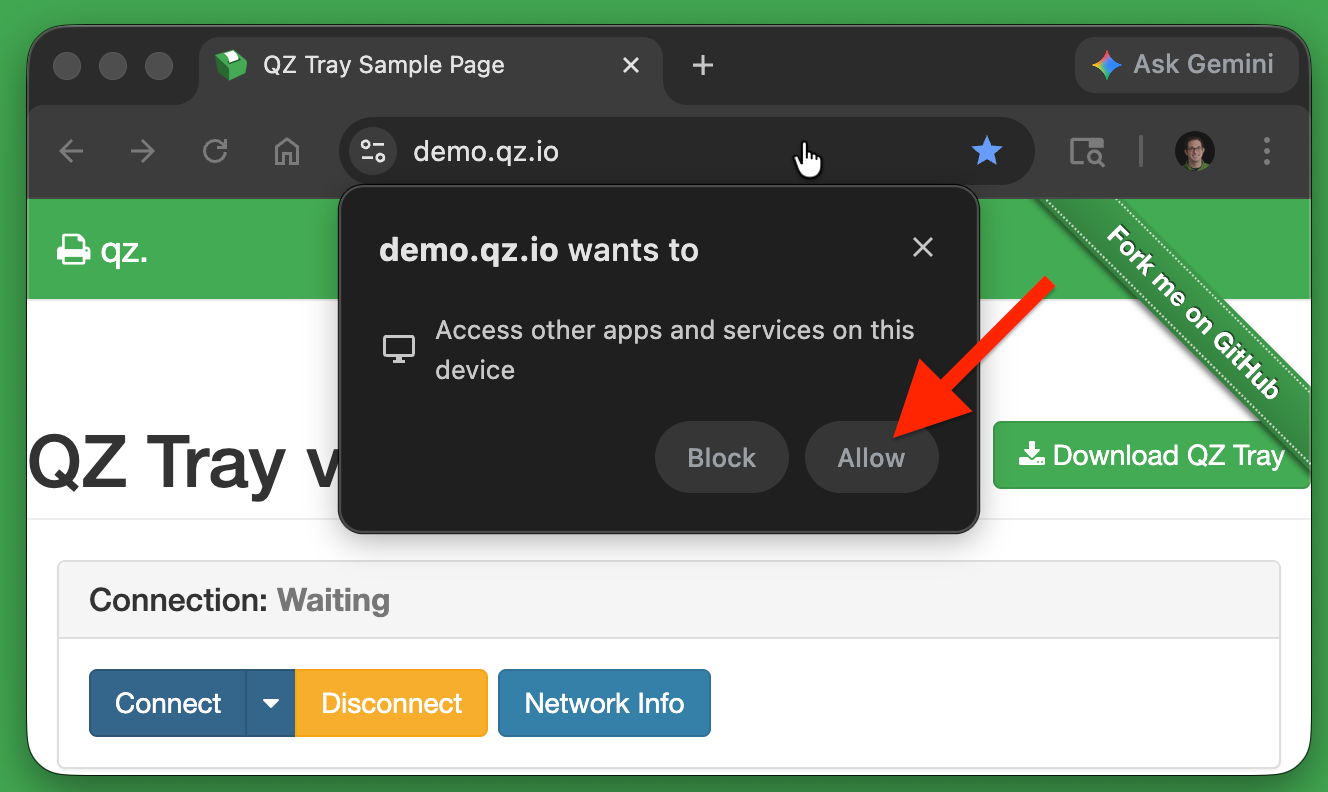
Is Chrome 147 or newer in use? From Chrome version 147 onward, Chrome shows an additional security pop-up the first time Qargo tries to connect to QZ Tray. When this pop-up appears, click Allow to grant permission. This only needs to be done once. After allowing it, printing works as normal.
-
Is the printer online?
-
Qargo does not track printing statuses. To check whether the printer is online, open the print queue on the computer:
-
-
-
Has the printer to be added to Qargo been added to the operating system? To add a printer to Qargo, it needs to be registered in the OS.
-
-
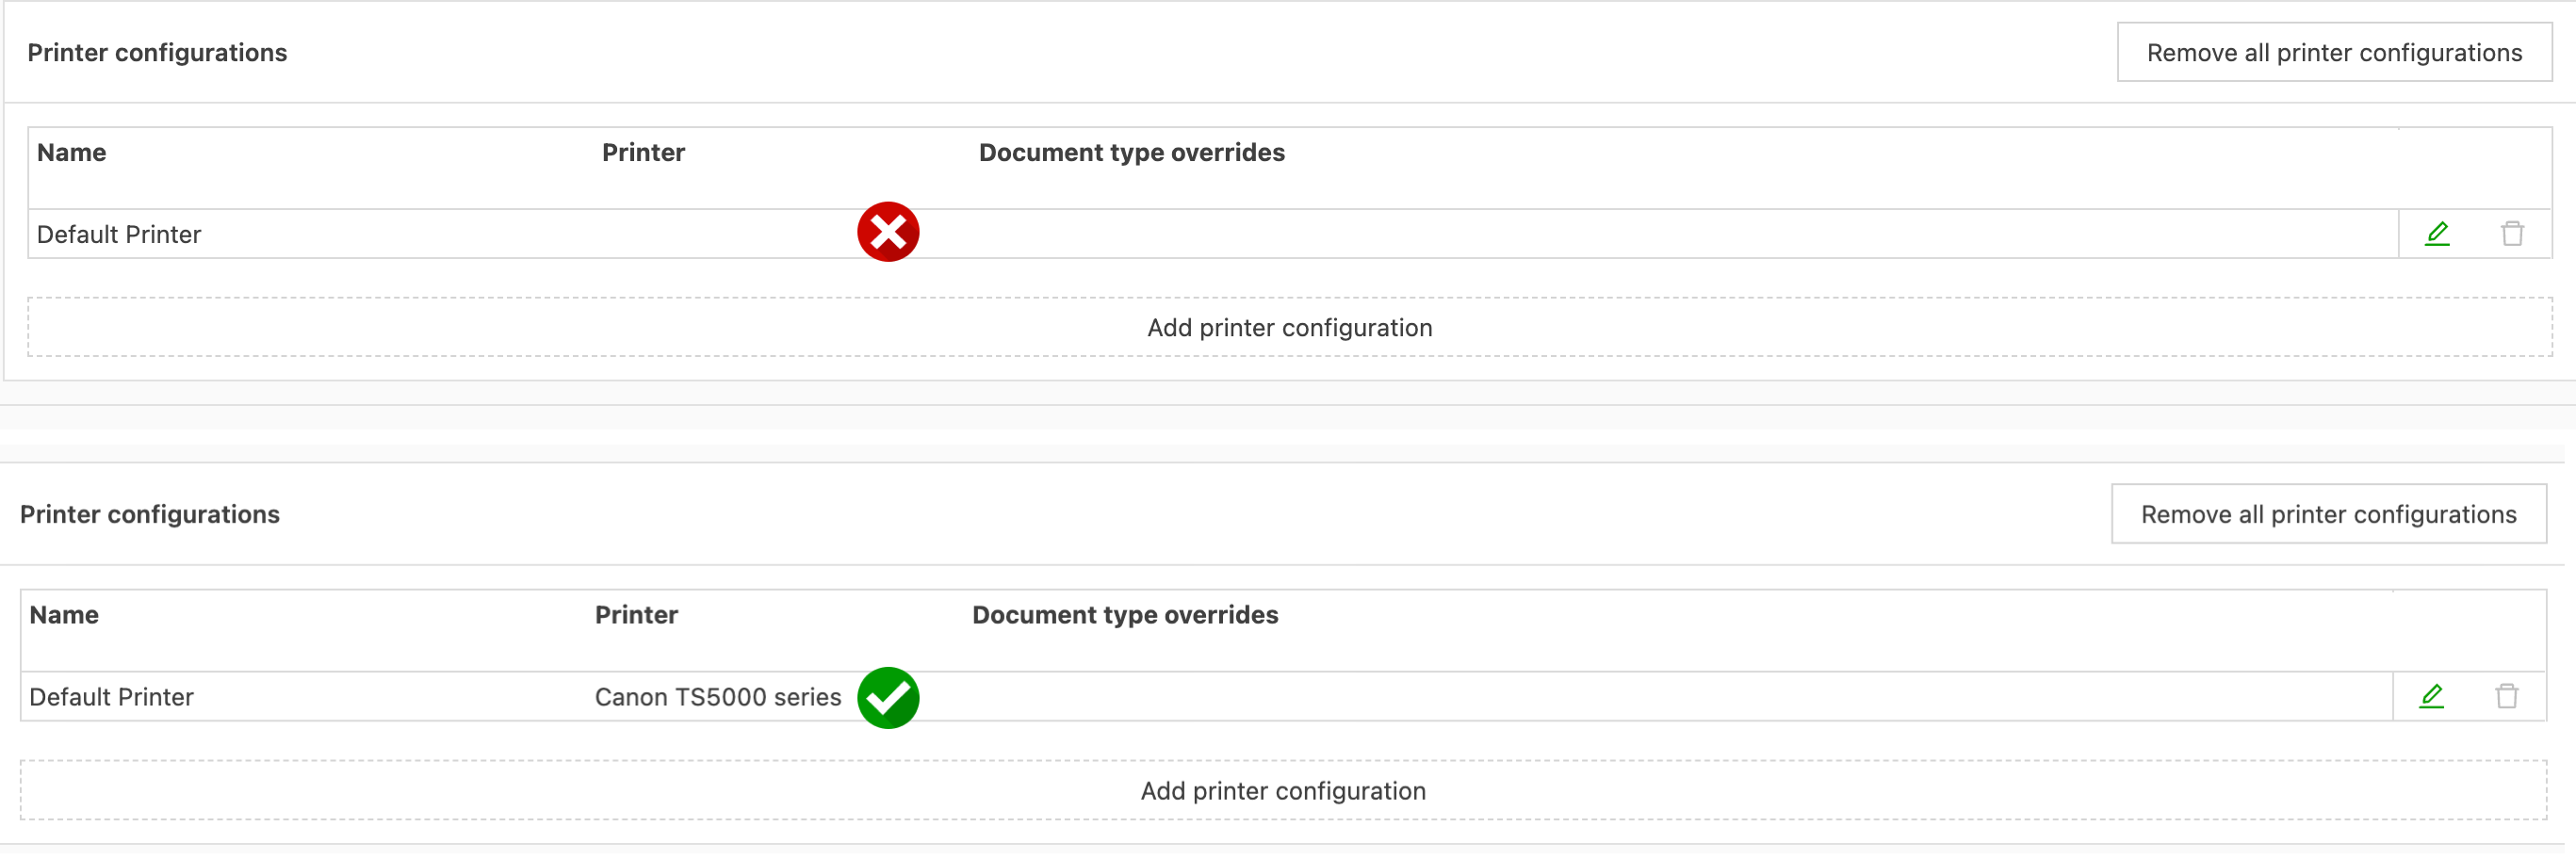
Is the default printer configured and specified?
-
After downloading and installing QZ Tray, step 3 of the configuration (editing the default printer) is required.
- From Configuration > Documents > Printer configuration, go to the Printer configurations panel. If no printer is showing, click the edit icon and add the printer from the dropdown. Click Save.
-




Troubleshooting QZ Tray connection issues in Qargo for label printing
QZ Tray is essential for label printing in Qargo. However, users may encounter issues such as “no printers available,” “could not connect to QZ Tray,” or repeated prompts to install QZ Tray. This guide provides a complete troubleshooting approach to resolve these problems.
Common causes of QZ Tray connection issues
- Browser permissions: Chrome or other browsers may block QZ Tray because permissions were denied.
- QZ Tray configuration: Incorrect settings in QZ Tray, such as blocked entries, can prevent the connection.
- Printer configuration: Qargo may not detect printers that are not properly set up in the operating system.
- Environment blockers: VPNs, remote desktops, or security tools may interfere with QZ Tray.
Step-by-step troubleshooting guide
1. Check browser permissions
- Chrome permissions: - Open Chrome and go to chrome://settings/content/localNetwork. - Remove any blocked entries related to localhost or Qargo. - Reload Qargo and try to print. - When prompted, allow the one-time pop-up for local network access and check Remember this decision.
- Reset site permissions: - Click the lock icon in the browser’s address bar. - Reset the site permissions for Qargo. - Refresh the page and try printing again. Allow any pop-ups that appear.
2. Verify that QZ Tray is running
- On Windows, check the system tray (bottom-right corner). If QZ Tray is not running, open it from the Start menu.
- Make sure Qargo is allowed in QZ Tray: - Go to QZ Tray > Advanced > Site Manager. - Remove any Qargo entries that are Blocked/Denied, or delete old entries. - Try printing again and, when prompted, click Allow and select Remember this decision.
3. Refresh the printer configuration in Qargo
- In Qargo, go to Configuration > Documents > Printer configuration.
- Click Refresh printers.
- Edit the Default printer configuration, choose the printer from the dropdown, and click Save.
- Perform a hard refresh of the page (e.g., Ctrl+F5 on Windows) if needed.
4. Verify the printer setup in Windows
- In Windows, open Settings > Bluetooth & devices > Printers & scanners.
- Make sure at least one printer exists and can print a Windows test page.
- If needed, add a printer (even a virtual one such as “Microsoft Print to PDF”).
5. Restart the QZ Tray and Qargo connection
- Close all Qargo tabs.
- Quit QZ Tray (right-click the QZ icon > Exit).
- Restart QZ Tray and reopen Qargo.
- Go to Printer configuration, click Refresh printers, and allow any prompts.
6. Address environment blockers
- When using remote or virtual desktops (e.g., RDP, AVD, Citrix), make sure printers are installed or redirected in that environment.
- Temporarily disable VPN and security tools, and make sure local loopback connections for the browser and QZ Tray are permitted.
Additional notes
- If Chrome blocks the connection between Qargo and QZ Tray because of a previously denied permission pop-up, Qargo shows “no printers available.” Make sure to allow the connection when prompted.
- For detailed steps on resetting Chrome permissions, refer to the QZ Tray help page.
These steps resolve most QZ Tray connection issues and enable smooth label printing in Qargo.