Invoices: upload carrier invoice
Carrier invoices can be uploaded in several ways, with automated scanning that extracts key data, matches existing orders, and highlights discrepancies.
Table of contents
Overview
-
Multiple upload methods:
- Manual upload directly in Qargo
- Through the Outlook add-in
- Upload through the task system
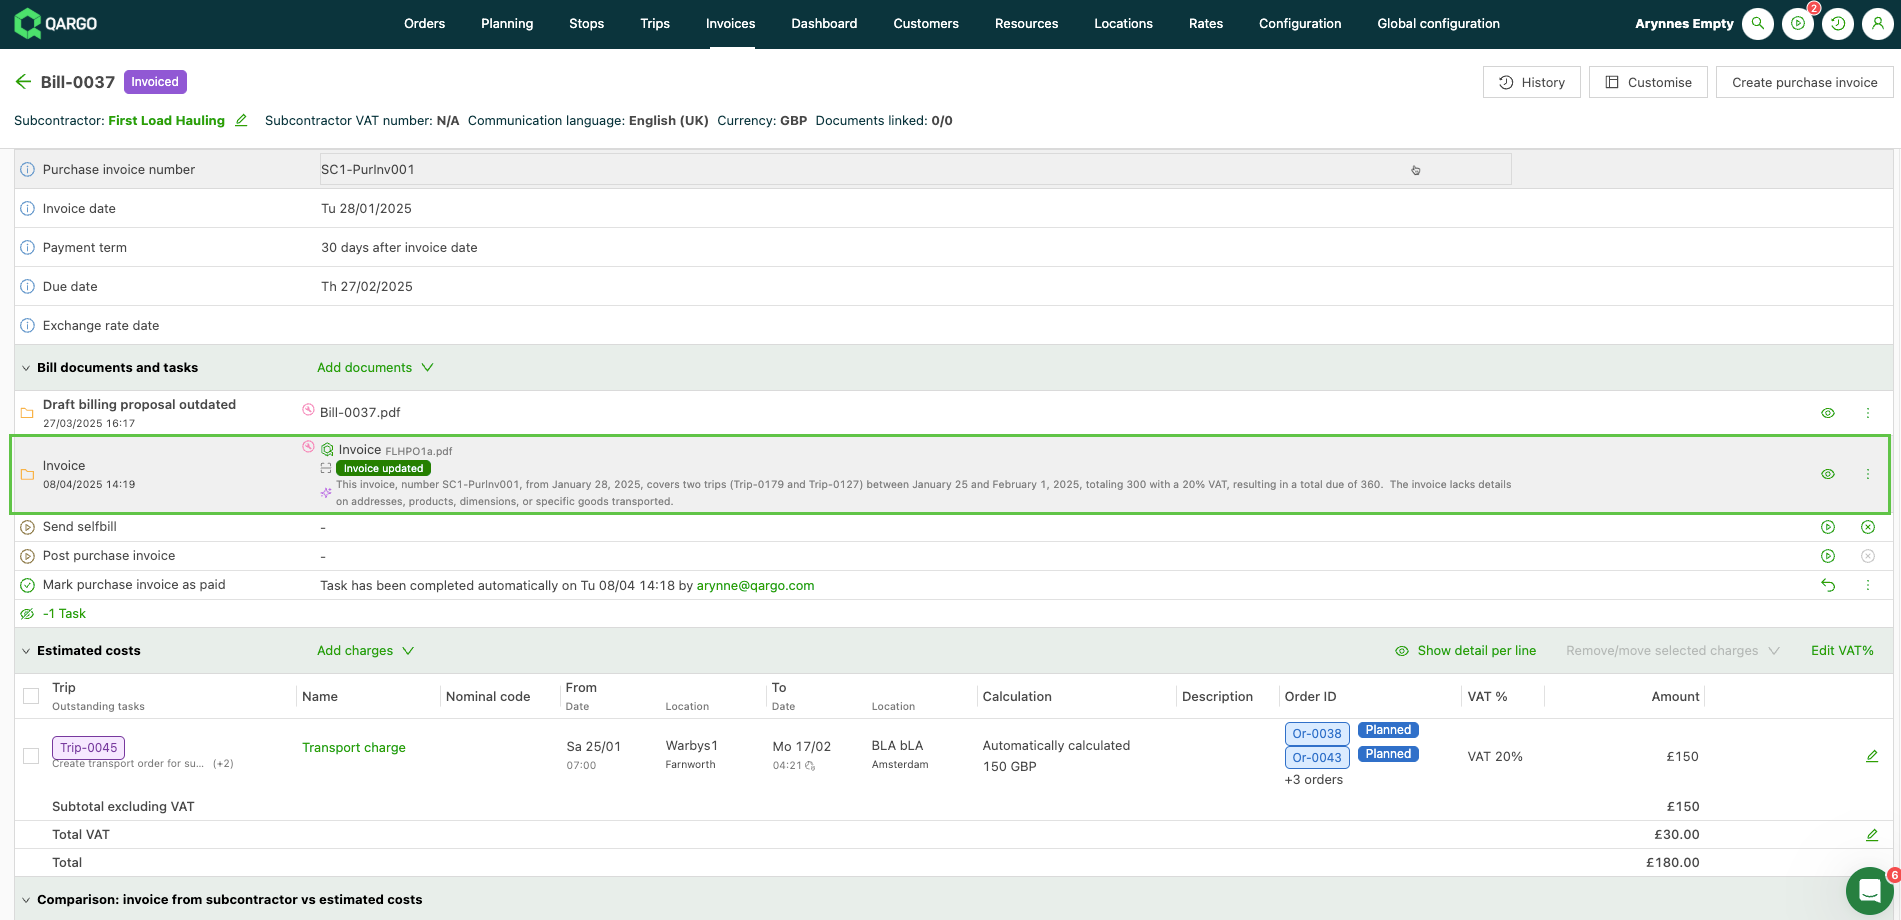
When a carrier invoice is uploaded to an existing billing proposal, the system automatically scans the invoice and updates its details.
Automated scanning:
Qargo automatically scans uploaded documents to extract and pre-fill key information. The key data extracted includes:
-
Carrier invoice number
-
Contract carrier company name
- Matched based on the tax ID, which must be in both the document and the profile.
-
Invoice date
-
Load charges
- Matched based on reference numbers.
-
Invoice amount totals
To improve matching, contract carrier invoices should include Qargo order or load references. Other data used for matching:
- Contract carrier tax ID
- Order / load reference number
- Billed status = Loads to bill ‘Not completed’ & ‘Completed’ (Status = Not yet billed)
If there are any discrepancies between the uploaded invoice and the amounts in Qargo, the system highlights these differences for review.
The fields below are all included in the scan and match function: load name
- load name
- order name
- intermodal booking reference
- container no.
- CMR reference
- shipment reference
- Pallex shipment number
- Hazchem shipment number
- Palletforce shipment number
- Palletways shipment number
- Palletways tracking ID
- TPN shipment number
- UPN shipment barcode
For more details on carrier invoices:
Create carrier invoice from existing self-bill
Create carrier invoice from contract carrier invoice
Create carrier invoice from loads
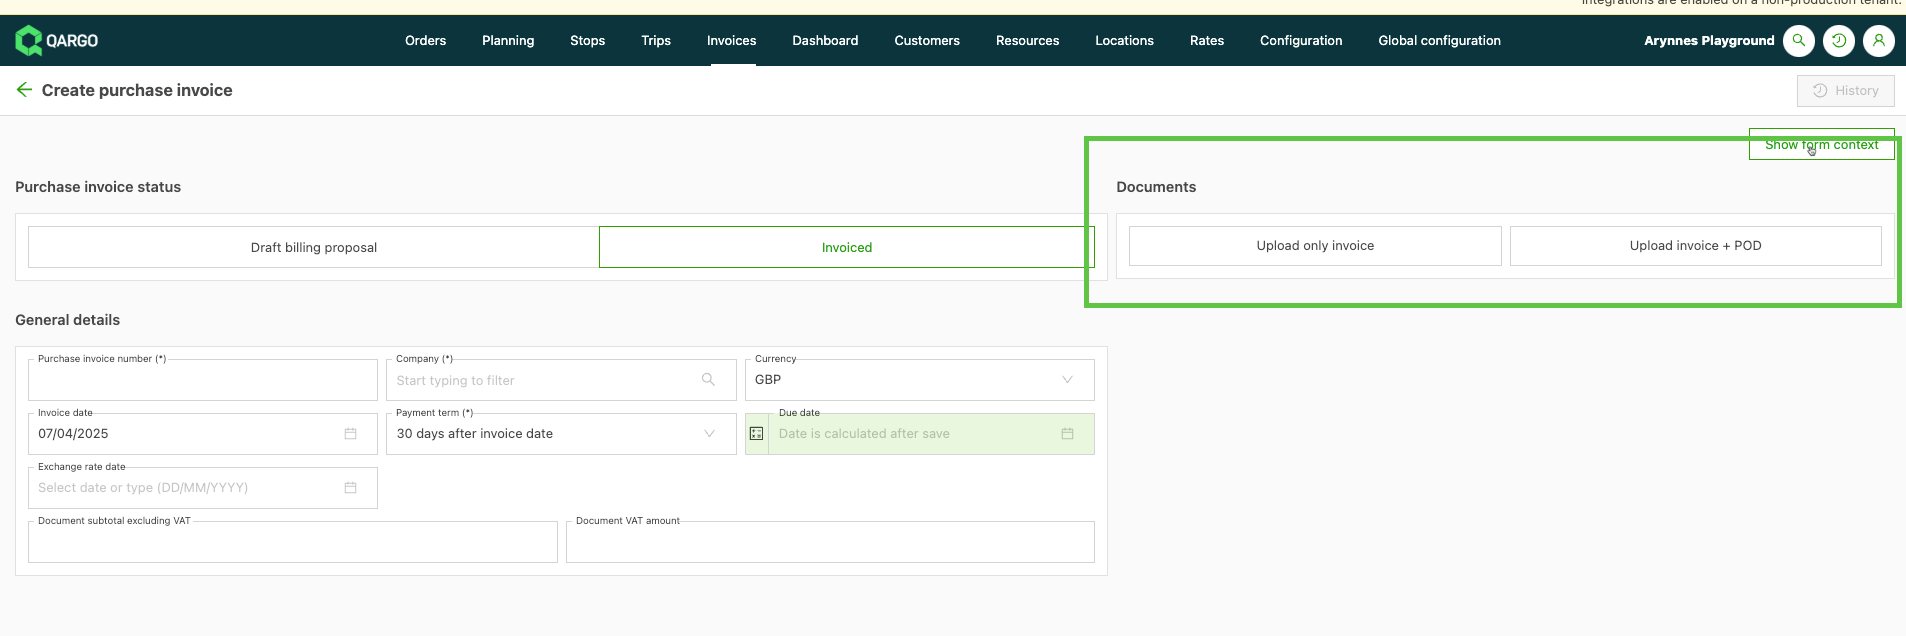
Manual upload directly in Qargo
Either of these options starts scanning the invoice and matching the available data to create the invoice.
Through the Outlook add-in
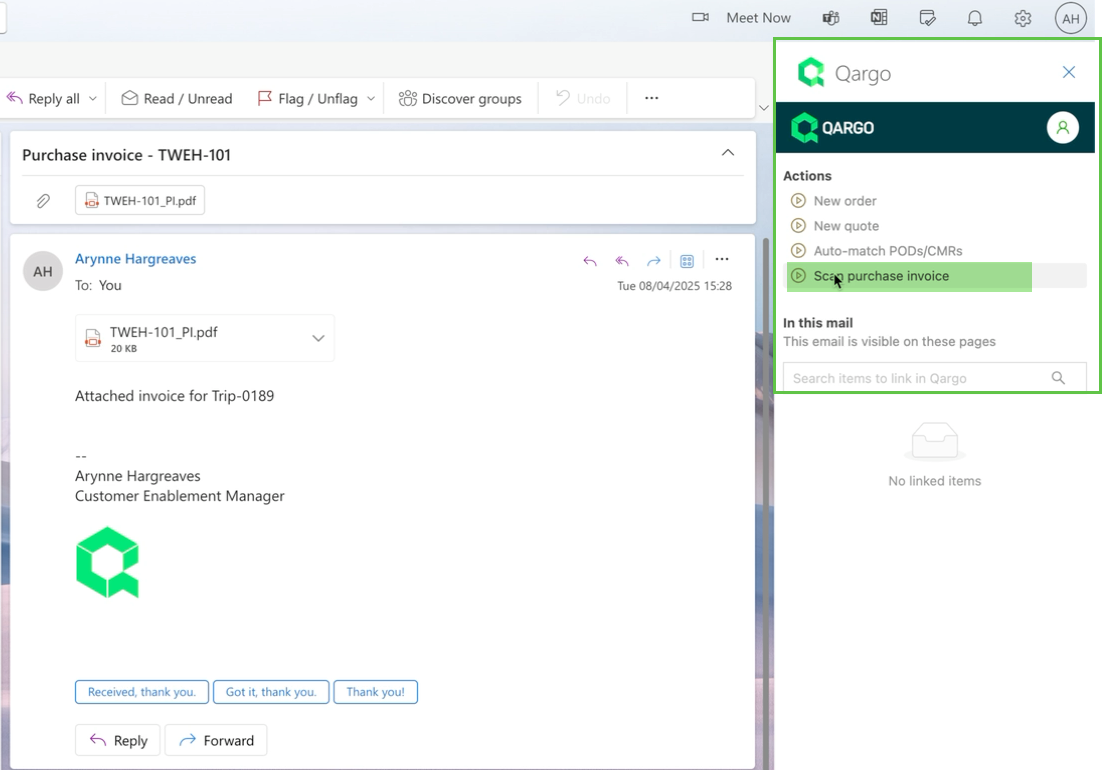
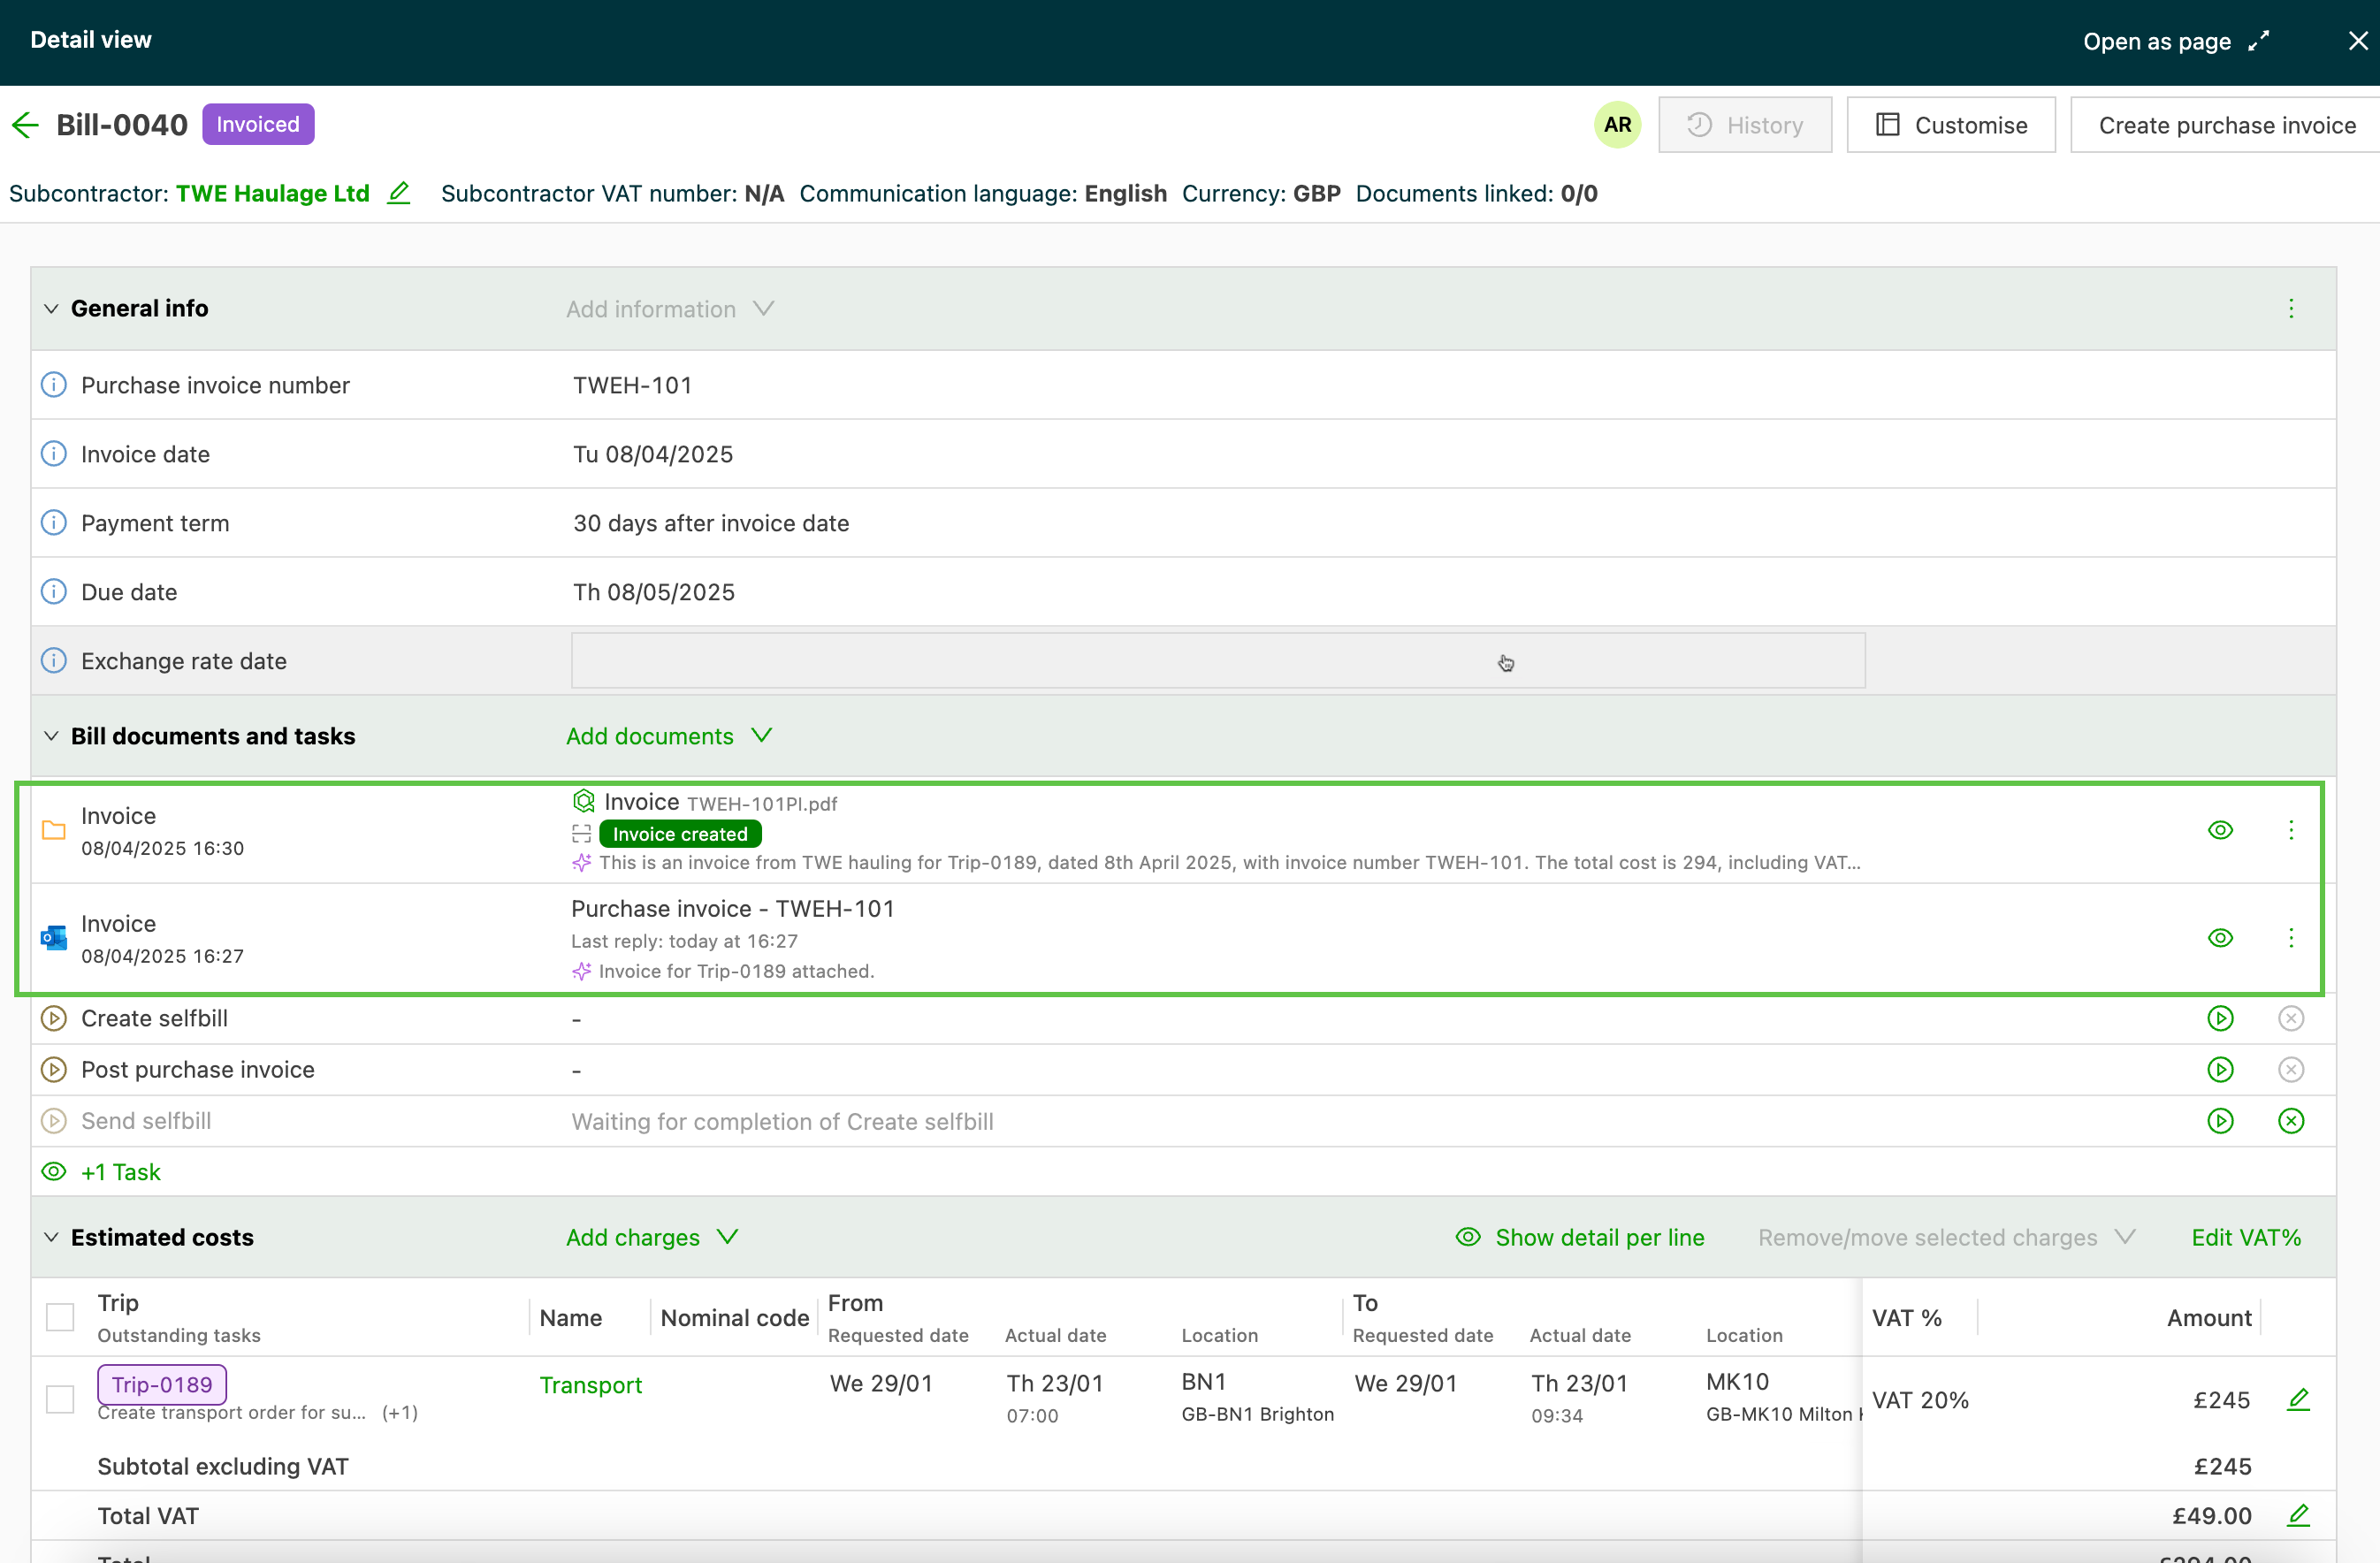
- Scan carrier invoices to upload them directly from email attachments, using the Qargo email intelligence add-in. Open the email and select the action ‘Scan carrier invoice’.
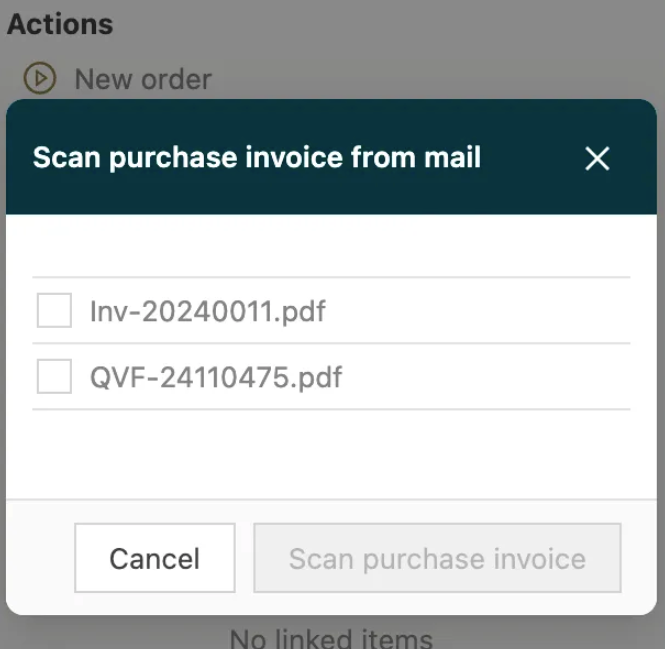
- If more than one attachment is linked to the email, this action opens a pop-up where the user can choose which document(s) to scan as a carrier invoice.
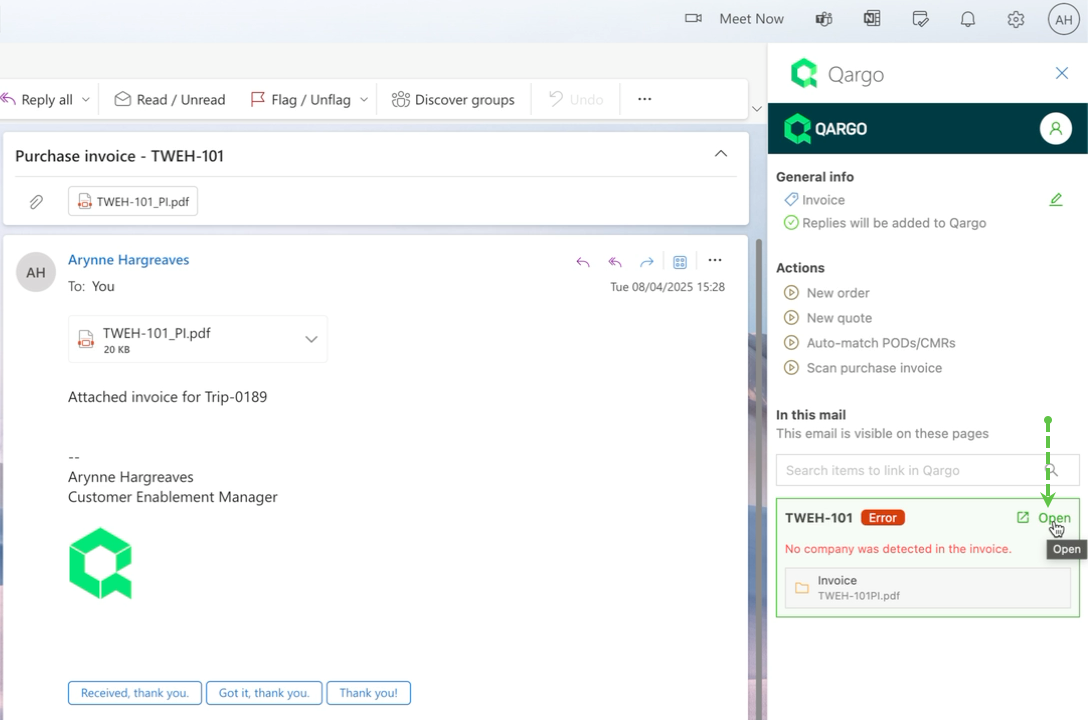
- If there is a problem with the upload, an error is shown. Click the ‘Open’ link to open the interface with the TMS and resolve the error.
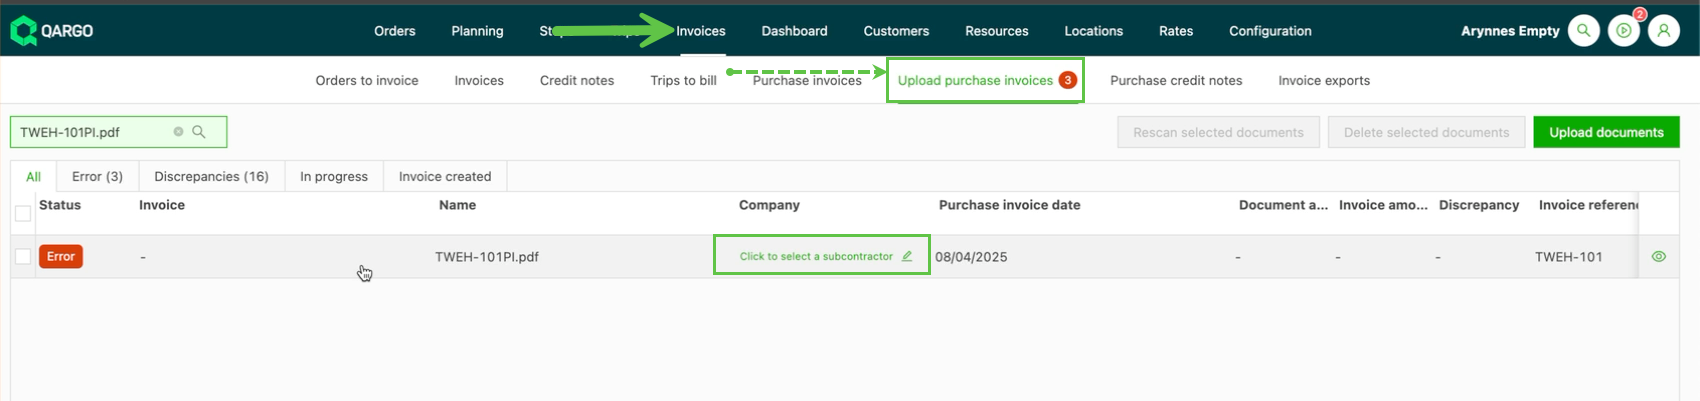
- The system opens on the Upload carrier invoice page. Once the error is resolved, the invoice is created.
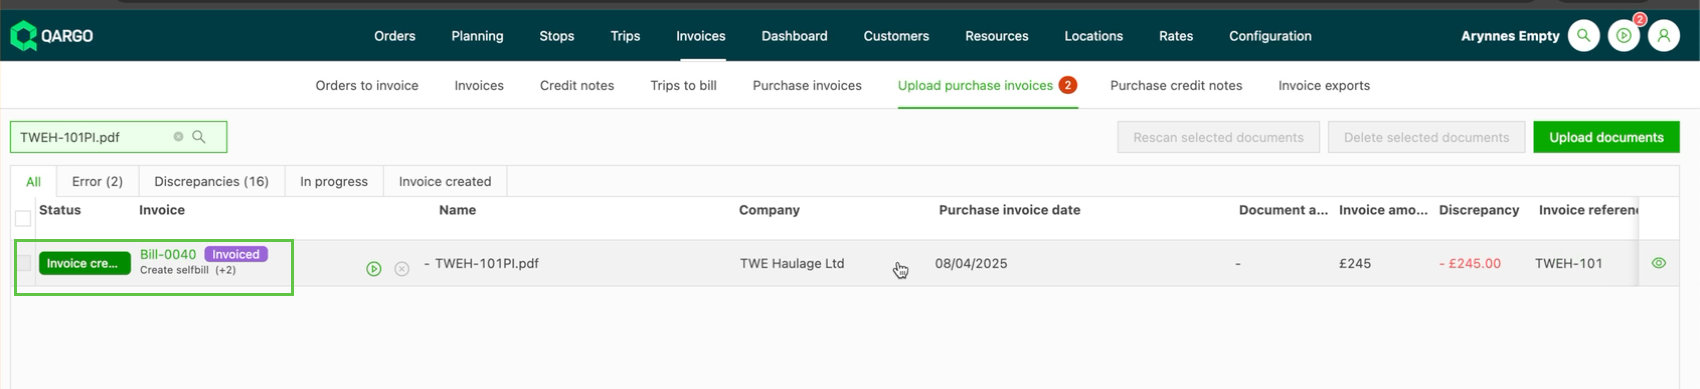
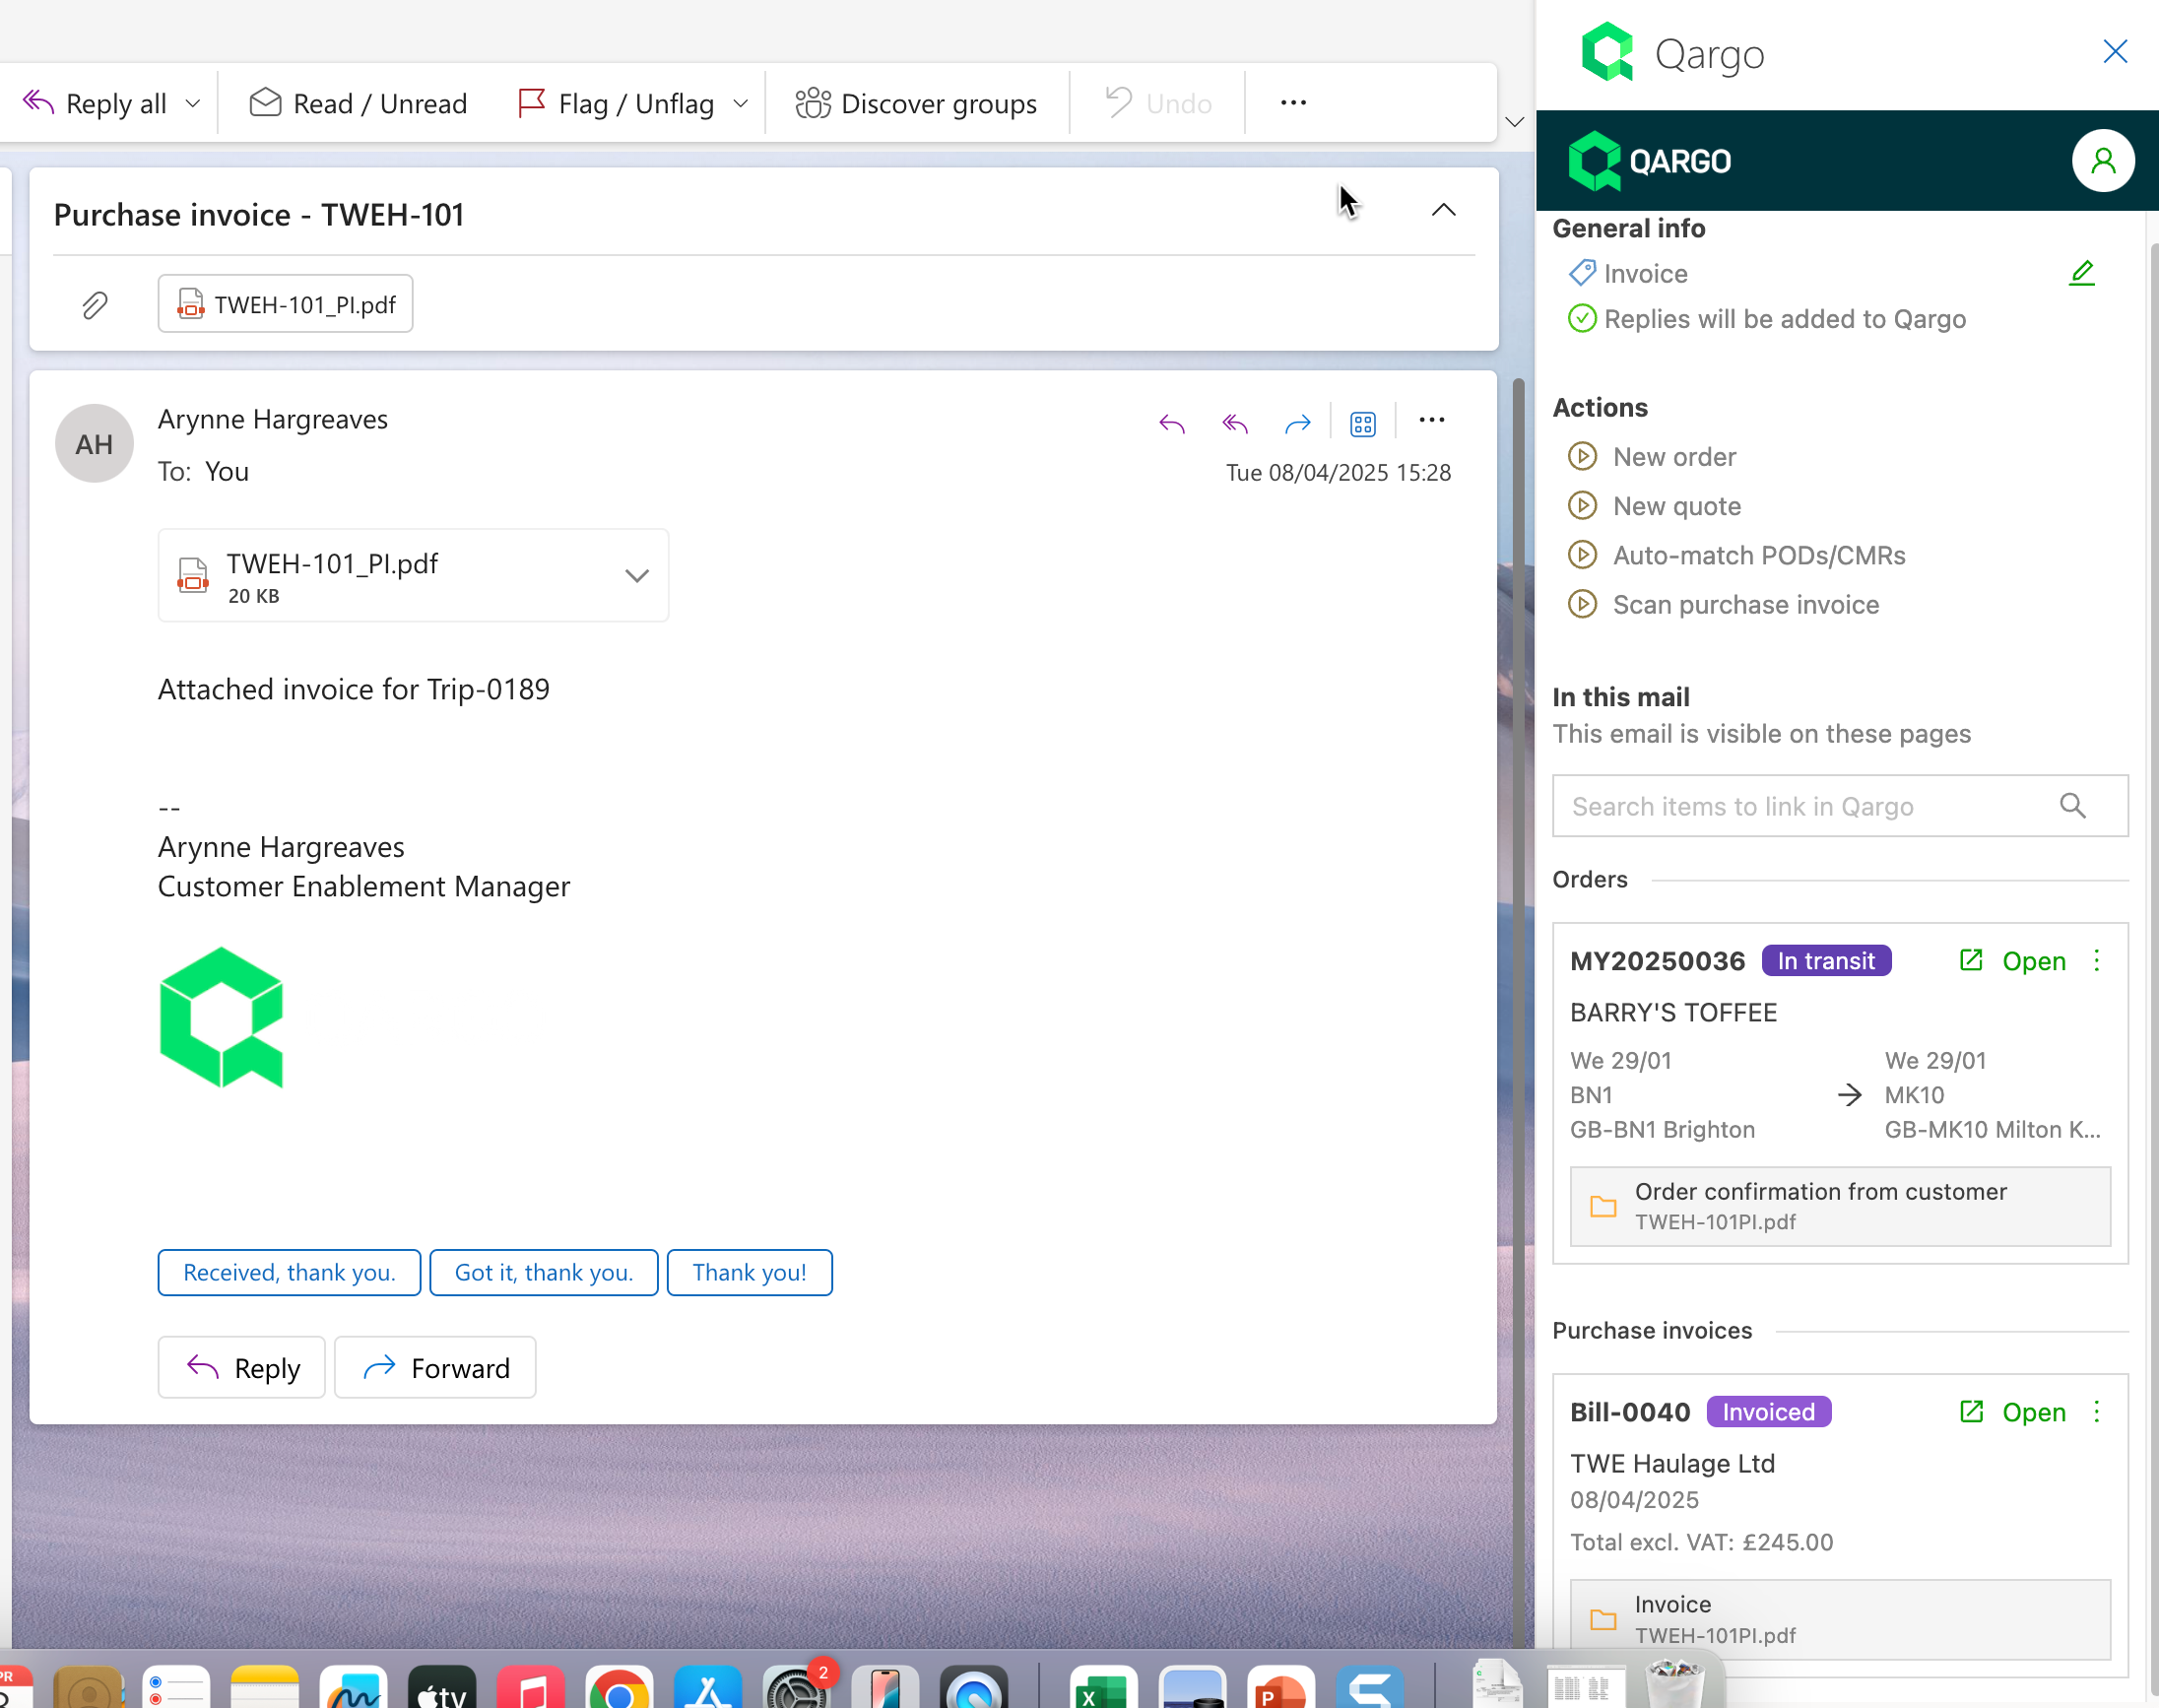
The Qargo add-in also updates to show the new status. It consolidates any threads for associated emails, with links to open the TMS.
Qargo Intelligence also provides a summary on the details pages, including an indication of document quality through the color-coded ‘Q’. The summary line expands to show a summary of the document. When the document is uploaded through the add-in, the email is shown next to the Outlook icon, along with the summary.
Upload through the task system
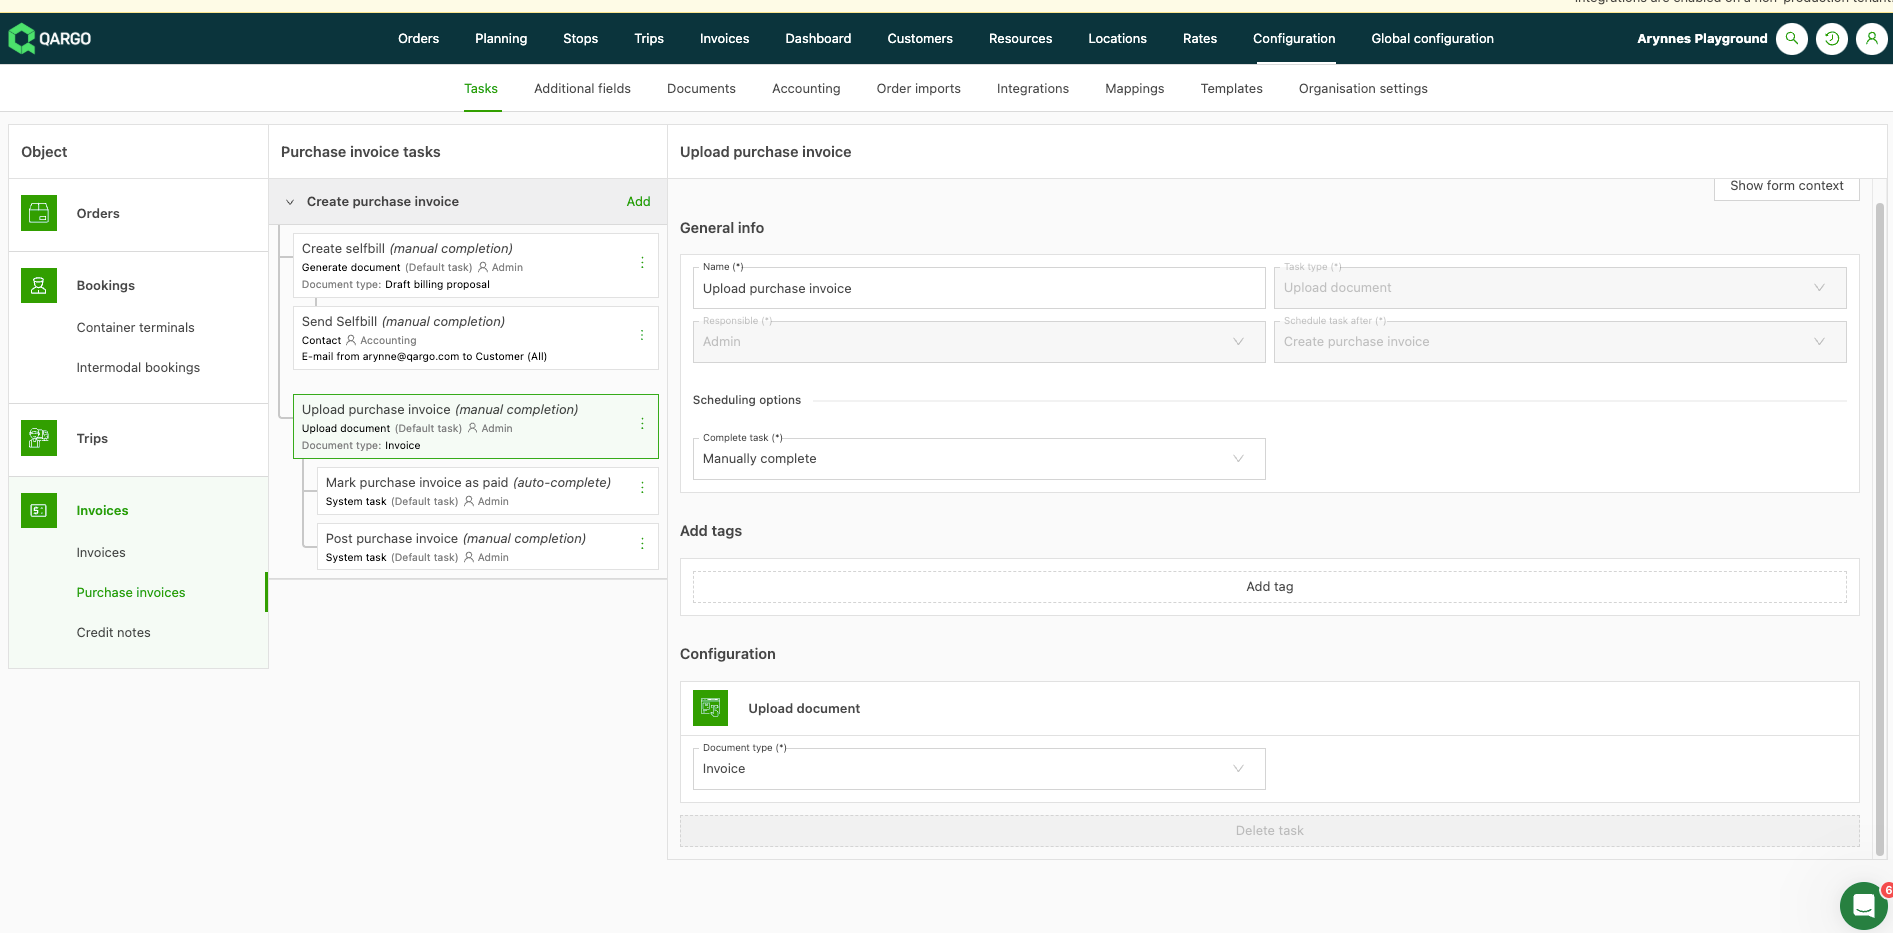
With task configuration, the task ‘Upload carrier invoice’ can be added and configured manually. This task is added to the carrier invoice workflow to make sure the required document is associated with the bill.
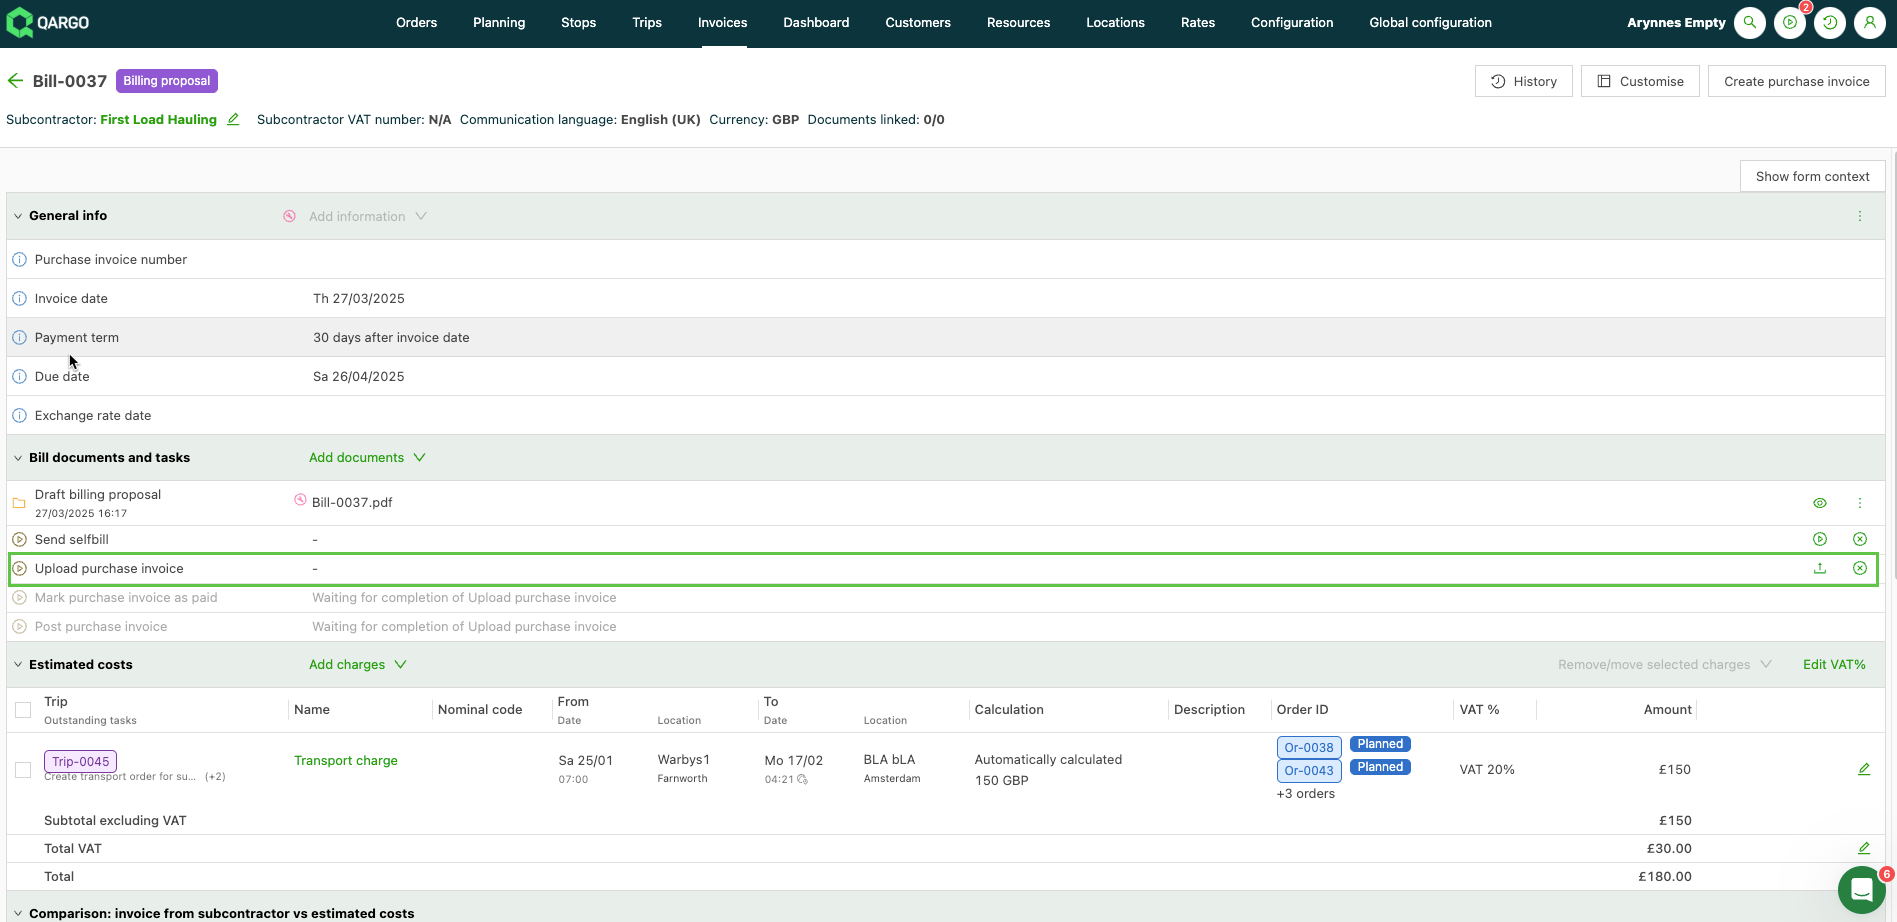
When a carrier invoice is created, the task is automatically added to the workflow. To upload the document manually, click the icon; the user is redirected to the ‘Upload’ window.
Once the invoice is uploaded, Qargo Intelligence scans the document and generates a summary.