Invoices – Create carrier invoice from loads
Manage outsourced load costs by creating carrier invoices, validating charges, and exporting to accounting.
When a load, or part of a load, is outsourced, the contracted third party charges back the associated costs. Creating a carrier invoice records these costs in the system, and the invoice can then be exported to accounting.
Once a resource is assigned to an order, a load is created and the costs associated with the load can be added. Load costs show as a ‘Bill’ under the Invoices menu. They are grouped based on the status of the load:
- All: Shows all loads, regardless of status.
- Not completed: Shows all loads that are not yet completed. This can include loads that are Planned as well as those In transit.
- Completed: Shows all loads with a status of Completed that have not been billed.
- Billed: Shows loads that have had a bill (carrier invoice) created against them. Clicking the load row opens the Load details. Scrolling down to ‘Resource costs’ shows the associated bill. Any updates must be made through the carrier invoice.
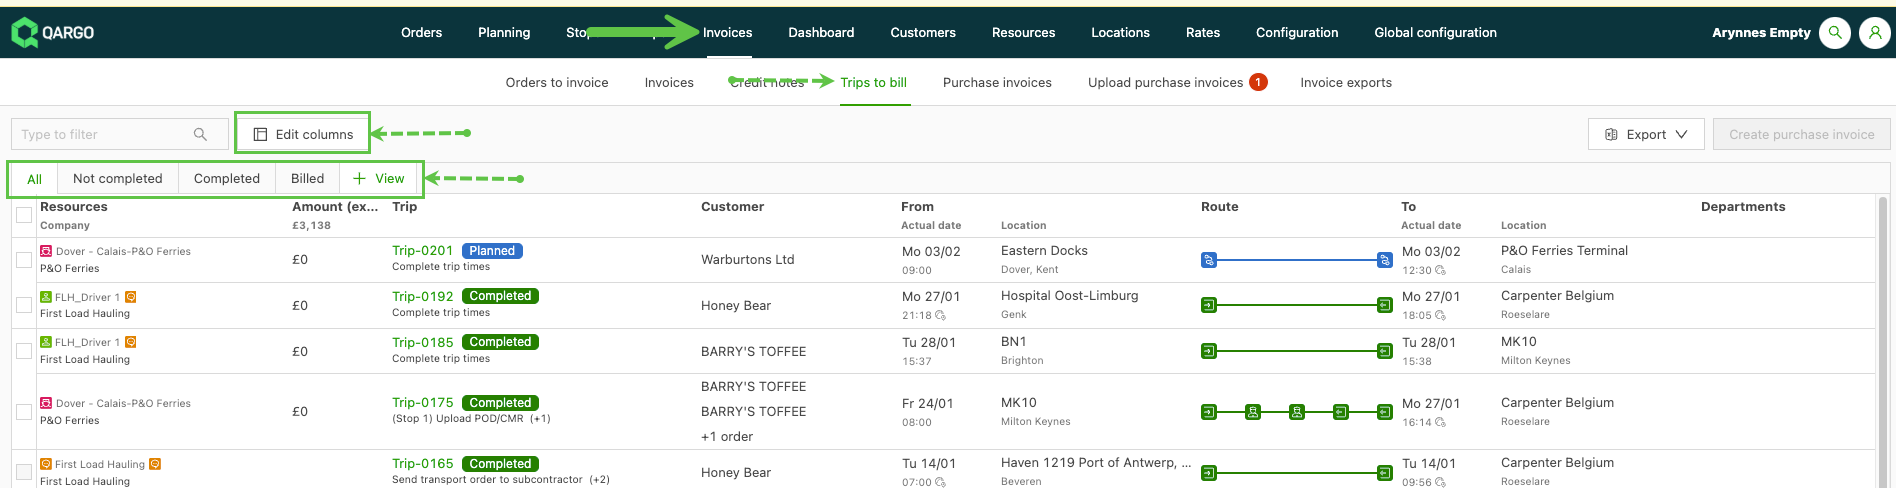
- +View: Use this tab to create a custom view. Users can create specific data views with the column header filters and the Edit columns button.
Edit columns
The list view table can be modified with ‘Edit columns’, which toggles specific data sets on or off. This allows users to create views that only display the data required to perform tasks. This maximizes screen space and makes data easy to access.
Create a carrier invoice directly from loads
-
Navigate to Invoices > Loads to bill.
-
Carrier invoices can only be created once a load is assigned. The load can be found under the appropriate tab.
-
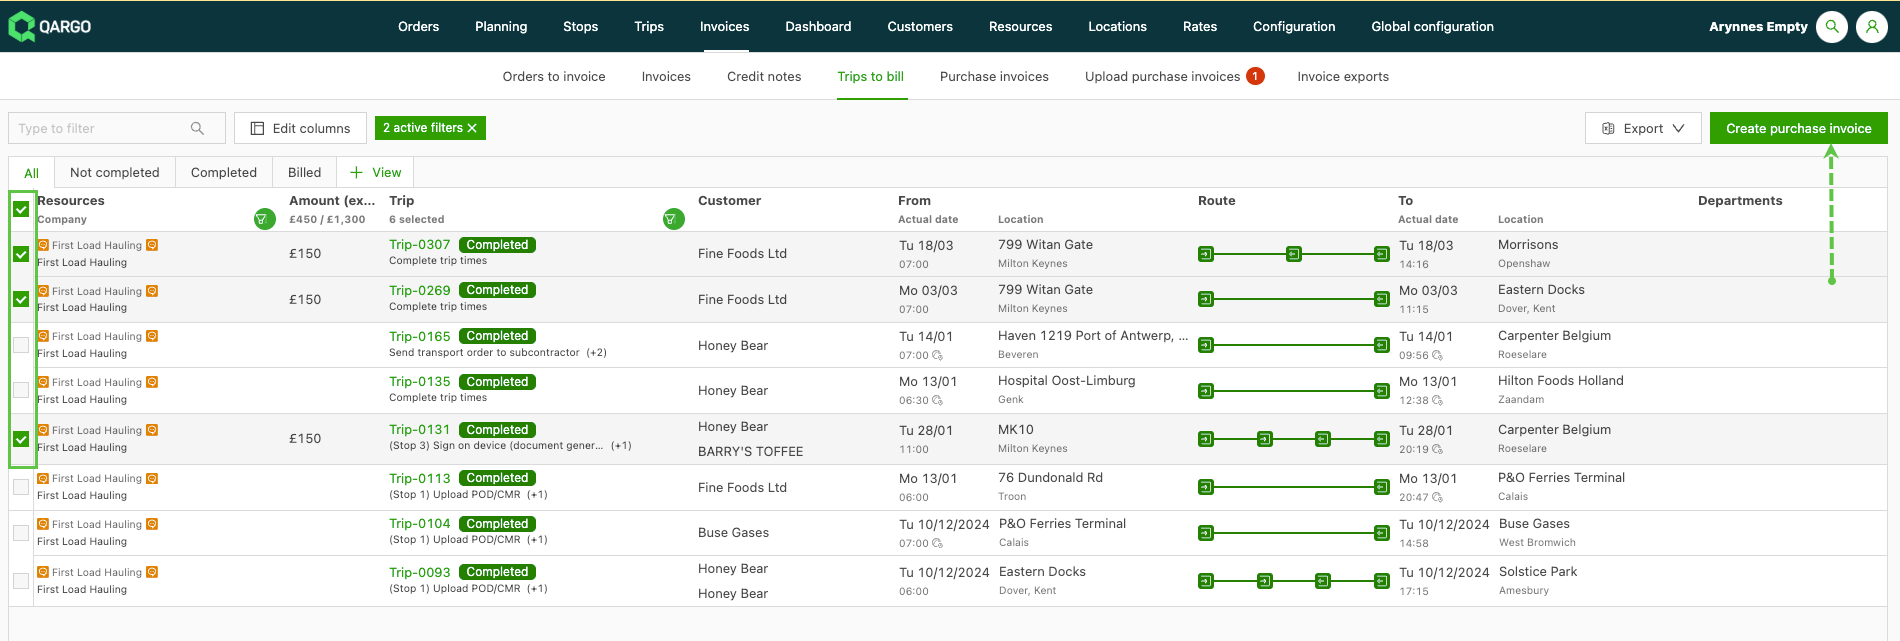
Select the load(s) with the checkbox; multiple loads can be selected. Click the green ‘Create carrier invoice’ button.
-
The column header filters can help reduce the volume of data, so multiple records can be processed quickly and easily.
-
-
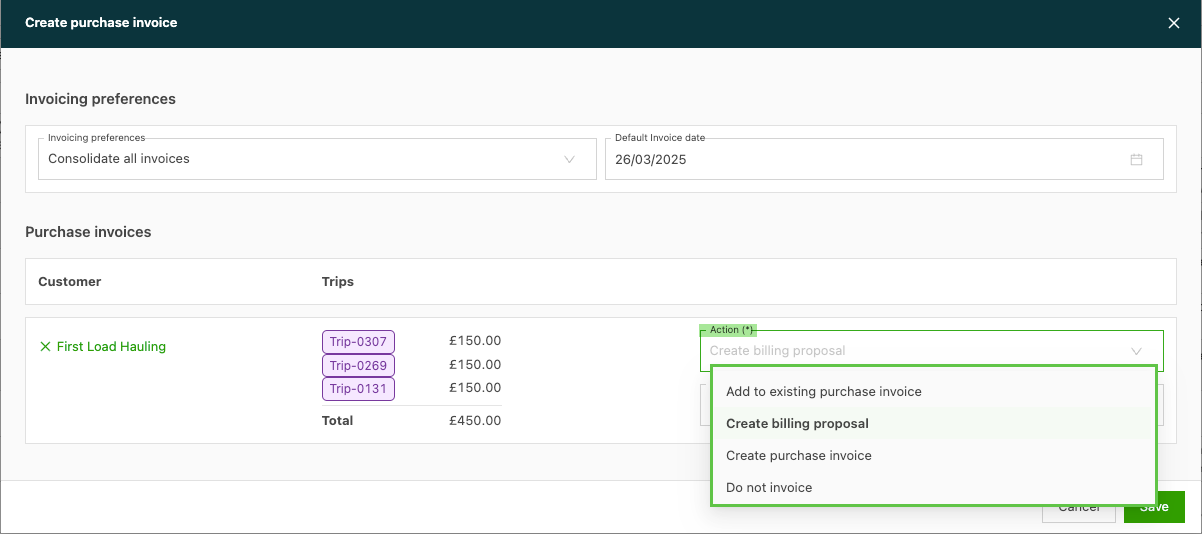
A new ‘Create carrier invoice’ window opens. It includes the selected loads, grouped based on invoice preferences.
-
Click the ‘Action’ field and a dropdown menu displays the options:
-
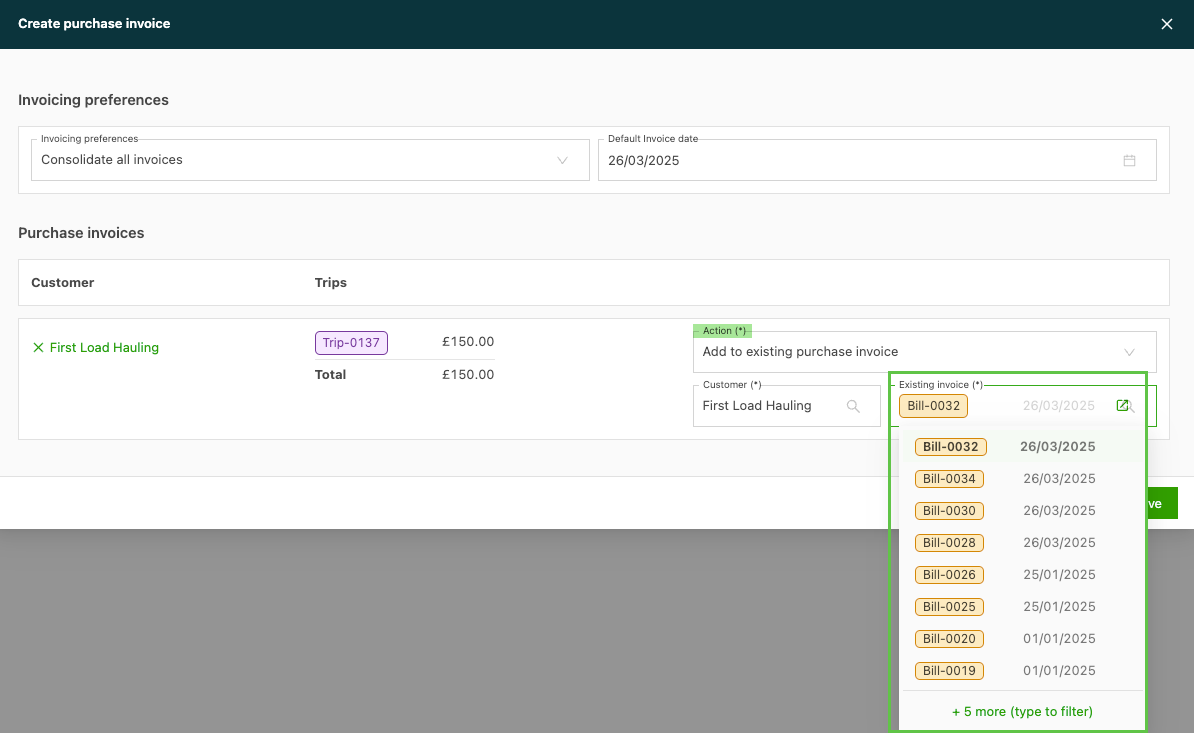
Add to existing carrier invoice: This moves the selected loads to an existing carrier invoice. When selecting this option, click the ‘Existing invoice’ field and a list of matching bills appears.
-
Create billing proposal: This creates a new billing proposal that includes the selected load costs. It is created as a Draft; however, it can be configured to be set to Invoiced automatically.
-
Create carrier invoice: This creates a carrier invoice including the selected load costs. The invoice has the status ‘Invoiced’ and can be finalized.
-
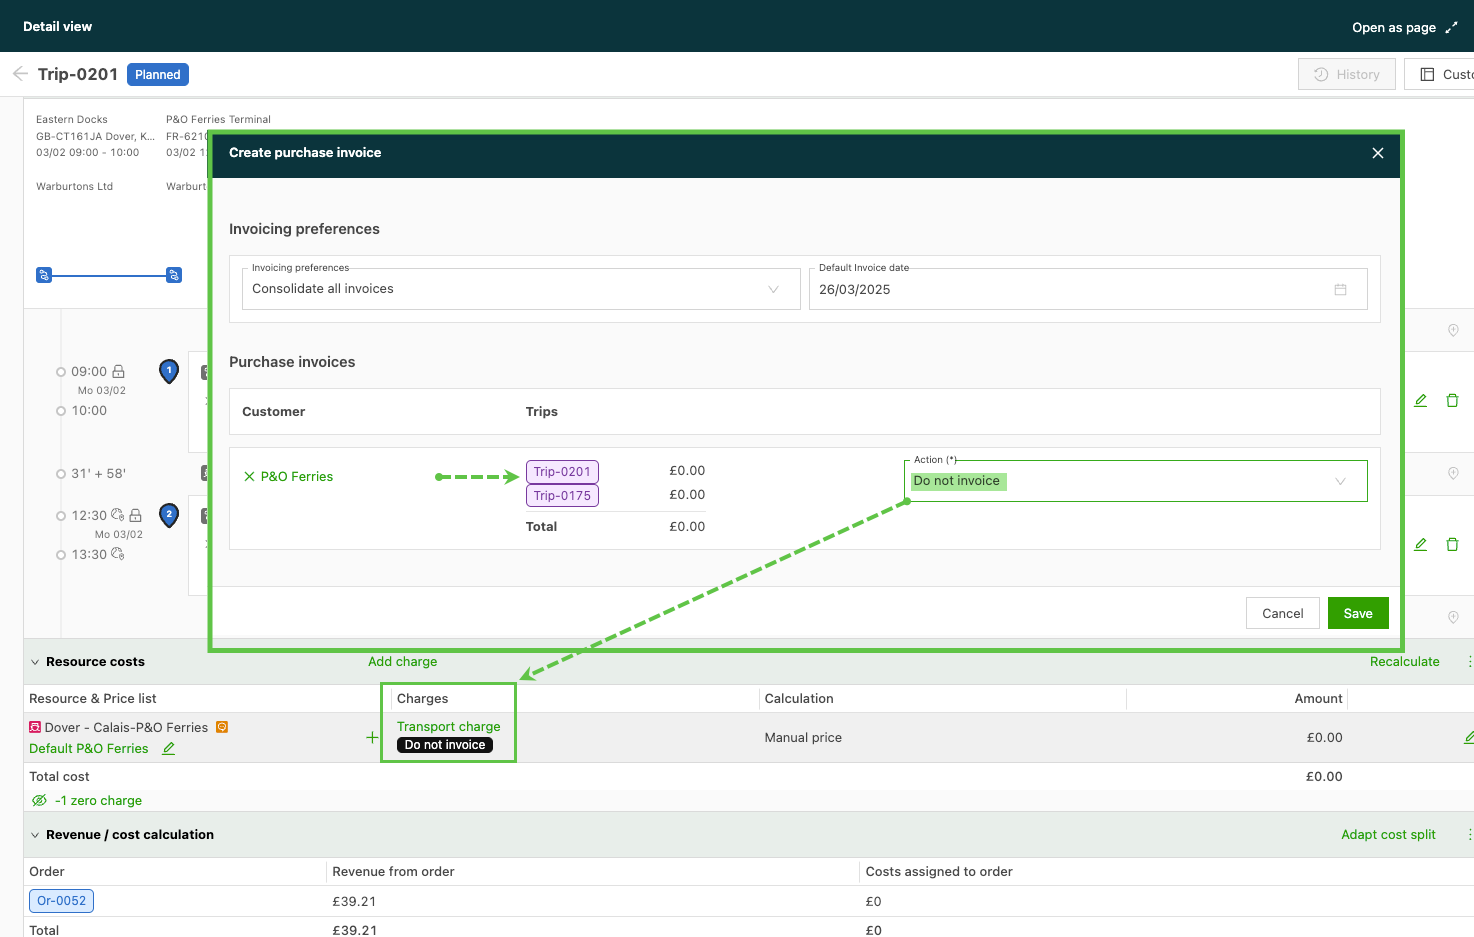
Do not invoice: This updates the load status and makes the record unavailable for selection. When the load details are opened, the ‘Do not invoice’ label shows on the costs.
-
IBAN and BIC/SWIFT in the invoice header
When a carrier invoice is opened, the IBAN and BIC/SWIFT codes of the supplier or contract carrier are now visible directly in the invoice header, next to the tax number.
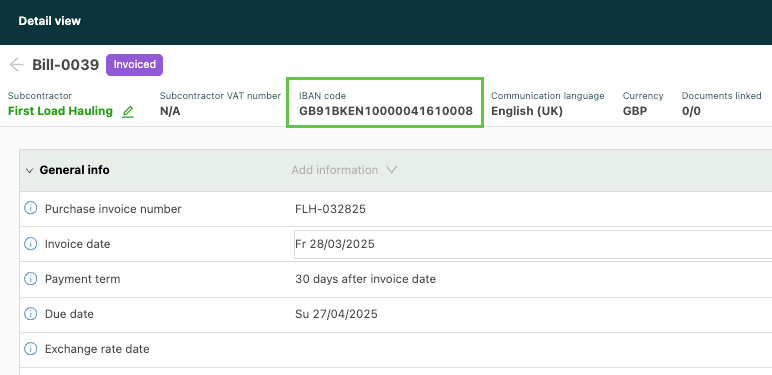
This makes it easier for finance and admin staff to access payment details without leaving the invoice view.
Prerequisite
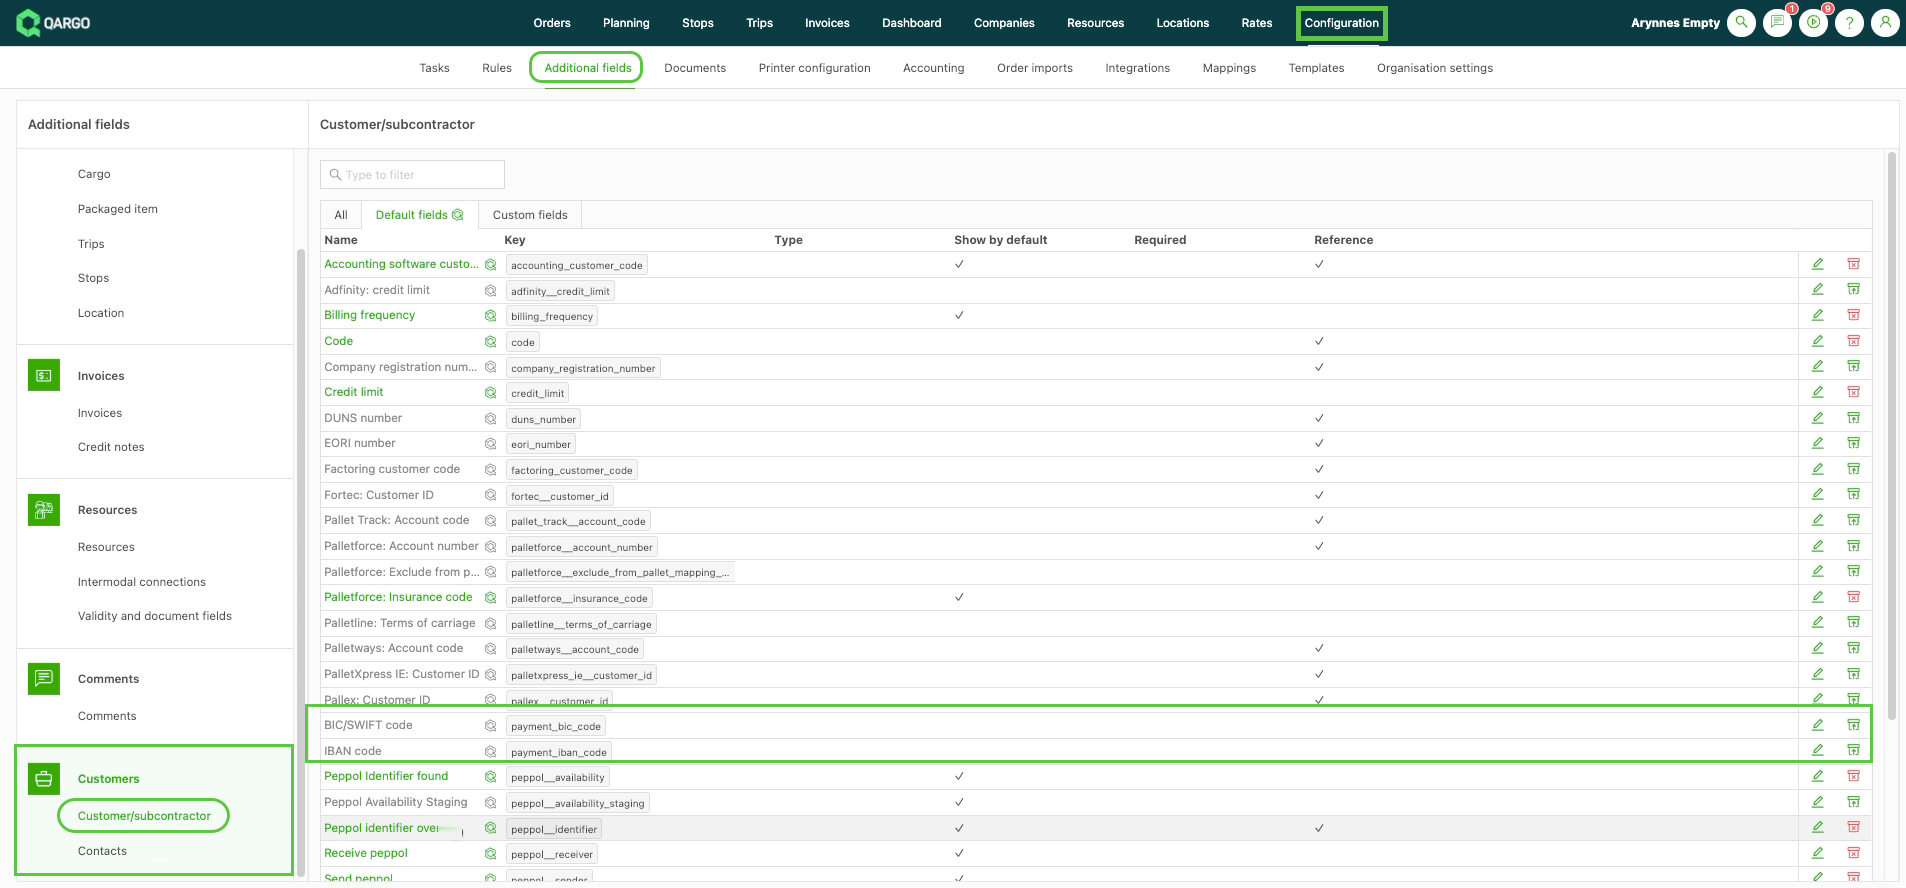
- Make sure the required fields are enabled in Additional fields > Customers/Contract carriers.
How these fields are populated
The IBAN and BIC/SWIFT codes are pulled automatically from the supplier or contract carrier record in Qargo.
To make sure the fields appear:
-
Go to Resources > Contract carriers
-
Open the relevant contract carrier record
-
Enter the IBAN and BIC/SWIFT codes
-
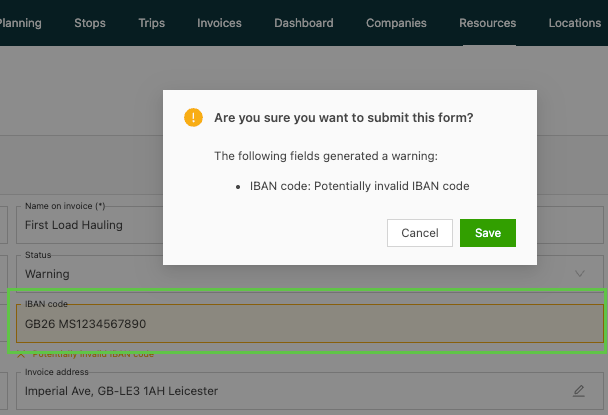
If an incorrect number is entered, a warning is generated.
-
-
Click Save
Once saved, the codes are visible in the header of carrier invoices for that supplier.
-
IBAN and BIC fields only appear when they are already stored on the supplier or contract carrier record. They are not read from the invoice document itself.
-
These fields are display only in the invoice header; they cannot be edited from within the invoice view.
-
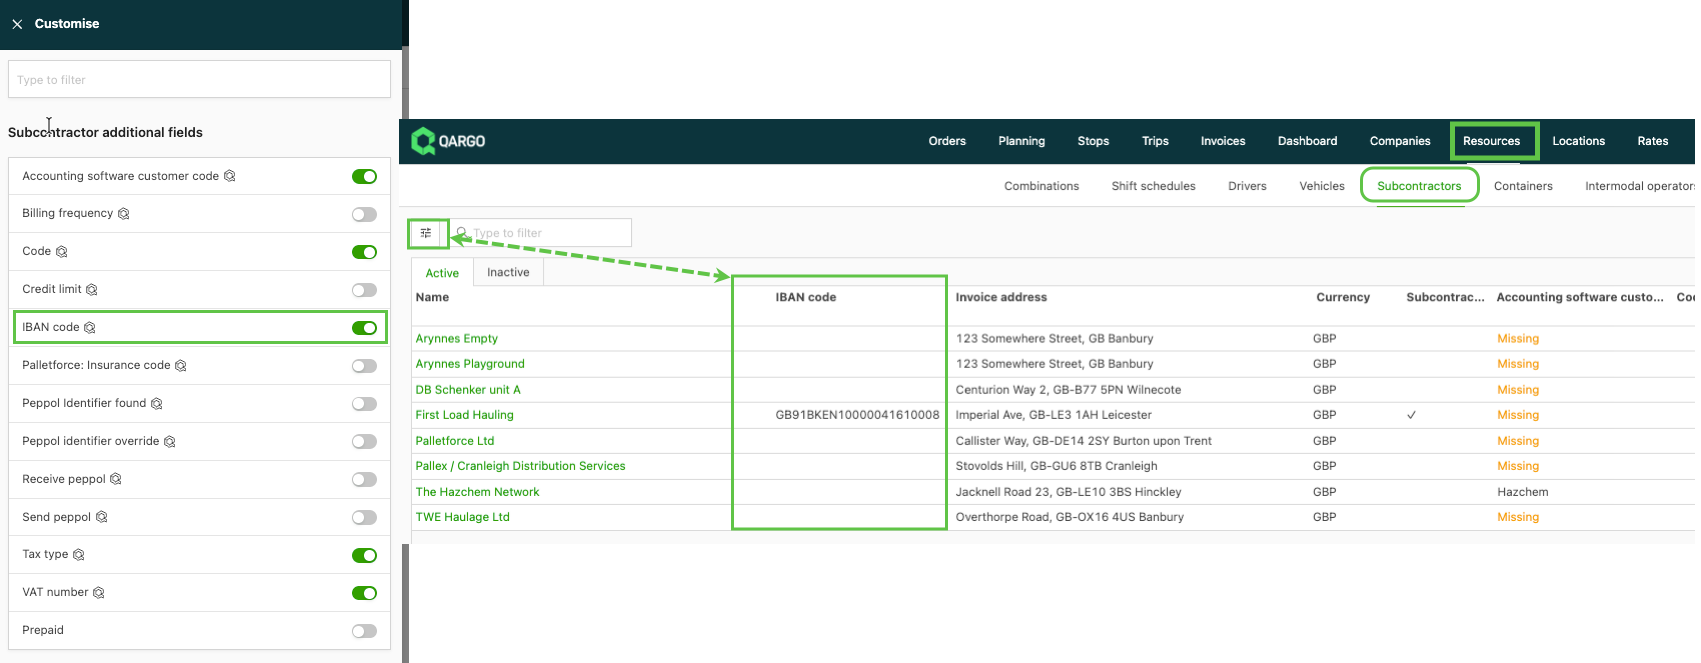
To view the IBAN/BIC number in the list view, use the ‘Customize’ option to display the column.
Add documents
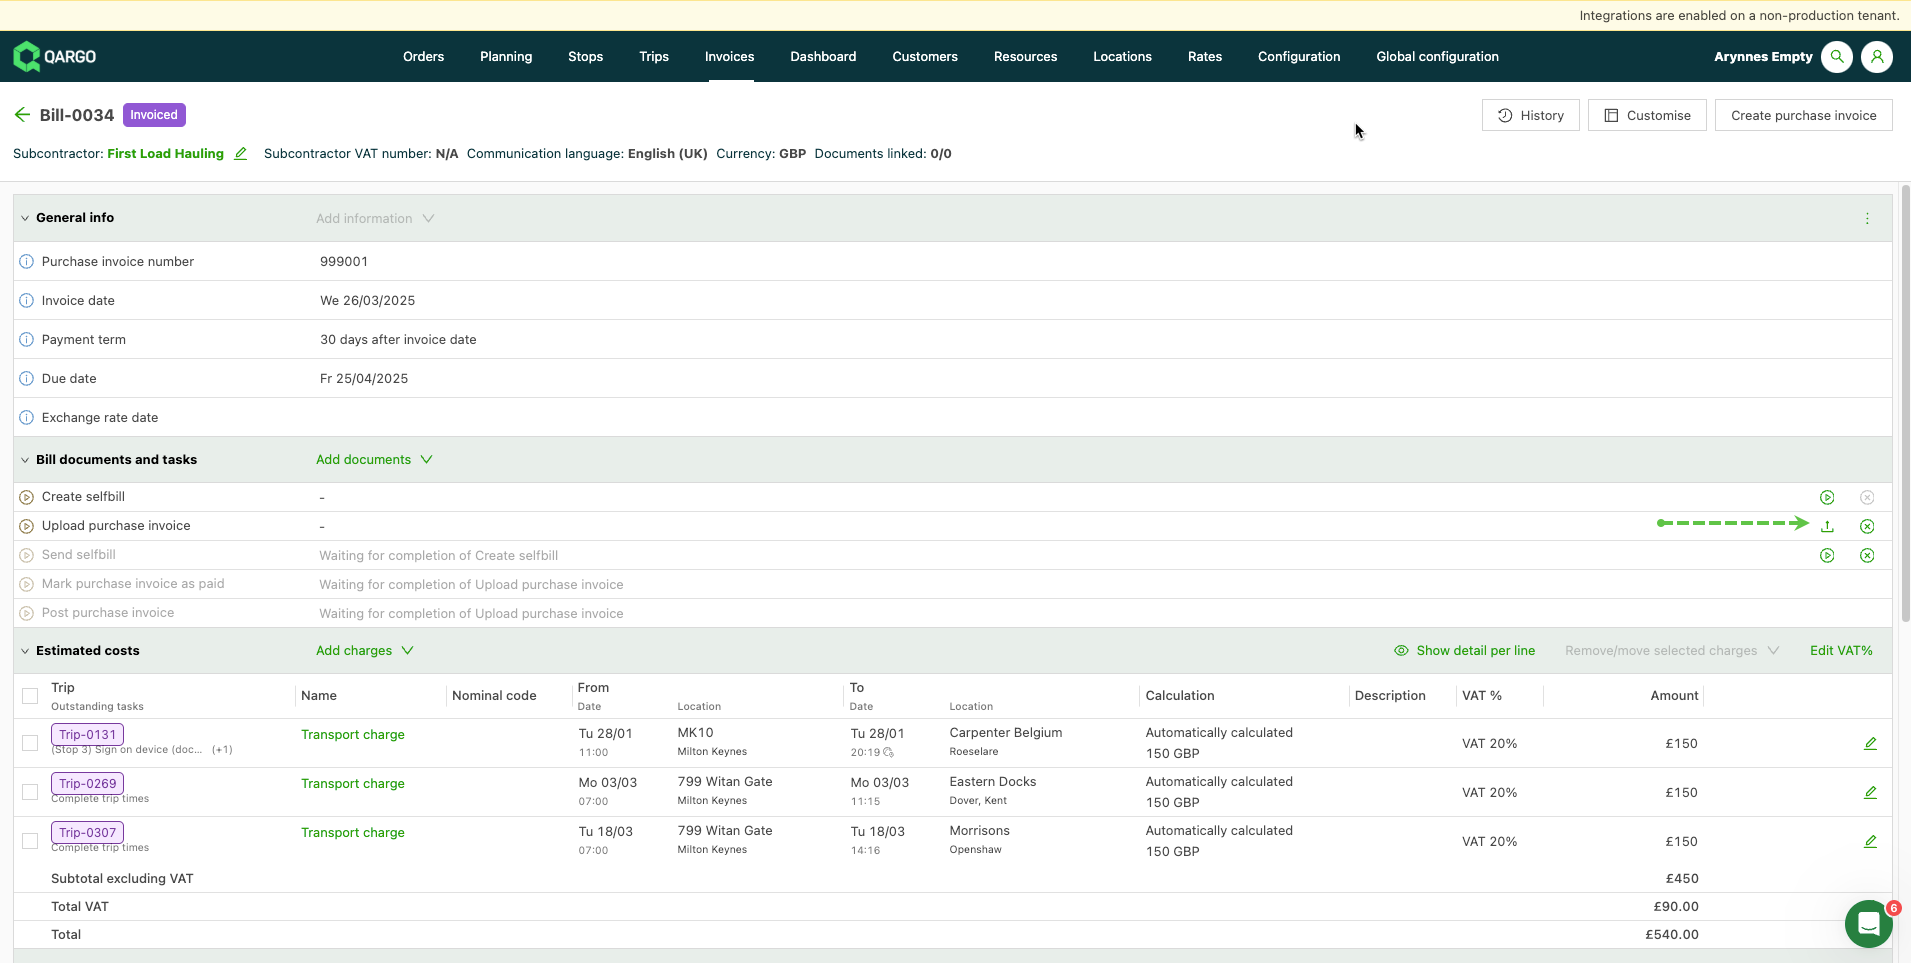
Upload the carrier invoice from the contract carrier by clicking the upload icon. Qargo document intelligence scans the document to validate the data and provides a summary.
Data validation:
-
Carrier invoice number. If this is blank, the invoice number is added once the document is uploaded.
-
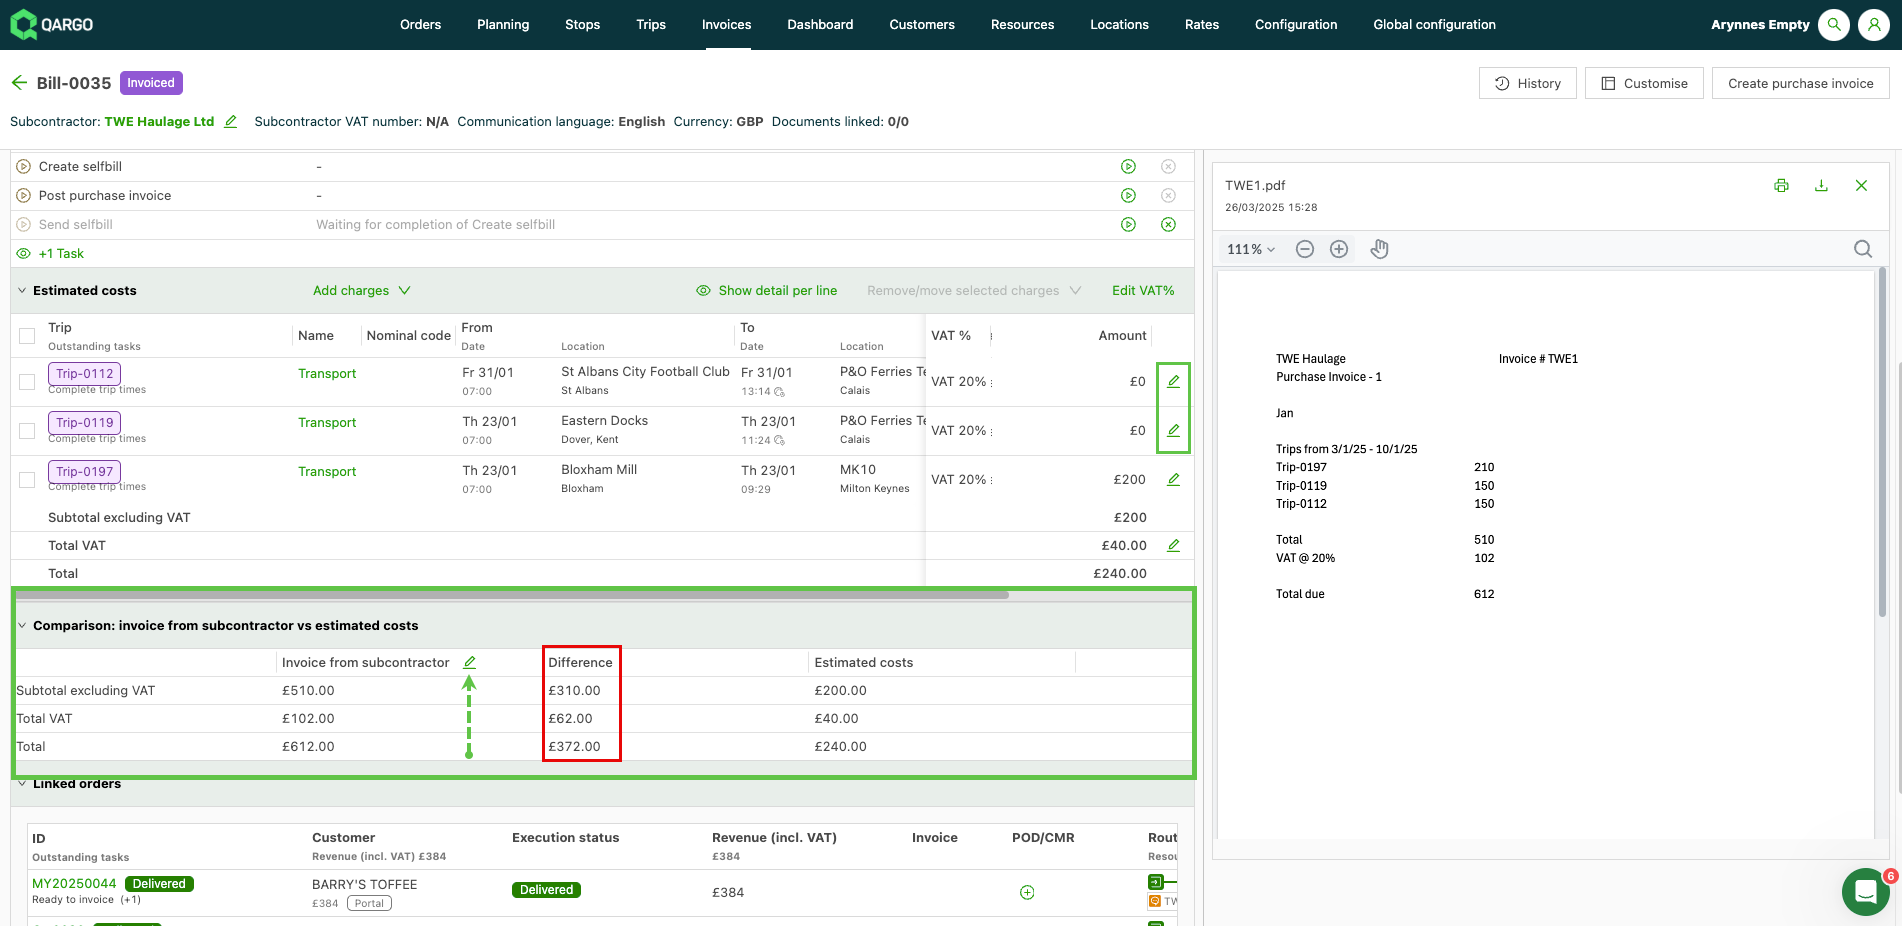
Charge validation. Charge amounts are cross-checked automatically between the document and the load costs. The sum of the charges on the shipment is validated against the contract carrier invoice.
-
Discrepancy handling. Any discrepancy between estimated and invoiced costs is shown in the Comparison panel. The contract carrier invoice amount can be updated with the pencil icon, or the individual load costs can be edited.
-
Using the ‘Add charges’ function and selecting ‘Add charge from load’ shows the loads on the invoice, with loads that can be updated shown in blue. Prices can be updated with the copy icon, or a discrepancy can be recorded.
-
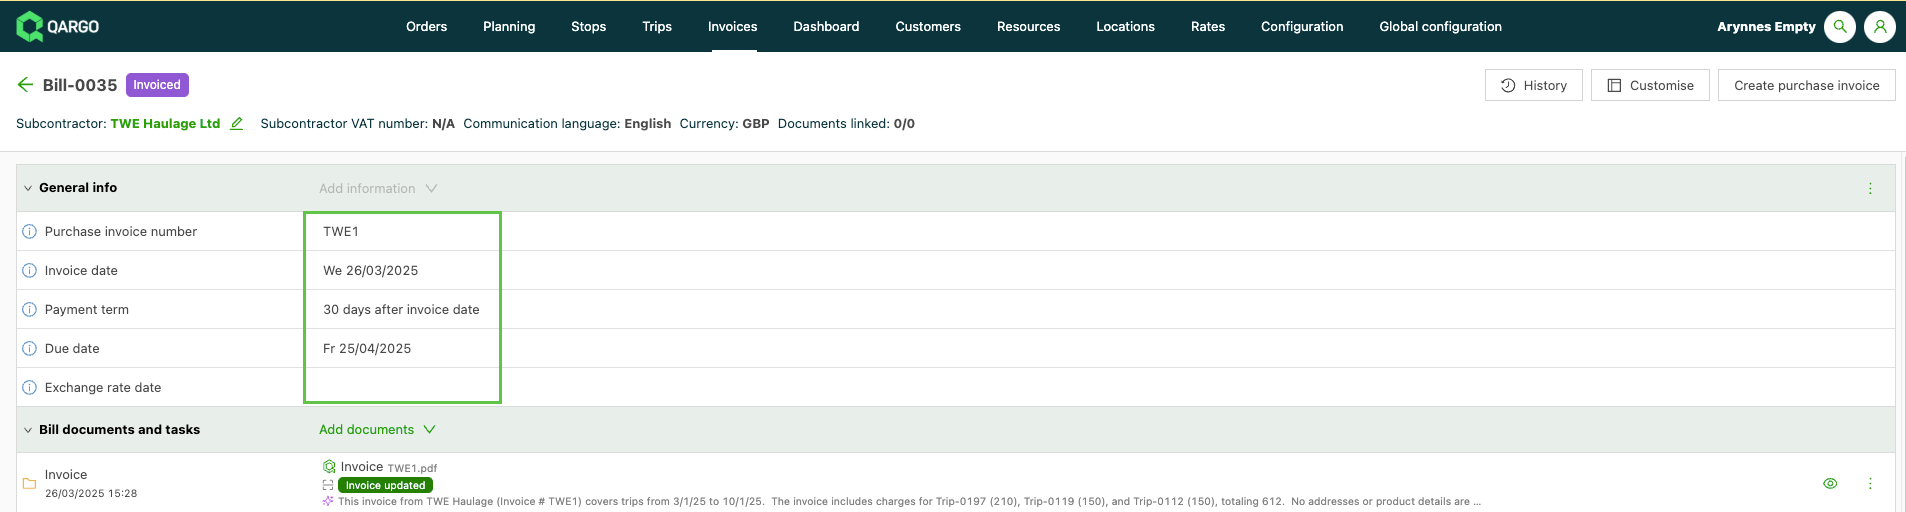
General information can be changed if updates are needed. Click into the row to update it, then save.
-
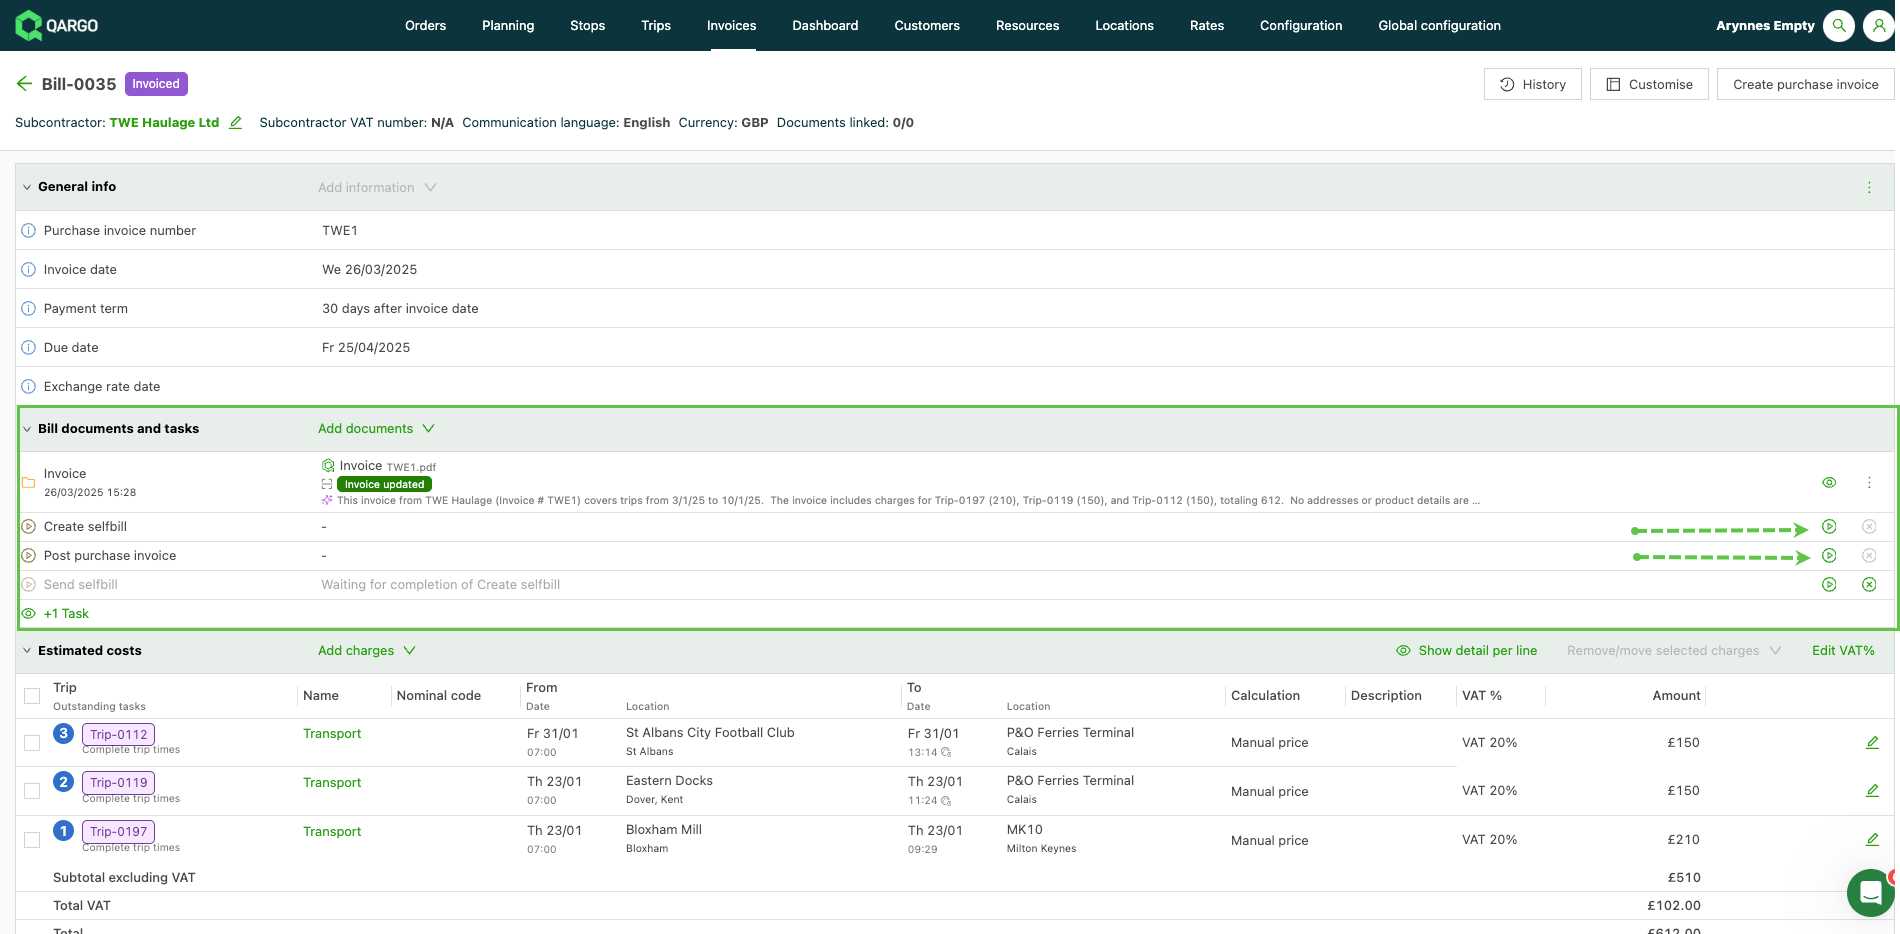
Completing the final tasks (Create self-bill / Post carrier invoice) sets the invoice to a posted status, making it available to export or send to accounting.
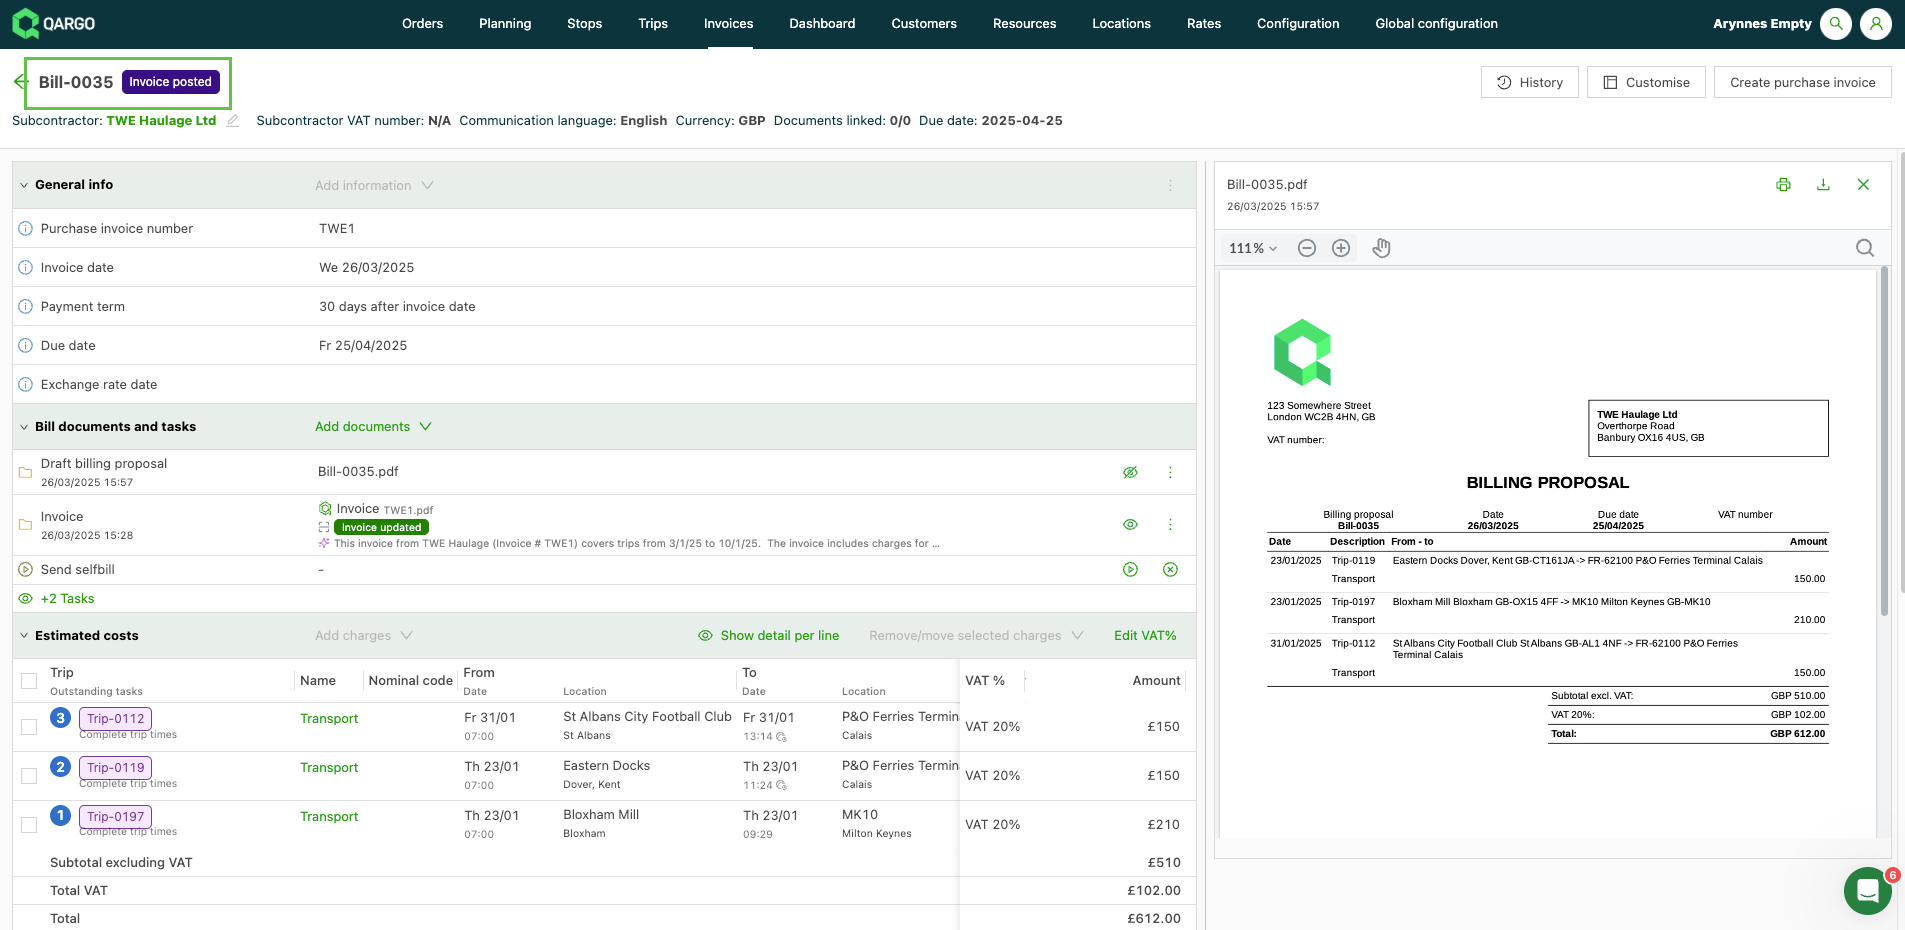
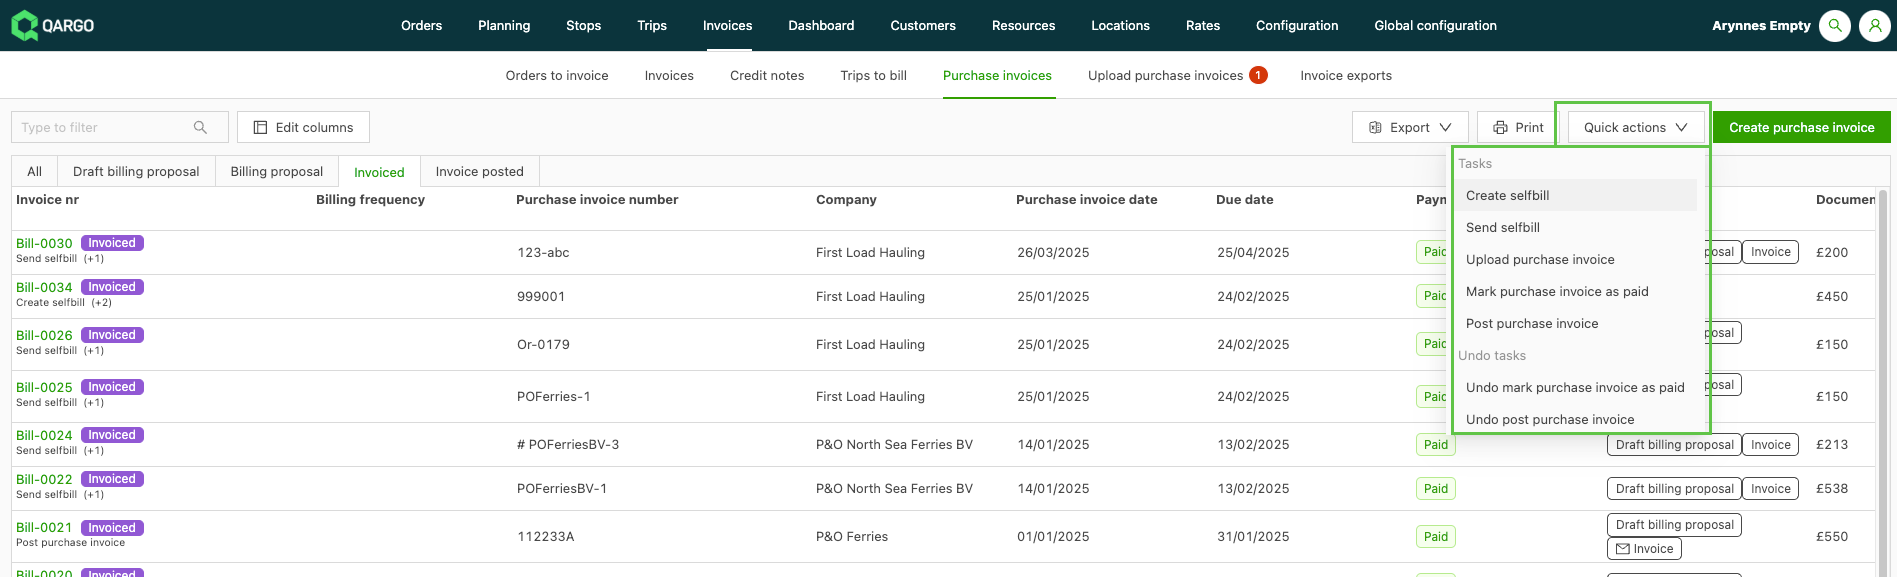
Tasks such as generating the PDF, sending the email, marking invoices as paid and posting to accounting can be done in bulk via Quick actions. See also how to complete these in bulk.