Invoices – create an invoice from a customer self-bill
Table of contents
Importing invoice documents
When a customer issues a self-bill, manually matching each charge on these pro forma invoices can take a lot of work. Documents can be uploaded directly into the system, which scans and validates the charges. This speeds up data entry and reduces the risk of errors or discrepancies in the data.
Users can upload a PDF document or spreadsheet to match orders in the system.
-
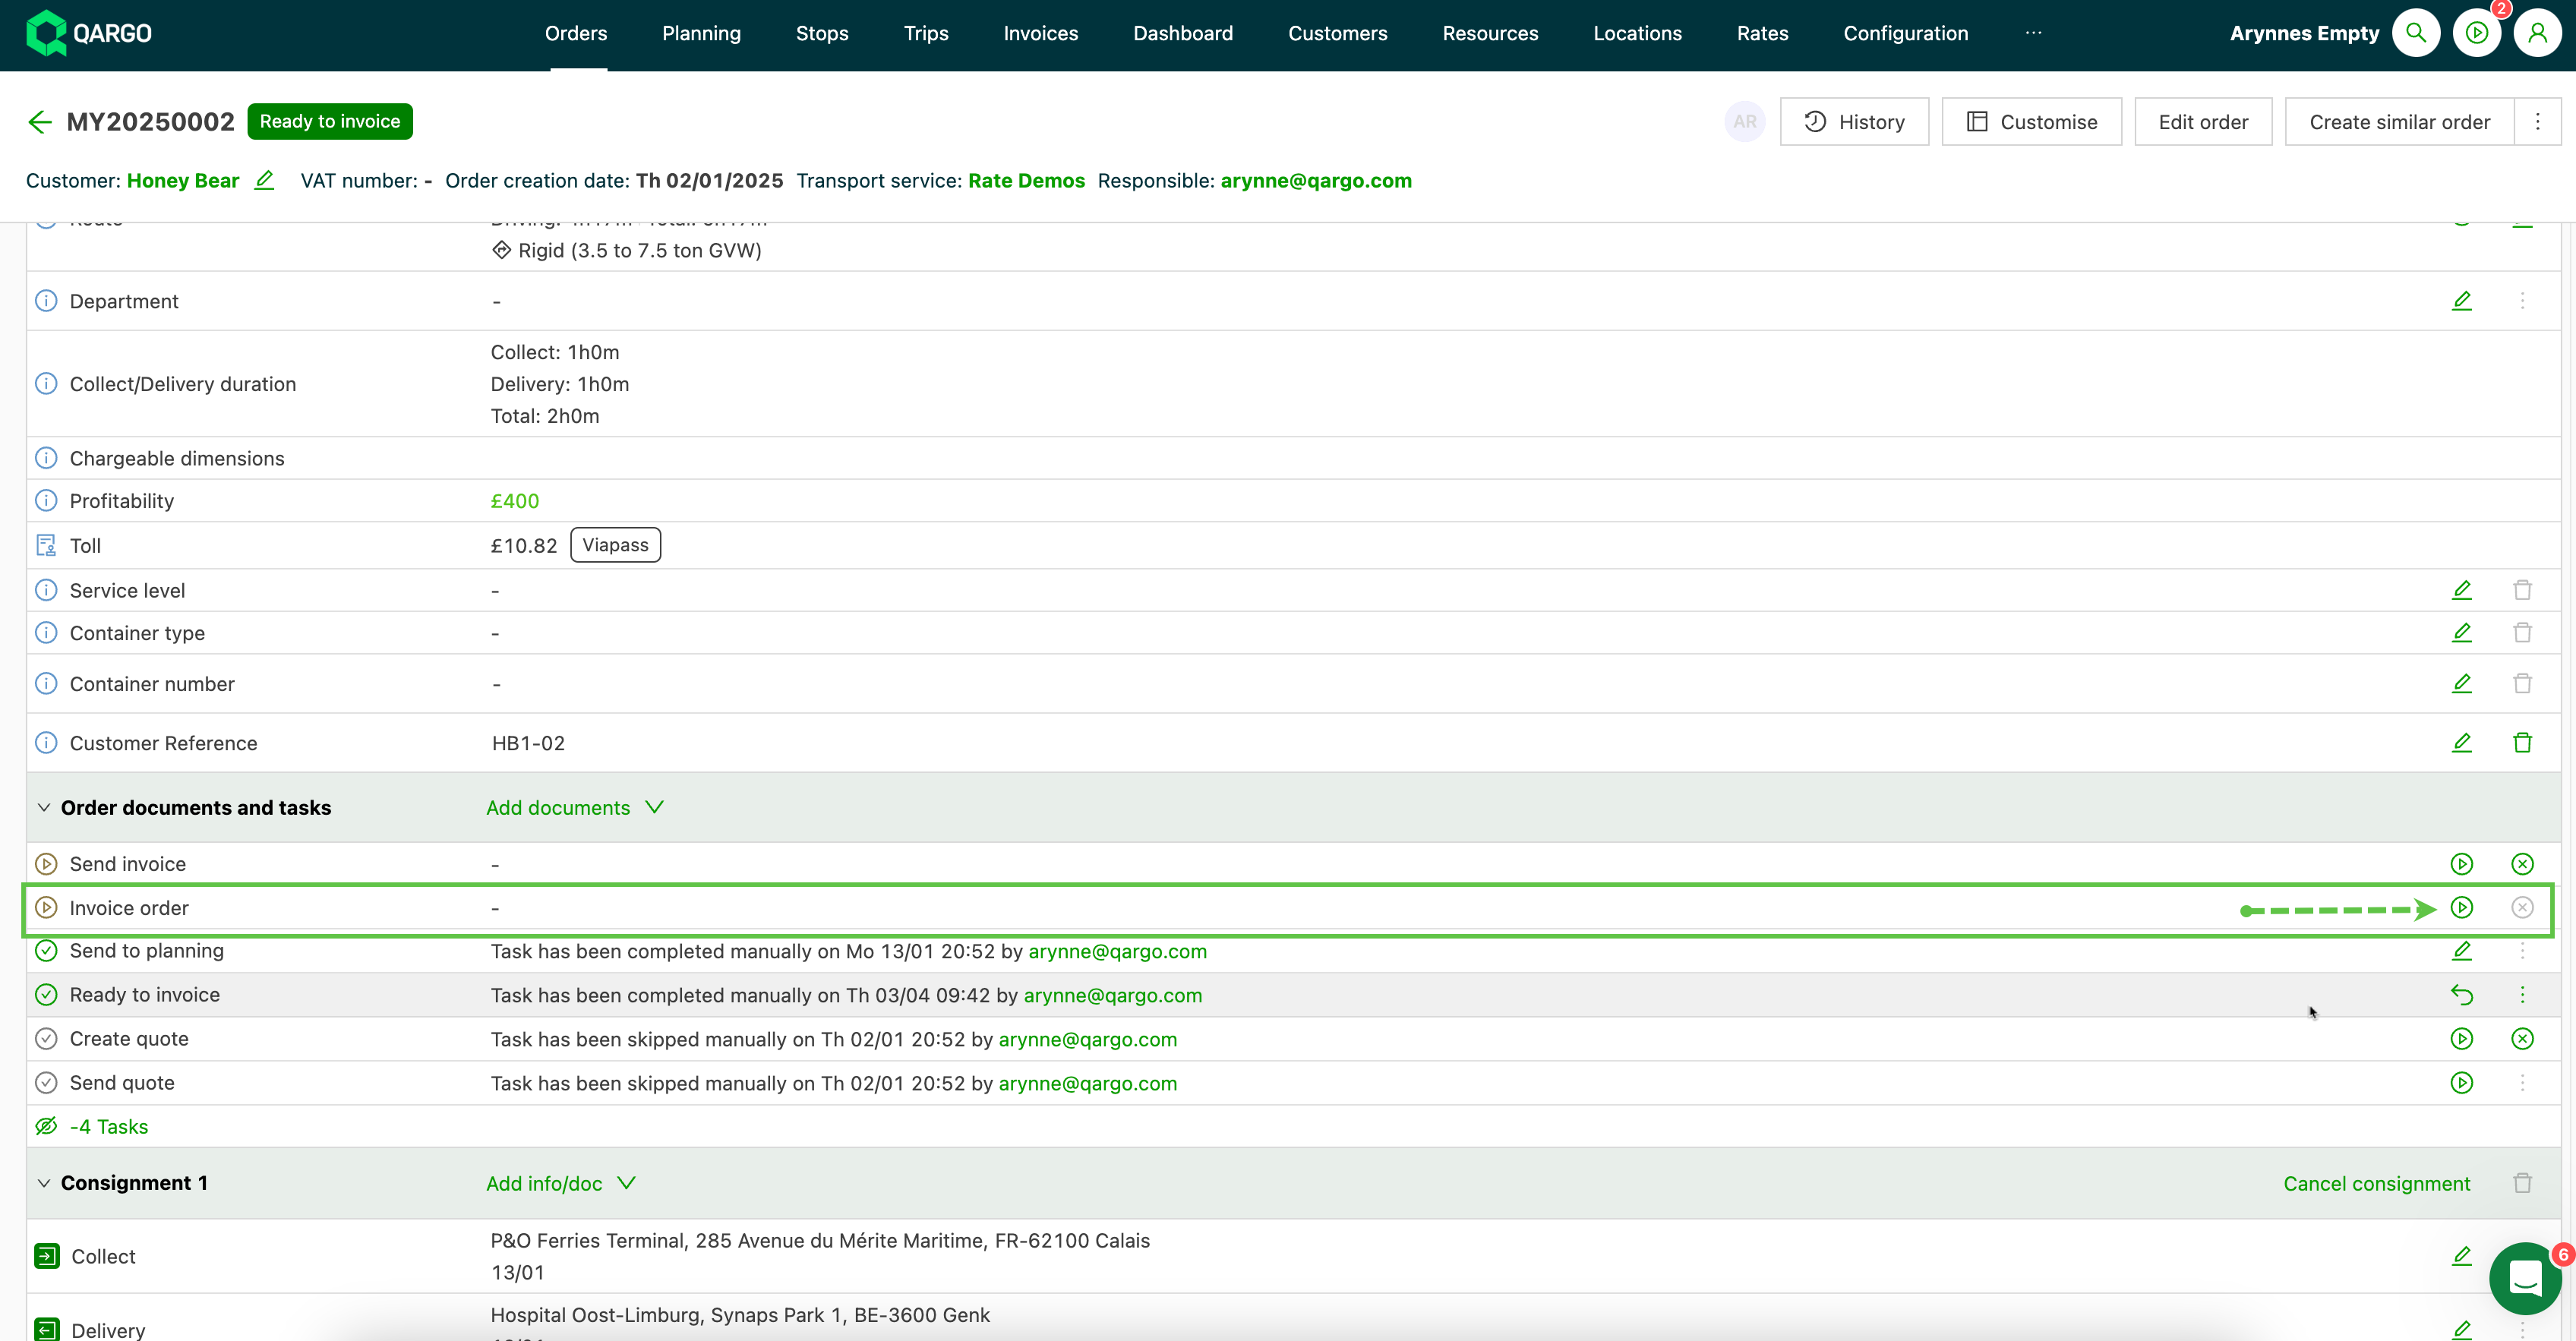
Navigate to Invoices > Invoices.
-
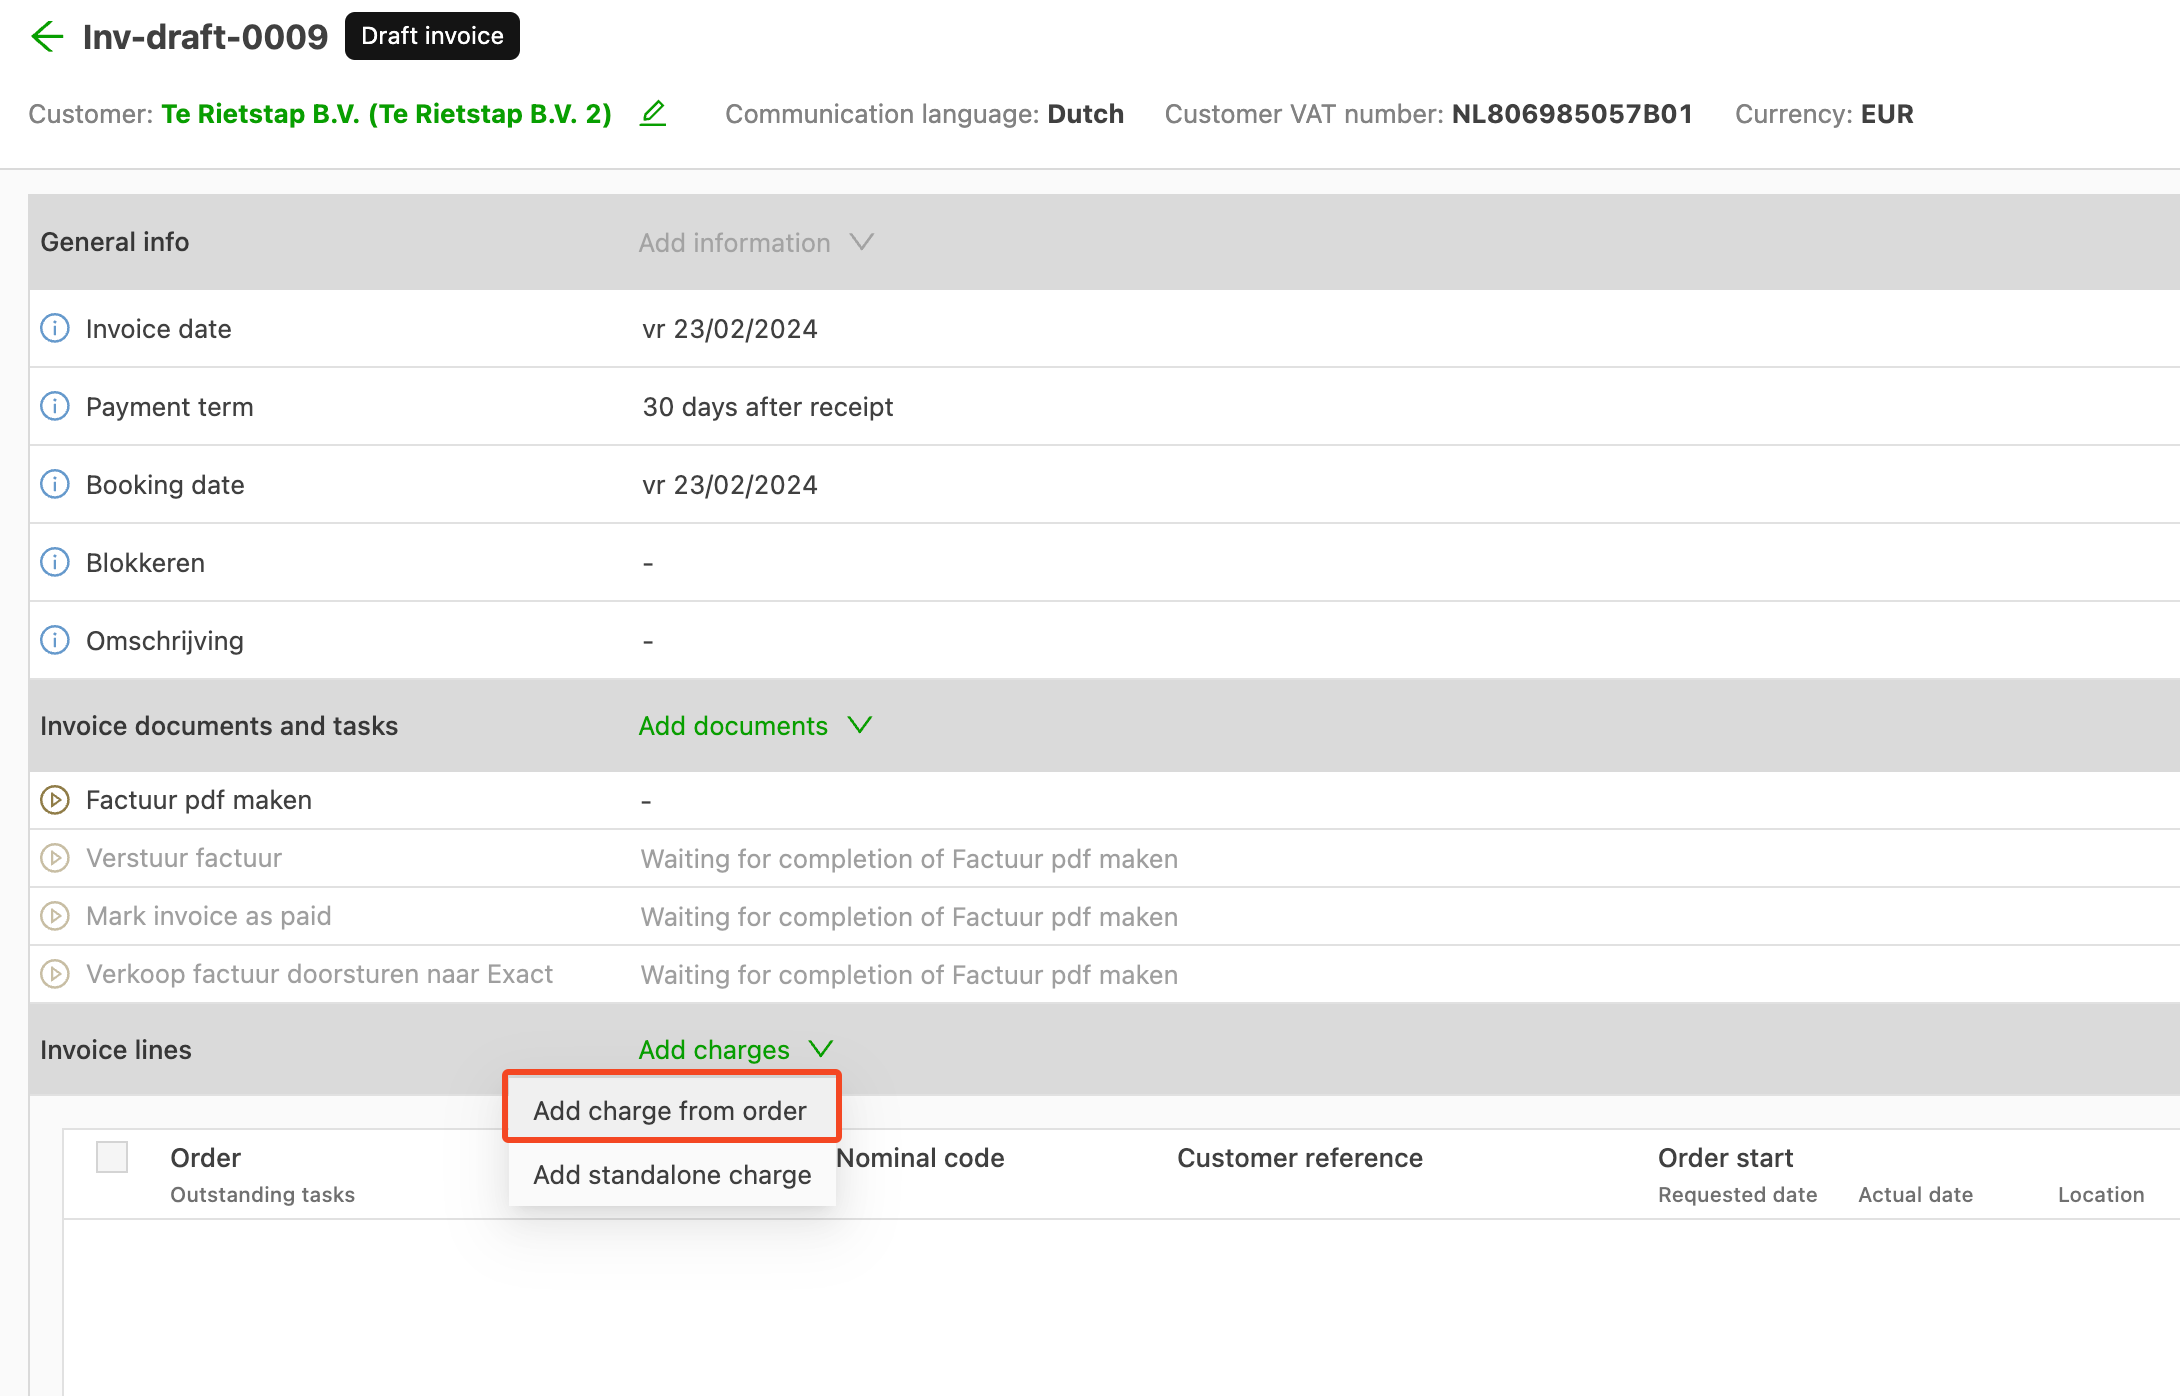
Click the green Create invoice button.

-
The Create invoice page shows 2 customer self-bill options:
-
Upload document: Upload a PDF invoice from the customer.
-
Upload spreadsheet: Copy and paste data from a spreadsheet submitted by the customer.

-
PDF documents

-
Navigate to the Invoices submenu and click the Create invoice button.
-
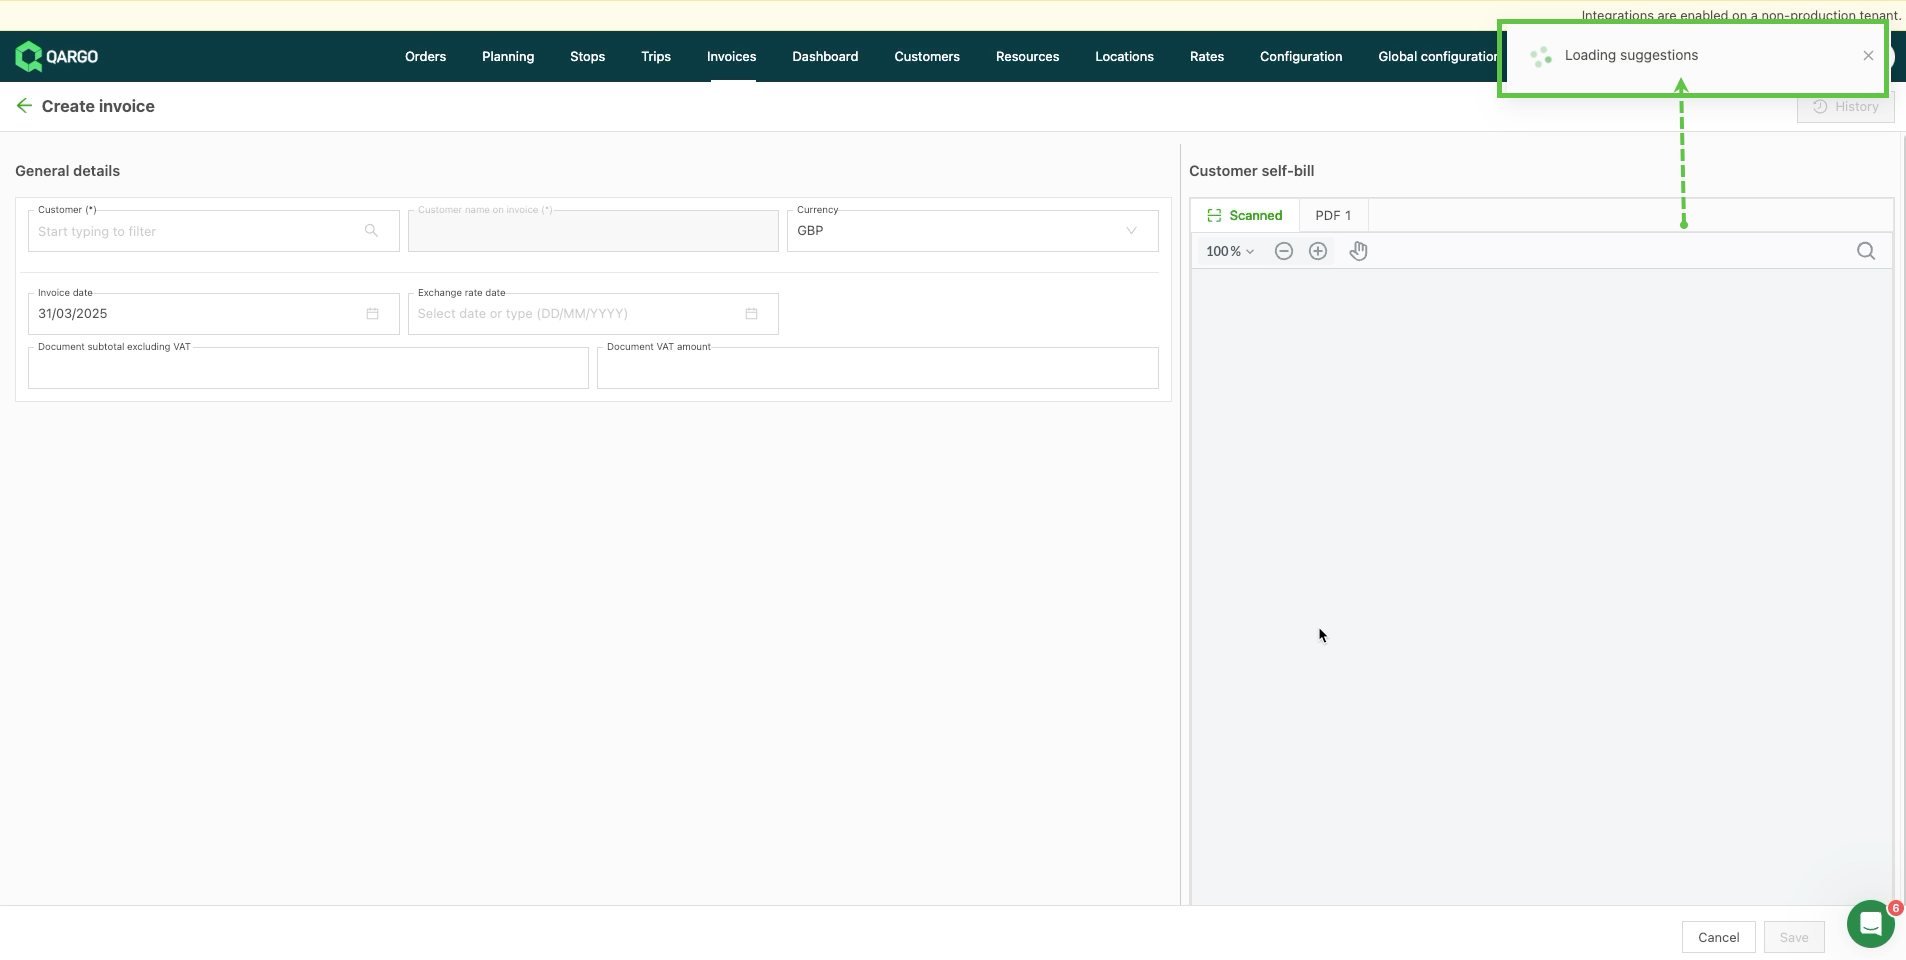
Click to select and upload the document, or drag it to the field.
-
The system scans and validates the document, then loads suggestions of matched orders based on the following:
- Customer reference numbers
- Loading / unloading references
- Order start / end dates
- Transport charges
-
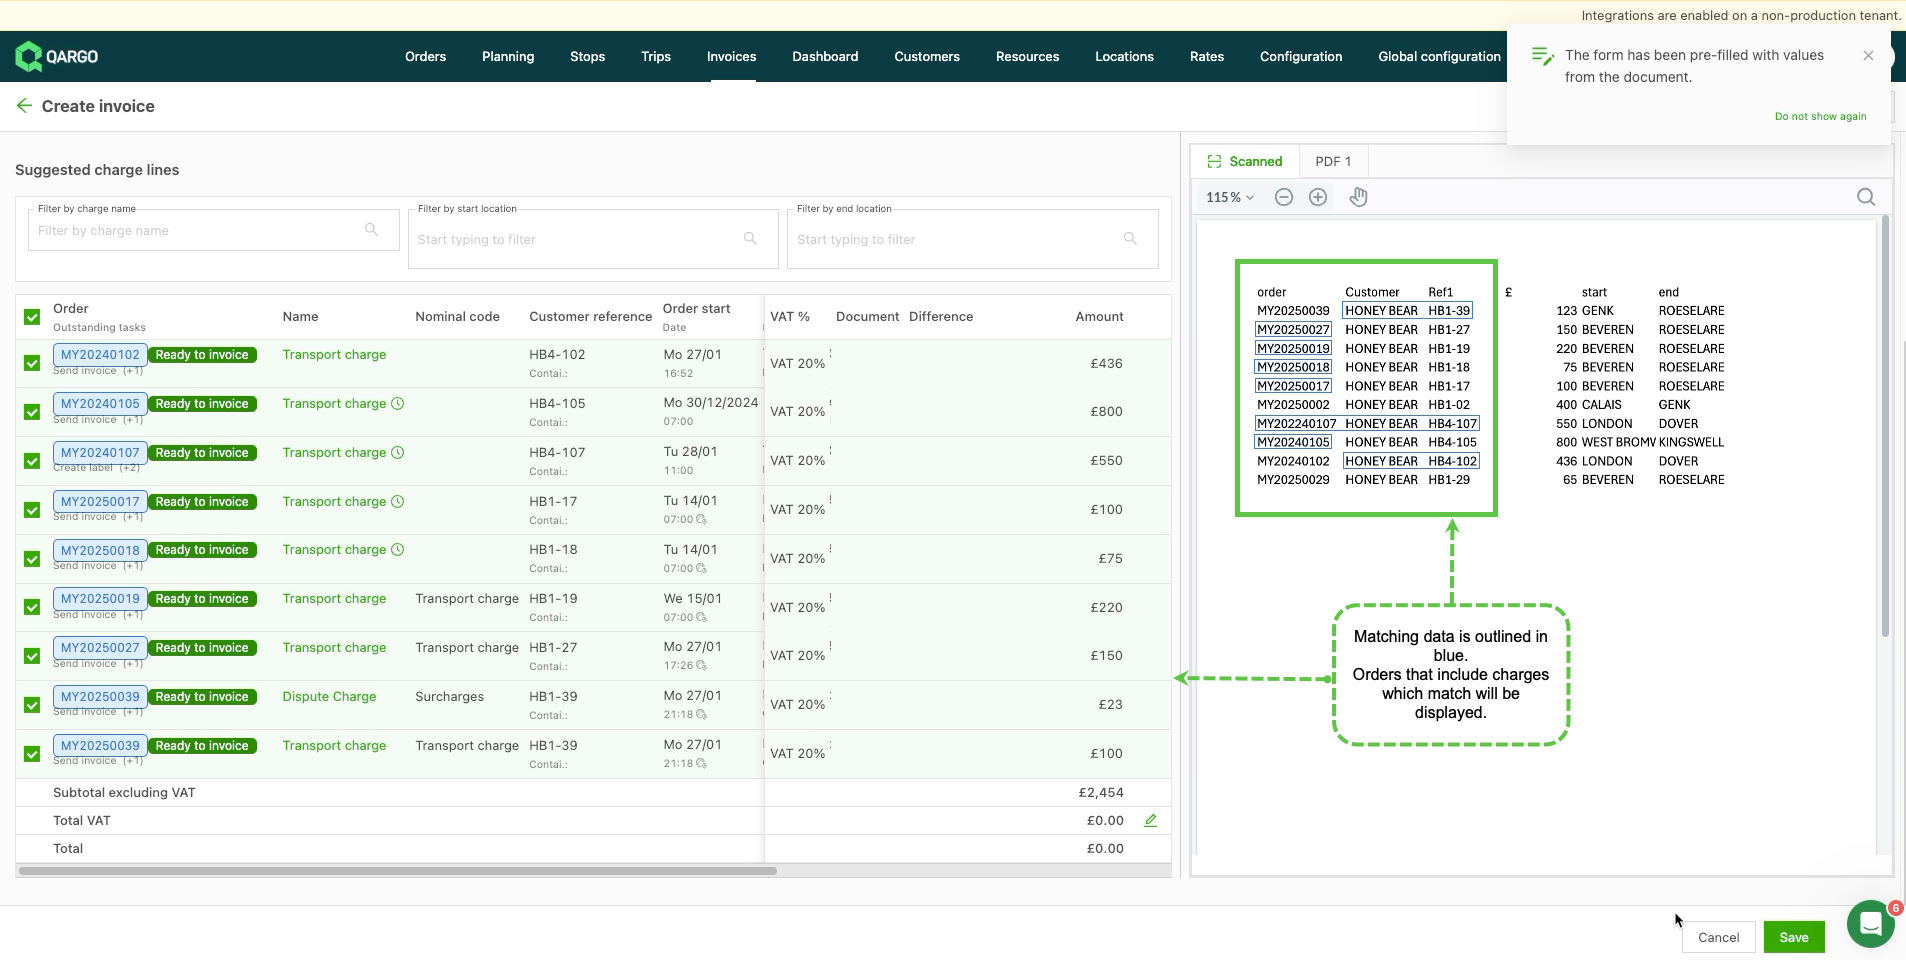
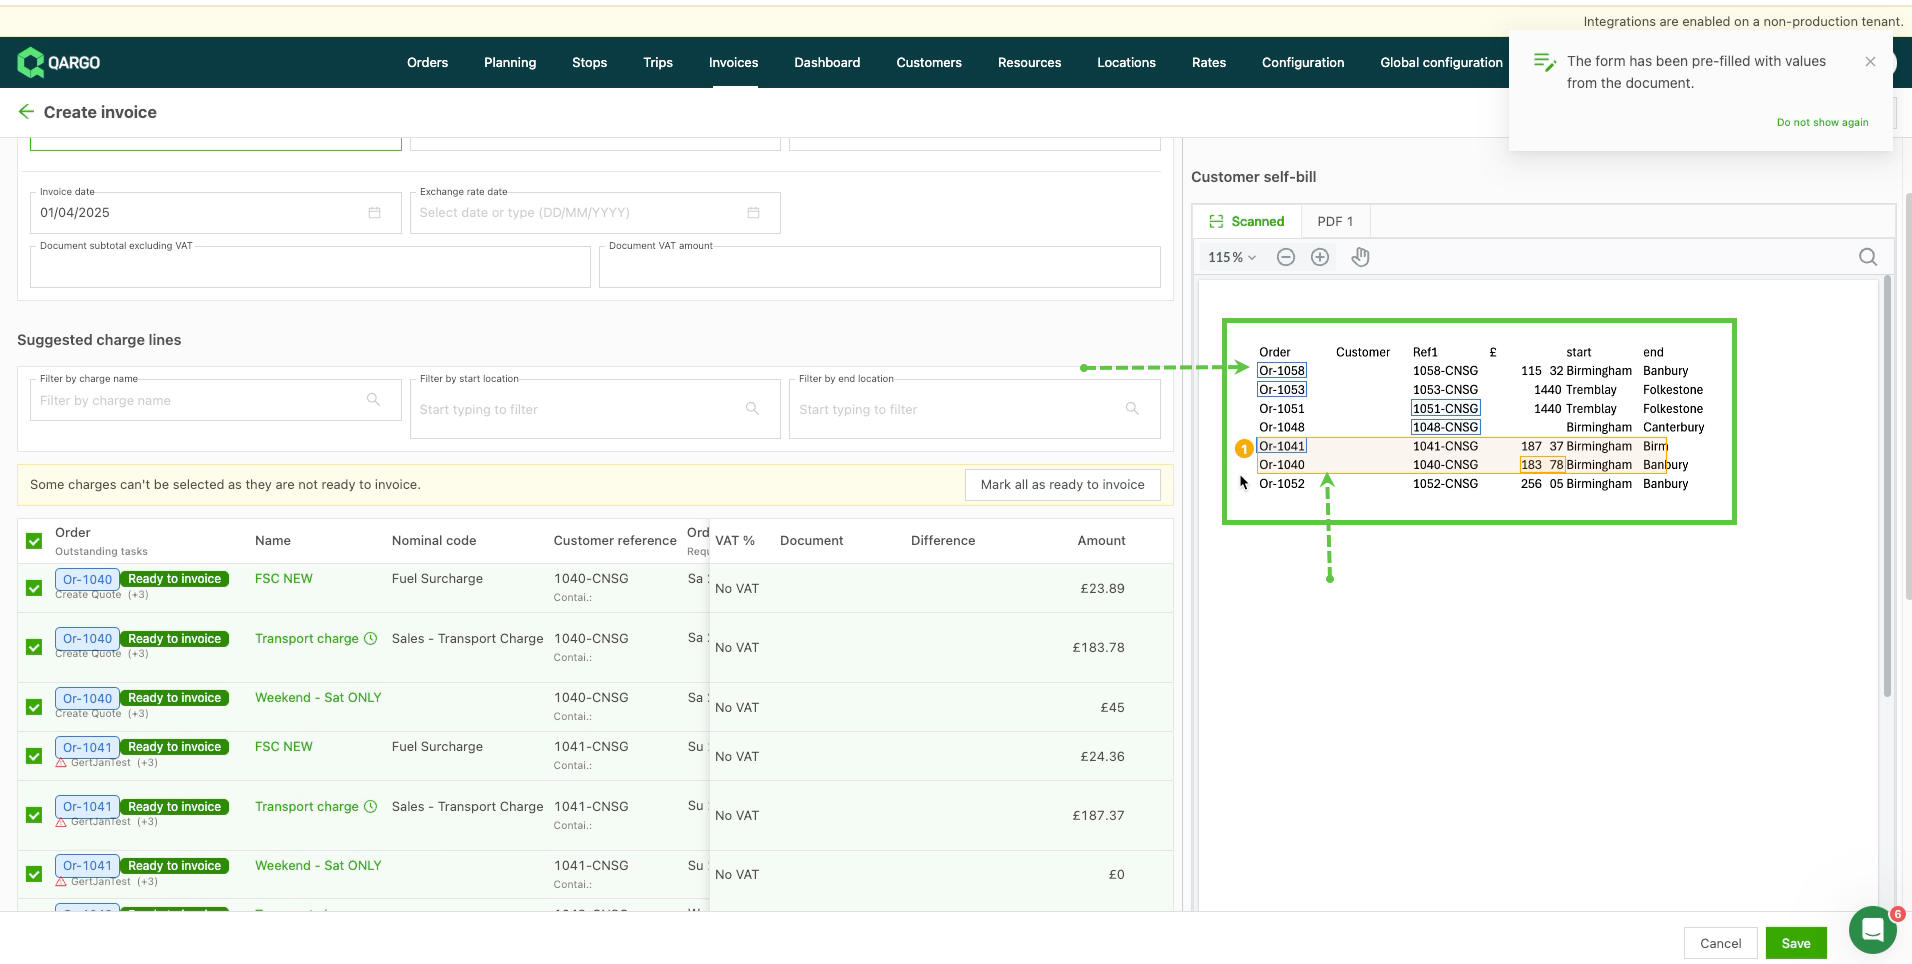
Once the document is validated, the system generates suggestions of orders that match the data in the uploaded document.
-
Orders that match are shown in blue.
-
Orders that cannot be matched are shown in orange.
-
-
-
-
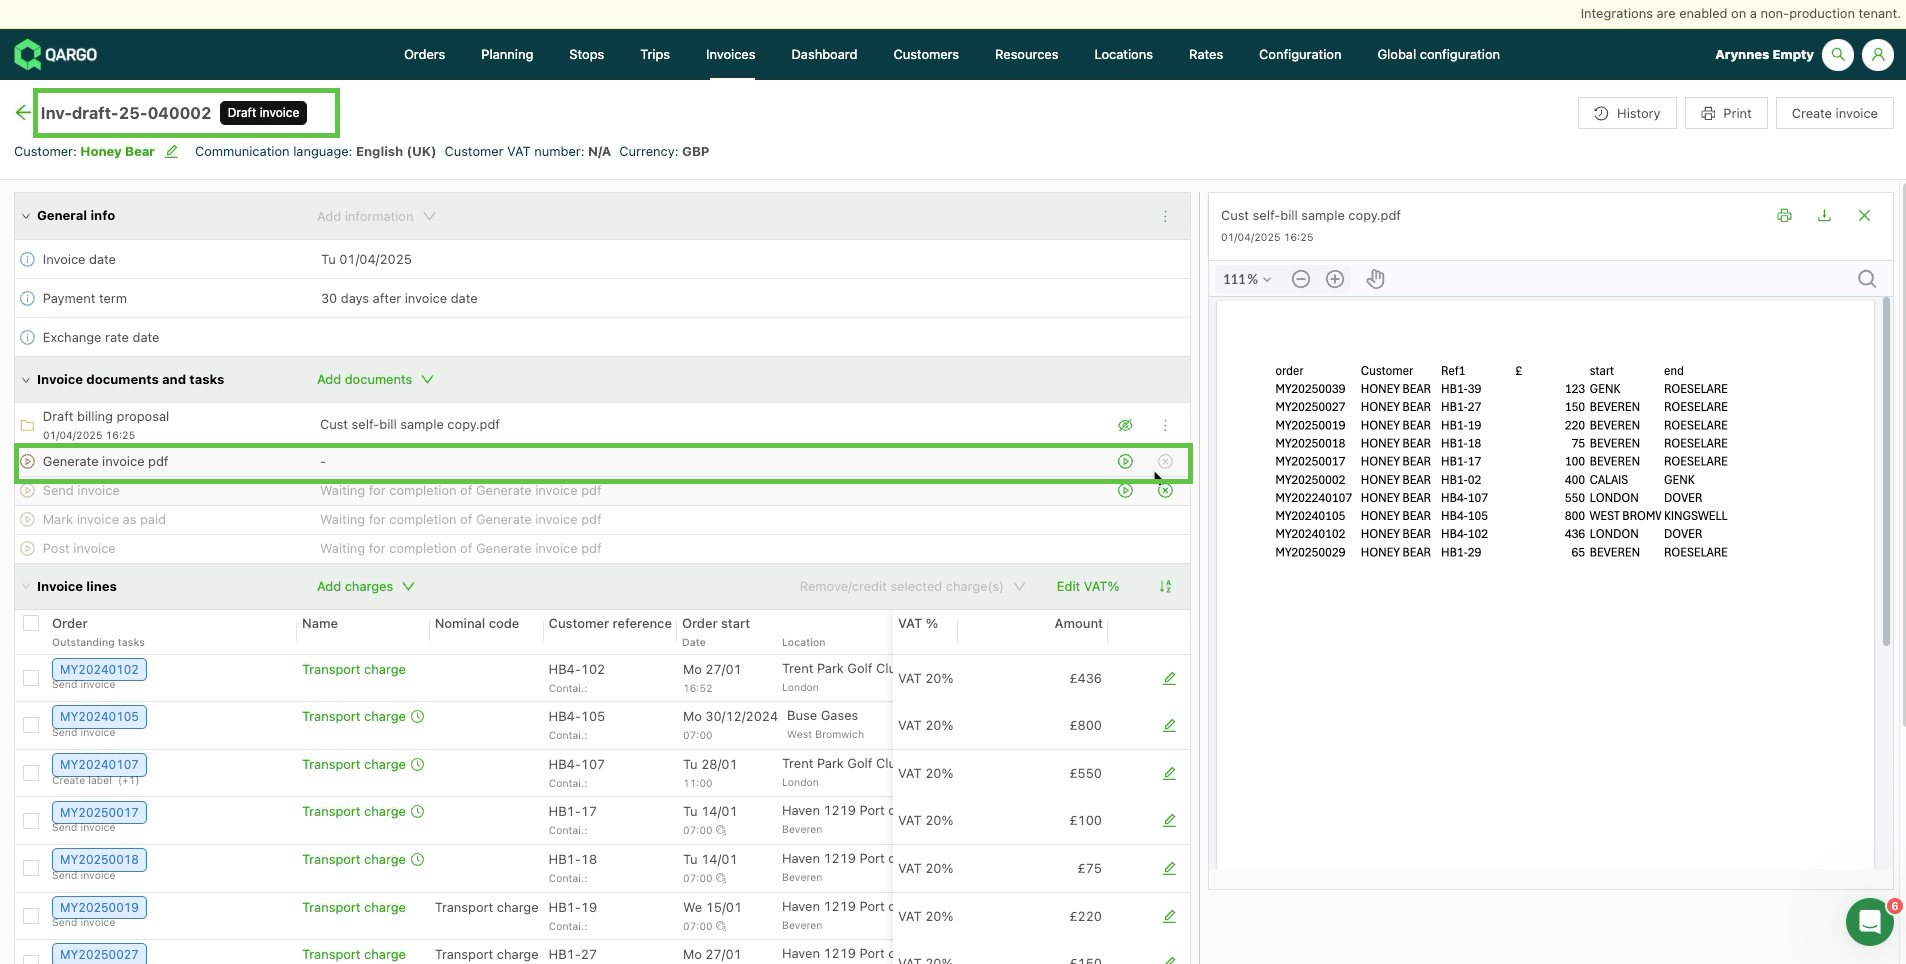
Once the charges are confirmed, click Save. This creates the draft invoice, from which the invoice can be generated.
-
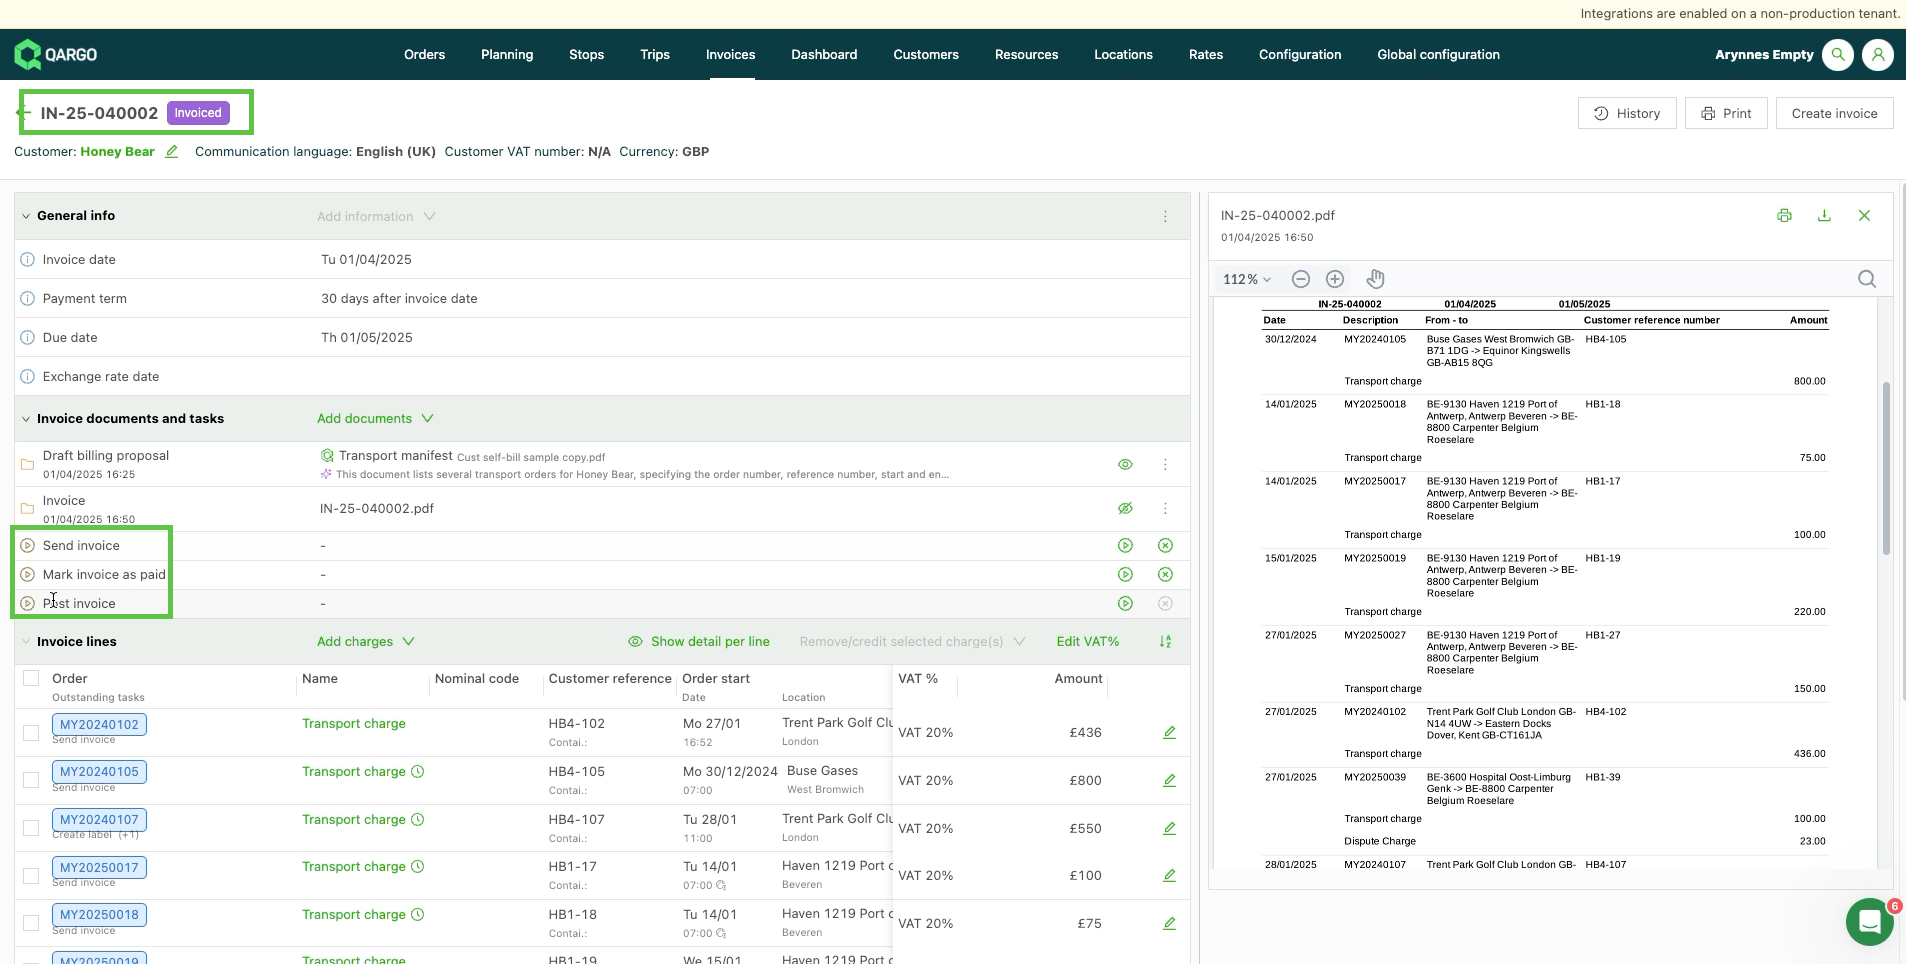
Clicking Generate invoice PDF changes the status from draft invoice to Invoiced.
-
Additional tasks become available so the user can complete processing when required.
Spreadsheets

-
Navigate to the Invoices submenu and click the Create invoice button.
-
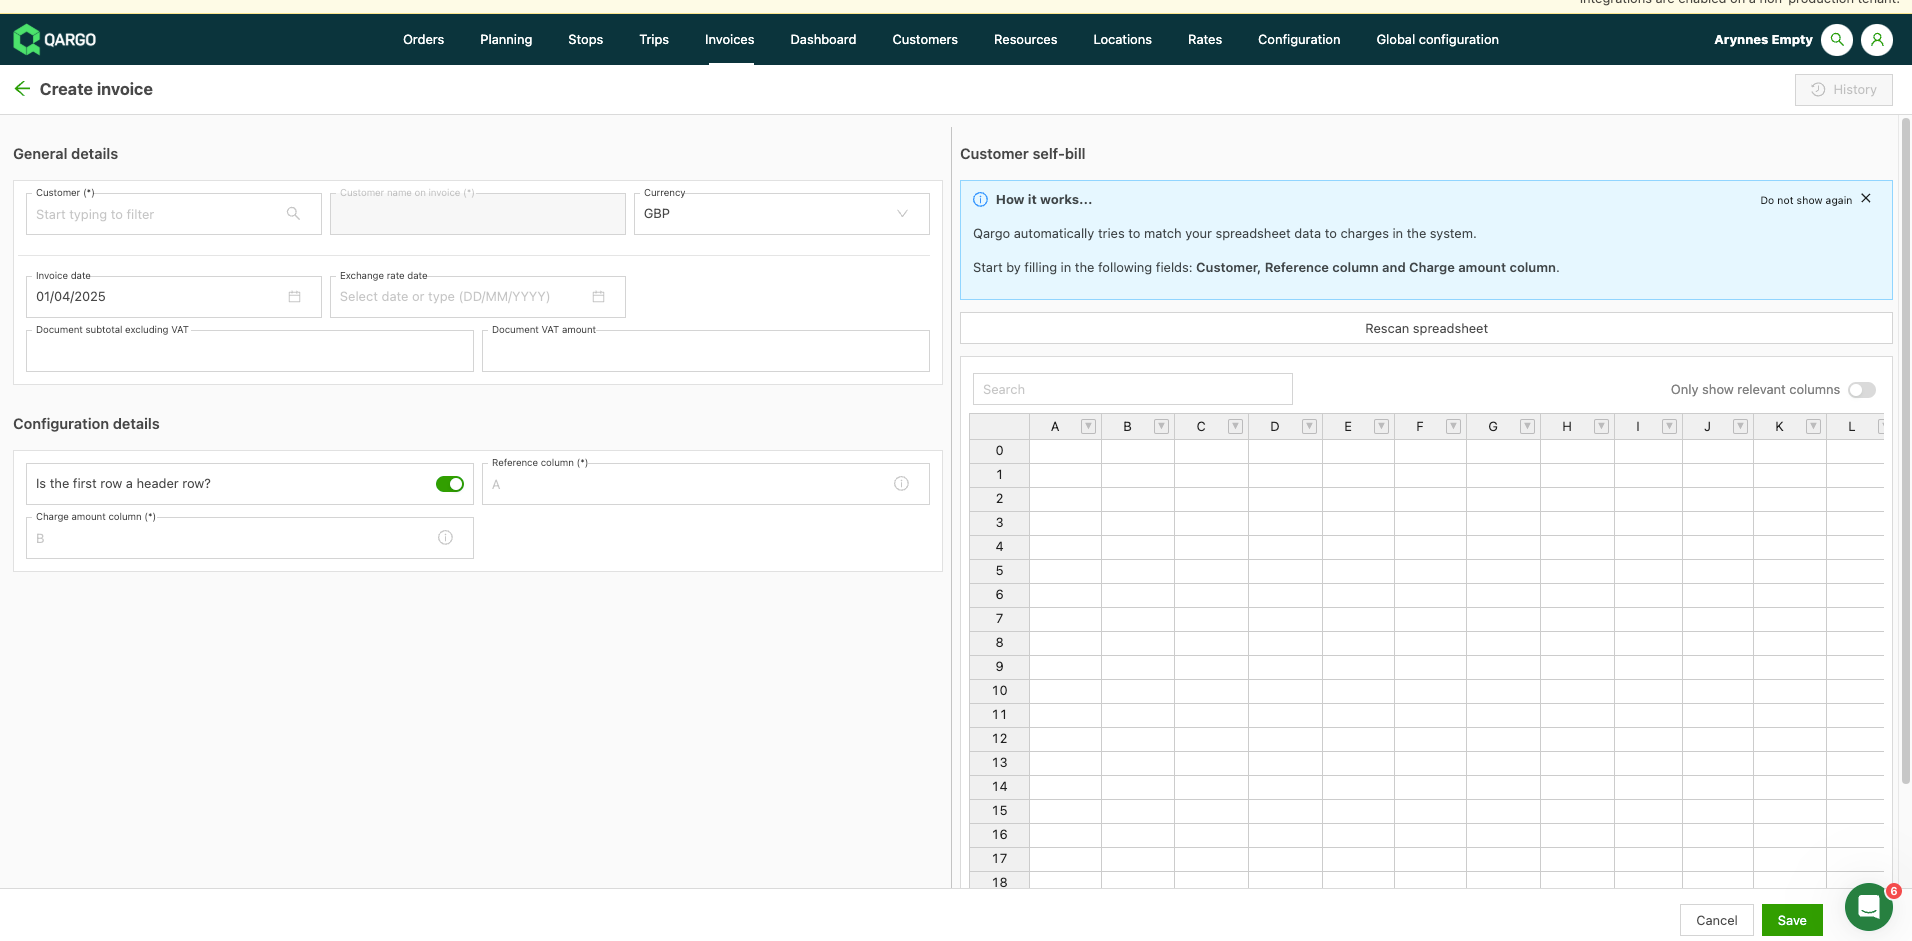
Click to select. A new table appears, into which the customer invoice spreadsheet can be copied.
-
The system scans and validates the document, then loads suggestions of matched orders based on the following:
- Customer reference numbers
- Transport charges
-
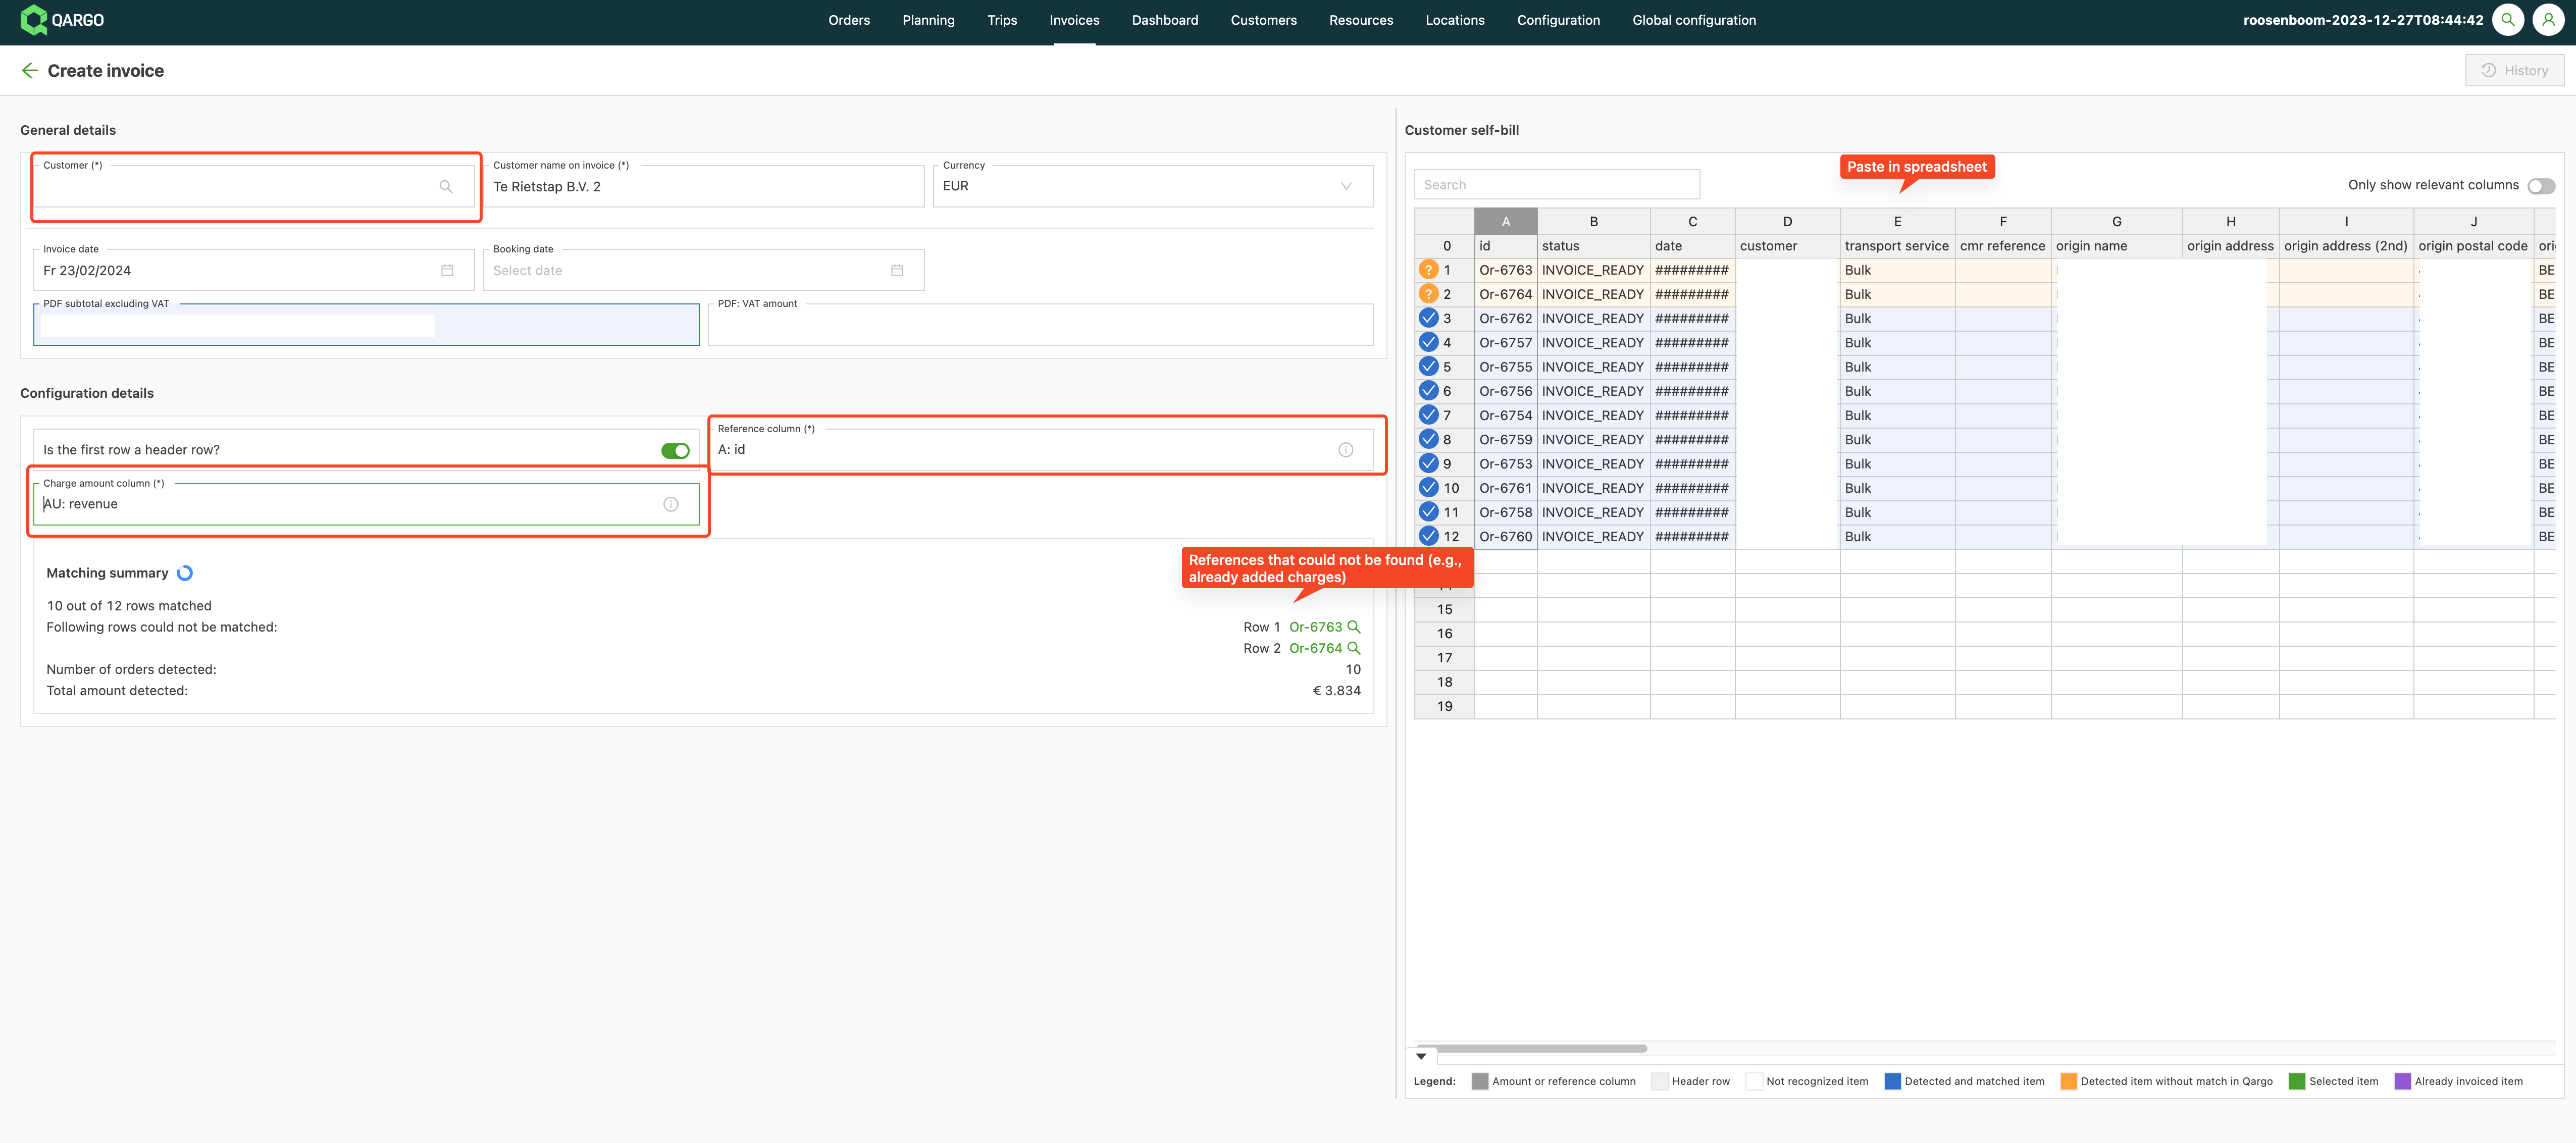
Once the document is validated, the system generates suggestions of orders that match the data in the uploaded document.
- Orders that match are shown in blue.
- Orders that cannot be matched are shown in orange.
-
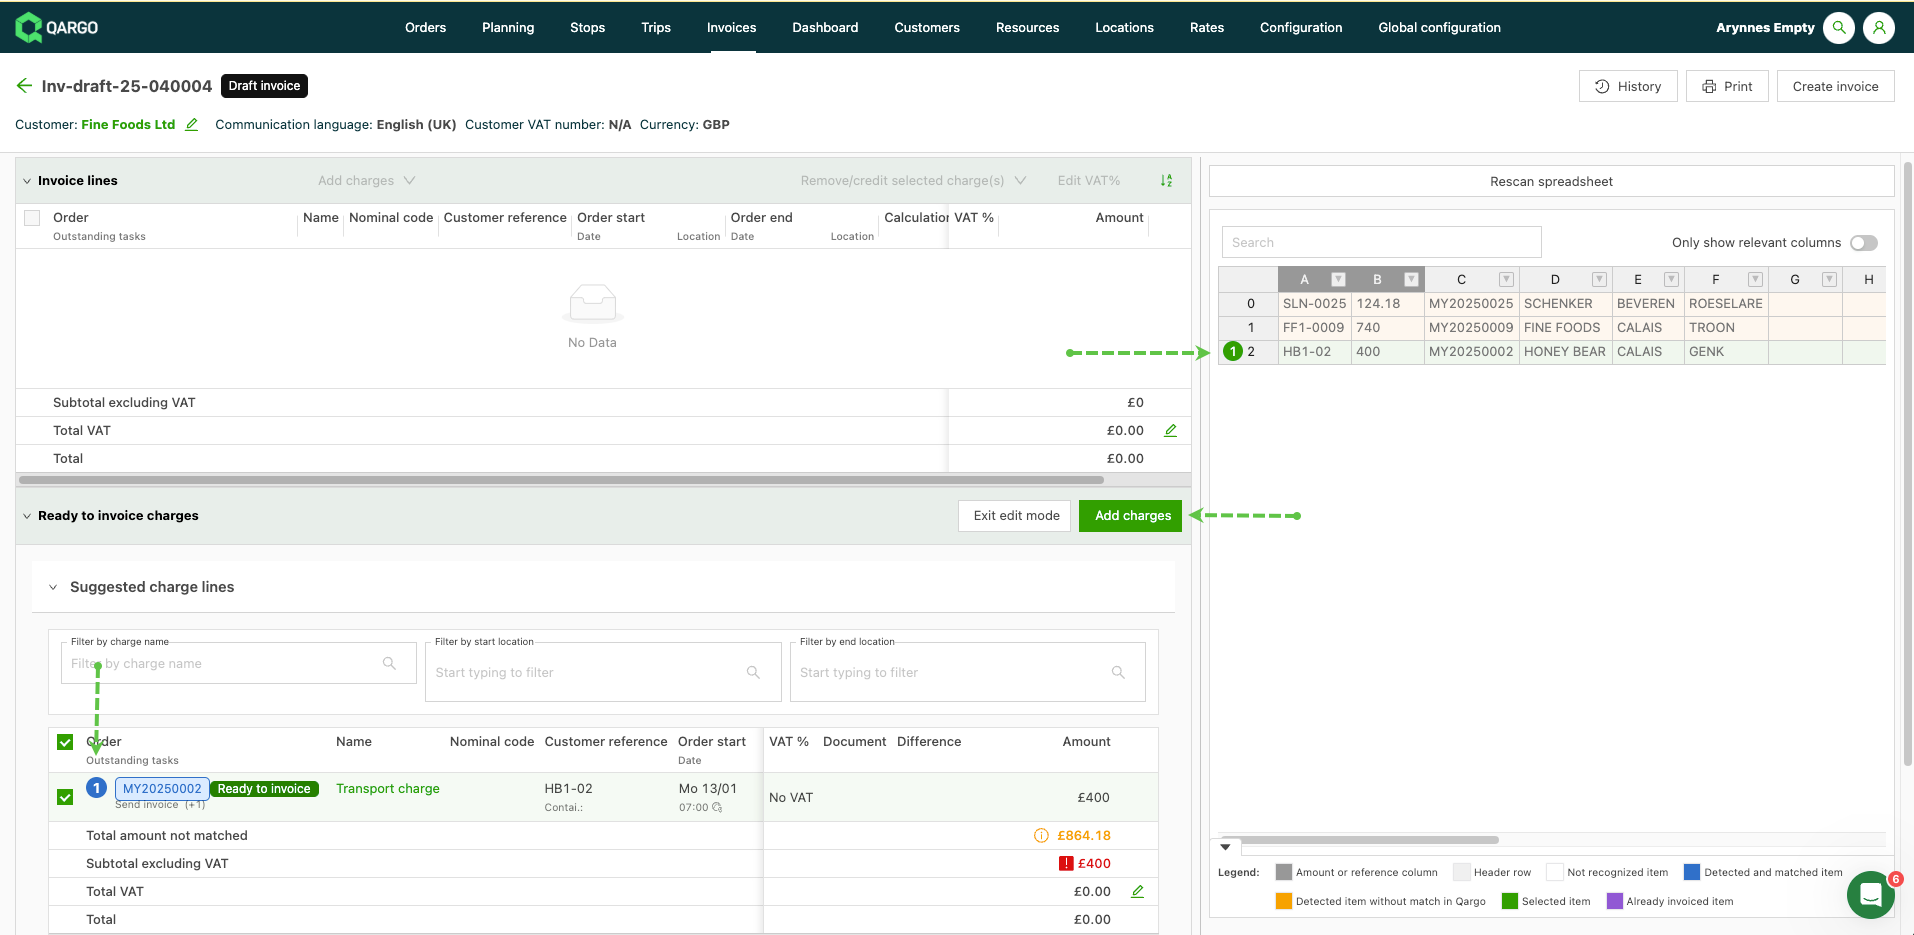
Edit the spreadsheet here to optimize matches. Once it is updated, save the invoice to create an empty draft invoice.
-
Charges that match are highlighted and numbered. Click Add charges to select them.
Detecting charge differences and adding dispute charges
When a self-bill is uploaded to create an invoice, the system also detects any difference between the price on the self-bill spreadsheet and the price in the system.
Below is an example scenario:
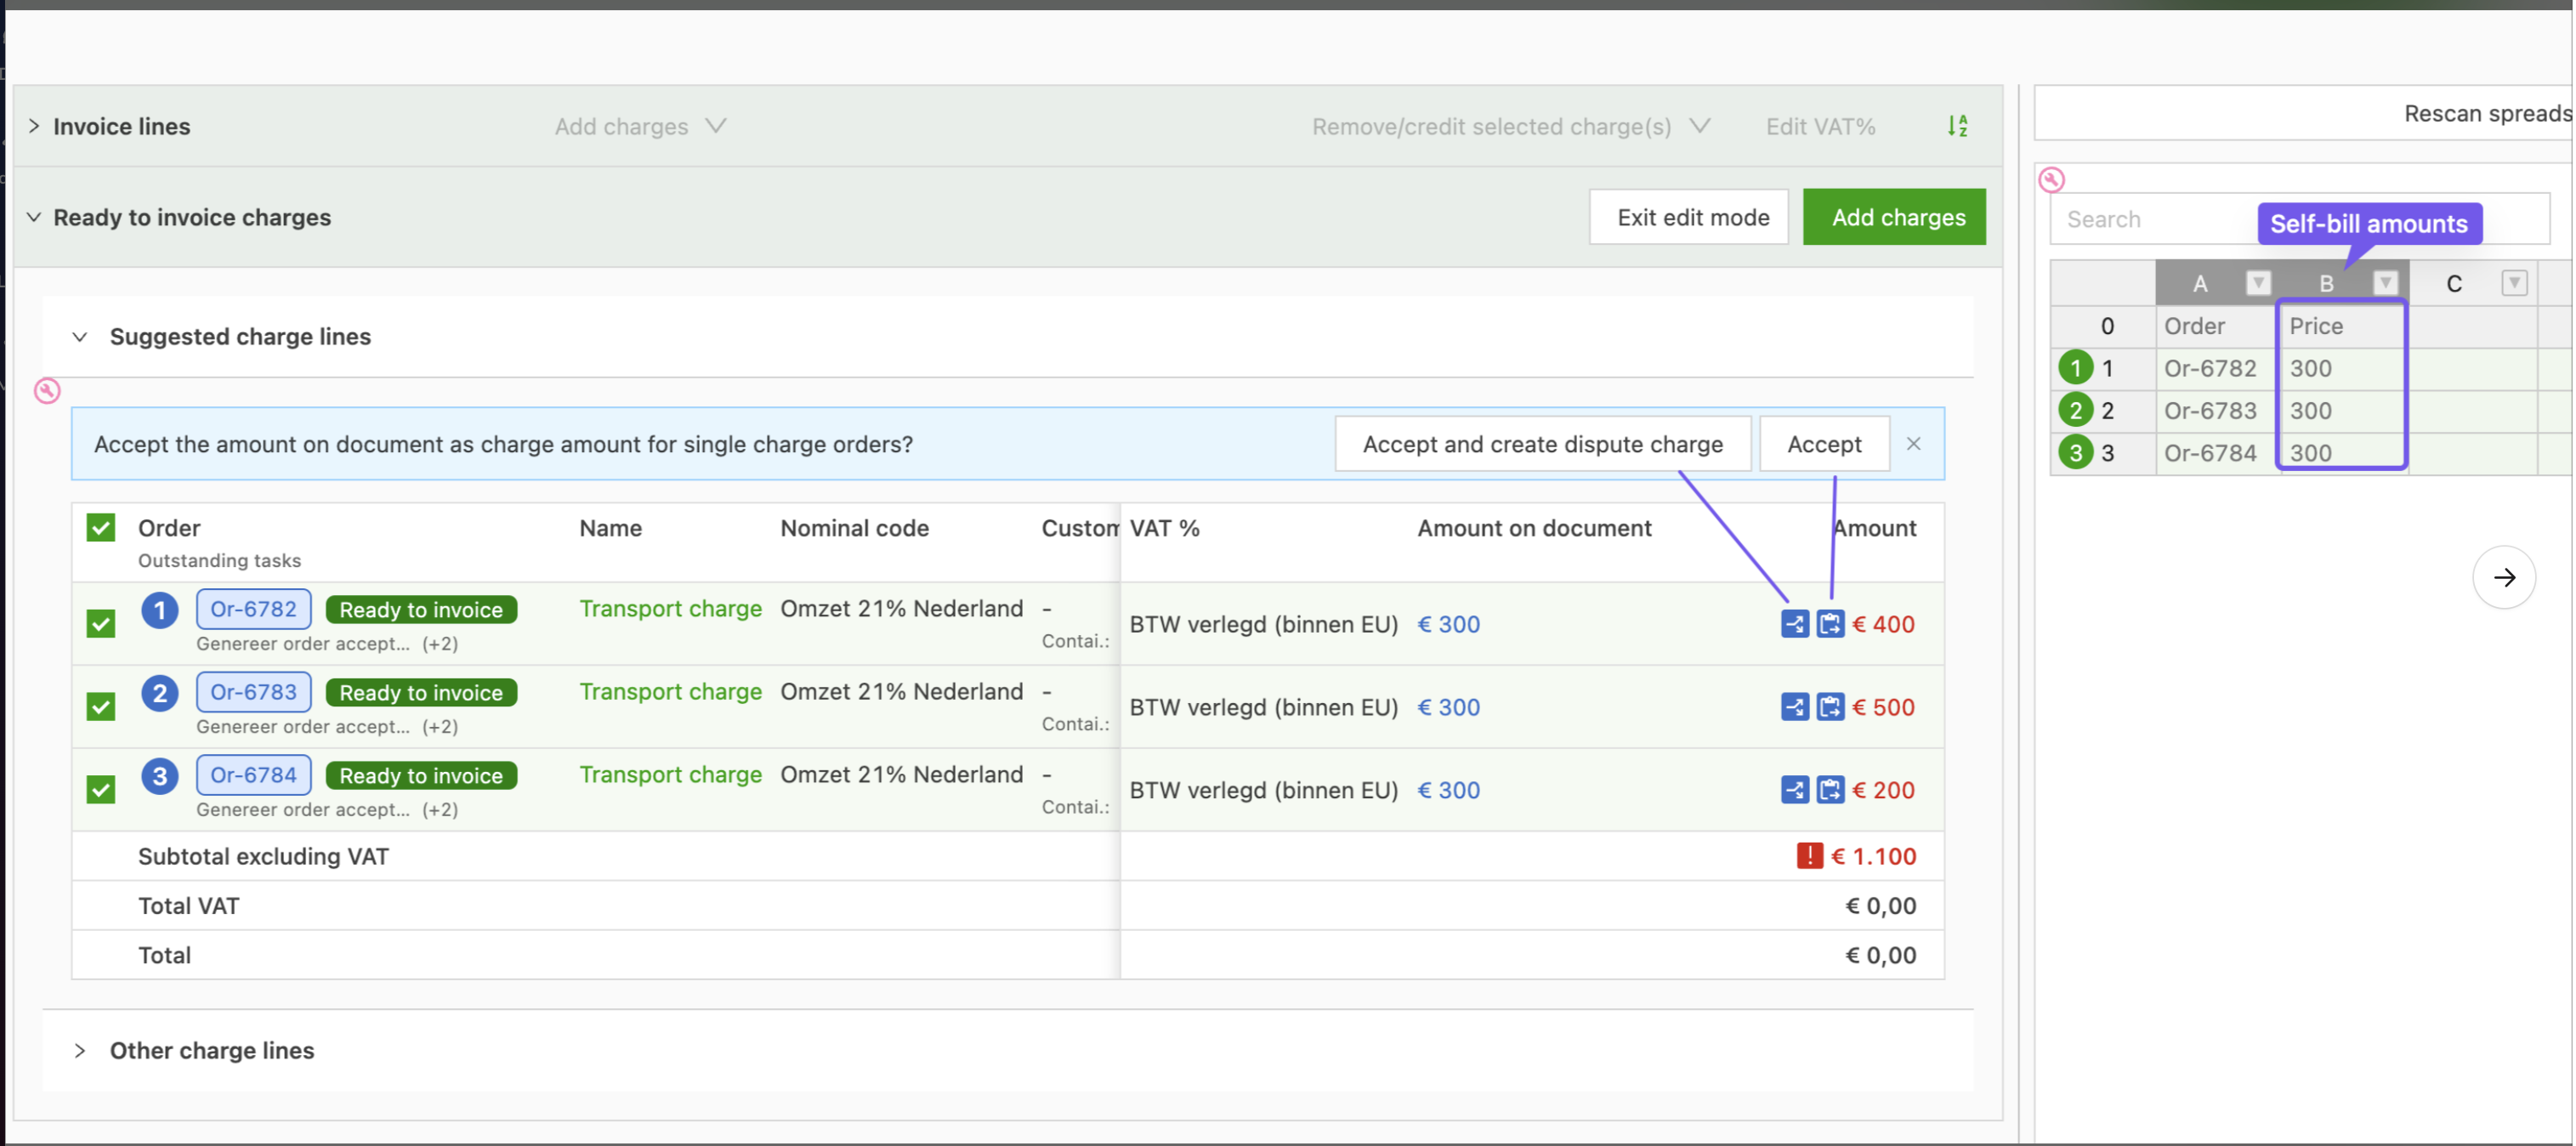
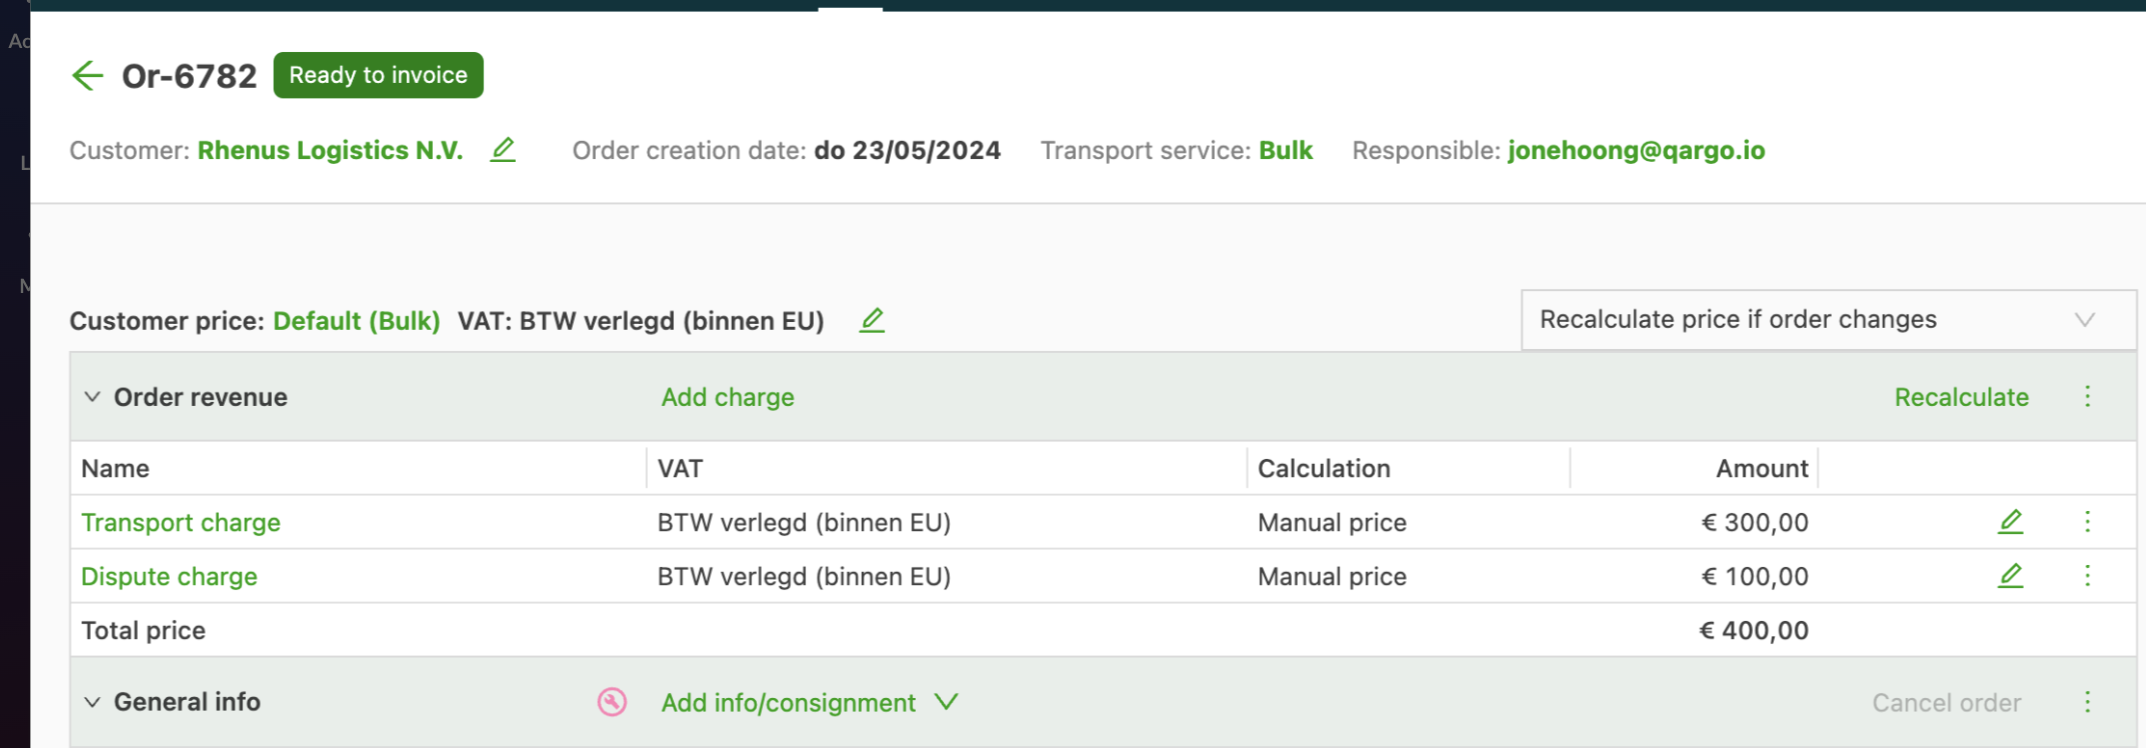
There are 3 charges, each linked to a single line in the spreadsheet, and none of the amounts match.
Clicking the split icon (the left one in screenshot 1 below) shows that the original charge amount will be changed to the amount on the self-bill.
The differences are then put on a new charge. In the first version, the user has to choose the charge.
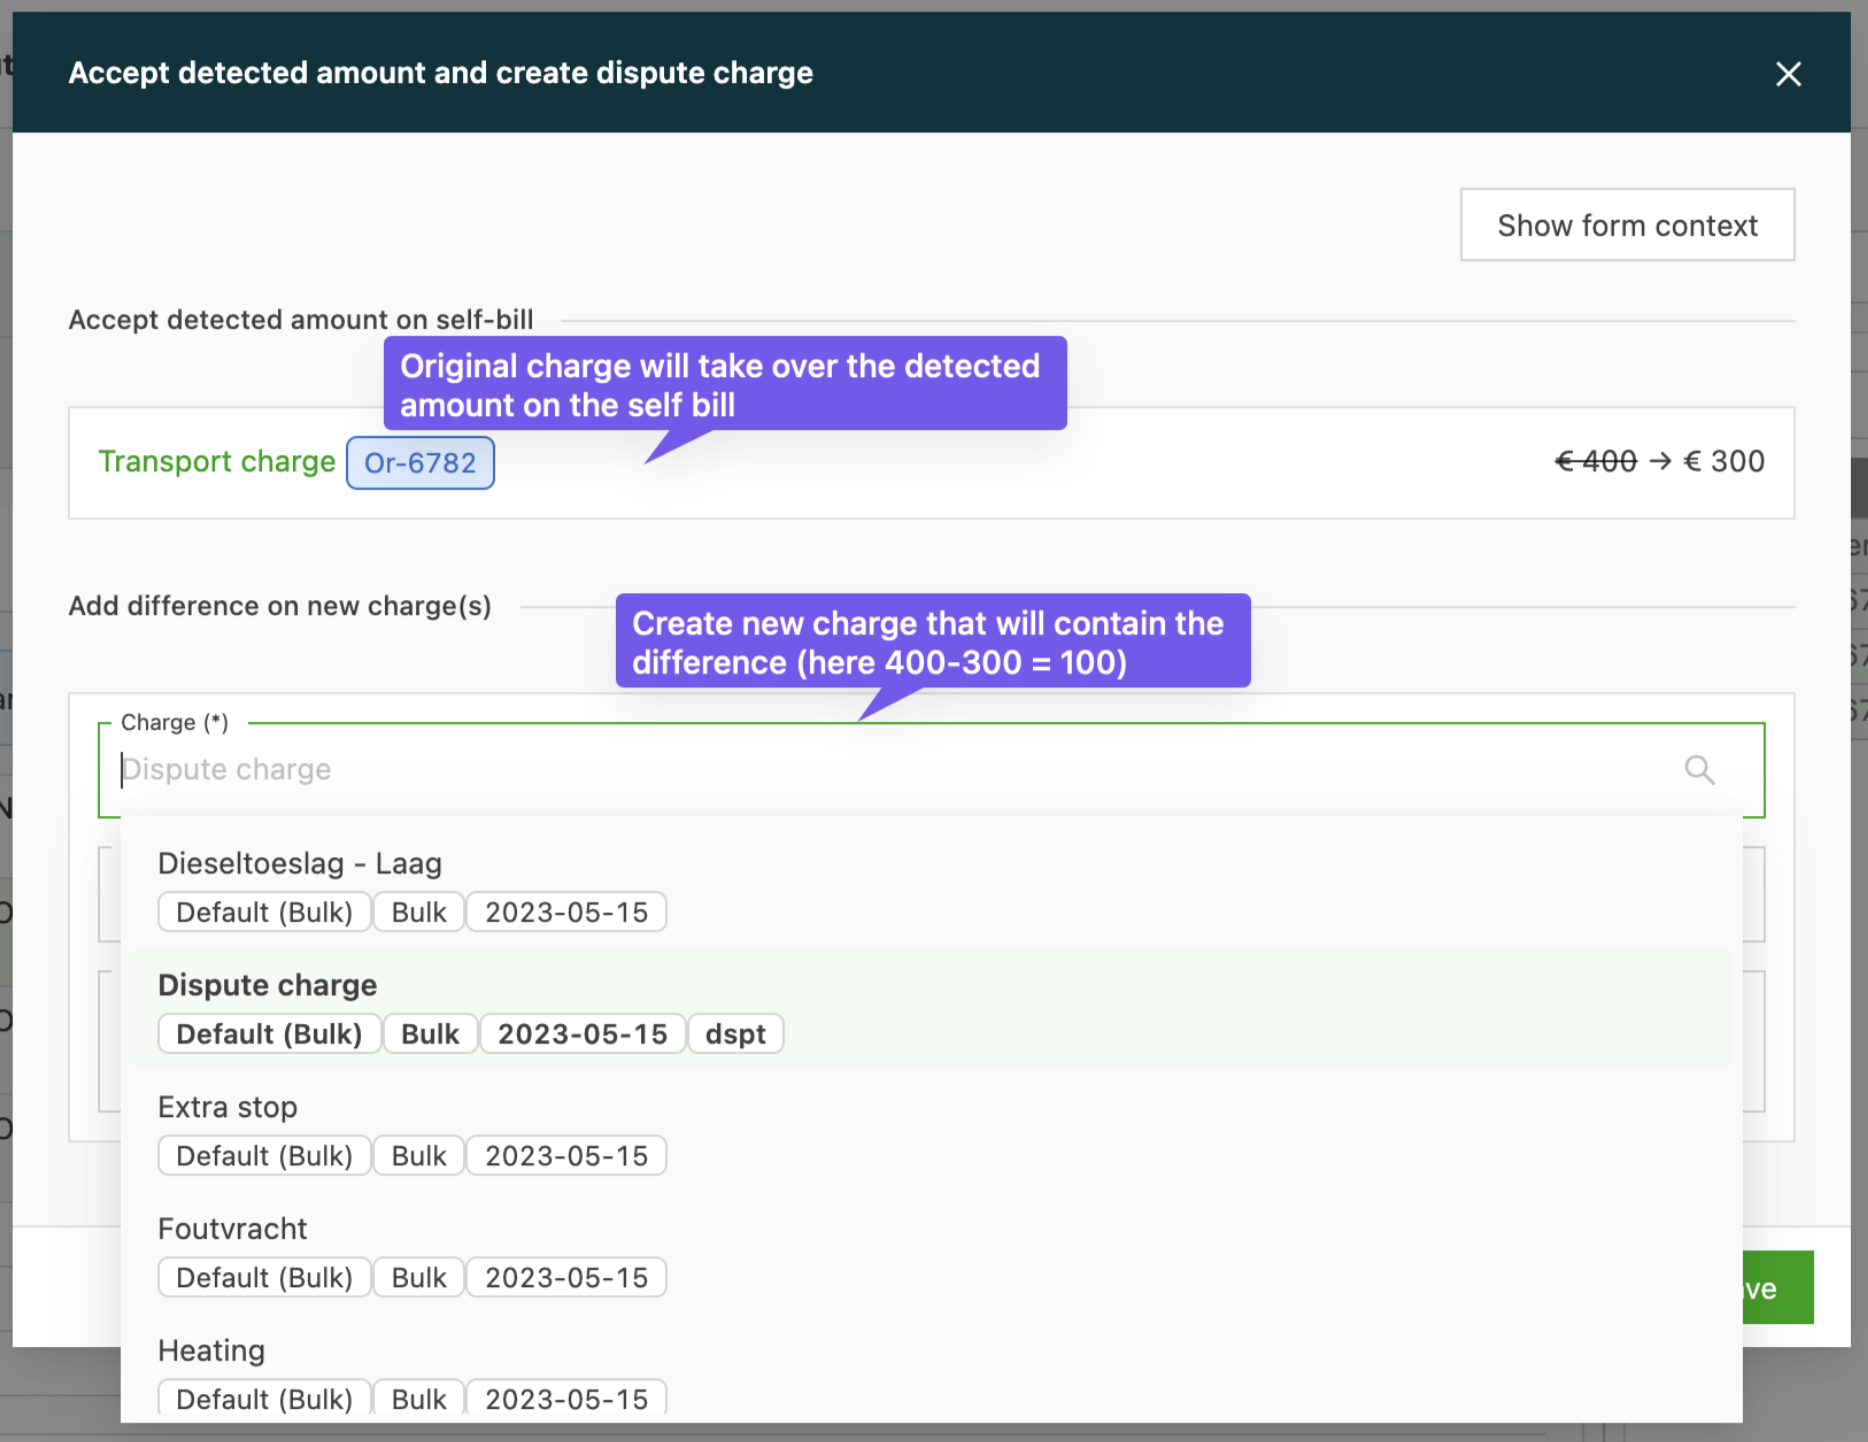
Once the charge has been selected and saved, the adjustments are made immediately (see the order detail page below).
Adjusting invoices
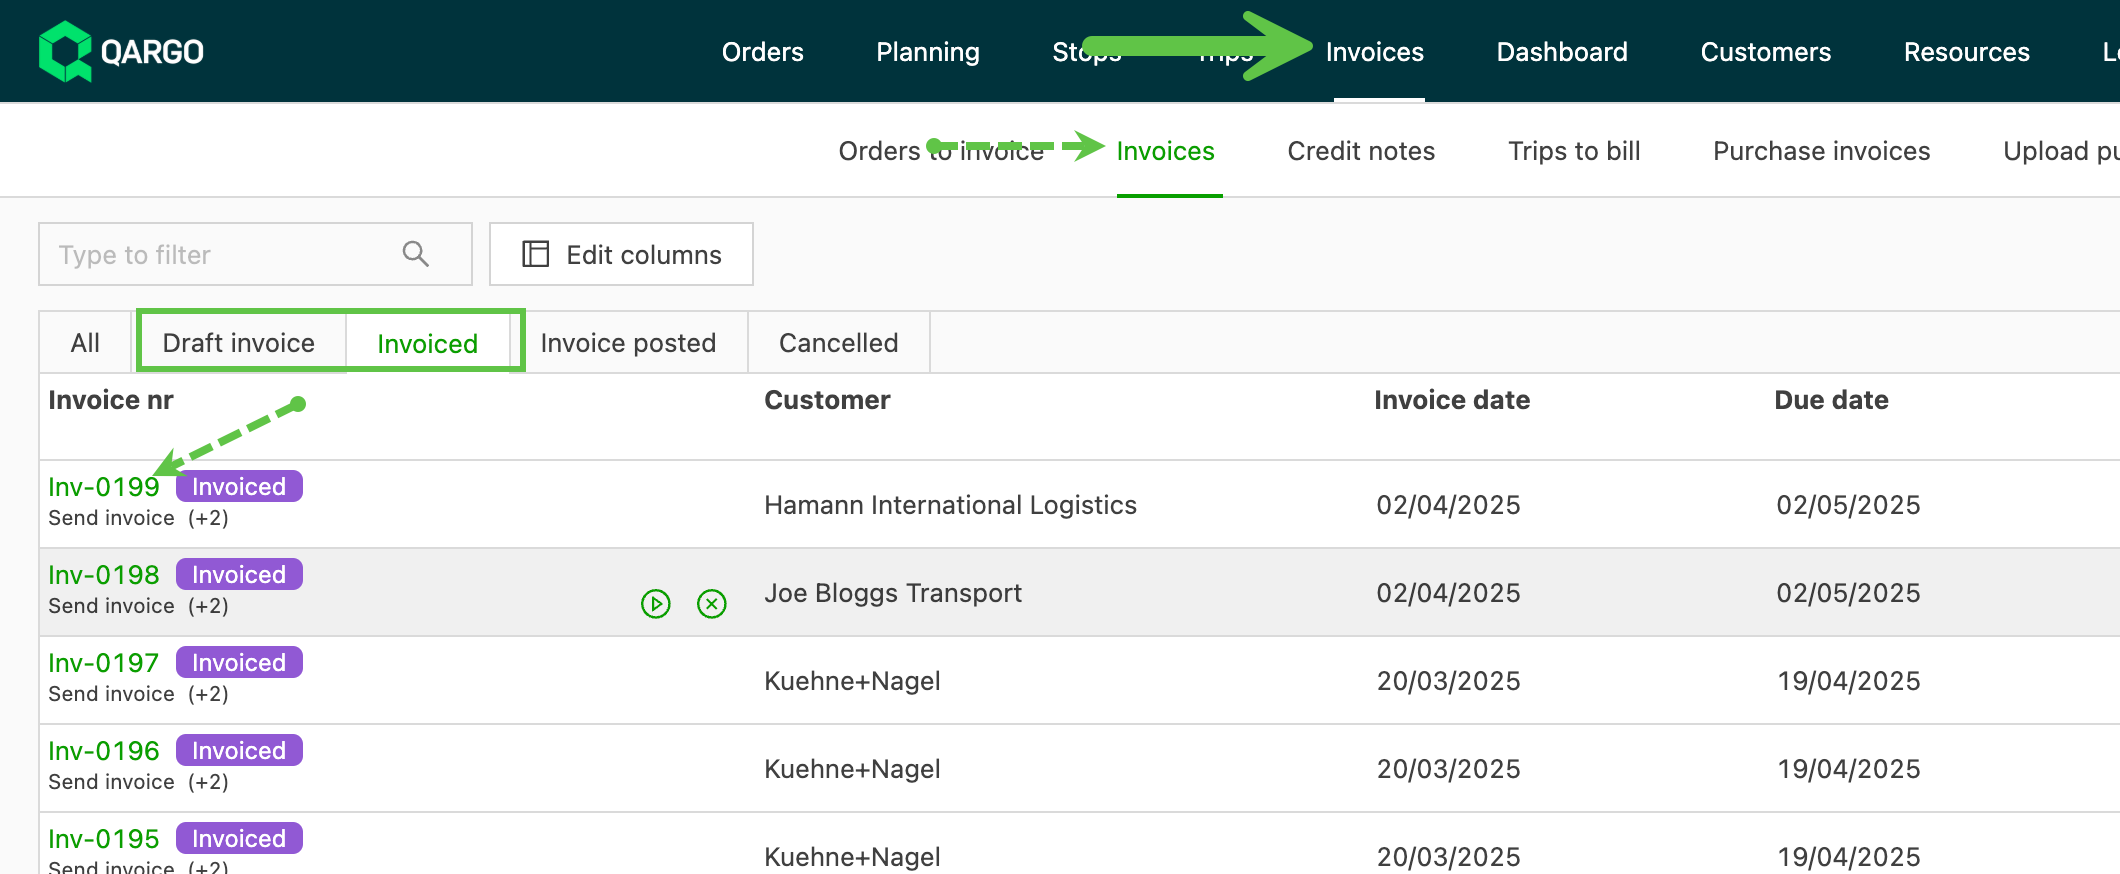
Once an invoice or draft invoice has been created, it can be found under the invoices column.
Click the invoice ID to open the invoice page and make adjustments.
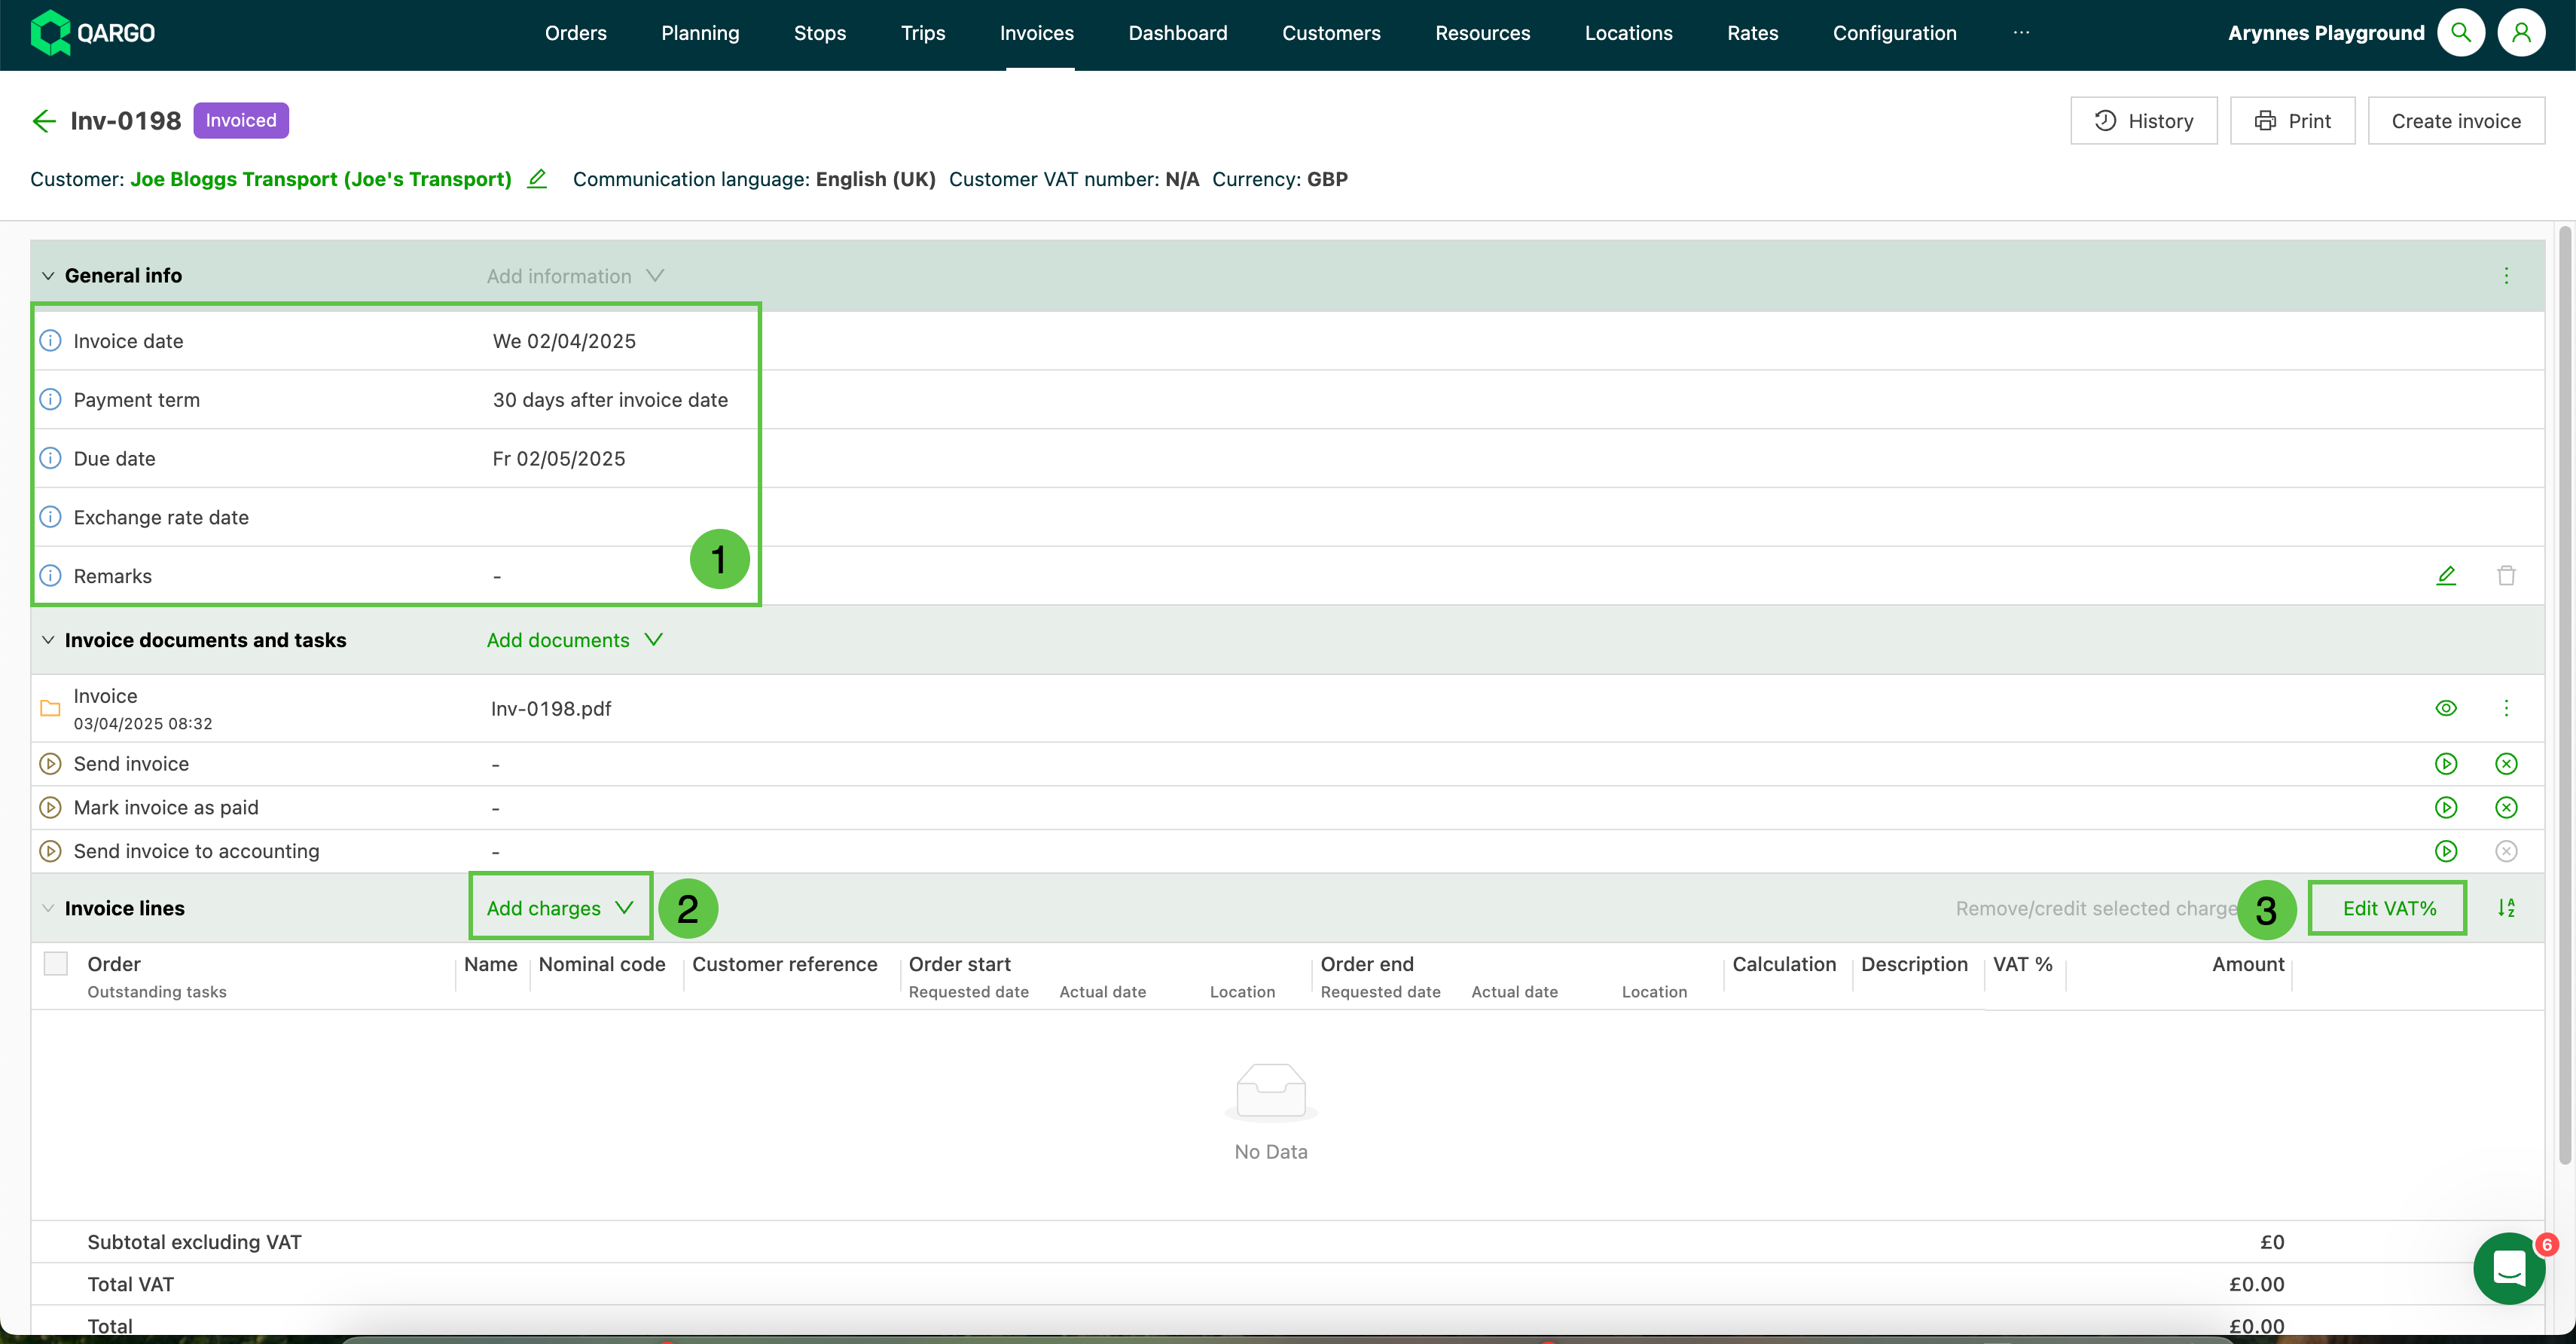
- General info: Click a row to update the details if required.
- Add charges: Select to add charges from the order or a standalone charge.
- Edit tax %: Select from the dropdown to adjust the tax rate as required.
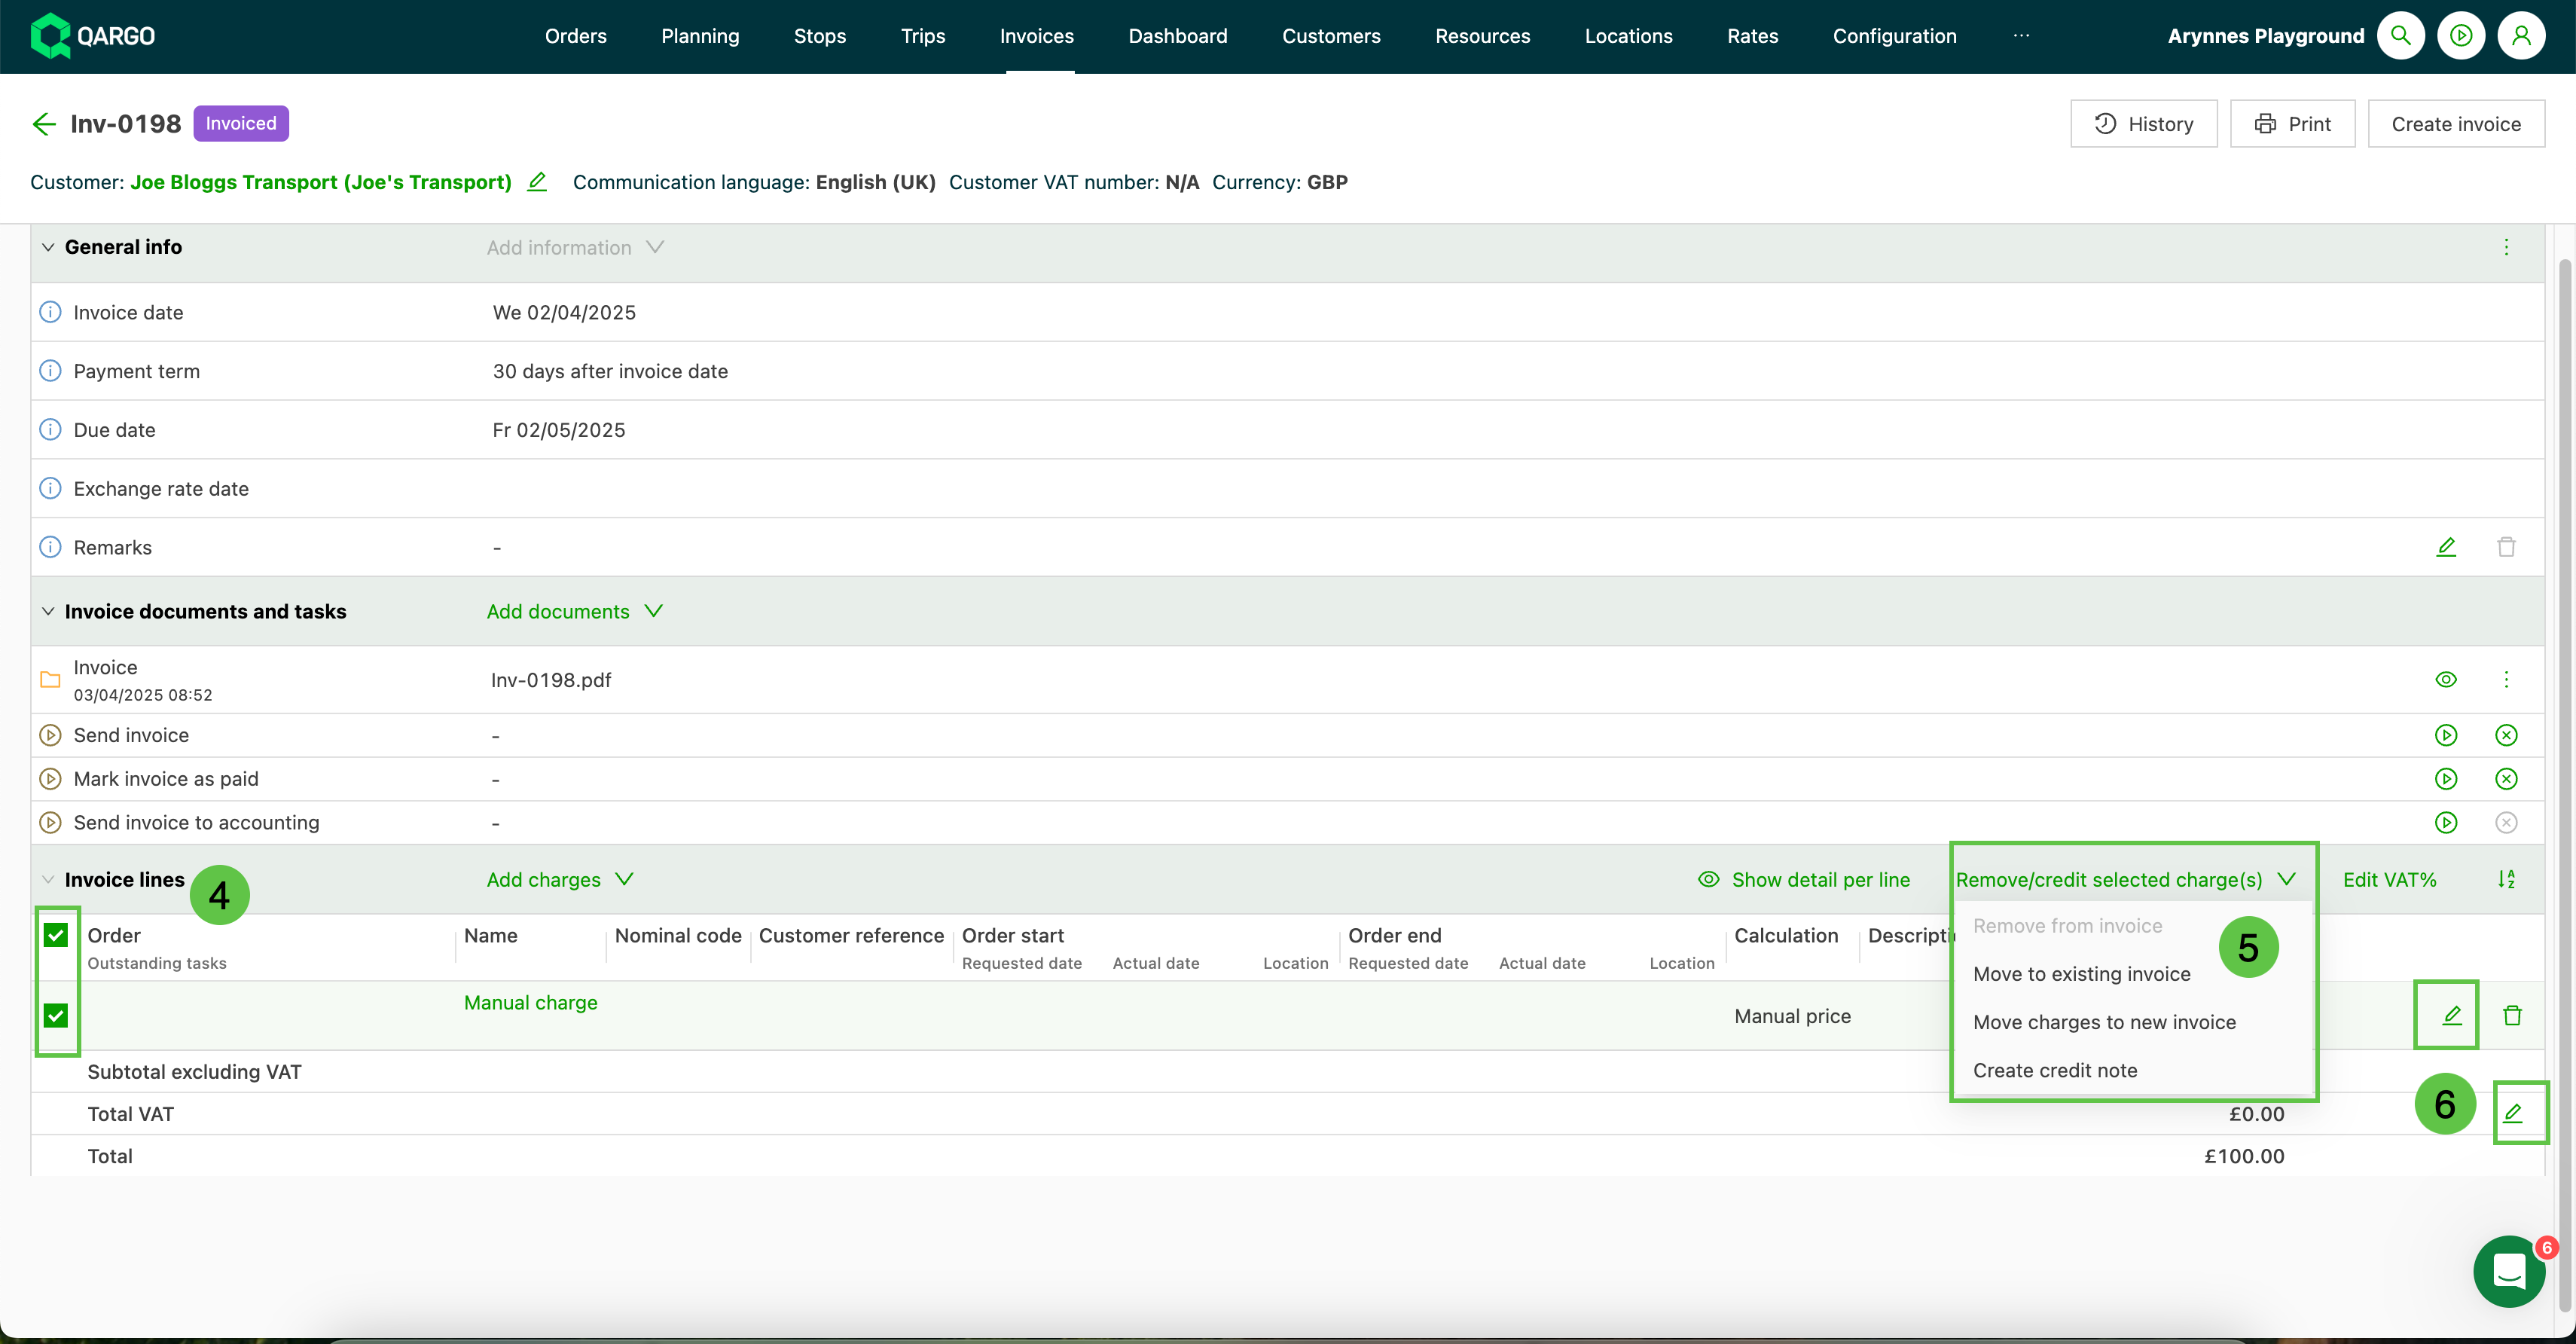
- Invoice lines: Click the check box to select the line(s) to update
- Remove/credit selected lines: Select the action to perform on the selected charge
- Edit details: Click the pencil icon to update specific charge or description details
Generating invoice PDFs
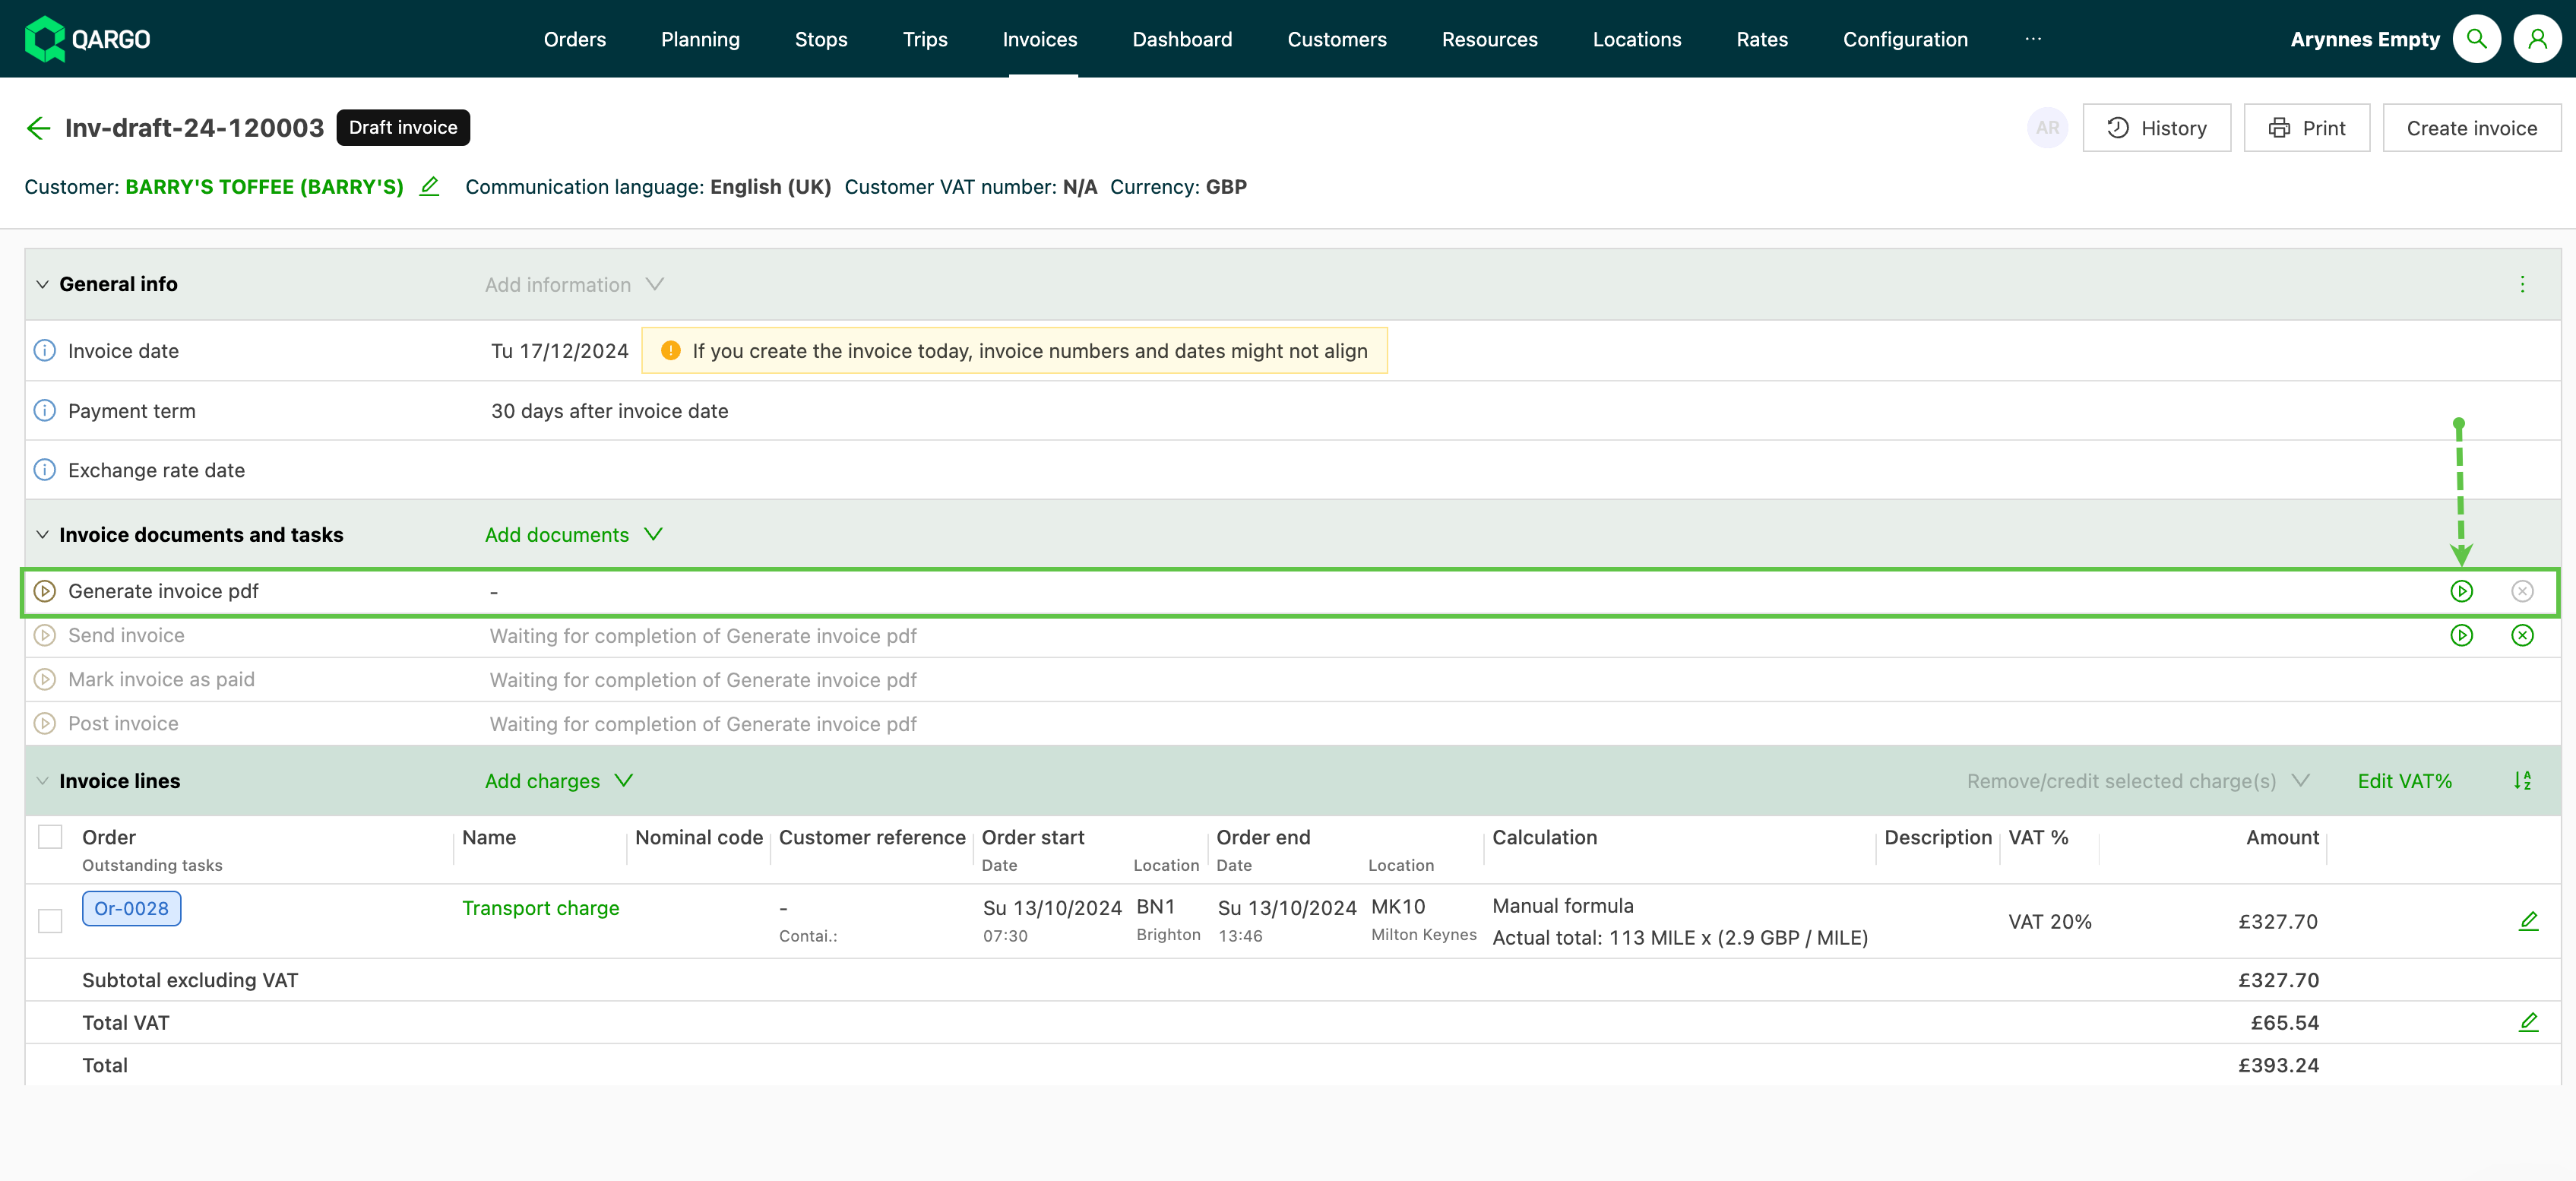
- Verify that the invoice details are accurately registered on the invoice page.
- Depending on the workflow configuration, the status may show Draft or Invoiced
- Click the play button on the right side of the task line
- Once the invoice has been generated, the PDF preview is also visible, so final checks can be done on the invoice
- Click the eye icon to turn the preview on or off
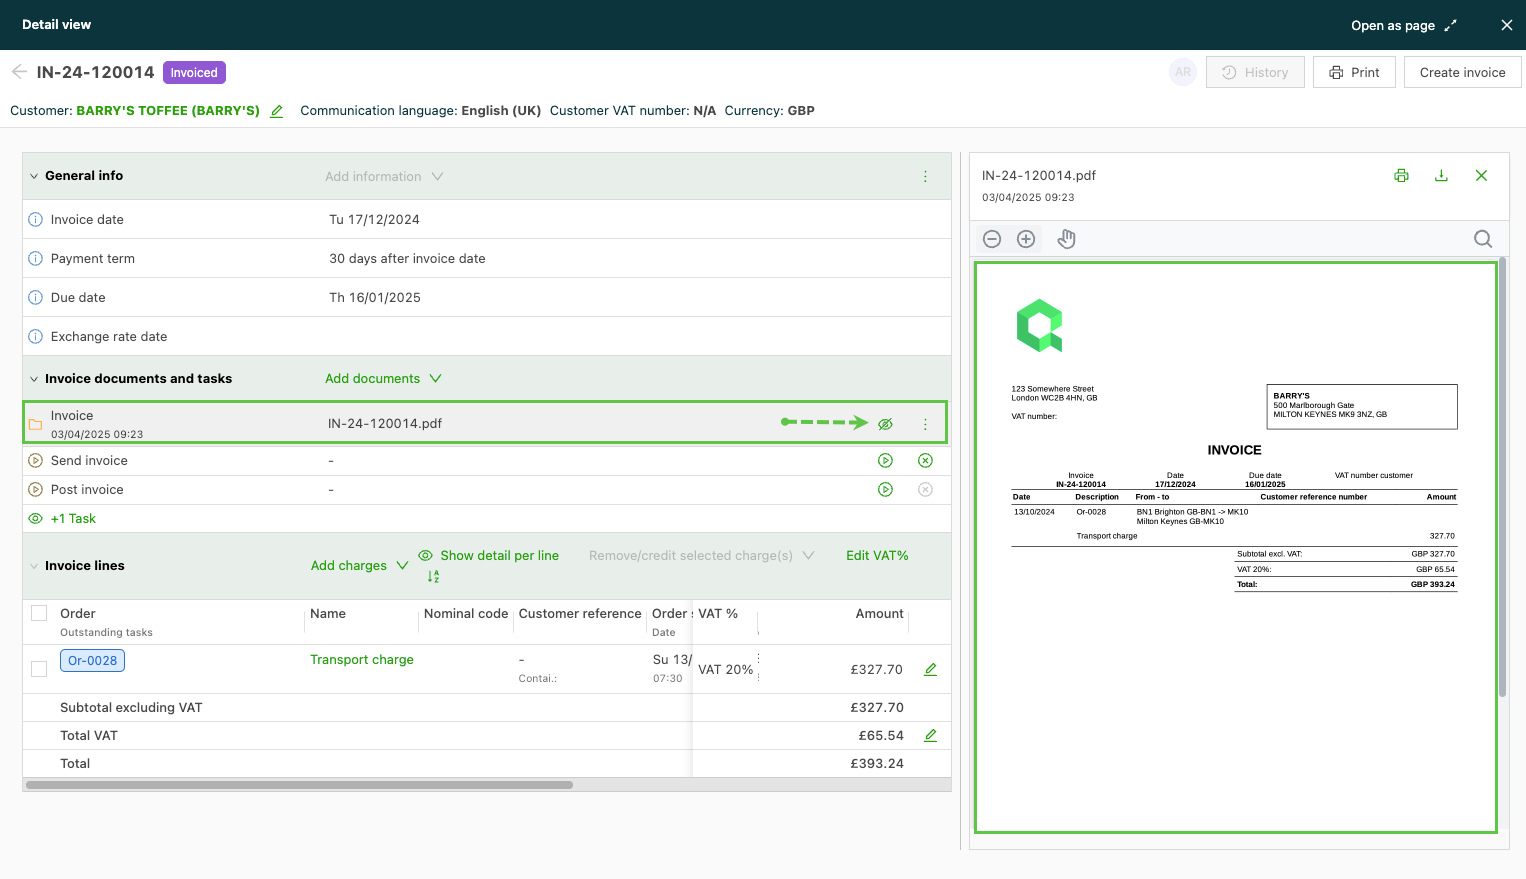
If any changes are made to the invoice (for example, adjusting the date or removing/adding an order), the PDF must be regenerated to show the changes.
Click the 3 dots next to the task and click Retrigger.
Sending invoices to customers
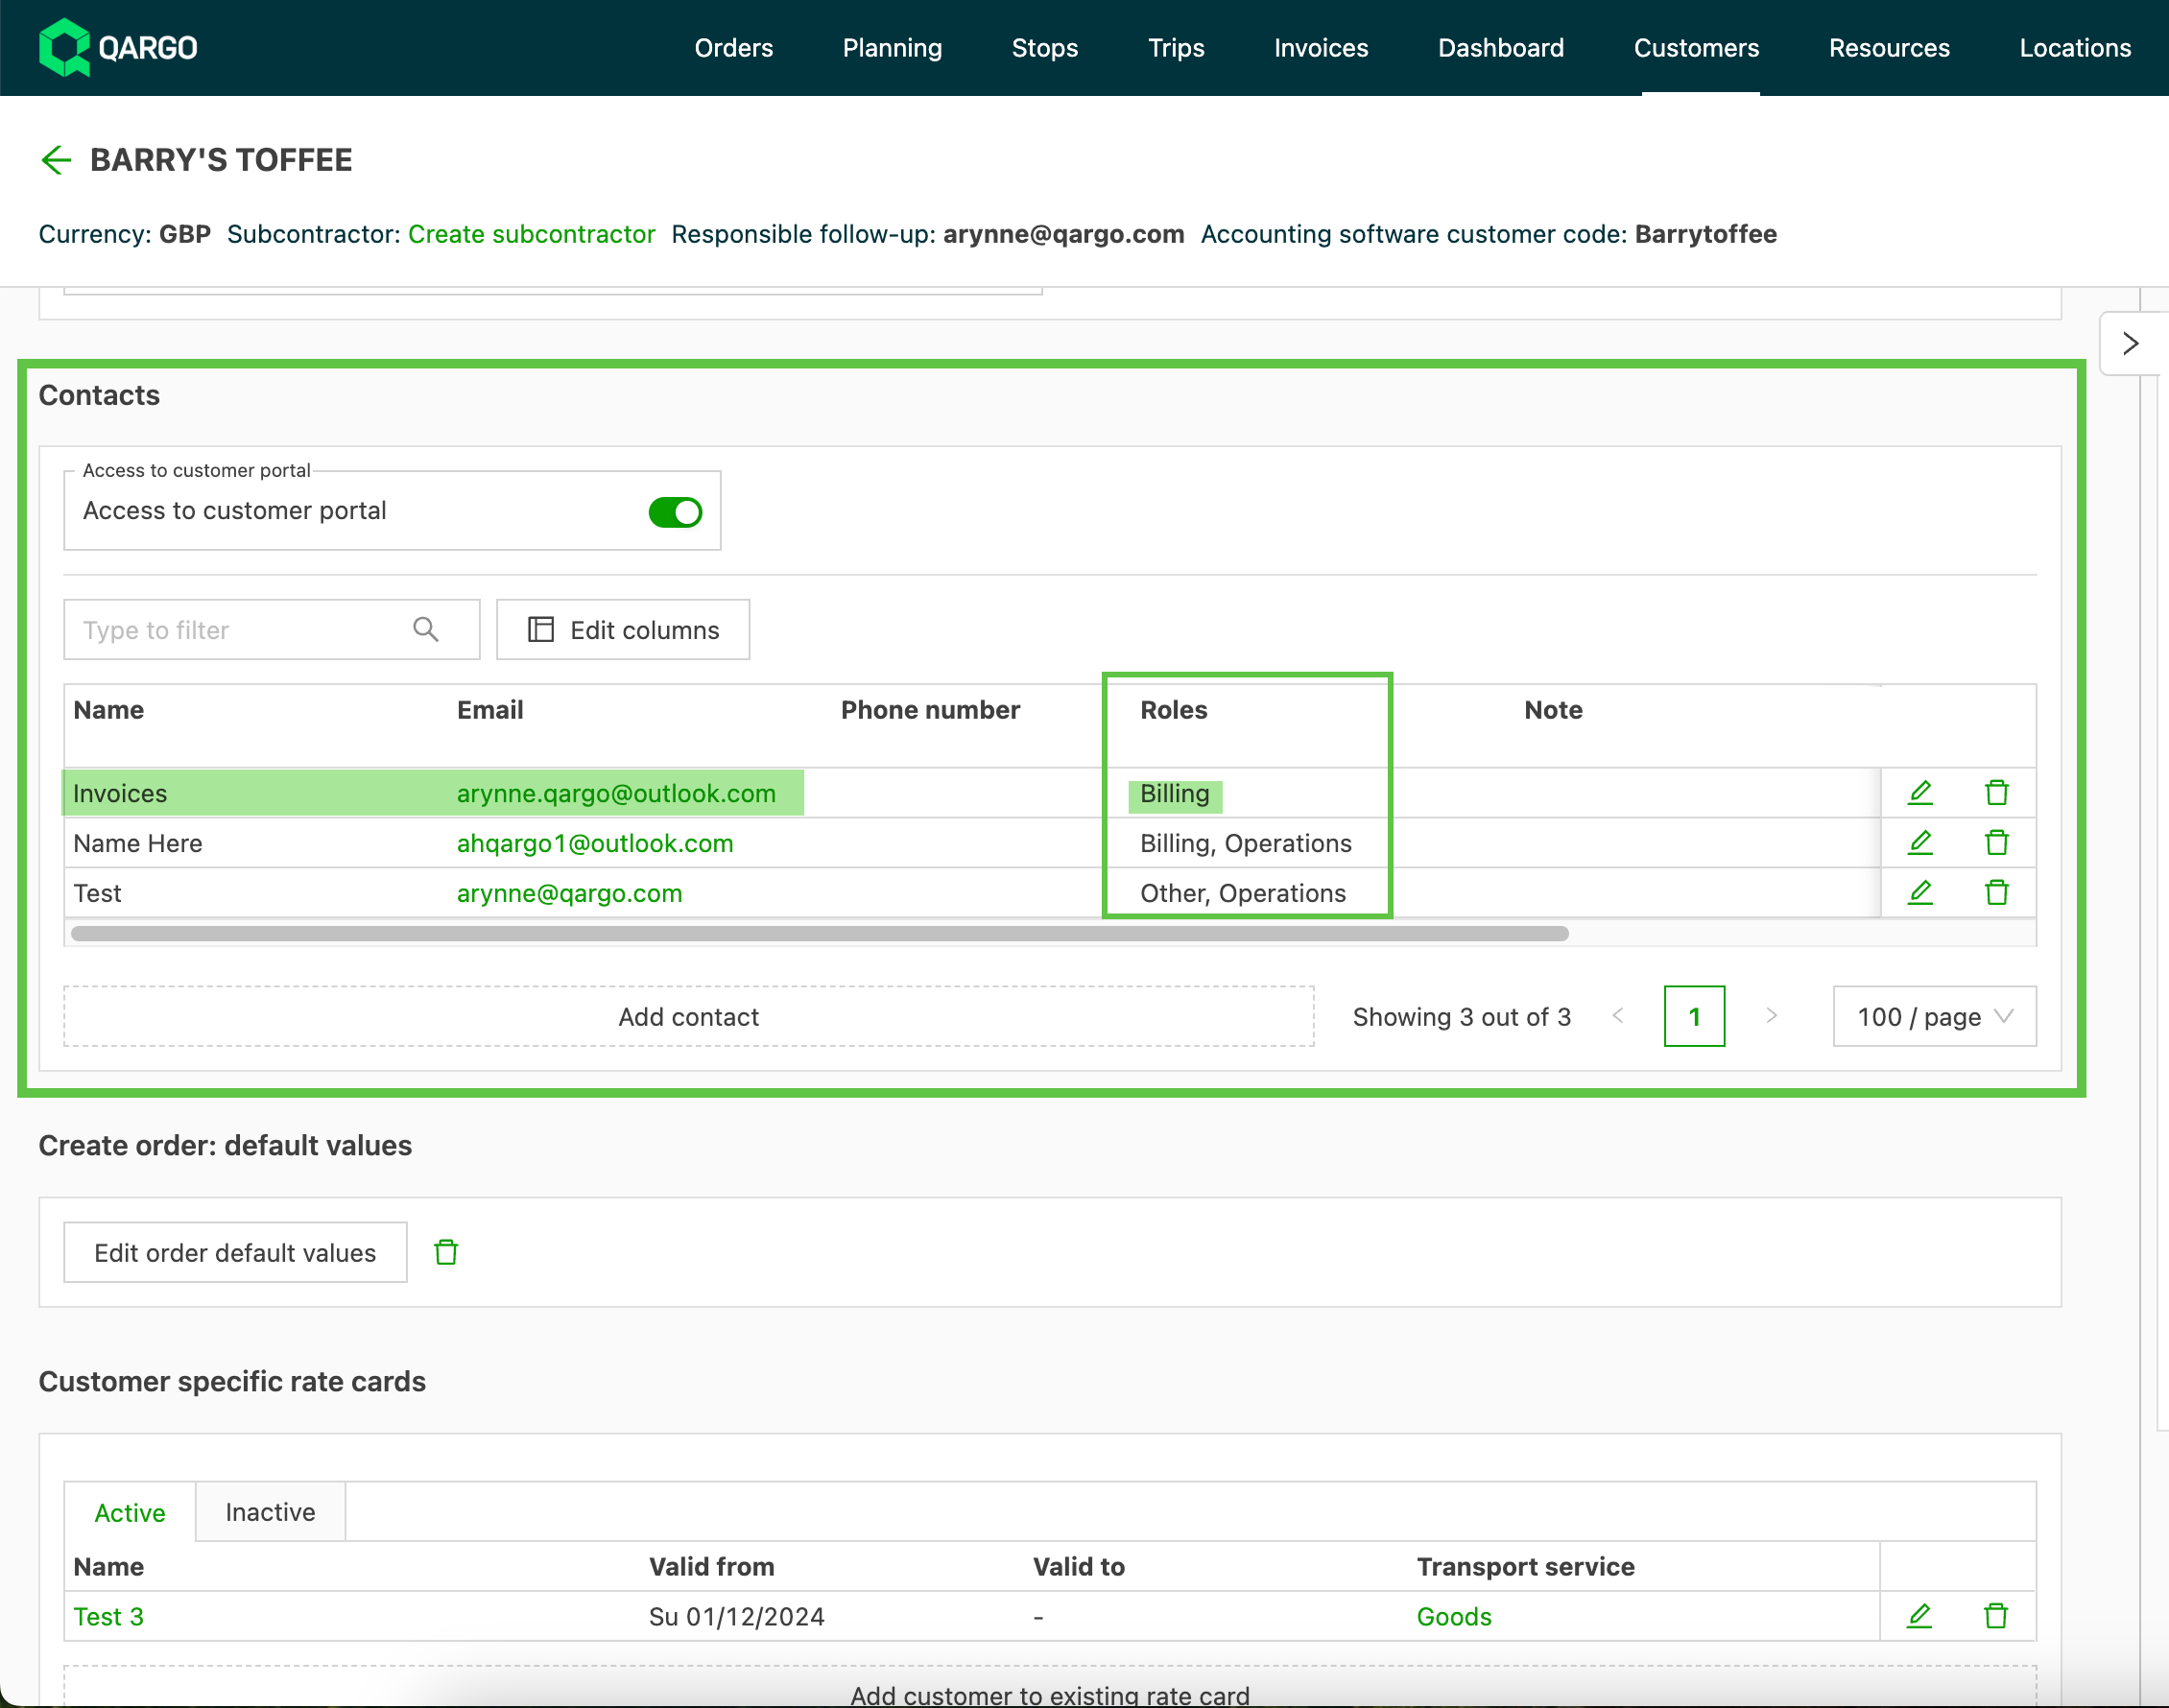
- Verify that the customer contact details are accurately registered on the customer page (role: billing).
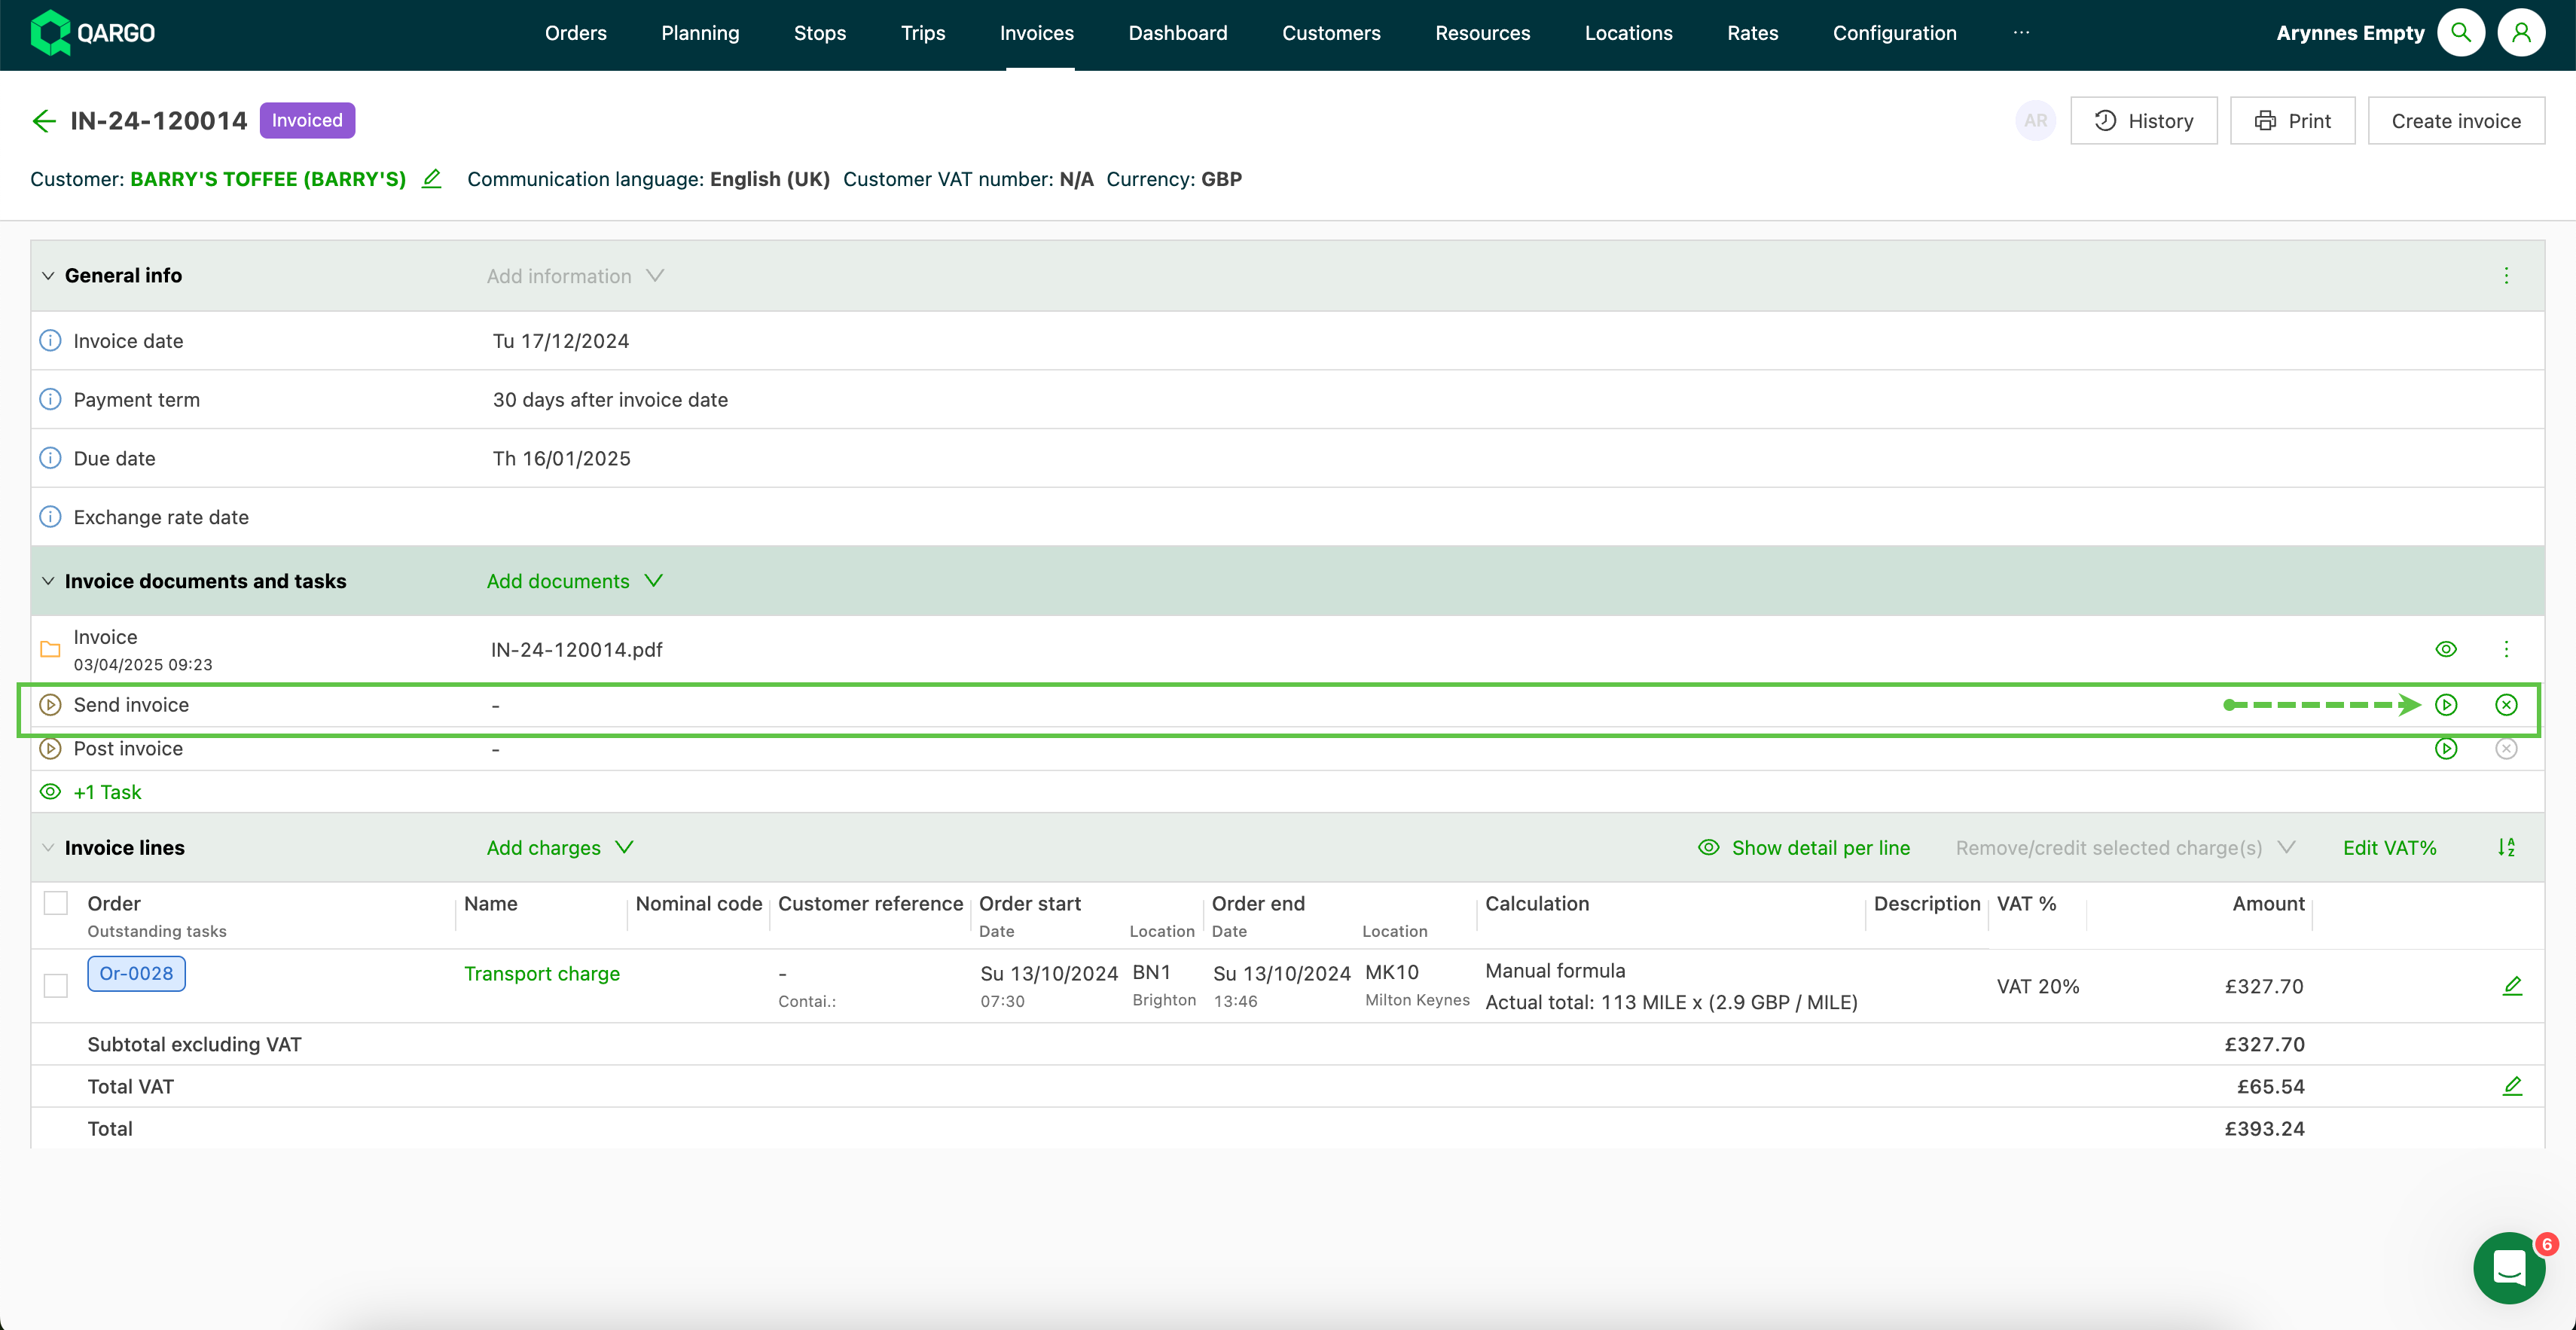
- Review the invoice details and click Send invoice
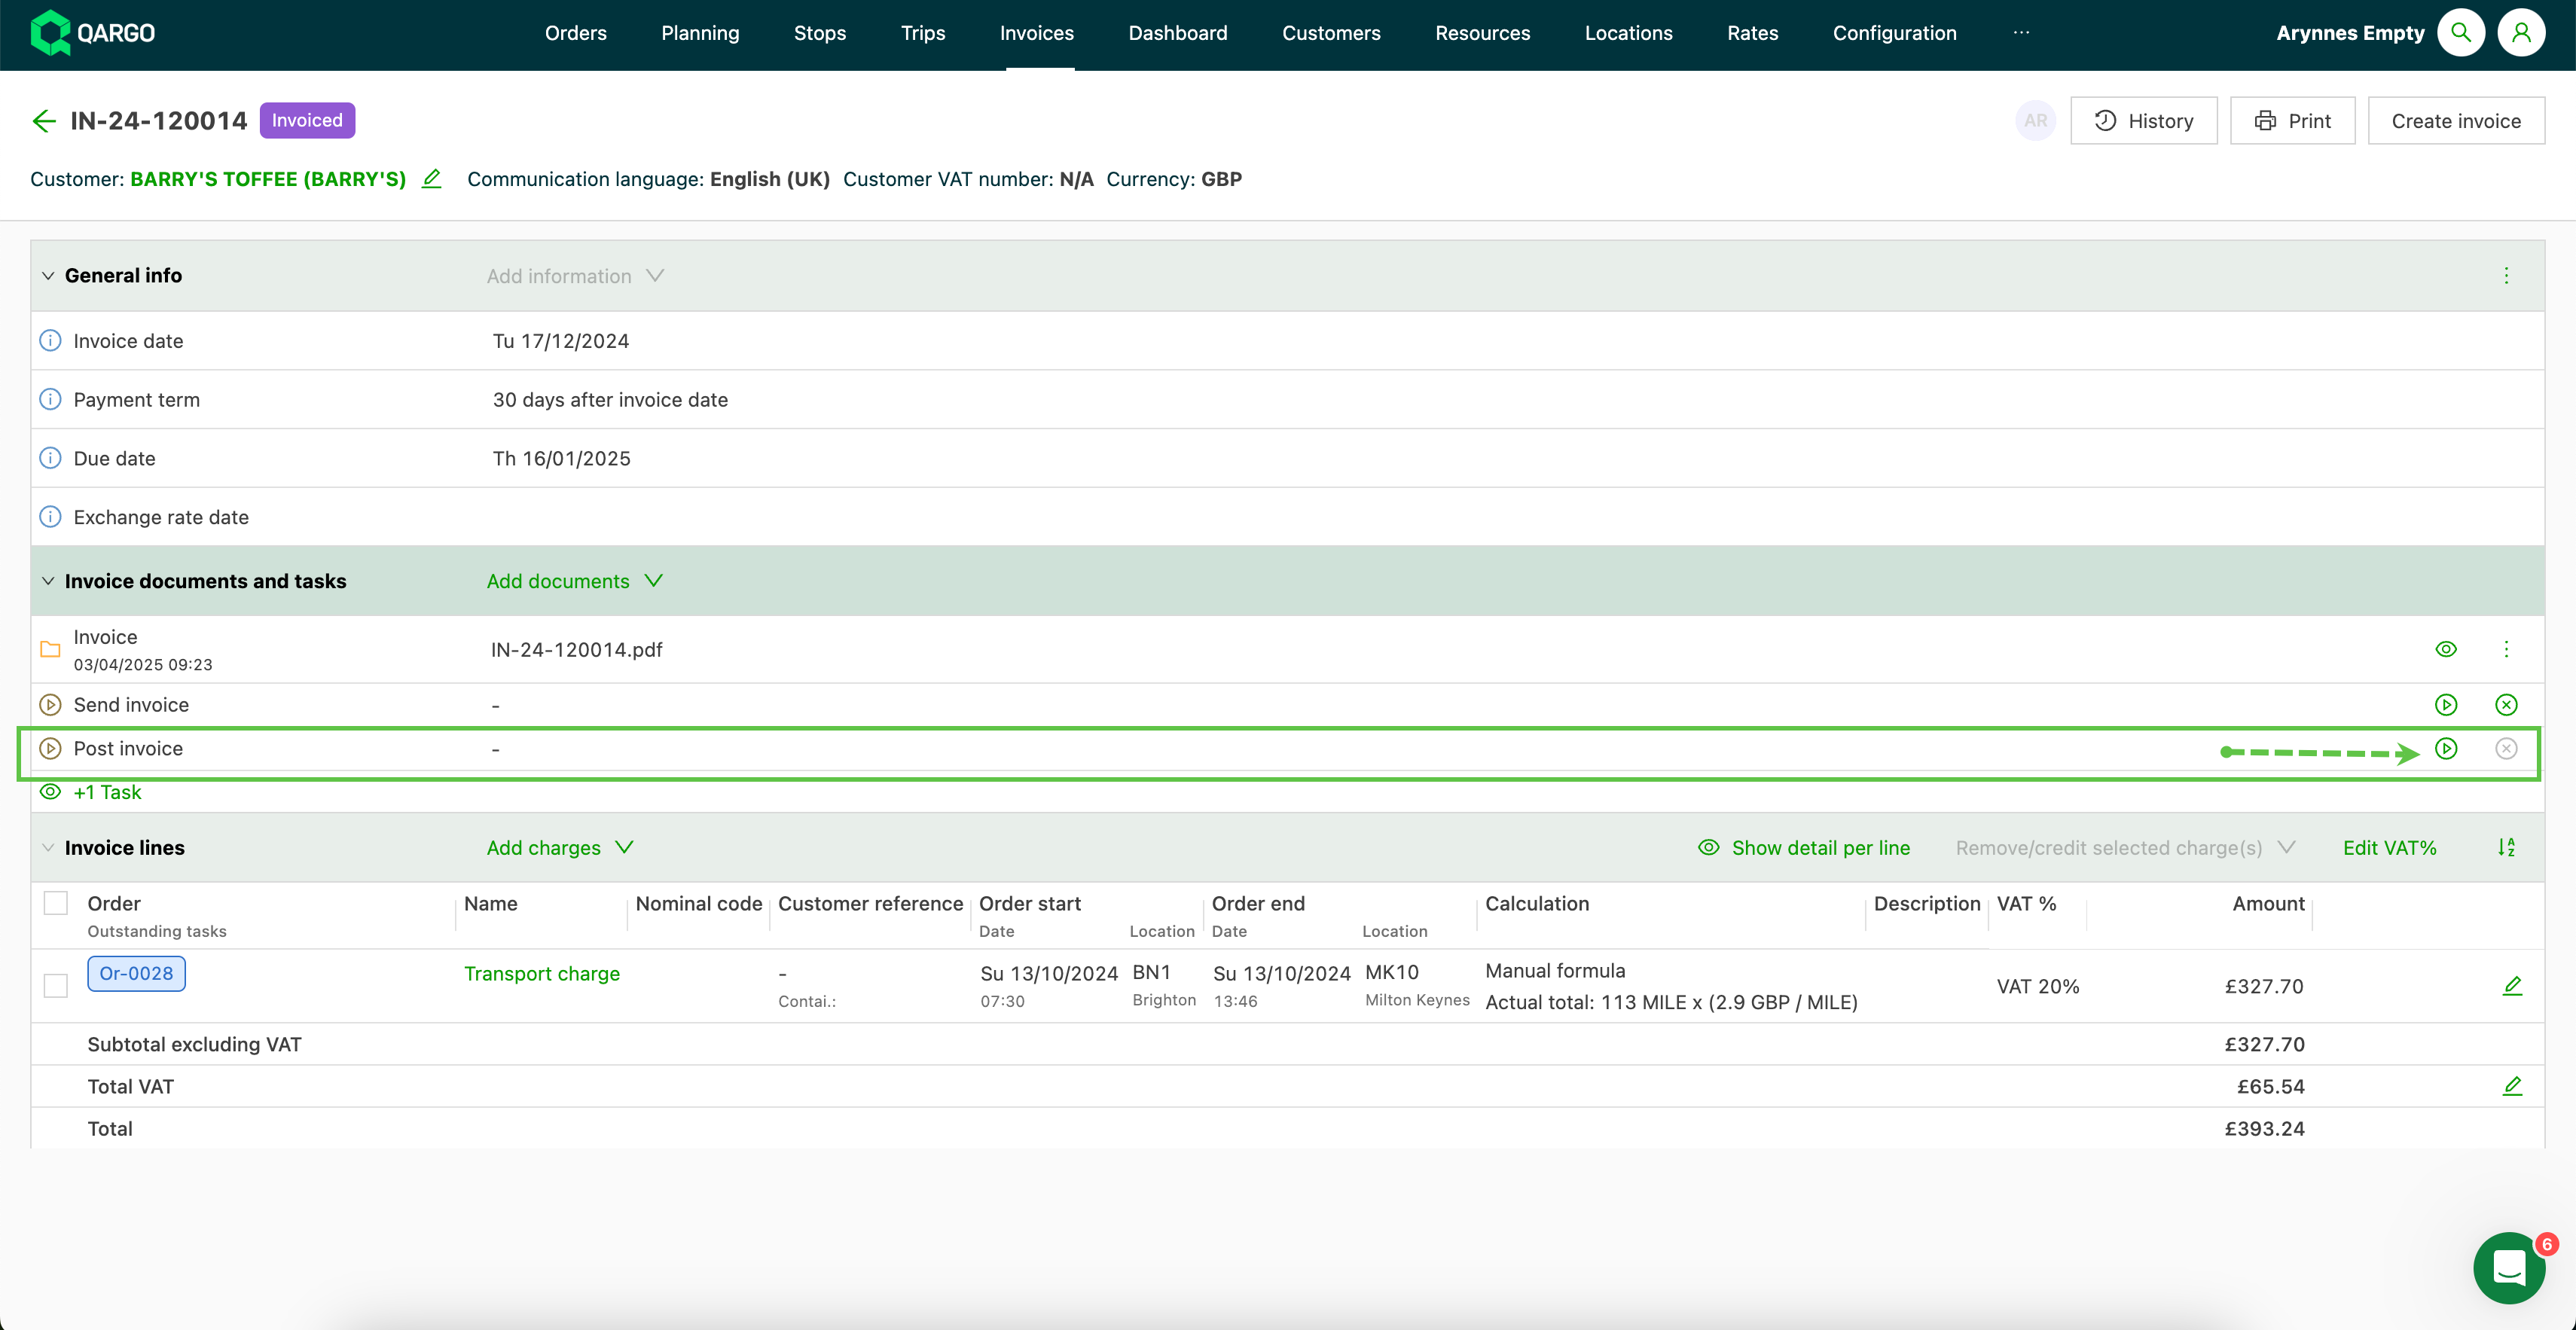
Posting to accounting
- Once billing is complete, the invoice must be posted to be available for import into accounting.
- The Post task can be configured (named) according to business requirements.
- Once the invoice has a posted status, the invoice record is included in any exports to accounting.
⚠️ Note: After posting, adjustments are limited. If changes are necessary, contact support.

Note: An individual invoice per order can also be created from the order page itself.