
Invoices: Create a carrier invoice from an existing billing proposal.
Learn how to convert self-bill billing proposals into carrier invoices: upload and validate contract carrier invoices, adjust charges, add documents, and post invoices to accounting efficiently.
Table of contents
Once a billing proposal includes loads and an invoice has been received from the contract carrier, the carrier invoice can be created. A “self-bill” is created as a Billing proposal until it is generated into a carrier invoice.
Creating a carrier invoice from an existing billing proposal
-
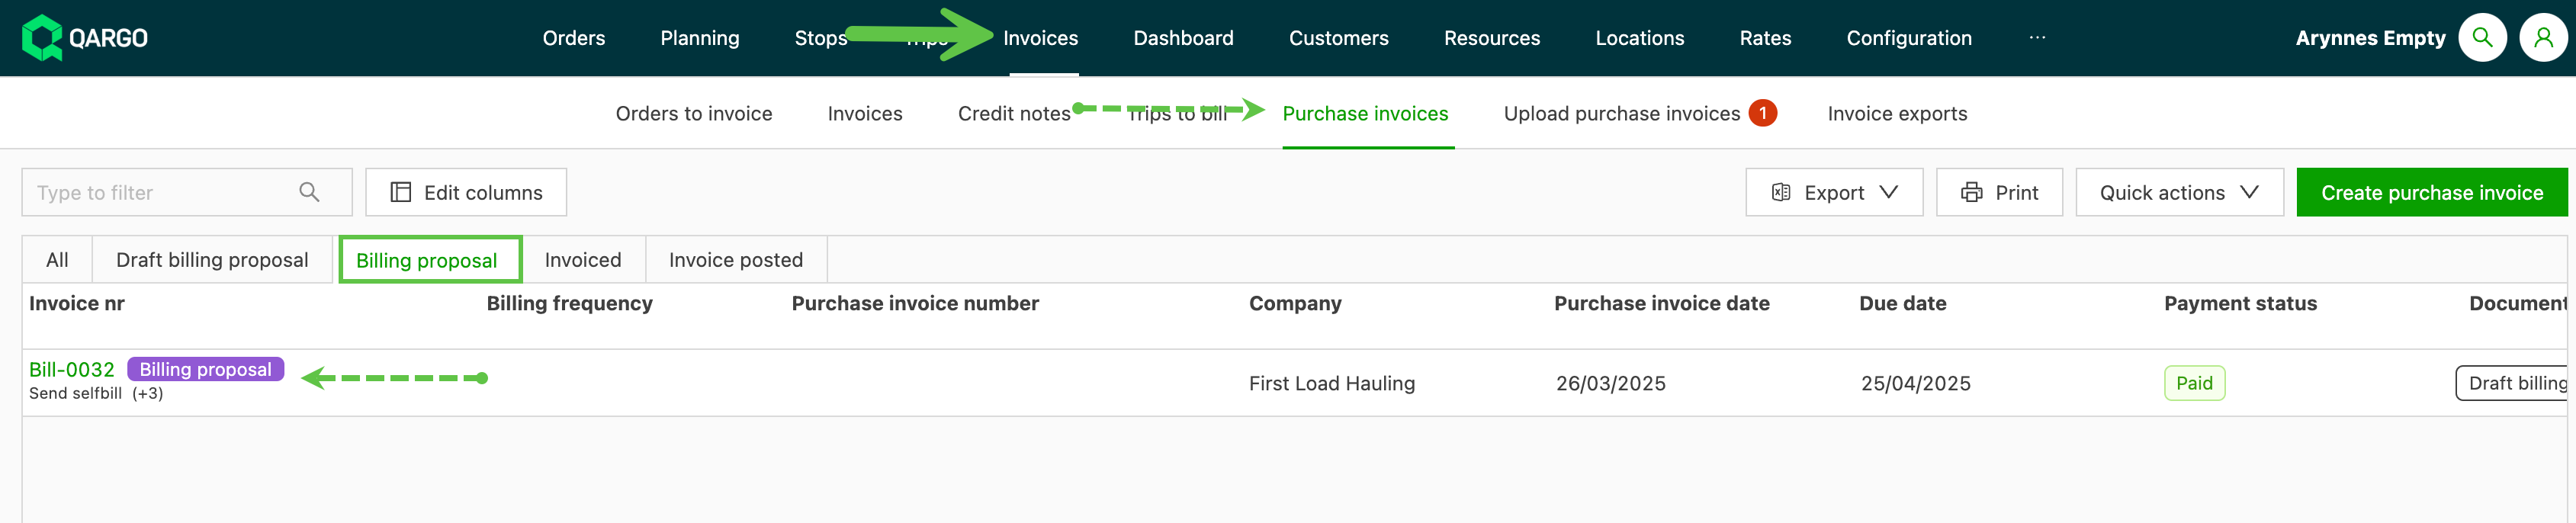
Go to Invoices > Carrier invoices.
-
The carrier invoices list view groups invoices into tabs based on status. The statuses are:
- All: A full list of all invoices, regardless of status.
- Draft billing proposal: Billing proposals that have been created, but for which the self-bill hasn’t been generated yet.
- Billing proposal: Once a self-bill has been generated, the invoice shows in this tab. It can then be generated into a carrier invoice.
- Invoiced: Once a self-bill invoice is generated, it can be processed to invoiced. Alternatively, a load can be created directly as a carrier invoice (click here to learn how to create the carrier invoice from a load).
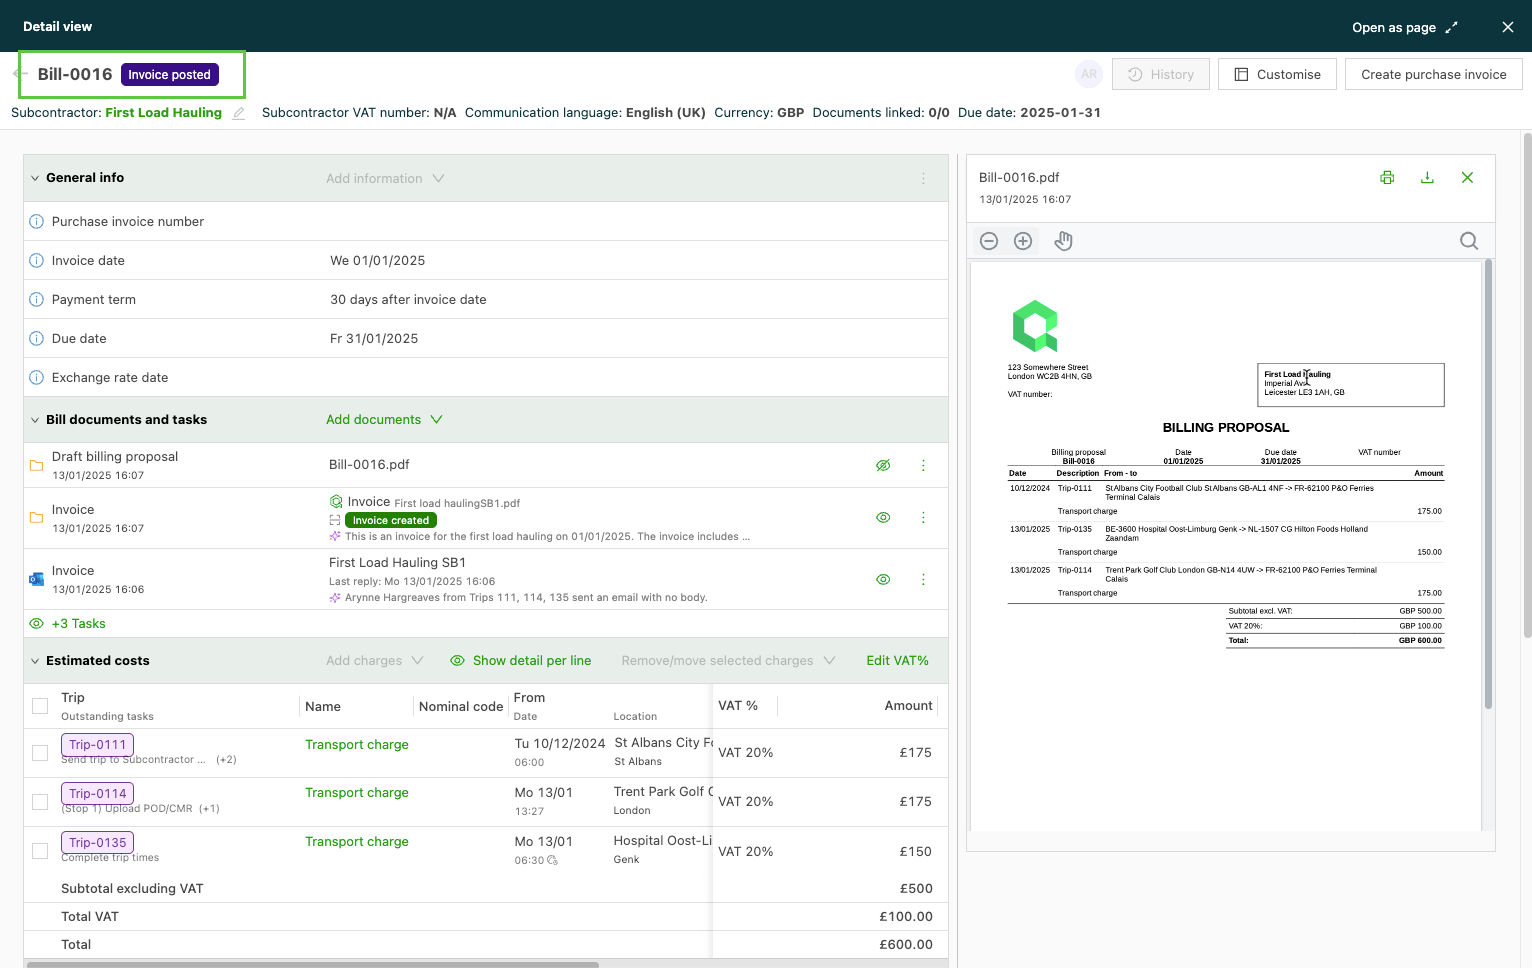
- Invoice posted: Once the invoice charges have been validated, the invoice can be set to a posted status. In a posted status, the invoice is available to export or send to accounting. Changes to charges are limited in a posted status.
-
On the Billing proposal tab, click the billing proposal number to open the details.
Manually adding the carrier invoice:
-
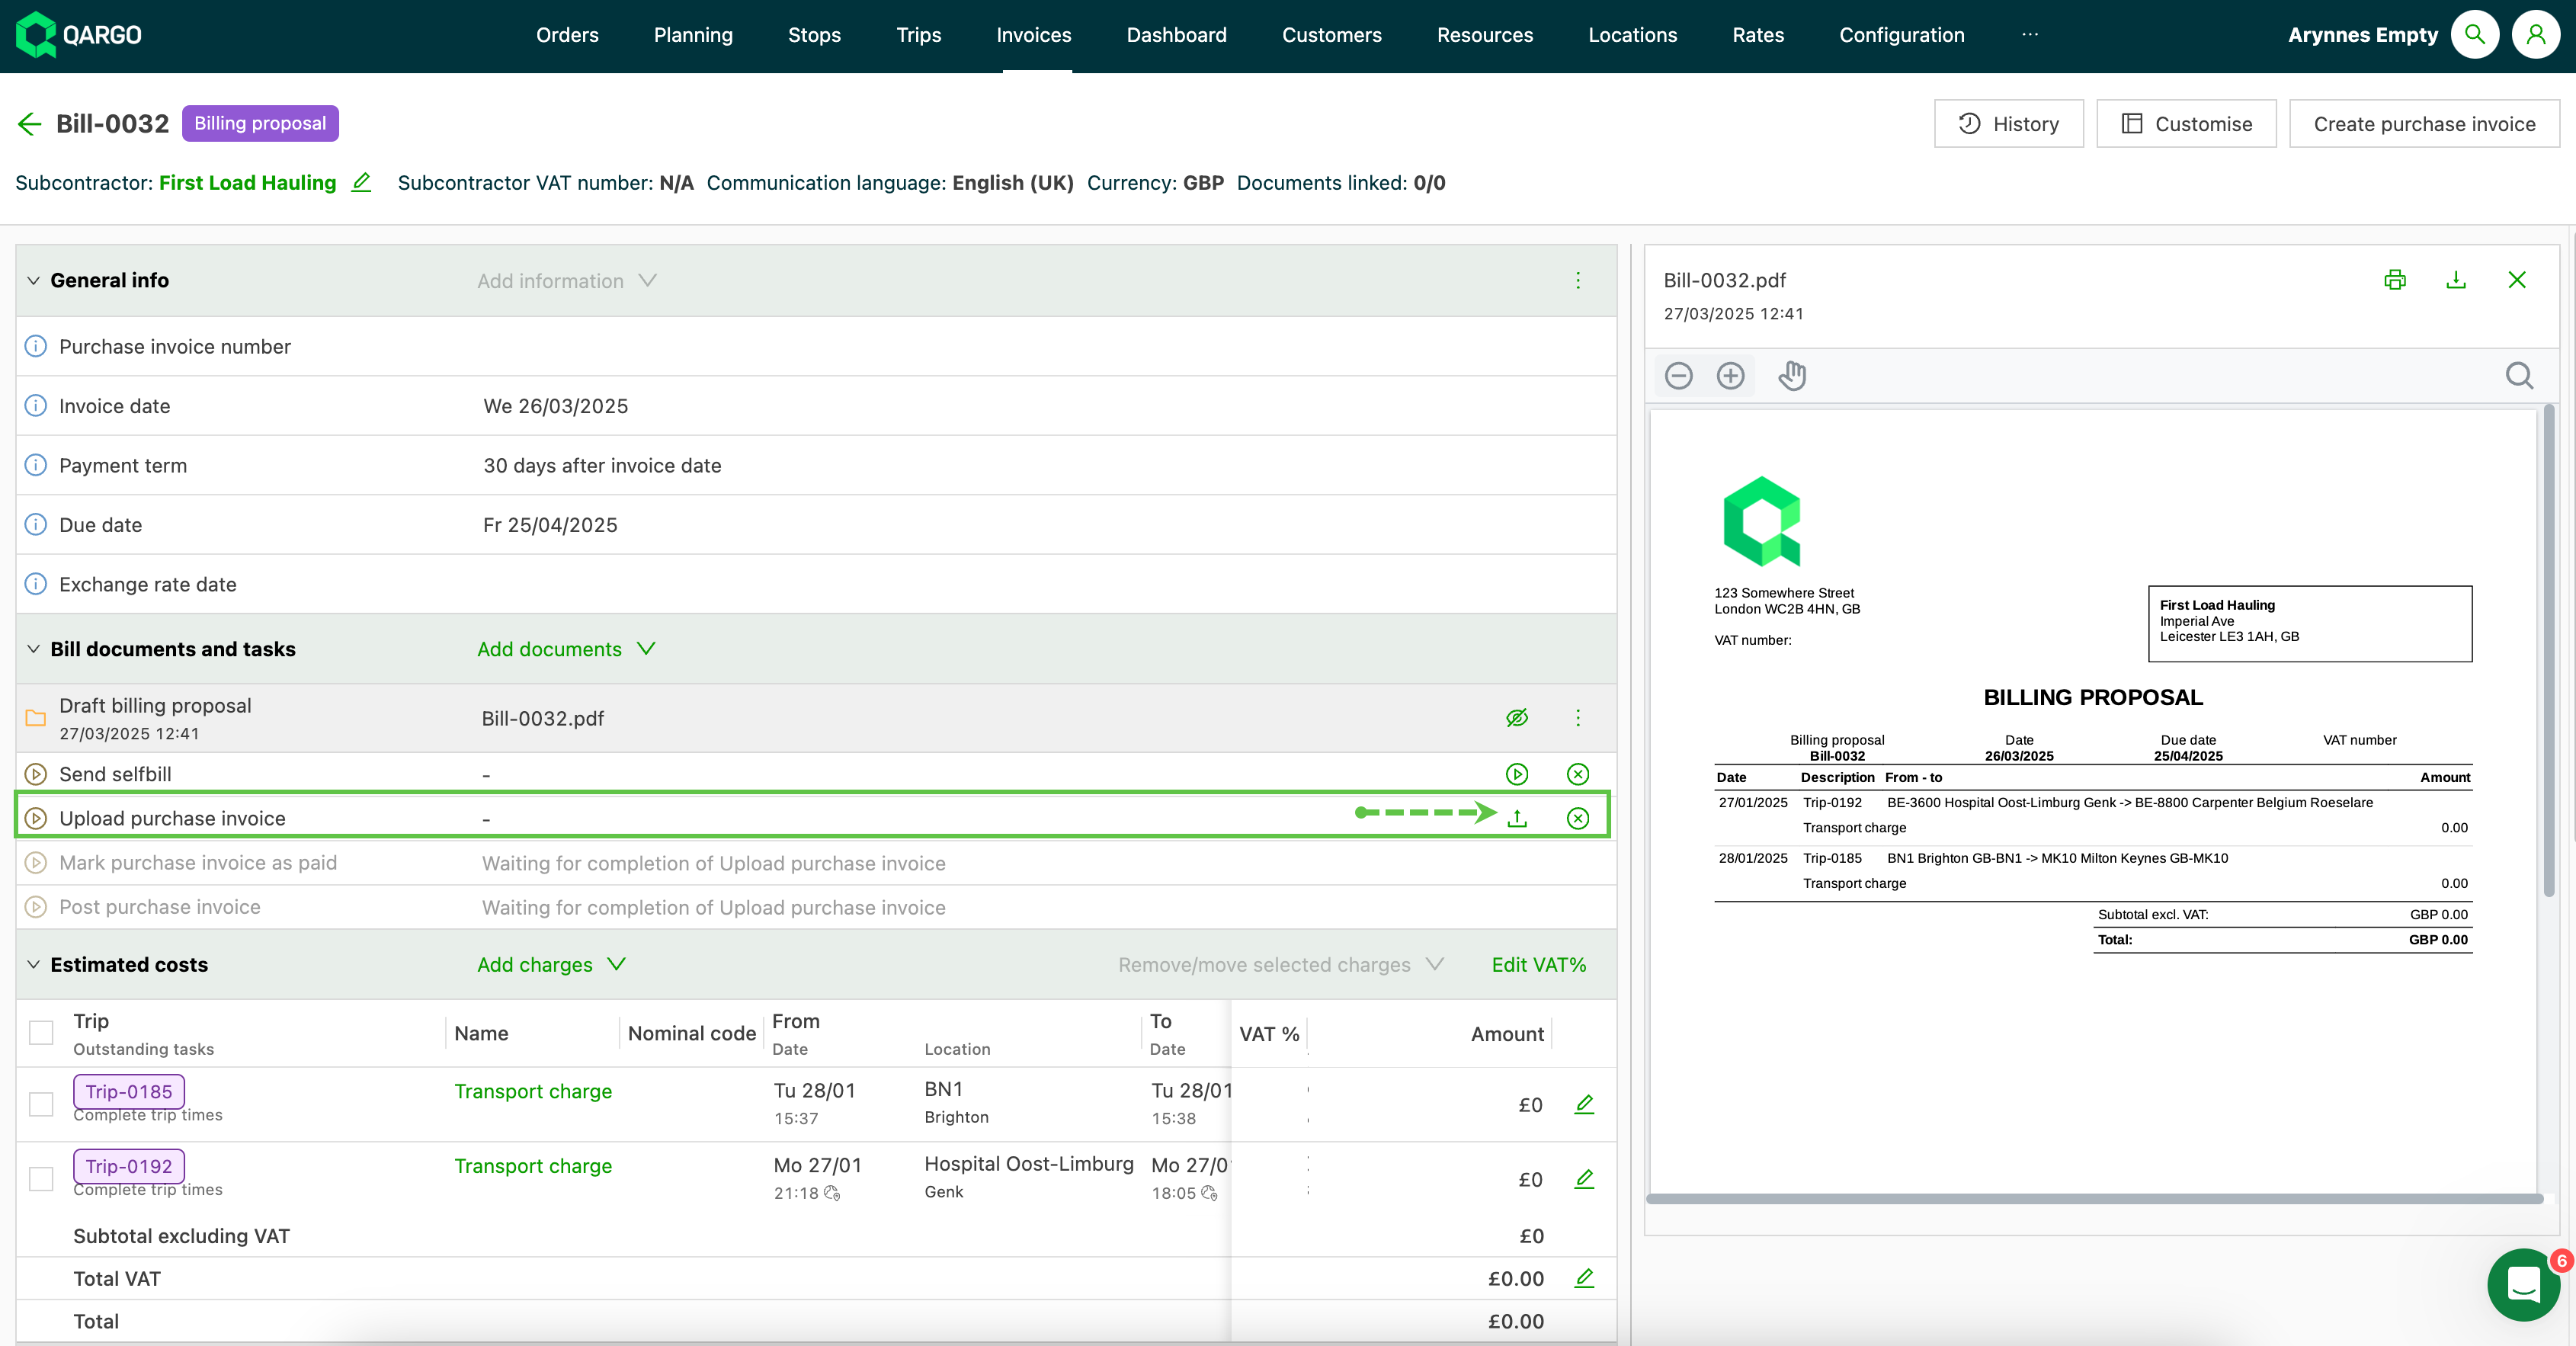
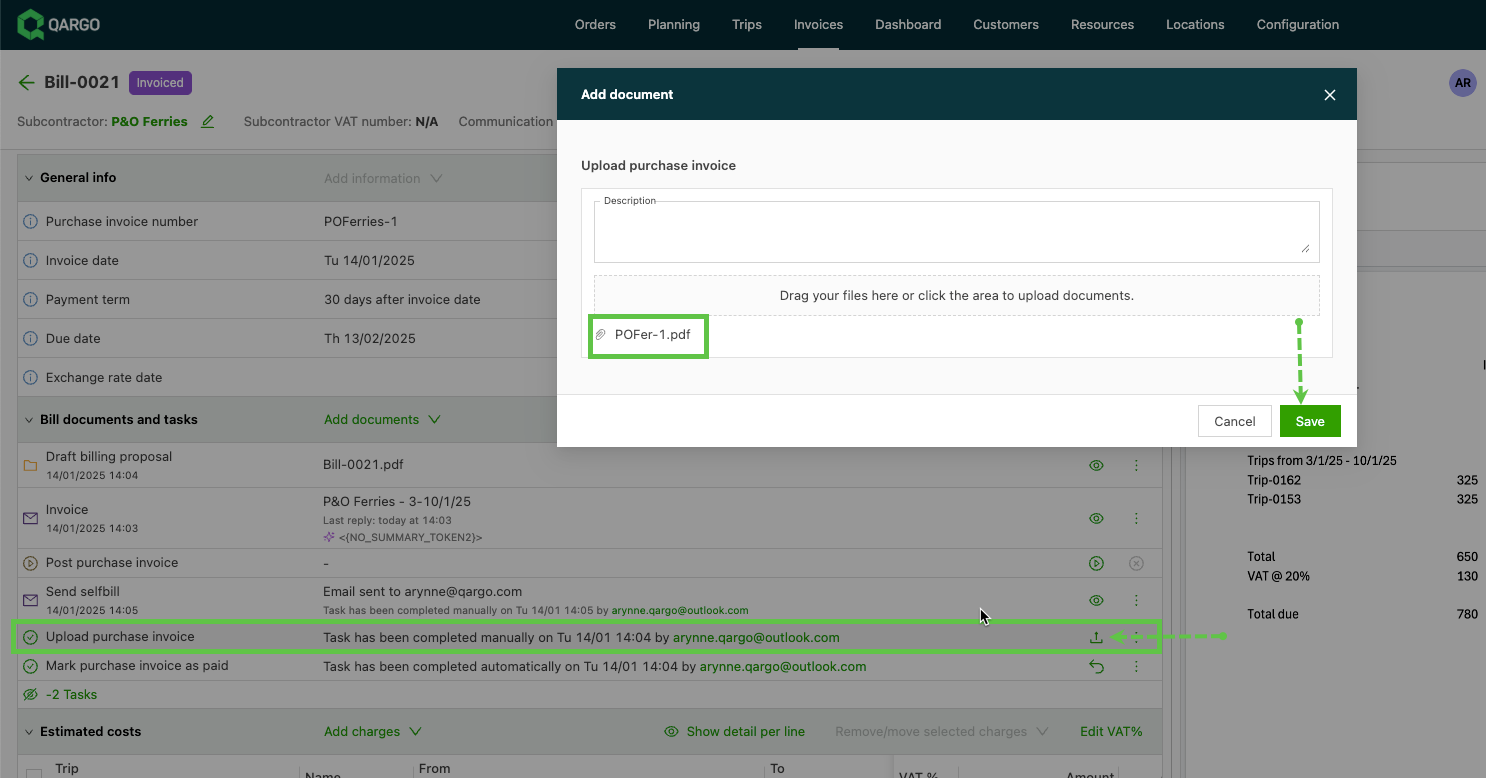
Upload the carrier invoice by clicking the upload icon. Qargo Document Intelligence scans and validates the data on the invoice. This updates some of the data, such as the carrier invoice number, and any discrepancy shows in the Comparison panel.
-
Once the carrier invoice is uploaded, the status changes automatically to Invoiced.
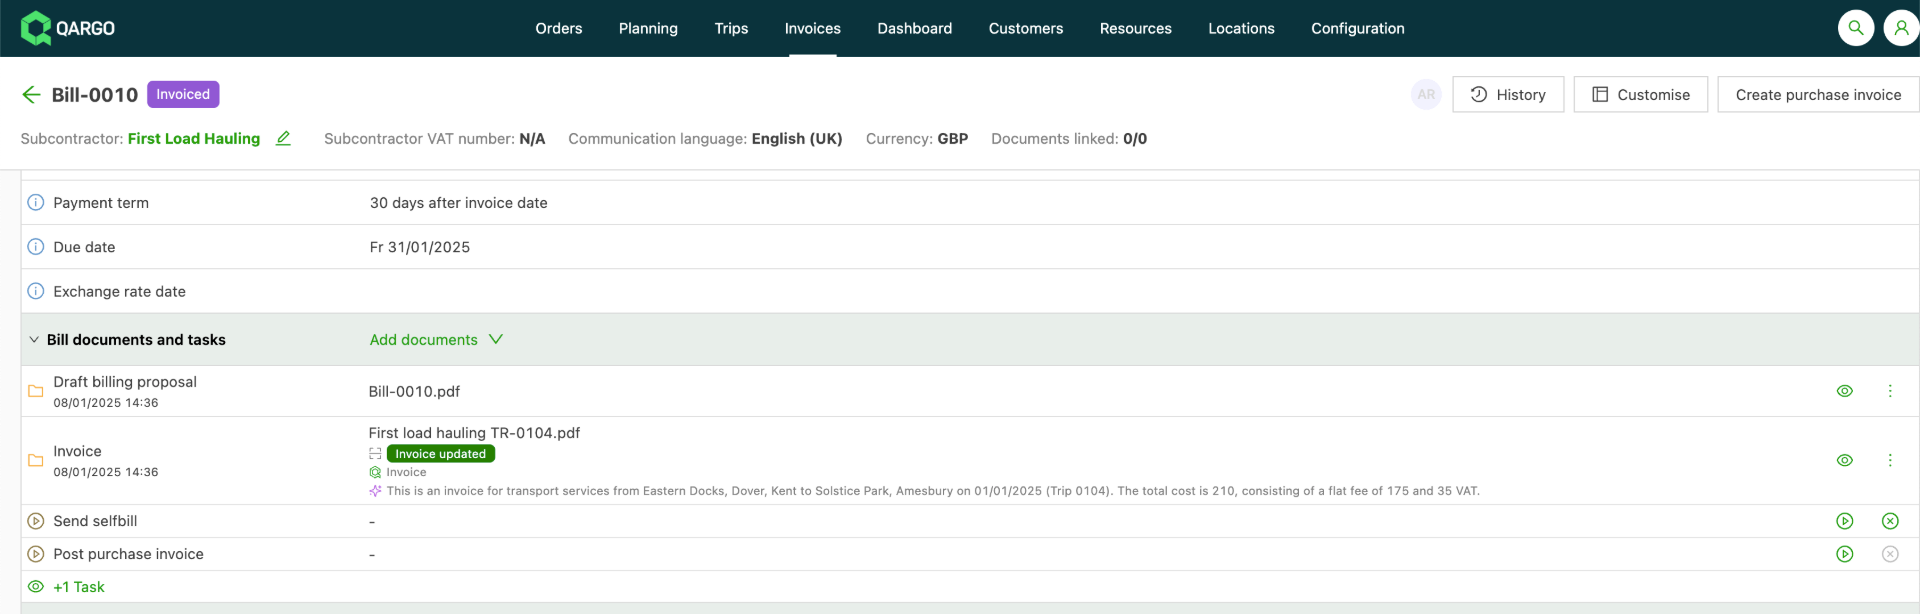
- The charges can be updated using the clipboard icon. This copies the costs over to the invoice.
Updating info and charges
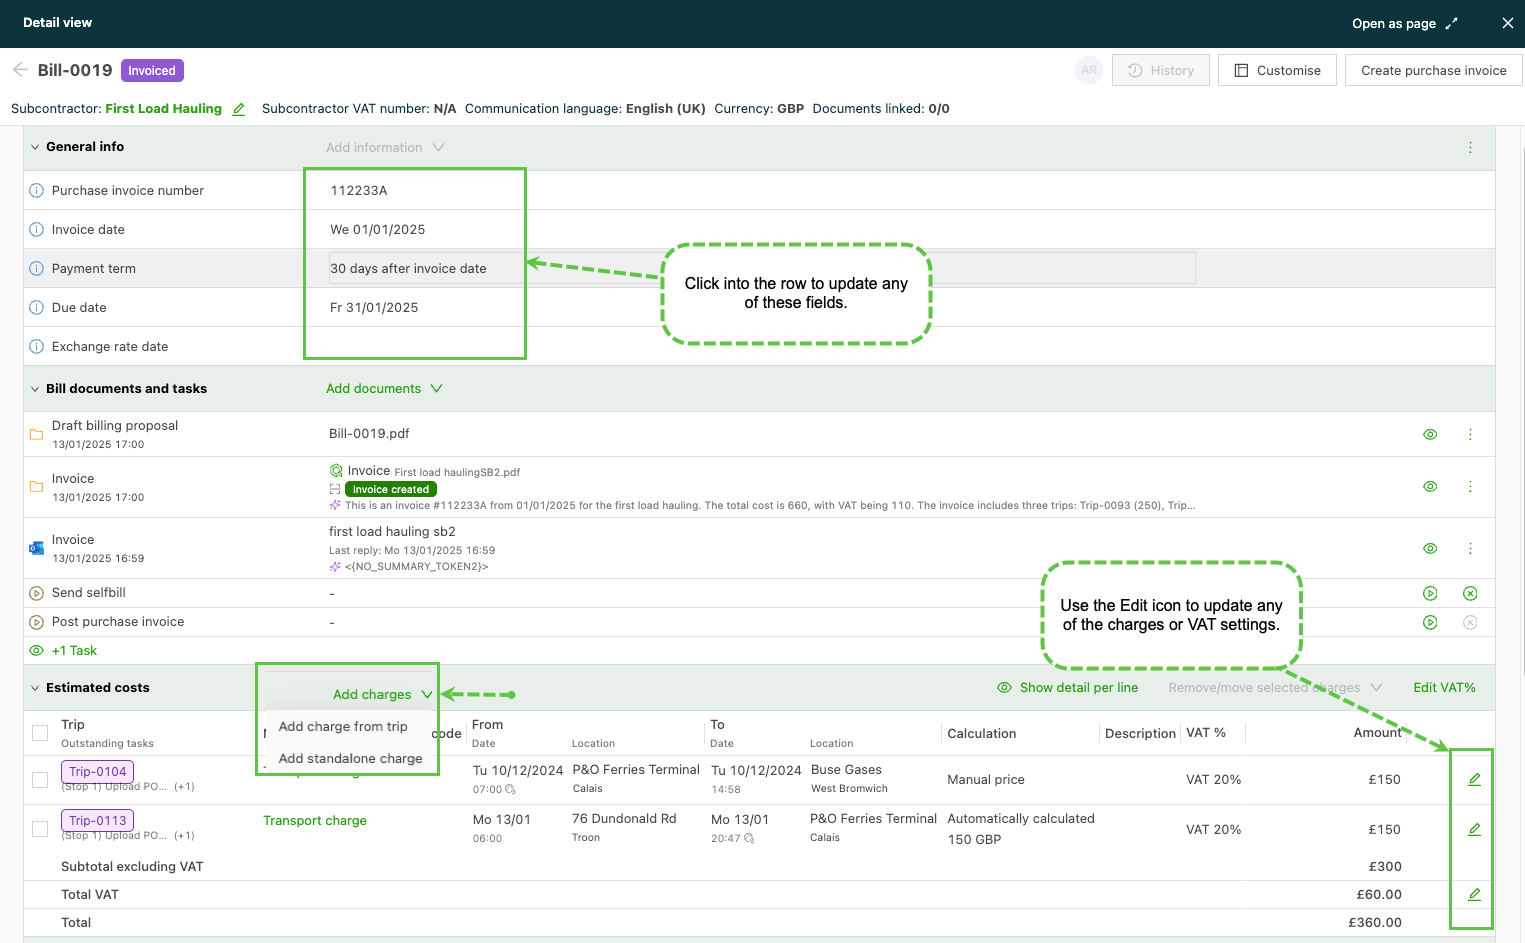
- The fields under General info can be updated if needed. Click the row to update and change the details. Click the Save icon.
- Use the Edit icon to update the estimated costs, including charges and tax settings.
- Click Add charges if additional costs need to be added to the invoice.
-
Add charge from load: This opens the Loads to add panel, which includes loads that match the contract carrier.
-
If a contract carrier invoice has already been uploaded, a warning icon displays and any missing loads are highlighted in orange.
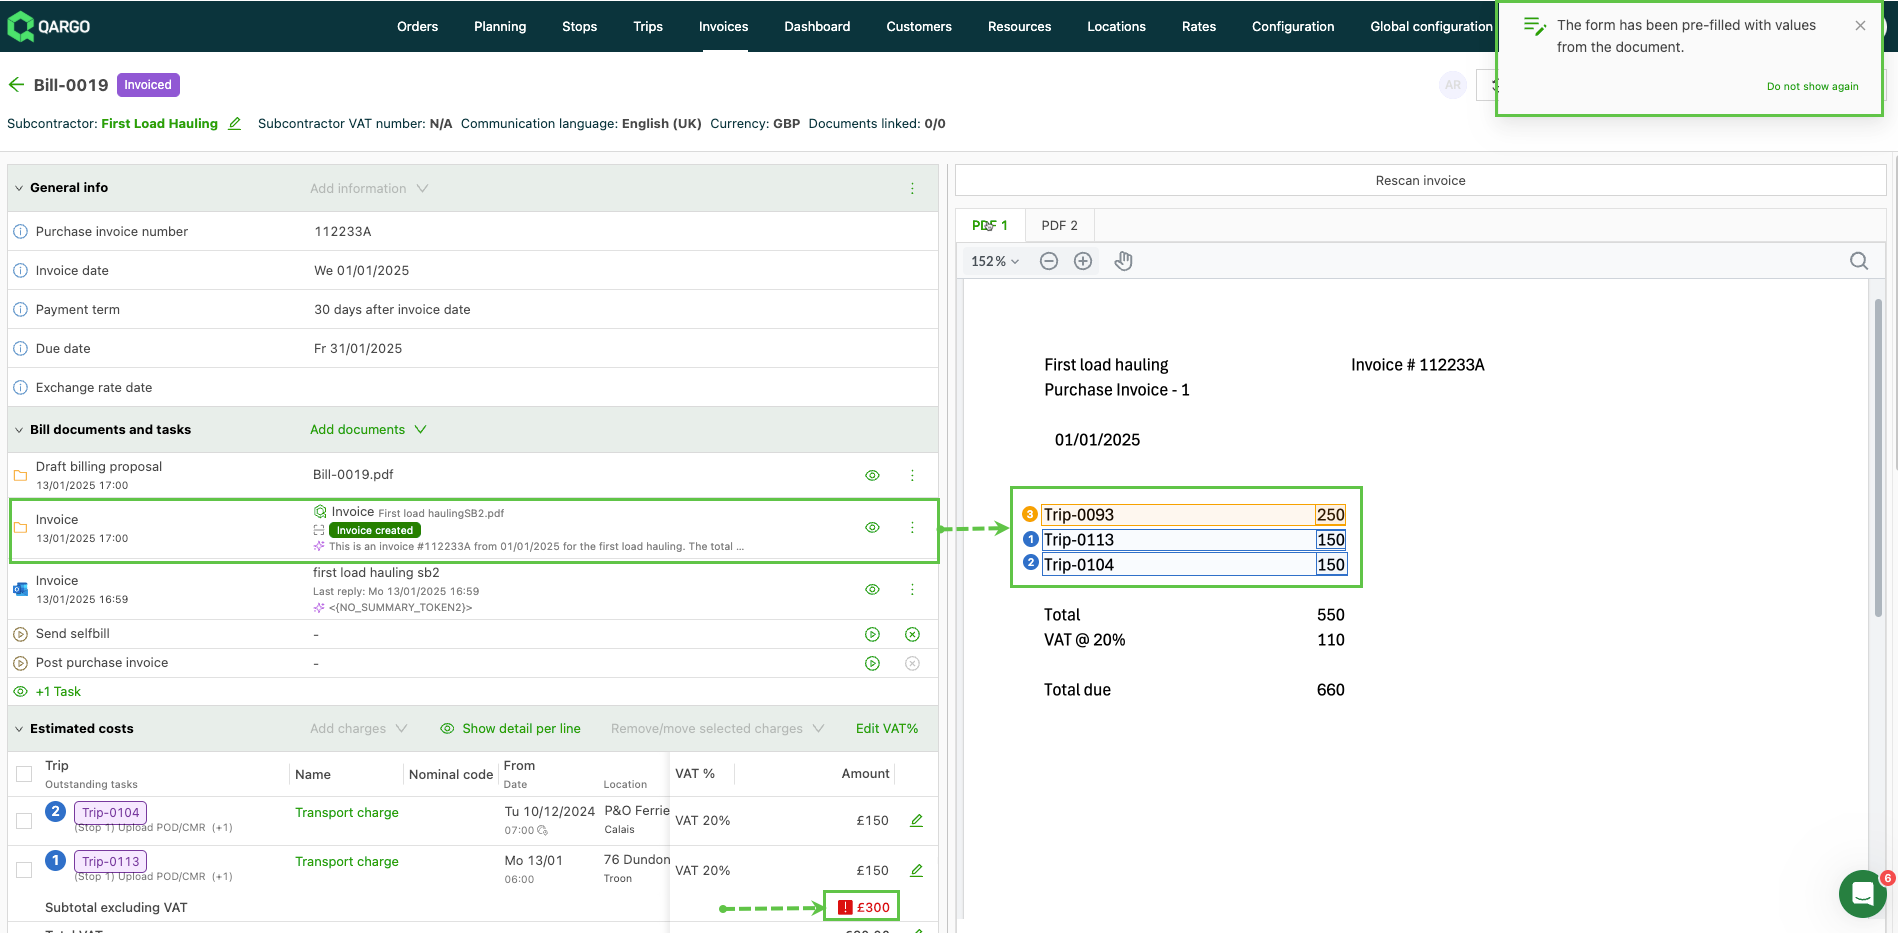
-
-
Add standalone charge: This opens the Add resource cost window. Under General info, click the Charge field to show the available charges.
-
Select the appropriate charge to add to the invoice. Under the calculation, there are 2 manual options to choose from. Manual lets the user enter a specific value. Manual formula opens options to calculate a value based on selected variables, for example a cost-over-distance calculation.
-
The charges can be updated manually if necessary. Click the Edit icon.
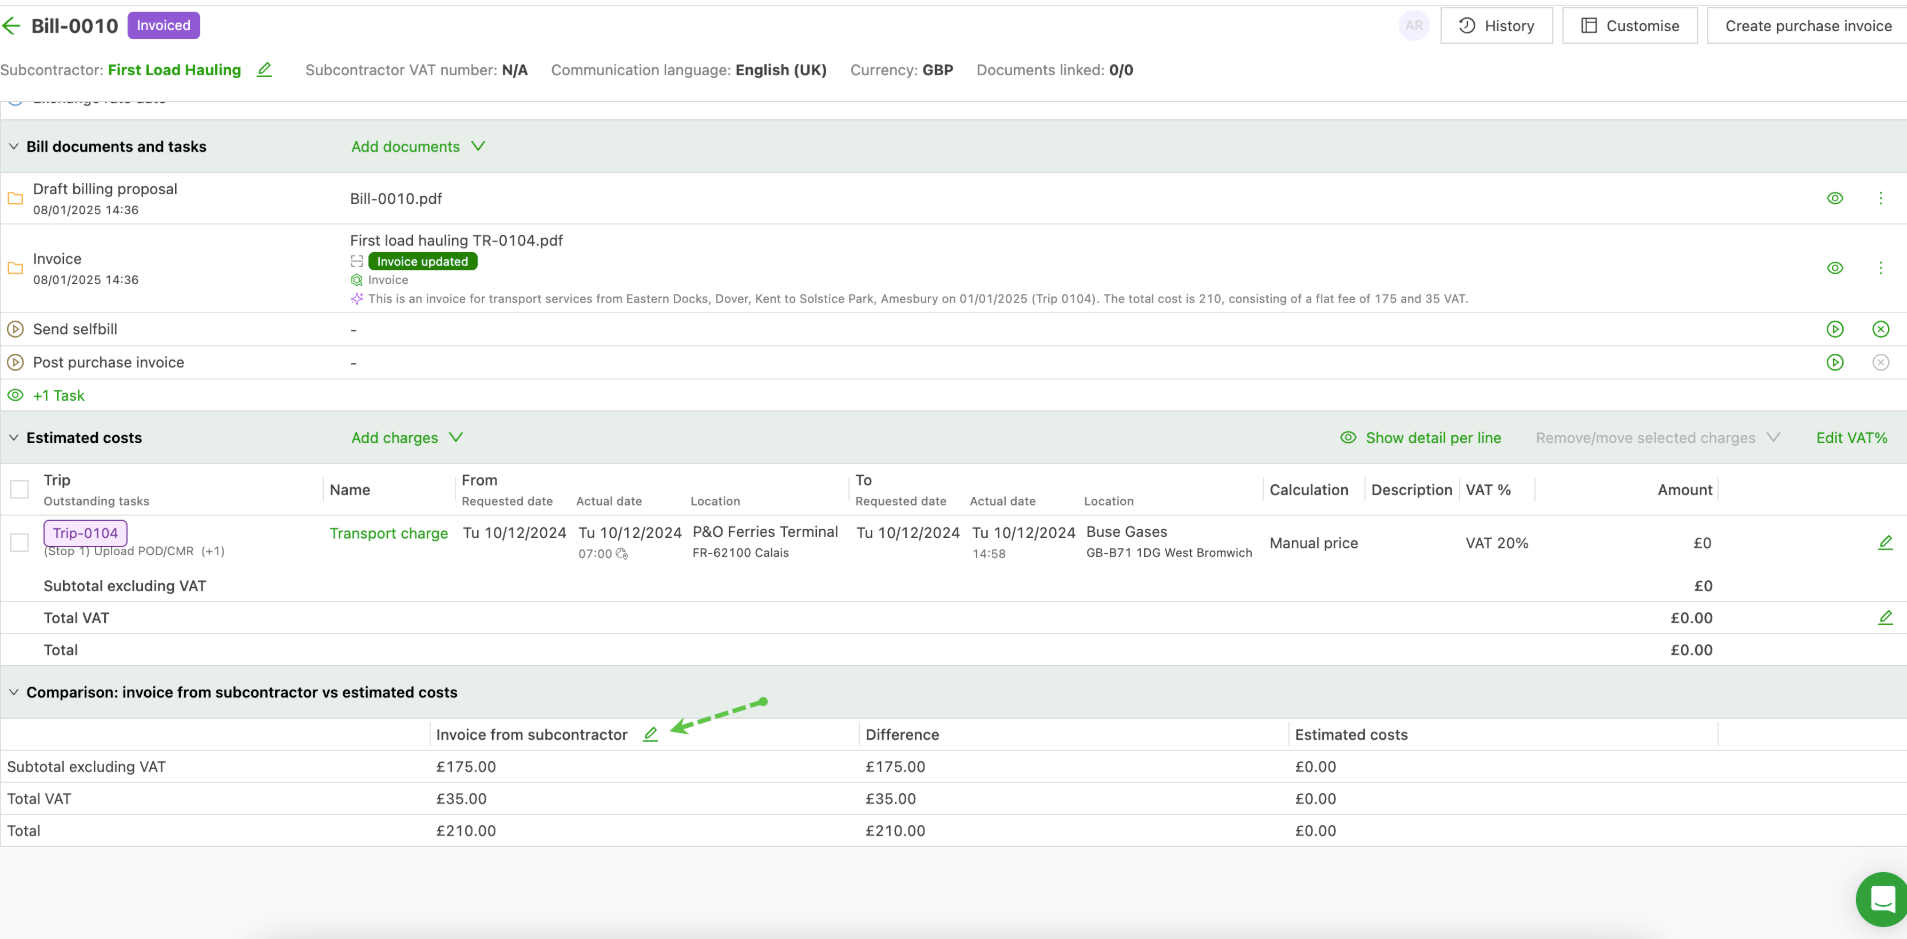
-
Enter the revised costs; the Save button is highlighted in green. Click Save.
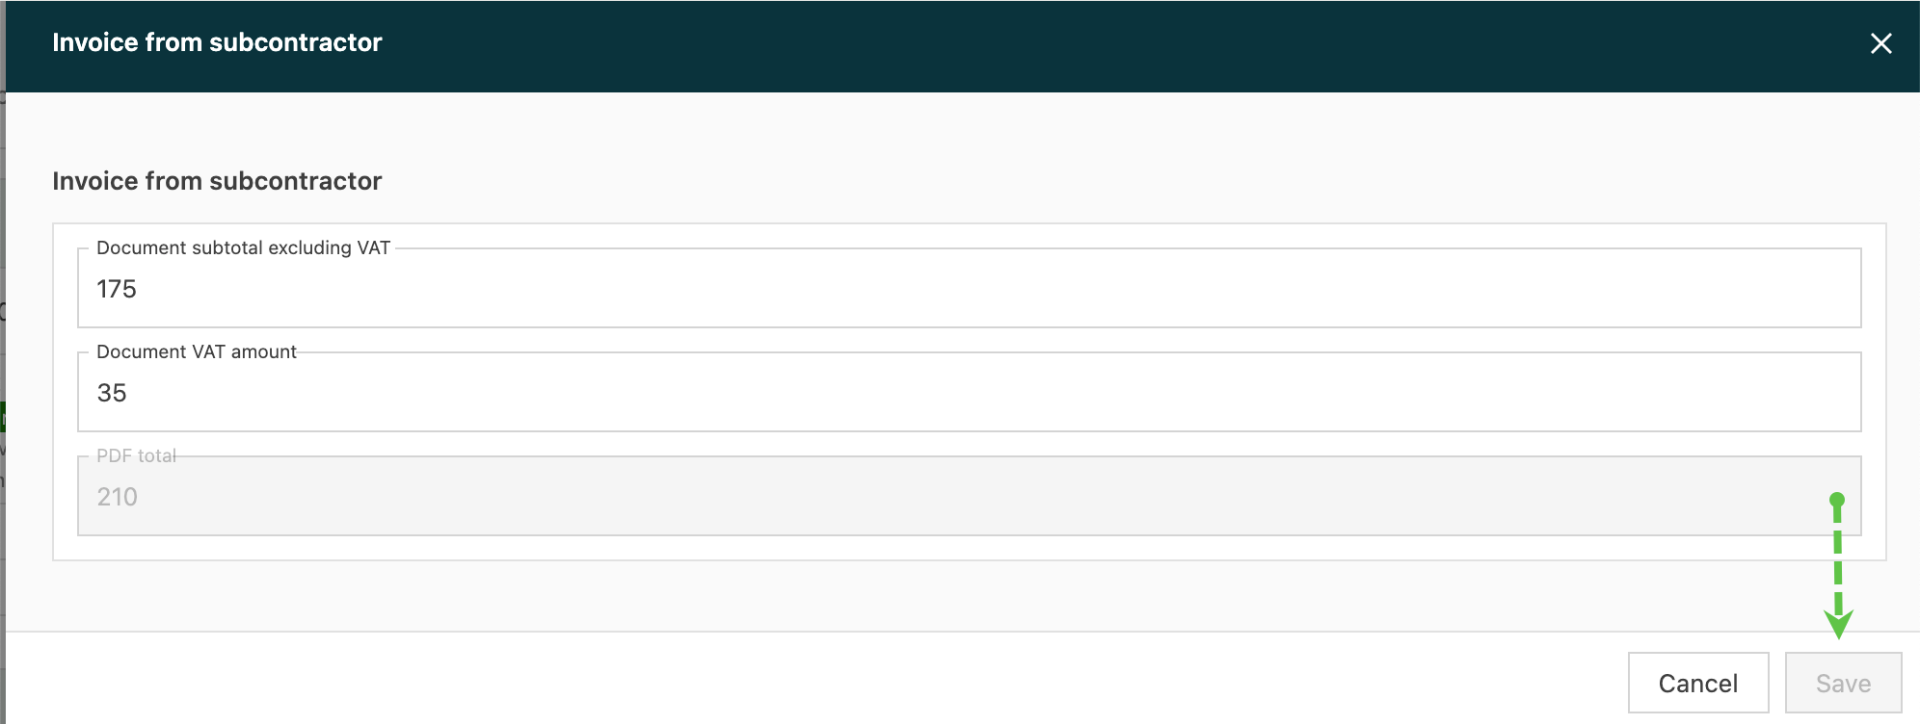
-
Complete the remaining tasks:
- Send self-bill to contract carrier
- Post carrier invoice to accounting
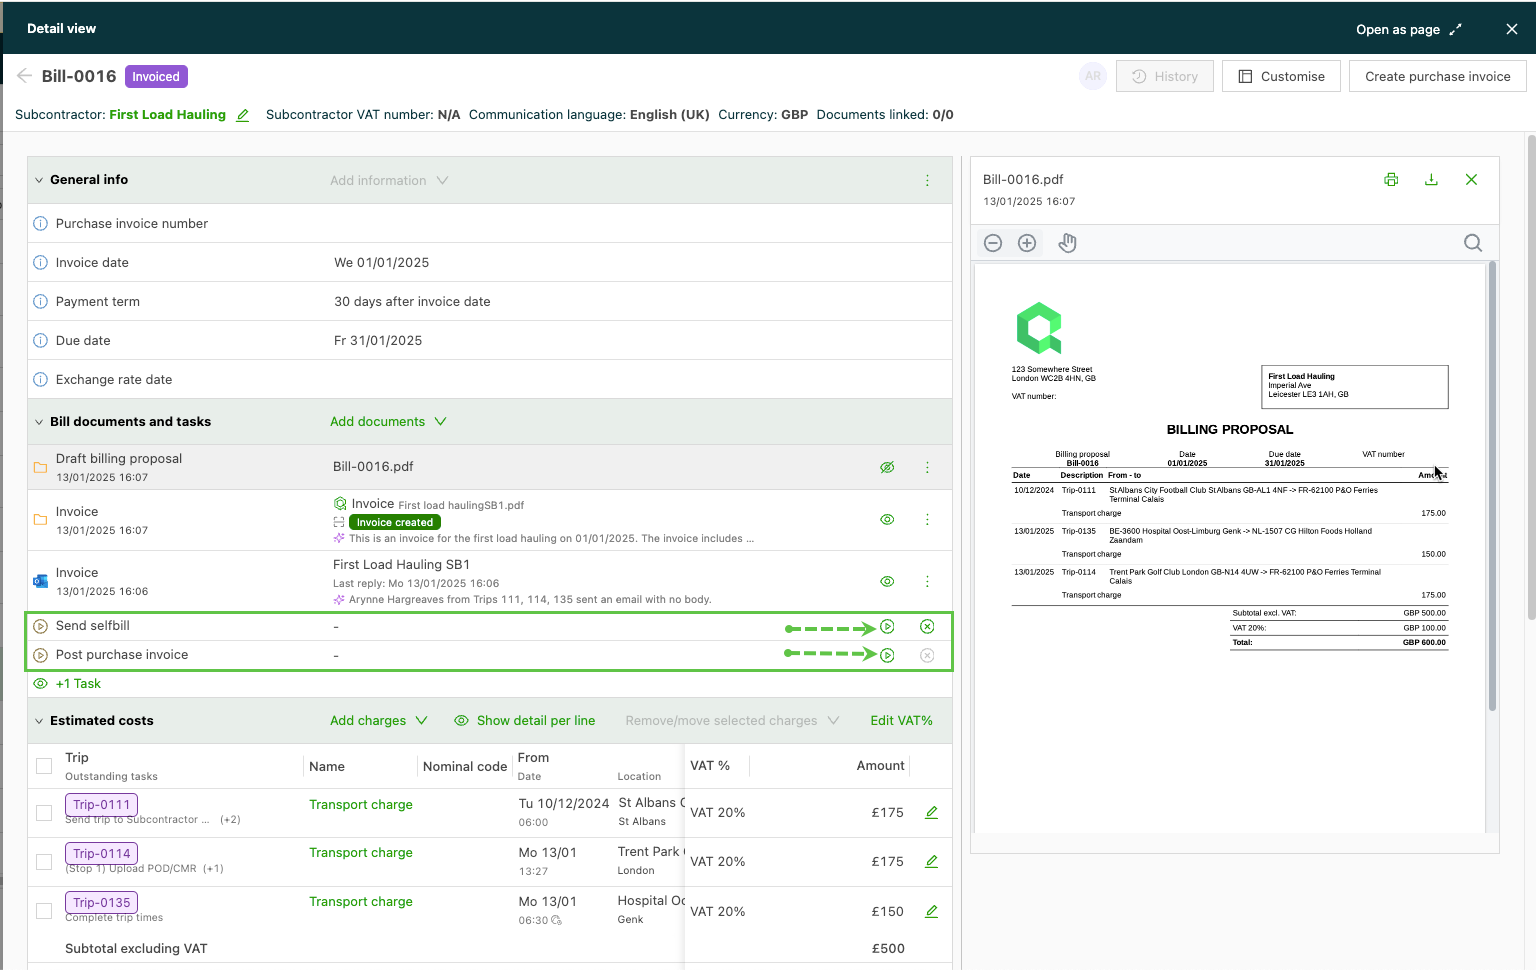
Add document function:
There are 2 other options to add the carrier invoice to the billing proposal:
-
Create a new invoice from the invoice proposal
- Upload the carrier invoice into the invoice proposal.
- This method ensures that the invoice and the proposal are associated within Qargo, preserving the relationship between the two.
-
Move costs from the invoice proposal to the existing invoice
- Transfer the costs listed in the invoice proposal to the existing carrier invoice.
- This approach does not create a direct link between the invoice and the proposal in Qargo.
- Select the Invoice option from the drop-down.
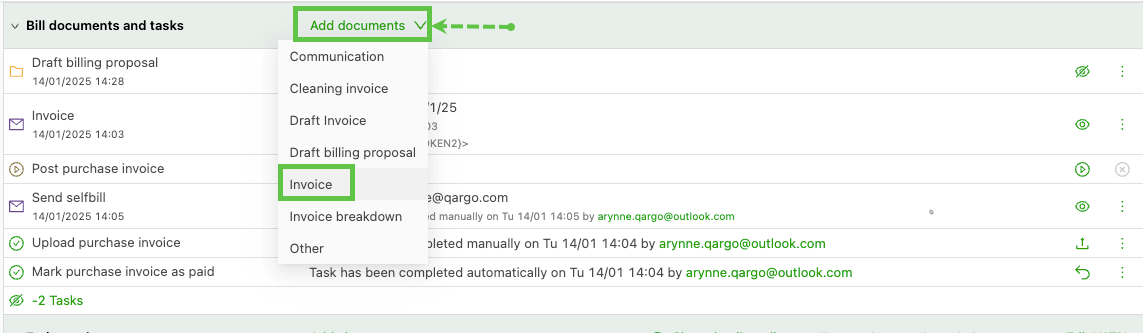
- The Add document window opens. Drag the file, or click and add the document to upload. Click Save.
-
Added from an email attachment, using the Qargo add-in for Outlook:
- From the email, select the search option in the Qargo add-in panel. Enter the billing proposal number. Find the correct billing proposal and click the Add button. This shows options to specify what is being added. Select Invoice, and it is added to the proposal.
-
If additional documents are available, they can be added in the Bill documents and tasks panel. Click the Add documents option. A drop-down shows the available document types.
-
Qargo Intelligence adds an AI-generated summary and validation where appropriate. Click the row to fully expand the summary.
-
If there are linked emails, these are also available to view, along with any attachments included in the emails.
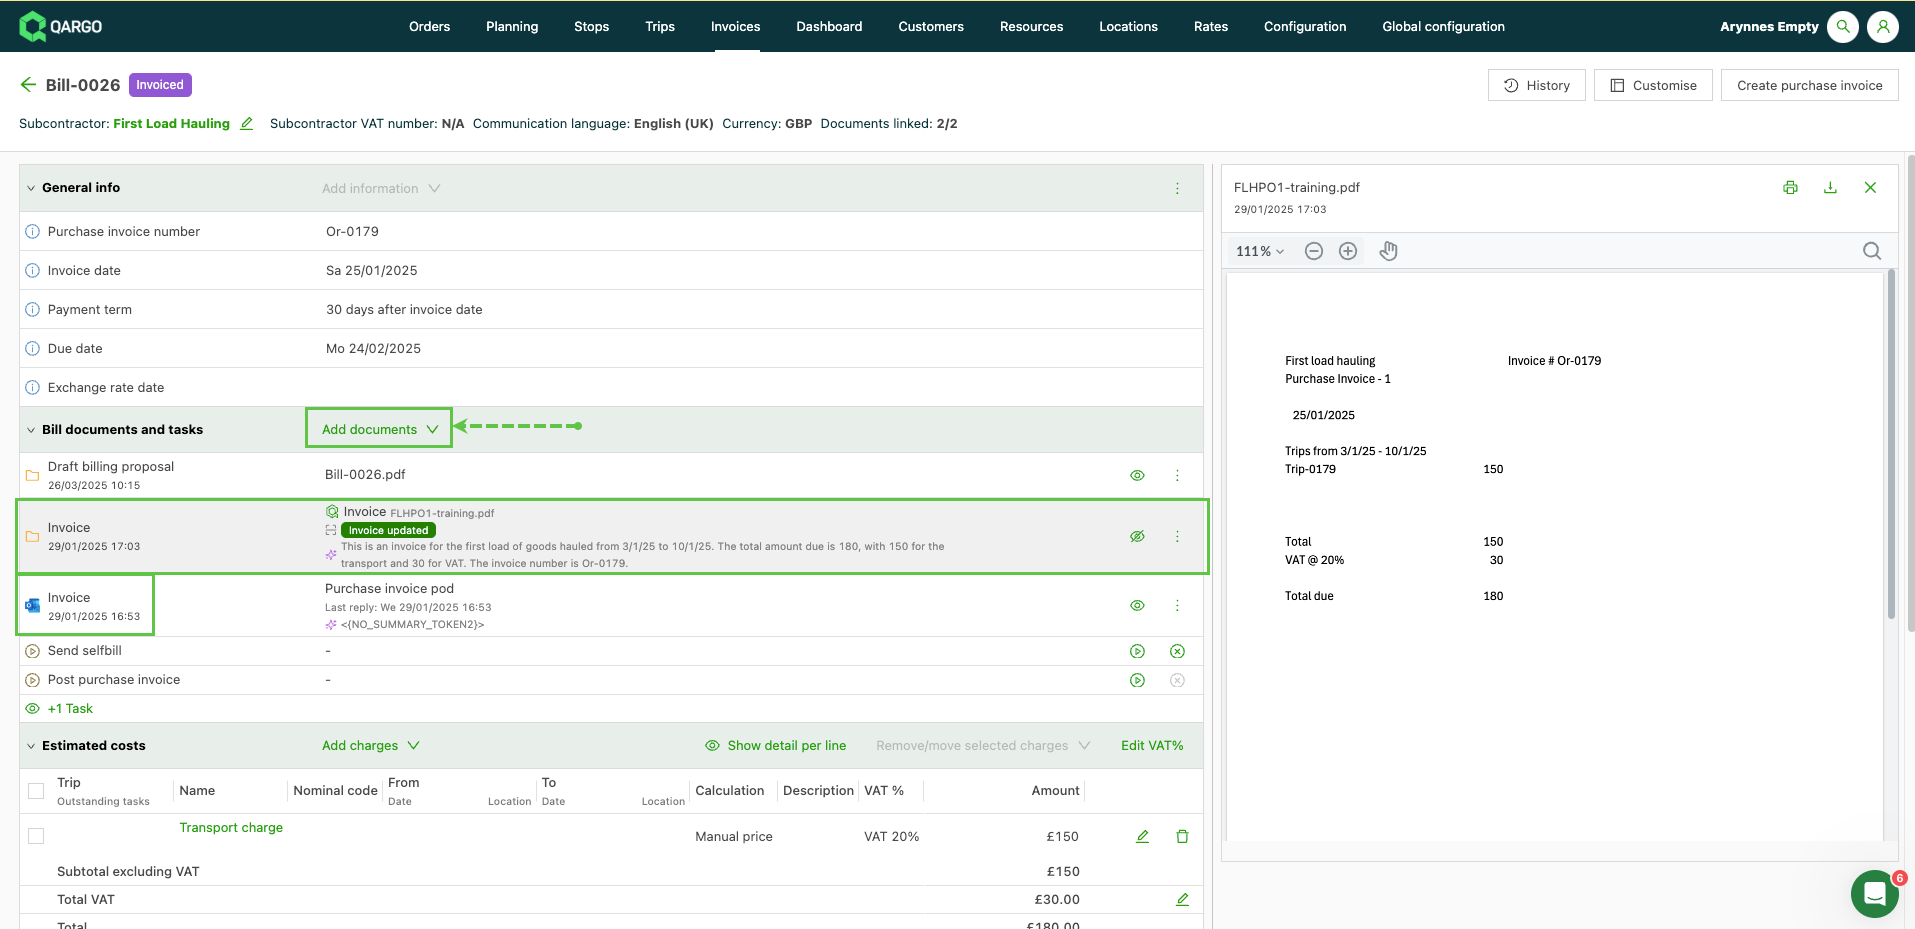
Click the link below to see what other features Qargo Intelligence offers.
The tasks of generating PDFs, sending emails, marking invoices as paid and posting to accounting can be done in bulk via Quick actions. See also how to create these in bulk.