
Invoices: create a draft invoice
Table of contents
A draft invoice allows users to create and review an invoice before finalizing it. This can include:
- Pre-approvals. A draft invoice can be sent to a customer for review and confirmation. Once it is approved, an actual invoice can be generated quickly with the Generate PDF task on the draft invoice.
- Batch processing. Users can add multiple orders to a draft invoice over time before creating the final invoice.
- Review and modification. Draft invoices offer the flexibility to make changes and update charges easily.
Creating a draft invoice
There are 2 options for creating a draft invoice.
- Create a standalone invoice as a draft
- Create a draft invoice for an order
Standalone invoices are typically used to invoice for services outside a typical transport order, such as storage fees. When a standalone invoice is created, the invoice moves to the draft invoice status by default as the first step.
Click here to learn more about standalone invoices.
Orders must have the Ready to invoice status before a draft invoice can be created.
Go to Invoices > Orders to invoice.
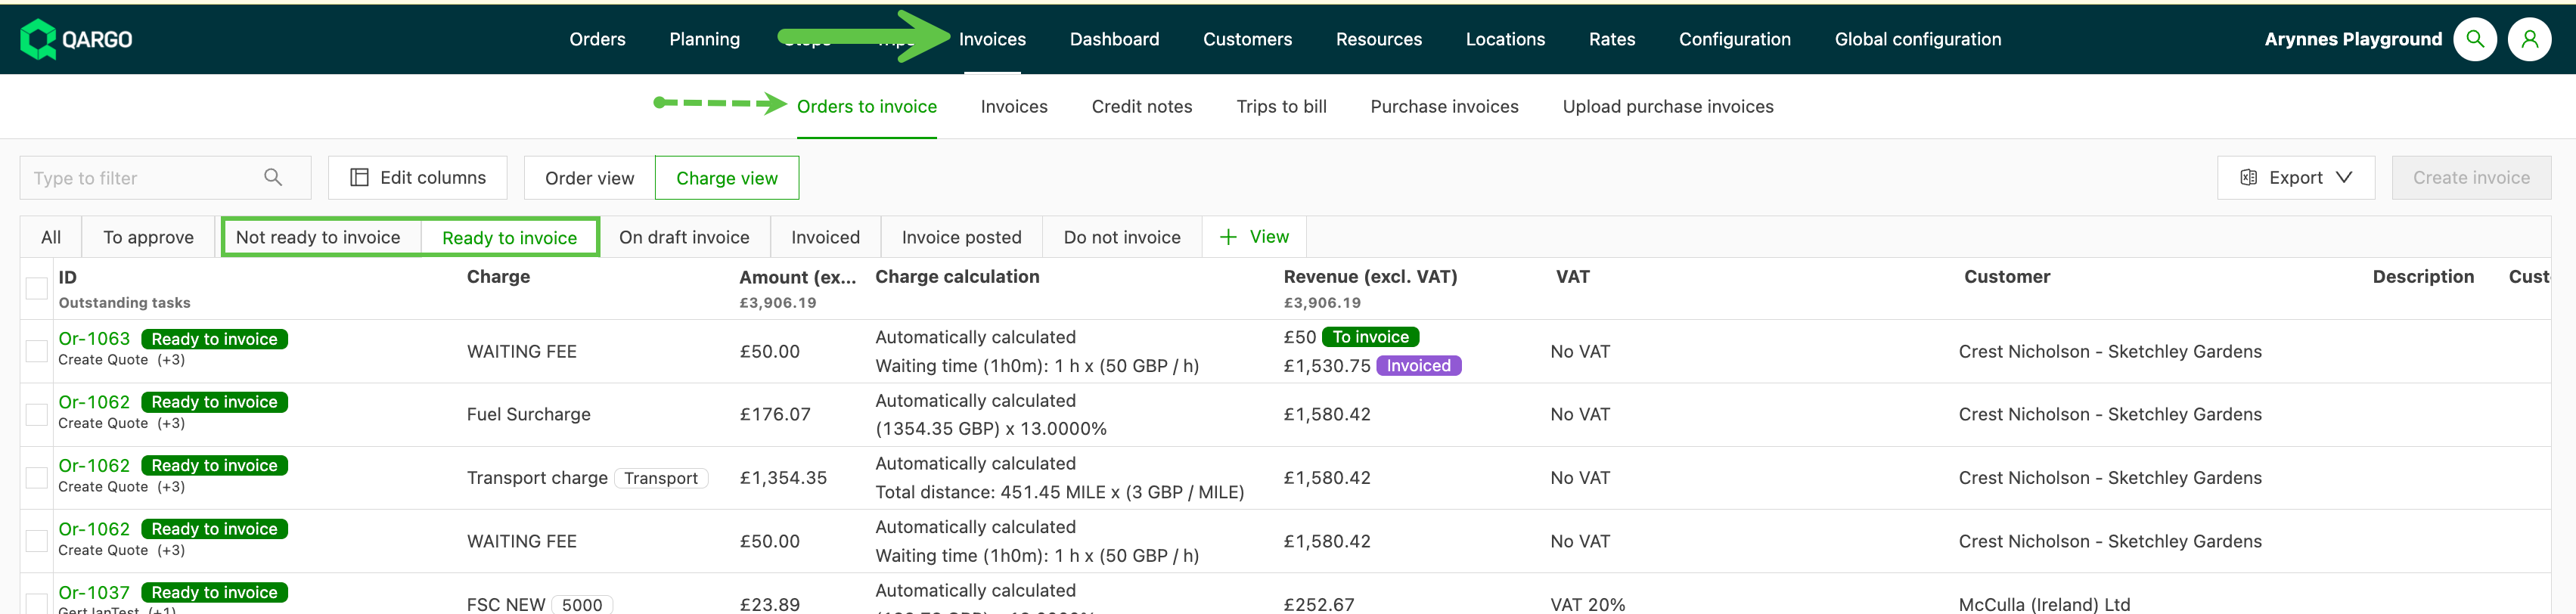
- On the Ready to invoice tab, select the orders to place in the draft. In the charge view, select the charges instead.
- Click Create invoice.
A new window opens, where the invoice preferences can be selected. All selections on the draft are copied to the standard invoice.
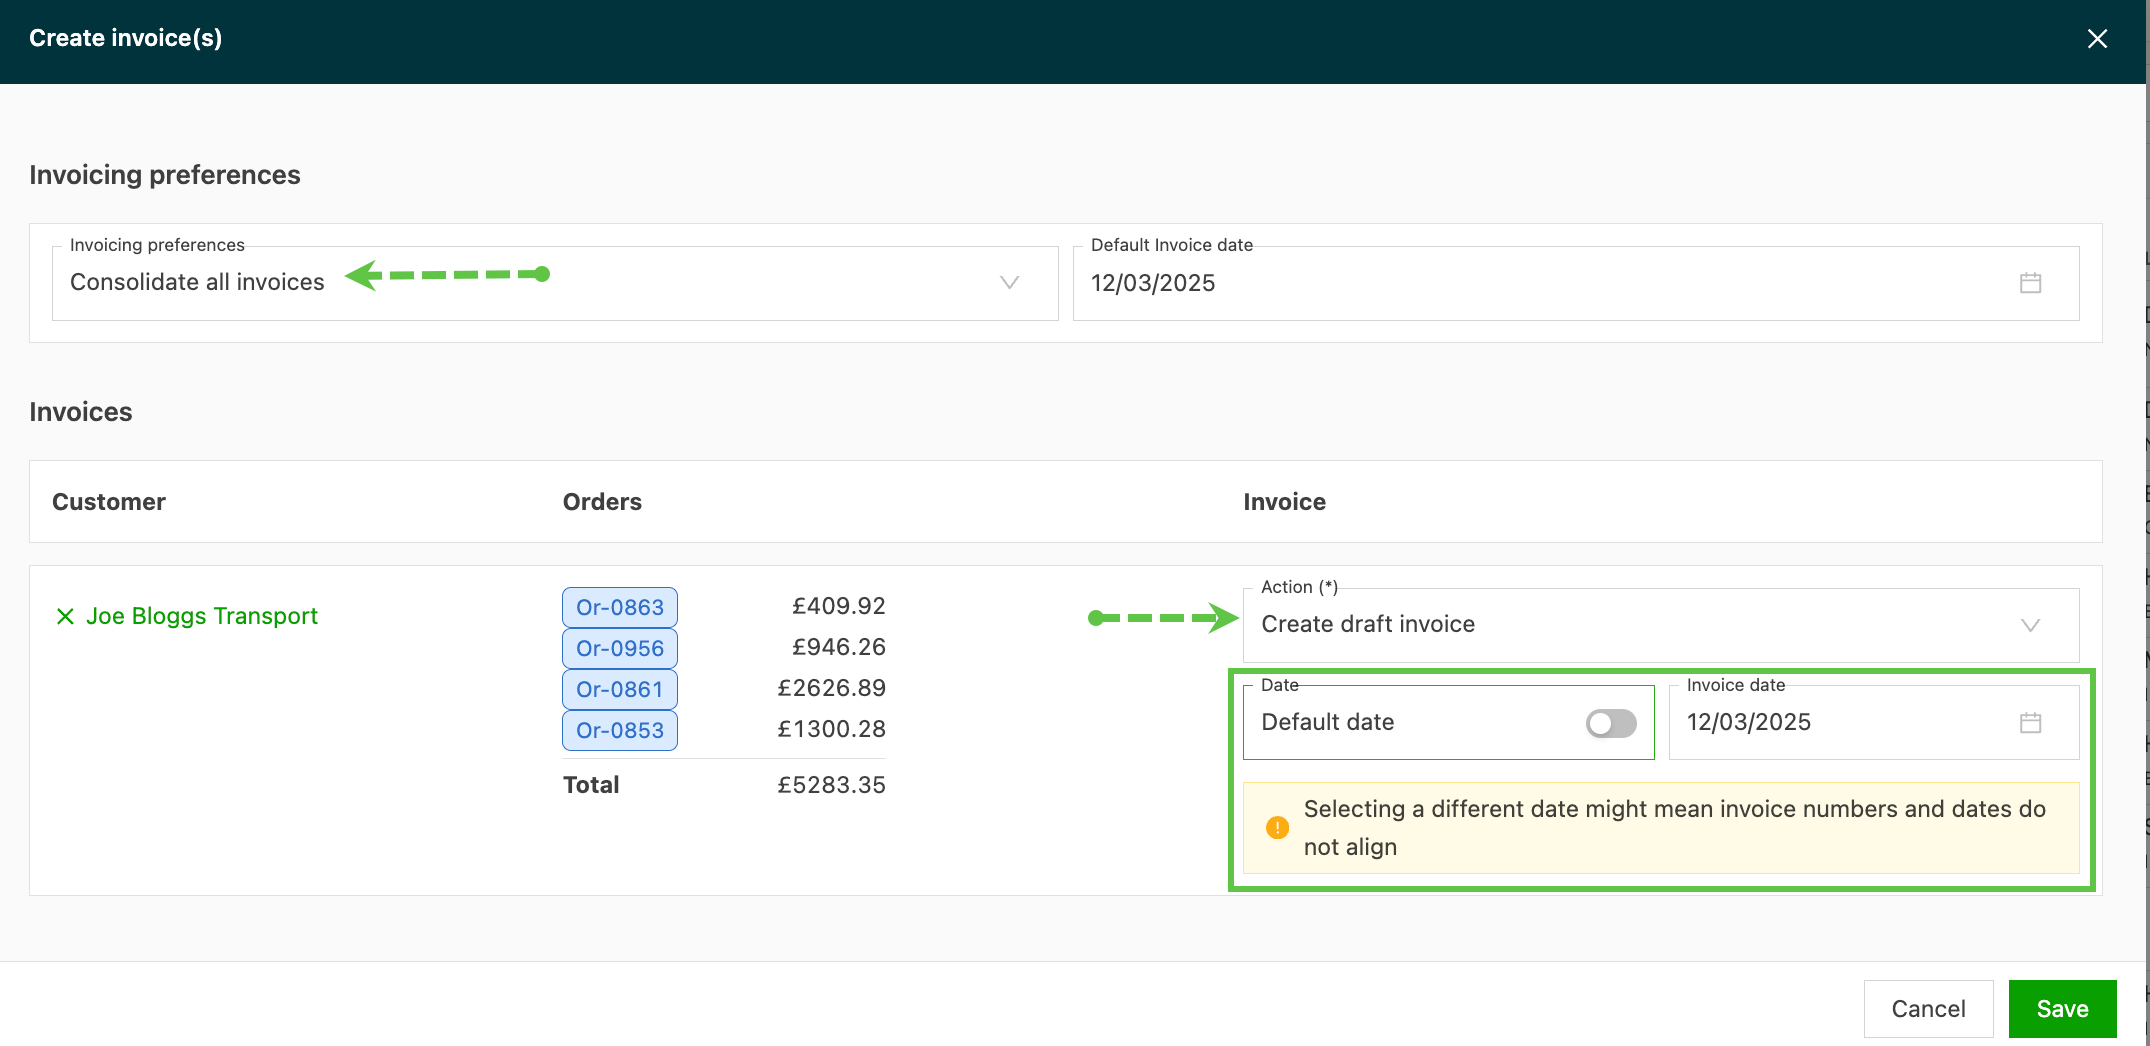
- When multiple orders are selected, they can be consolidated into a single invoice or grouped based on preferences. They can also be split into a separate invoice for each order.
- Under Actions, select Create draft invoice.
- The date defaults to the current date. Using a different date may put the invoice number sequence out of order.
- Click Save.
- The draft invoice is generated with a unique draft invoice number.

General info:
- This section includes the invoice date and the payment terms for the invoice.
- If exchange rates are used, enter the date to use for the exchange.
- Remarks can be added to give more context or details for the draft invoice.
- Click these rows to update this information, then use the save icon to apply the changes.

Invoice documents and tasks:
- Add any documents to include with the invoice, for example when sending a billing proposal to a customer.
- When the draft invoice is ready to become a standard invoice, use the Generate PDF task to convert it.
- If pre-approval is required before the invoice is generated, use the Send invoice task.

Invoice lines:
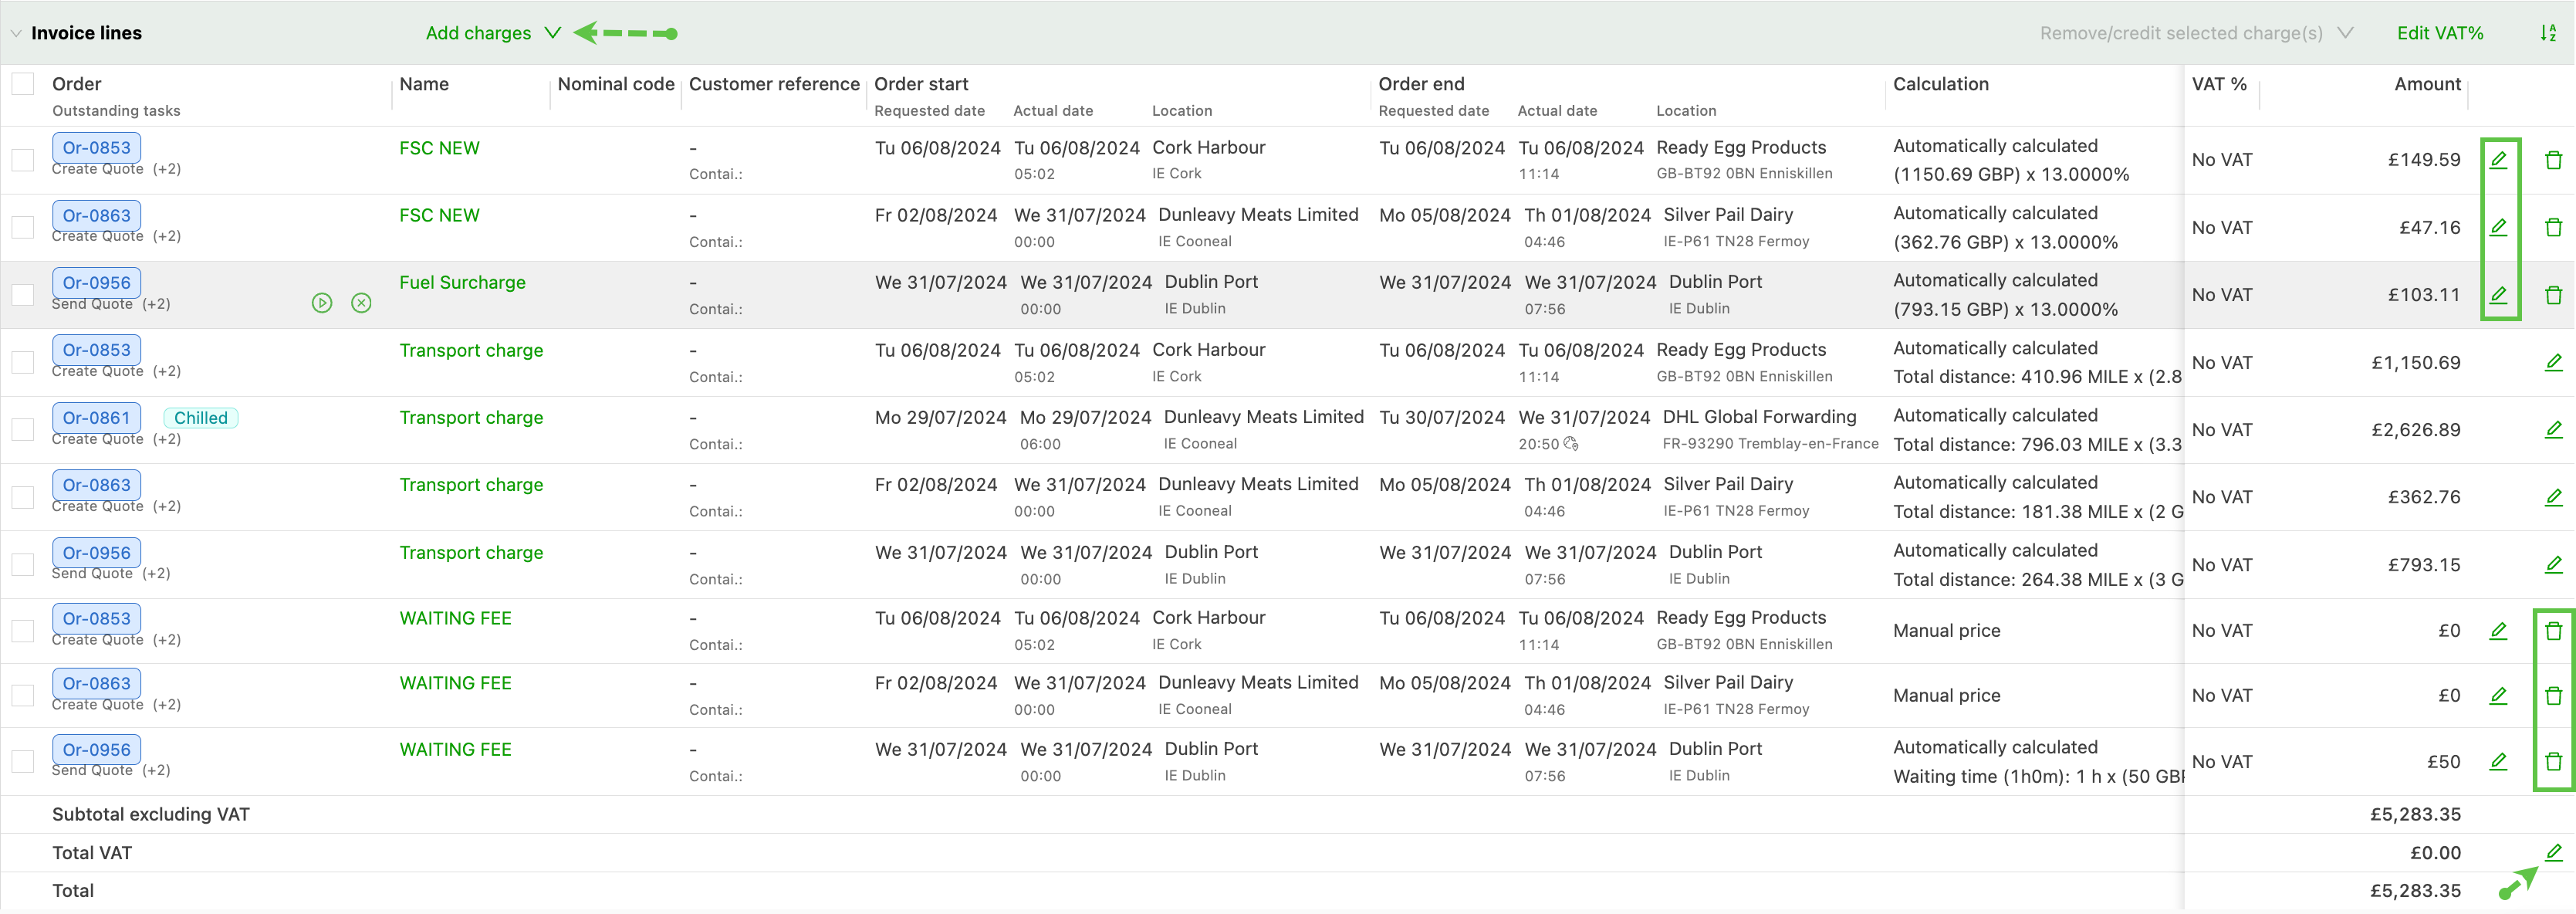
- Charges are shown as line items linked to the order. Use the pencil icon to make any required edits.
- The delete icon removes a charge. Note: use it with caution. This permanently deletes the charge.
- Click Add charge to add more charges. These can be standalone charges or charges from other orders for the same customer.
- To change the tax, use the pencil icon to select the right calculation method.
Once the draft invoice is approved or ready, it can be converted to a final invoice with a single click on the Generate PDF task. This creates the final invoice with its unique invoice number.
Deleting a draft invoice
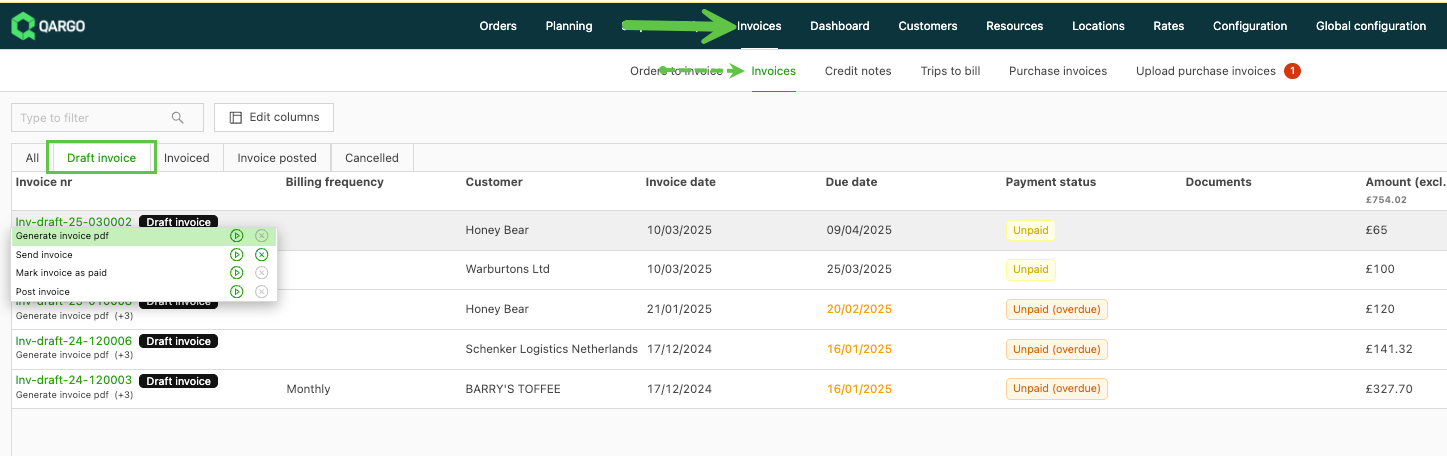
- Go to Invoices > Draft invoices.
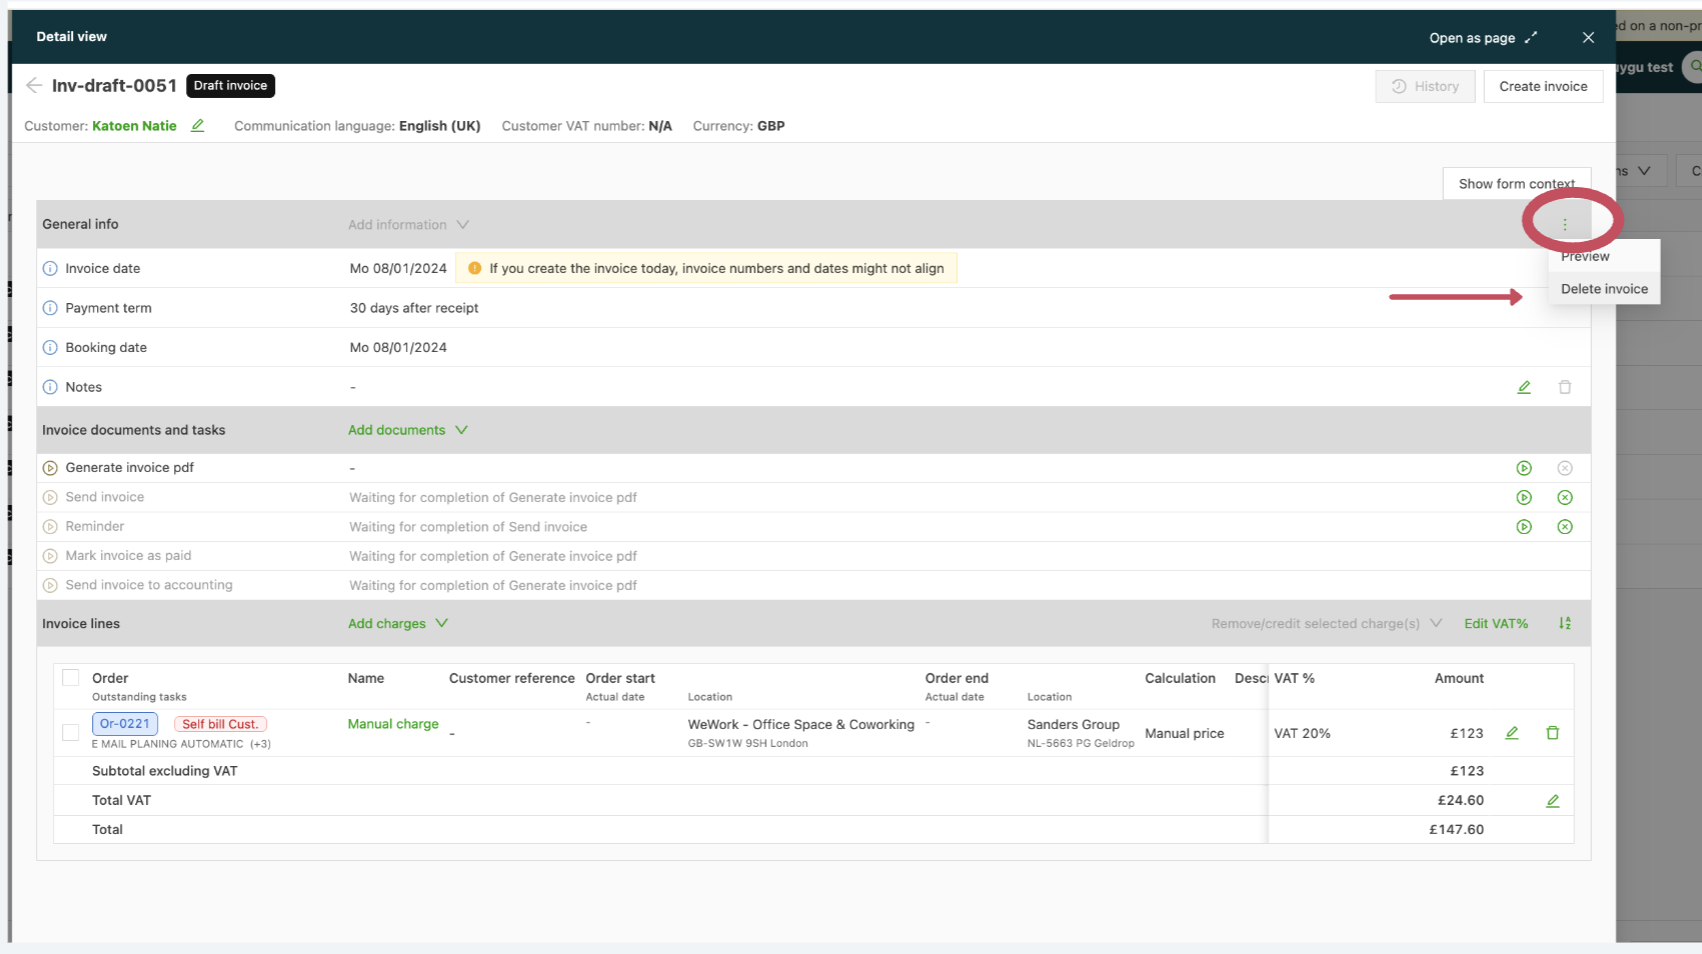
- Open the invoice page and locate the three dots on the right side of the page.
- Click the three dots and select Delete invoice.
Any orders linked to the draft invoice are automatically removed from the invoice and get the Ready to invoice status.
Click the link below for more details on creating invoices.