Invoices - Create credit memo
Manage credit memos in Qargo: create, edit, cancel, refund, or re-invoice charges. Use tabs, filters, and bulk actions for efficiency.
Table of contents
A credit memo is used to reduce the amount a customer owes, to correct a billing error, or to write off part or all of an invoice that will not be collected.
Qargo also enforces strict constraints that do not allow invoices with negative totals. In such cases, credit memos must be issued to balance overcharges or correct billing errors.
Introduction
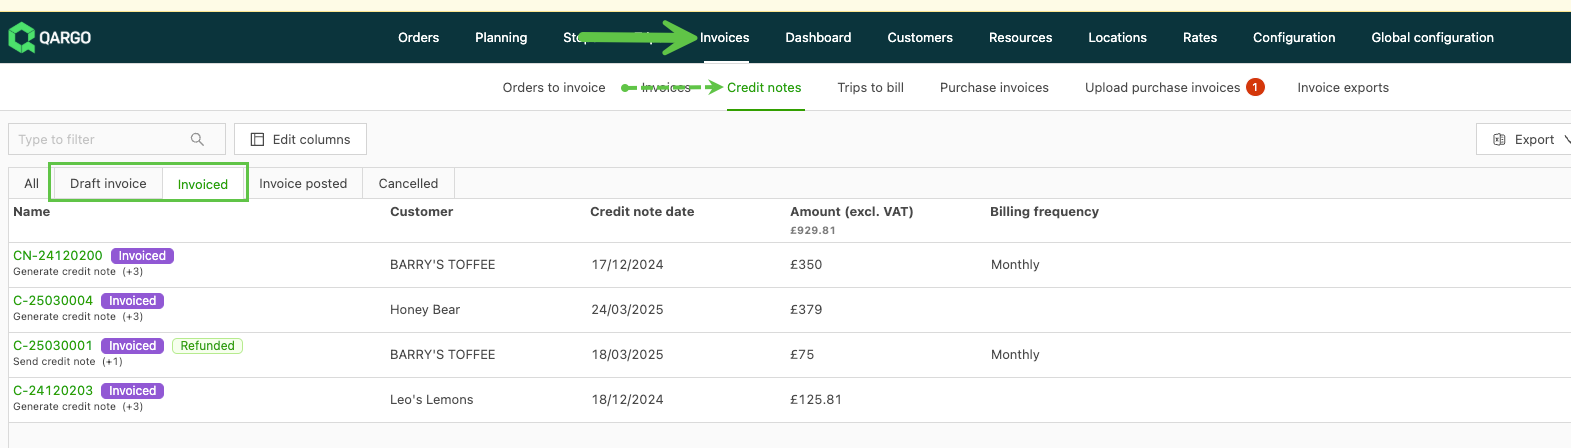
The credit memos page is organized into tabs to help find records easily based on their status. Tabs include:
- All: Shows all credit memo records, regardless of status.
- Draft invoice: Shows credit memos in a draft status (the Generate credit memo task is not complete).
- Invoiced: Invoiced credit memos have had the Generate credit memo PDF task completed. The credit memo is available to send to the customer, but can still be updated if required.
- Invoice posted: Credit memos in a posted status cannot be updated and are ready to be imported into accounting software.
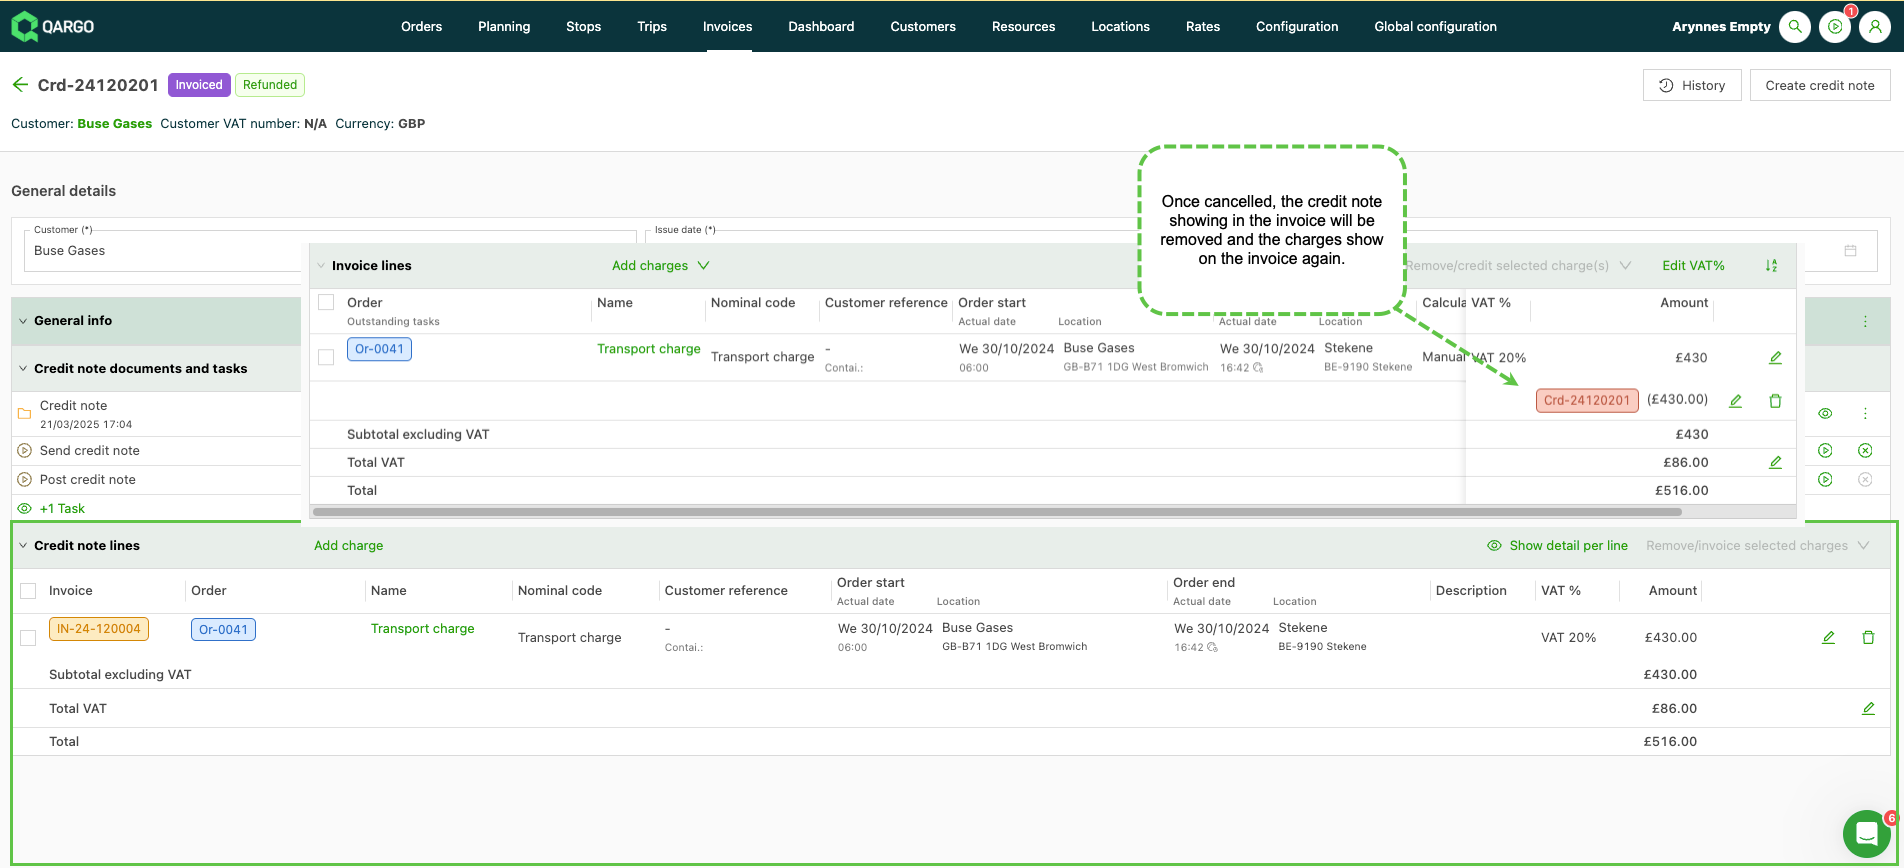
- Canceled: Canceling a credit memo removes the credit amount and sets it back to 0. The record of the credit memo on the invoice is removed.

Each tab includes a table of columns that can be customized to show relevant data with the Edit columns button. A side menu opens, and options can be selected by toggling them on or off.
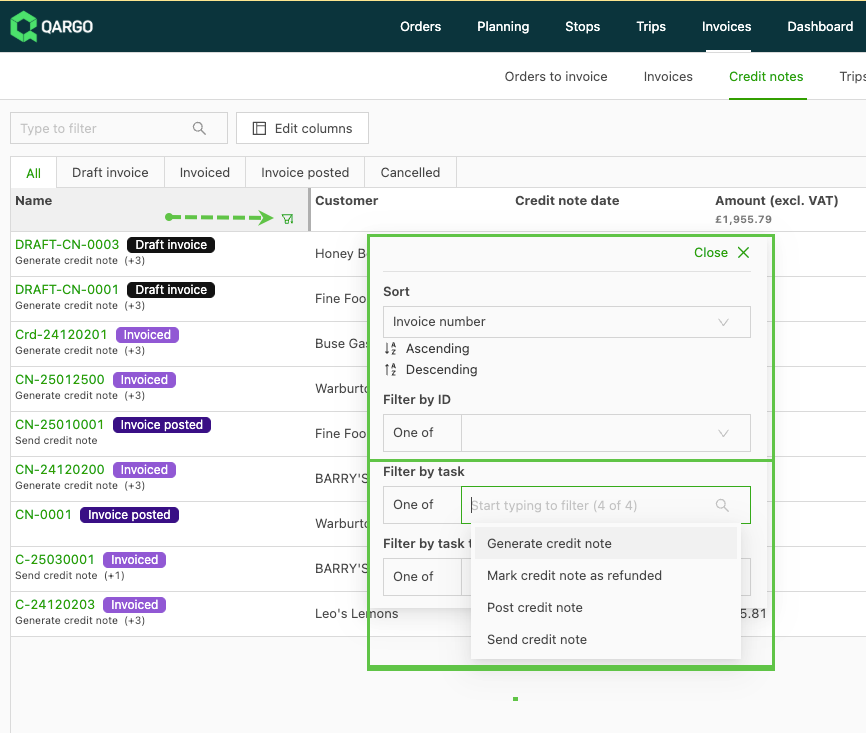
Use filtering in the column headers to display relevant records for processing, including filtering by task, customer or even billing frequency.
- Click the filter icon to display the filtering options available for that column.
Create a credit memo
There are 2 options for creating a credit memo in Qargo:
In line with Qargo’s invoice constraints, credit memos must be used instead of negative invoices when adjusting overcharges or billing errors.
- Create a Standalone credit memo to create a credit that can offset an account balance.
- Create a Credit memo from an existing invoice or order to offset the original invoice amount.
Standalone credit memo
-
Navigate to the Invoices > Credit memos submenu.
-
Click the green Create credit memo button.

-
Enter the customer name and date, and click Save.
-
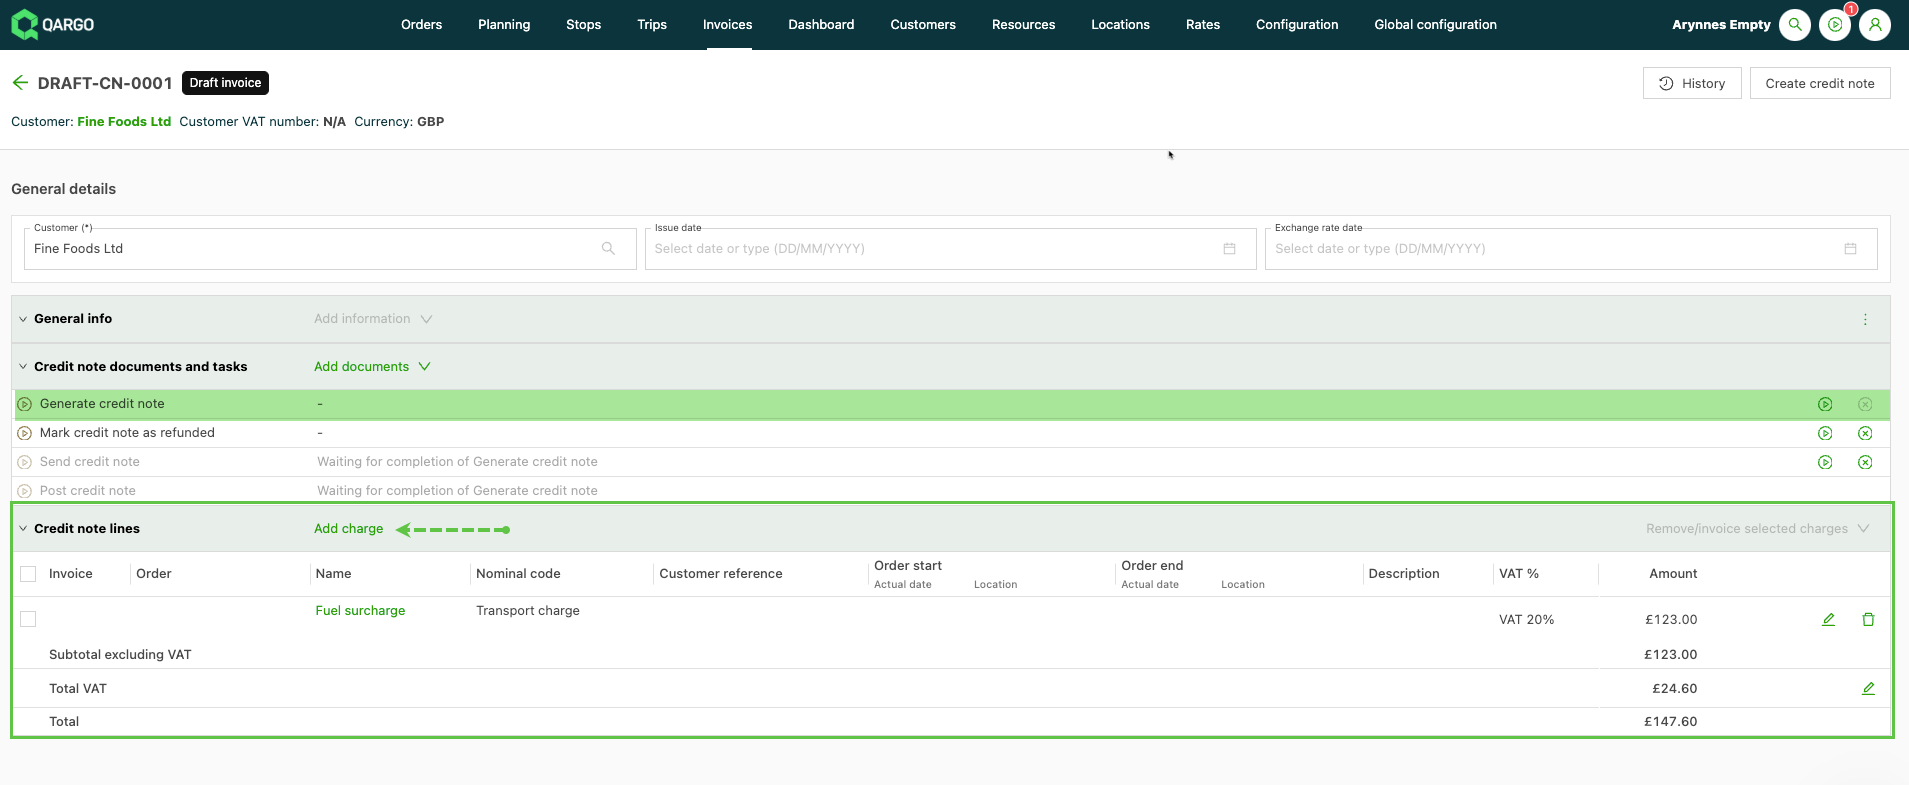
The credit memo is created as a draft.
-
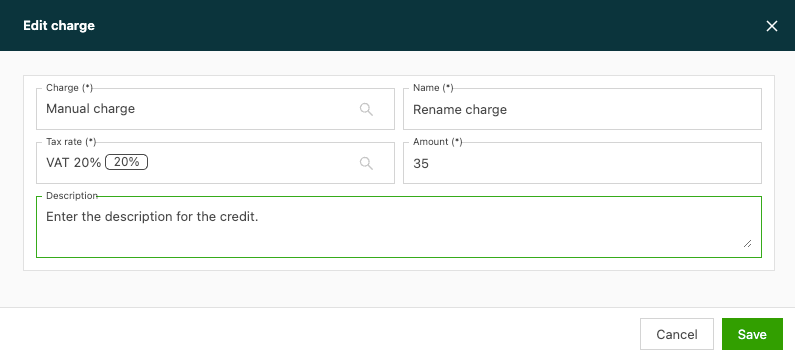
Navigate to the Credit memo lines panel and select Add charge. The Edit charge window opens.
-
Select the Charge(*) field. A drop-down shows the available charge options to select. These can be renamed if necessary in the Name(*) field.
-
Add the Amount(*) and make sure a Tax rate(*) is entered.
-
Use the description field to type details of the credit.
-
Click Save.
-
The charge now shows, with the appropriate tax rate applied. The credit memo stays in Draft status, and in the Draft invoice tab, until the Generate credit memo PDF task is completed.
-
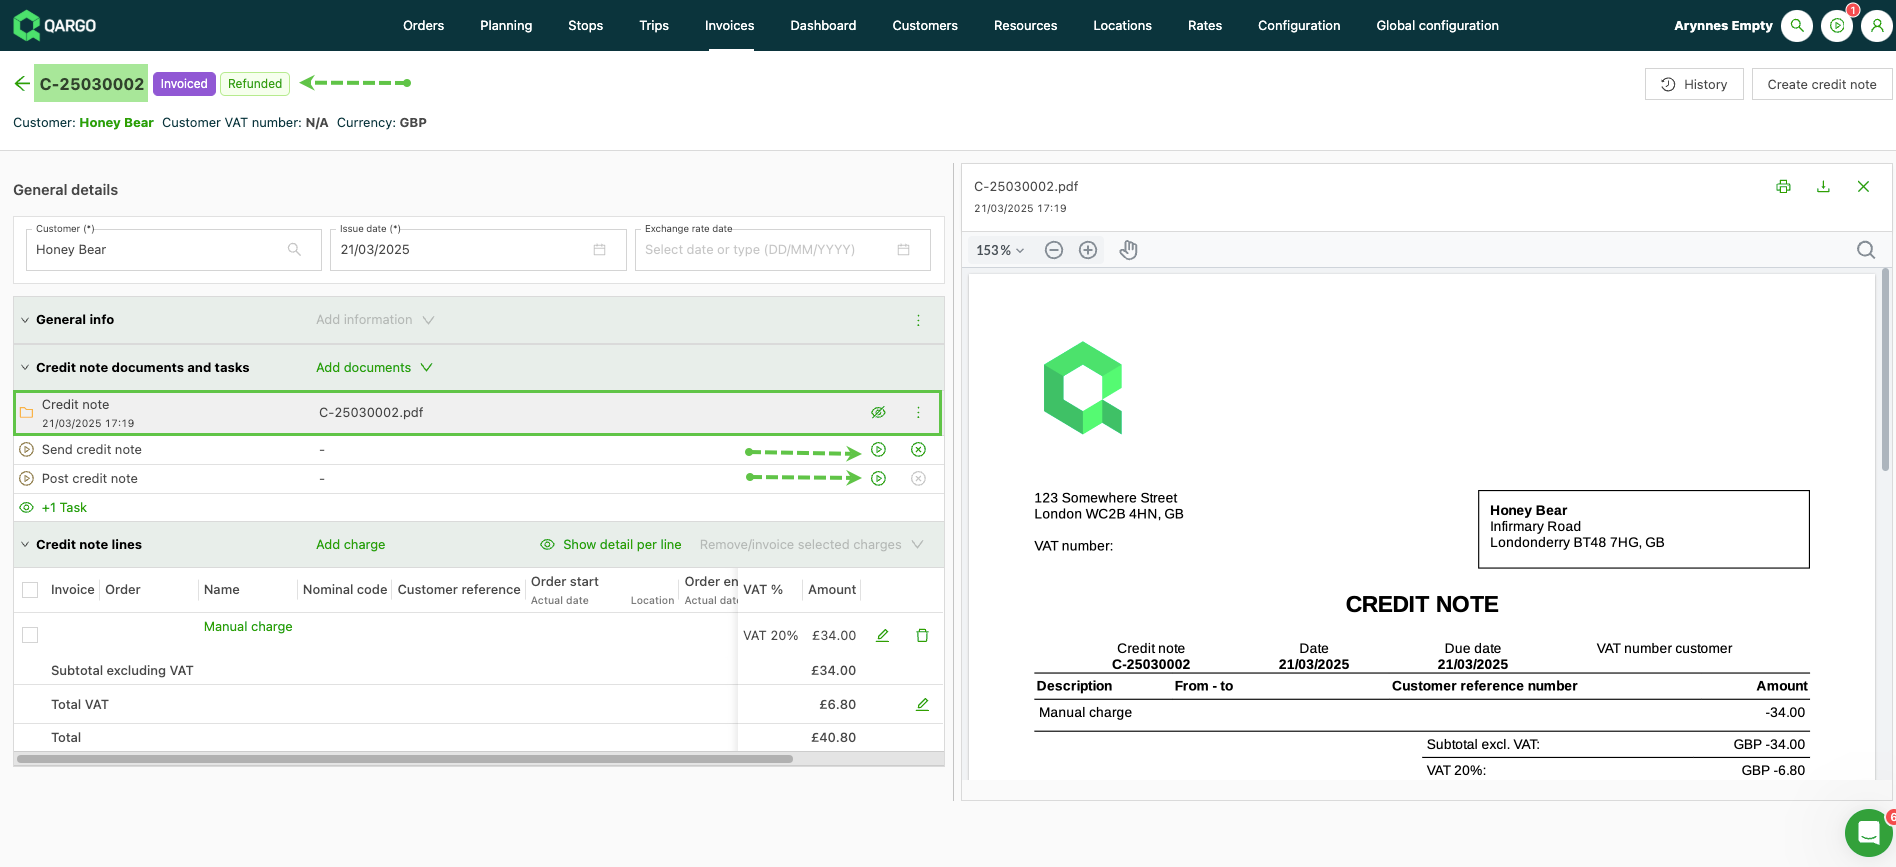
Credit memos in an Invoiced status are in the Invoiced tab and have the PDF file available, which can be sent to customers.
-
Once sent to the customer, credit memos can be applied to the customer account and marked as Refunded. This can be set as either a manual or an automatic task. If manual, it shows as a task to generate.
- *Note: If set as an automatic task, adding the tag is recommended for visual confirmation that it has been completed.
-
Credit memos that have been set to Invoiced can be processed to a posted status.
-
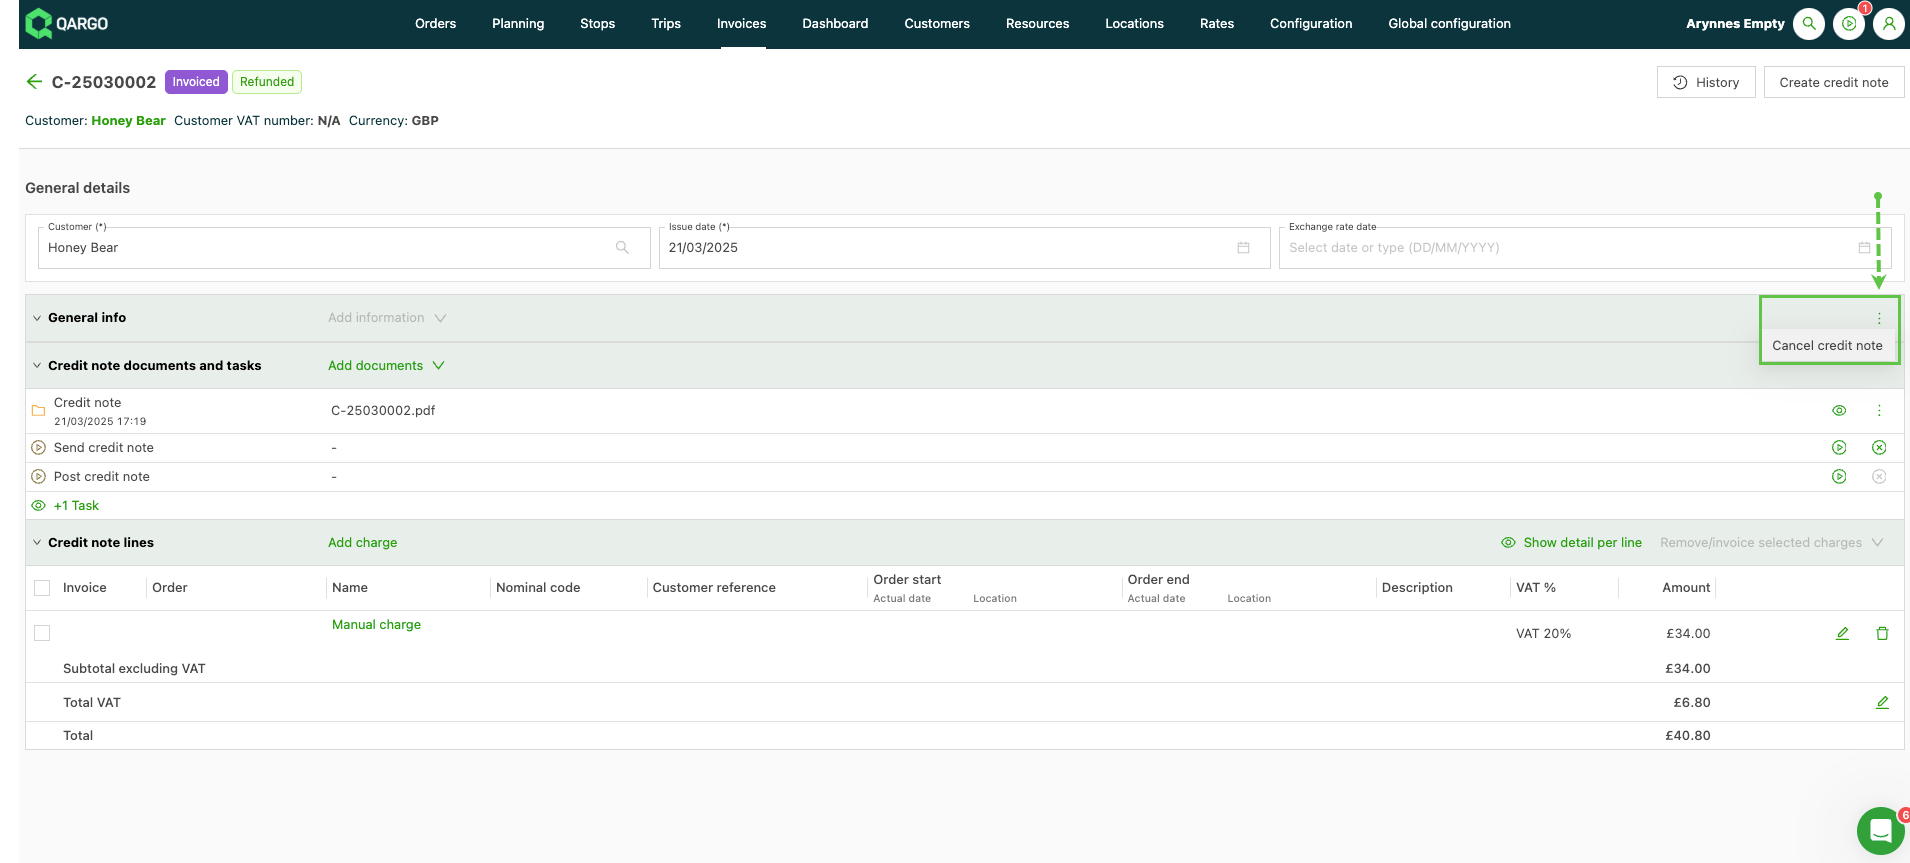
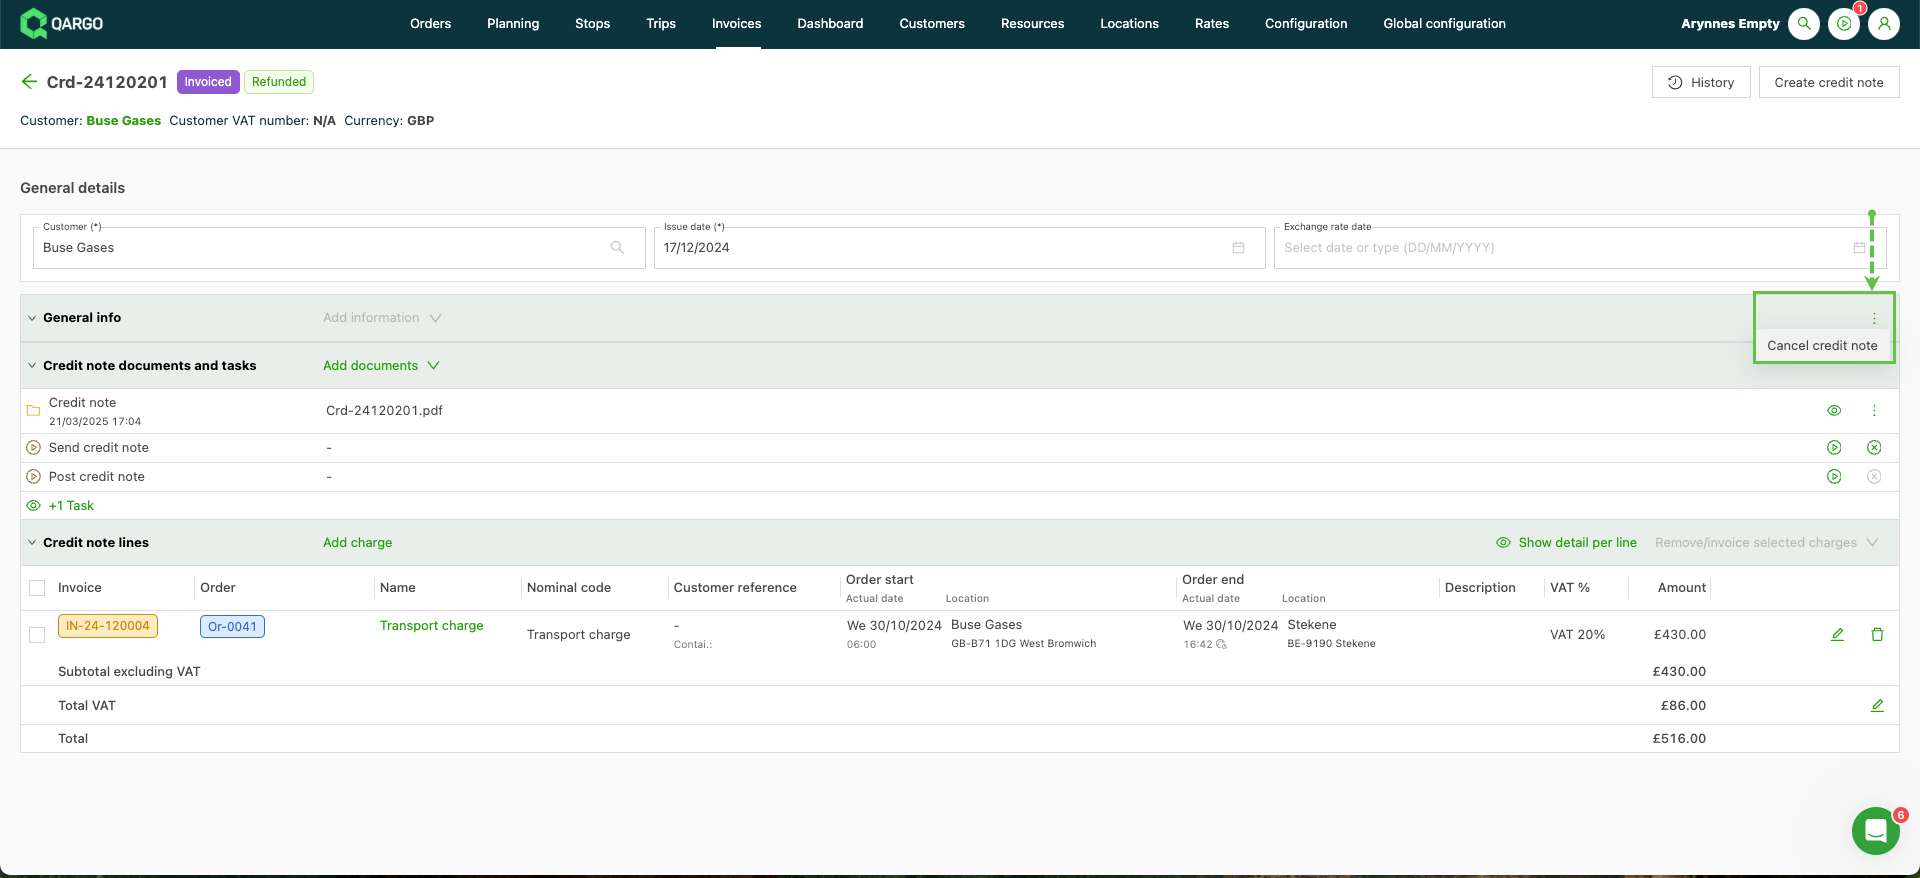
A credit memo can be canceled from the General info panel menu. Once the credit memo has been canceled, it shows in the Canceled tab. The charges that were credited are set to 0.
-
The credit memo shows a Canceled label.

Credit memo from an existing invoice
-
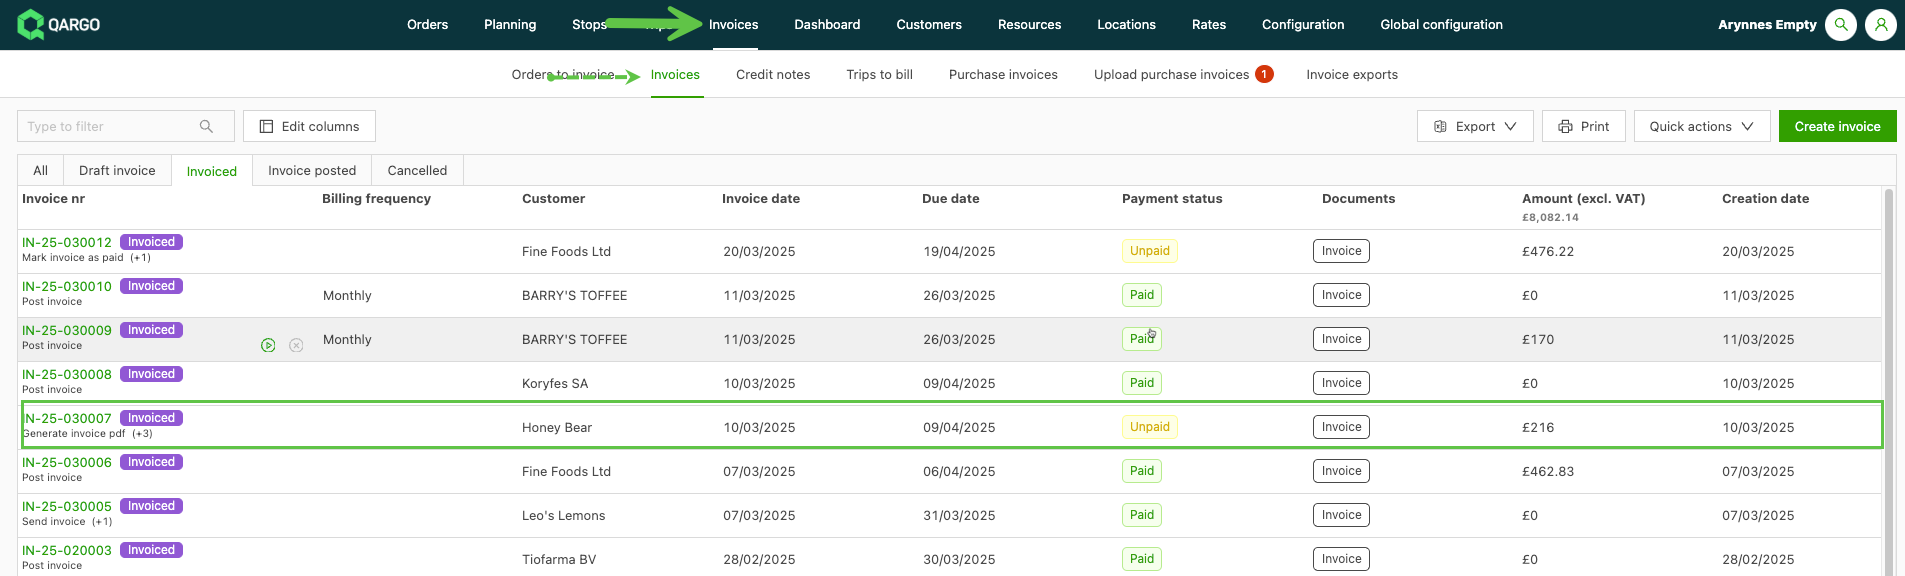
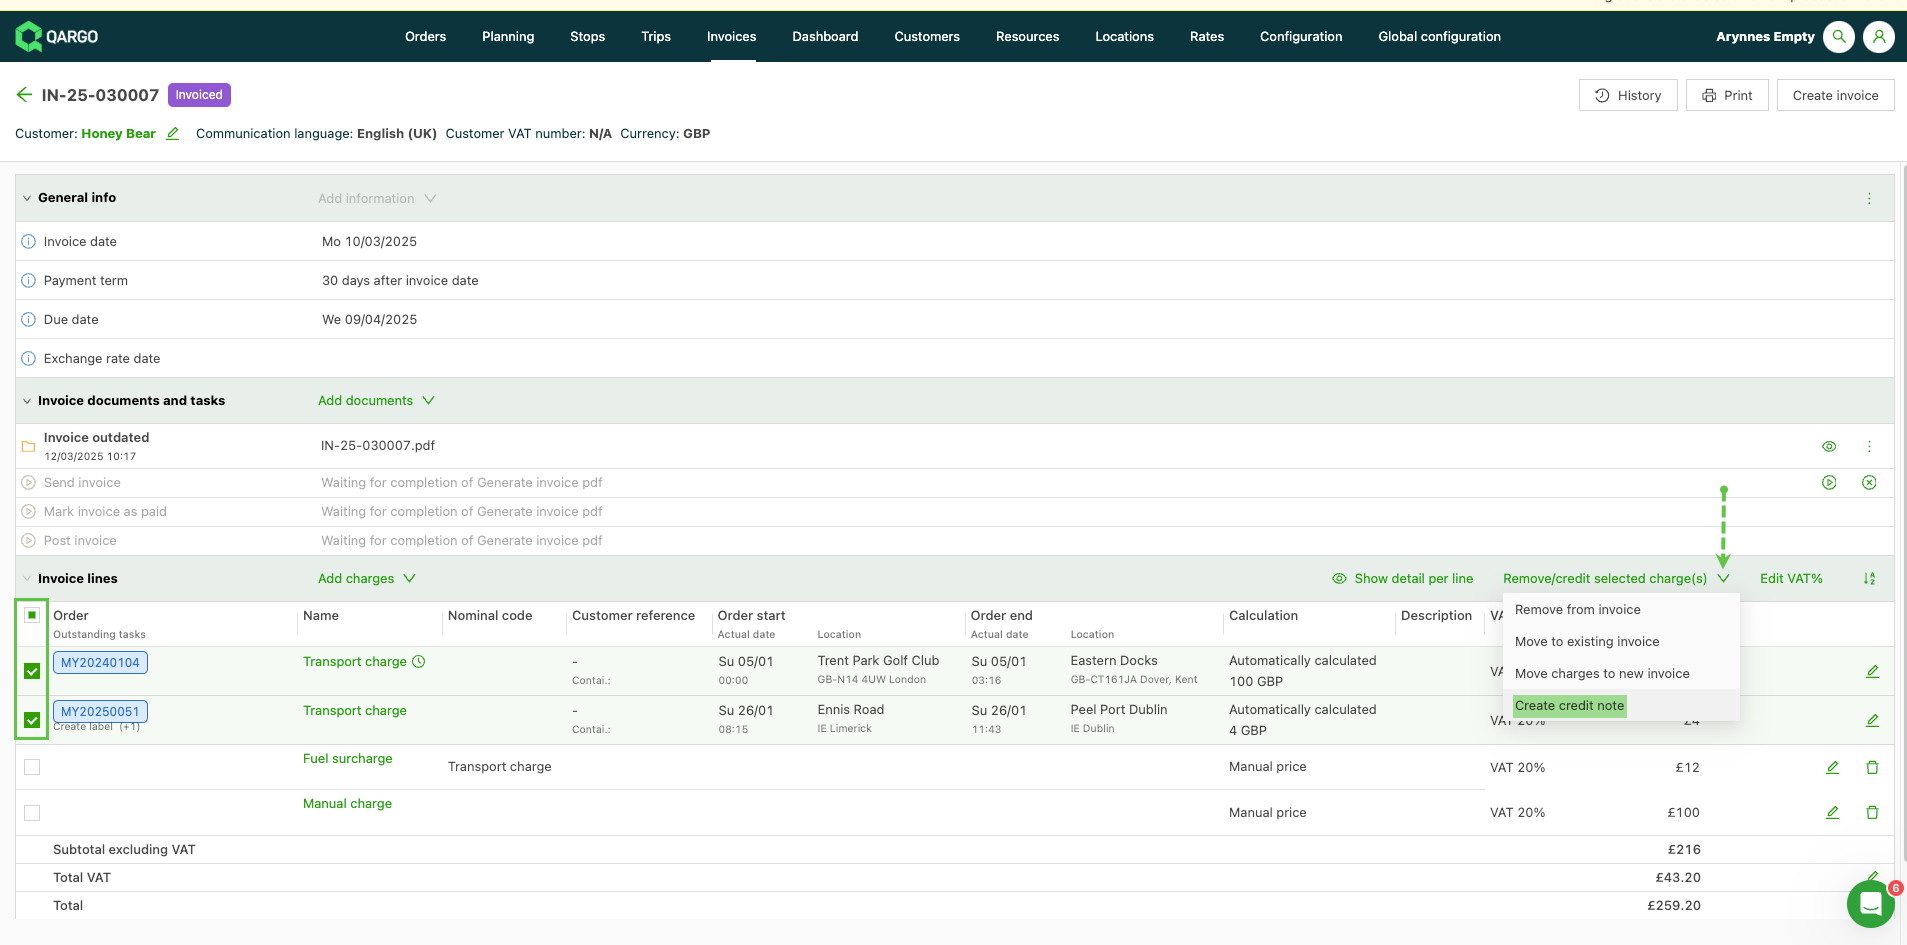
Navigate to the Invoices > Invoices submenu. Select the invoice for the order whose charges need to be updated.
-
Select the cost line(s) to credit and use Remove/credit selected charge(s).
-
From the drop-down menu, select Create credit memo.
-
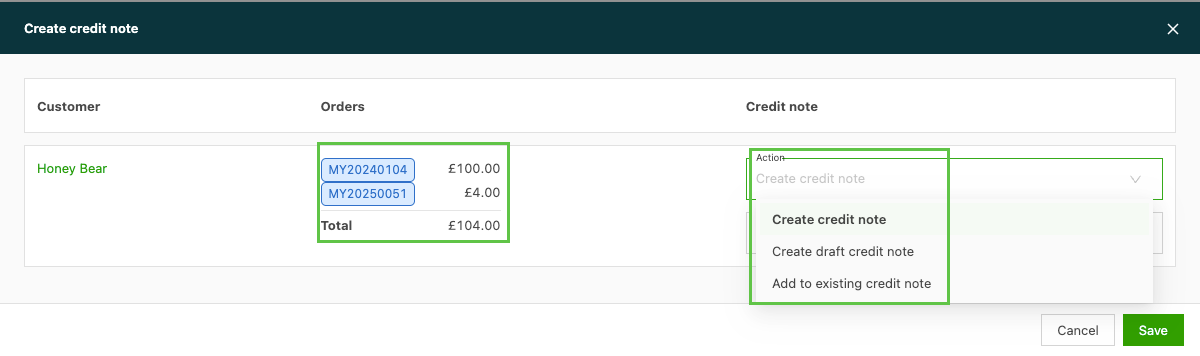
A new window opens with 3 options to create the credit memo:
- Create credit memo: Creates a new credit memo under a unique number, with the selected charges.
- Create draft credit memo: Creates a draft credit memo under a unique number, with the selected charges.
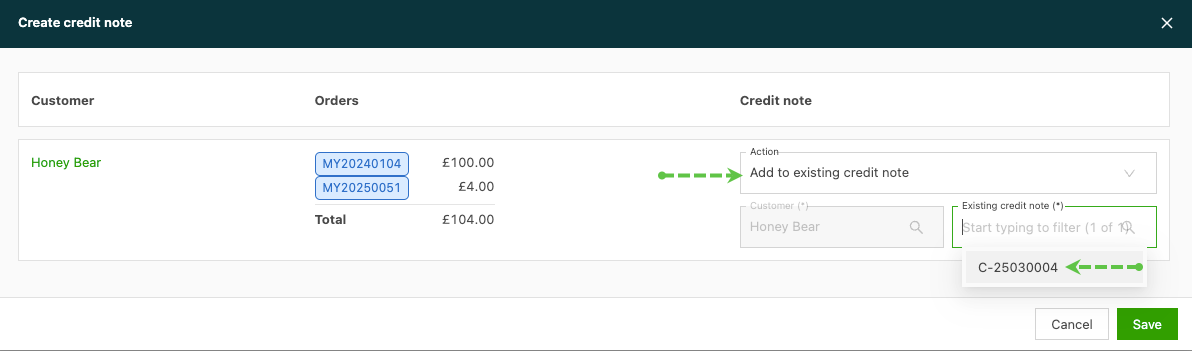
- Add to existing credit memo: Gives the option to select an existing draft or standard credit memo to add the charges to. Charges cannot be added to a credit memo that is already posted.
-
Select the action required for the selected charges.
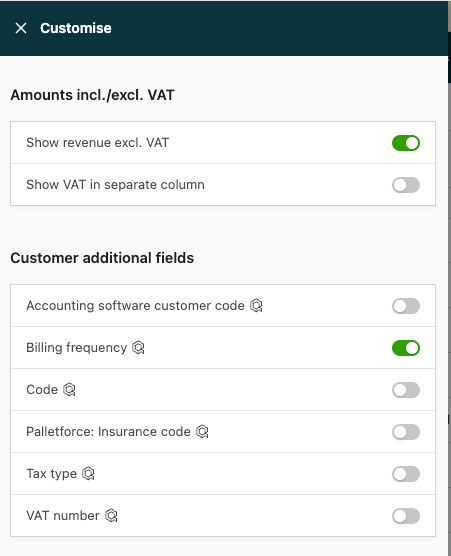
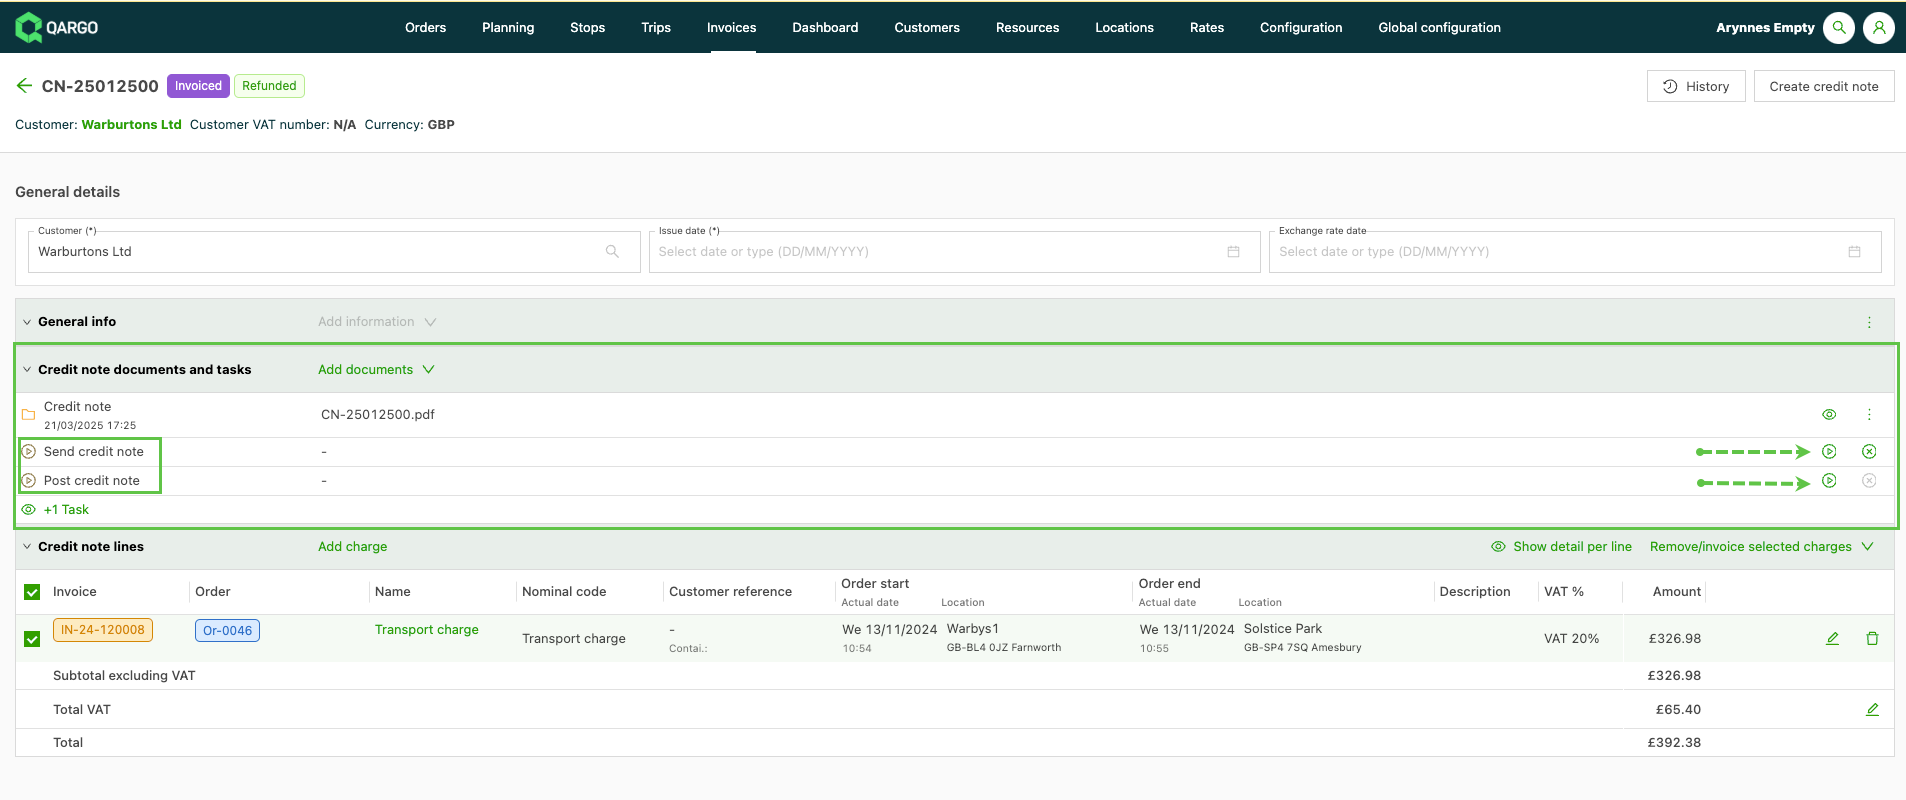
Once a credit memo is created, a tag displays on the original invoice showing the credited amount.
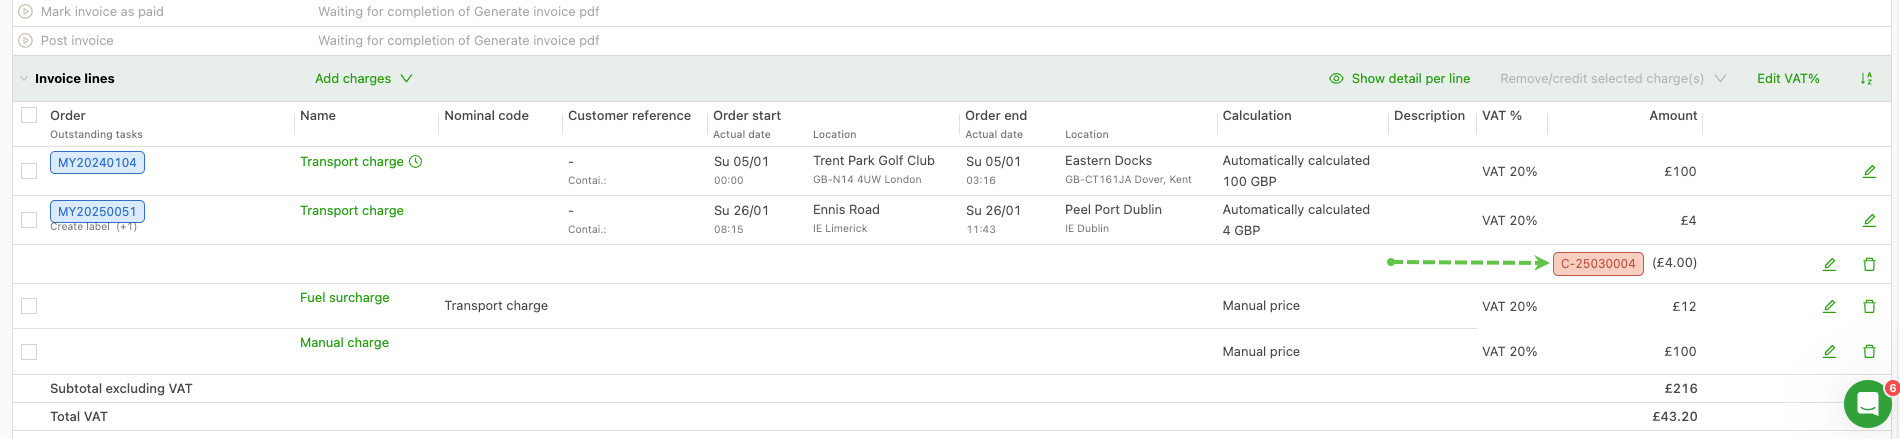
- Multiple charges can be moved to different credit memos if necessary.
Credit memos show in the appropriate tab (Draft/Invoiced). If the full selected charge is being credited, the credit memo can be generated and sent to the customer. It can then be posted and becomes available to import into accounts.
Adjusting charges
In some cases, the credit being issued may not cover the entire charge. The steps to create the credit memo are the same: select the charge to adjust and create the draft or standard credit memo.
-
Navigate to the credit memos submenu and select the appropriate tab for the credit memo (draft/invoiced).
-
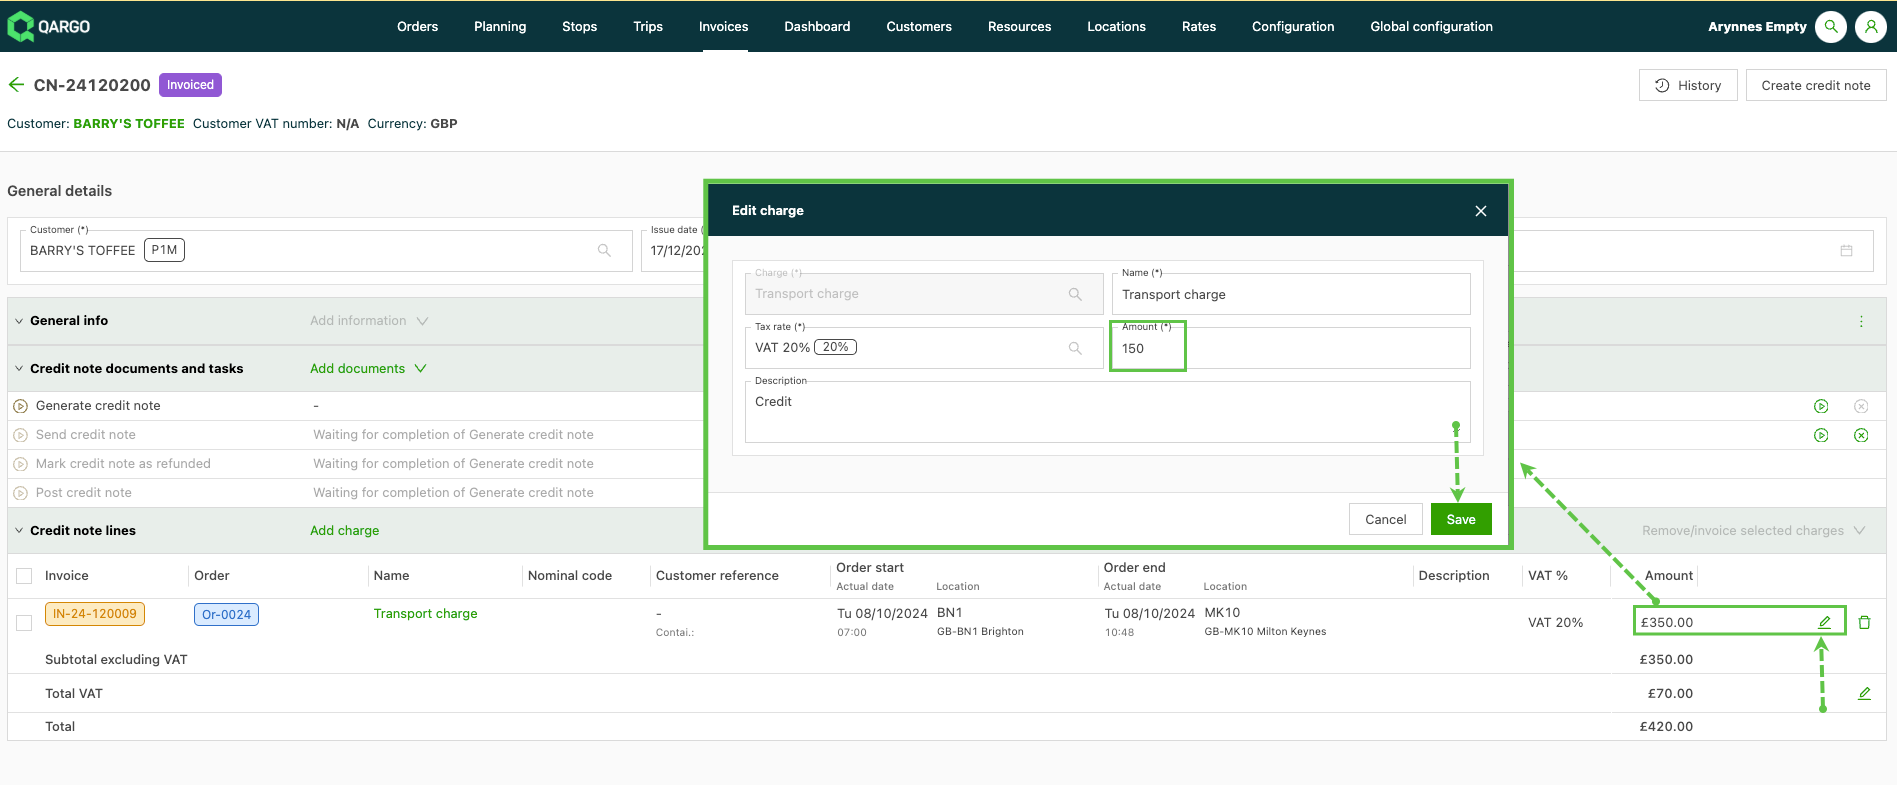
Open the credit memo by clicking its number and navigate to the Credit memo lines panel.
-
Click the edit icon next to the charge to adjust. An Edit charge window opens where the amount can be updated. A free-form description field is also available to add any other details.
-
Click Save. The amount updates and now shows on the credit memo.
-
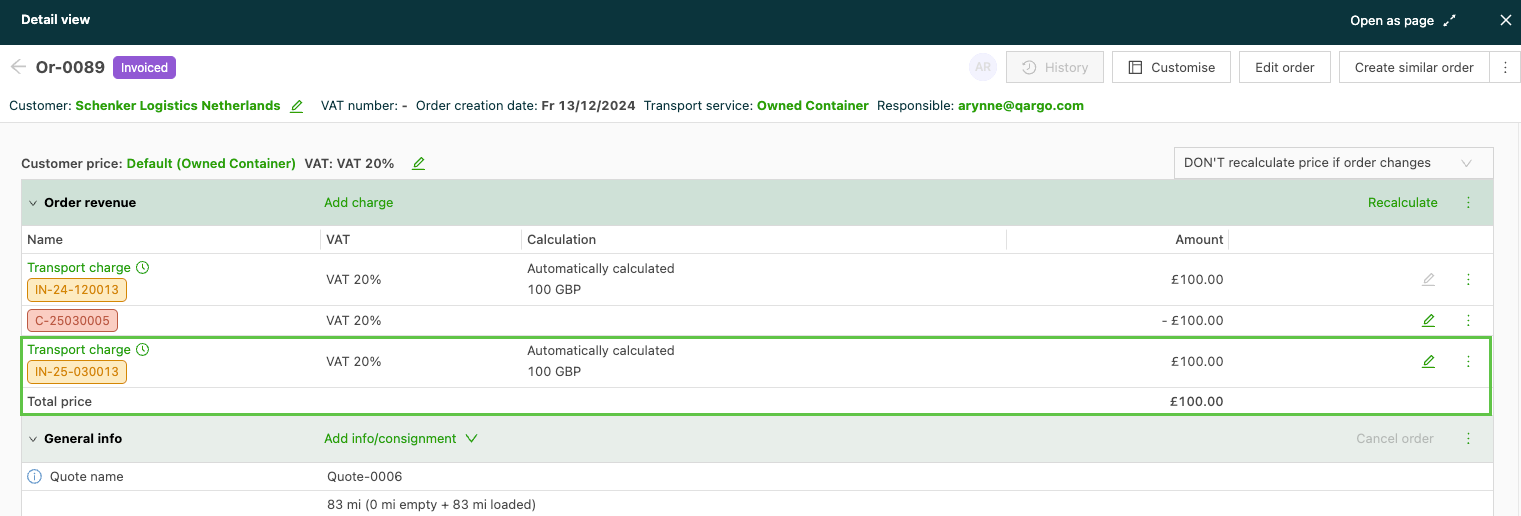
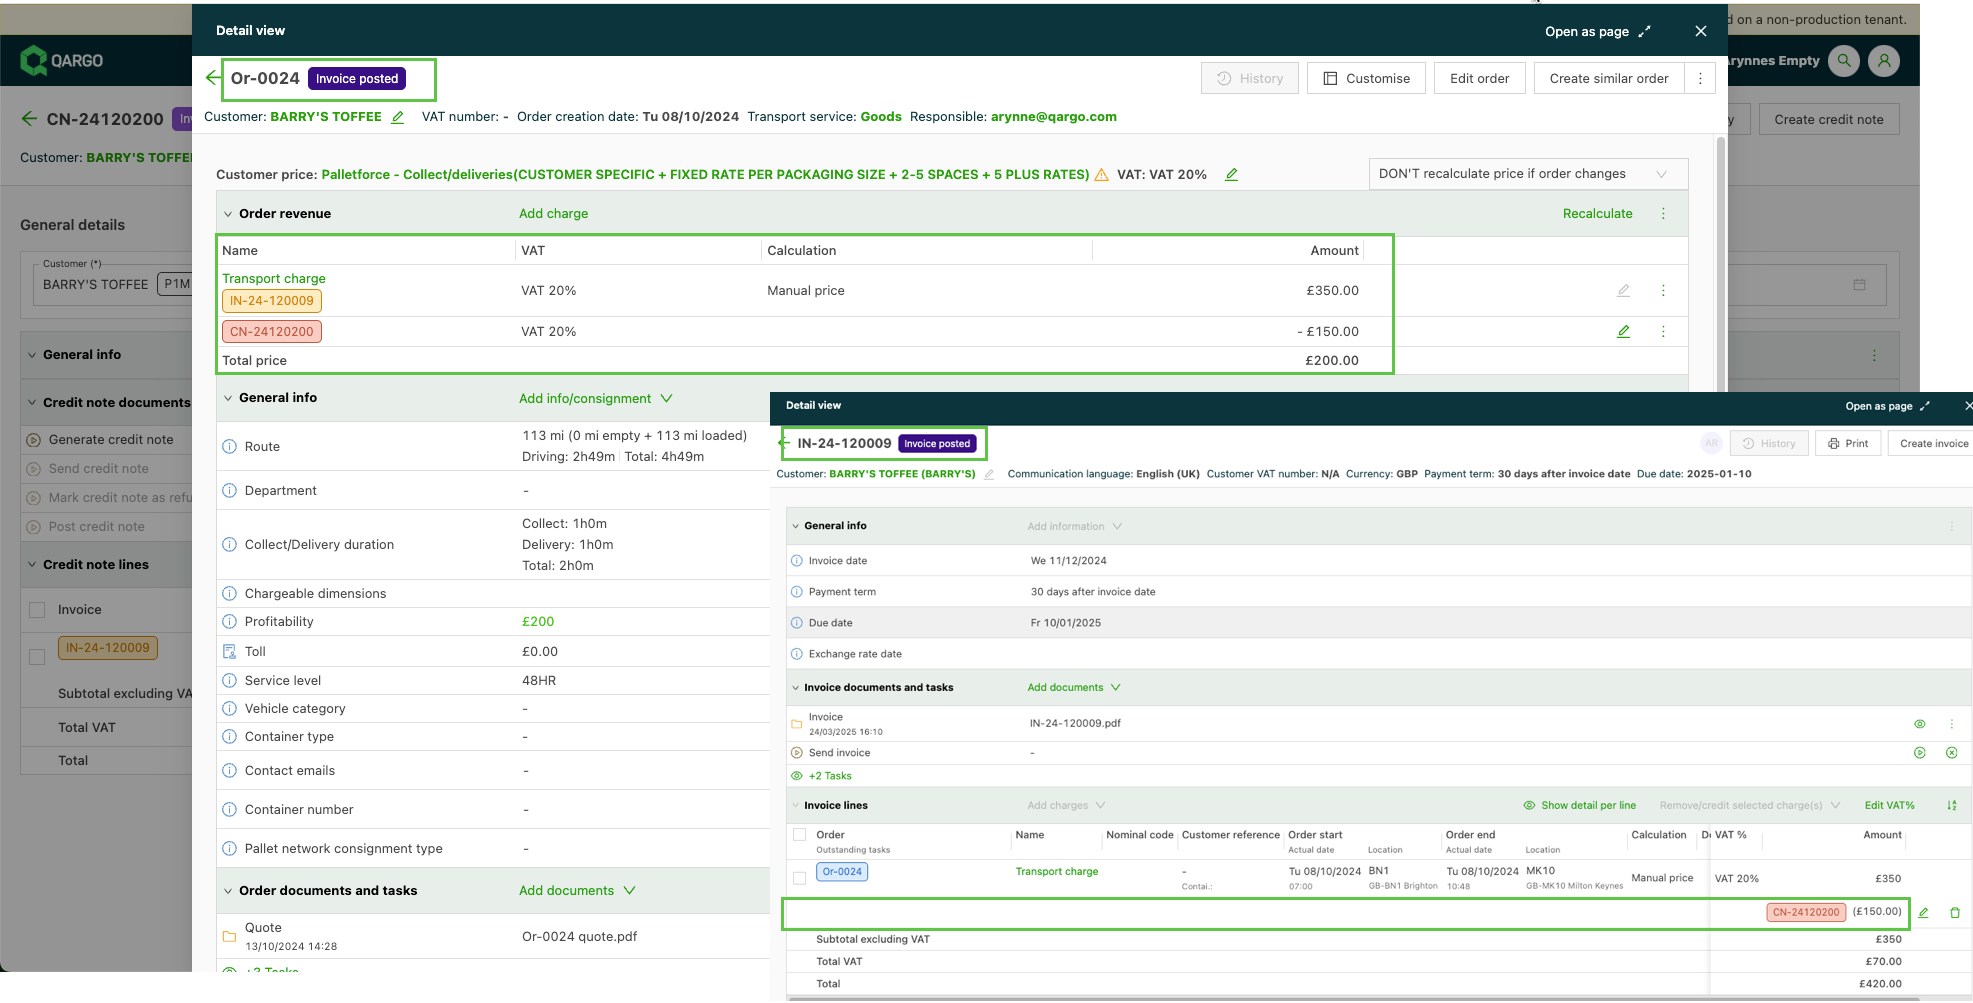
The credit memo details show both on the invoice and on the order:
Additional functions
There are 2 other buttons available on the main list page:
-
Export: Allows users to export all or a selection of credit memo records as an Excel file. This is separate from the export specifically for imports into accounts.
-
Quick actions: Tasks shown here can be done in bulk on selected records.
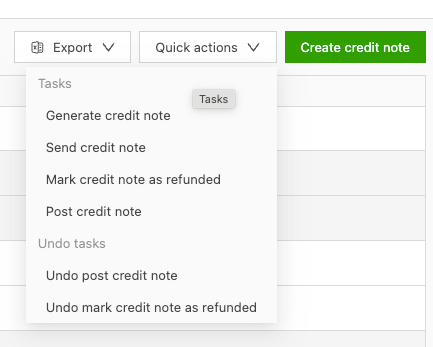
Export
Use the Export button to generate a report based on all or a selection of credit memo records. This can be combined with the filters in the column headers to generate specific exports.
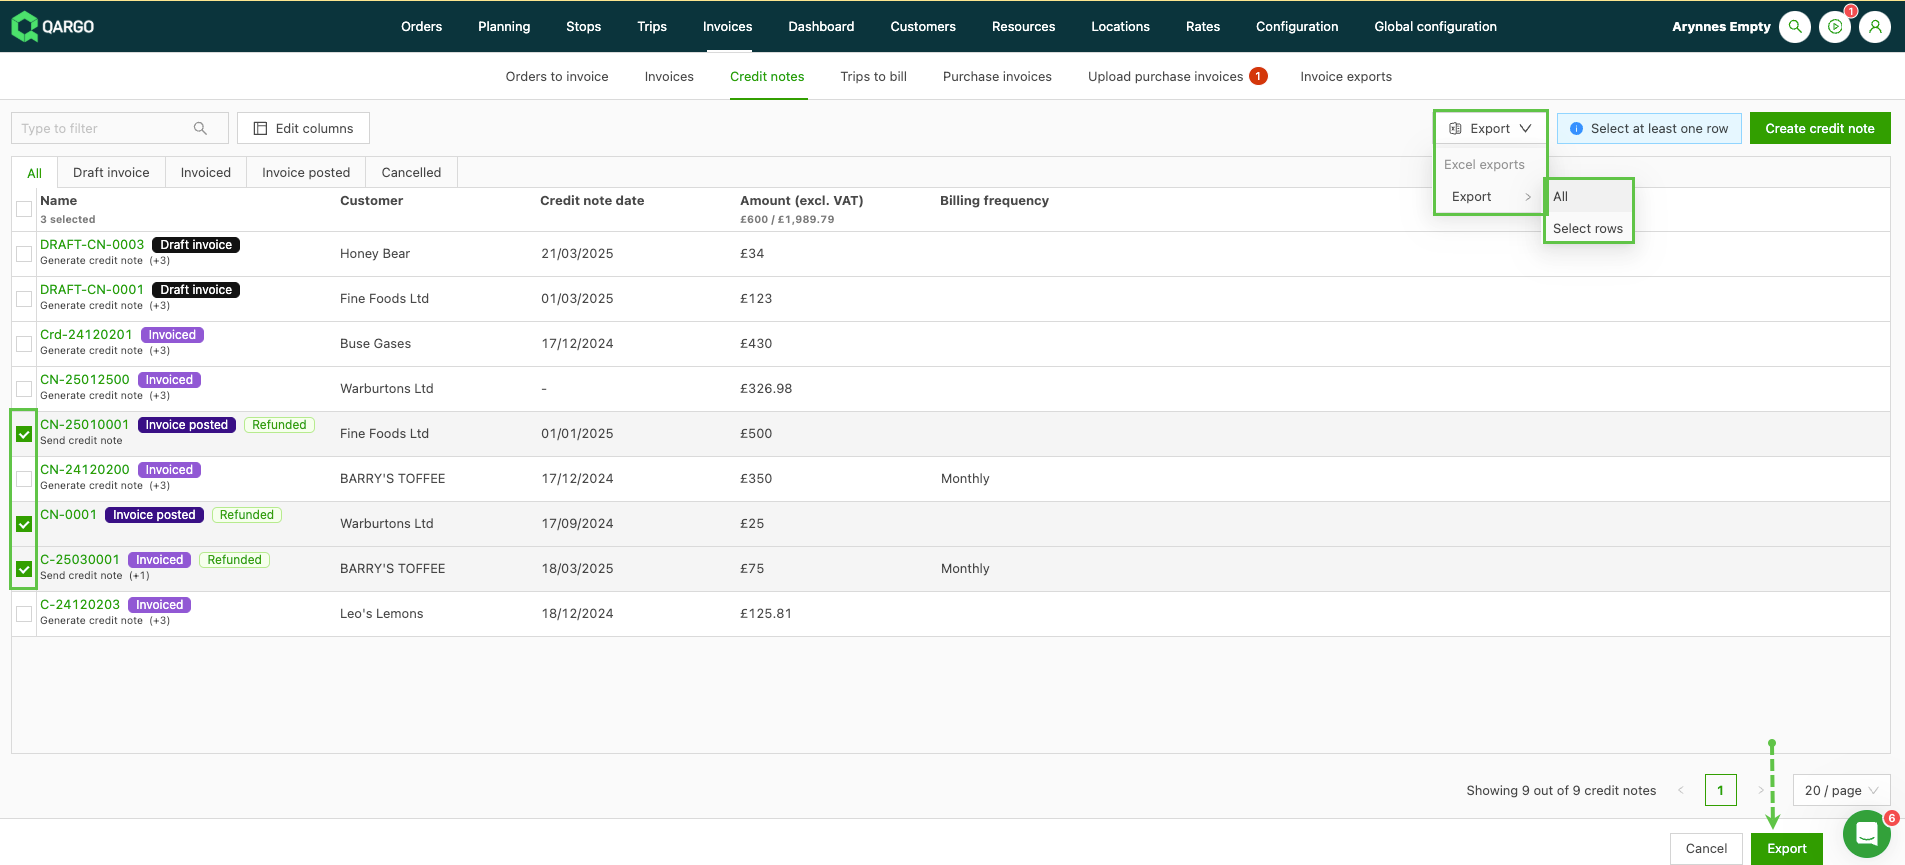
Quick actions tasks
Generate credit memo:
Creates the PDF file for the credit memo. Any subsequent tasks scheduled after this task become available. Once the PDF file is available, it can be sent to the customer.
Send credit memo:
Sending the credit memo can be configured as either an automatic or a manual task. If set to send automatically (email), the billing contact on the customer profile must have an email address.
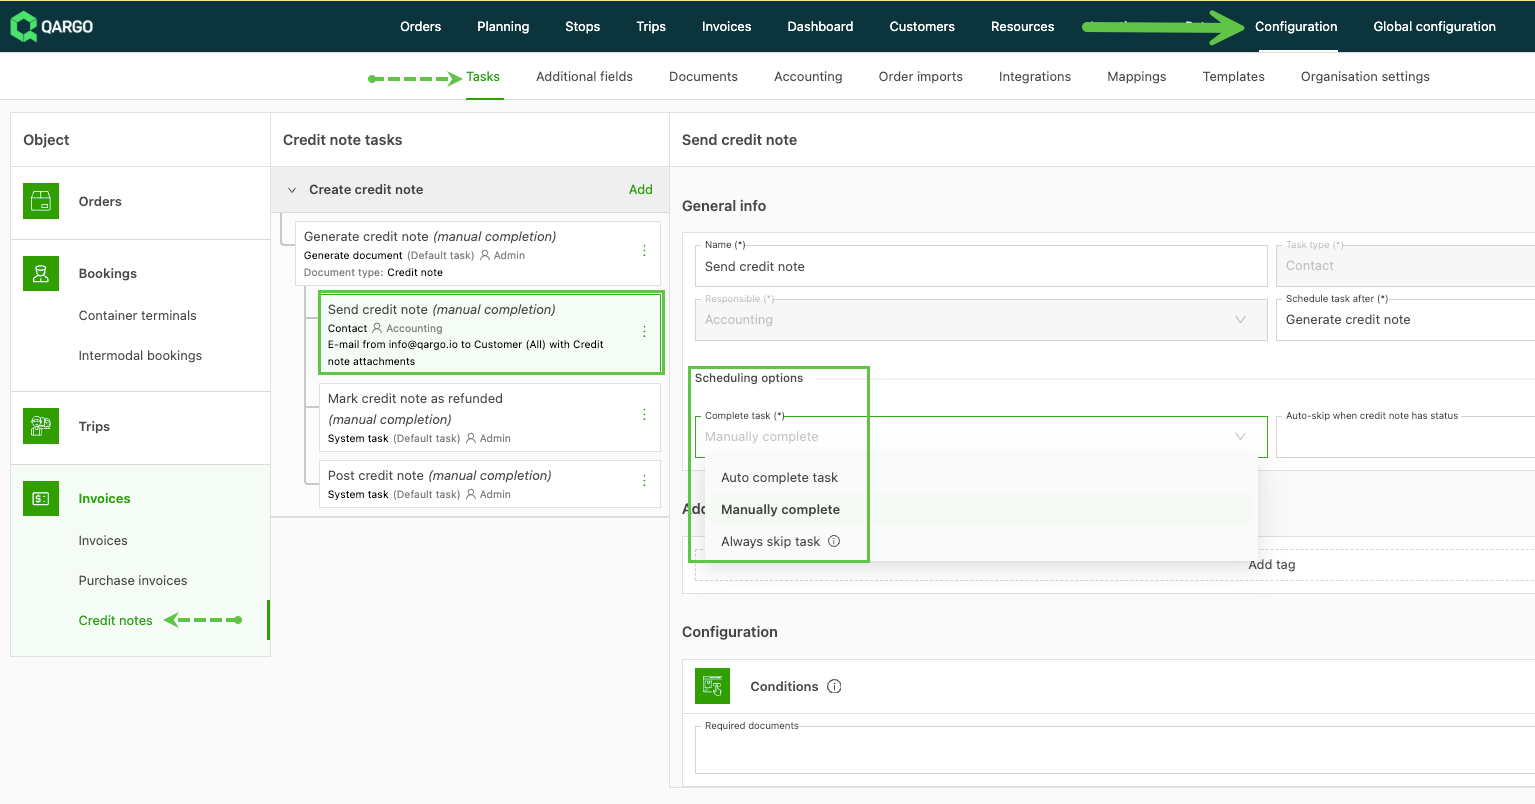
Mark credit memo as refunded / Undo mark credit memo as refunded:
Can be configured to process automatically once the credit memo is generated. When configuring the task, a tag can be added which is applied to the record. If set to manual, this shows as a task to be completed once the Generate credit memo PDF task is completed.
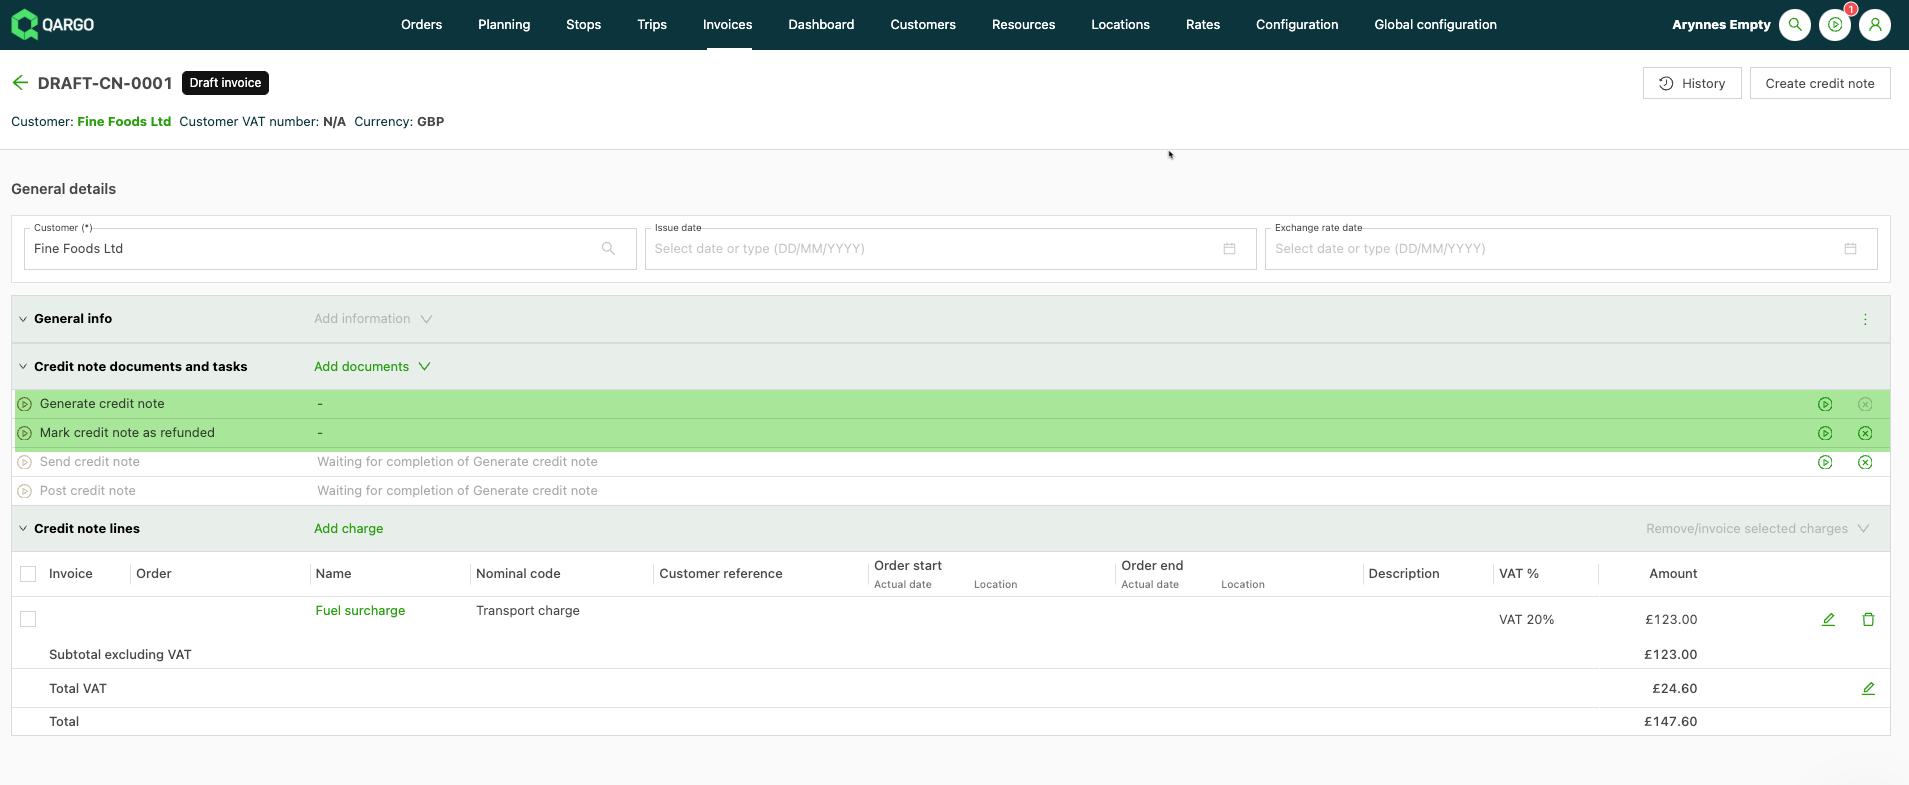
Post credit memo / Undo post credit memo:
The credit memo must have the Generate credit memo PDF task completed before it can be updated to a Posted status. Once the status is posted, the record is included in any exports to accounts. Posted invoices cannot be updated.
Click the link below for more information on posted invoice restrictions.
Post-invoice actions and restrictions.
Cancel a credit memo
If a credit memo is created but not required, it can be set to Canceled, provided the credit memo is not in a posted status.
- Open the credit memo and navigate to the General details panel.
- Use the menu on the right and select Cancel credit memo.
Re-invoicing credit memo charges
Because of mistakes made on an invoice, it may be necessary to create a credit memo from the invoice and re-invoice the order.
This is now possible by opening the credit memo page, selecting the charges on the credit memo to re-invoice and adding them to a new or existing invoice.
If an invoice was assigned to the wrong customer, it can be corrected by issuing a full credit memo against the original invoice and reassigning the charges to a new or existing invoice with updated customer details.
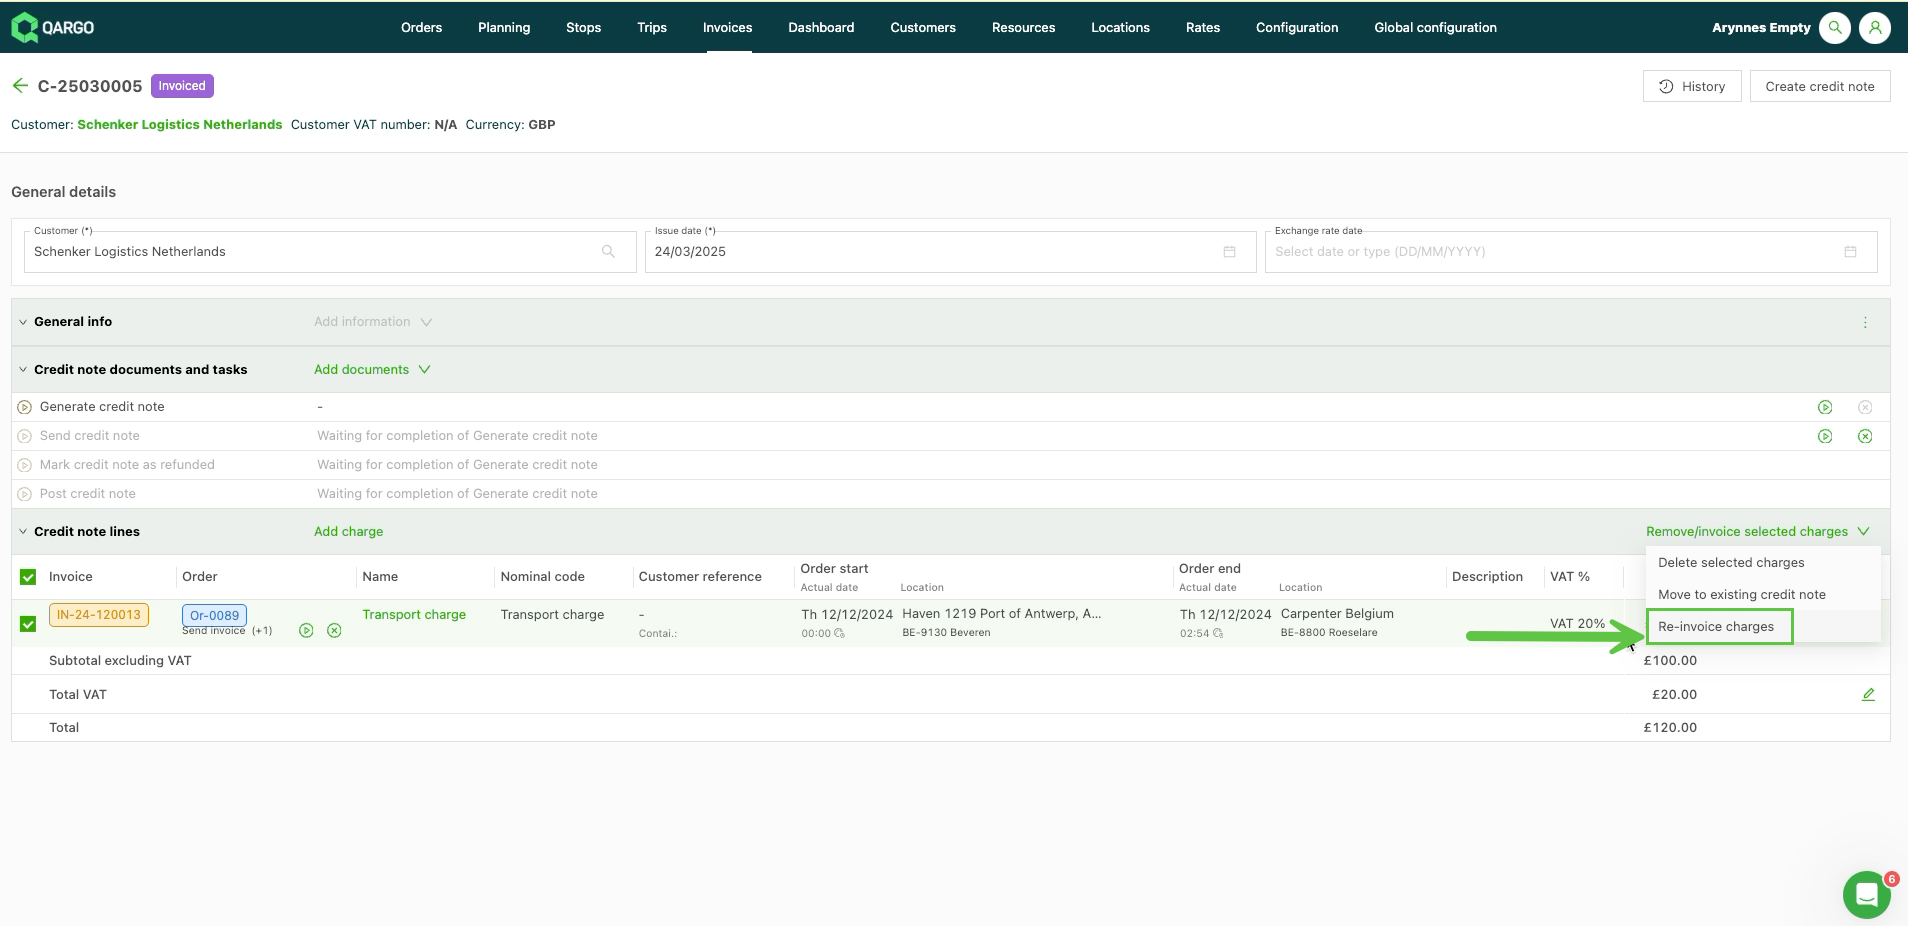
After a new invoice has been created from the selected charges, the charges are also automatically re-added to the order in an additional line, as in the example below: