
Invoices – Orders to invoice view options
View 'Orders to invoice' by orders or charges. Use tabs to track status, filter columns, and manage invoices efficiently.
Table of contents
Summary
| Tab view | Description |
|---|---|
| All | This shows all orders or charges, regardless of the status of the order or charge. |
| To approve | Charge view only. Charges that require approval before they can be invoiced. |
| Not ready to invoice | The Not ready to invoice status includes all the orders or charges that have not yet been set to a Ready to invoice status. |
| Ready to invoice | Once an order or charge is confirmed, it can be set to ‘Ready to invoice’, which makes it available to be invoiced. |
| Draft / On draft invoice | A draft invoice allows users to create and review an invoice before finalizing it. Draft invoices are given a unique ‘DRAFT’ invoice number. |
| Invoiced | The order / charge shows in the ‘Invoiced’ tab view and includes the invoice number assigned to the order / charge. |
| Invoice posted | An invoice with a Posted status indicates that the invoice has been generated and issued to the customer. Once in a posted status, no further updates can be made to the charges and order details. |
| Do not invoice | Marking an order or charge as ‘Do not invoice’ removes the revenue amount and sets the value to ‘0’. |
| Custom view | Create a custom view, using filtering on column headers to tailor the view to individual requirements. |
Learn more about how to make the best use of the Order and Charge views.
Invoice by tab view
All
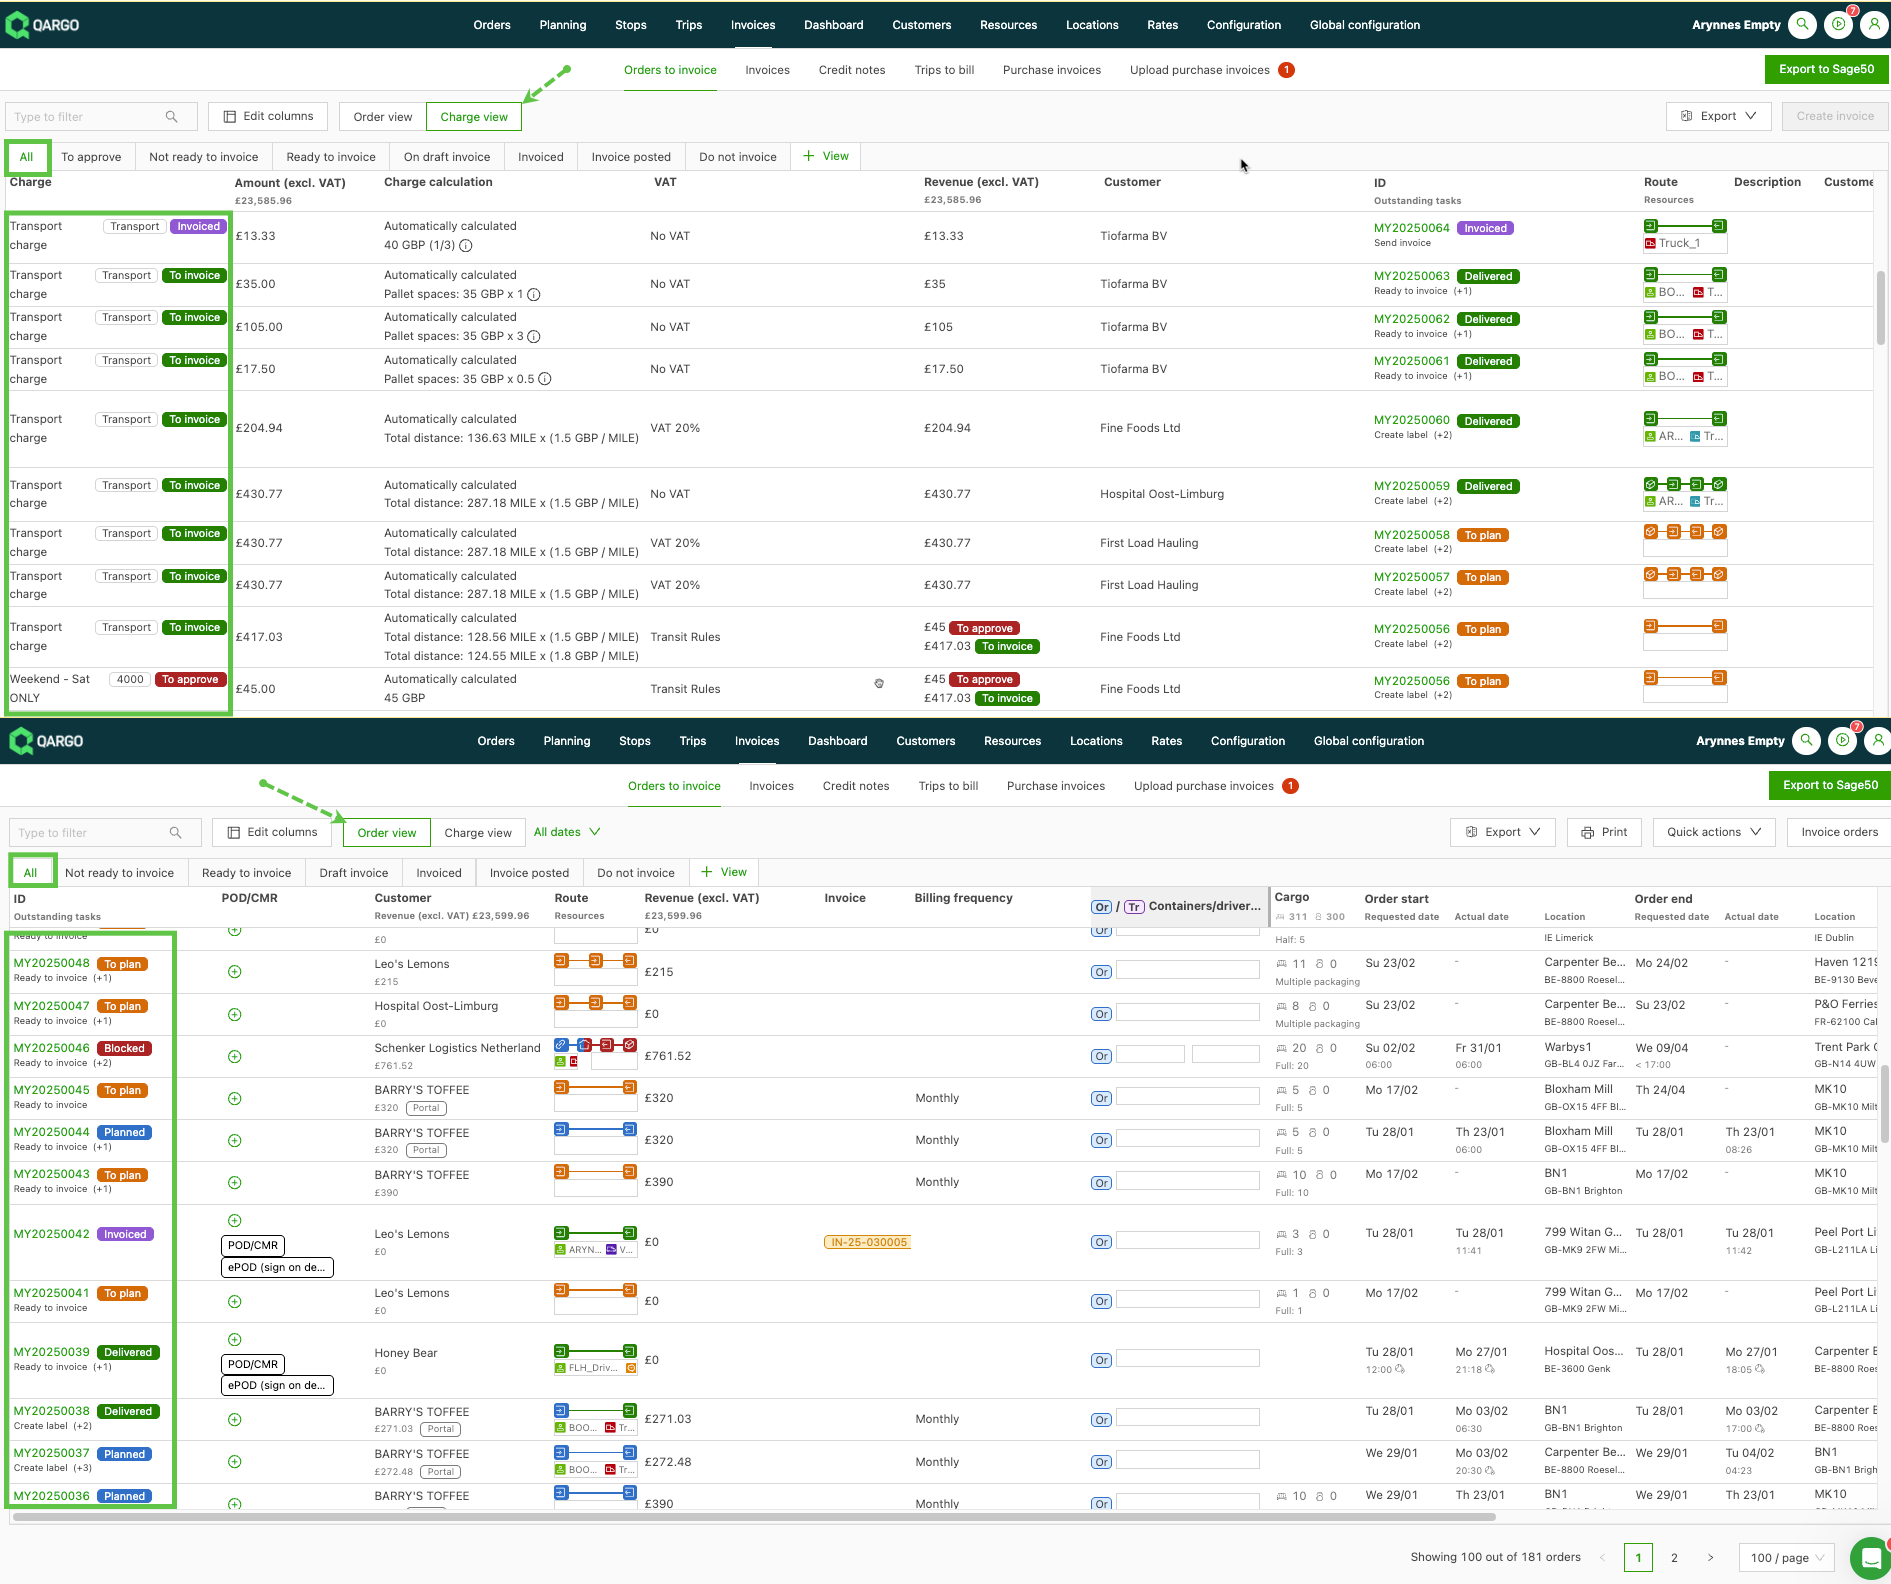
This shows all orders or charges, regardless of the status of the order or charge. In the Order view, the status shown is the status of the order (i.e., Delivered, To plan, Invoiced). In the Charge view, the status shown is the status of the charge (i.e., To approve, To invoice, Invoiced). Column headers can be filtered in each view, allowing for better data visualization. Use this view to gain the widest visibility of all orders or charges.
To approve (Charge view only):
Charges that are configured to require approval before they can be invoiced are individually tagged with the status ‘To approve’. This view can be used to filter for outstanding charges that require approval prior to billing.

Not ready to invoice
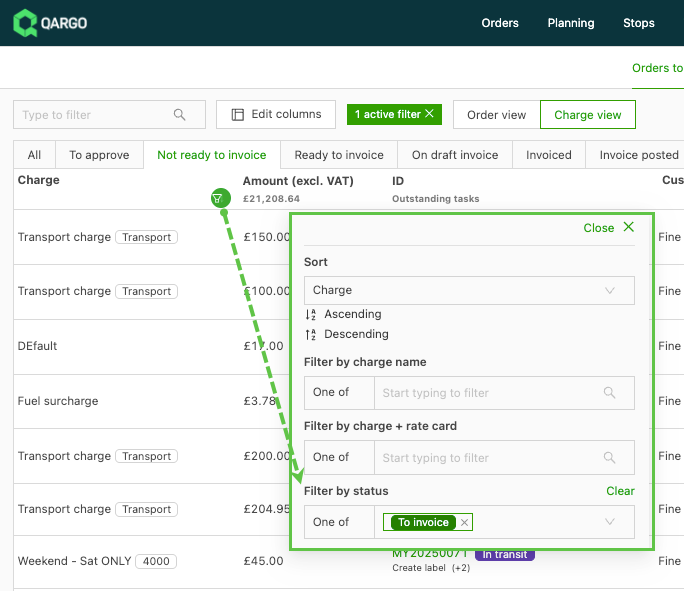
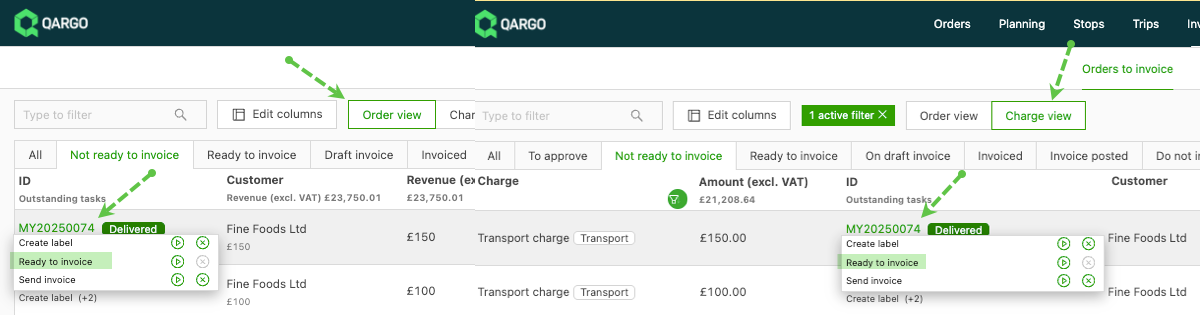
The Not ready to invoice status includes all the orders or charges that have not yet been set to a Ready to invoice status. This can include various order or charge statuses. In each view, it is possible to set the individual record (order or charge) to ready to invoice. Column headers can be filtered, so it is possible to group the records based on the outstanding task or status.
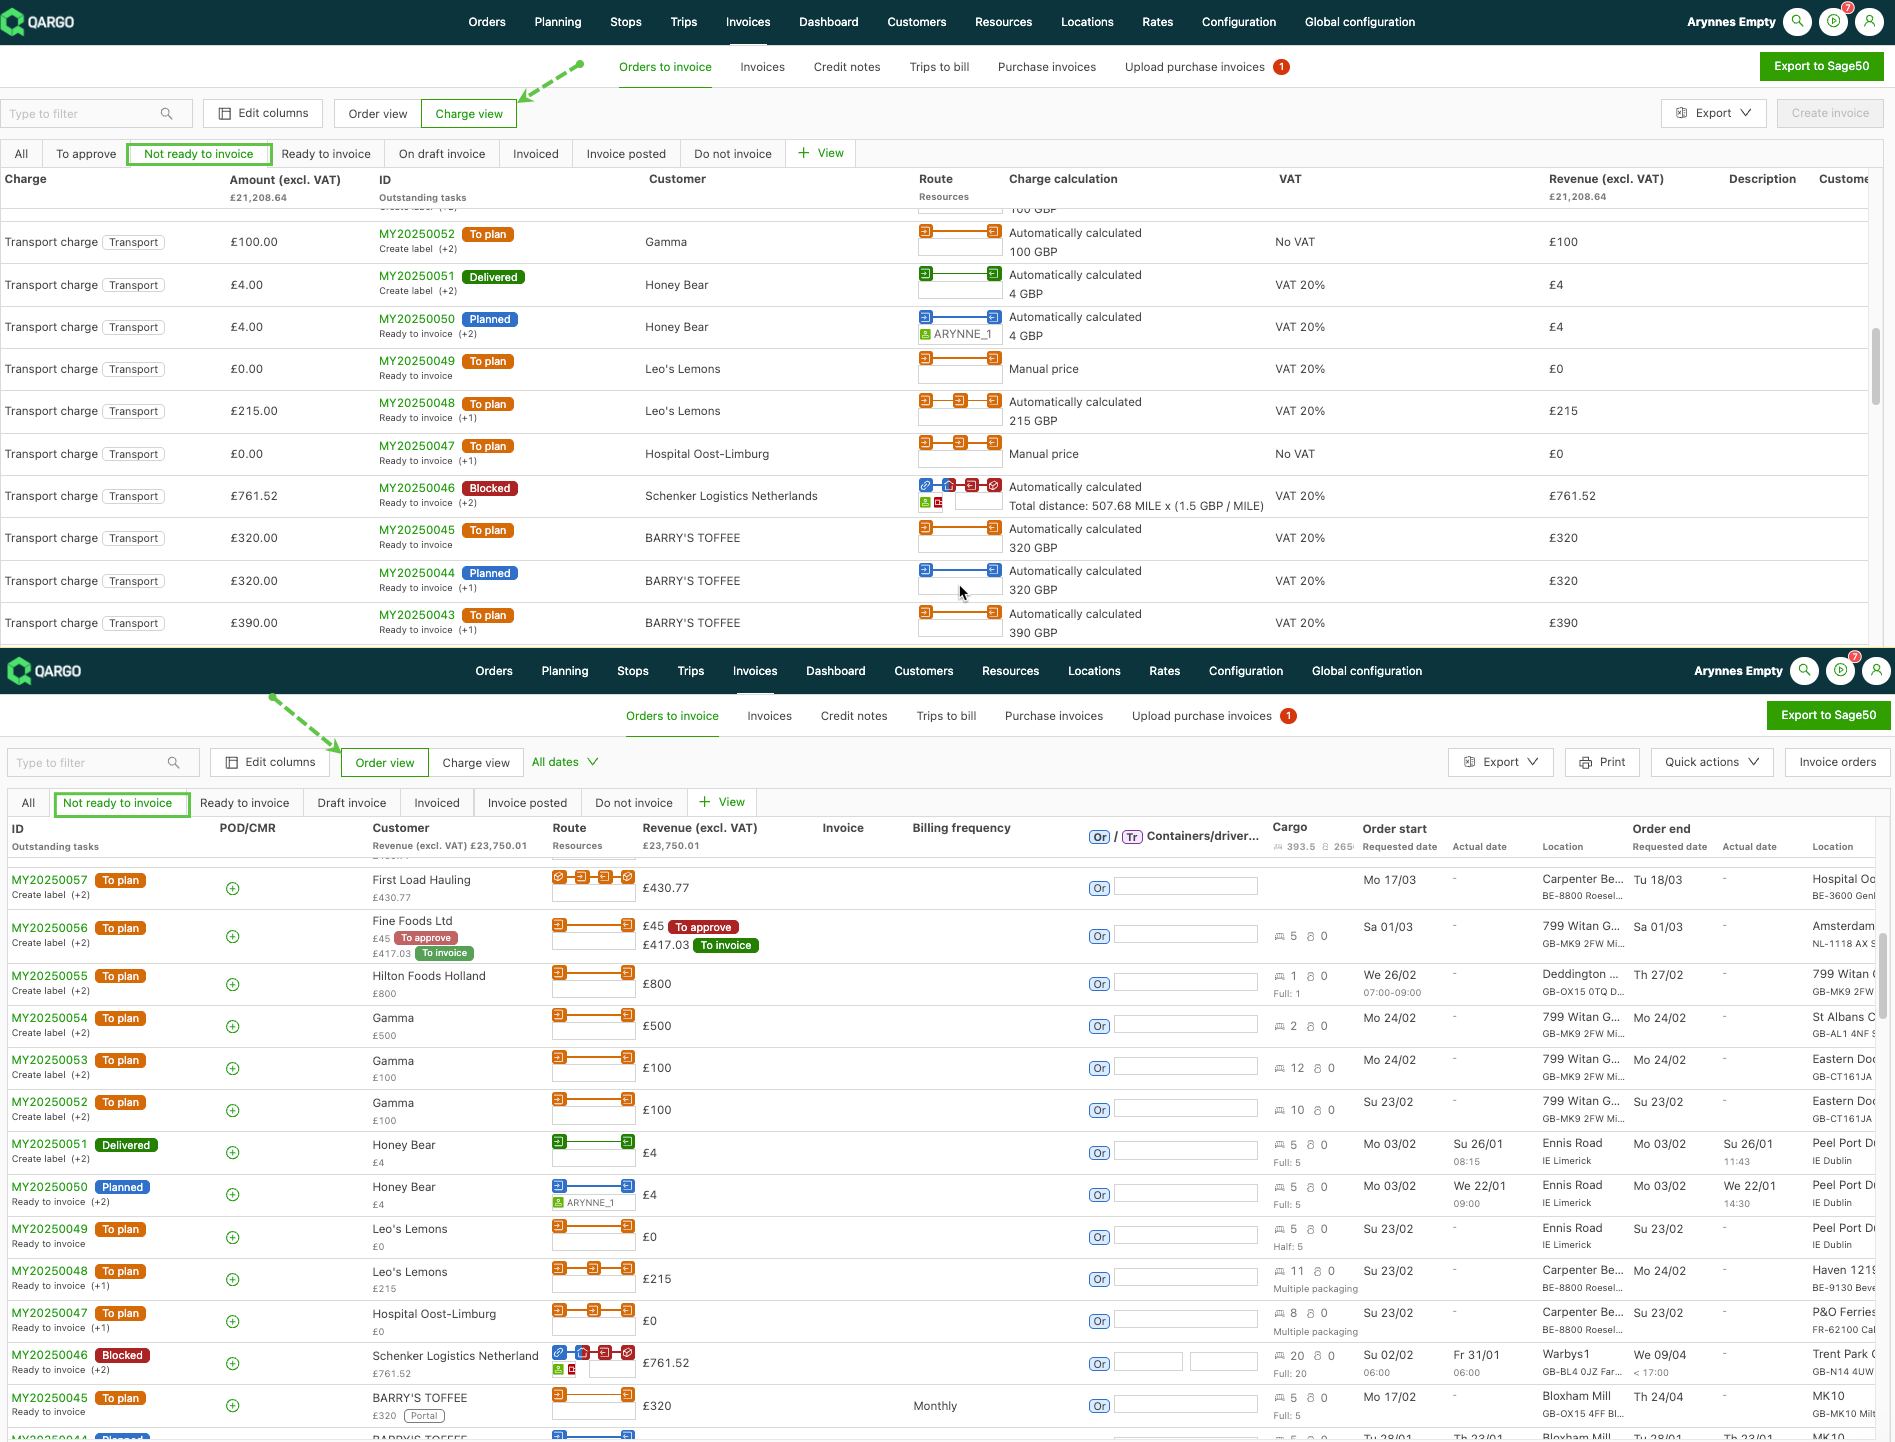
If charges need to be updated, clicking anywhere in the row opens the order details, where they can be updated as required. In the Charge view, it is possible to update the charges directly from the screen.
Ready to invoice
Once an order or charge is confirmed, it can be set to ‘Ready to invoice’, which makes it available to be invoiced.
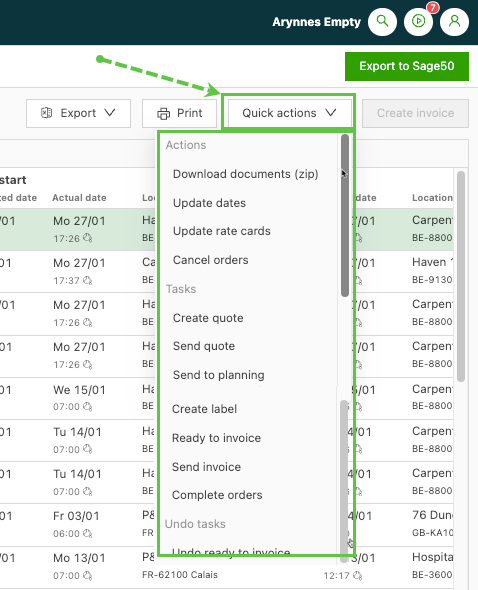
The Order view offers a wider choice of functions via the ‘Quick actions’ menu. This provides a variety of functions associated with processing invoices, including downloading documents or setting the order status back to ‘Not ready’ if necessary.
From the Charge view, clicking the checkboxes combines charges to create an invoice. In this way, it is possible to separate charges from a single invoice if necessary.
Once all auditing is complete and the orders or charges are ready to be invoiced, select the checkboxes and click the ‘Create invoice’ button. In the Order view, this automatically includes all charges on the order. In the Charge view, charges are sorted by charge, so make sure to select all the charges to be included on the order.
See the link below for a complete overview of creating an invoice.
Draft invoice / On draft invoice
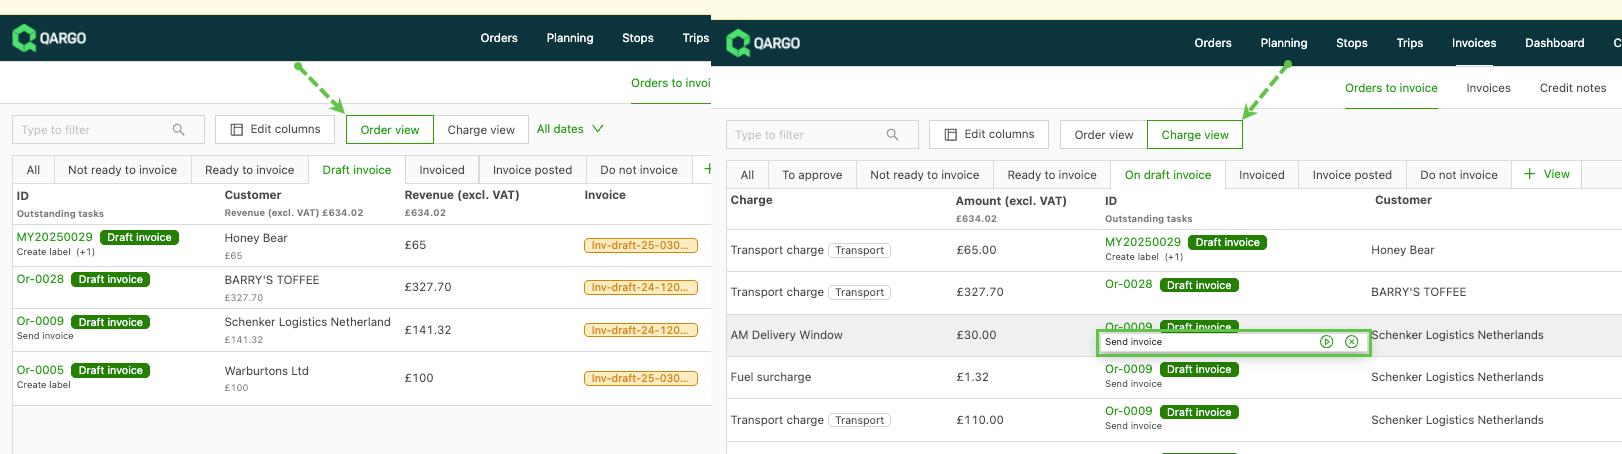
A draft invoice allows users to create and review an invoice before finalizing it. Draft invoices are given a unique ‘DRAFT’ invoice number. In the ‘Orders to invoice’ screens, these still show under either the order number (Order view) or the charge description (Charge view), with a status of ‘Draft invoice’. The invoice functionality is limited to the ‘Send invoice’ task in both the Order view and the Charge view. However, in the Charge view, the charges can also be updated from the main list.
Invoiced
Once an invoice has been created, the order / charge shows in the ‘Invoiced’ tab view. The Invoice column now includes the invoice number assigned to the order / charge. In the Order view, the orders are still grouped by order number, and the Charge view still groups them by charge type.
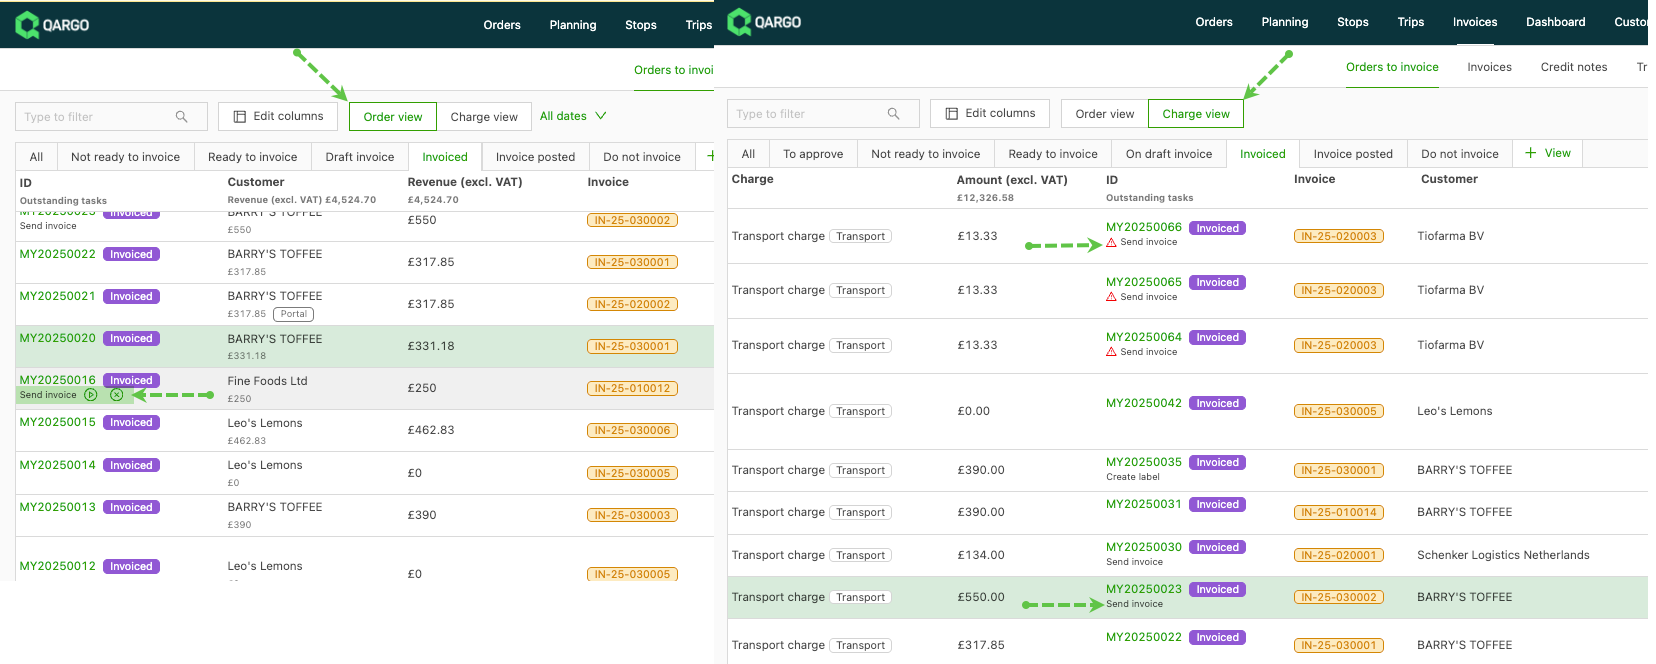
Functionality is limited. It is still possible to update the charges in the Charge view screen, while in the Order view, clicking the order number opens the order details, where the charges can be updated. Once any changes have been made, the ‘Send invoice’ task shows so that the updated details can be resent to the customer. If there are any errors, an alert shows on the task.
Invoice posted
An invoice with a Posted status indicates that the invoice has been generated and issued to the customer. Once in a posted status, no further updates can be made to the charges and order details. It is possible to add additional charges to the order; however, this does not affect the posted invoice. It moves the order back to a ‘Ready to invoice’ status for the new charges added, which need to be invoiced separately from the posted invoice. For adjustments after posting, consider using credit memos or standalone invoices for additional charges. Credit memos can reverse the original charges and allow a corrected invoice to be reissued, while standalone invoices cover missed charges without altering the original posted invoice. These approaches ensure accurate and transparent financial records.

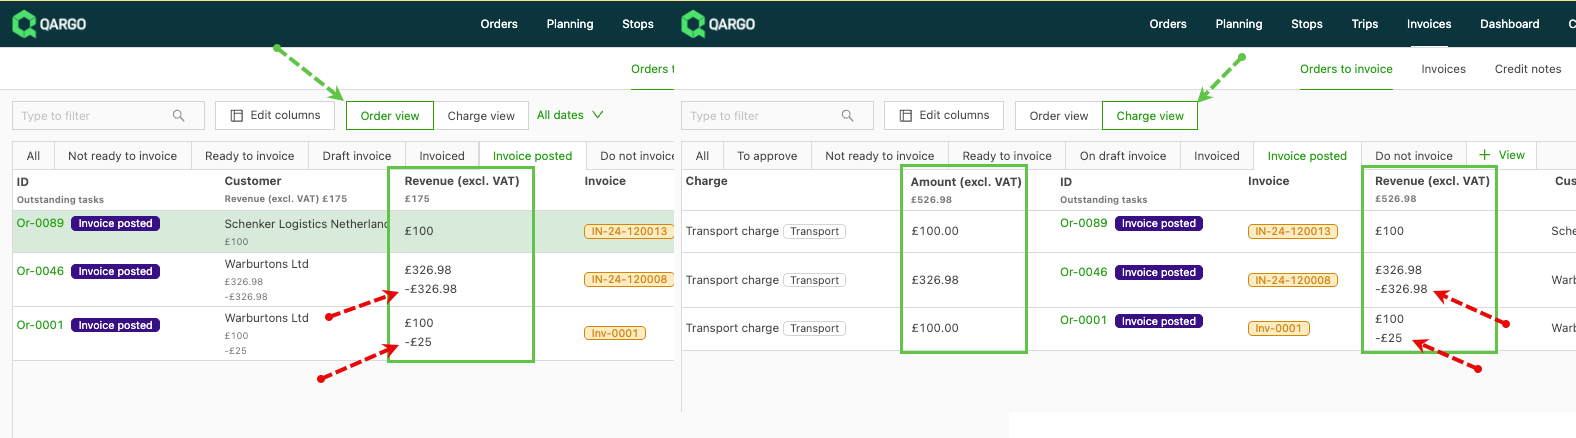
If any changes are required to the posted invoice, a credit memo can be created for either a specific charge on the invoice or the whole invoice. If a credit memo is created, it is shown as a negative amount in the Revenue column. Alternatively, if creating a credit memo is not preferred, a standalone invoice can be issued to include any additional charges separately. This method is ideal for smaller adjustments and avoids changes to the original invoice.
In some circumstances, it is possible for a Super Admin user to unpost an invoice.
Depending on individual business requirements, posted invoices can be exported in a format that allows data to be transferred to third-party accounting software. Where integrations exist, this process can be carried out through a direct transfer. For a complete guide on correcting or adjusting invoice amounts after posting, refer to the sections on credit memos, standalone invoices, and editing invoices while in editable statuses. Each method offers flexibility depending on the scope of the adjustment and the status of the invoice.
Do not invoice
Marking an order or charge as ‘Do not invoice’ removes the revenue amount and sets the value to ‘0’. When creating an invoice, there are 2 ways to use the ‘Do not invoice’ option:
- Manually mark an order / charge as ‘Do not invoice’.
- Configure charges to be set automatically to ‘Do not invoice’ when the amount is zero. This is configured in the charge settings as ‘don’t invoice if amount is 0’.
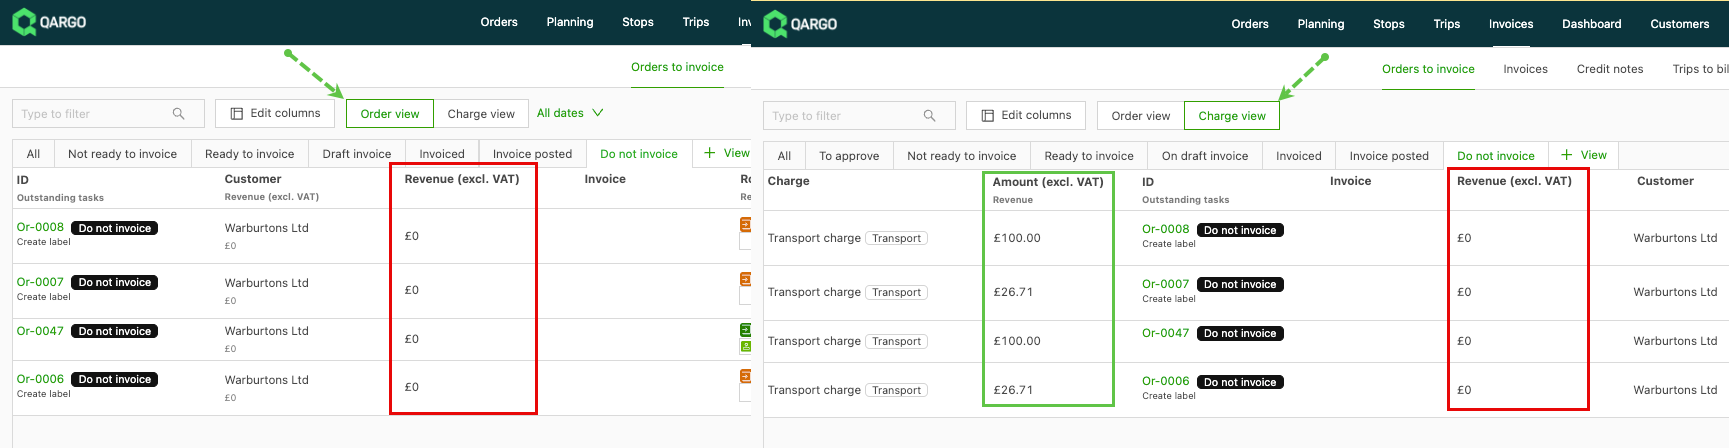
The Charge view retains the original charge amount, but the revenue is set to 0. The Order view only shows the revenue amount as 0.
Custom view (+)
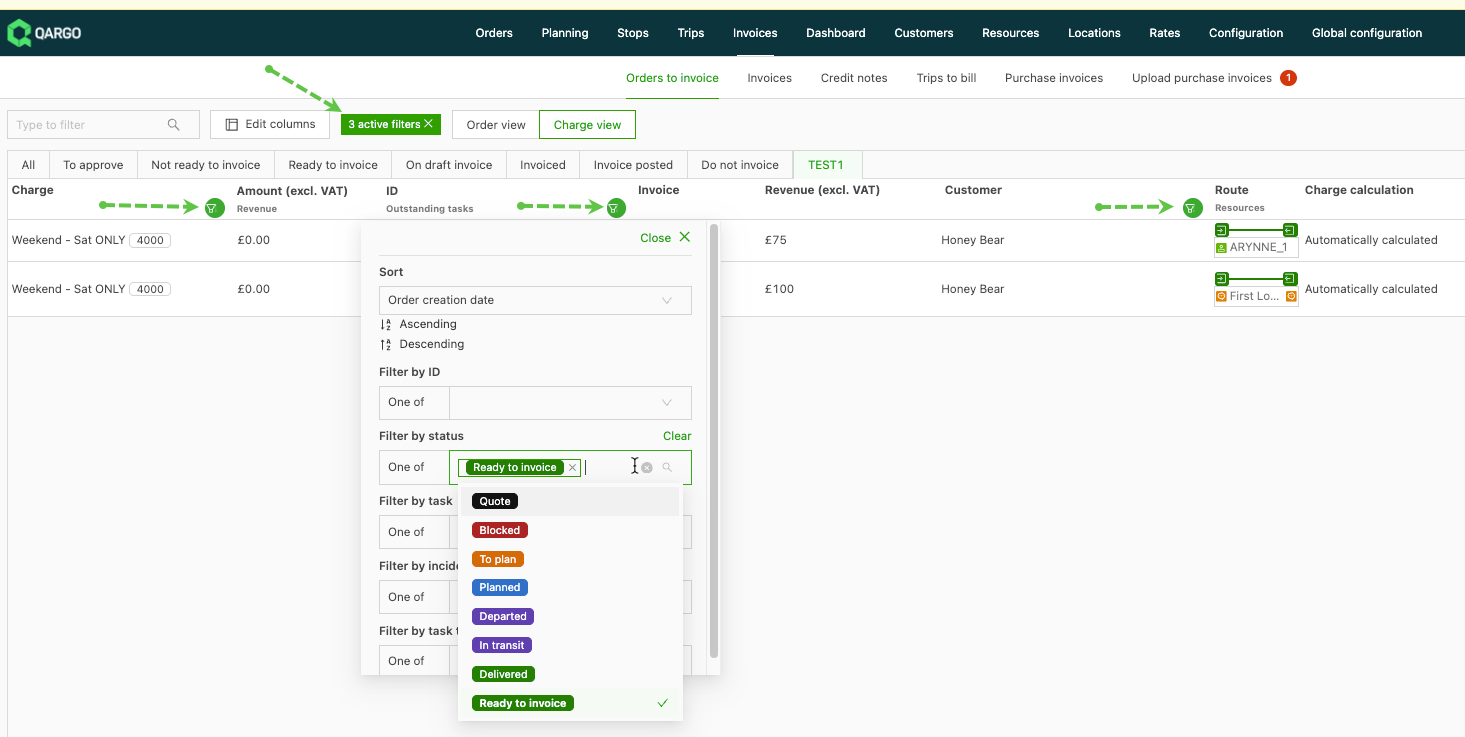
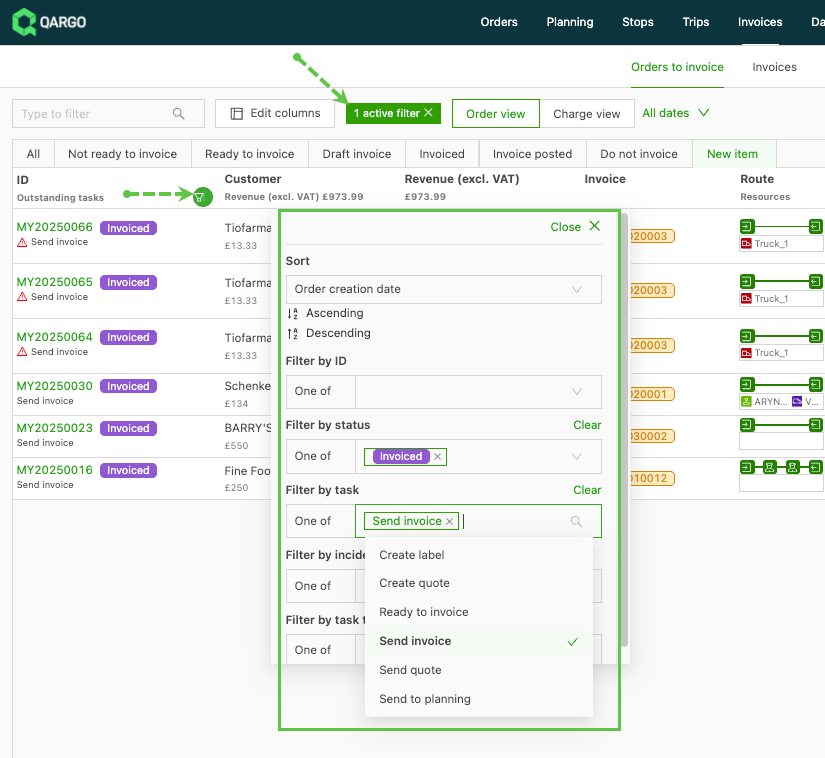
Each view (Order / Charge) offers the option to create a custom view. When + View is first selected, the default shows as All. Each column header has filtering options, which can then be used to tailor the view to individual requirements. Once a filter is applied to a column, the filter icon shows in green, and an indicator shows how many filters are active. In some cases, it is possible to add multiple options to the filter.
Surcharge revenue column
The Surcharge revenue column, available on the ‘Orders to invoice’ page and also on the Orders overview page, shows which surcharges make up the total and can be filtered by surcharge name. This makes it possible to list every order that is missing a specific surcharge before billing, for example a holiday surcharge on a public holiday.
Add the Surcharge revenue column
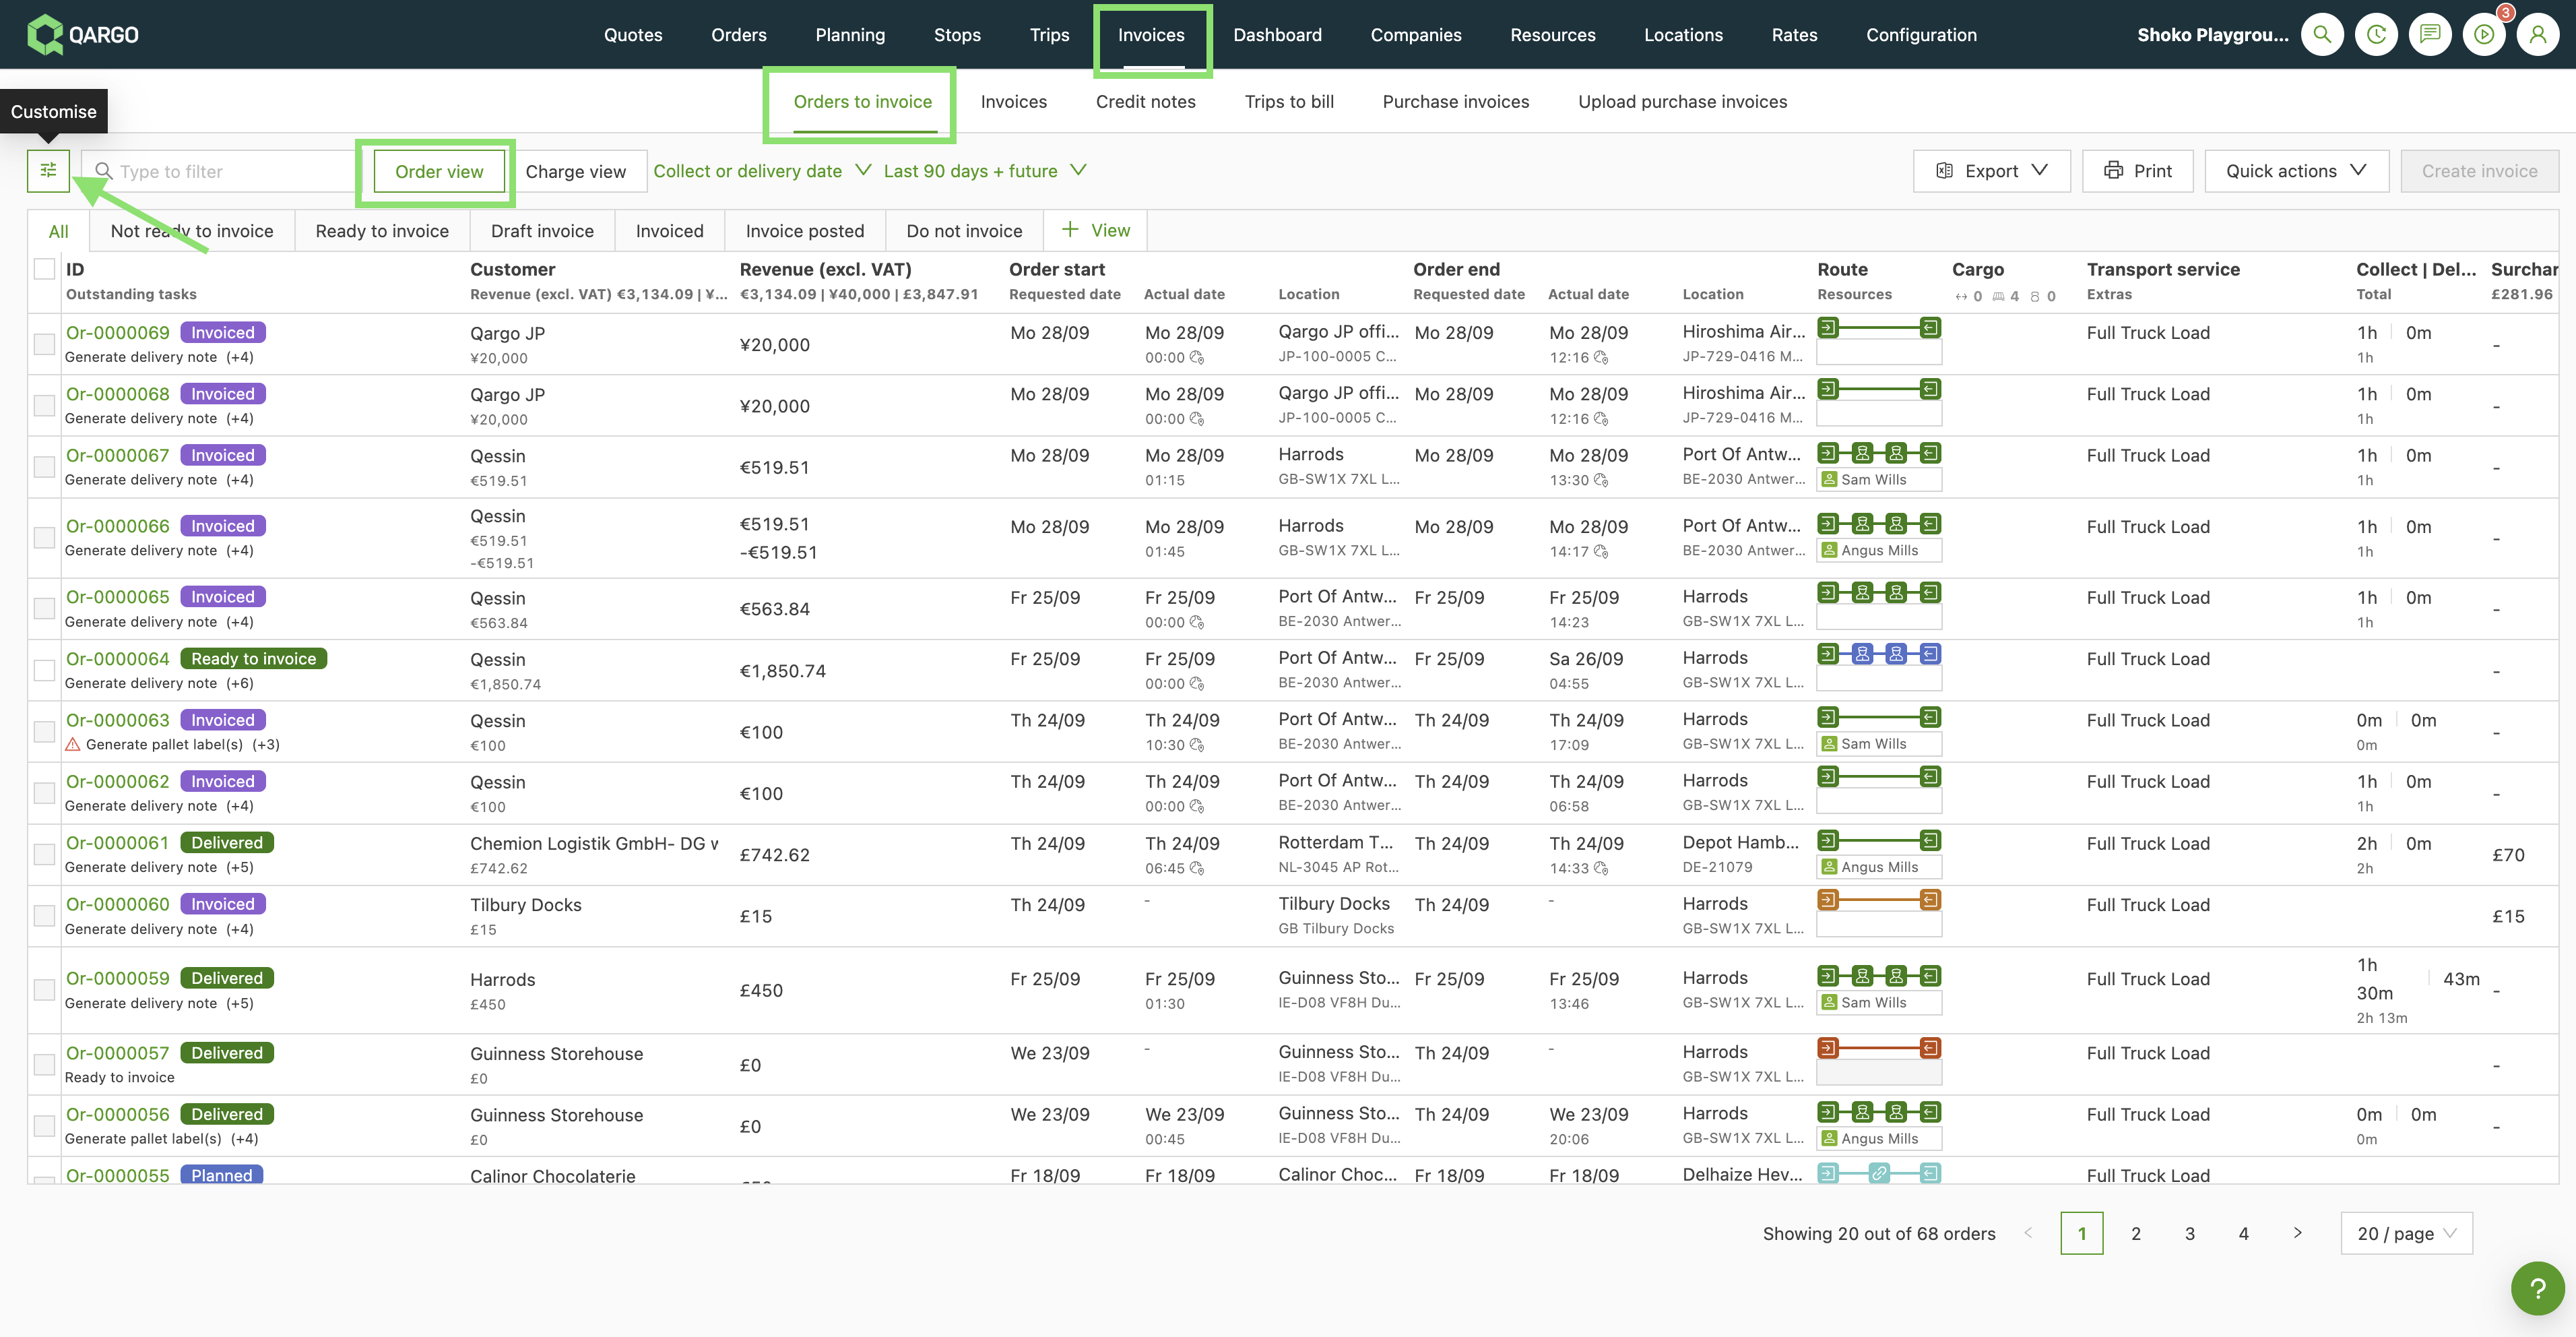
- Navigate to Invoices > Orders to invoice, then select the Order view.
- Click Customize.
- Toggle on the Surcharge revenue column in the Profitability section.
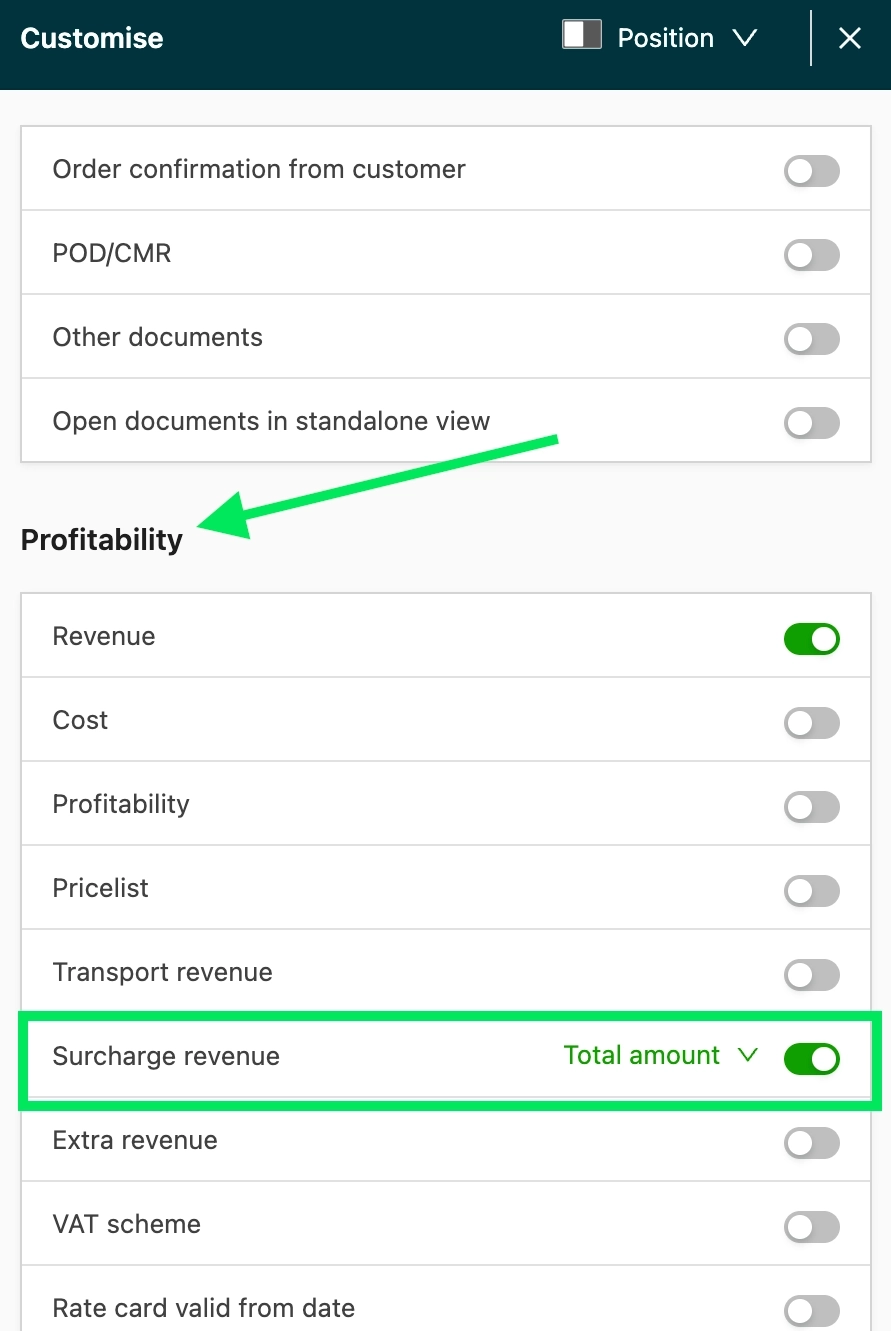
Switch the display mode
-
Navigate to the Surcharge revenue column toggle in the Customize panel.
-
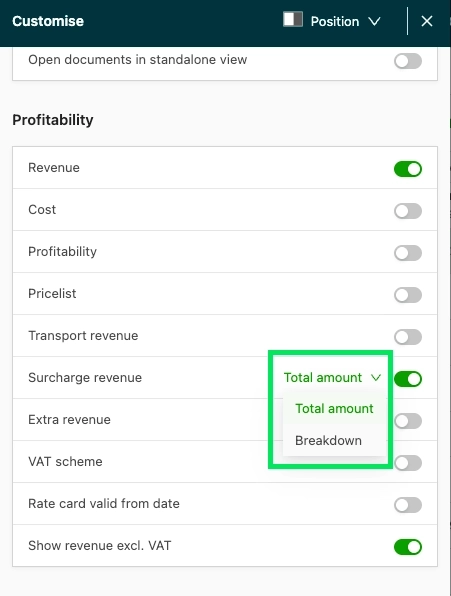
Click the dropdown button next to the toggle.
-
Select a display mode:
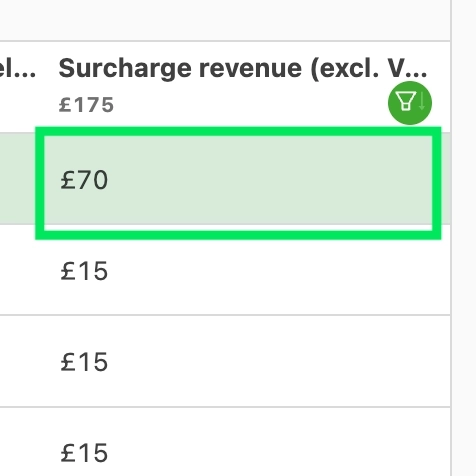
- Total amount: a single combined total.
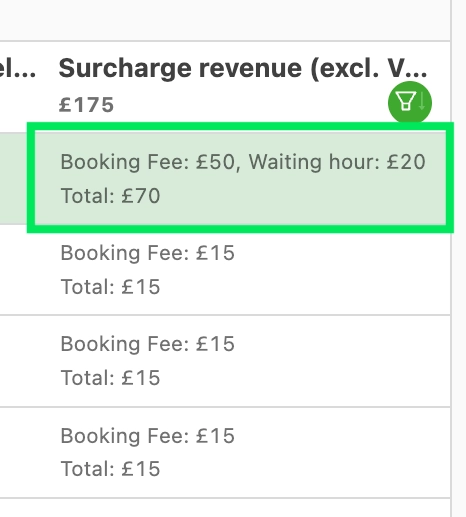
- Breakdown: each surcharge listed by name and amount, e.g., Booking fee: £50, Waiting hour: £20, followed by the total.
Total amount:
Breakdown:
Filter by surcharge name
- Click the filter icon on the Surcharge revenue column header.
- Choose Is or Is not.
- Pick a surcharge name.
For example,
Is + ‘Booking fee’ lists every order containing the Booking surcharge.
Is not + ‘Booking fee’ lists orders missing the Booking surcharge. - Save the view to keep the display mode and filter for next time.
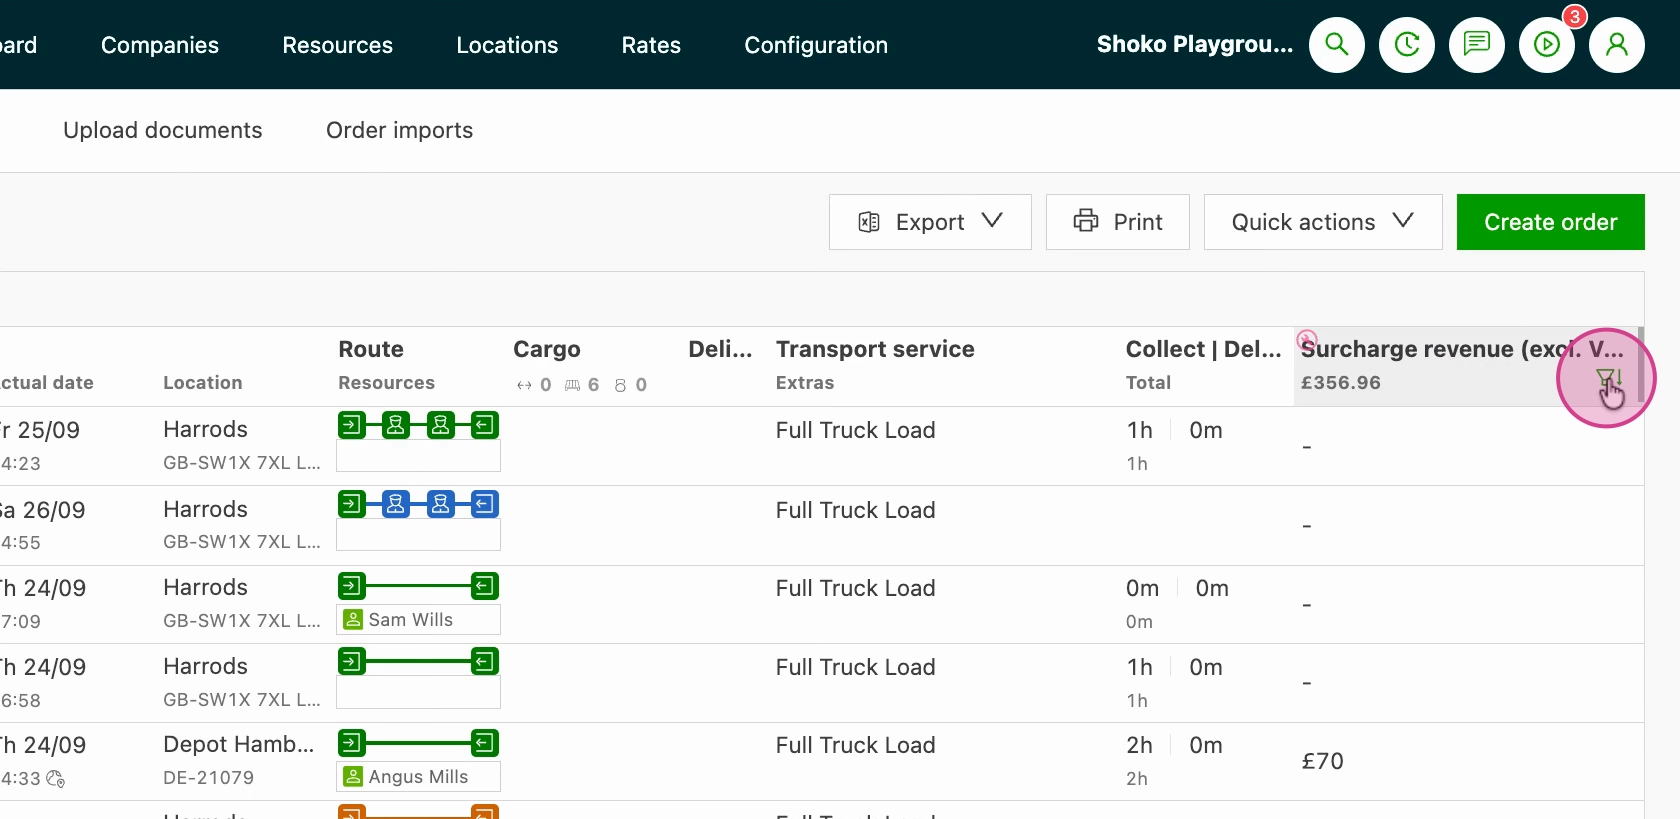
Video showing how the filtering works:
Troubleshooting:
| Issue | Resolution |
|---|---|
| The filter icon is not visible on the Surcharge revenue column. | If the filter icon isn’t visible after enabling the column, scroll the table to the right (at narrower screen widths, 1440px and below, the Surcharge revenue column can sit beyond the visible area). Alternatively, turning off a few other columns brings it into view without scrolling, if it needs to stay visible in a saved view. |