
Companies: Create a new customer
Learn how to add new customer accounts to Qargo with this step-by-step guide.
Table of contents
Introduction
Creating new companies in Qargo is a straightforward process. It helps collect and manage all the details needed for orders, invoices and communication.
A common use case for this feature is a business onboarding a new client. The business can then track the client’s orders and payment details efficiently and set credit limits for smoother financial control.
Key terminology
- Customer: A business or individual that receives services managed through Qargo.
- Order: A service request entered in the system on behalf of a customer.
- Credit limit: The maximum outstanding invoice balance a customer can carry before a warning is triggered.
- Status: The current relationship stage of the customer (Prospect, Approved, Not approved, Warning, Blocked).
- Invoice: A bill sent to the customer for services rendered.
Steps for adding a new customer
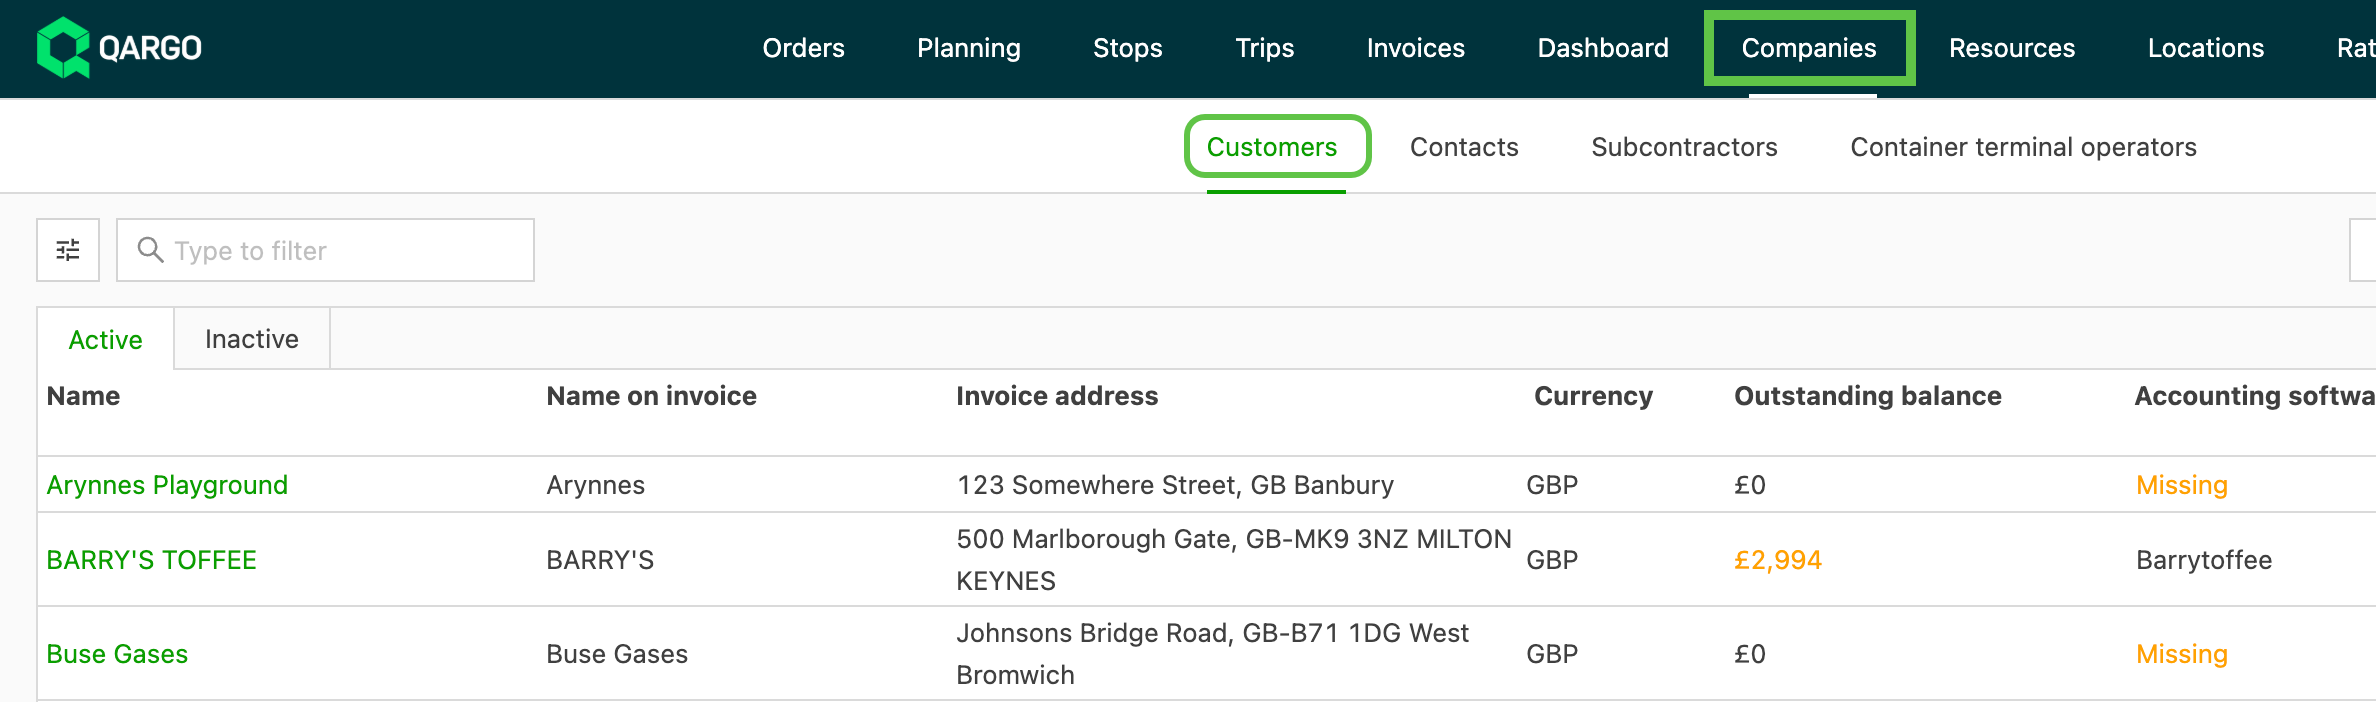
1. Go to the Companies tab: Start from the main navigation menu and click Companies.
2. Click the Customers submenu: This opens the customer list page, where current customers can be viewed.
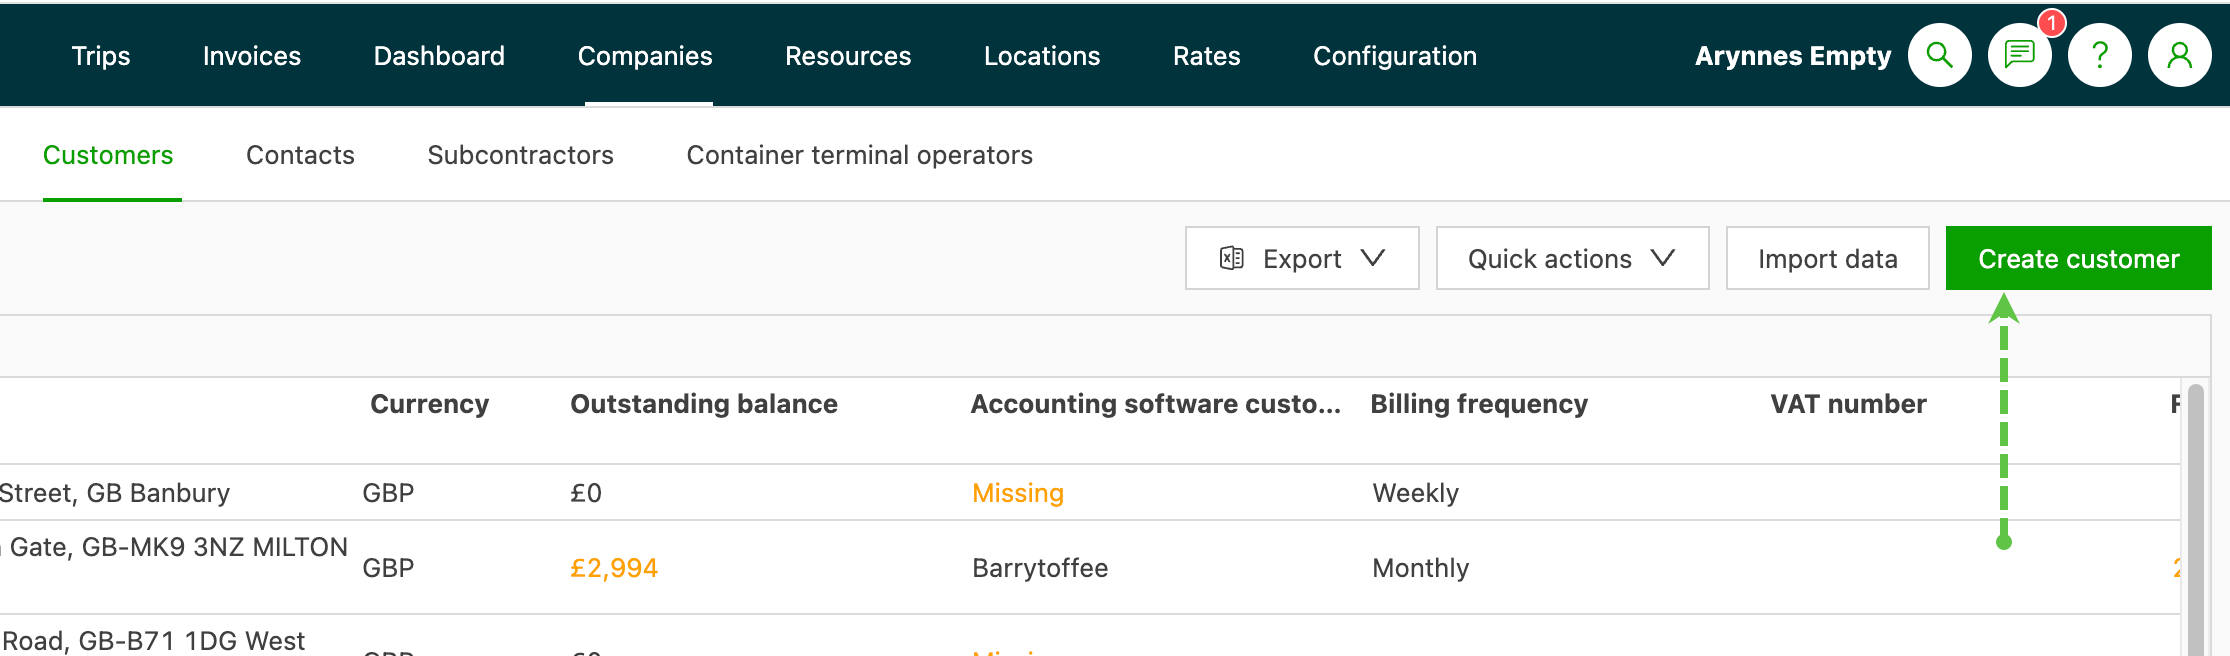
3. Start creating the customer: Click the Create customer button at the top right of the page.
4. Search for the customer’s company: Start typing the customer’s company name. A Google Search box appears. It helps find the company and auto-fills company details such as the address.
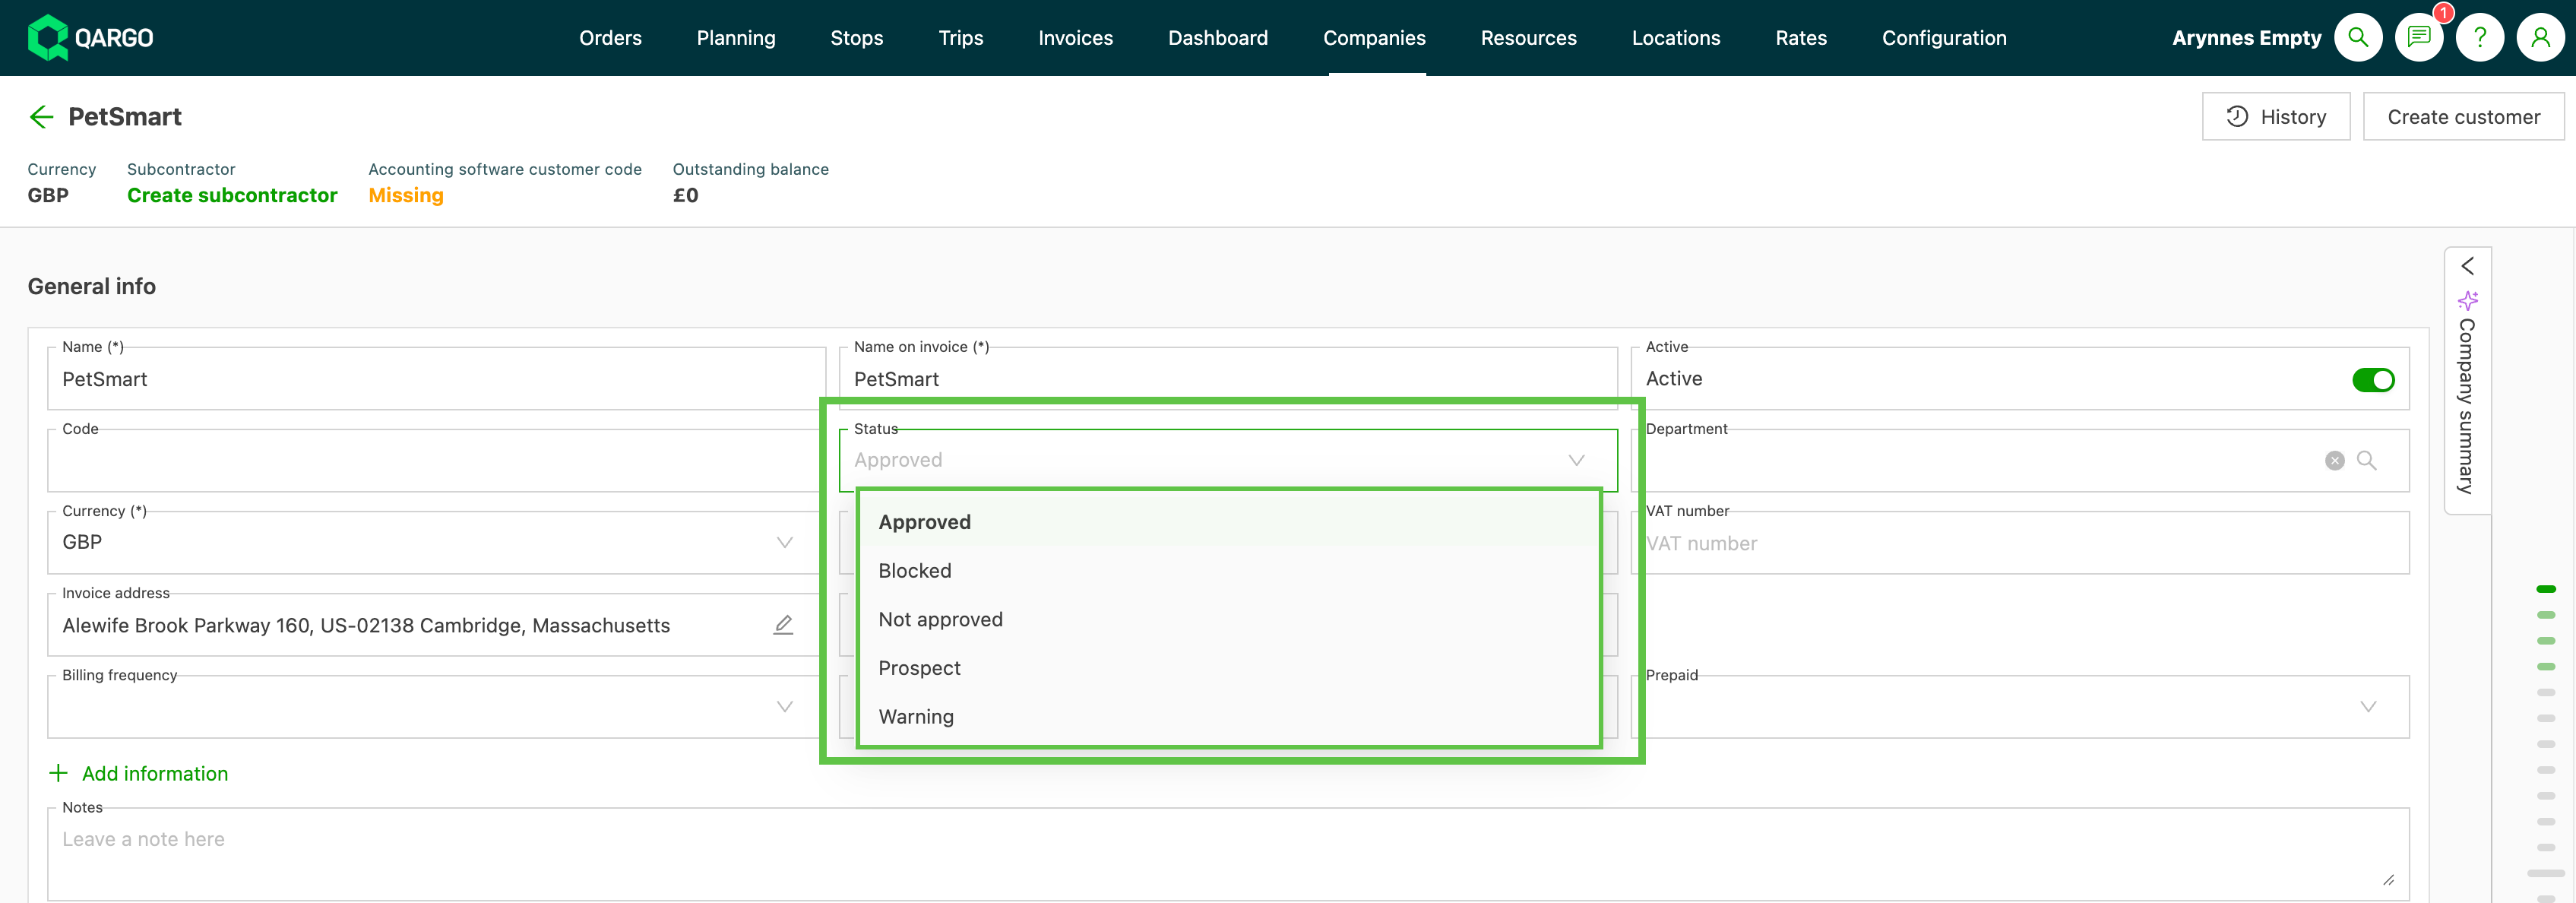
5. Fill in the customer details: Complete the customer form and select a status:
- Prospect: The company is a potential customer but is not yet approved. Only quotes can be created; no orders can be placed.
- Not approved: The company is not yet fully approved as a customer. This is an intermediate step between Prospect and Approved. The same permissions as Prospect apply.
- Approved: The customer is approved. Orders can be placed without restrictions.
- Warning: The customer is approved, but a warning is triggered when an order is created. The operator can dismiss the warning and continue with the order.
- Blocked: The customer is blocked; no new orders can be created.
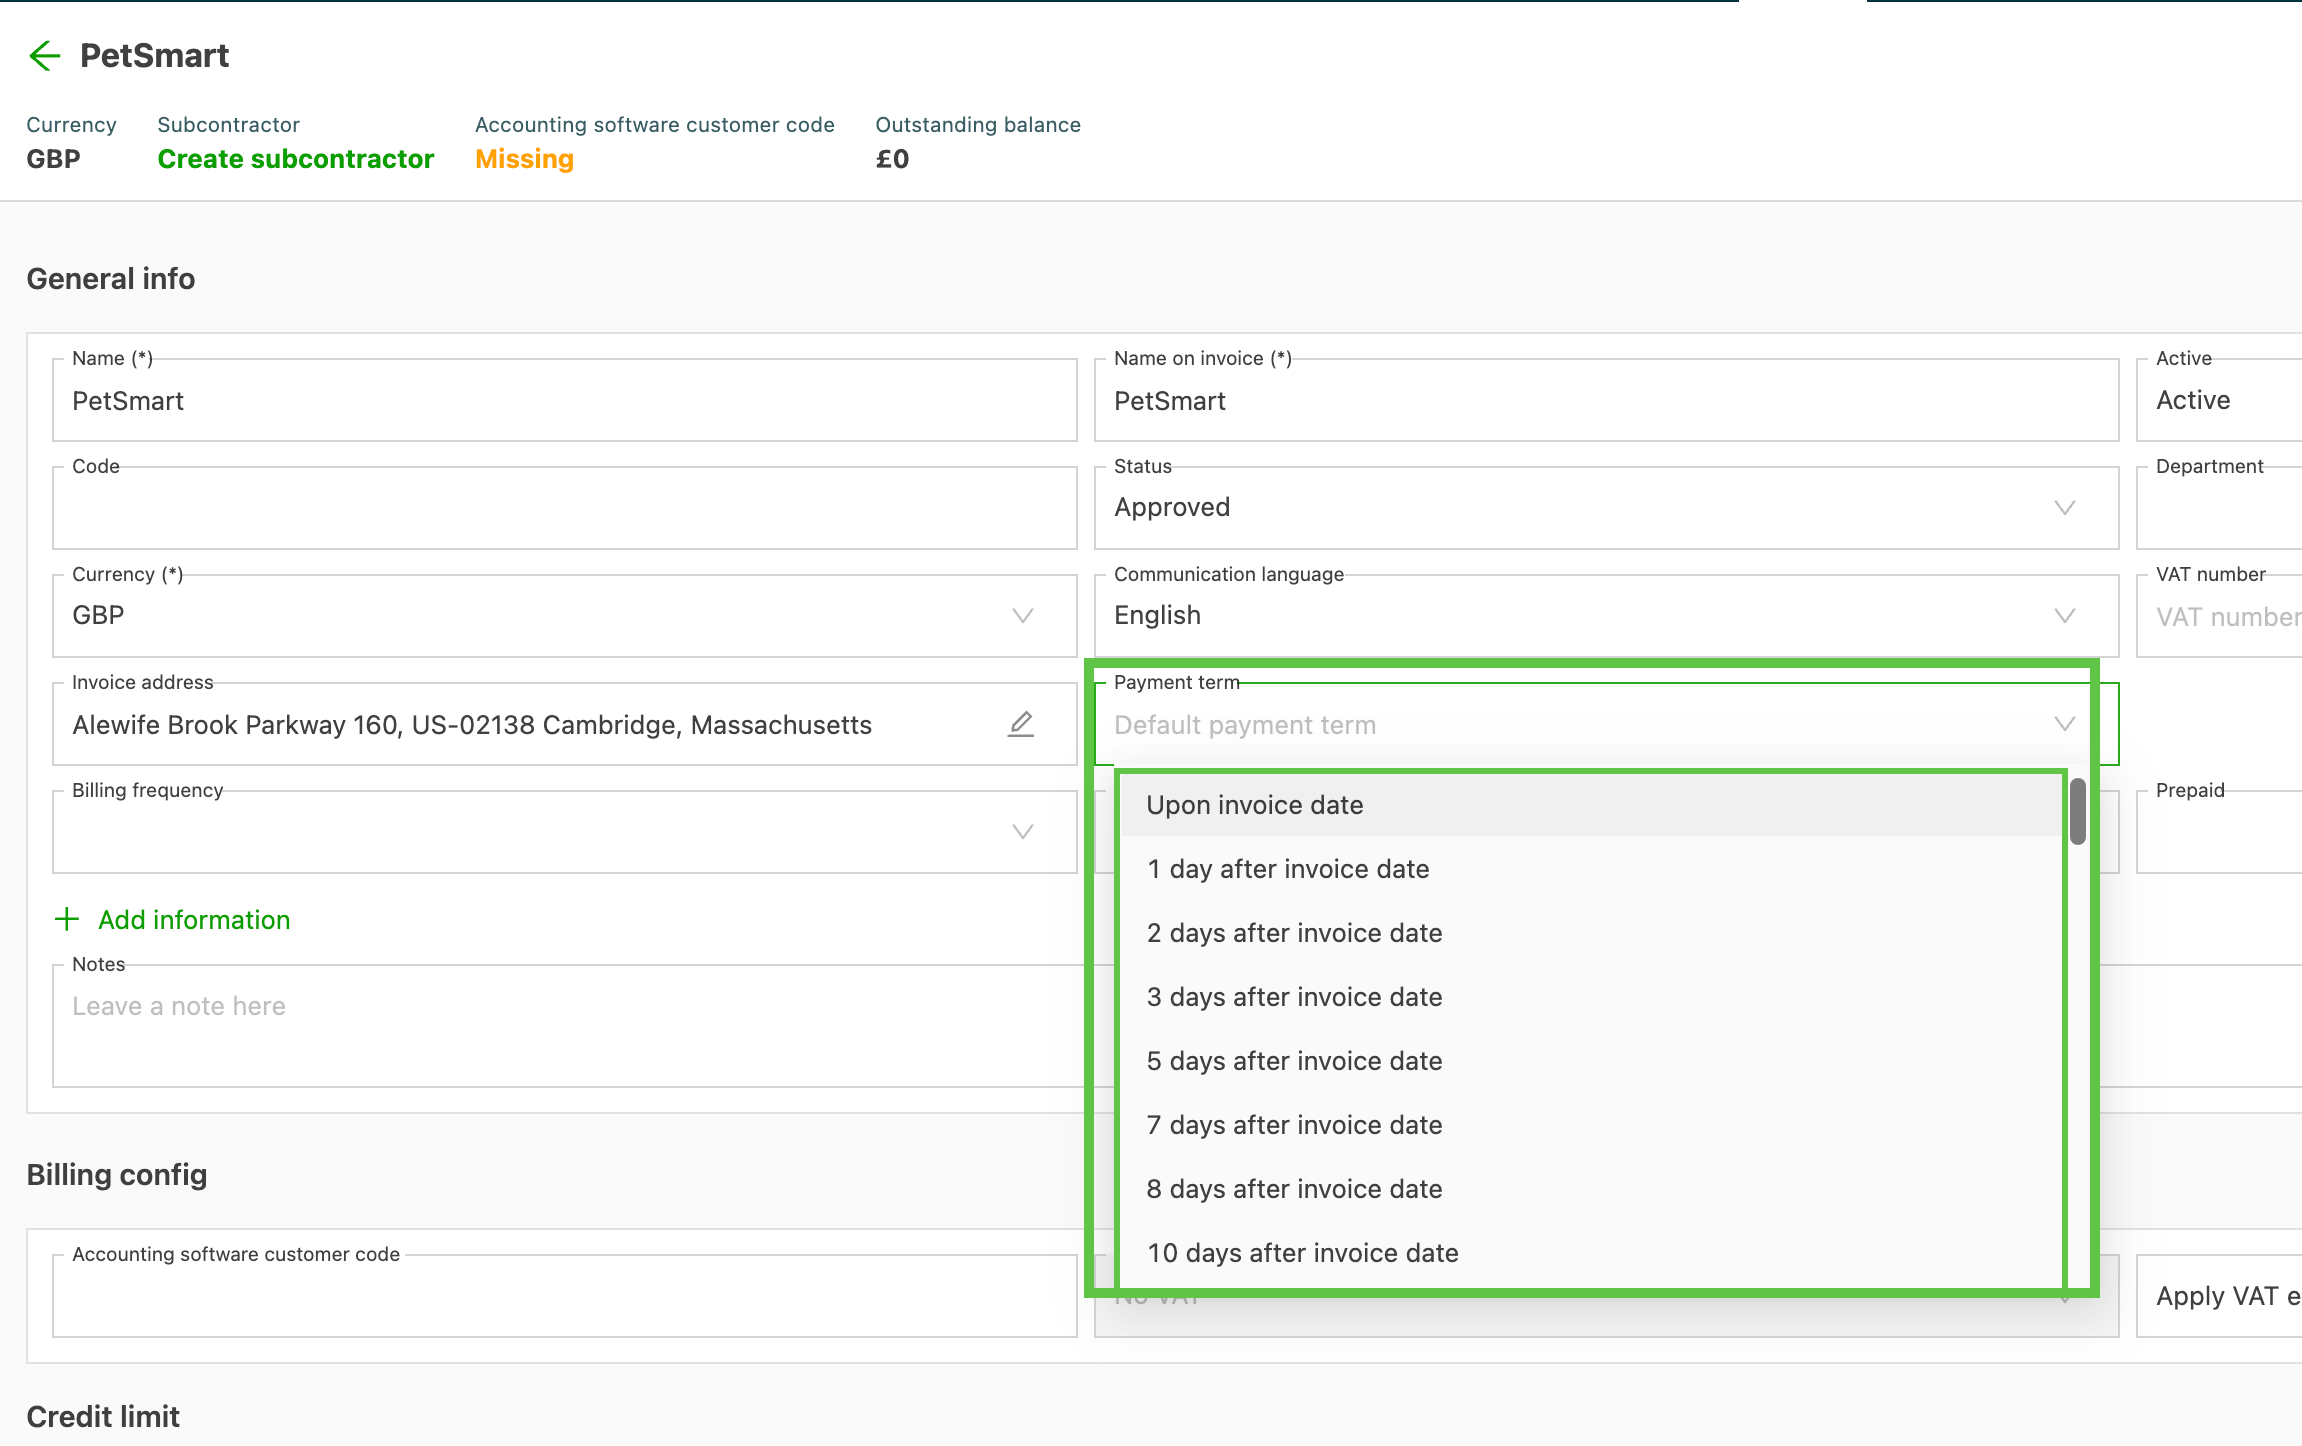
6. Set payment terms: Add payment terms and other account details as needed.
Creating a customer from the Orders tab
This is a useful shortcut for quickly adding a new customer while creating an order.
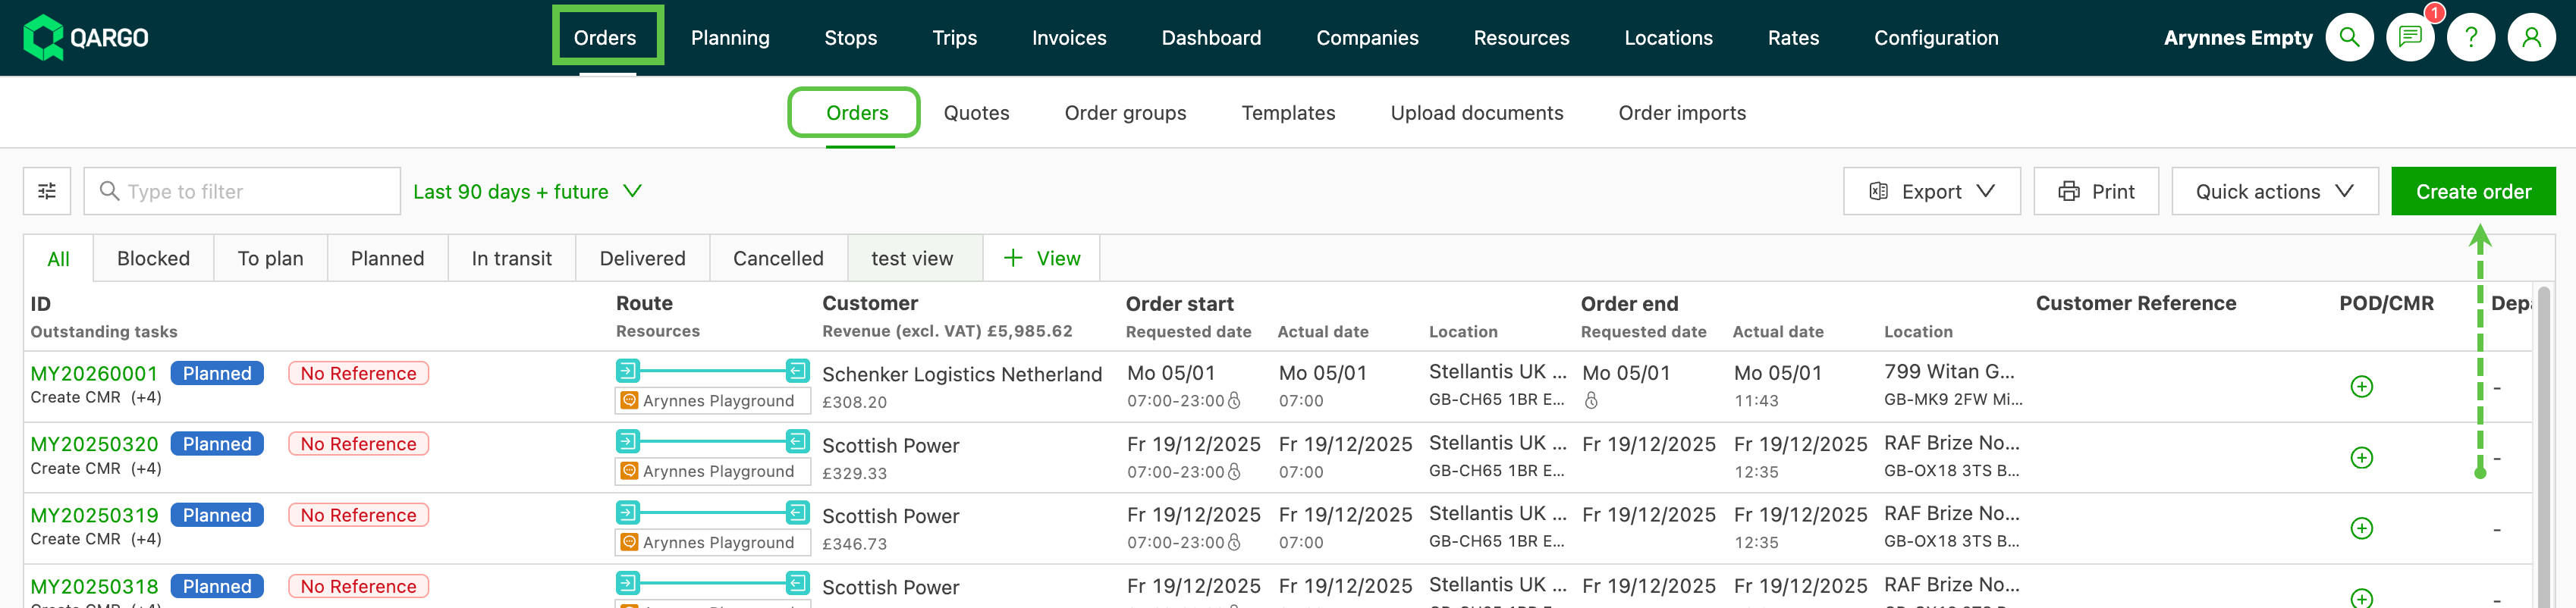
- Go to the Orders tab: In the submenu, click the Orders tab and click the Create order button.
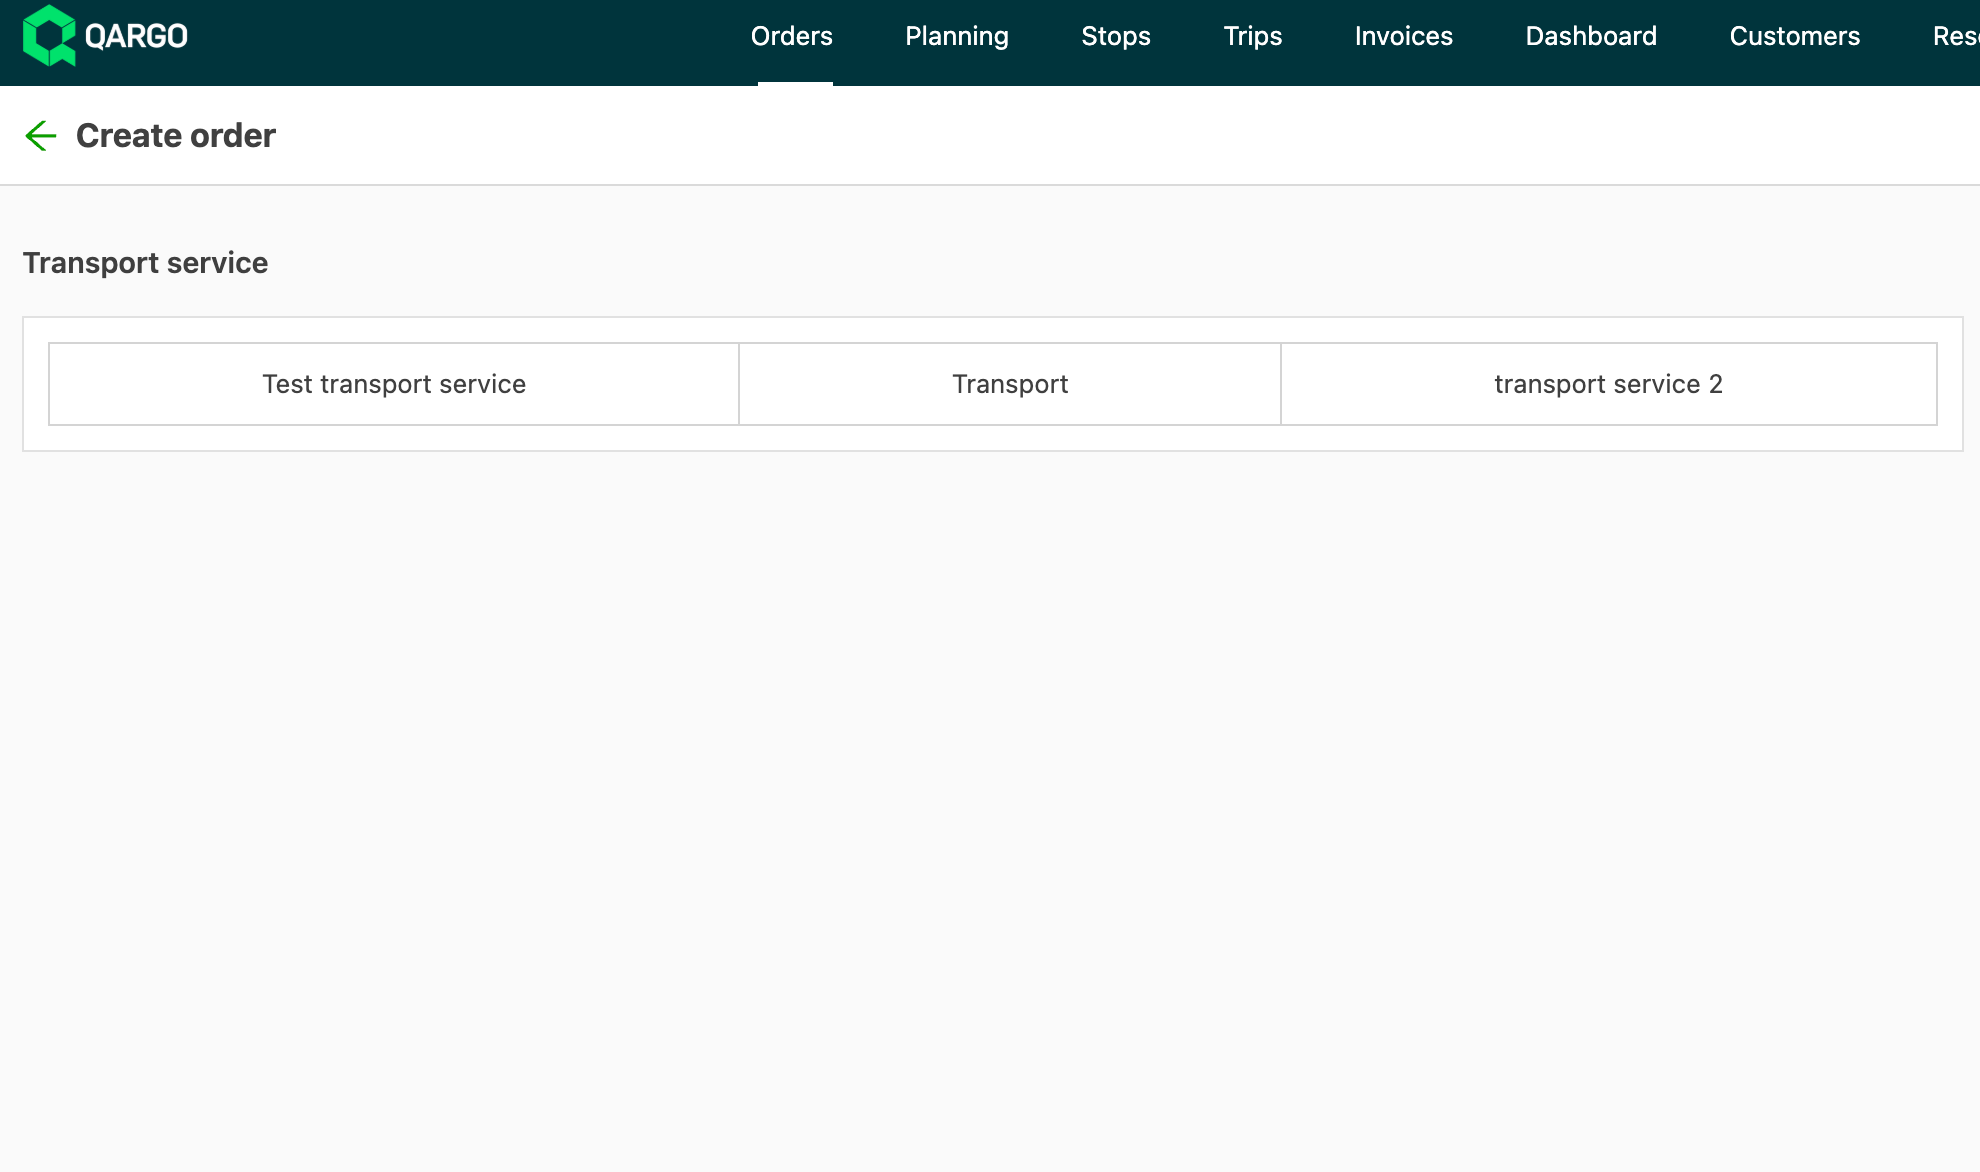
2. Select the transportation service: From the available options, select the transportation service required.
3. Create a new customer: Click the Customer box. A list of existing customers appears. Scroll to the bottom of this list and select the + Create new customer option. Fill in the required customer details and click Save.
Setting customer credit limits
A customer credit limit makes it possible to monitor and control outstanding receivables. This helps a business stay financially healthy.
Configure organization settings for credit limit calculation and limits
Users can set how the credit limit is accrued in 2 different ways:
- Revenue from all orders
- Revenue from invoiced orders only
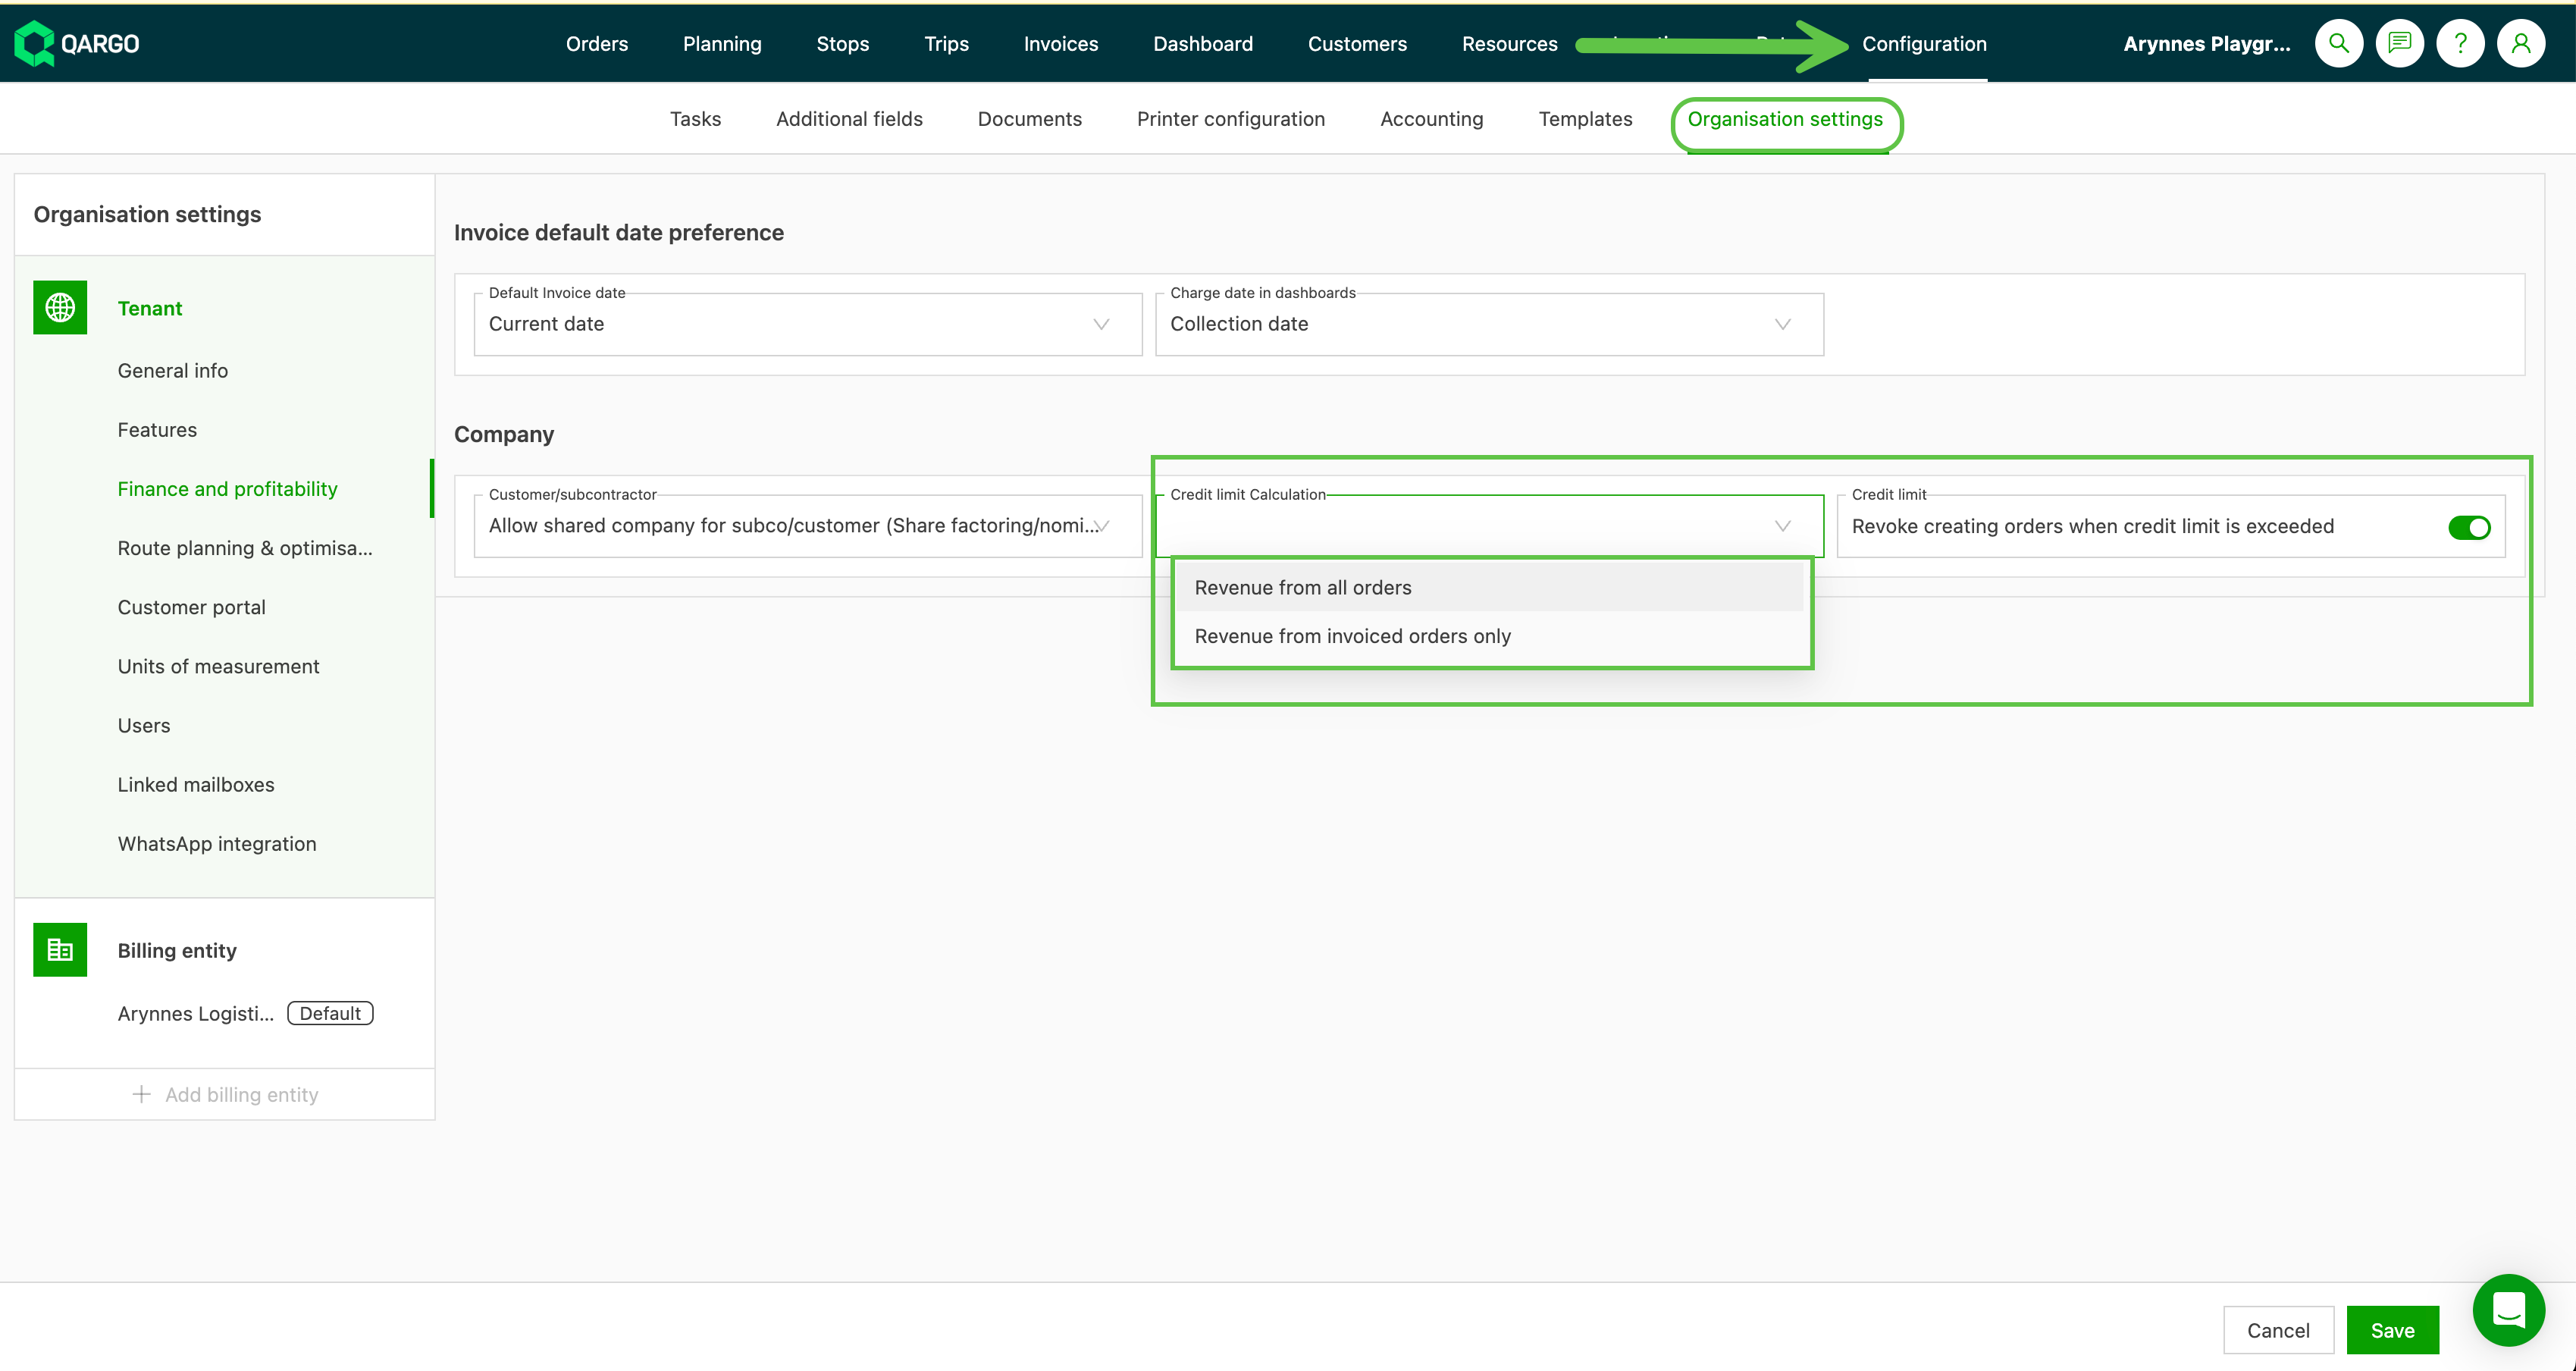
Configuration to use credit limits
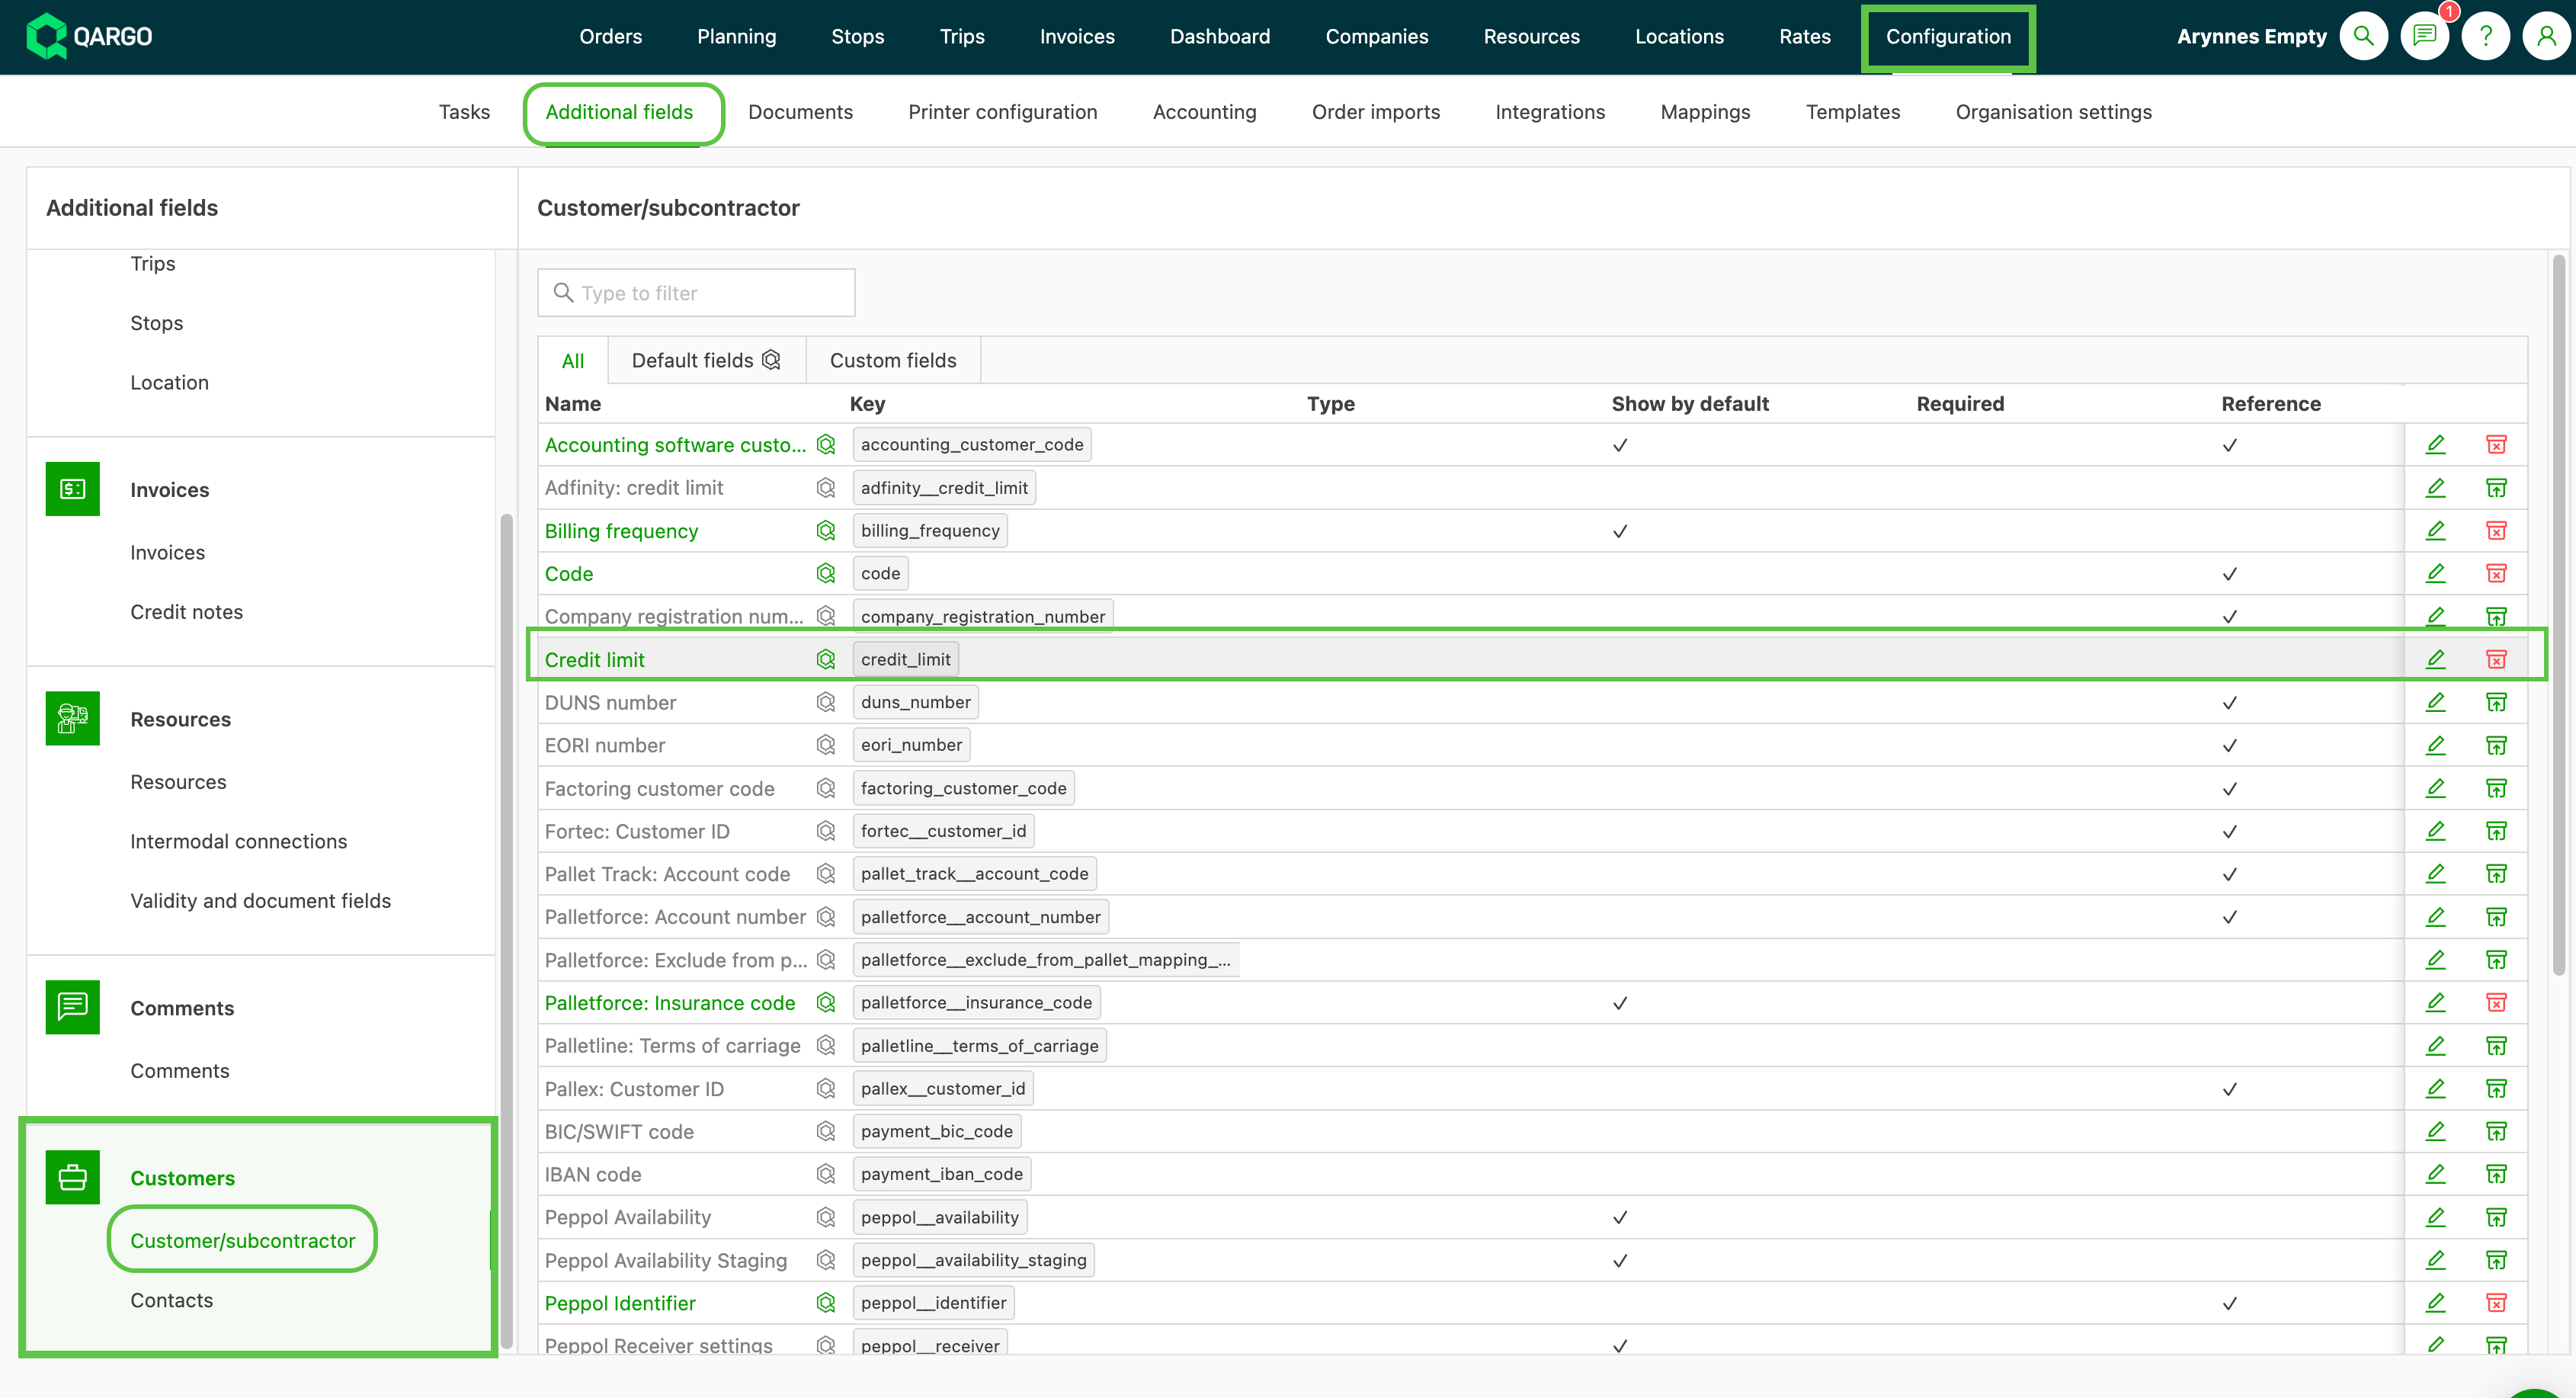
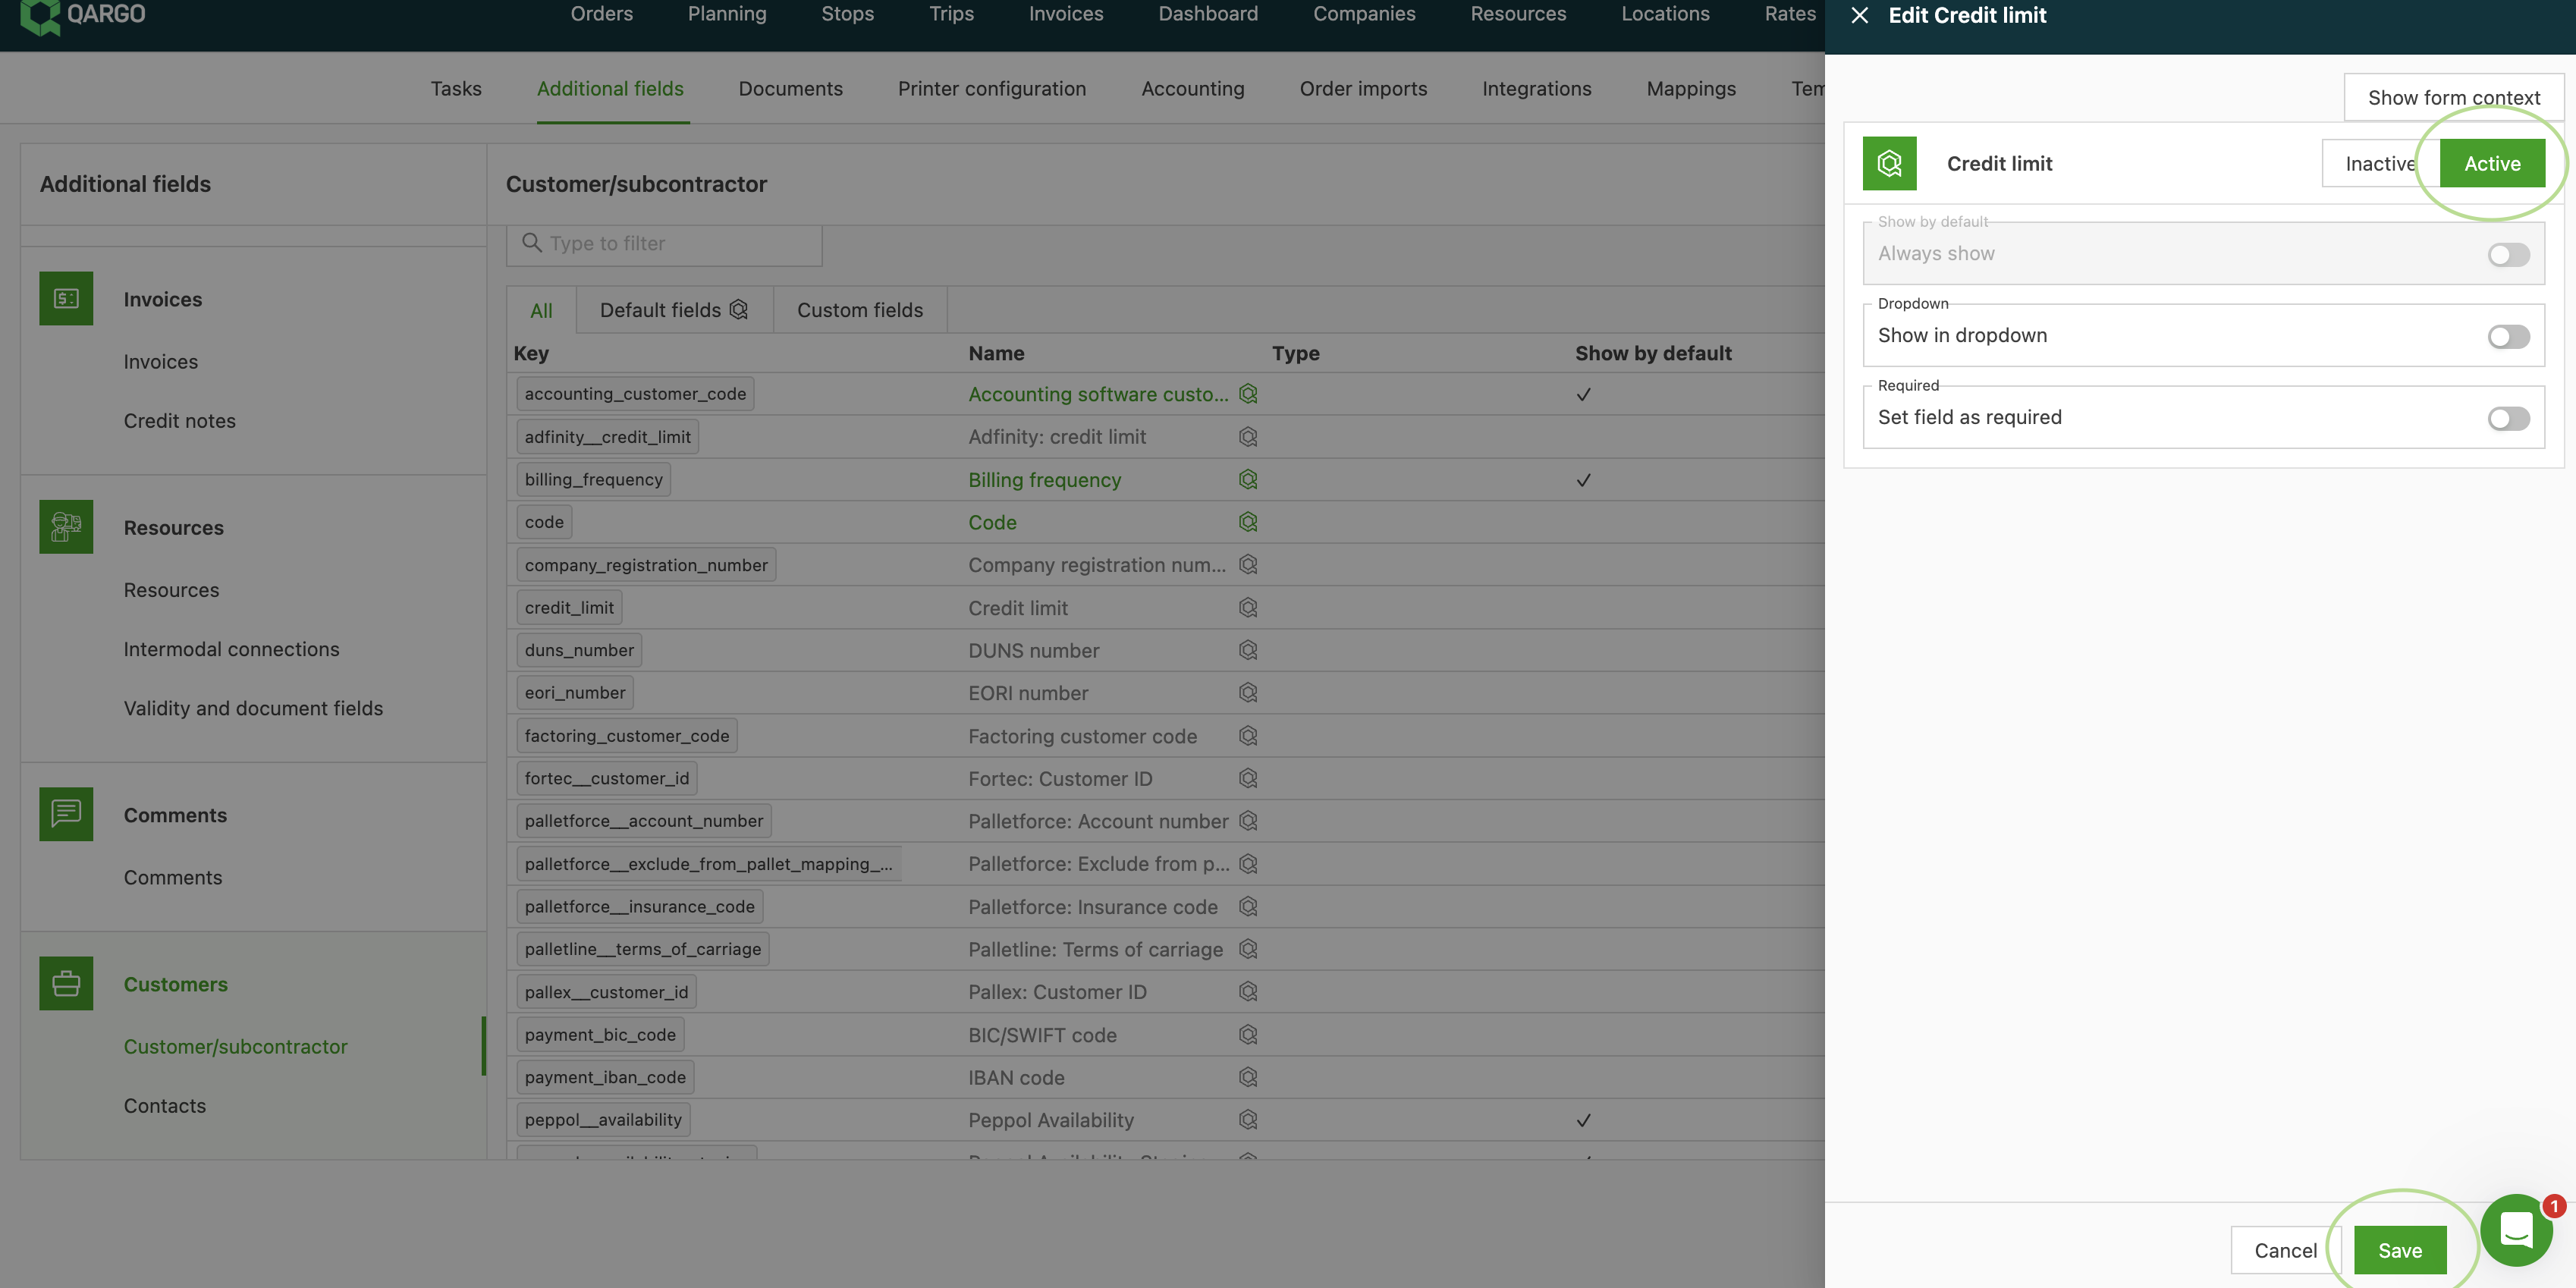
1. Activate the credit limit field: Before assigning a credit limit to a customer, make sure the ‘Credit limit’ field is activated in the configuration settings.
- Go to the Configuration module
- Select the Additional fields submenu
- In the left-hand menu, select Customers
- Click ‘Customer contract carrier’, then find Credit limit in the list of fields and click it
- Click Active. Then click Save.
2. Assign a credit limit to the customer:
- Go back to the Companies screen and select the customer to edit.
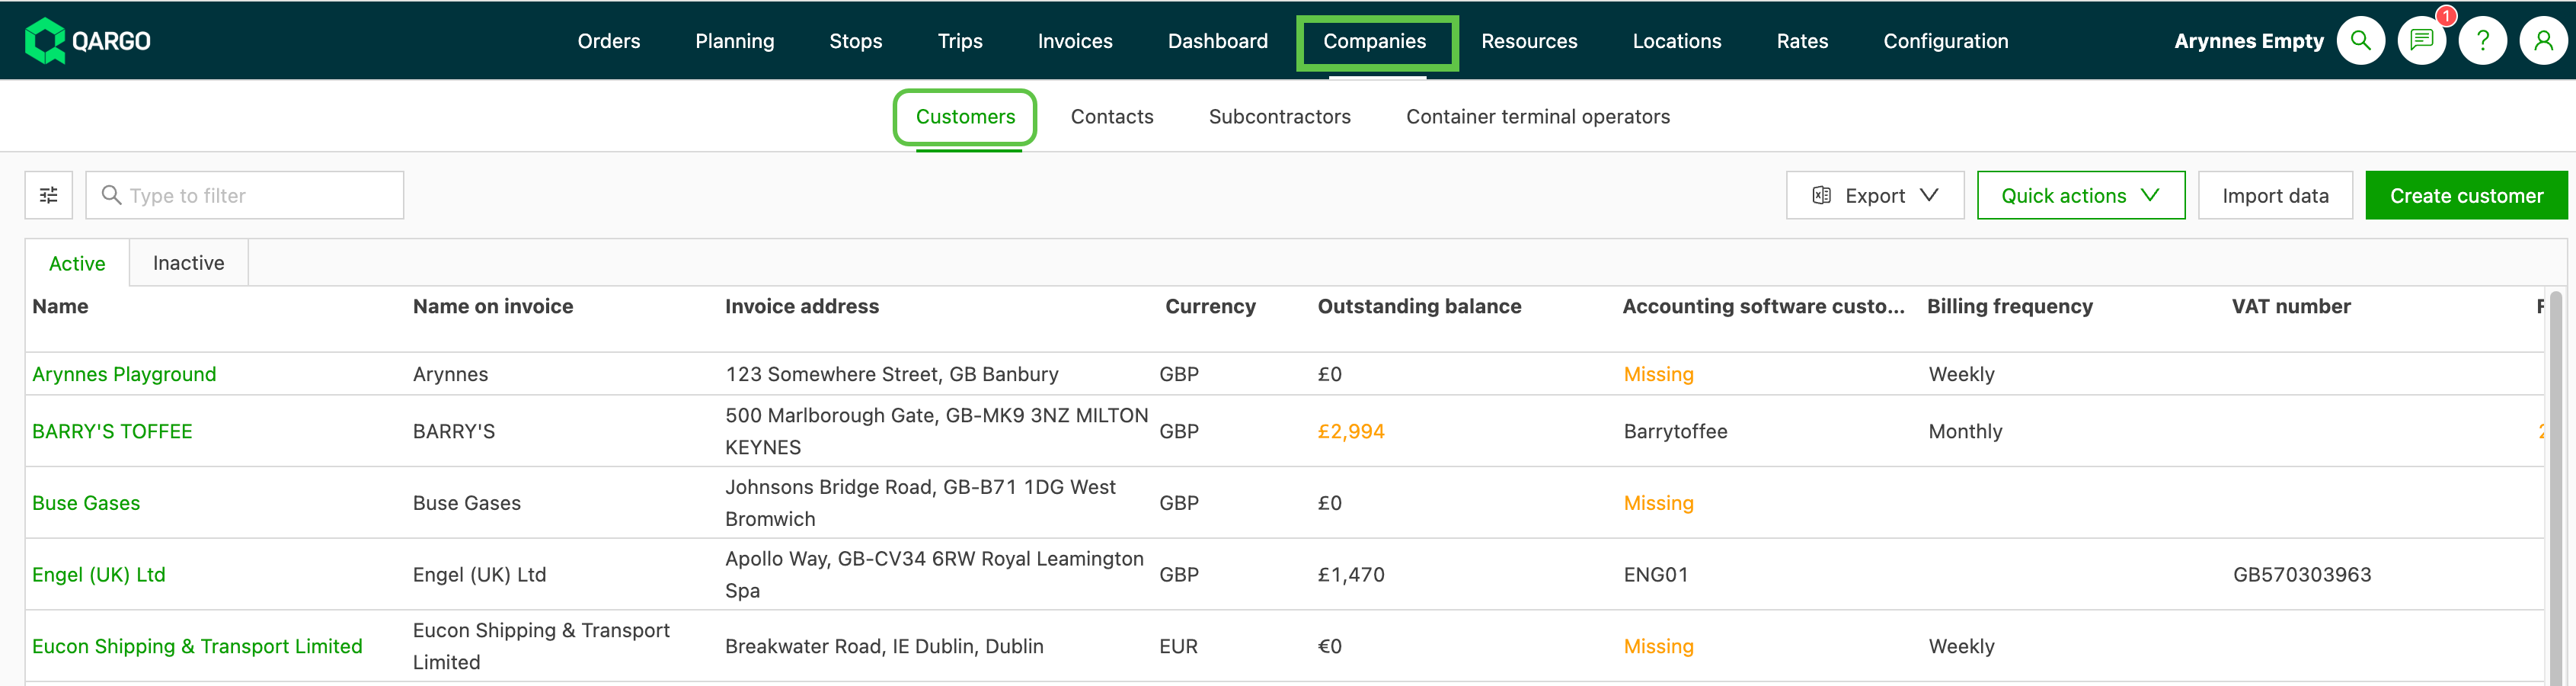
- Scroll down the customer details page to find the Credit limit field.
- Enter the credit limit amount for this customer.
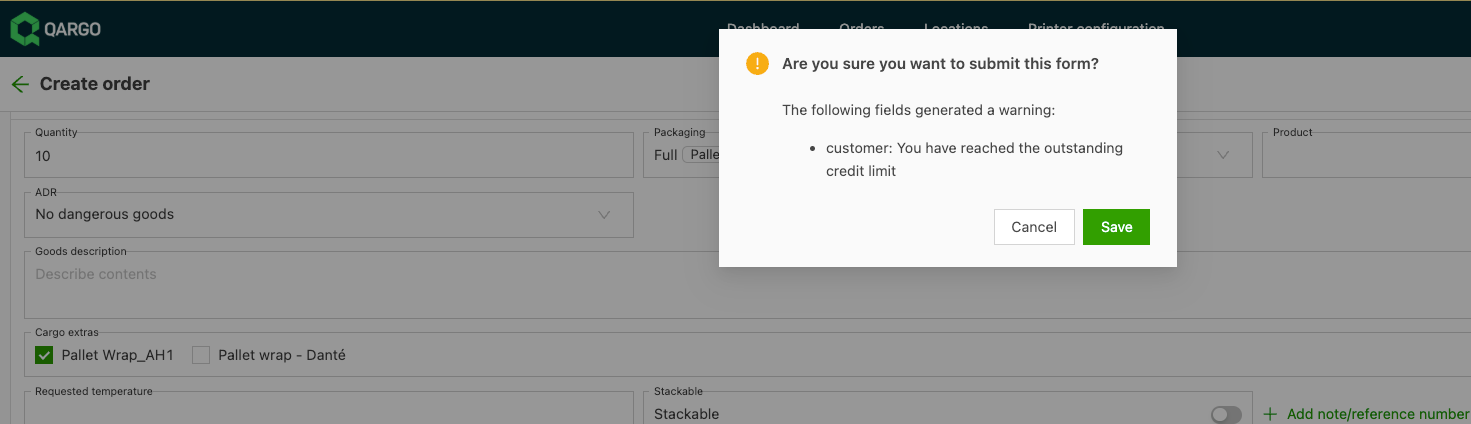
3. Warning for an exceeded credit limit:
- Once the credit limit is configured, if a customer’s outstanding invoices exceed this amount, Qargo automatically triggers a warning when someone tries to create an order for that customer. This helps manage exposure proactively.

Additional use case examples
- Setting different credit limits for customers based on their payment history and reliability.
- Using the credit limit warning as a prompt to start credit control measures or pause further orders.
- Quickly updating credit limits after customer reviews during annual or quarterly financial assessments.