
Invoices: customize the invoice list view
Customize invoice views by adjusting column visibility and filtering data. Use Edit columns and column filters to select data.
Table of contents
Customize the columns
Navigate to Invoices. When the invoice page loads, the default view shows the All tab. Additional tabs provide default list views for:
- Draft invoice
- Invoiced
- Invoice posted
- Canceled.
The invoices and their details can be customized on the invoices page.
- Click Customize.
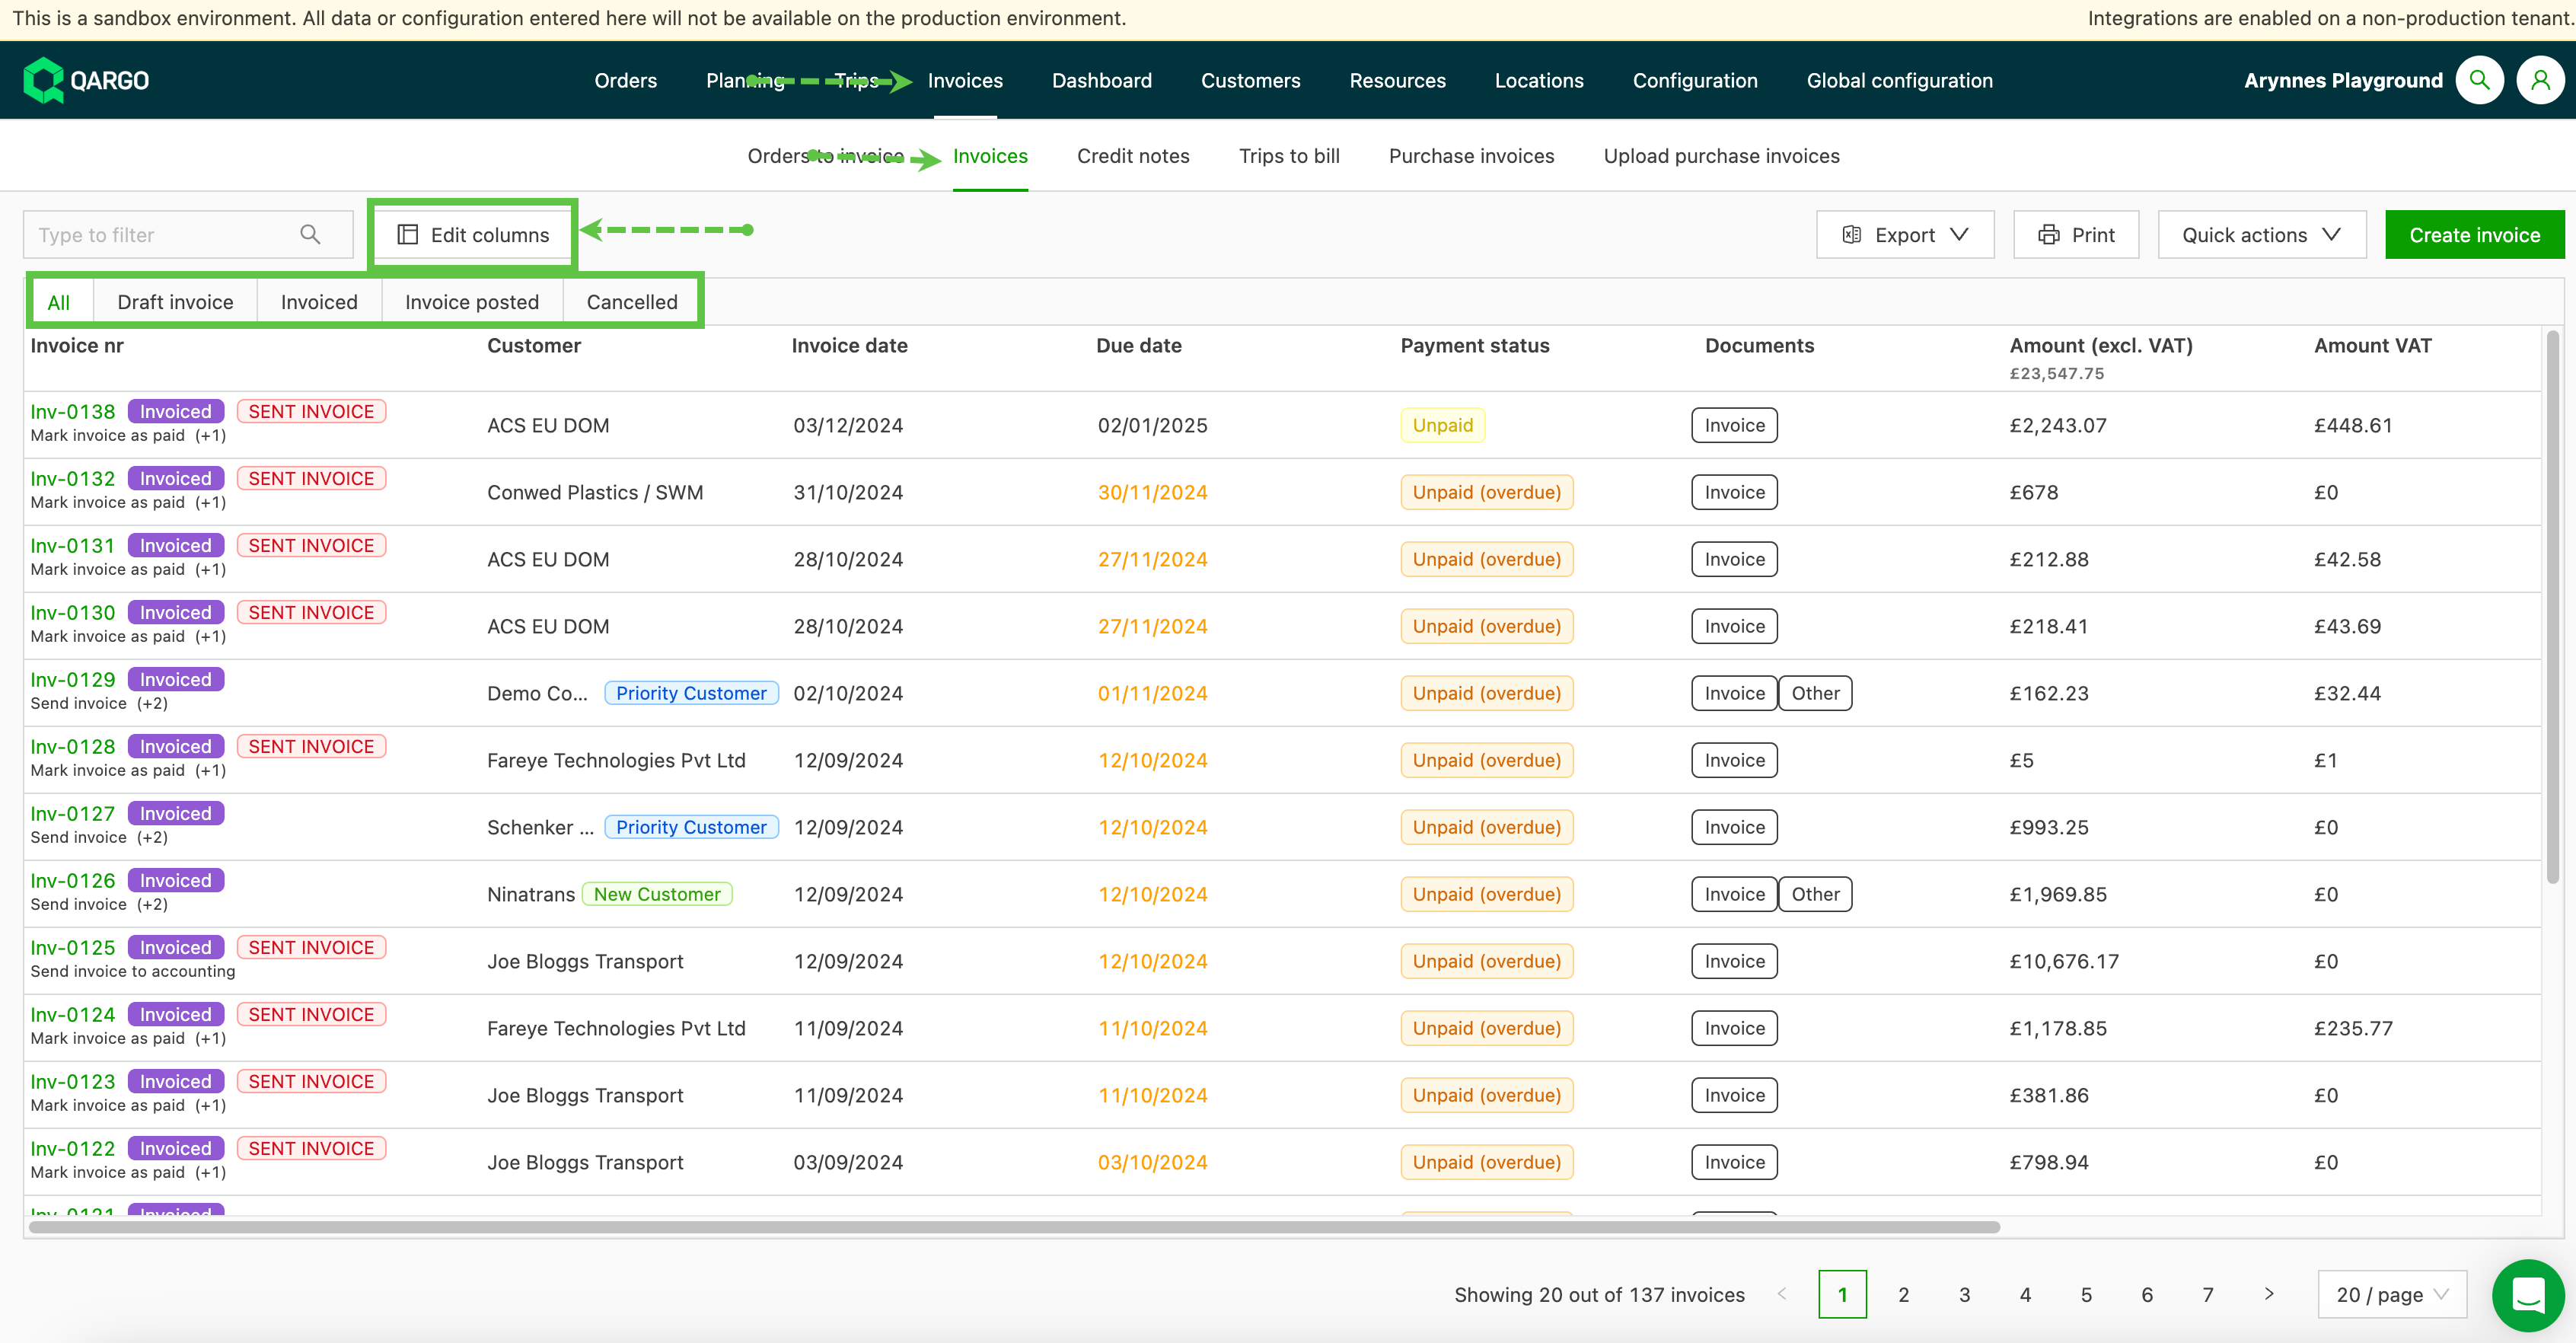
A side pane then opens on the left side of the screen.
- Select the invoice details to show on the page.
- Close the side pane when done.
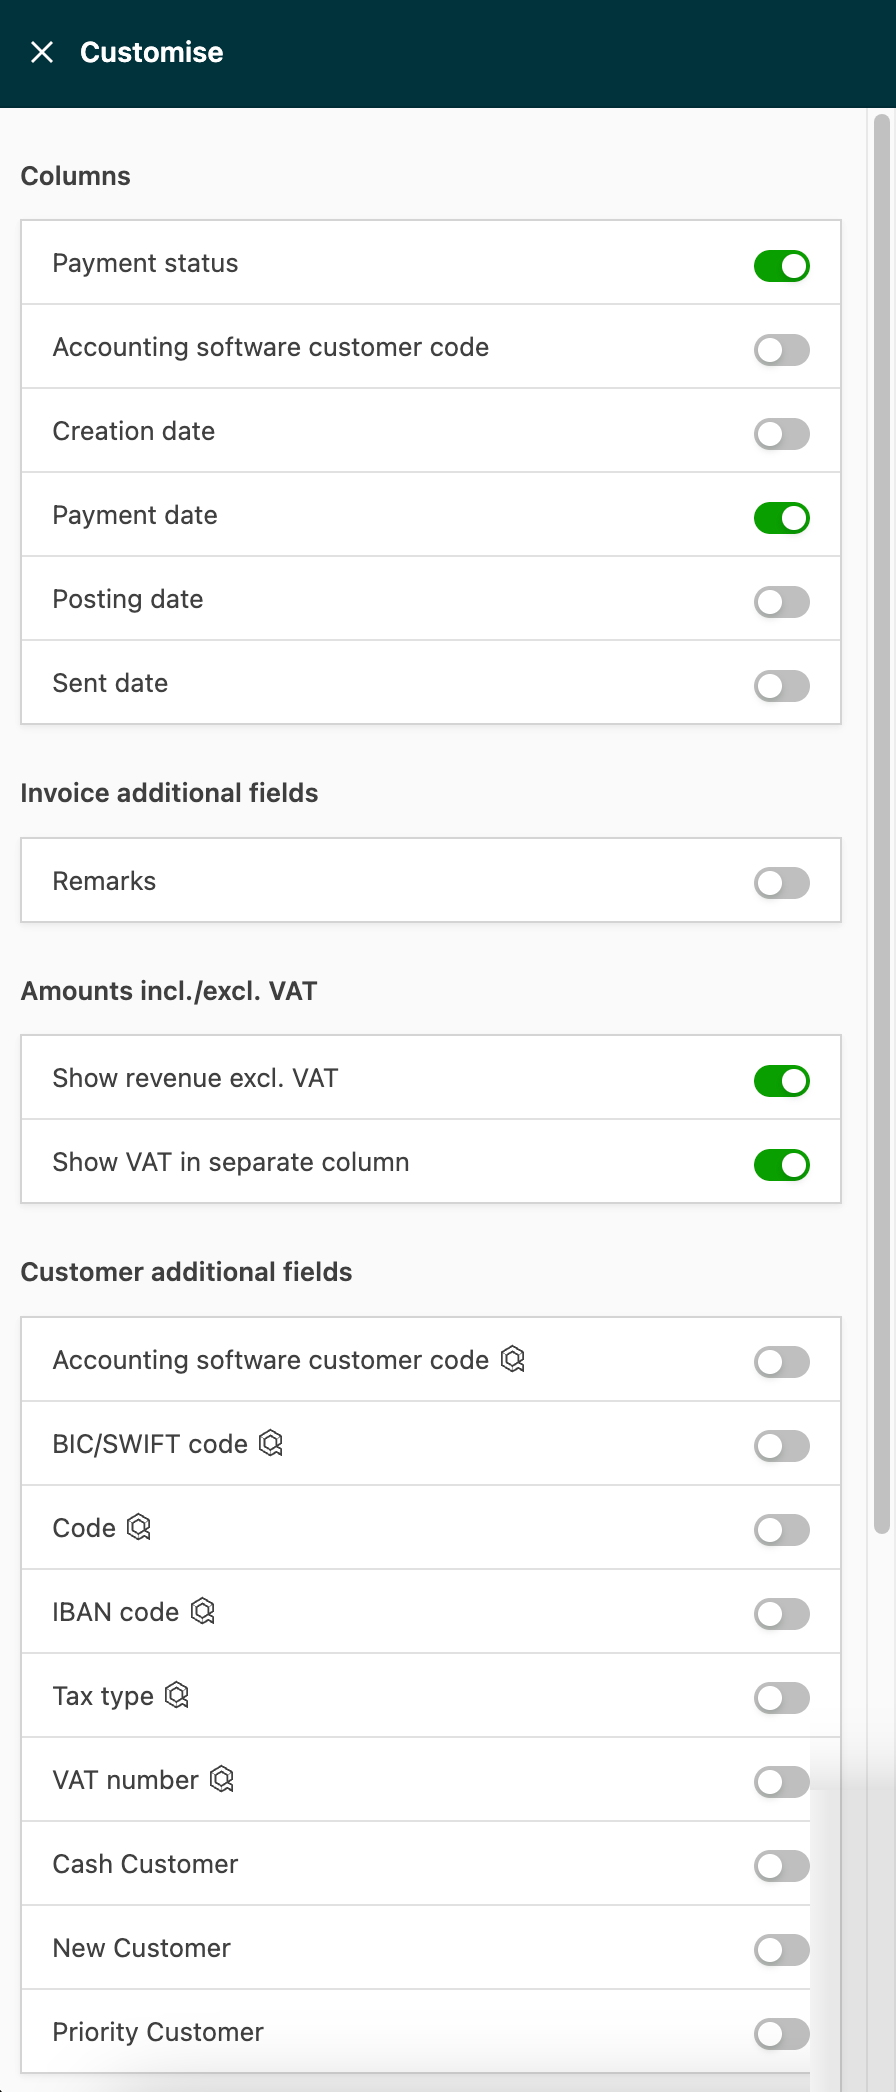
Invoice additional fields are added in Configuration. Once added, those additional fields are shown in the side pane.
Dates on the invoice list
Q: What do the dates on the invoice list mean?
A: The invoice list has 7 date columns. Use Customize to show or hide them.
Name changes
- Posting date is now Accounting export date.
- Issue date is now Invoice date.
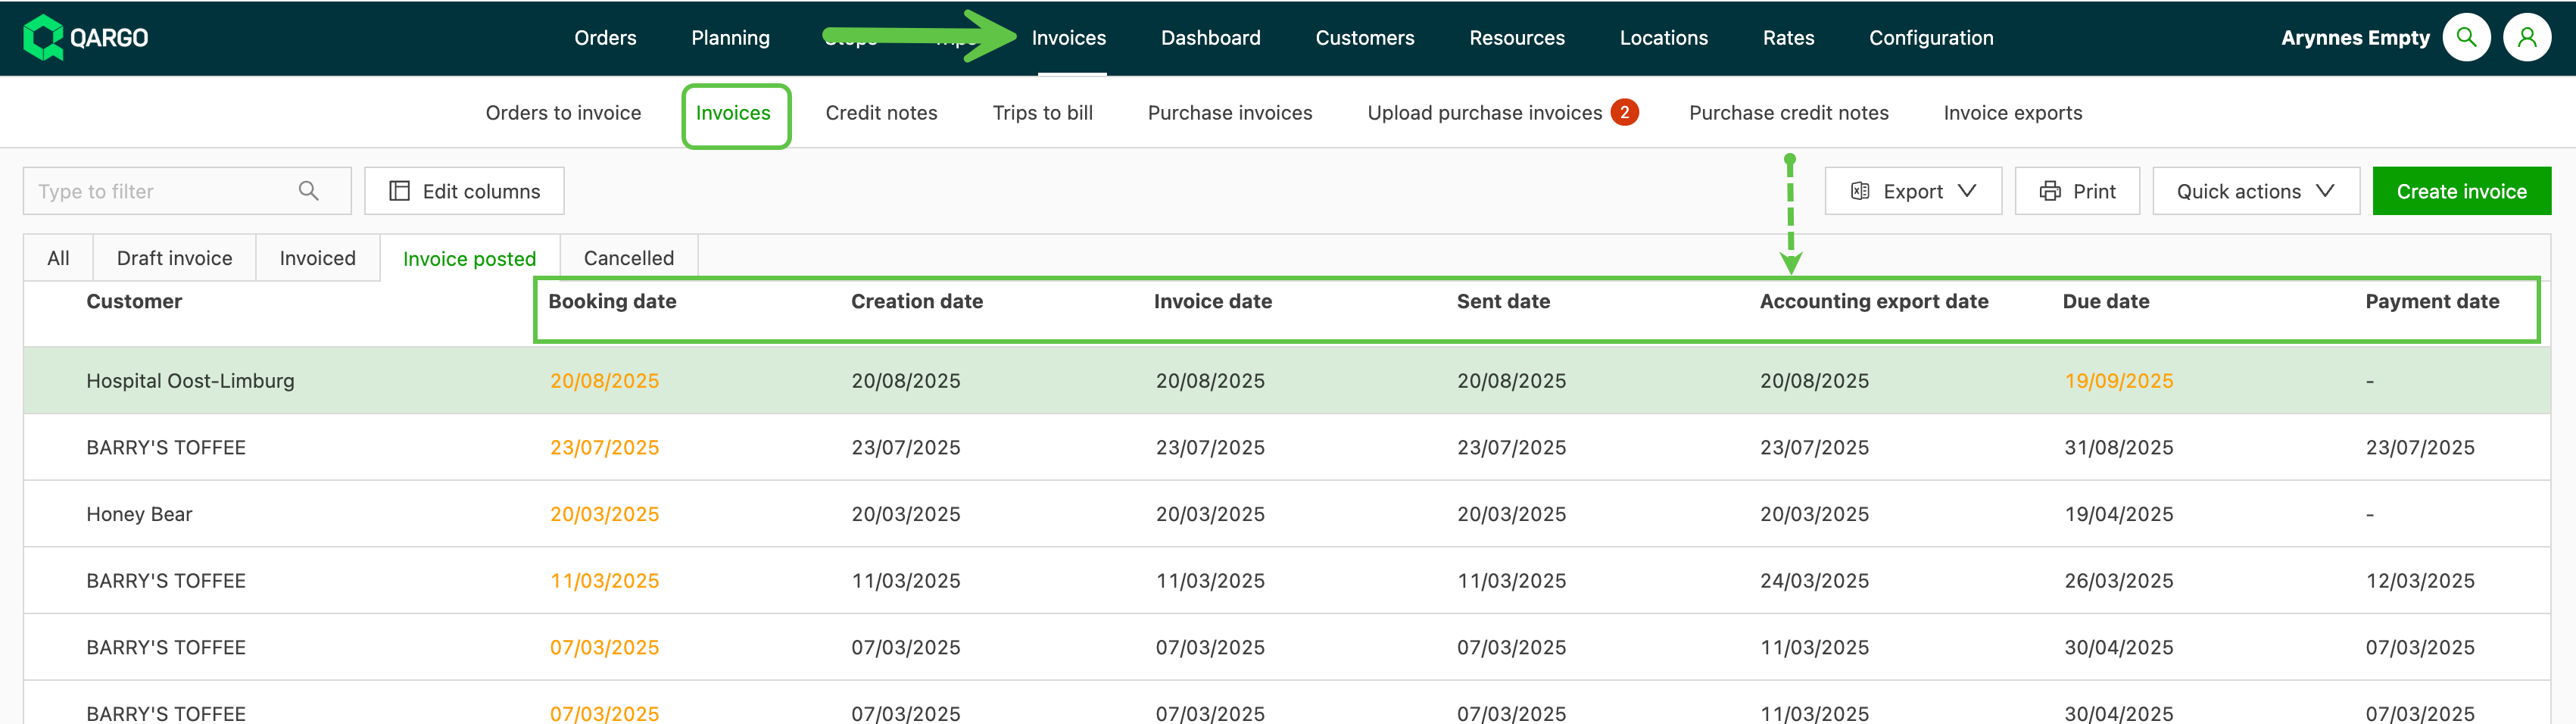
Date columns
-
Creation date: when the invoice was created in the system.
-
Invoice date: the date entered when adding the invoice.
-
Sent date: when the invoice was sent to the customer.
-
Accounting export date: when the invoice was exported to the accounting software. Previously called “Posted date”.
-
Due date: when payment is due.
-
Payment date: when the invoice was marked as paid.
-
Booking date: the date sent to the accounting package. By default, it equals the invoice date. Change it to book the invoice in a different period.
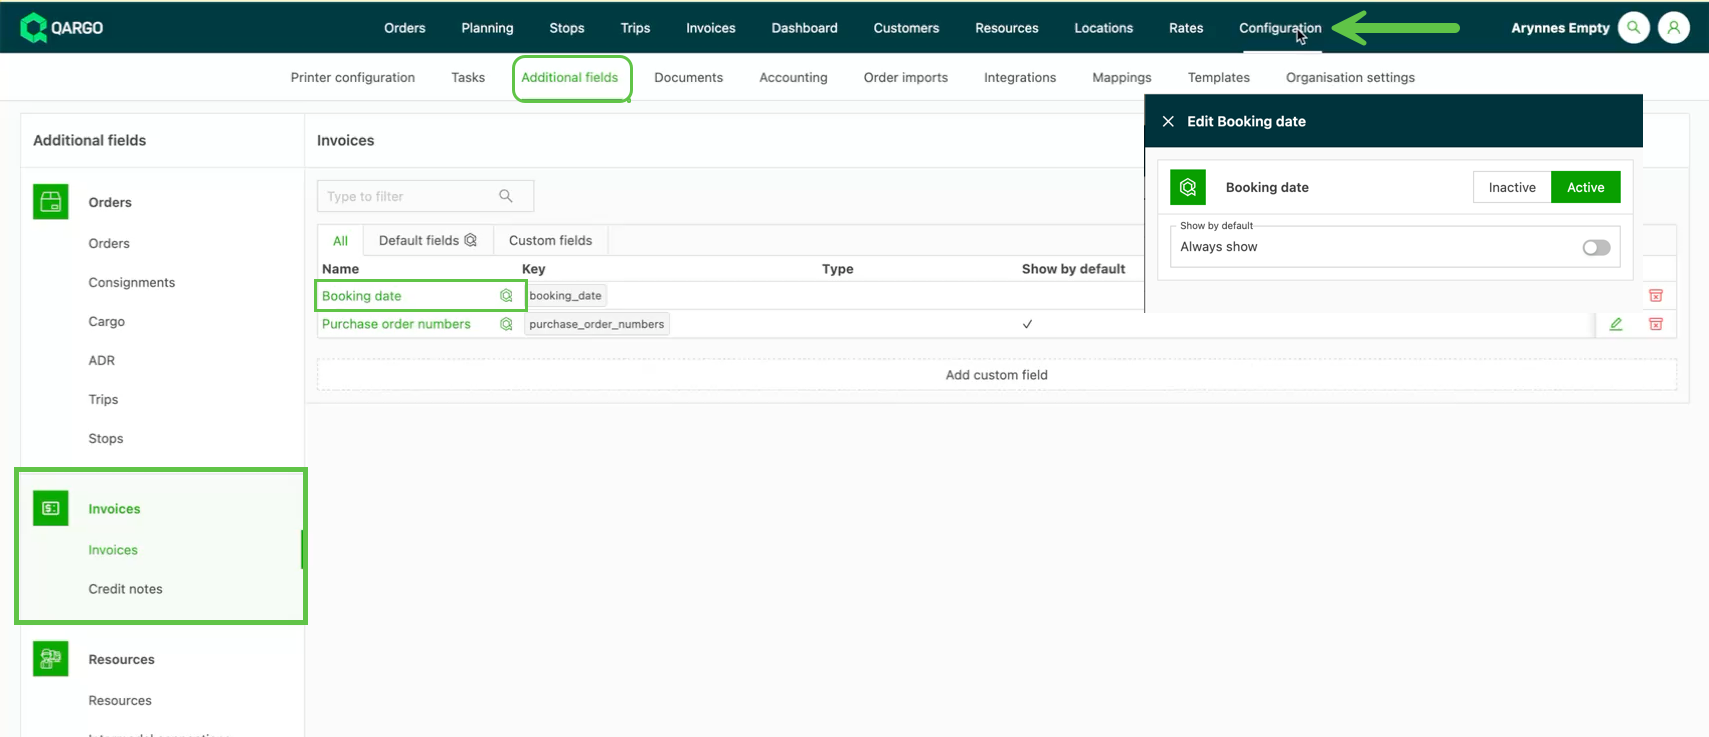
Q: How can the Booking date column be activated?
The Booking date is inactive by default.
-
Go to Configuration > Additional fields.
-
Select Invoices in the Invoices side menu.
-
Click Booking date and set it to Active.
Filter data
Data on the page can be filtered with the filter icon in the table header. Hover over the column header and the filter icon appears in the bottom right corner.
- Click the filter icon.
- Select the data to filter.
- The data updates as the filters are selected.
- A label displays how many filters are applied. These count the filters in the column header; i.e., multiple filters in 1 column show as 1 active filter. The filter icon is highlighted green to indicate which column has the filter applied.
- Once the filters are selected, click Close to close the pop-up window.
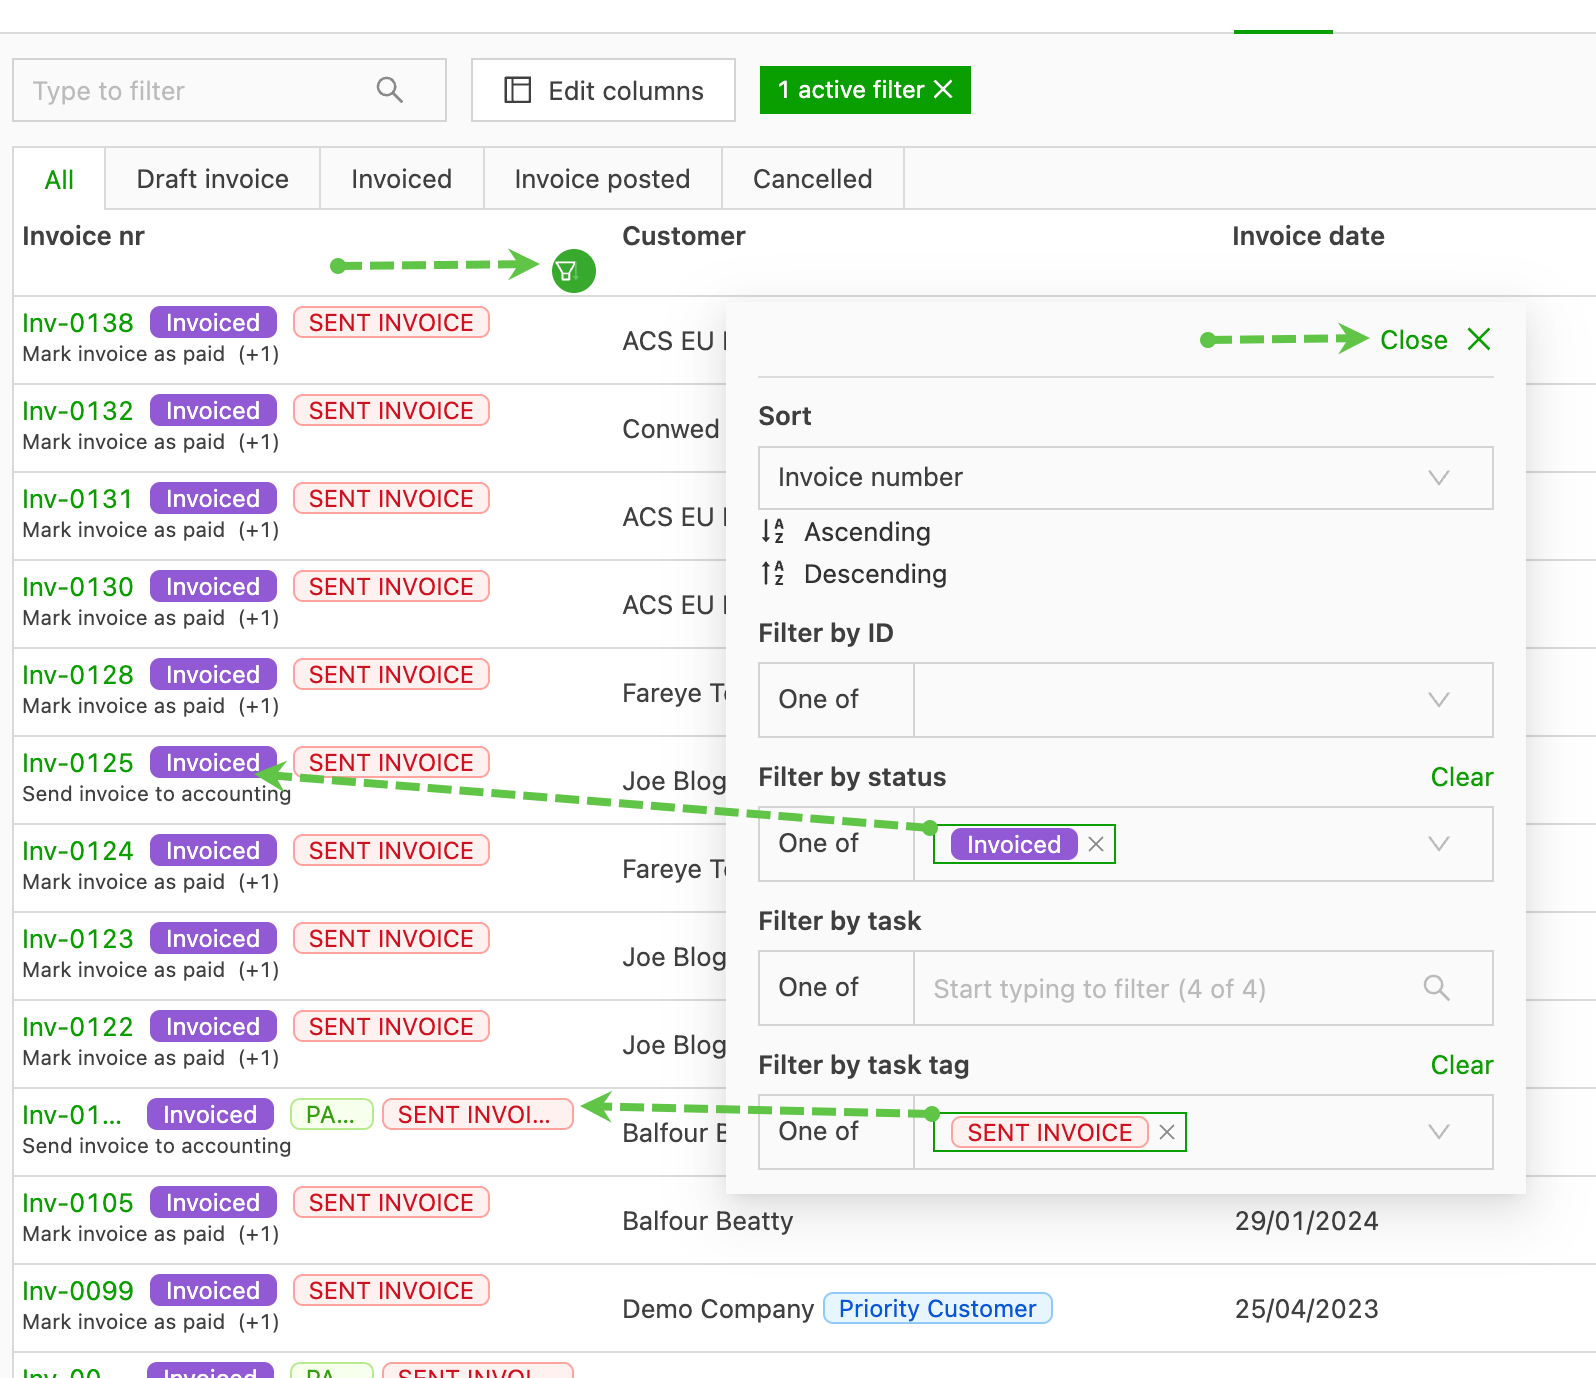
The filter is saved. The next time this page is opened, the same view is shown.
Select date range option:
The following filter options are available:
- Last 90 days + future: this filters on all orders
- Date: to filter on one specific date. By default, this filters on the current date.
- Date range: This allows the user to easily select a date range on a calendar. When selecting date range filtering, two options are available to choose from. Additionally, Qargo provides the following date types to refine the filtering:
- Created date: An audit timestamp indicating when the quote was first created. It does not change when the quote is accepted or converted to an order.
- Requested date: Represents the initially requested operational date from the order.
- Actual date: Derived from the load once the order is planned and executed.
- Order start/end date: Used for filtering orders during billing or other operational tasks.
For convenience, some preconfigured date ranges are available when filtering on a date range. When one of these options is selected, the dates are selected automatically:
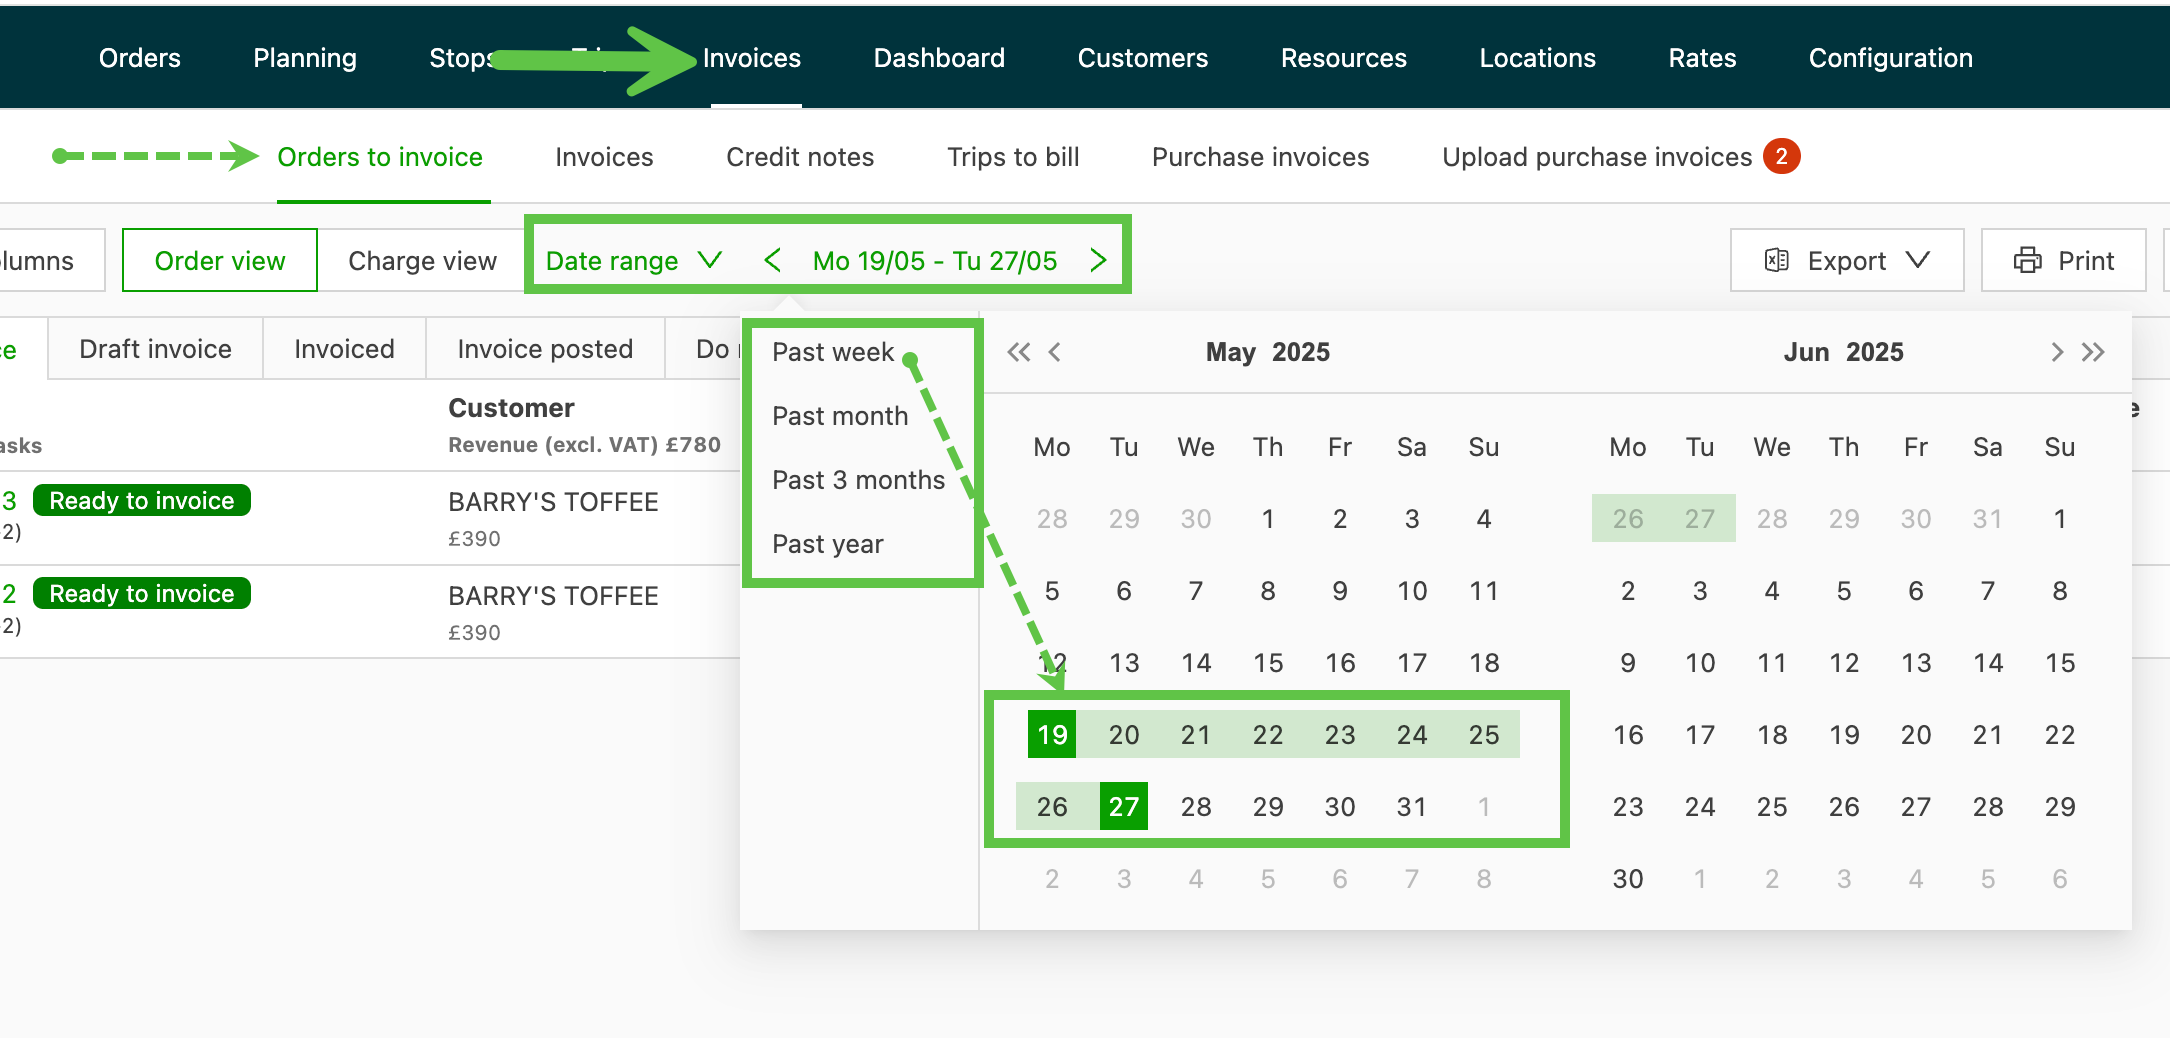
Users can also select any date range by selecting a start/end date on the calendar.
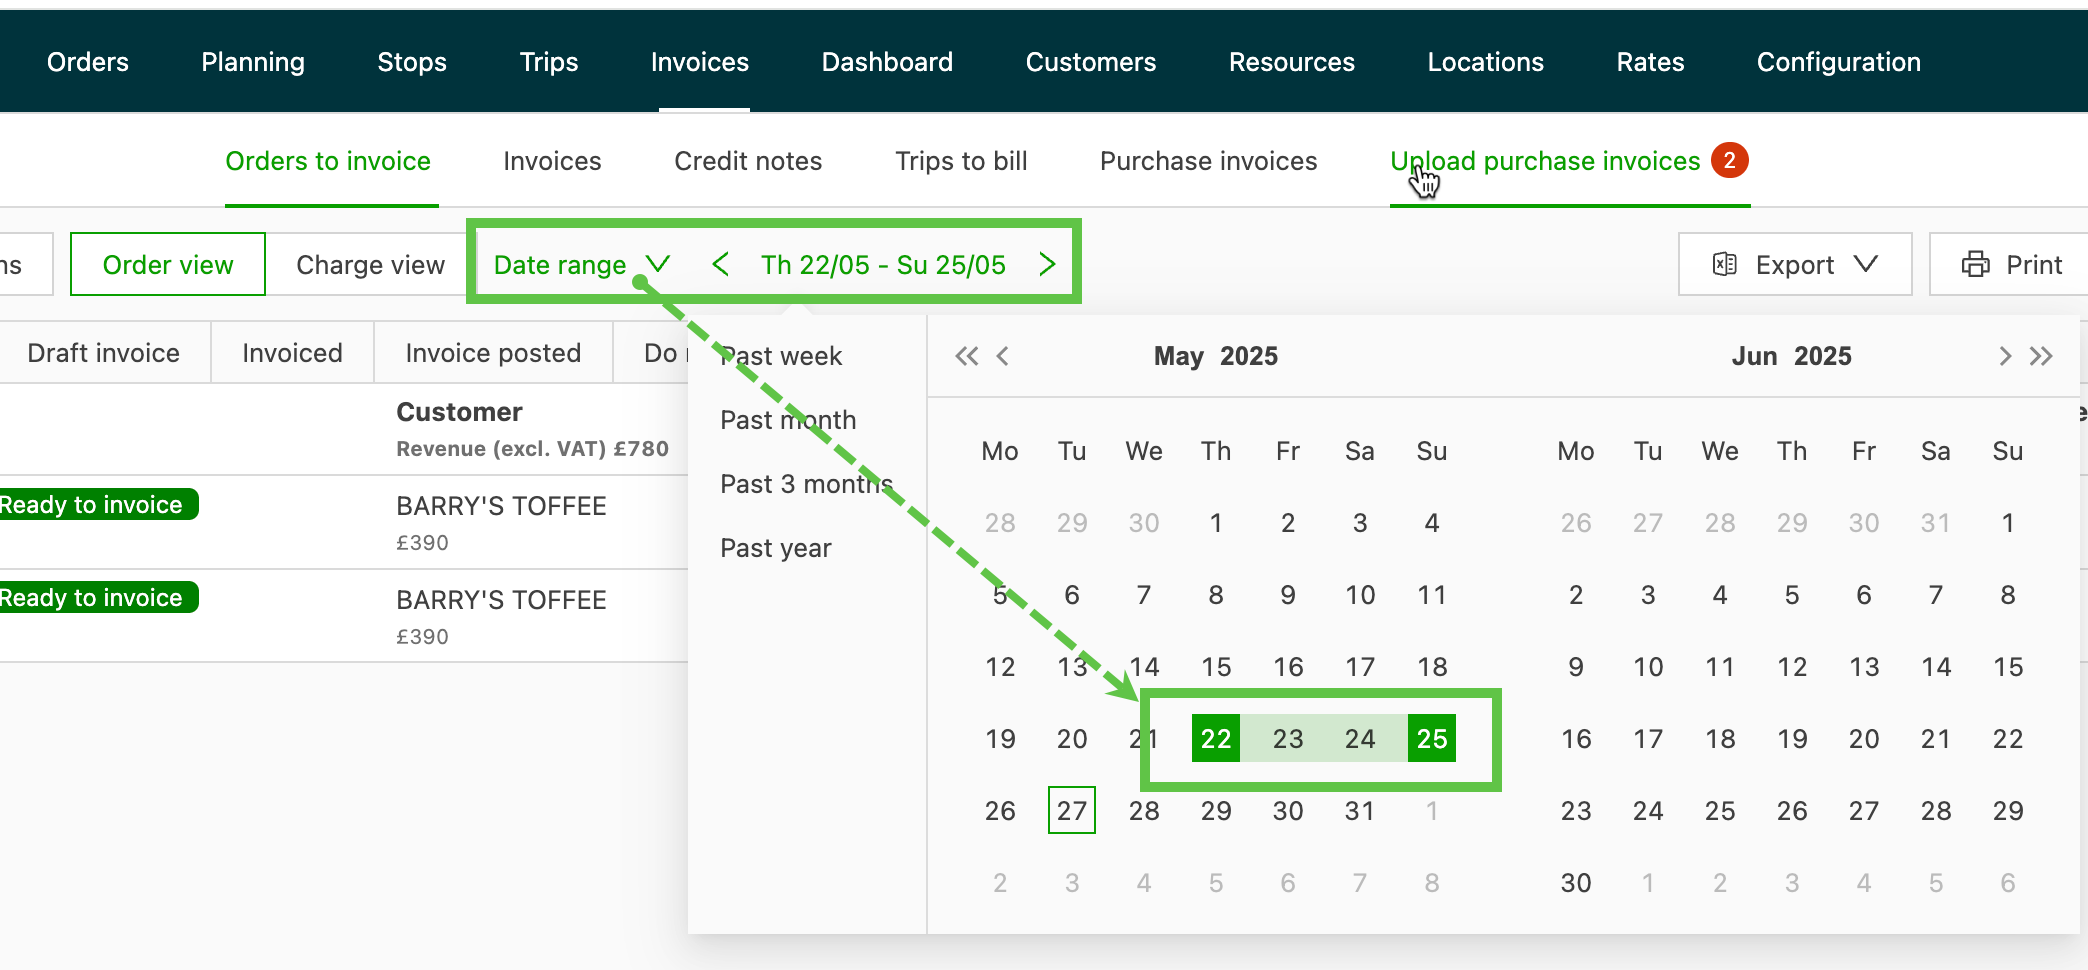
- For orders, the filter is on Requested date.
- For loads, the filter is on Actual date. When filtering for billing purposes, the Order start/end date filter is recommended. If an order has different requested and actual dates, align them to avoid discrepancies in the results.
🔔 Pro tip: Filtering on the Order start/end columns is possible. Column filters are retained on the page when reloading.
Troubleshooting scenarios
Orders missing from the weekly billing list
If an order does not appear in the weekly billing list, a mismatch in date filters is the likely cause. Follow these steps to resolve the issue:
-
Use the Order start/end date filter for billing purposes.
-
Be aware of the two operational date types:
- Requested date: From the order.
- Actual date: From the load once the order is planned.
-
Make sure the correct date type is selected in the Order start date filter.
-
If an order has different requested and actual dates, it may not show under a filter that uses the other date. Align the dates as needed for the billing run.
Orders not appearing when searching or filtering for PODs
If an order is missing when searching or filtering for proofs of delivery (PODs), the cause may be the date filter selection. To make sure the order appears:
- Verify the selected date filter.
- Use the Requested date range rather than other date filters.
- Make sure the requested date range includes the order’s date.
Best practices for date alignment
- Always confirm the type of date filter required for the task (e.g., billing vs. searching for PODs).
- Align requested and actual dates where possible to avoid discrepancies.
- Regularly review and update date filters to match operational needs.
Troubleshooting tips
- Double-check the date range in the filters to make sure it covers the relevant period.
- If orders are still missing, verify that the correct date type (requested or actual) is used.
- Consult Qargo’s support documentation or contact support if issues persist.