
Configuration - Signing customer paperwork with the sign-on-glass signature
Sign customer paperwork or a prefilled CMR with the receiver's sign-on-glass signature, name and timestamp at delivery.
Table of contents
Introduction
-
What
- A generate-document task option that places the receiver’s sign-on-glass signature, signer name and timestamp onto the customer’s own paperwork, or onto a prefilled CMR.
- The result is saved as a POD/CMR.
-
Why
- Many customers only accept their own paperwork back, signed in a specific position and often on every page.
- Without this option, the signature lands in one fixed spot, and an external signing tool is needed to position it.
-
How
- Configured once on a generate-document task in the Orders tasks, with a signature position.
- Runs automatically after the signature step at delivery, like the ePOD.
Terminology
| Term | Definition |
|---|---|
| Sign-on-glass | The signature the receiver draws on the driver’s device at delivery |
| Customer paperwork | The customer’s own document, uploaded to the shipment (for example a scanned delivery receipt) |
| Prefilled CMR | A CMR already filled with order data, ready for the receiver signature |
| POD/CMR | The document type the signed result is saved as |
| Signature position | The setting that decides where on the page the signature block goes |
Prerequisites
-
The Super Admin role is required to configure the task.
-
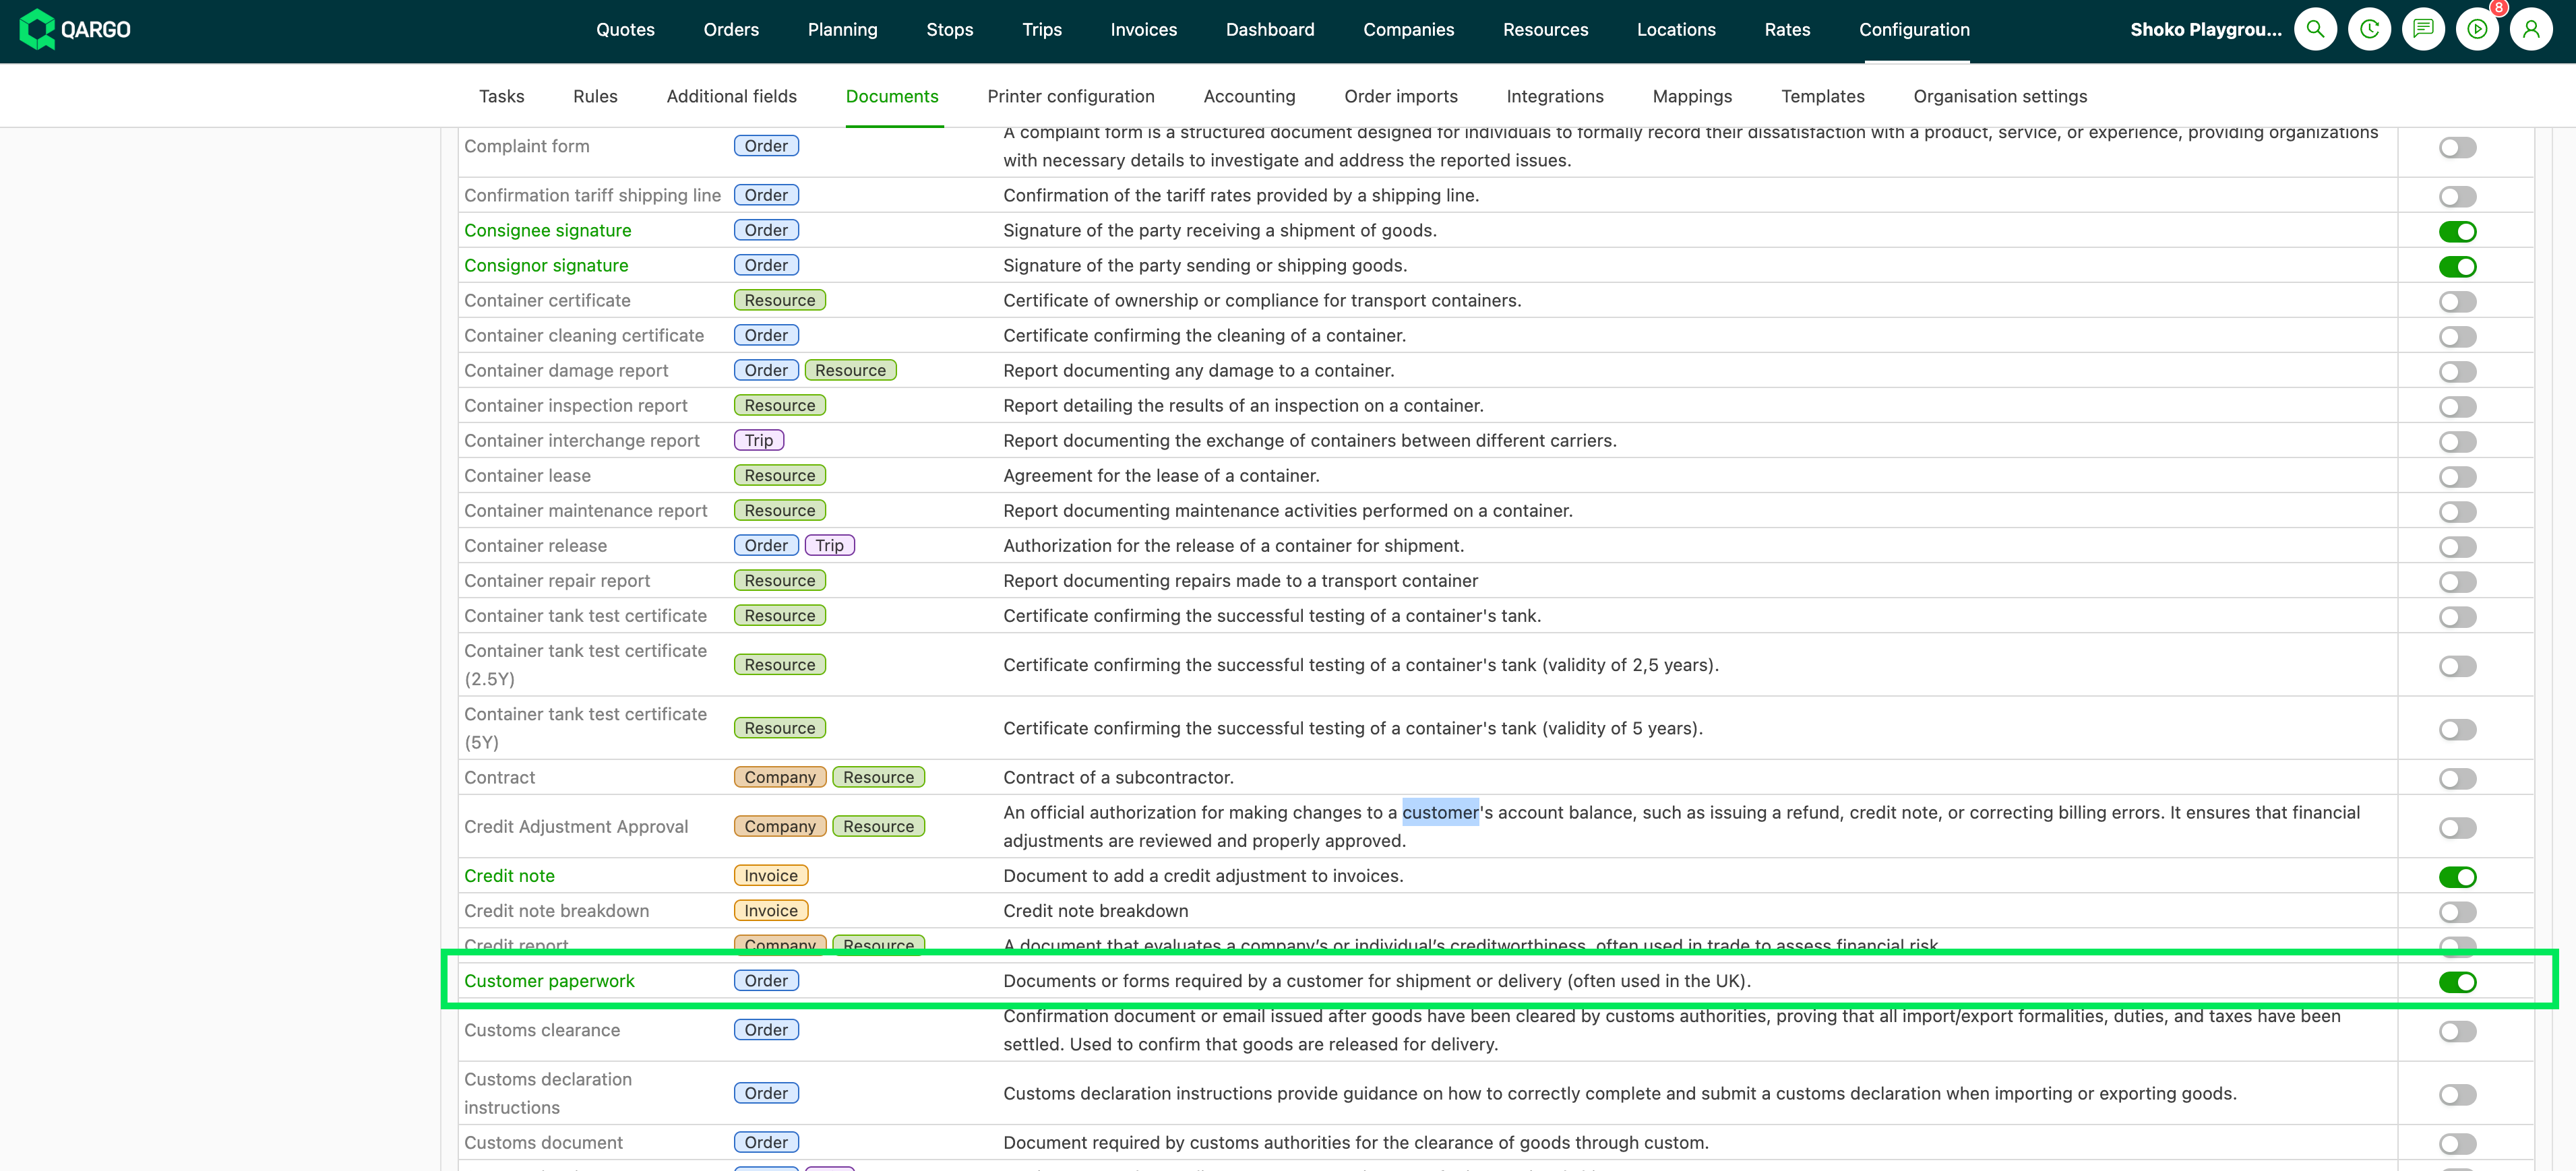
The Customer paperwork document type is enabled under Configuration > Documents > Available document types. It is off by default.
-
The shipment has Customer paperwork uploaded (first option), through Add info/doc > Add document on the shipment, or a Prefilled CMR (second option).
-
The paperwork is on the shipment before the signature step runs.
Setting up the signed-paperwork task
-
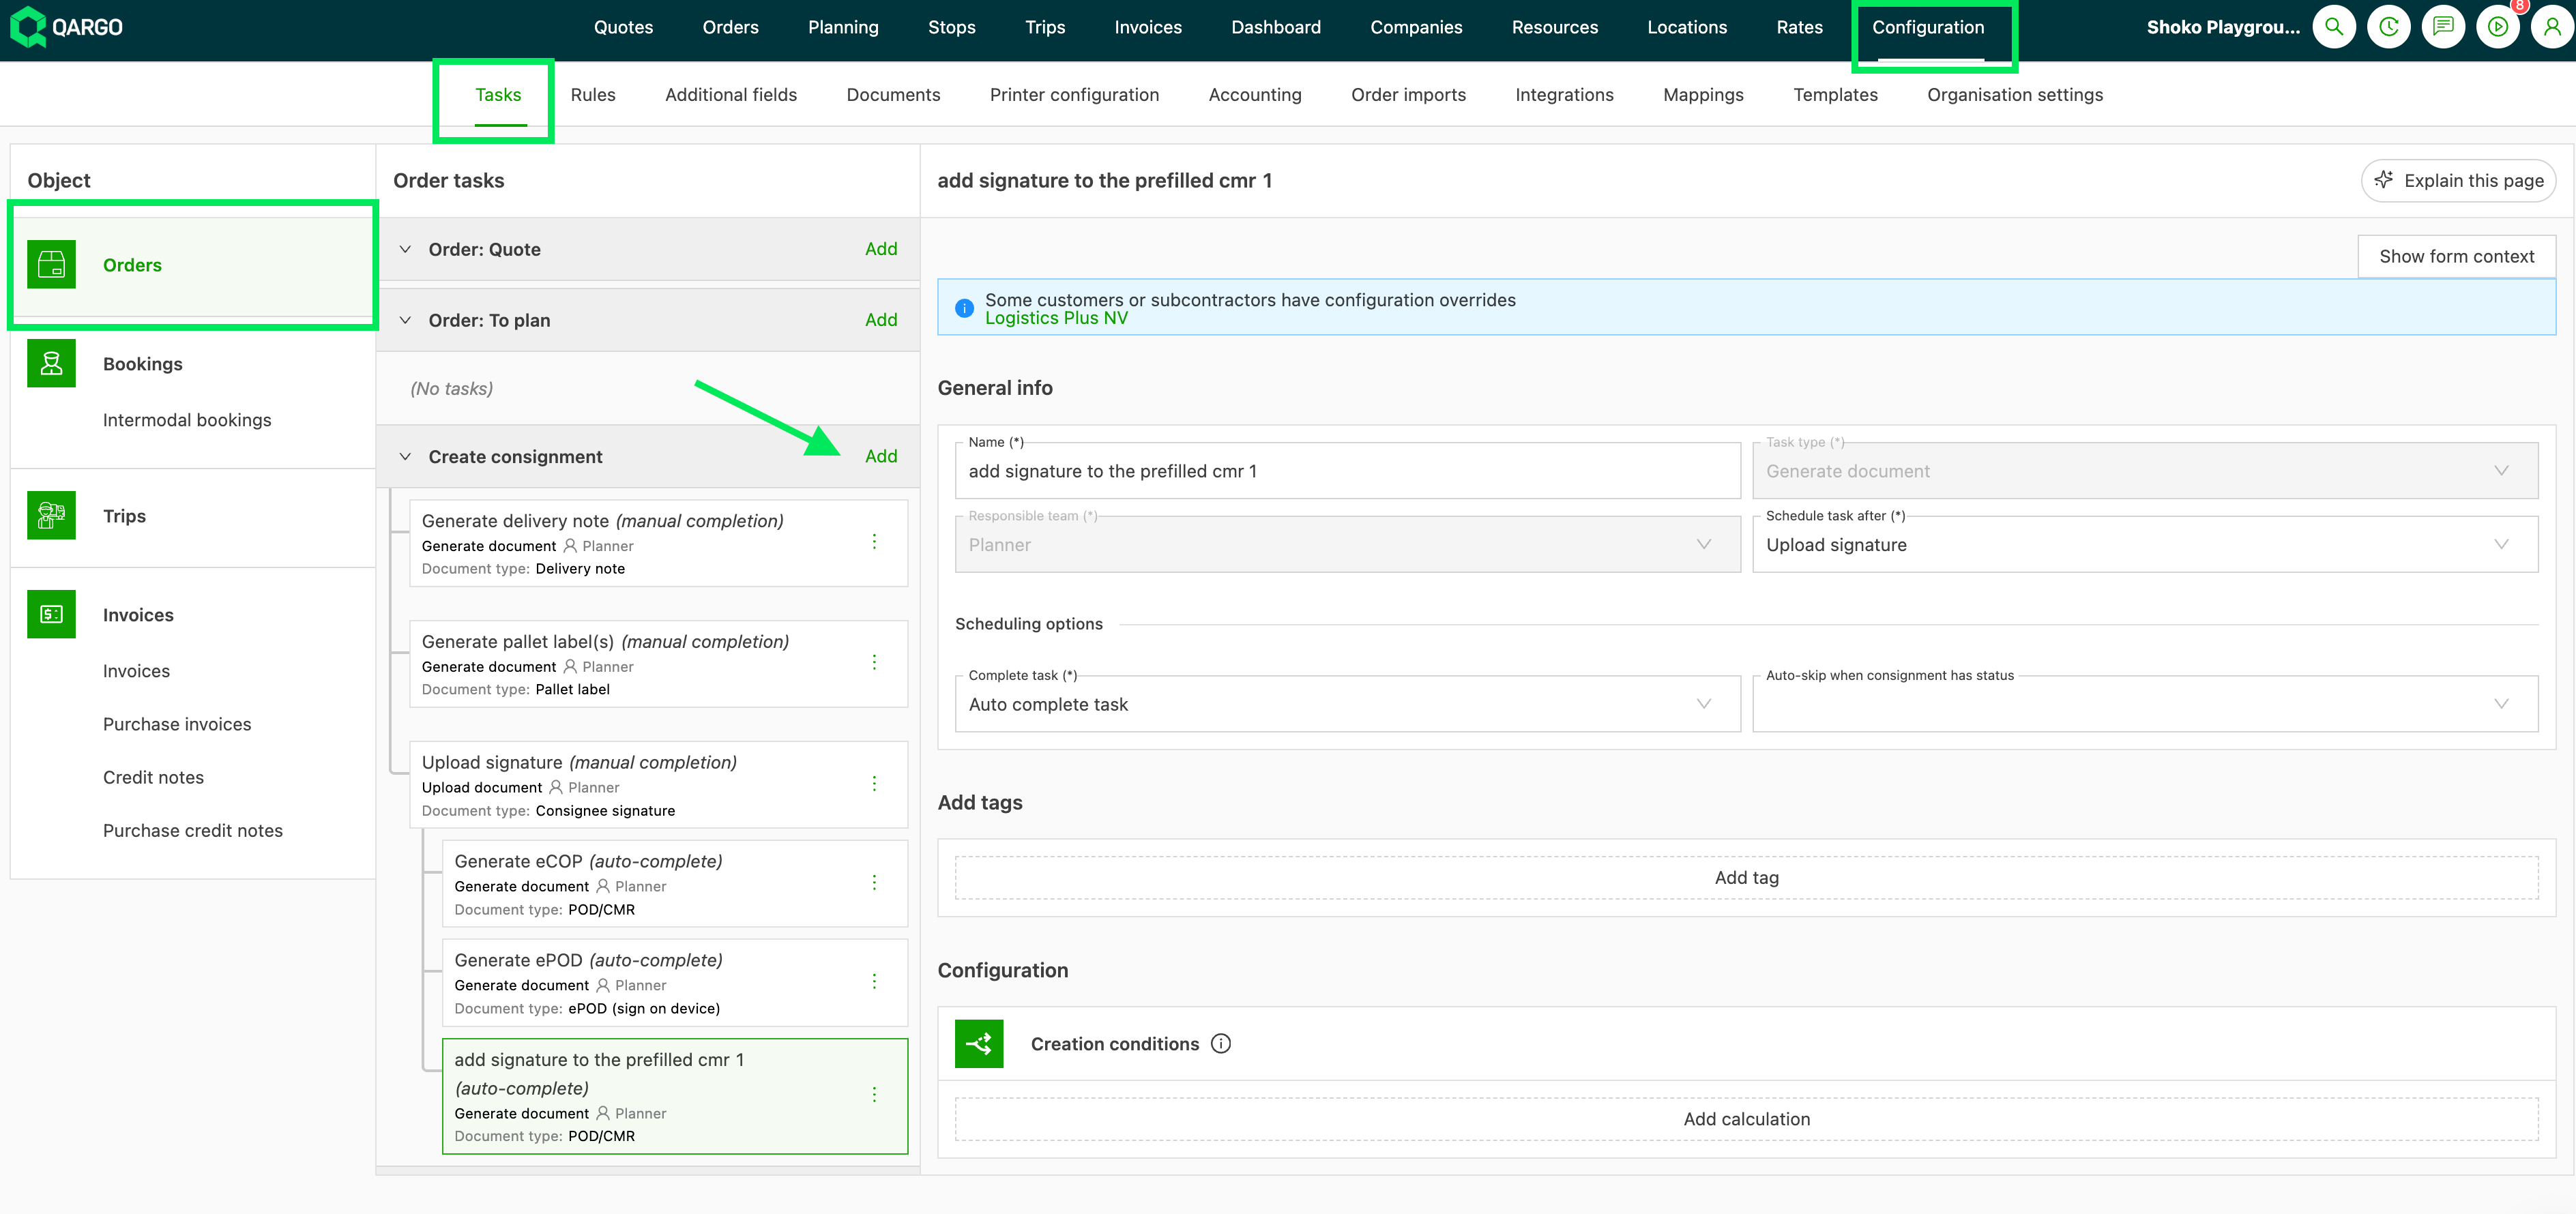
Navigate to Configuration > Tasks.
-
Select Orders in the left menu.
-
Click Add in the Create shipment section, or
Open an existing generate-document task there. -
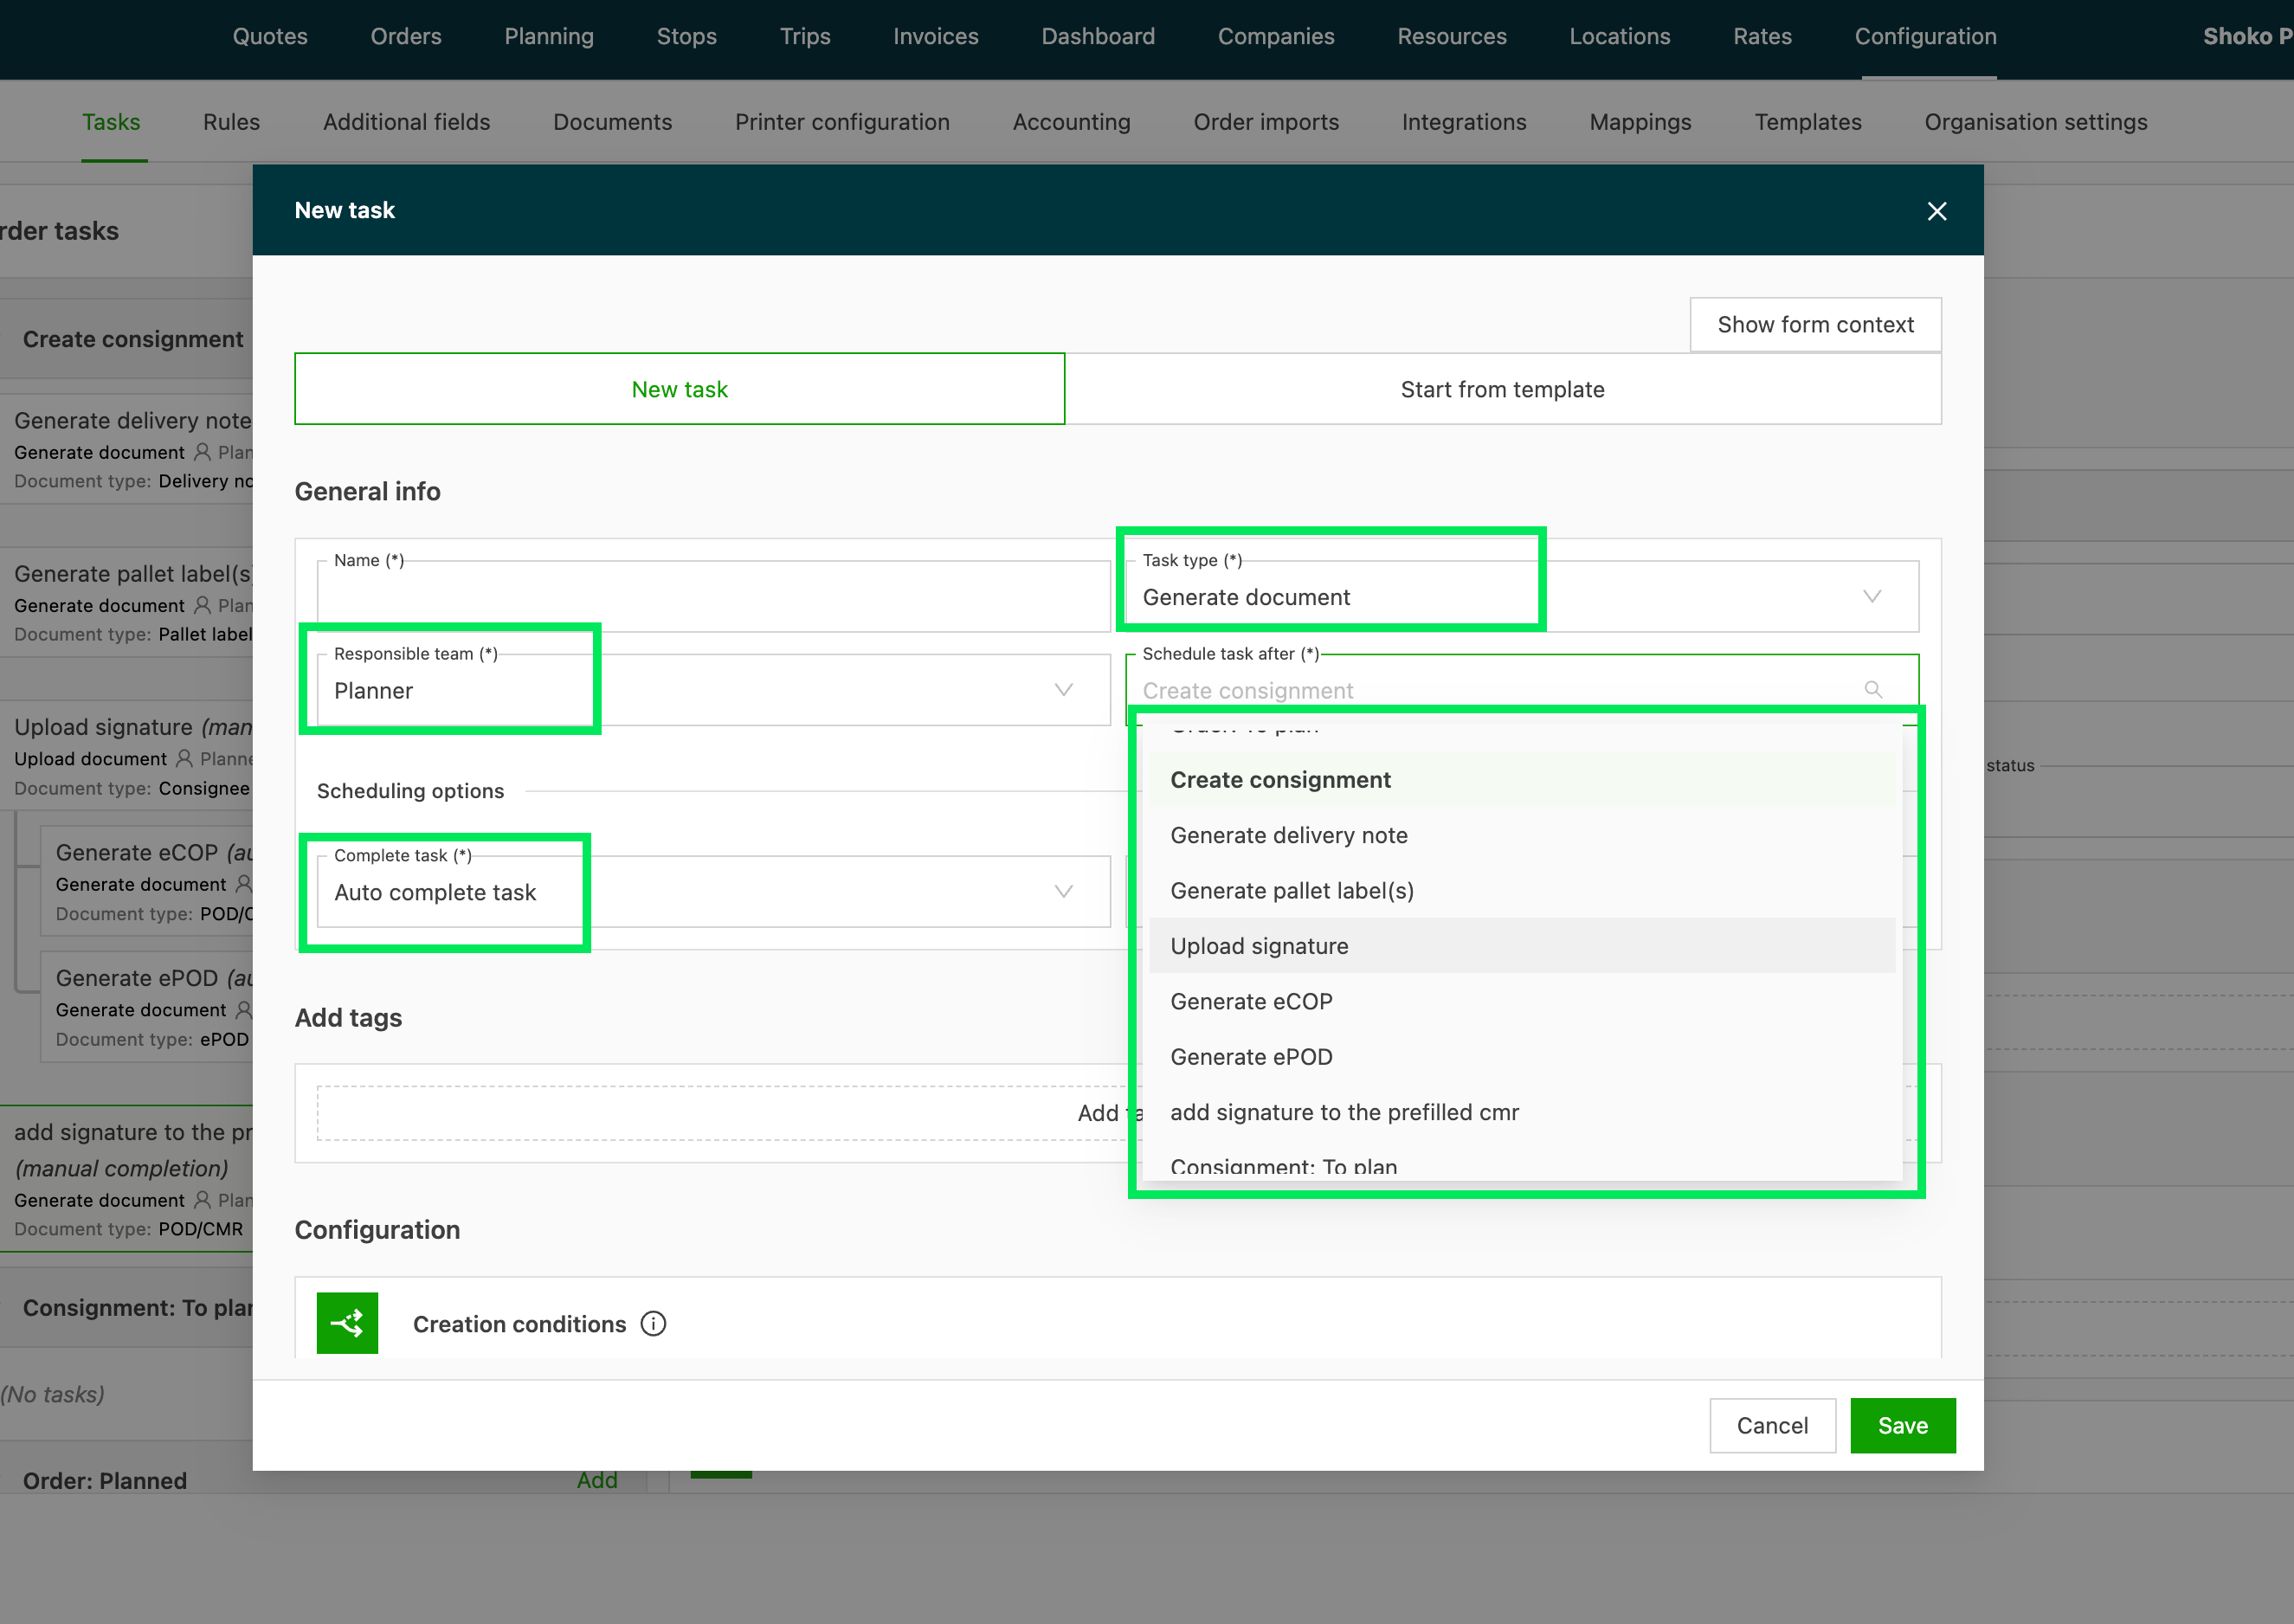
Select Generate document as the Task type, and select the Responsible team (for example Planner).
-
Set Schedule task after to the step that captures the signature, for example Upload signature.
-
Set Complete task to Auto complete task.
-
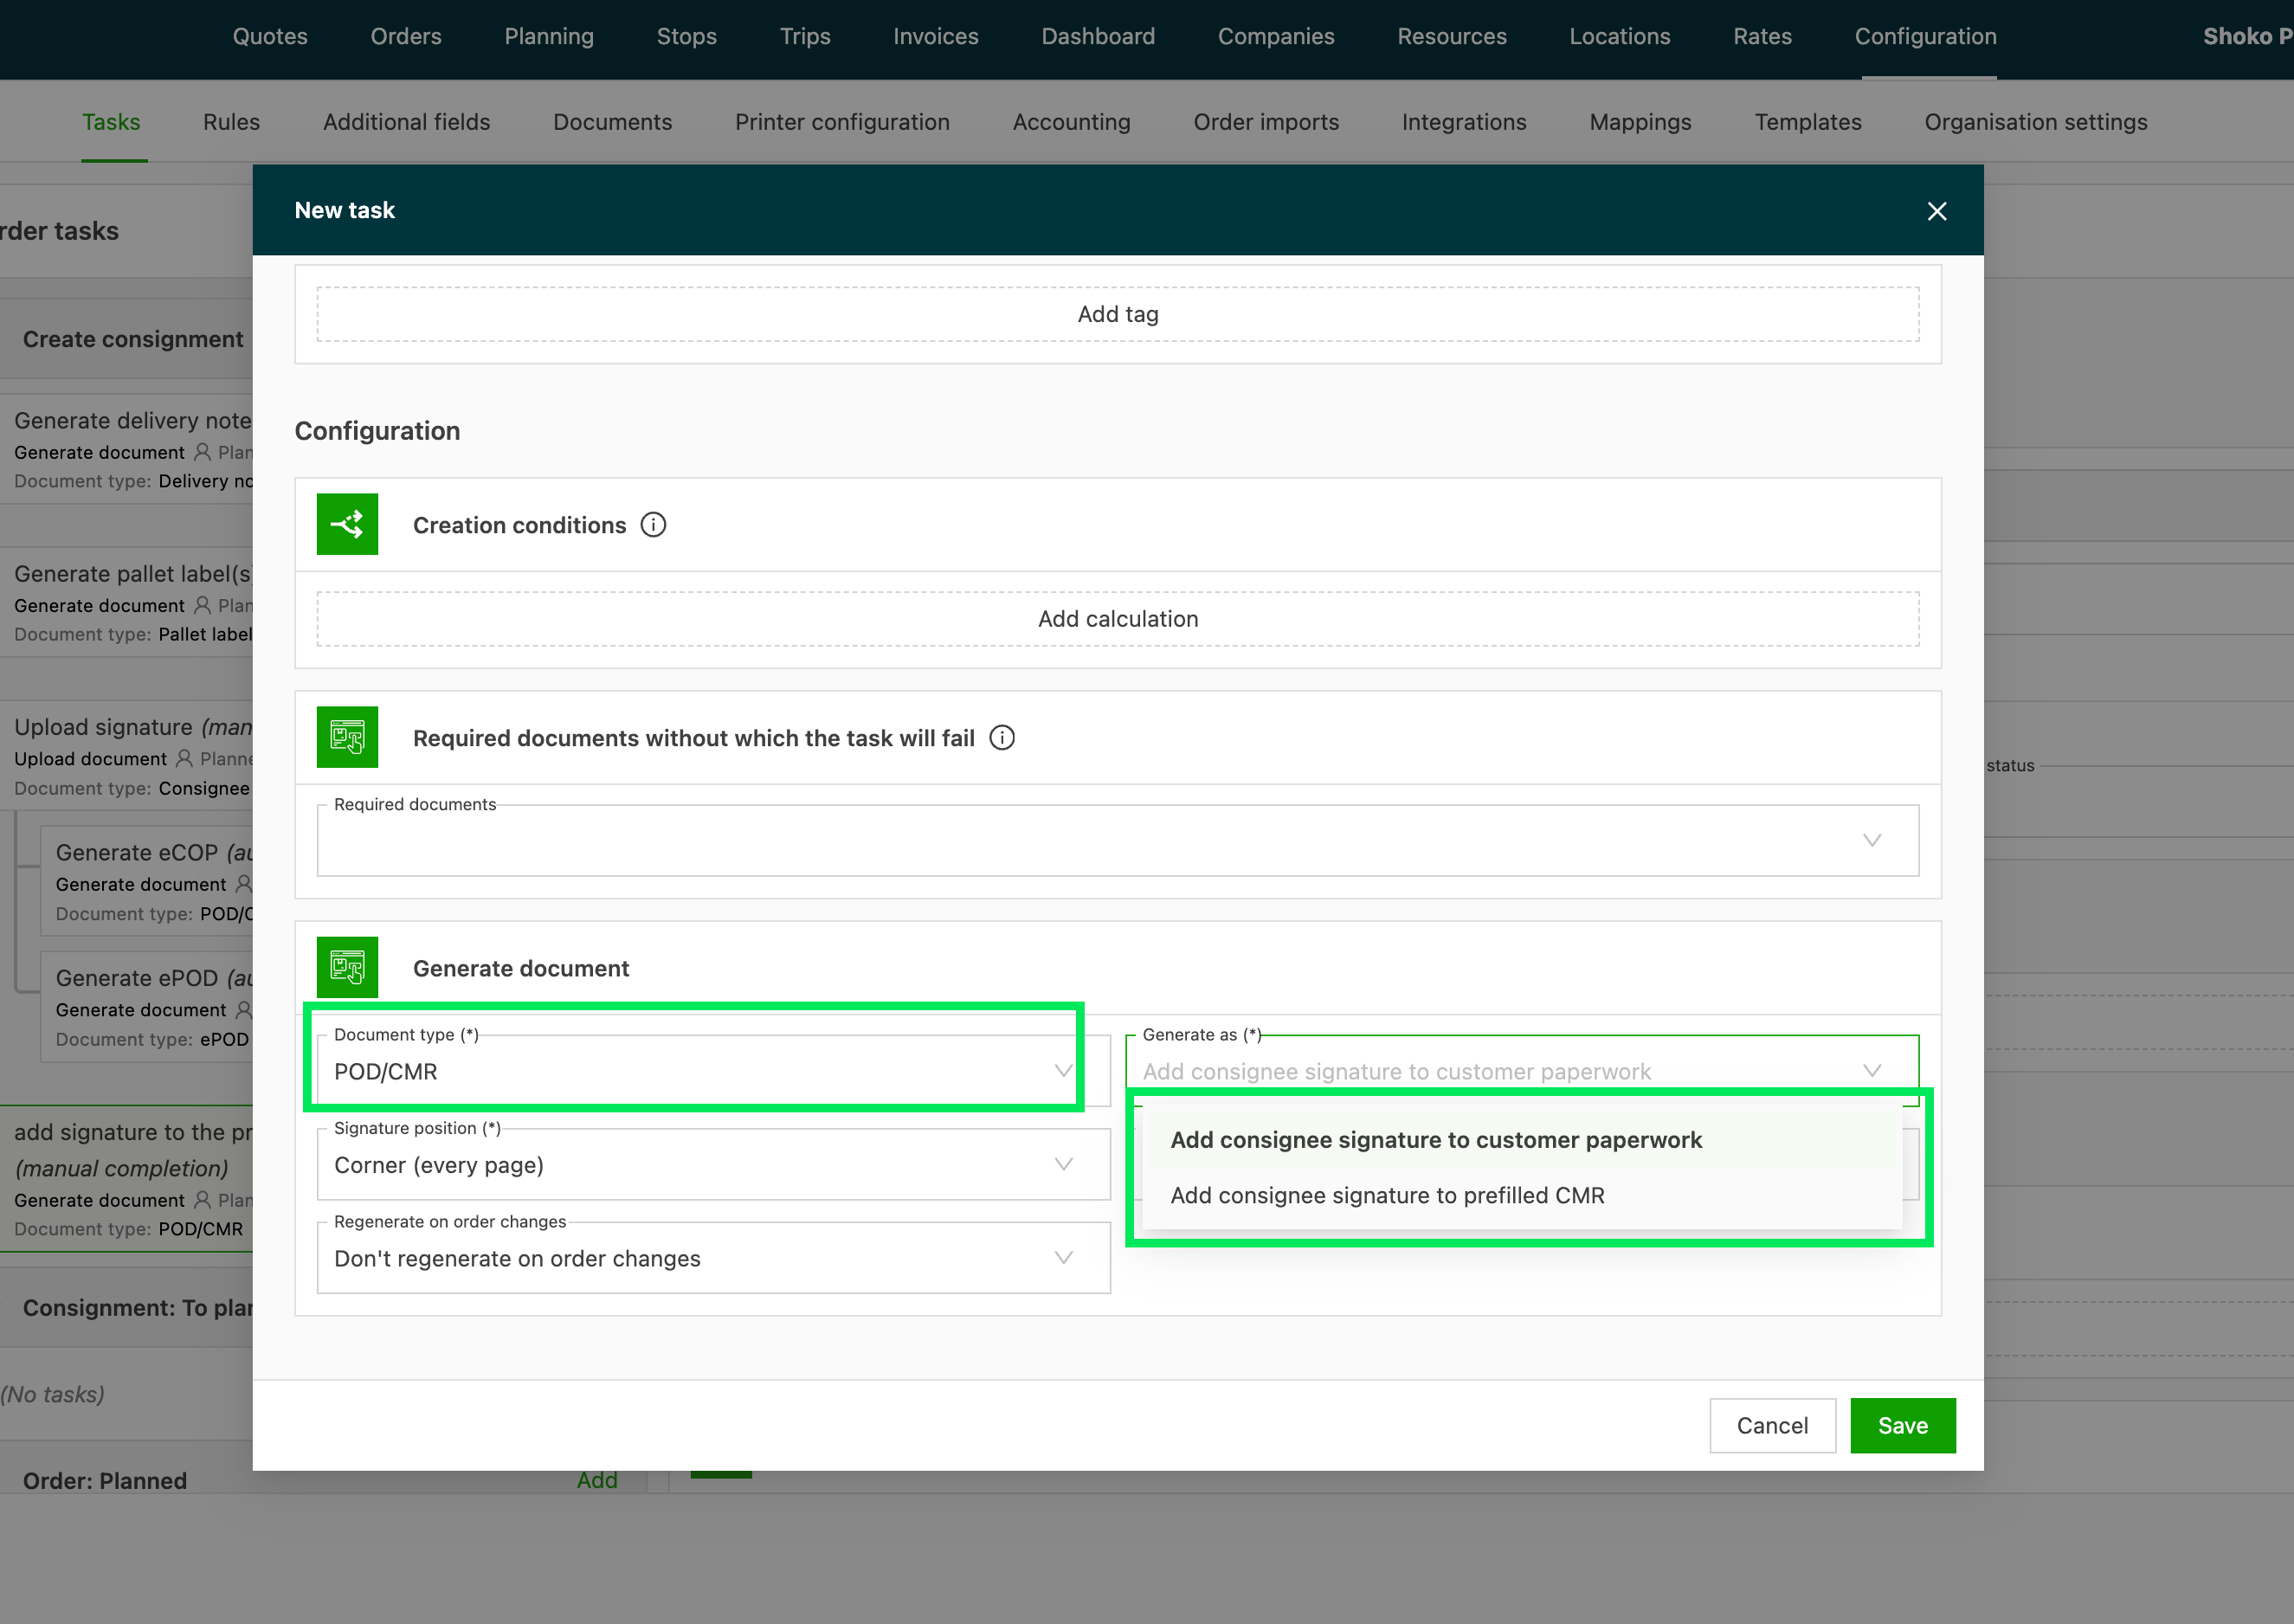
Choose POD/CMR as the Document type.
-
Select one of the two Generate as options:
- Add receiver signature to customer paperwork: adds the signer name, signature and timestamp to the uploaded customer paperwork and saves the result as a POD/CMR.
- Add receiver signature to prefilled CMR: places the signature on the prefilled CMR and saves the result as a POD/CMR. Suited to consignment note flows.
-
Set the Signature position (see below). It is required for both options.
-
Save the task.
Choosing the signature position
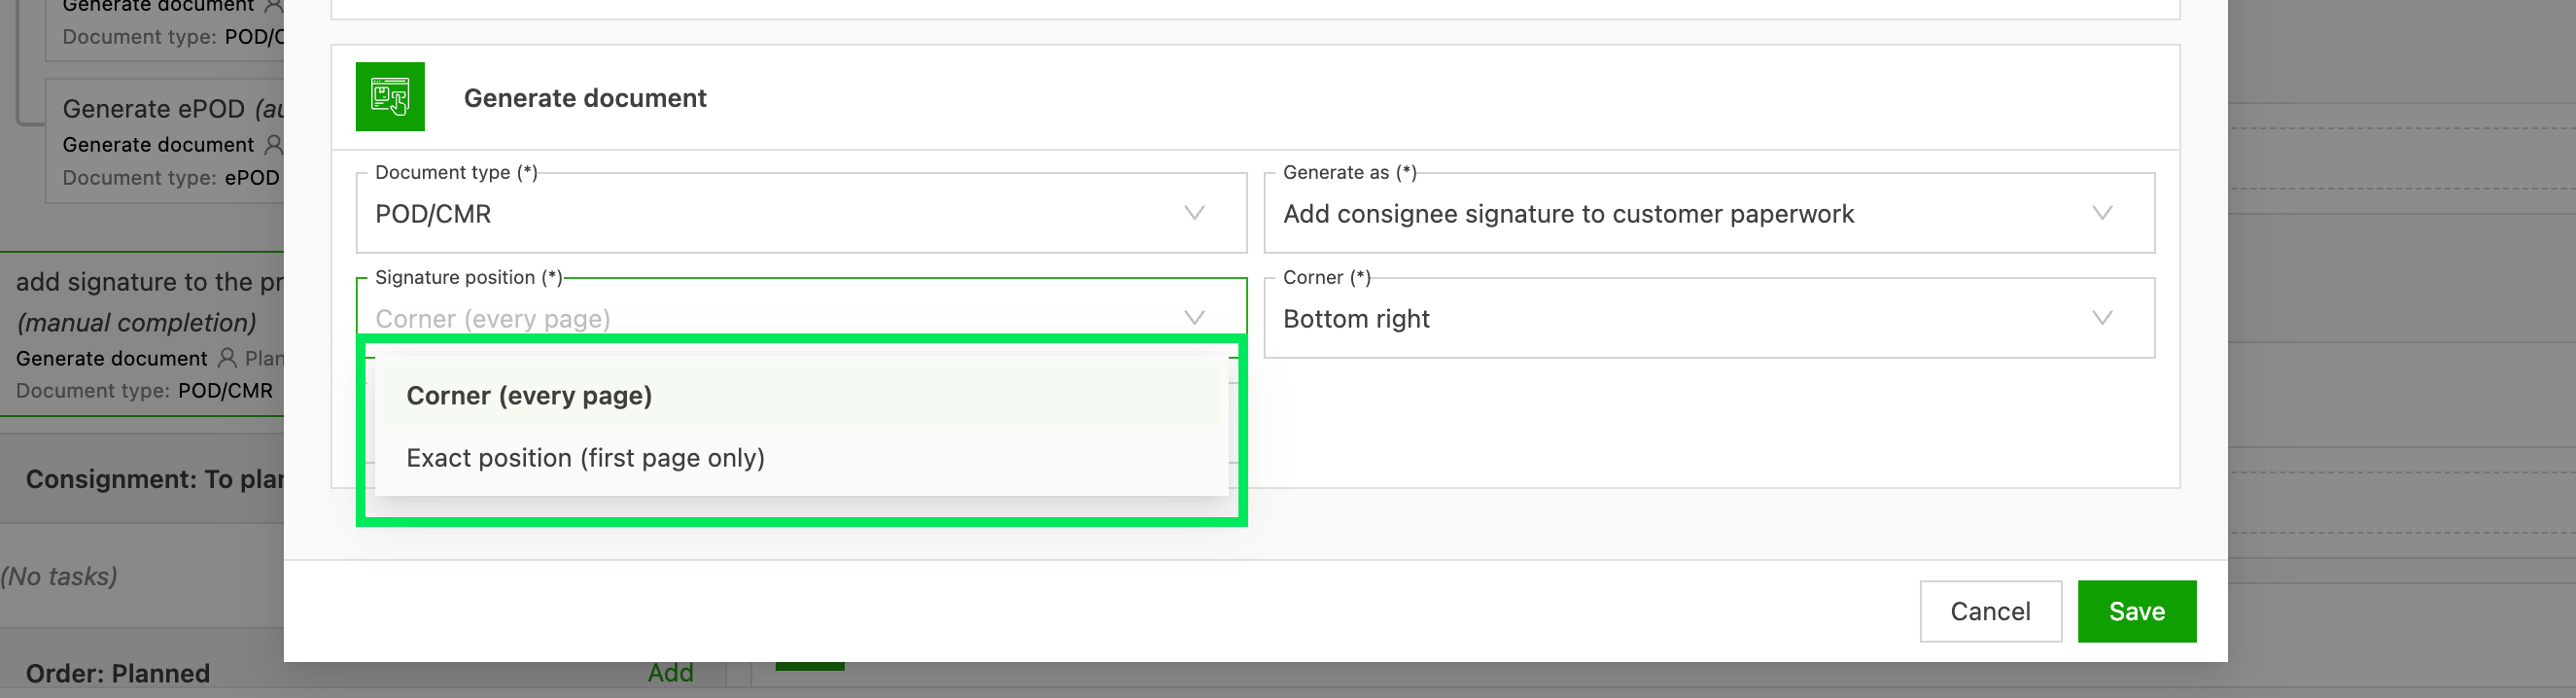
Signature position offers two ways to position the signature block.
| Option | How it works | Pages signed |
|---|---|---|
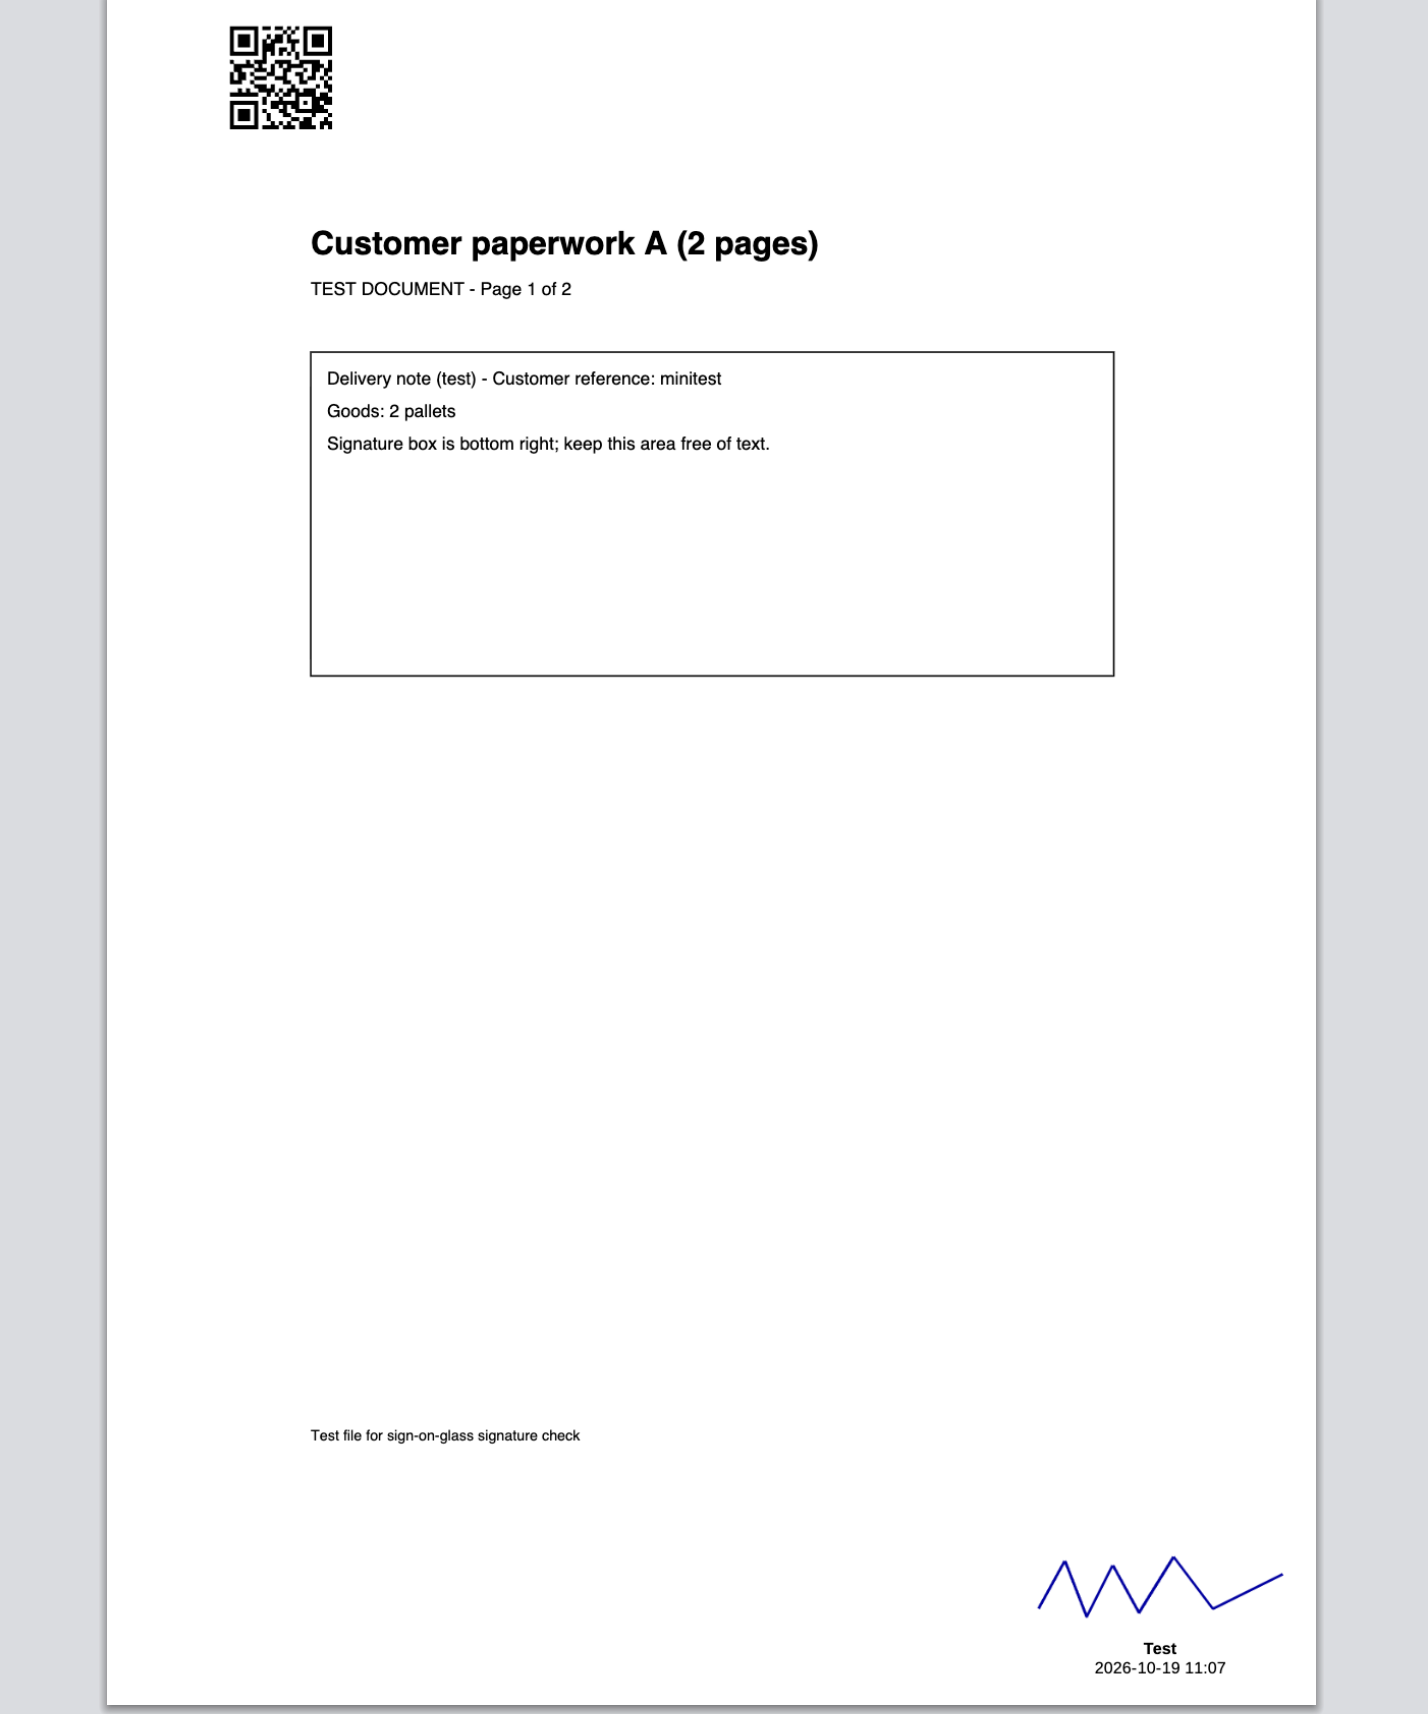
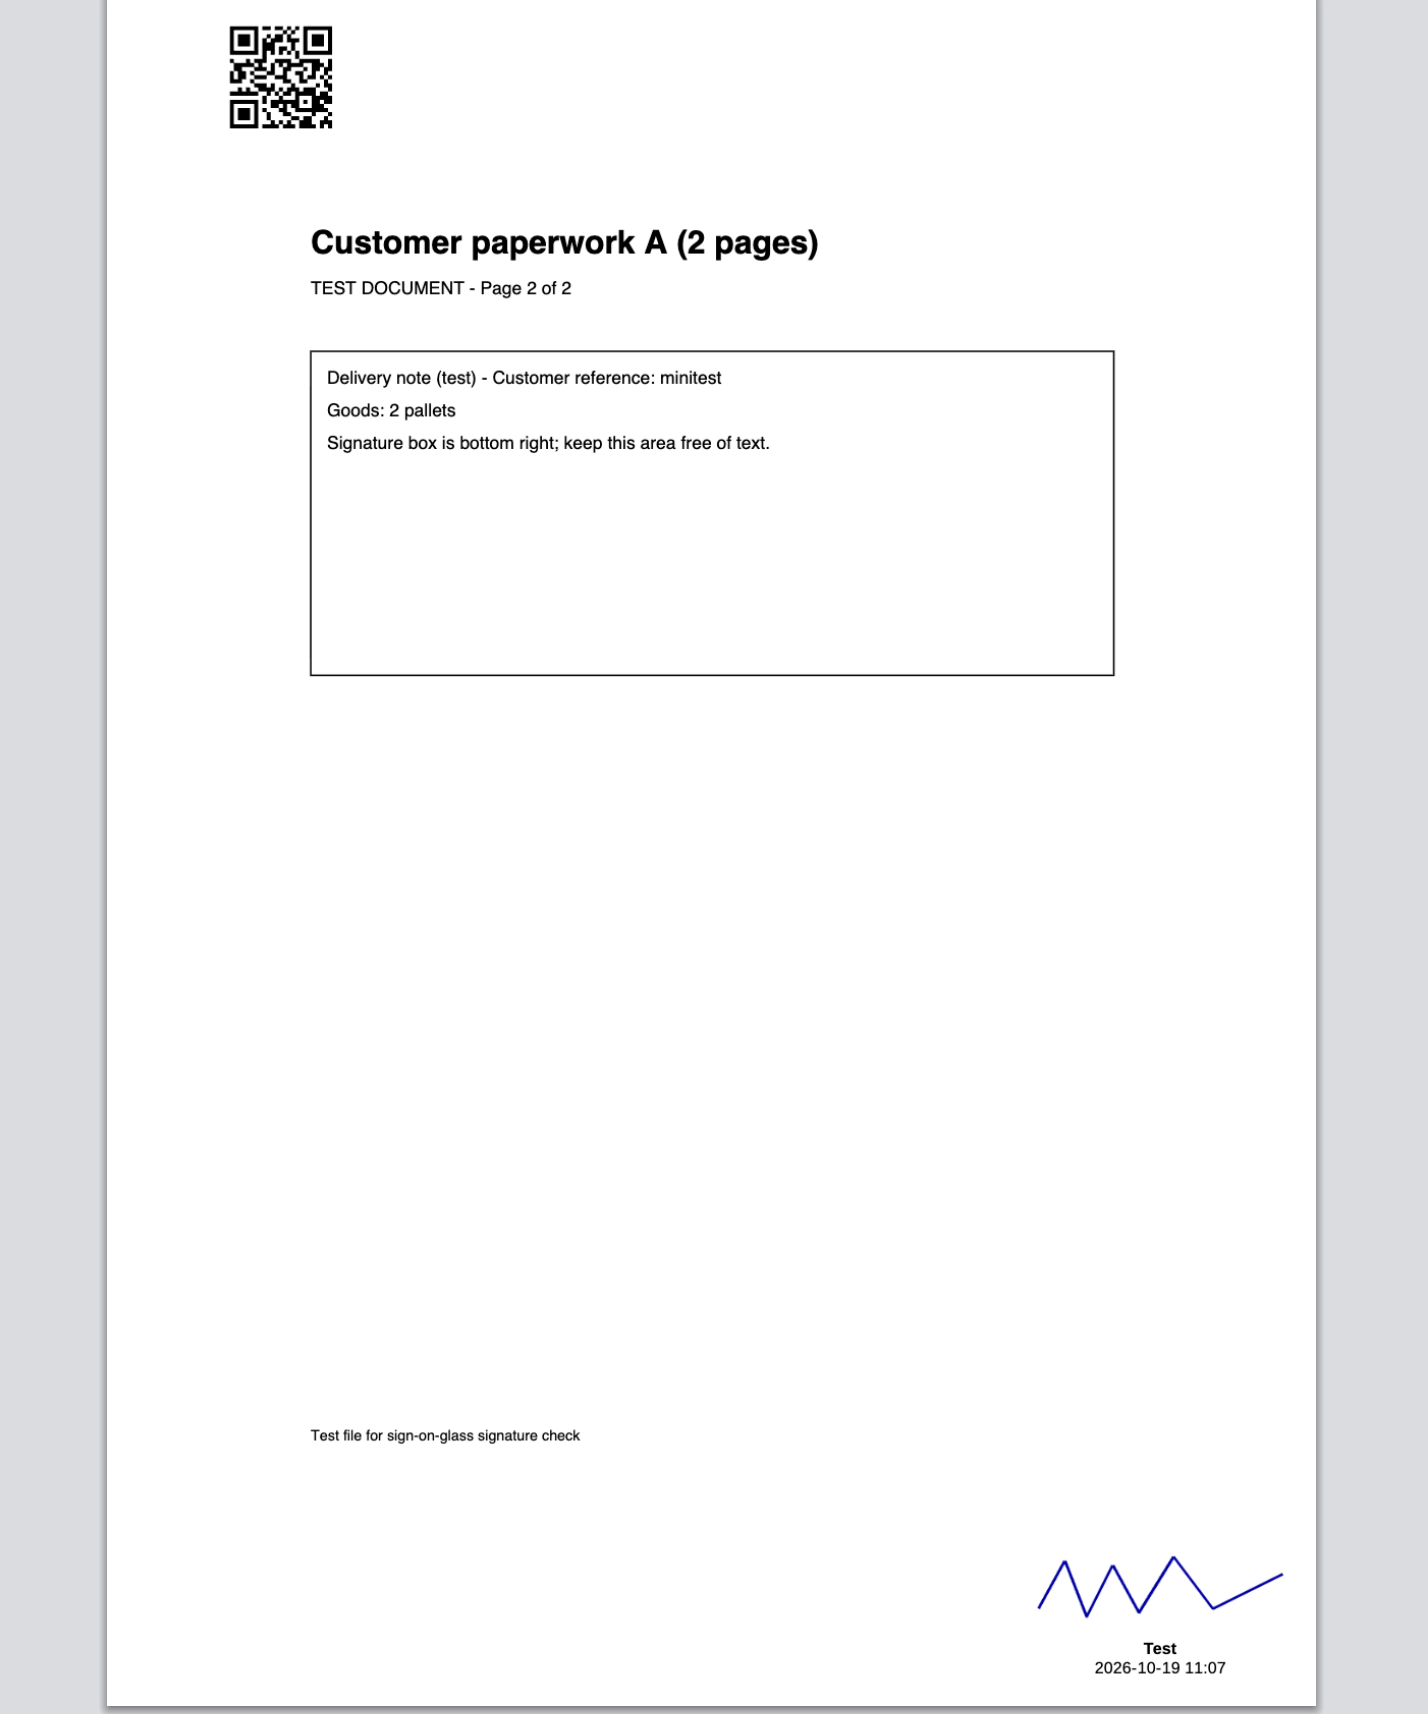
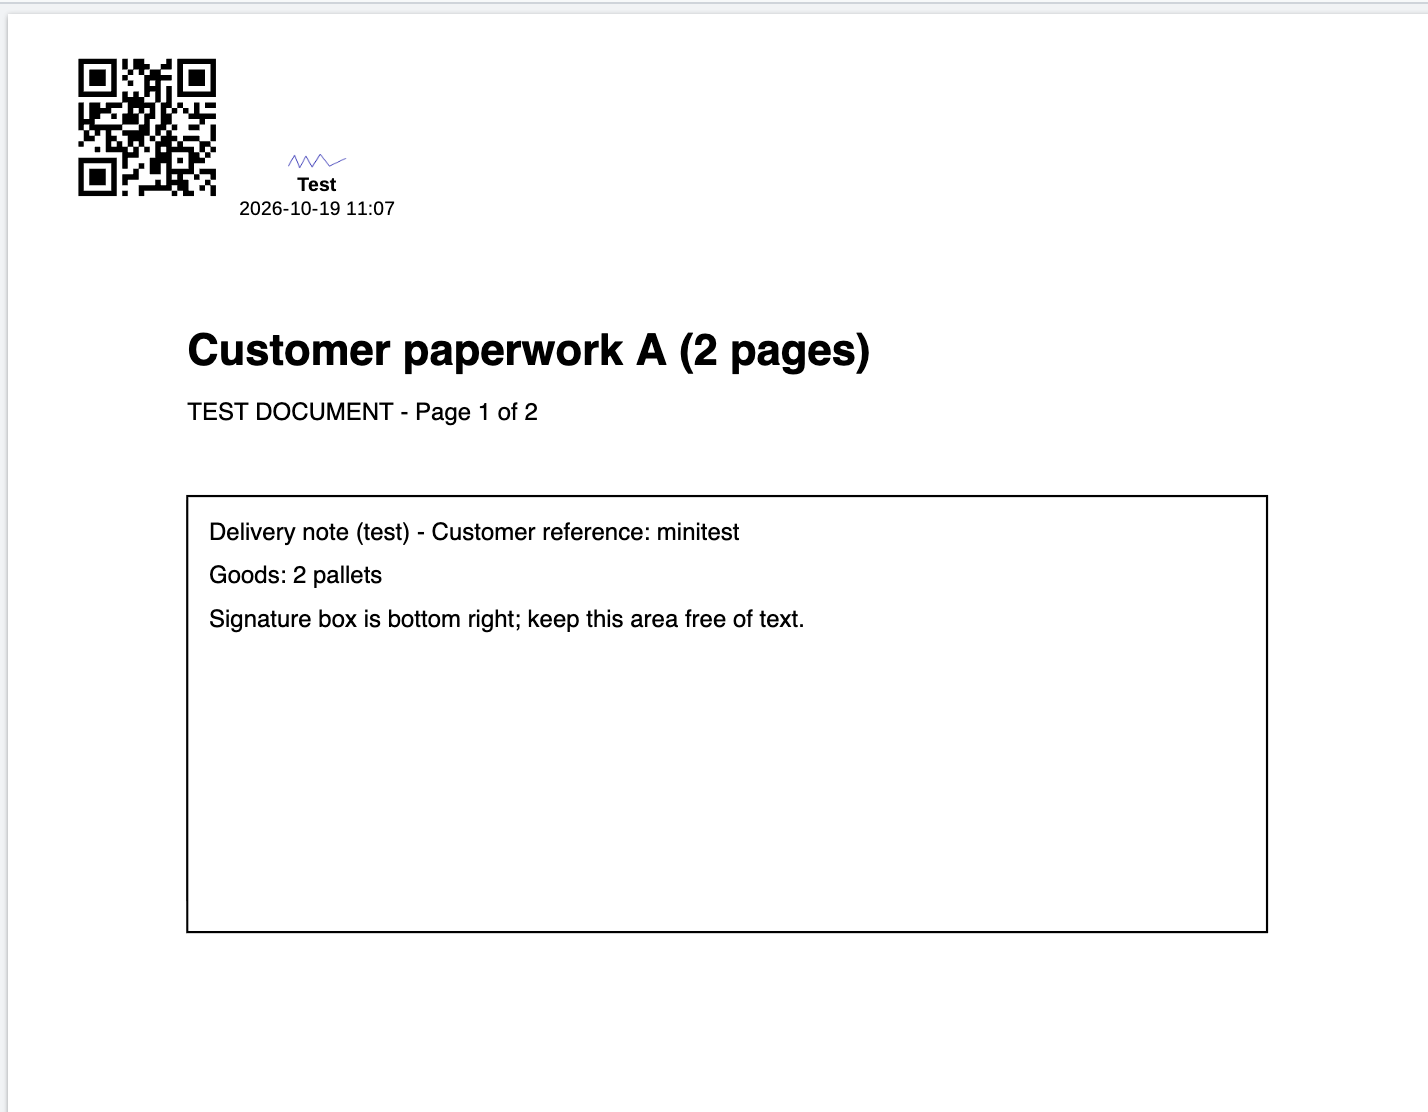
| Corner (every page), then Corner: top left, top right, bottom left or bottom right | Each page is scaled down slightly to make room, and the signature block is added in the chosen corner. | Every page |
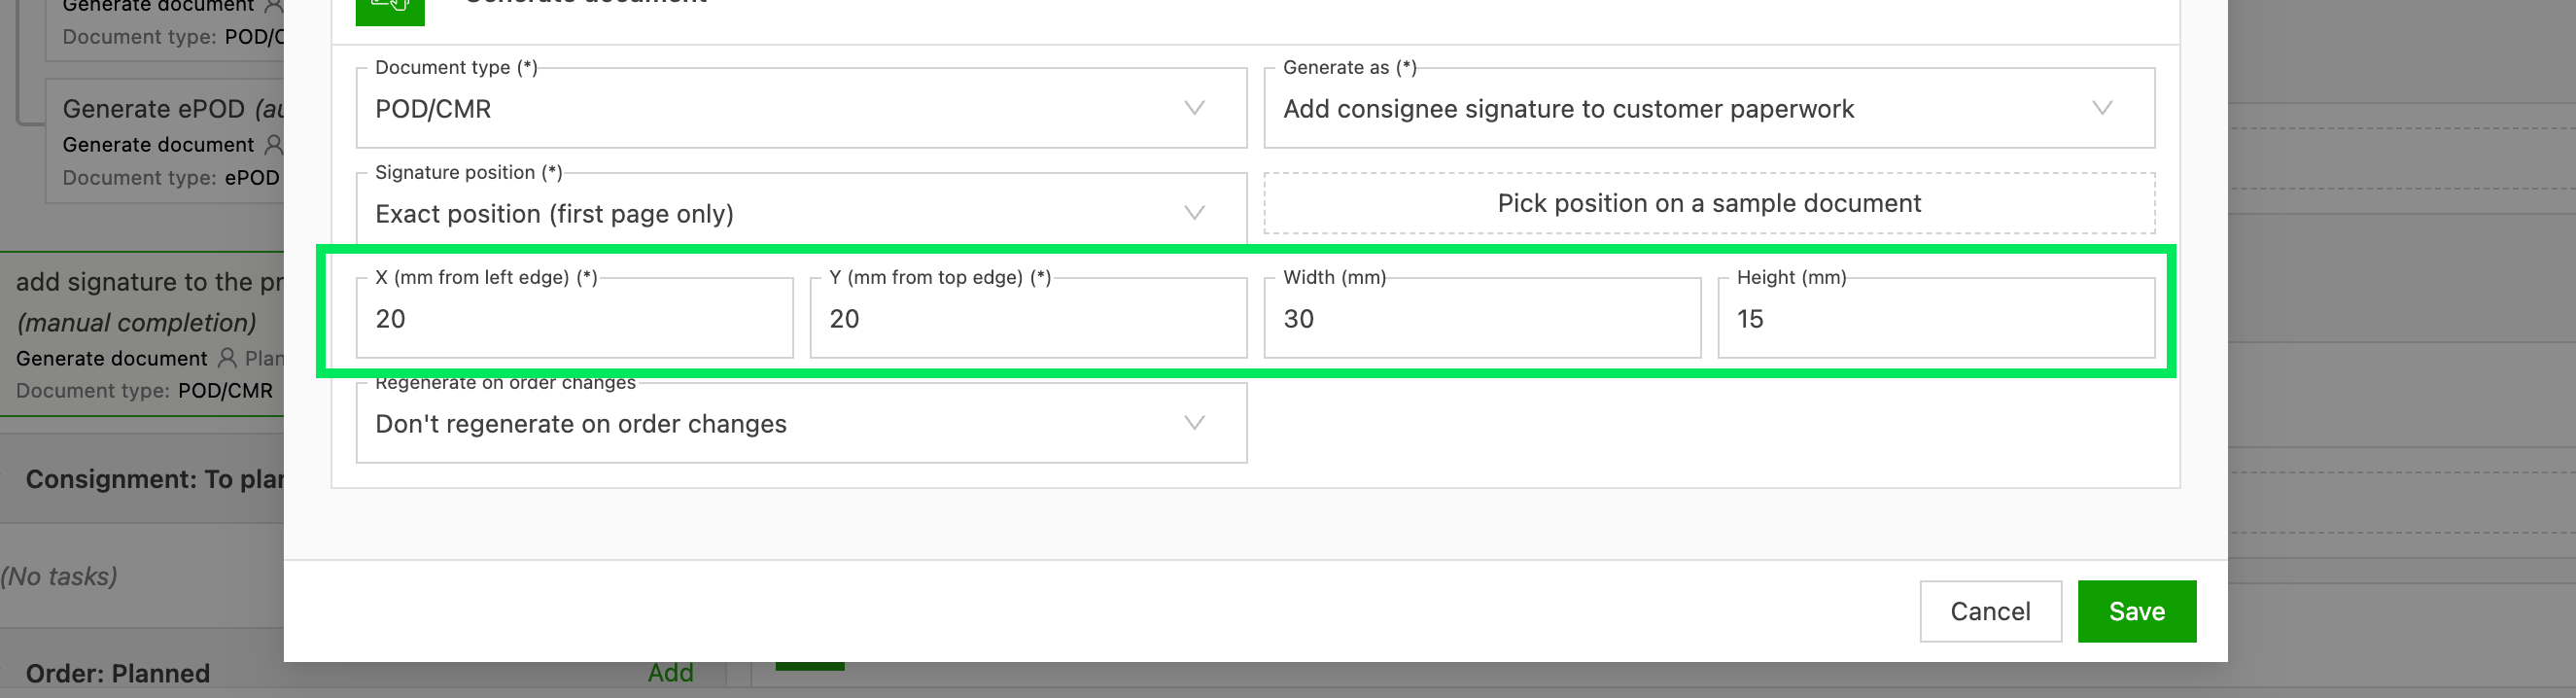
| Exact position (first page only) | The exact spot is set in millimeters, or selected on an example document. The page is not scaled. The block measures 45 x 25 mm by default. | First page only |
Using a different position for one customer
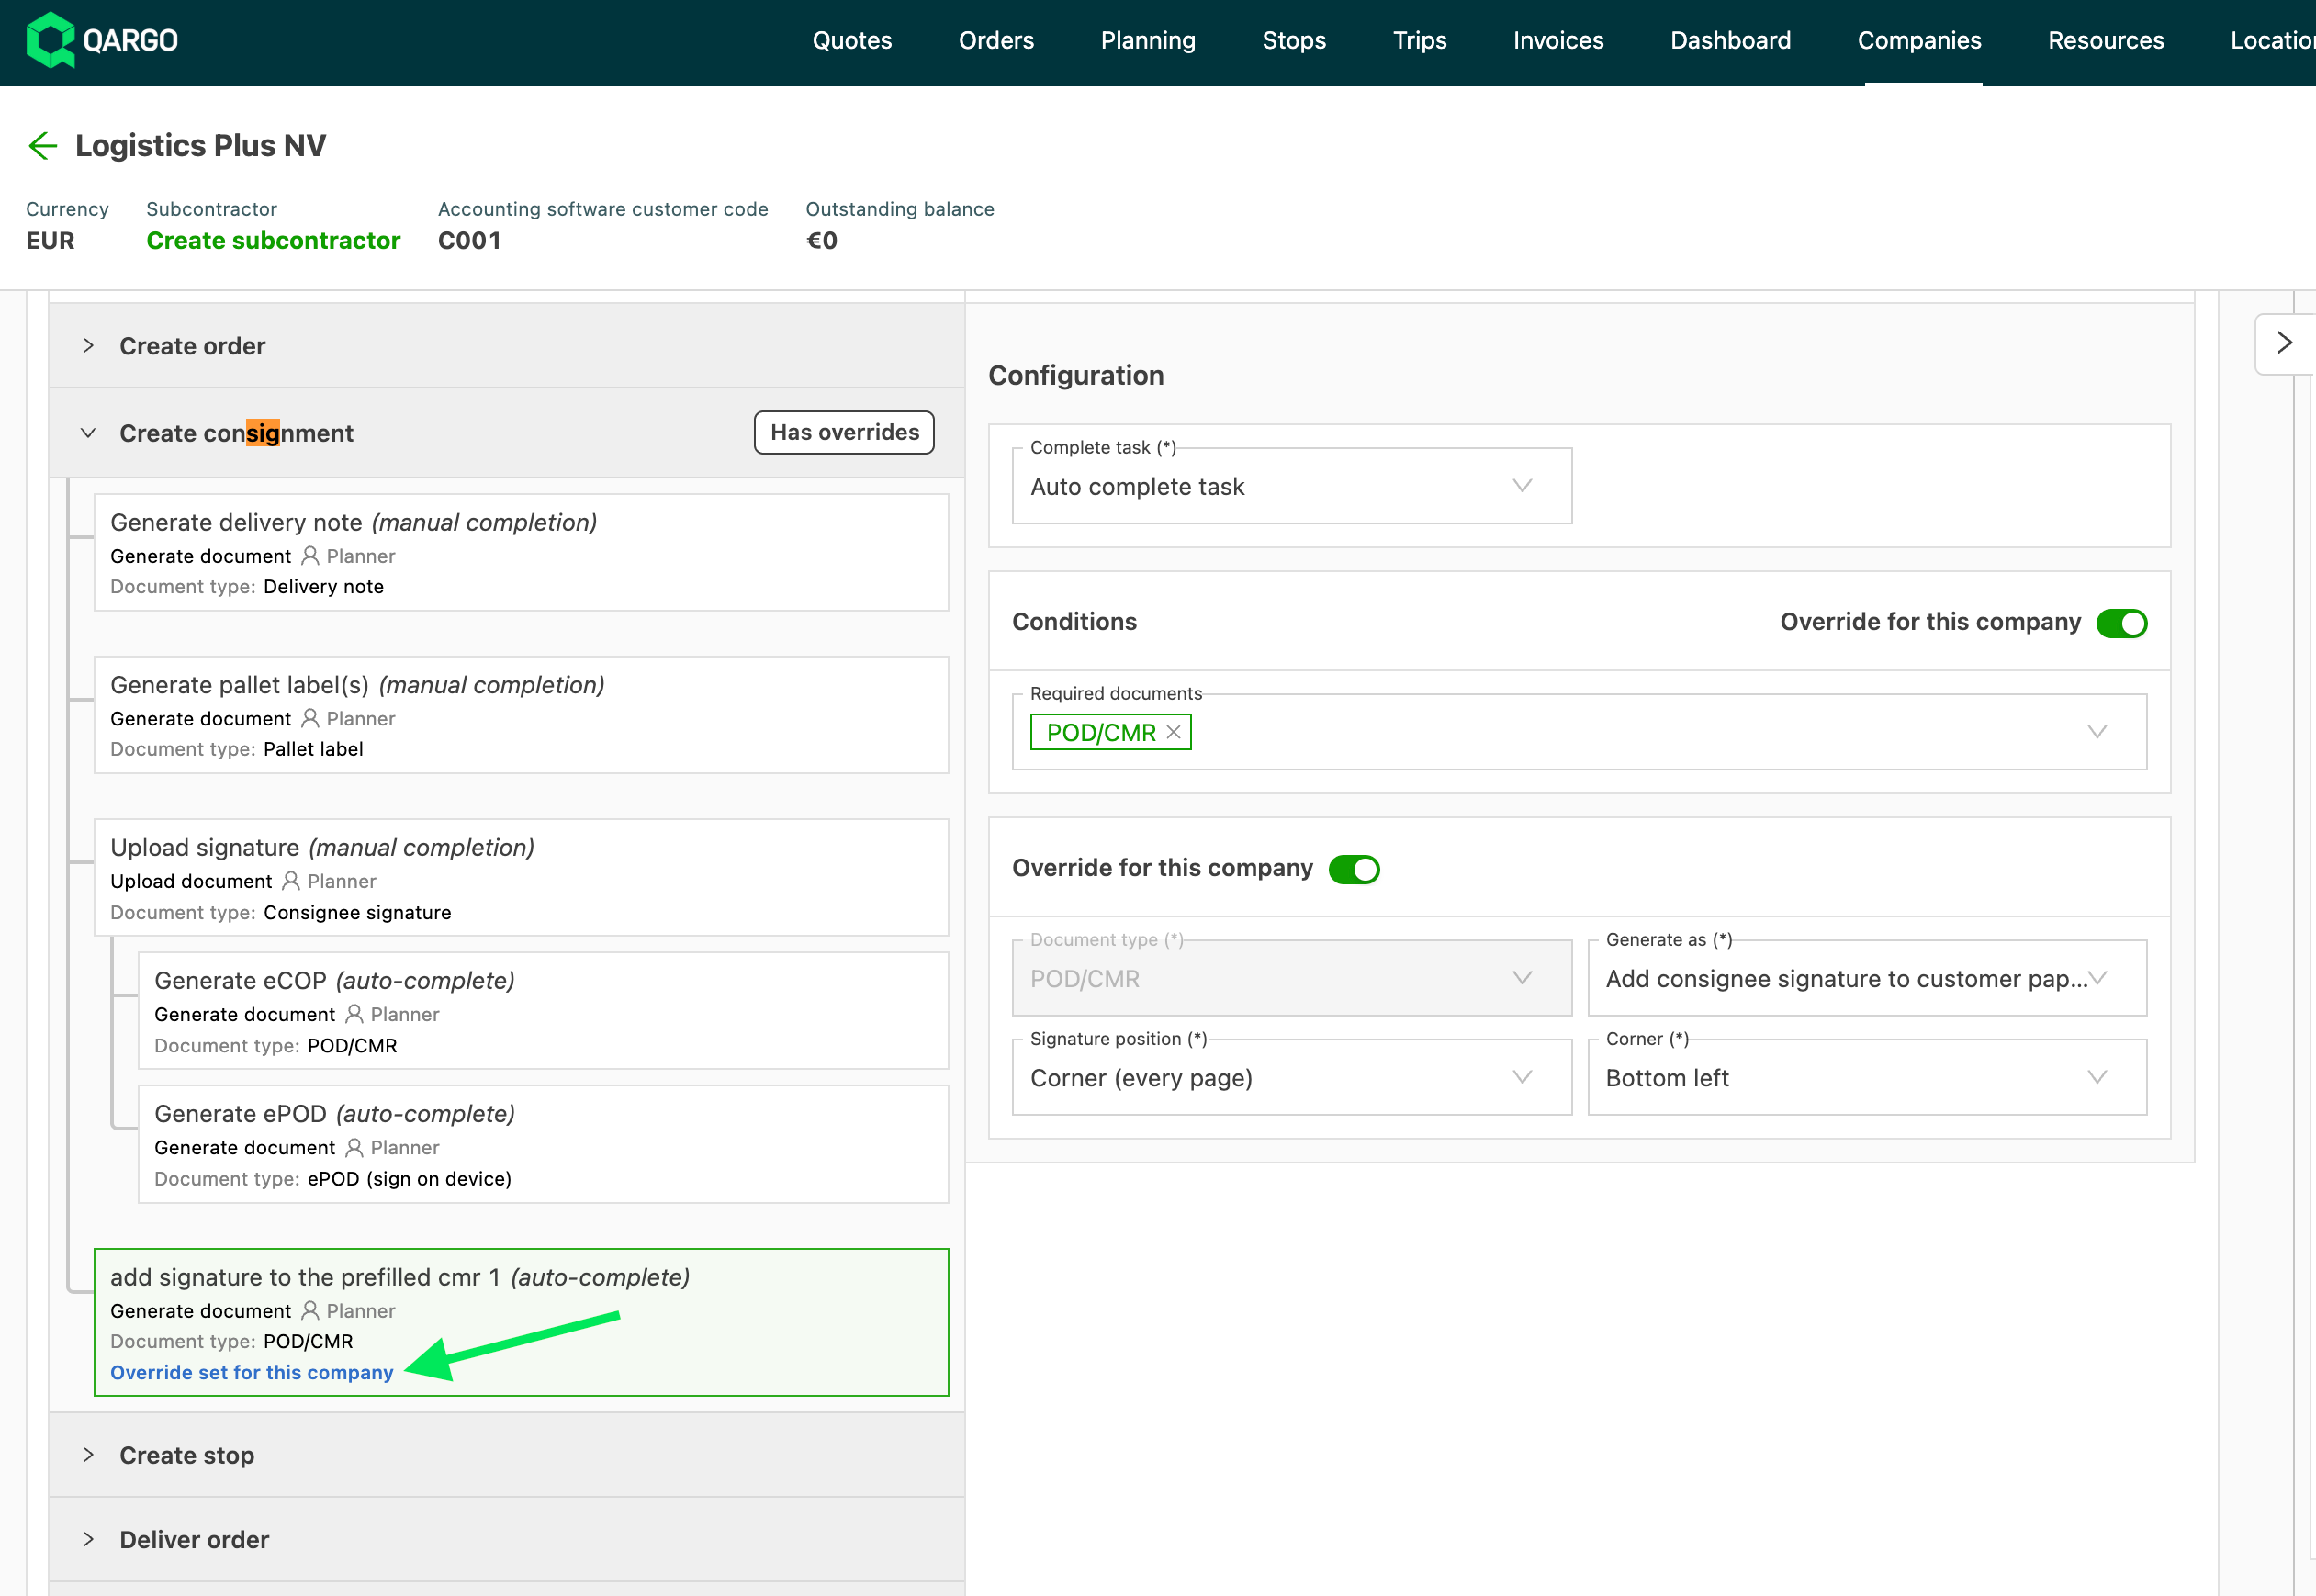
Each customer has its own paperwork, so a single position rarely fits all. A per-customer override applies a different signature position to that customer’s paperwork. All other customers keep the task default.
On the task, a banner lists the customers that have an override. Selecting the customer name opens their detail page.
- Navigate to Companies > Customers.
- Select a relevant customer.
- Scroll down to Tasks.
- Click Create shipment.
- Select the relevant task.
- Set up an override in the panel.
An override replaces the whole signature configuration. Later changes to the task default do not apply to that customer.
Running the task automatically at delivery
With Complete task set to Auto complete task and the task scheduled after the signature step, the signed document is created as soon as the signature step completes, in the same way as the ePOD task.
Examples
| Scenario | Result |
|---|---|
| A carrier used to upload customer paperwork to an external signing tool, position the signature, and email it to the driver. | The signed paperwork is created in Qargo at delivery, with no external step. |
| A customer’s own clients only accept the customer’s paperwork back. | The uploaded document returns with name, signature and timestamp in the required position, saved as a POD. |
| A customer requires the signature on every page. | A Corner position signs every page. |
Troubleshooting
| Issue | Solution |
|---|---|
| Customer paperwork is missing from Add document | Enable it under Configuration > Documents > Available document types. |
| No signed POD was created, only the ePOD | Upload the paperwork before the signature step. |
| No signed POD was created and the receiver signature was skipped | Capture the receiver signature. Without it, no signed document is created. |
| Only the first page is signed | Switch to a Corner position. |
| The task failed | See How to sign every customer paperwork document on a shipment (link to be added). |
FAQ
Q: Where does the signed document go?
A: It is saved as a POD/CMR document. It can be viewed, printed and downloaded like any other document.
Q: What if a shipment has several customer paperwork documents?
A: Each one is signed and saved as its own POD/CMR.
Q: Can the signed document be emailed automatically?
A: Yes, with a workflow task. See Tasks - Add workflow tasks.