
PLANNING - Distribution planning view
The Distribution planning view splits the Planning Legs into two stacked tables, orders still to plan and planned loads, so planners running multi-stop distribution work can build, extend, and merge loads directly from the view.
Table of contents
- Key terminology
- Use cases
- 🎥 Watch the video on the Distribution planning view
- Open the Distribution planning view
- Read the load and order rows
- Create a new load from unplanned orders
- Add orders to existing loads
- Merge orders into an existing load
- Merge orders into another order in an existing load
- Resolve stop order warnings
- Troubleshooting
- Related content
Key terminology
| Term | Definition |
|---|---|
| Load | A sequence of stops (orders) completed by a vehicle within a single distribution round. |
| Order | A delivery or pickup job that requires planning and assignment to a load. |
| Stage (leg) | A single point within a load, representing the pickup or drop-off of an order. |
| Primary resource | The main asset assigned to perform a load, such as a specific vehicle or driver. |
| Optimizer | Qargo’s engine that automatically determines the most efficient route and sequence for stops within a load. |
Use cases
- Distribution (messagerie) planners managing daily multi-stop rounds can sort unplanned orders by the combined Pickup/Delivery location column and group orders by geography before they go onto a route.
- Planners extending an existing round with late incoming orders can merge those orders into the load and let the optimizer insert each stop at the right point in the route.
- Consolidation planners can see at a glance which legs belong to which load, with every order stage nested under its load summary row, instead of one flat list.
🎥 Watch the video on the Distribution planning view
Open the Distribution planning view
- Navigate to the Planning module.
- Select the Legs view from the planning view options.
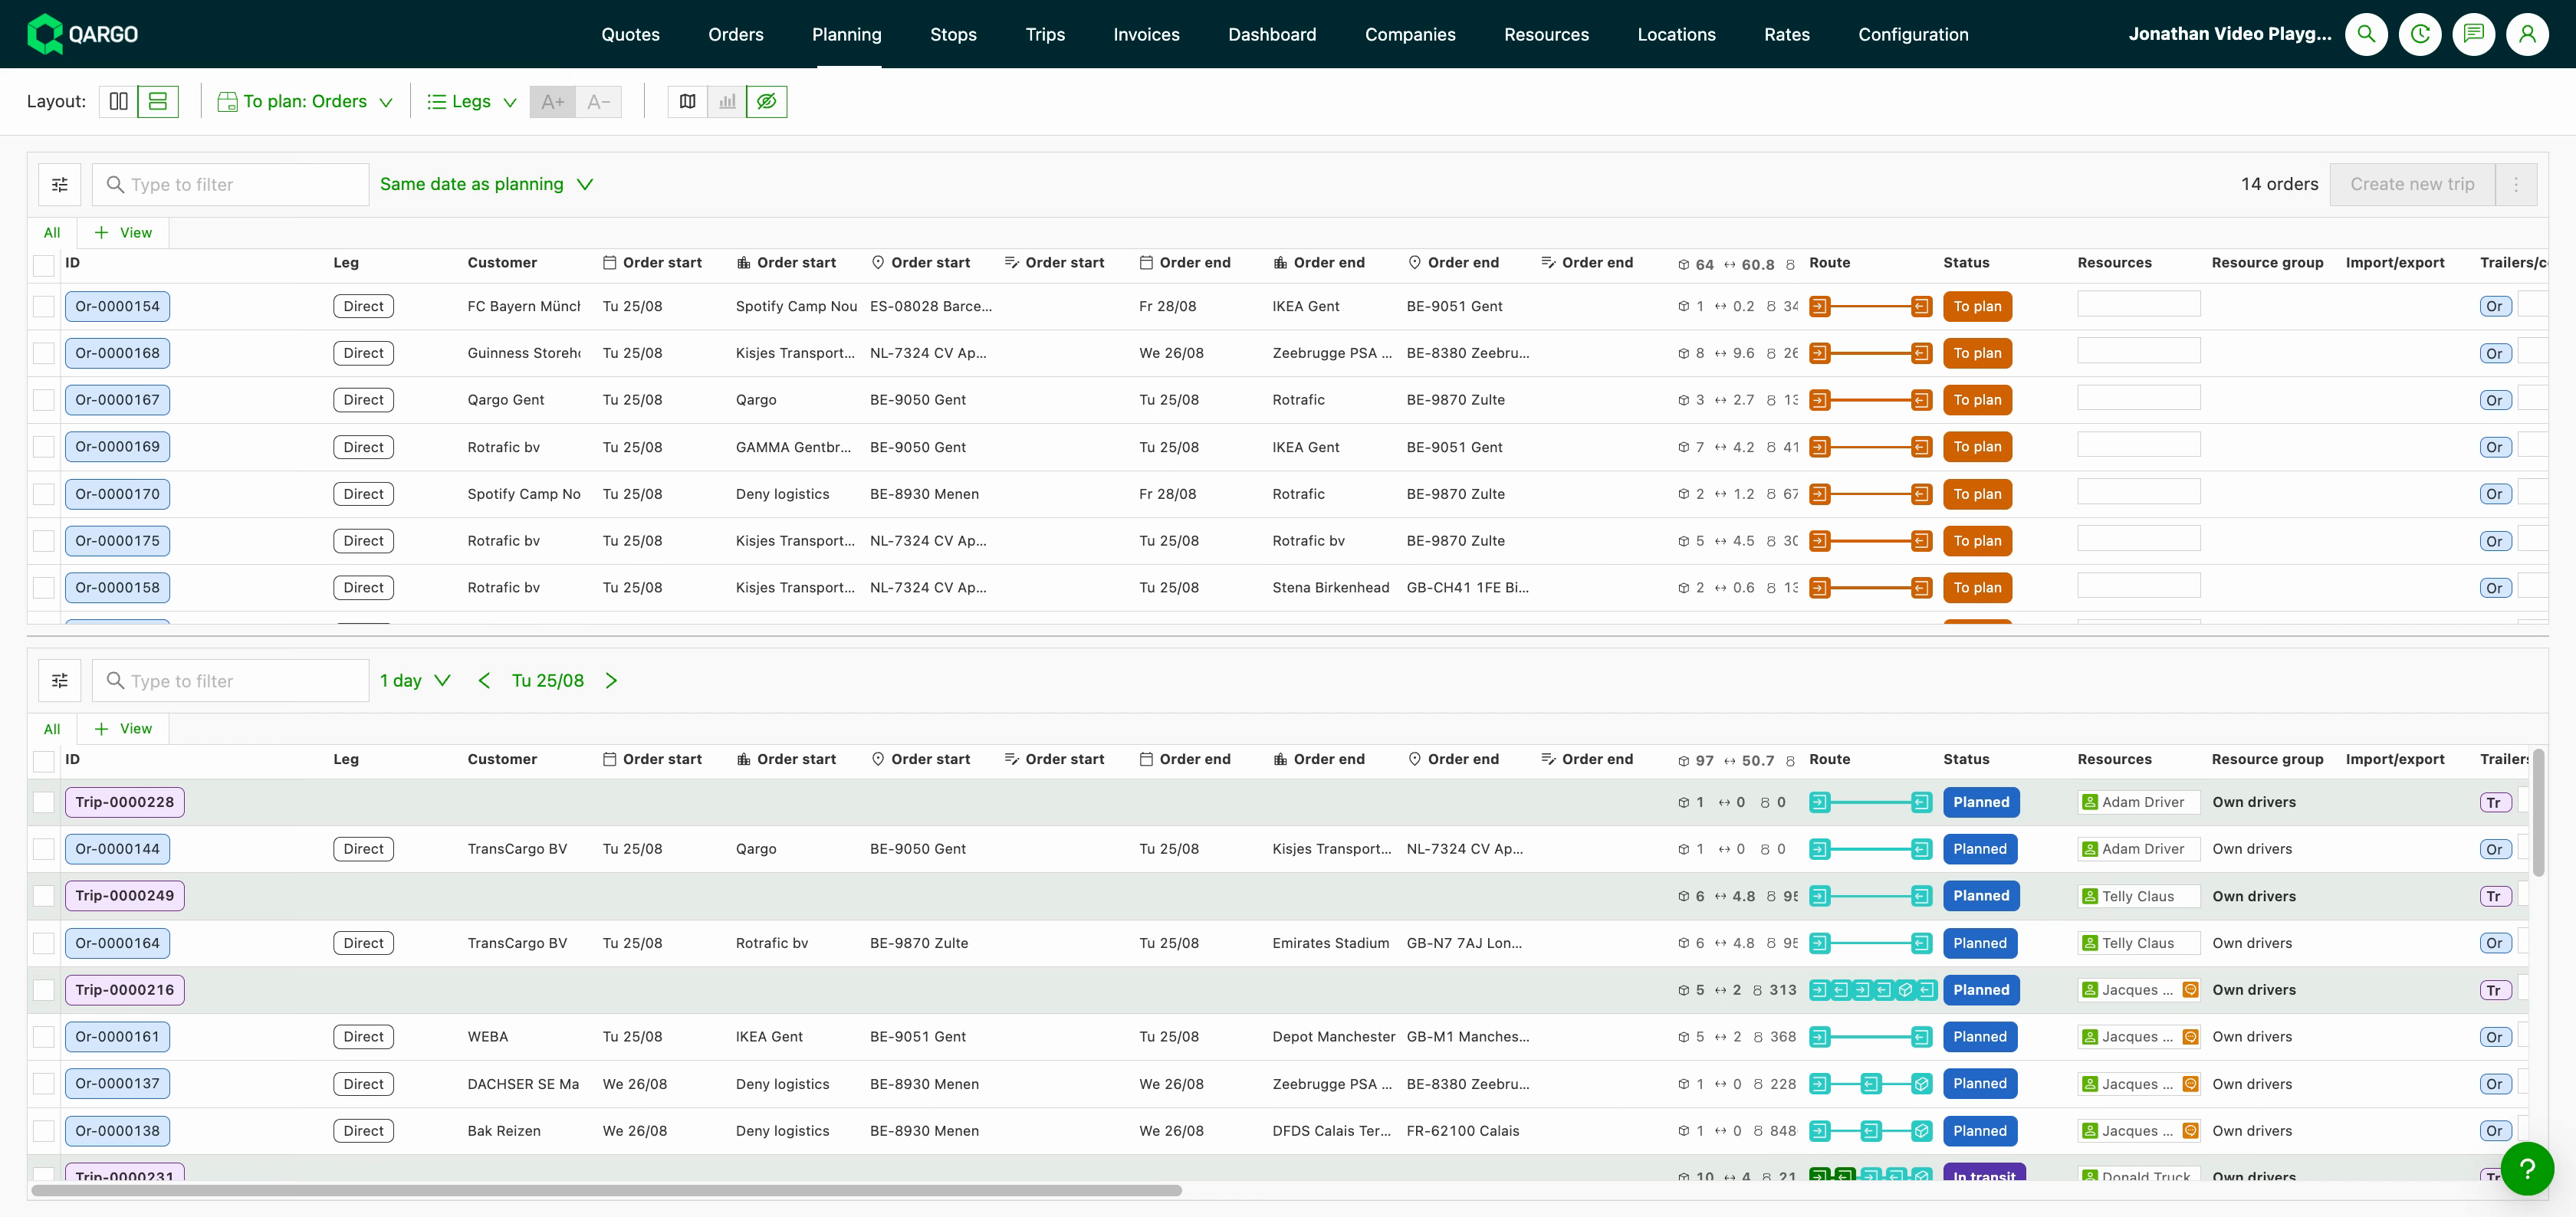
With the feature enabled, the Legs view shows two stacked tables:
- The top table lists orders still to plan.
- The bottom table lists planned loads, with each order stage nested under its load summary row.
- Horizontal scrolling stays linked so the columns line up, and each table scrolls vertically on its own.
Read the load and order rows
Every value is pinned to its level, so a load row and a stage row never mix totals:
- A load row shows the peak quantity carried at any point in the load and the route of the whole load.
- A stage row shows what is loaded or unloaded at that stop and that order’s own route, with the part belonging to the current load highlighted.
- In the planned table, a filter selects loads, not legs: a matching load stays fully visible with all its orders, so a planner can see what else that truck is carrying.
Create a new load from unplanned orders
- Select the checkboxes of the orders to plan in the top table.
- Click Create new load.
- Review the new load: the optimizer inserts each stop at the right point in the route.
Add orders to existing loads
There are two ways to quickly drop an order into an existing load.
- Select the checkboxes of the order(s) to add.
- Hover over the planned view on the left until an arrow appears
- Click the arrow at the location where the order should be added
Another way to add an order to an existing load is drag-and-drop.
- Click and hold the order in the To plan view
- Drag the order down to the load it should be added to
- Drop the order on the location in the load where it should land
Merge orders into an existing load
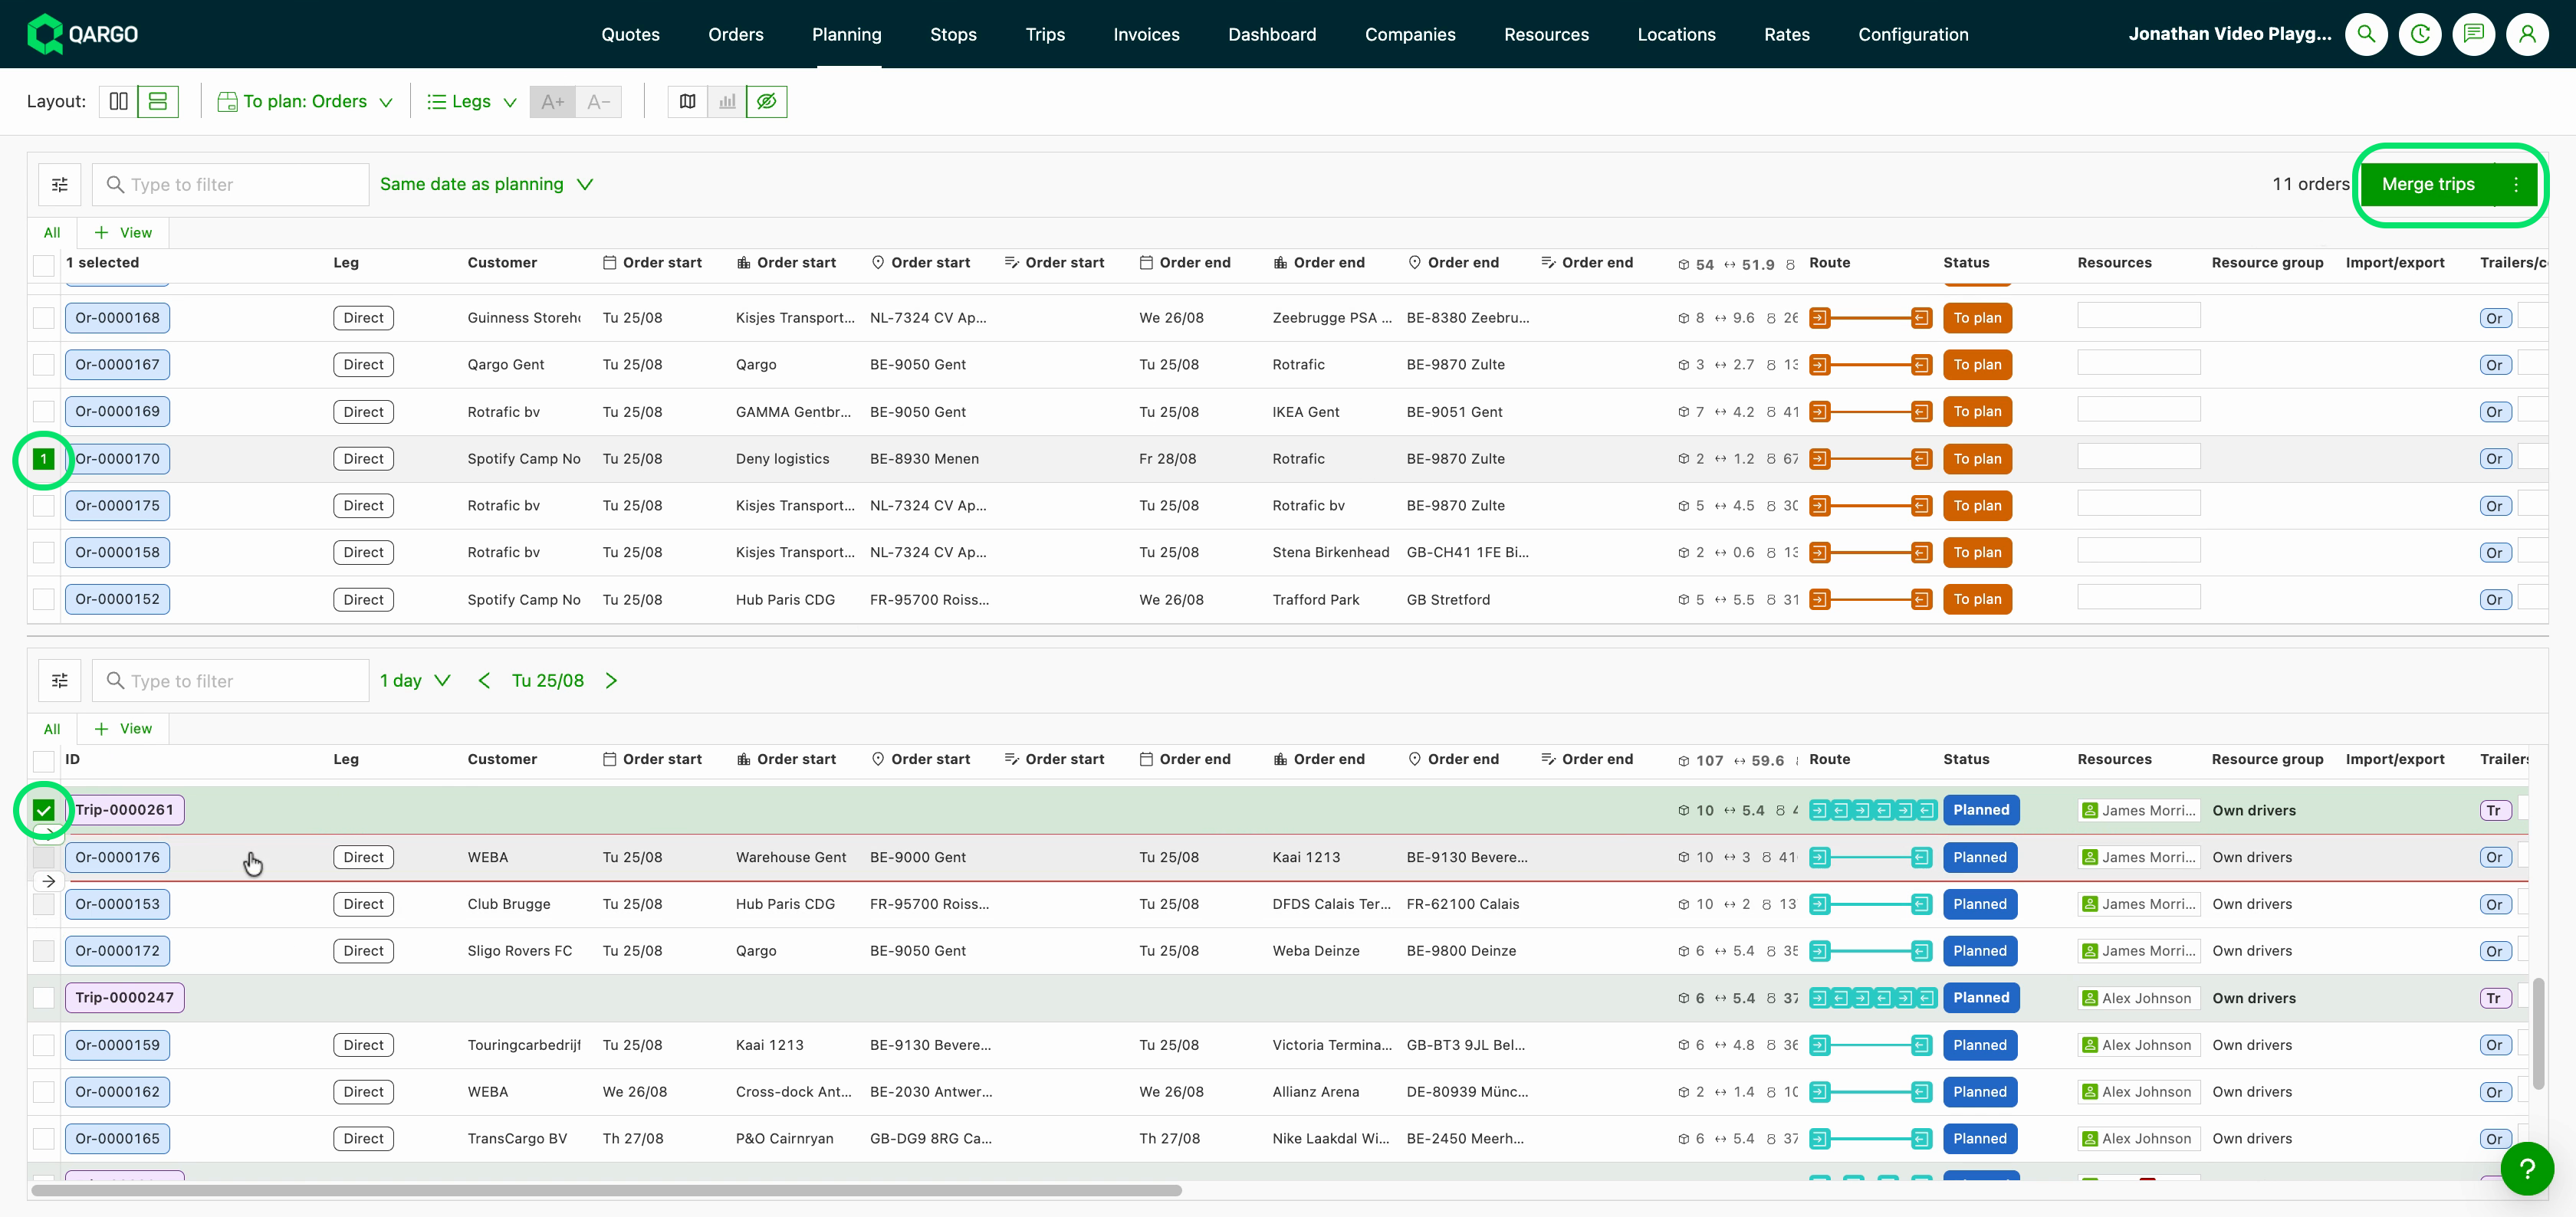
- Select one or more orders in the to-plan table together with one or more existing loads in the planned table.
- Merge the selection into a single load: the existing optimizer inserts each stop at the right point in the route.
- Check the primary resource in the merge modal. It is pre-filled when exactly one load is selected, and left empty when several loads are selected, instead of the system picking one for the planner.
- Confirm to save the merged load.
Merge orders into another order in an existing load
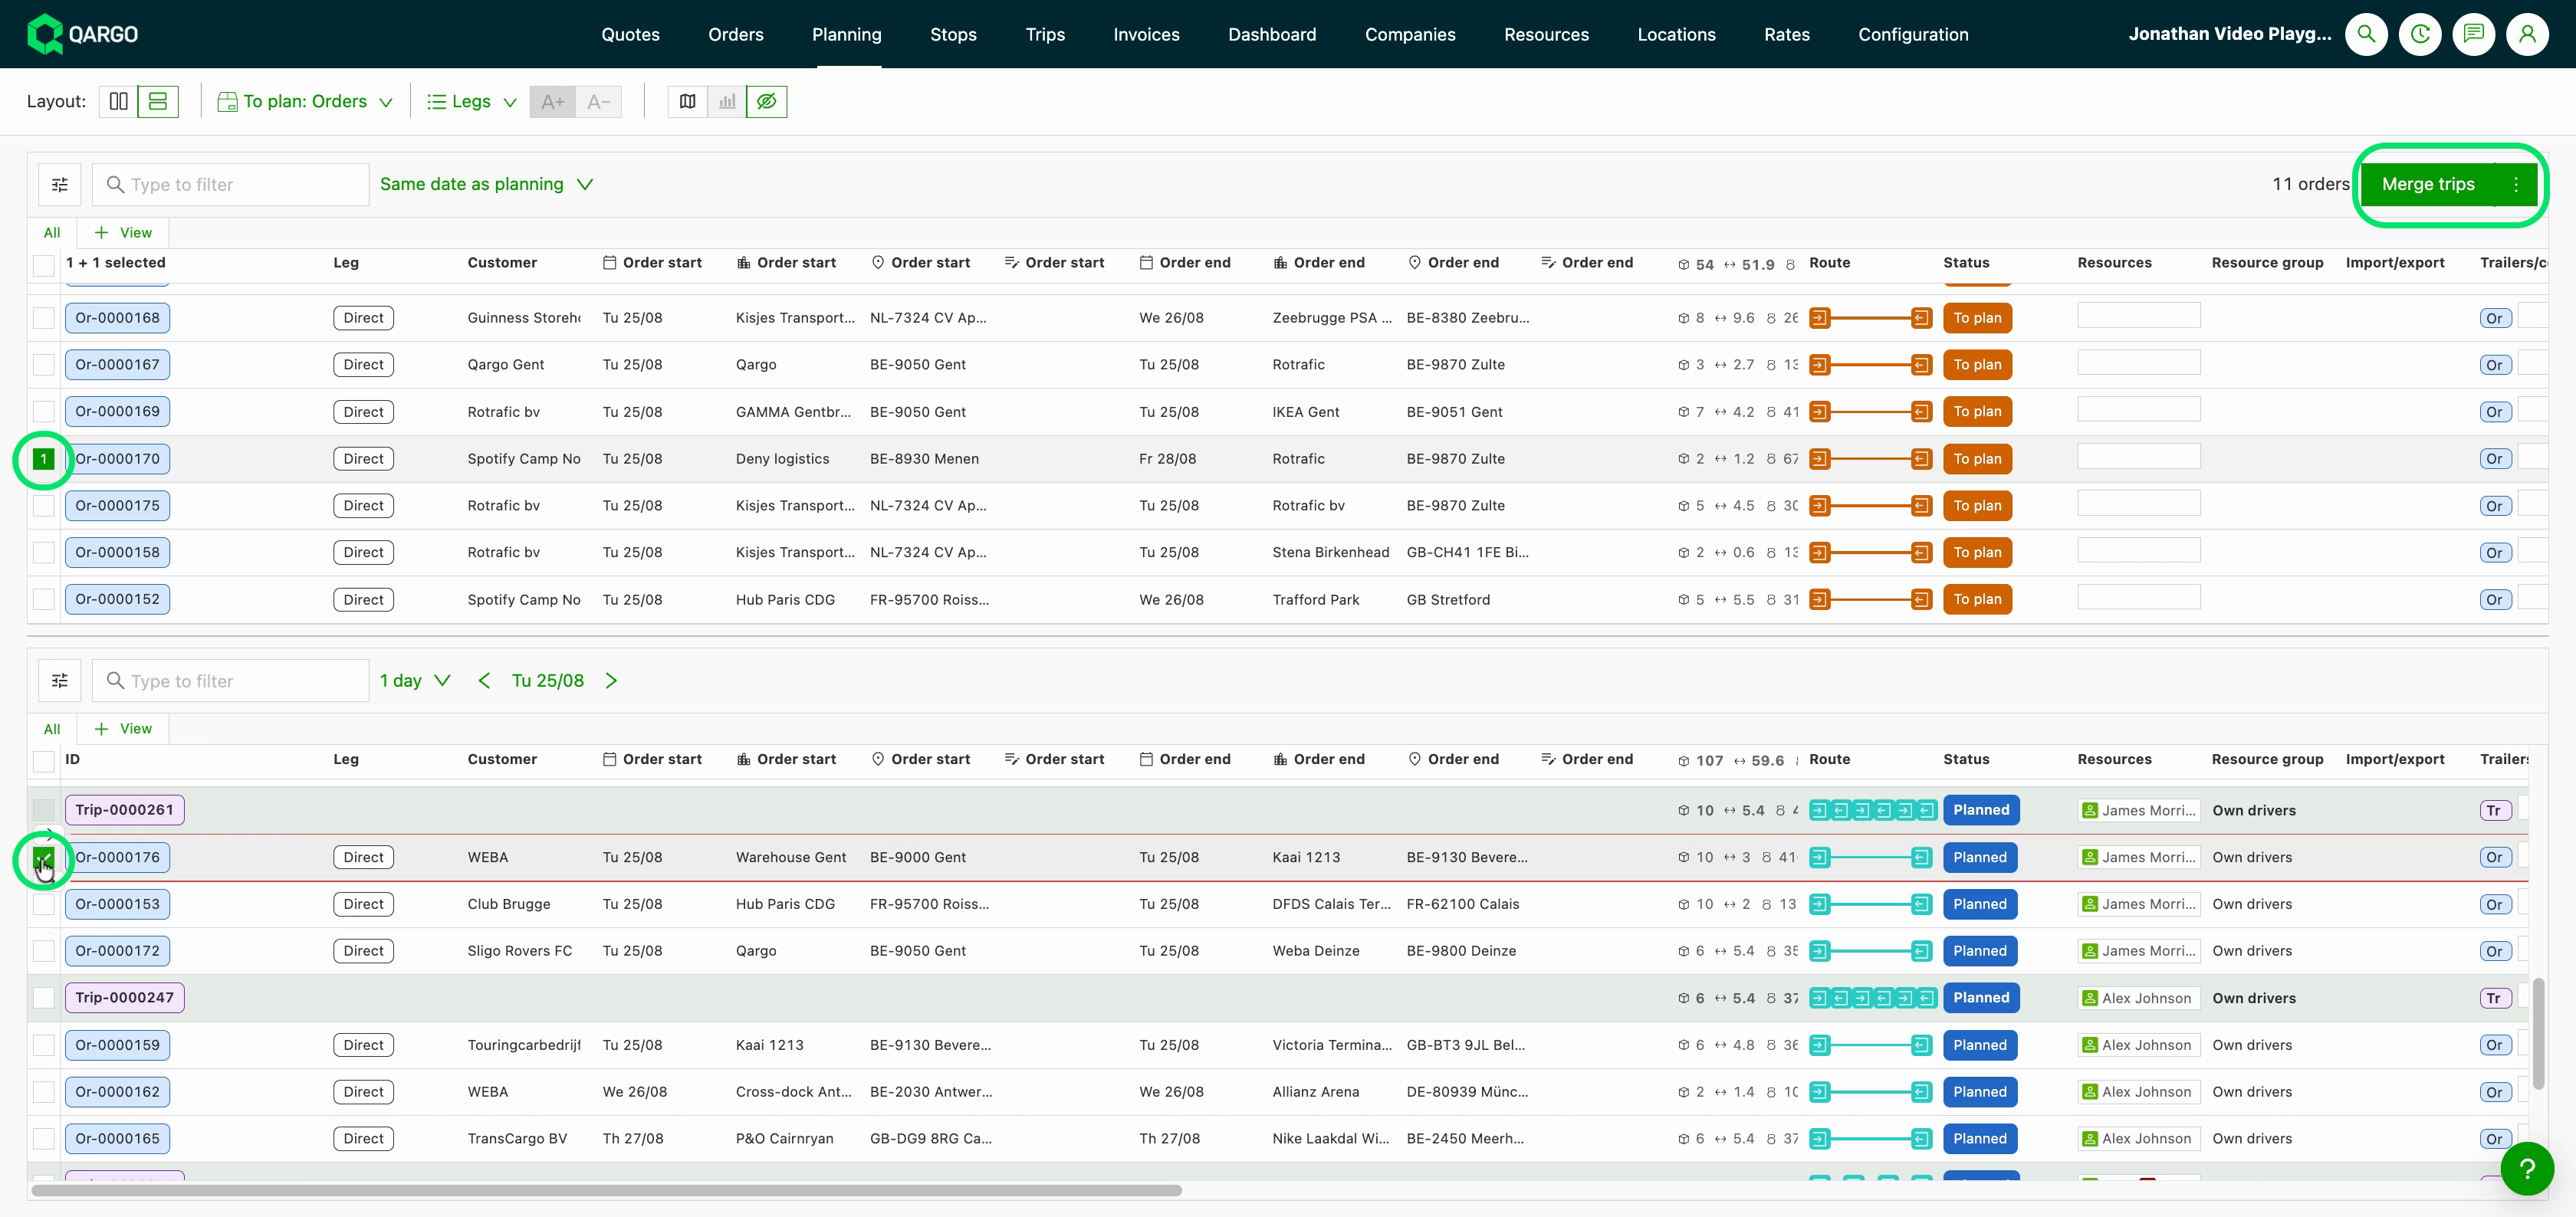
- Select one or more orders in the to-plan table together with one or more existing orders in the planned table.
- Merge the selection into a new load: the optimizer takes the planned order out of the existing load and creates a new load with the order from the To plan board.
- Add a primary resource in the merge modal. It is not pre-filled, since a new load is created.
- Confirm to save the merged load.
Resolve stop order warnings
When the optimizer cannot work out where an order’s stops belong, the load is flagged instead of blocking the planner.
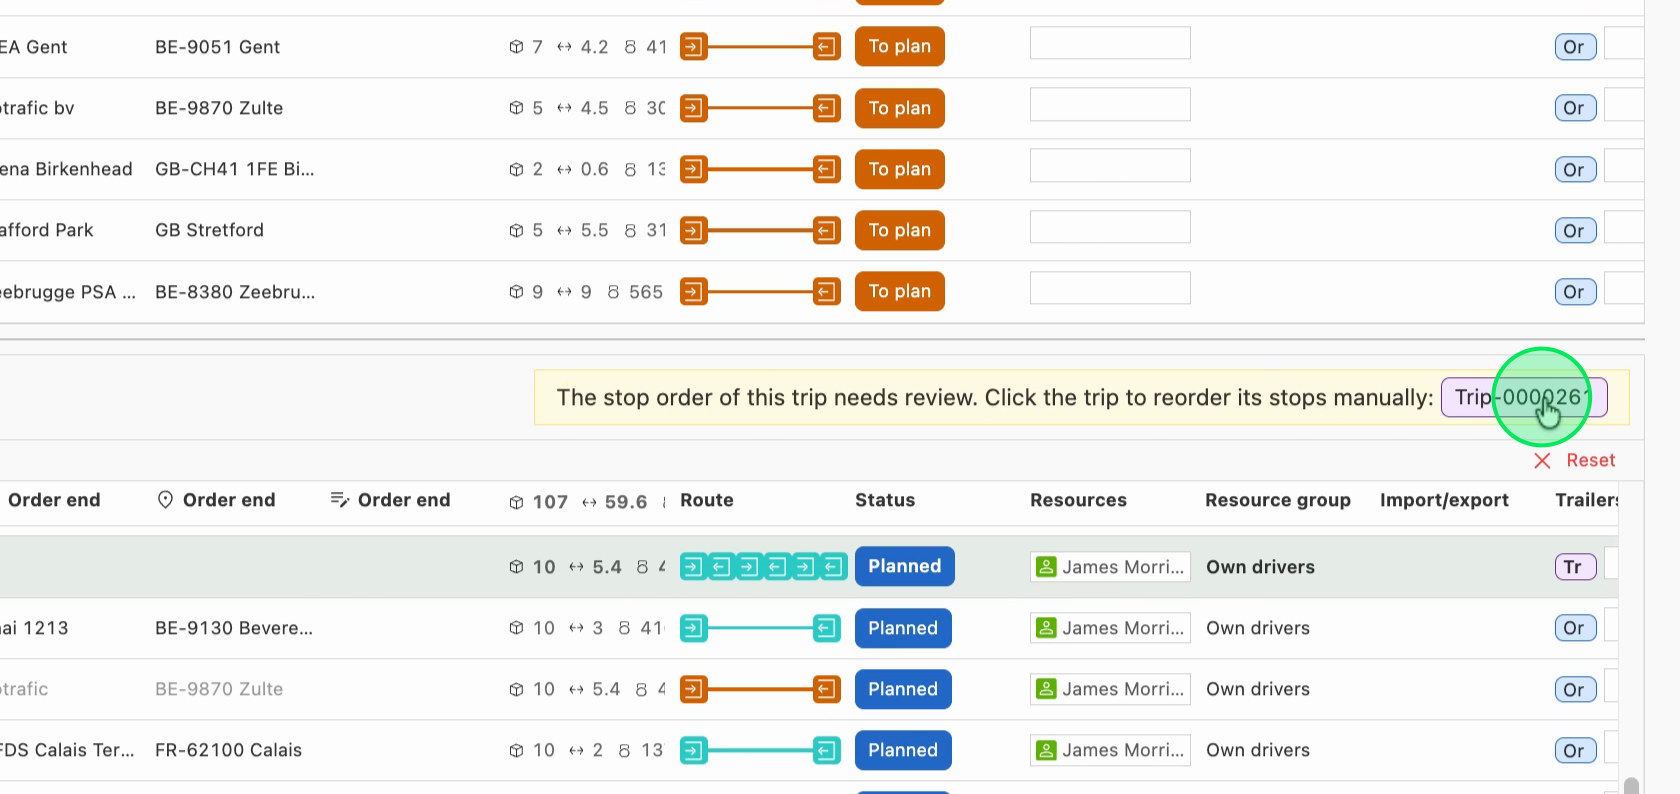
- Find the flagged load: a warning icon replaces the load row’s checkbox, and the load is listed in an alert box.
- Click the load in the alert box to open the load details on the Route section.
- Set the correct stop sequence and save.
Troubleshooting
| Issue | Resolution |
|---|---|
| The two stacked tables are not visible and the Legs view still shows a single table | The has_split_legs_view tenant flag is not yet enabled. The rollout is progressive; contact the Qargo account manager or Qargo Support. |
| The planned table cannot be narrowed down to only the legs that match a filter | By design, filters in the planned table select whole loads so every order in the load stays visible. Use search to find one specific order. |
| A stage cannot be moved straight from one load to another | Direct load-to-load moves are not included. Unplan the stage back to the to-plan table first, then merge it into the target load. |
| Column changes apply to both tables at once | Both tables share one column set. Per-table column customization, expanding/collapsing load rows, and choosing which column stays sticky are planned for a later iteration. |
| Orders are not assigned automatically to a recurring route | Recurring routes (tournées) and auto-assignment by ZIP code are part of the separate Recurring routes feature, not this view. |
Related content
Still have questions? Browse the full FAQ list or contact Qargo Support.