Planning: select and drop
Changes to a critical planning function allow vast improvements to planning functions and provide significant performance improvements.
Table of contents
Introduction
The ability to drag and scroll through the planning page has been replaced with new and more efficient planning features. Drag and drop is still available, but it only works with resources that are visible in the current view. Scrolling on the screen is also available when no order is being dragged.
This change introduces multiple benefits for the user:
- New ‘Select and drop’ feature. The user-friendly and more accurate ‘Select and drop’ gives a more intuitive and accurate planning experience.
- ‘Select multiple and drop’ feature. New functionality allows users to select multiple orders and use the improved drop feature to plan them to the resource
- Streamlined planning and load modification experience. New functions allow users to easily unplan, select and move either orders or loads between resources.
- Significant improvement to overall performance on the page. Users will notice the new functions are much quicker and more responsive.
How to use select and drop
To add an order to an existing load using select and drop:
- Tick the checkbox next to the order to add
- Move the cursor to the desired position on the planning timeline
- Click to drop the order at that position
This new selection function also allows multiple orders to be selected and planned at once.
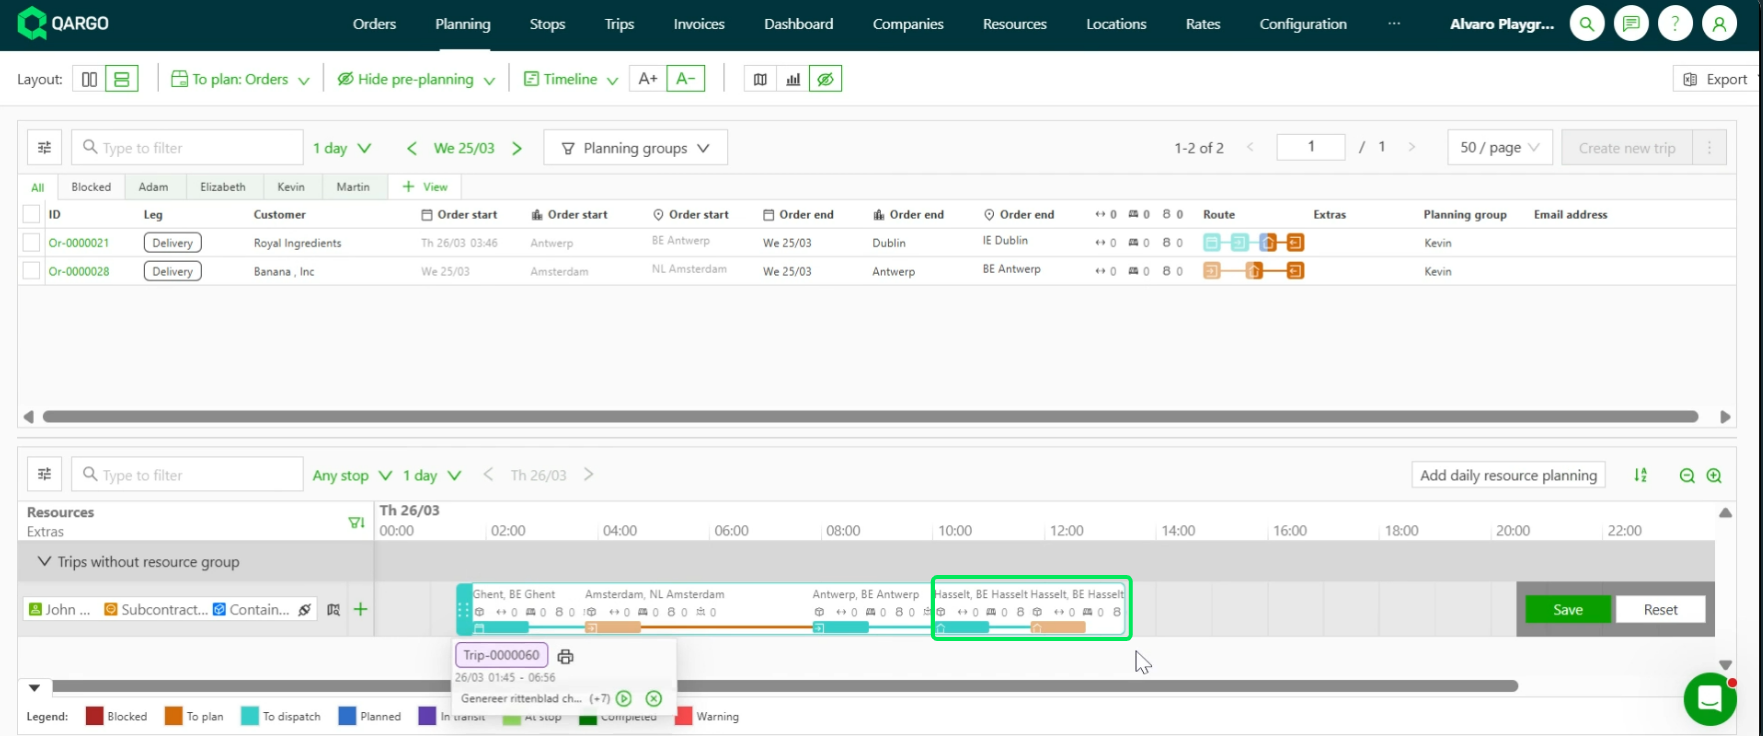
Automatic terminal stop grouping
When an order is added to an existing load using ‘Select and drop’, Qargo now automatically places the terminal (load/unload) stop next to the matching terminal stop already on the load.
When using ‘Select and drop’, Qargo detects when both orders share a matching terminal (load/unload only) and automatically moves the new terminal stop next to the existing one. The rest of the stop sequence stays intact. Nothing else is moved or reordered.
How to use it
-
Tick the checkbox next to the order that needs to be added to an existing load
-
Move the cursor to the planning timeline and position it before the last stop of the existing load
-
Click to drop. Qargo automatically groups the terminal stop next to the matching one already on the load
🎥 Watch the video walkthrough
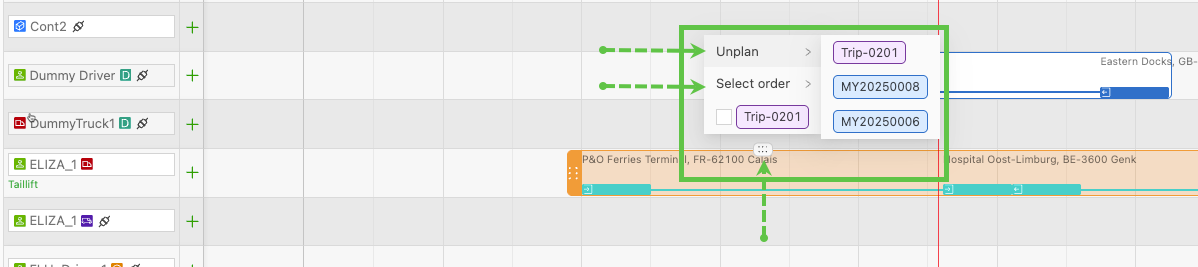
New menu button on load.
A new menu button shows on the load once it is planned. If a single order is planned, the menu shows the option to unplan or select the load so it can be reassigned to a new resource.
Where multiple orders are planned on a load, the menu button displays between each order portion of the load. The menu is specific to those order details and shows:
- Unplan option
- Order number
- Load number
Plan entire load to new resource:
Click the menu button and select the load. The select/drop function shows, and the load can be moved to the new resource.
Reassign an order from the load to a new resource:
If multiple orders are planned on the same load and a single order must be reassigned to a different resource, click the menu button and select the order. The select/drop function shows, and the selected order can be planned to a new resource.
Insert/plan orders to existing loads:
Once an order is planned to a resource, adding more orders to the load is quick and easy. Use the checkbox to select the orders to add to the load. On the load, arrows appear between the existing stops, and the orders can be dropped there. Save the new load details. Drag the stops as before to resequence as required, and save.
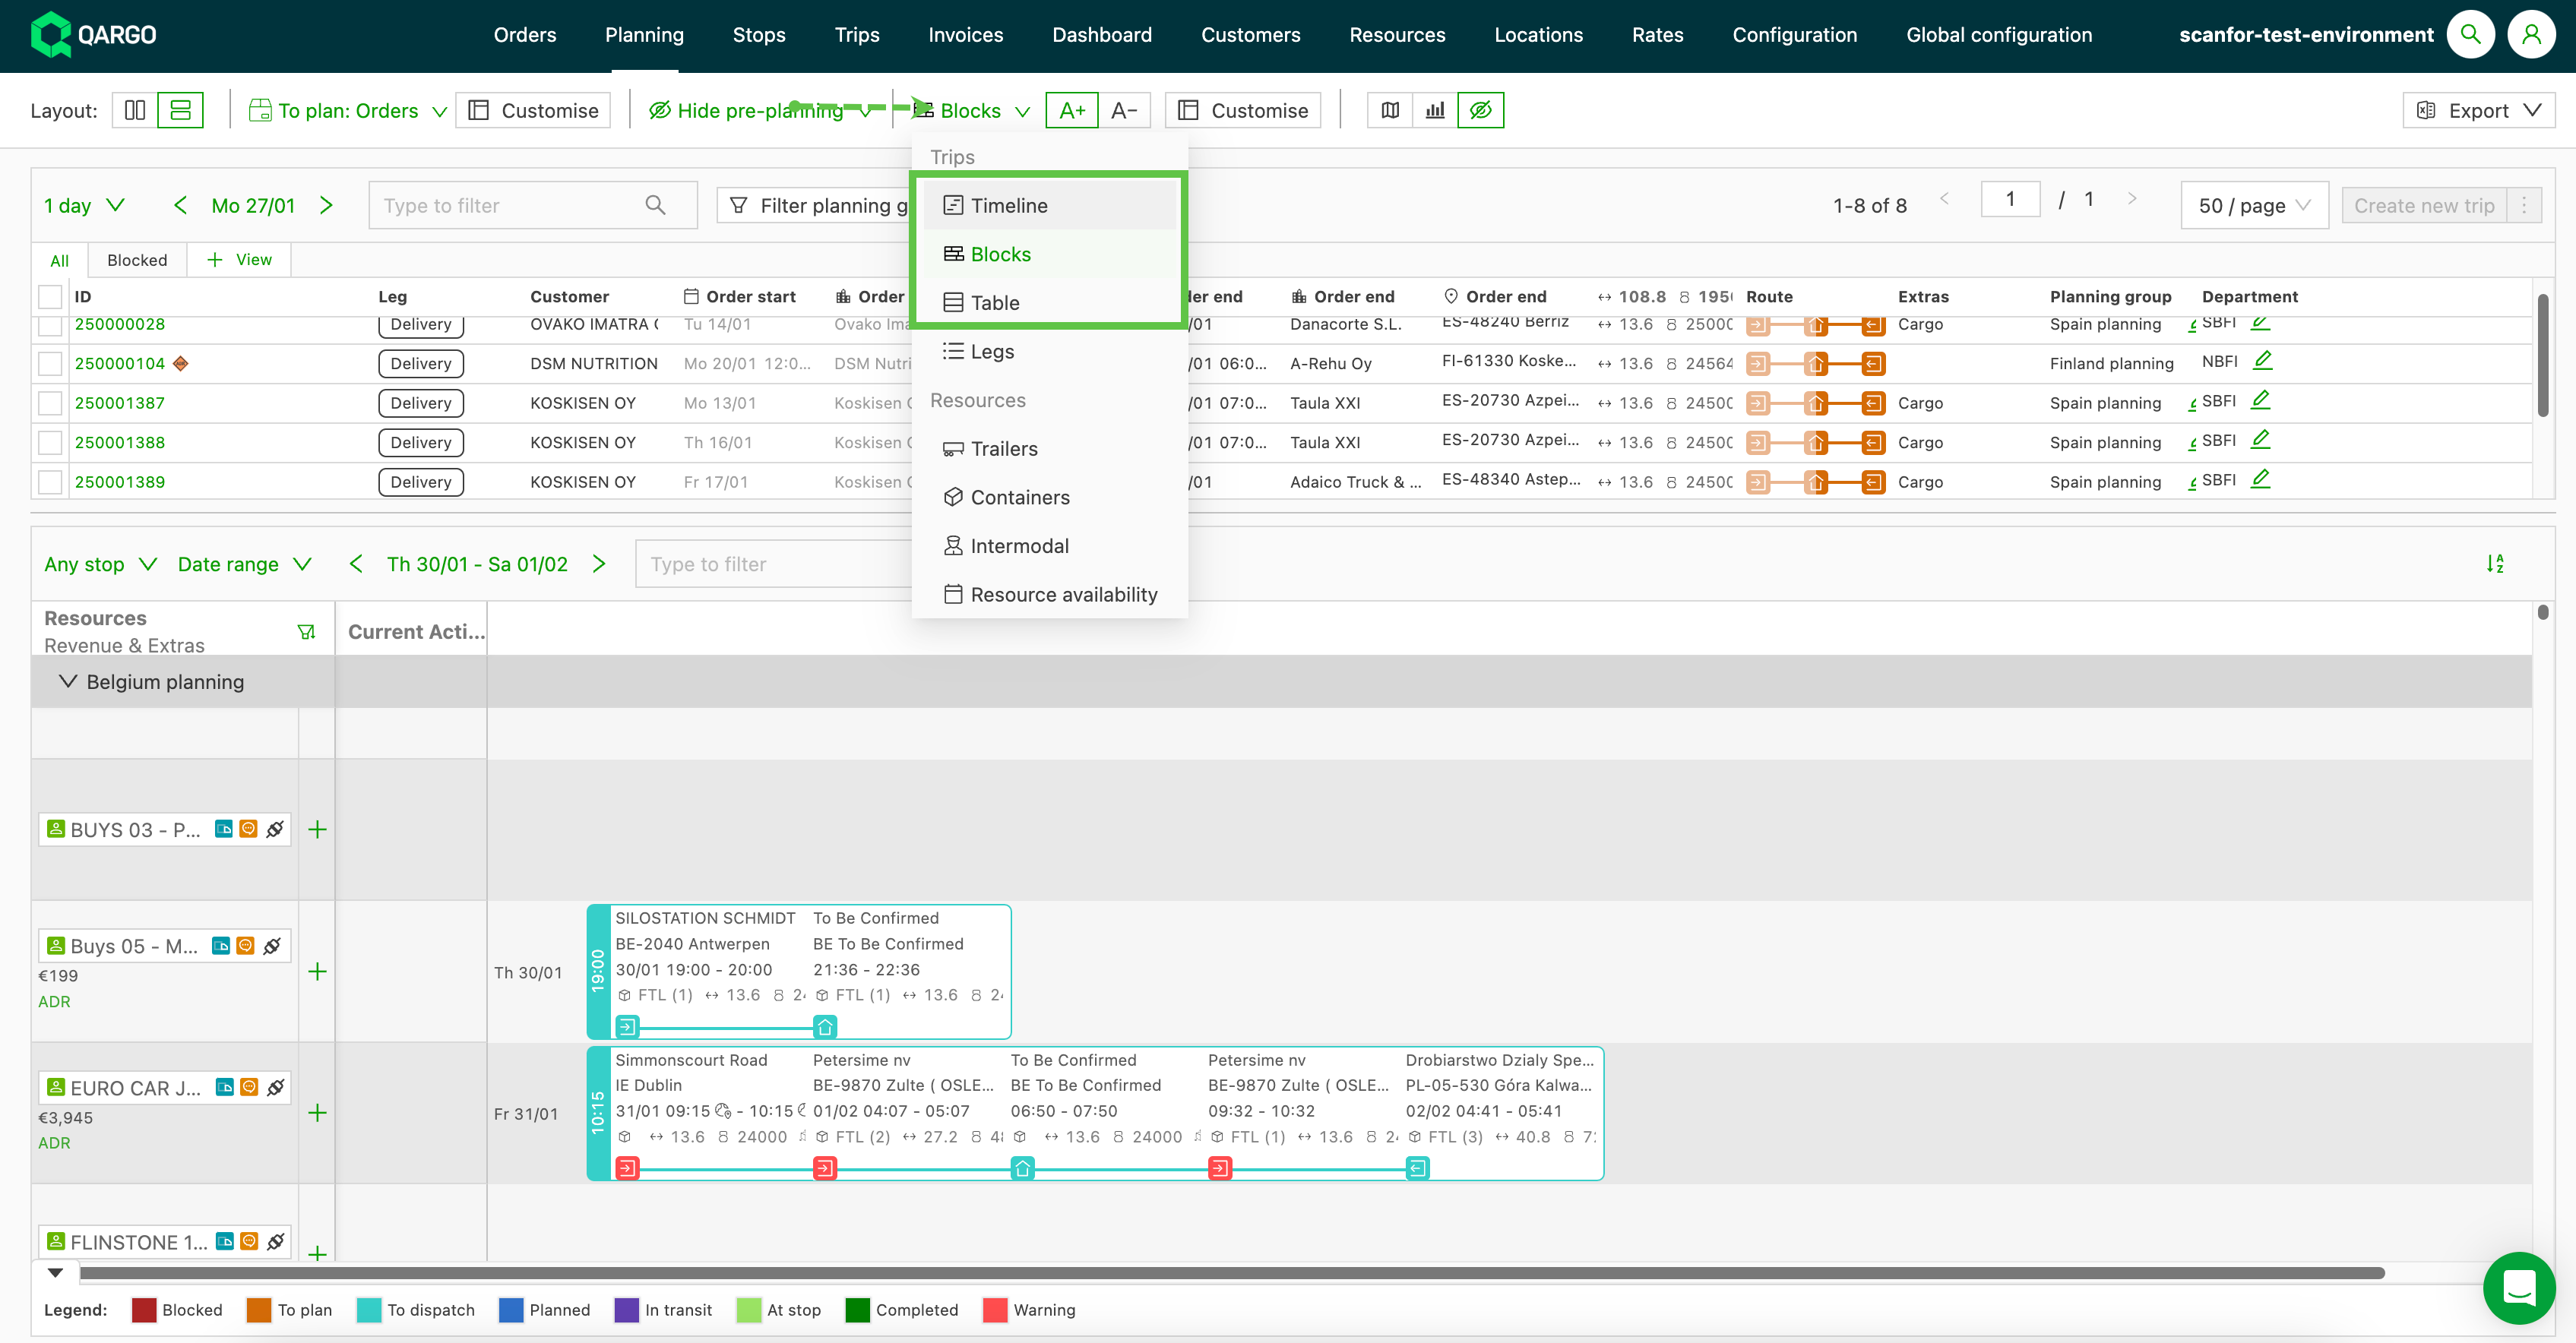
These new features are available in the Timeline, Block and Table planning views, and relate to planning orders only.
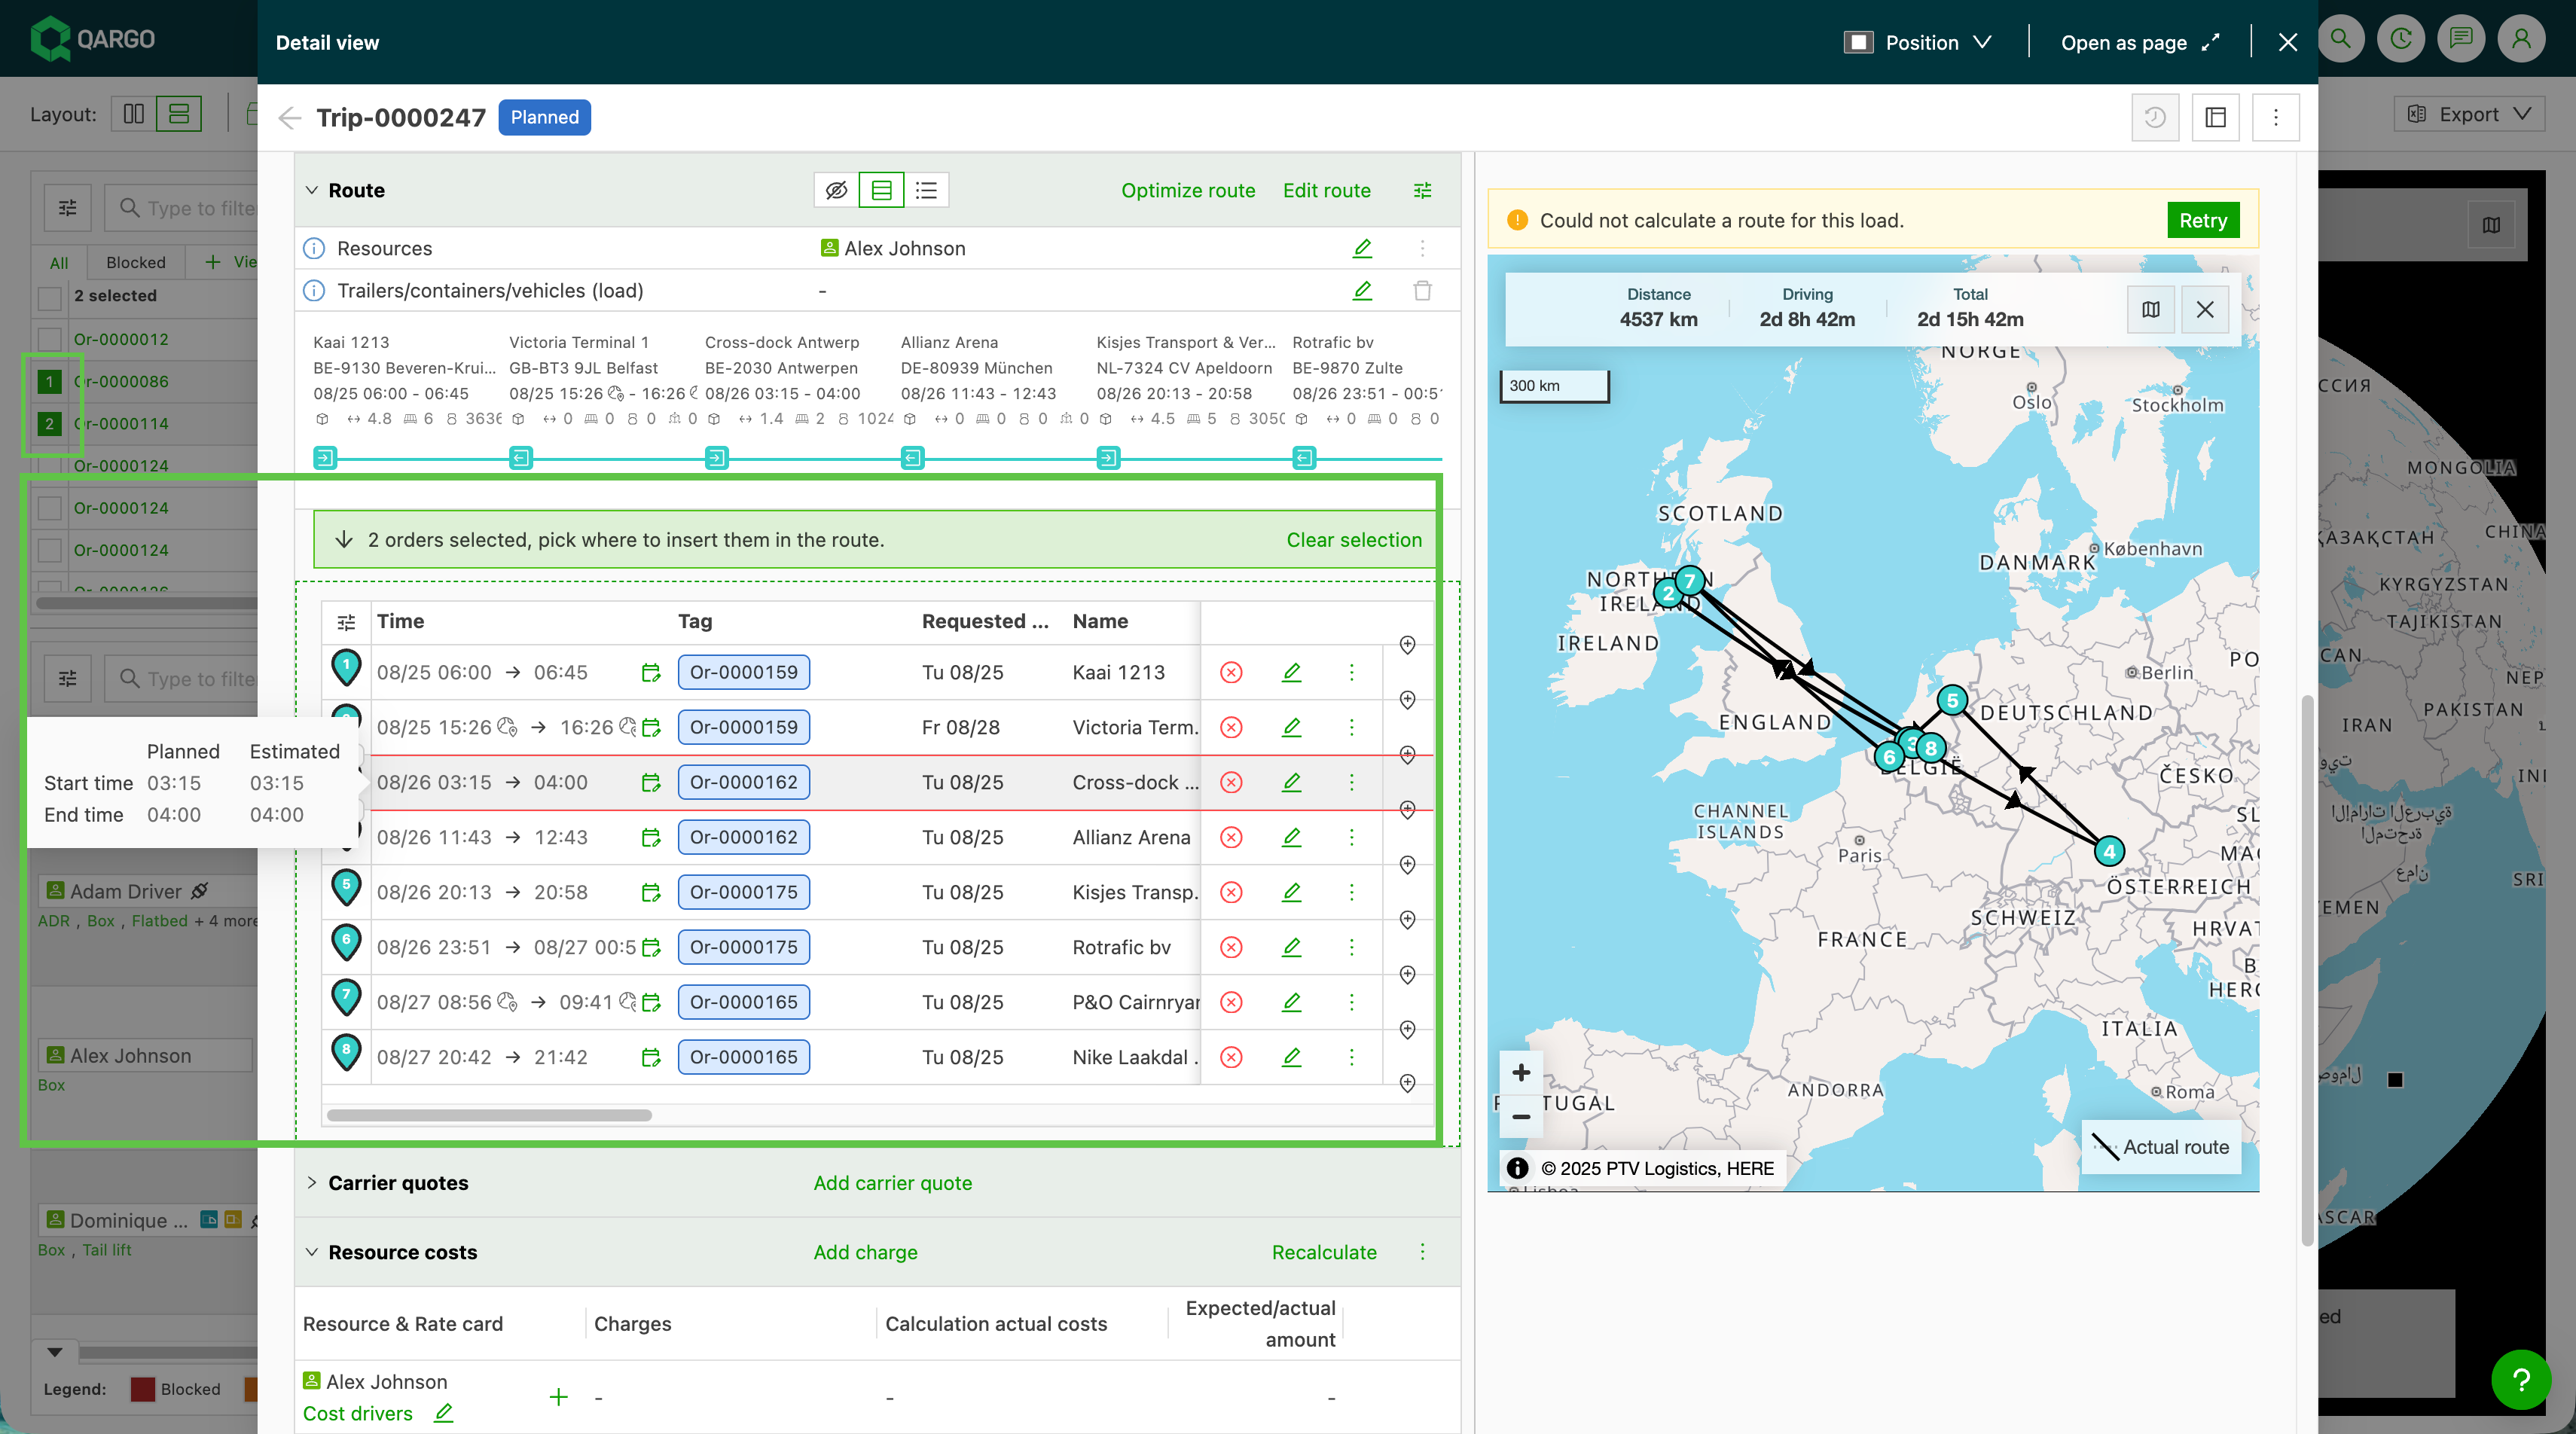
Add a stop to a load from the open load detail
🎥 Watch the video for a tour of how to use this feature.
The open load detail on the Planboard shows a load’s route without opening the full load screen.
No modal opens and no drag and drop is needed. This works in both the Timeline route view and the Blocks view, and reuses the same arrows-and-lines insert indicator already shown on the planning board with Select and drop.
Add a stop in the Timeline route view
-
Select one or more orders in the To plan: Orders list in the Timeline route view.
-
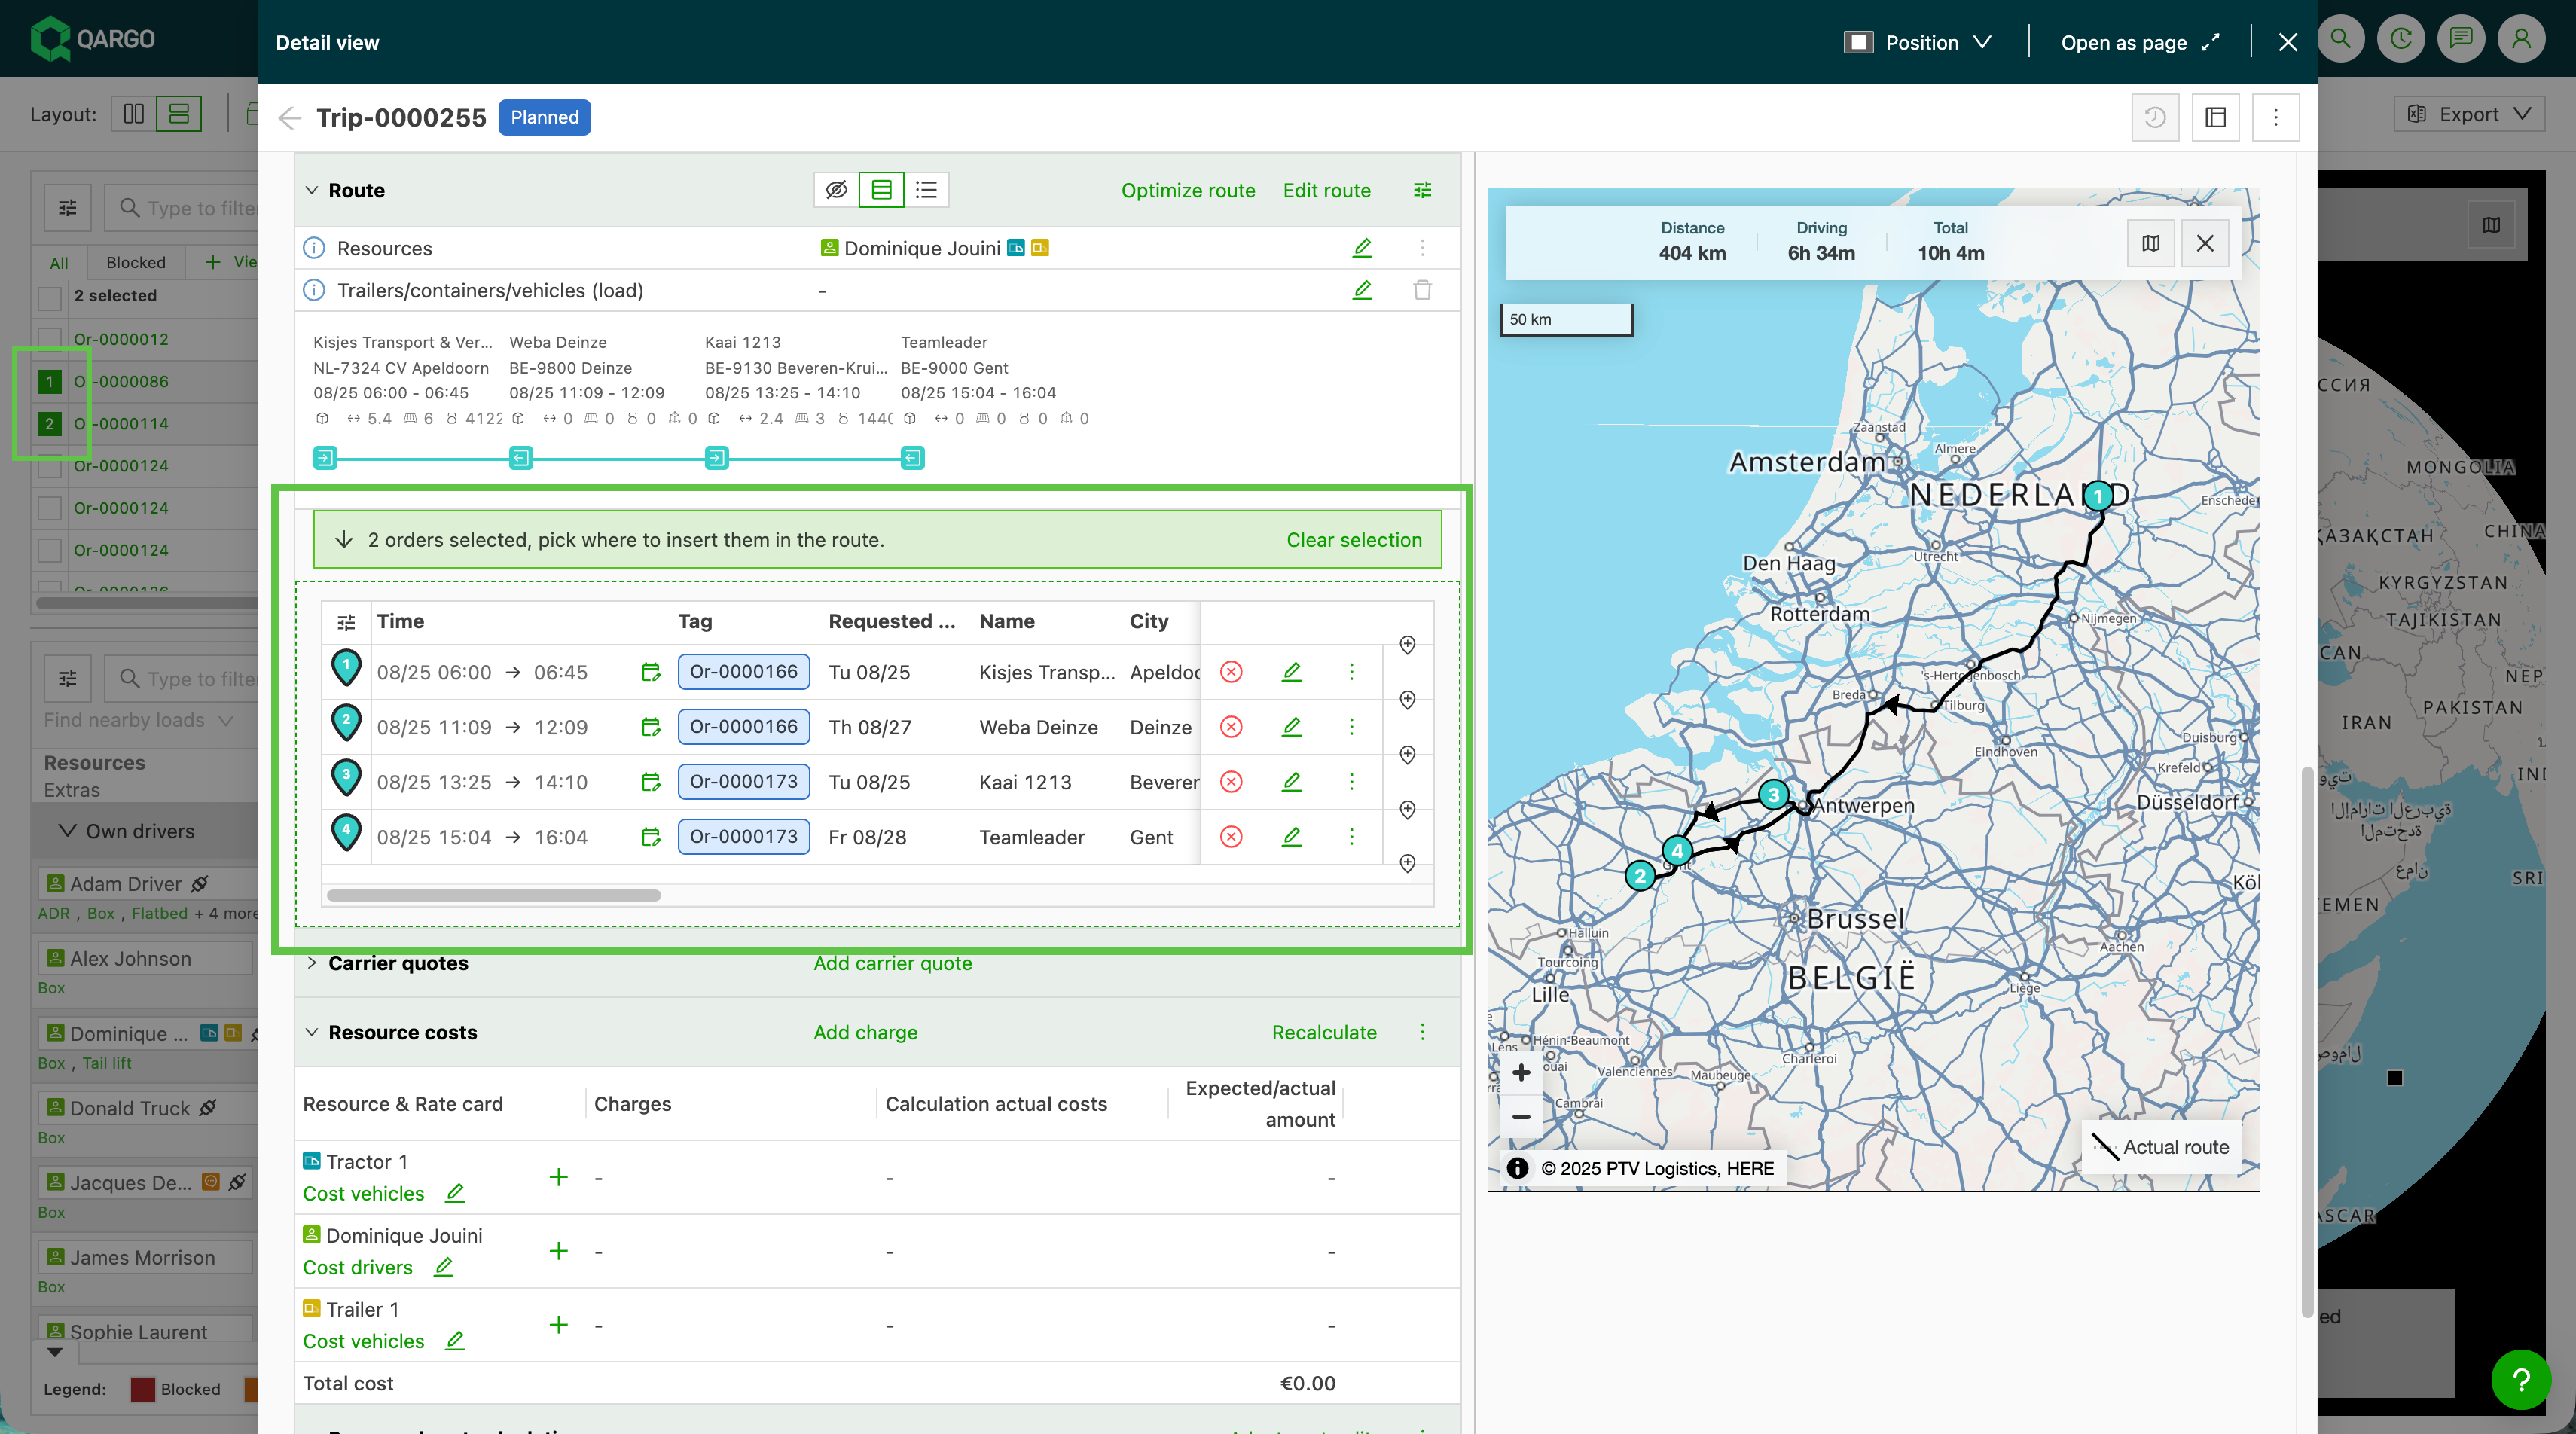
Open the load’s detail from the Planboard. The system automatically scrolls to the Route section, which shows a green dashed border and the hint “X order(s) selected, pick where to insert it in the route”.
-
Hover over a route row to reveal the insert indicator. Hovering over the small arrow shows a tooltip describing the insert position.
-
Click the insert position. The selected order’s stop is added at that position and saved immediately, and the order drops out of the To plan list.
Add a stop in the Blocks view
- Switch the load detail to the Blocks view.
- Select one or more orders in the To plan: Orders list. The Blocks route switches to a green dashed border and shows the same hint.
- Hover over a block to reveal the insert boxes, then click the block. The stop is inserted and saved immediately, with no confirmation step and no edit-route mode.