Invoices: create custom views on invoices and credit memos
Create, save, and switch between custom views on invoice and credit memo tabs, with saved filters and column settings, just like order views.
Table of contents
Introduction
-
What is this feature?
- Custom views are now available on every tab of the Invoices page. These views allow filters and column settings to be saved and reused. They work the same way as the existing custom views on the Orders tab.
-
Why was it introduced?
- There was no way to save filter configurations on invoice or credit memo screens. Accounting and admin teams had to reapply filters manually each time the page was opened — for example, filtering by “Paid” or “Unpaid” status. This feature removes that repetitive step and streamlines daily invoice management workflows.
-
How does it work?
- Custom views can be created, saved, and switched between on each invoice and credit memo tab. Filters, column visibility, and column order are all preserved within each view. Views can also be shared with other users when a super admin user shares them.
- A new “filter by status” column filter has also been added to the Sales invoices and Carrier invoices tabs.
Terminology
| Term | Definition |
|---|---|
| Custom view | A saved combination of filters and column settings on a list tab, allowing quick access to a specific data configuration |
| Sales invoice | An invoice issued to a customer for services or goods delivered |
| Carrier invoice | An invoice received from a supplier or contract carrier for costs incurred |
| Credit memo | A document issued to adjust or correct a previously issued sales invoice |
| Carrier credit memo | A document received from a supplier to adjust or correct a previously issued carrier invoice |
| Column settings | The configuration of which columns are visible and in what order they appear in a list view |
Available tabs with custom views
Custom views are supported on four separate tabs within the billing section:
- Sales invoices — manage views for outgoing invoices
- Carrier invoices — manage views for incoming supplier invoices
- Credit memos — manage views for sales credit adjustments
- Carrier credit memos — manage views for purchase credit adjustments
- Orders to invoice — manage views for orders and charges awaiting billing
- Loads to bill — manage views for load costs awaiting a carrier invoice
- Upload carrier invoices — manage views for supplier invoices scanned in through document upload
Each tab keeps its own independent set of views. Invoice views are not shared with carrier invoice views, and credit memo views are not shared with carrier credit memo views.
Creating a custom view
Step 1: Apply filters and column settings
- Navigate to the desired tab on the Invoices page.
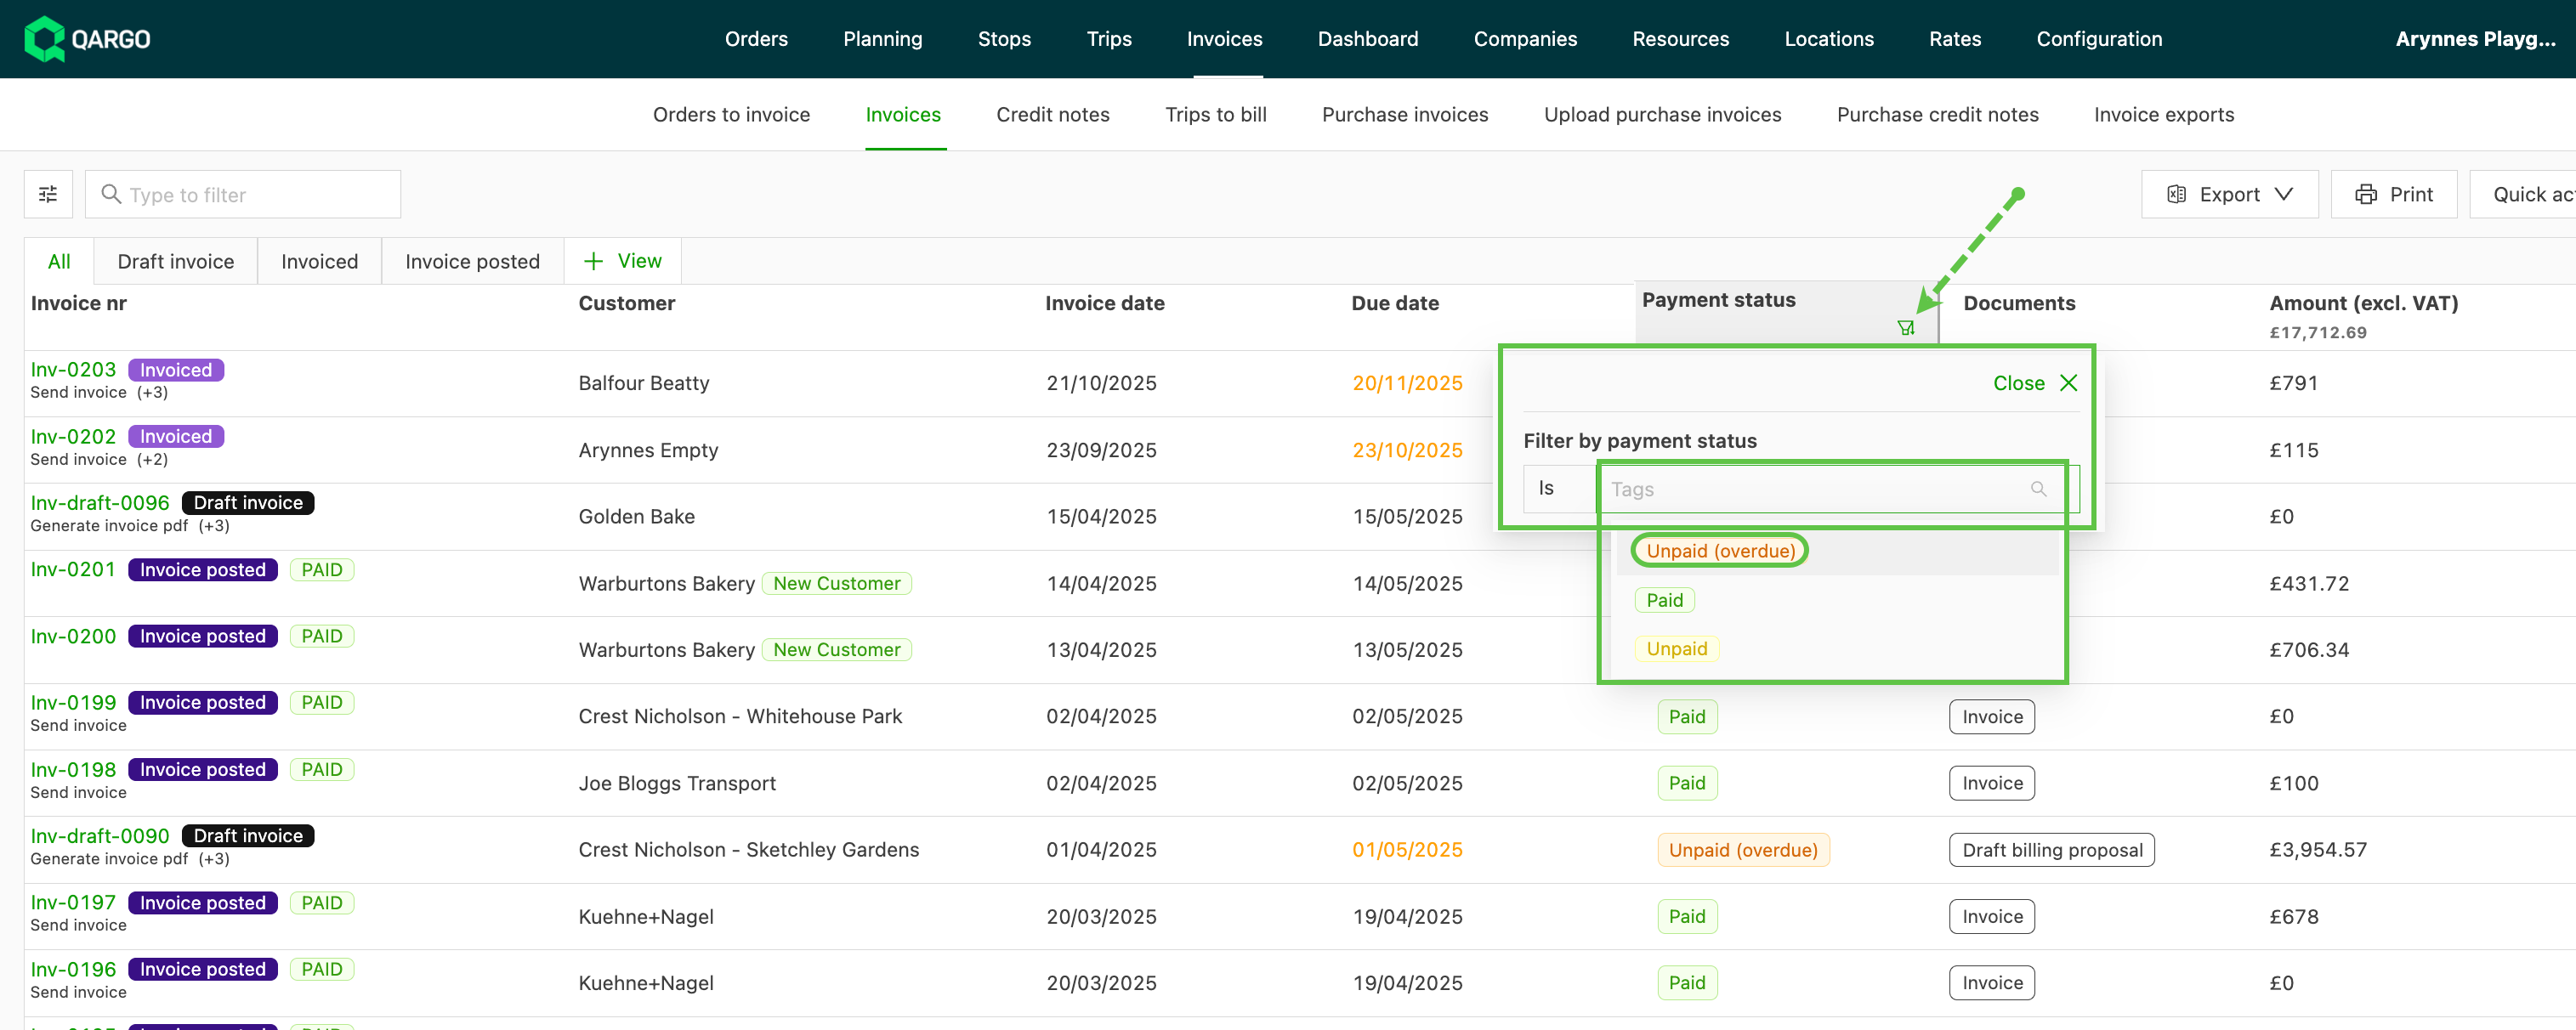
- Apply the desired filters using the column filter options. For example, filter the Sales invoices tab by a specific status such as “Paid” or “Unpaid.”
- Adjust column visibility and order as needed by configuring the column settings.
Step 2: Save the view
- Enter a descriptive name for the view (e.g., “Unpaid invoices” or “Q1 carrier invoices”).
- Click the save view option to store the current filter and column configuration.
The new view now appears in the views dropdown and can be accessed at any time.
Step 3: Switch between views
- Open the views selector at the top of the invoice or credit memo list.
- Select the desired saved view from the dropdown.
- The list immediately updates to reflect the saved filters and column settings.
Sharing views (super admin users only)
Custom views can be shared with other users. When a view is shared, both the filter configuration and the column order and visibility settings are included. This makes it easy for teams to work from a consistent data layout without each user having to configure their own filters.
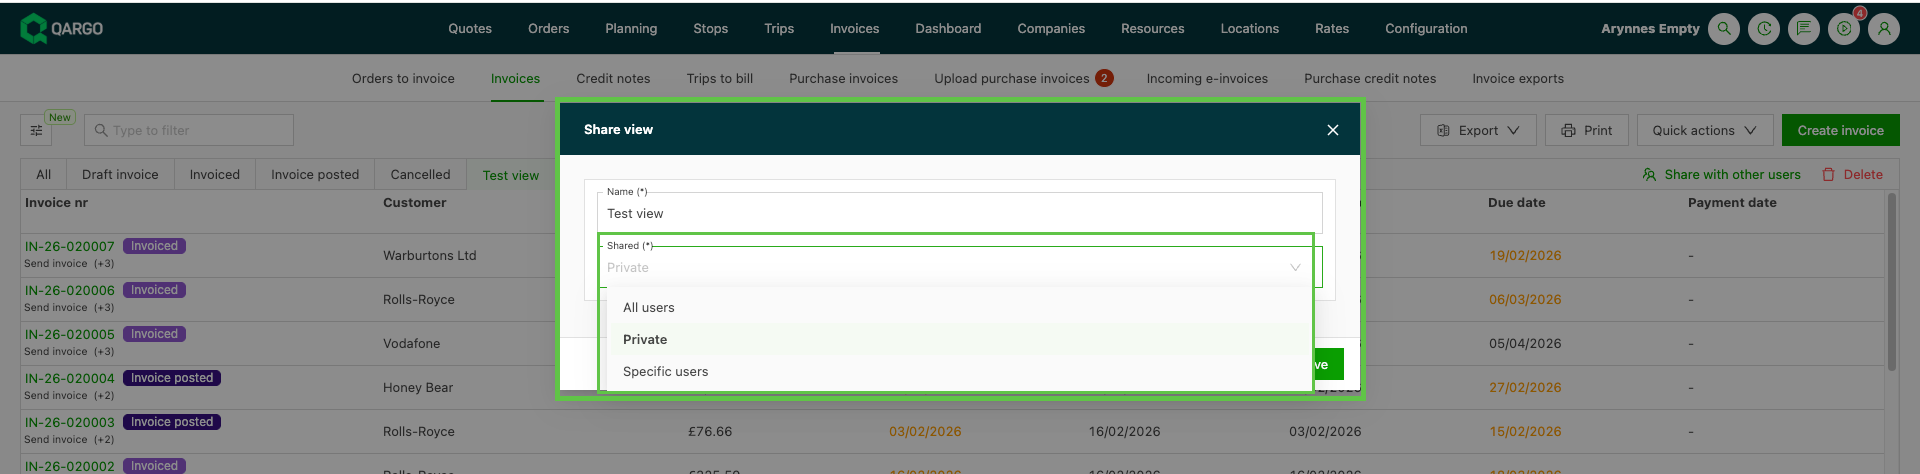
To share a custom view, the options include sharing with all users or with selected users
-
Select ‘specific users’
-
From the dropdown, select the users to share the view with
- Multiple users can be selected, but they must already be users on the platform
Filter by status on credit memos
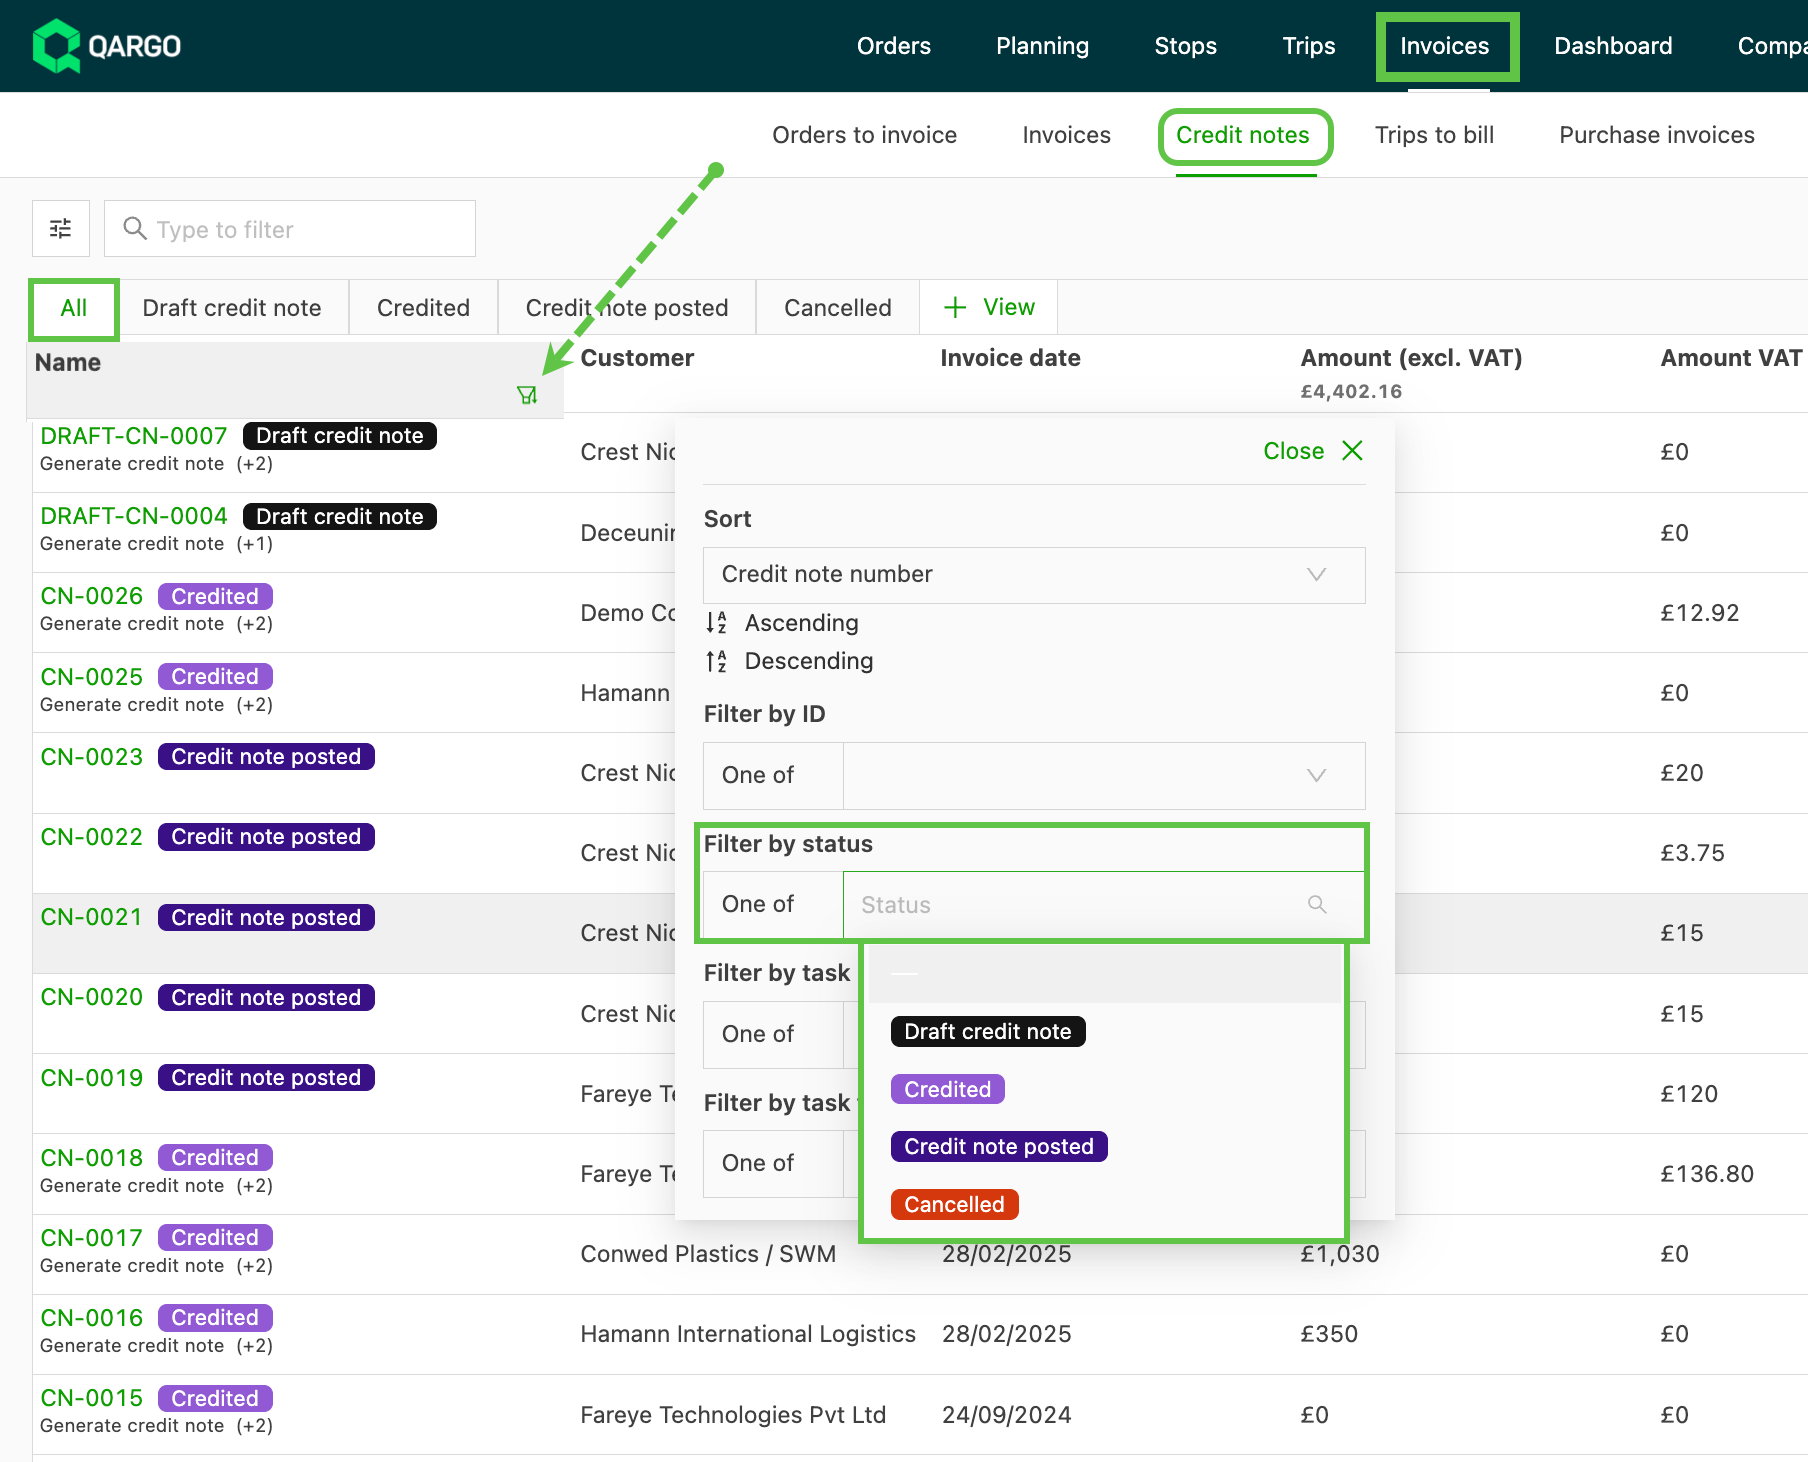
A new filter by status column filter has been added to the Credit memos and Carrier credit memos tabs.
This filter was previously unavailable on these tabs. It allows records to be narrowed down by their current status directly from the column header.
Troubleshooting
| Issue | Solution |
|---|---|
| A saved view does not appear on a different tab | Views are tab-specific across all seven billing tabs: Orders to invoice, Loads to bill, Sales invoices, Carrier invoices, Upload carrier invoices, Credit memos, and Carrier credit memos. A view saved on one tab only appears on that tab, not on any other. Check that the correct tab is selected. |
| Filters reset after navigating away | Make sure the view has been explicitly saved. Unsaved filter configurations do not persist between sessions. |
| “Filter by status” is not visible on credit memos | Refresh the page to load the latest update. If the issue persists, contact Qargo support for further assistance. |
| A shared view does not show the expected columns | Column settings are included when sharing, but later changes by the original creator may not update automatically for other users. Share the view again if column settings have changed. |
Adding the refund status column on the credit memos tab
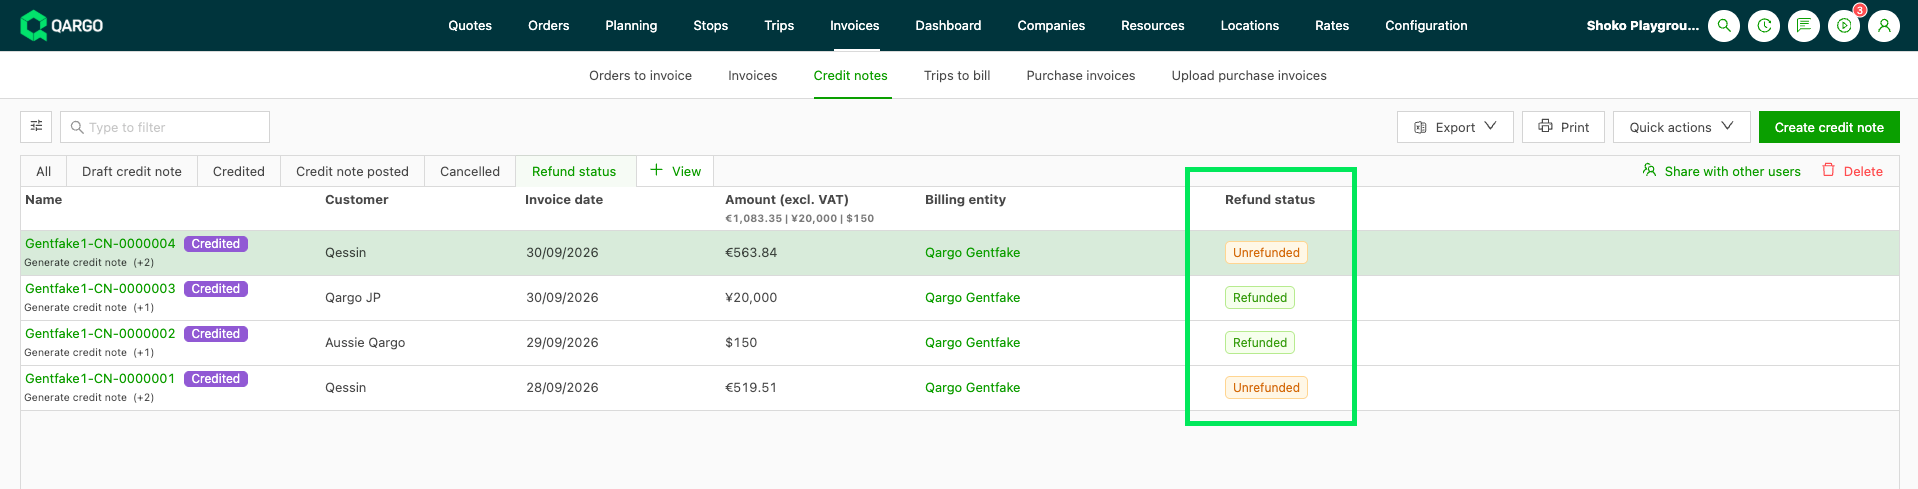
The refund status column shows whether each credit memo has been refunded, without opening it to read its refund task.
Use case
A finance team wants to see at a glance which credit memos still need refunding. The team adds the refund status column, filters on Unrefunded, and saves that as a view to open each morning to work through the outstanding refunds.
Walkthrough
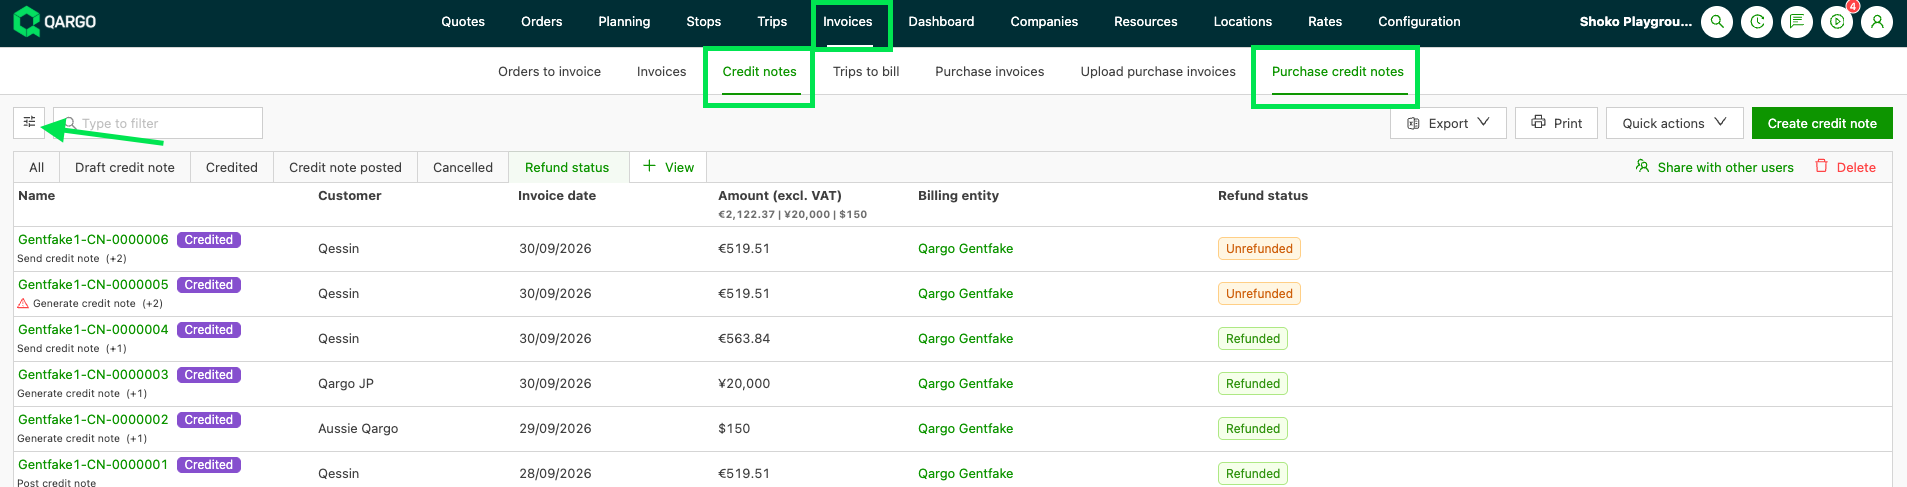
- Navigate to Invoices > Credit memos (or Carrier credit memos).
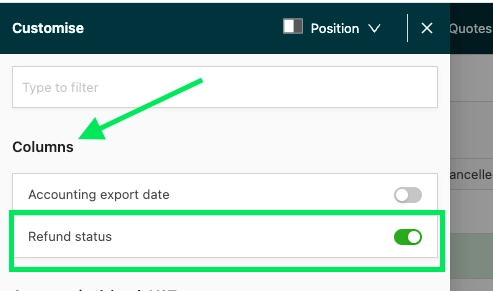
- Click the Customize button.
- Toggle on the Refund status column under the Columns section.
- Save the view (if a new view was created for this column).
The column shows two values:
- Refunded (green): the Mark credit memo as refunded task on that credit memo is complete.
- Unrefunded (orange): that task is not complete yet.
Sort and filter on the column
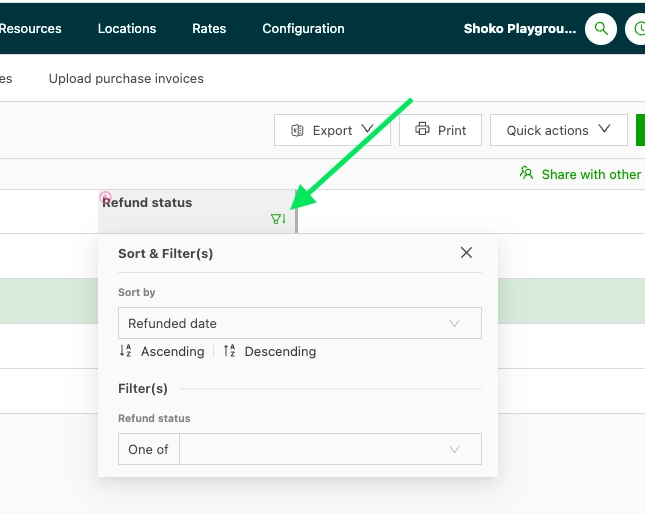
The column can be sorted by refunded date or filtered on Refunded/Unrefunded to show only outstanding credit memos.
How a credit memo becomes refunded
A credit memo becomes Refunded as soon as its Mark credit memo as refunded task is completed.
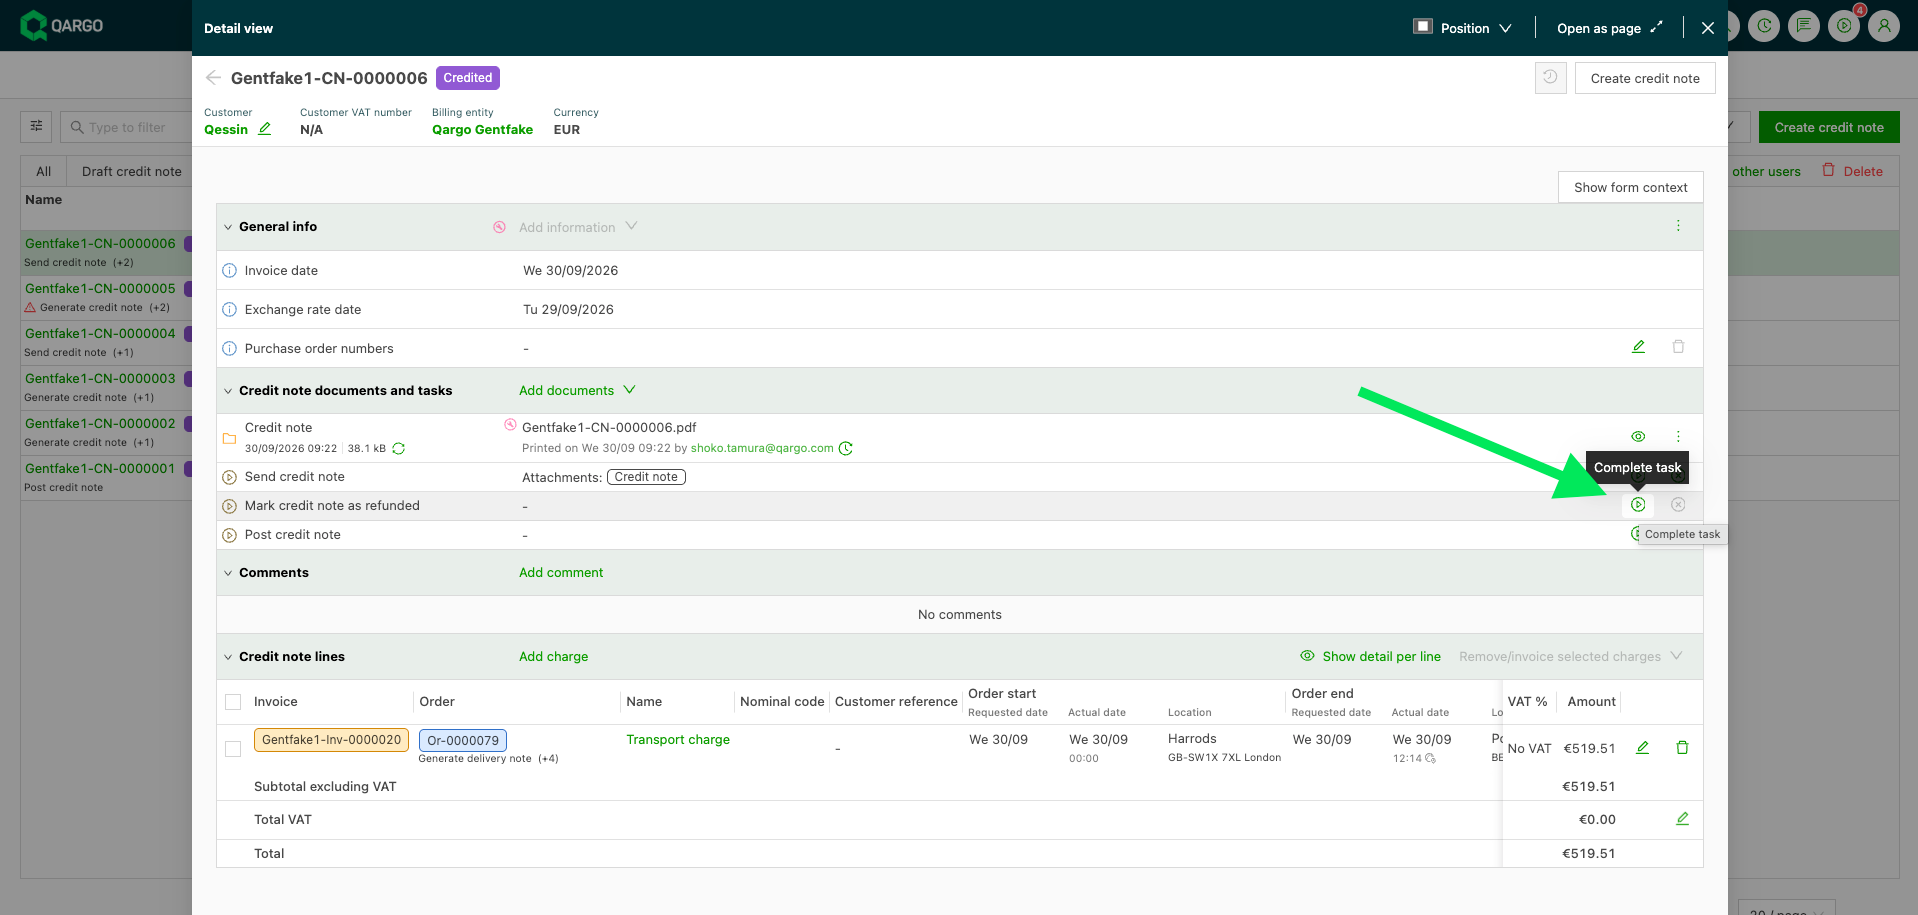
- Open a credit memo with Unrefunded status.
- Click the Complete task button on the Mark credit memo as refunded row.