
Intermodal: understanding buyer and seller roles in Qargo
Qargo links Buyer/Seller (commercial) with Shipper/Receiver (logistics) for safe, compliant shipments. It uses master data, prefill, archiving, and permissions to streamline data entry and ensure EORI compliance.
Introduction
Qargo supports both commercial and logistics data in its customs and shipping workflows. This article explains how the system handles the Buyer and Seller roles. It also explains how they relate to the Shipper and Receiver roles that appear during transport and import declarations.
Terminology
| Term | Definition |
|---|---|
| Shipper | The party of the shipment that is responsible for sending the goods. Typically linked to the Seller for transport and safety declarations, but the role focuses on logistics movement. |
| Receiver | The party receiving the goods at the destination. Typically linked to the Buyer for transport and safety declarations, but the role focuses on logistics movement. |
| Seller | The party involved in the underlying commercial sale of the goods. Required data for import declarations, as the transaction value depends on this party. |
| Buyer | The party purchasing the goods in the underlying commercial sale. Required data for import declarations, as the transaction value depends on this party. |
| ENS/ICS2 | European Union safety and customs declarations for goods in transit. They are used to assess risk and ensure security during transport. Requires Shipper and Receiver data. |
| EORI | Economic Operators Registration and Identification number. It is used to identify parties in customs processes and ensure compliance. |
| Master data | A single source of truth for key business entities (e.g., customers, Buyer/Seller records) used across shipments and declarations. |
| Prefill | The process of automatically populating Buyer/Seller data into a shipment record to streamline data entry. |
| Archiving | The process of marking records as inactive or historical. This affects how they appear for prefill and selection in future shipments. |
| On-the-fly data entry | Entering Buyer/Seller information during a workflow when a suitable record does not exist in master data. |
| Permissions | Access controls governing who can view, modify, or link Buyer/Seller data and related records. |
Key roles and when they matter
- Logistics roles (Shipper and Receiver): These are the parties involved in the physical movement of goods. They are required data fields for transport and safety processes (such as ENS/ICS2).
- Commercial roles (Seller and Buyer): These are the parties involved in the underlying commercial sale of the goods. They are required data fields for import declarations because the transaction value depends on the relationship between Seller and Buyer.
How Qargo uses buyer and seller data
-
Import declarations:
- Seller and Buyer data are mandatory because the declared value of goods depends on the commercial transaction between these parties.
Data and master records
-
Qargo introduces fields to link shipments to Buyer and Seller. This makes it possible to:
- Prefill buyer/seller information when possible
- Maintain a single source of truth for master data
- Ensure EORI compliance where required
-
Not every transaction will have all Buyer/Seller details available upfront. In such cases, users can:
- Use existing customer records (when available) as Buyer/Seller
- Add Buyer/Seller information via EORI number on the fly if needed, while taking security and data integrity considerations into account
Prefill, archiving, and permissions
-
Prefill logic: When possible, Qargo prefills Buyer/Seller information to streamline order capture. This also applies when using the scanning feature: suggestions are offered to complete the form.
-
If the information is archived or restricted, the system hides or disables prefill to avoid displaying outdated data.
-
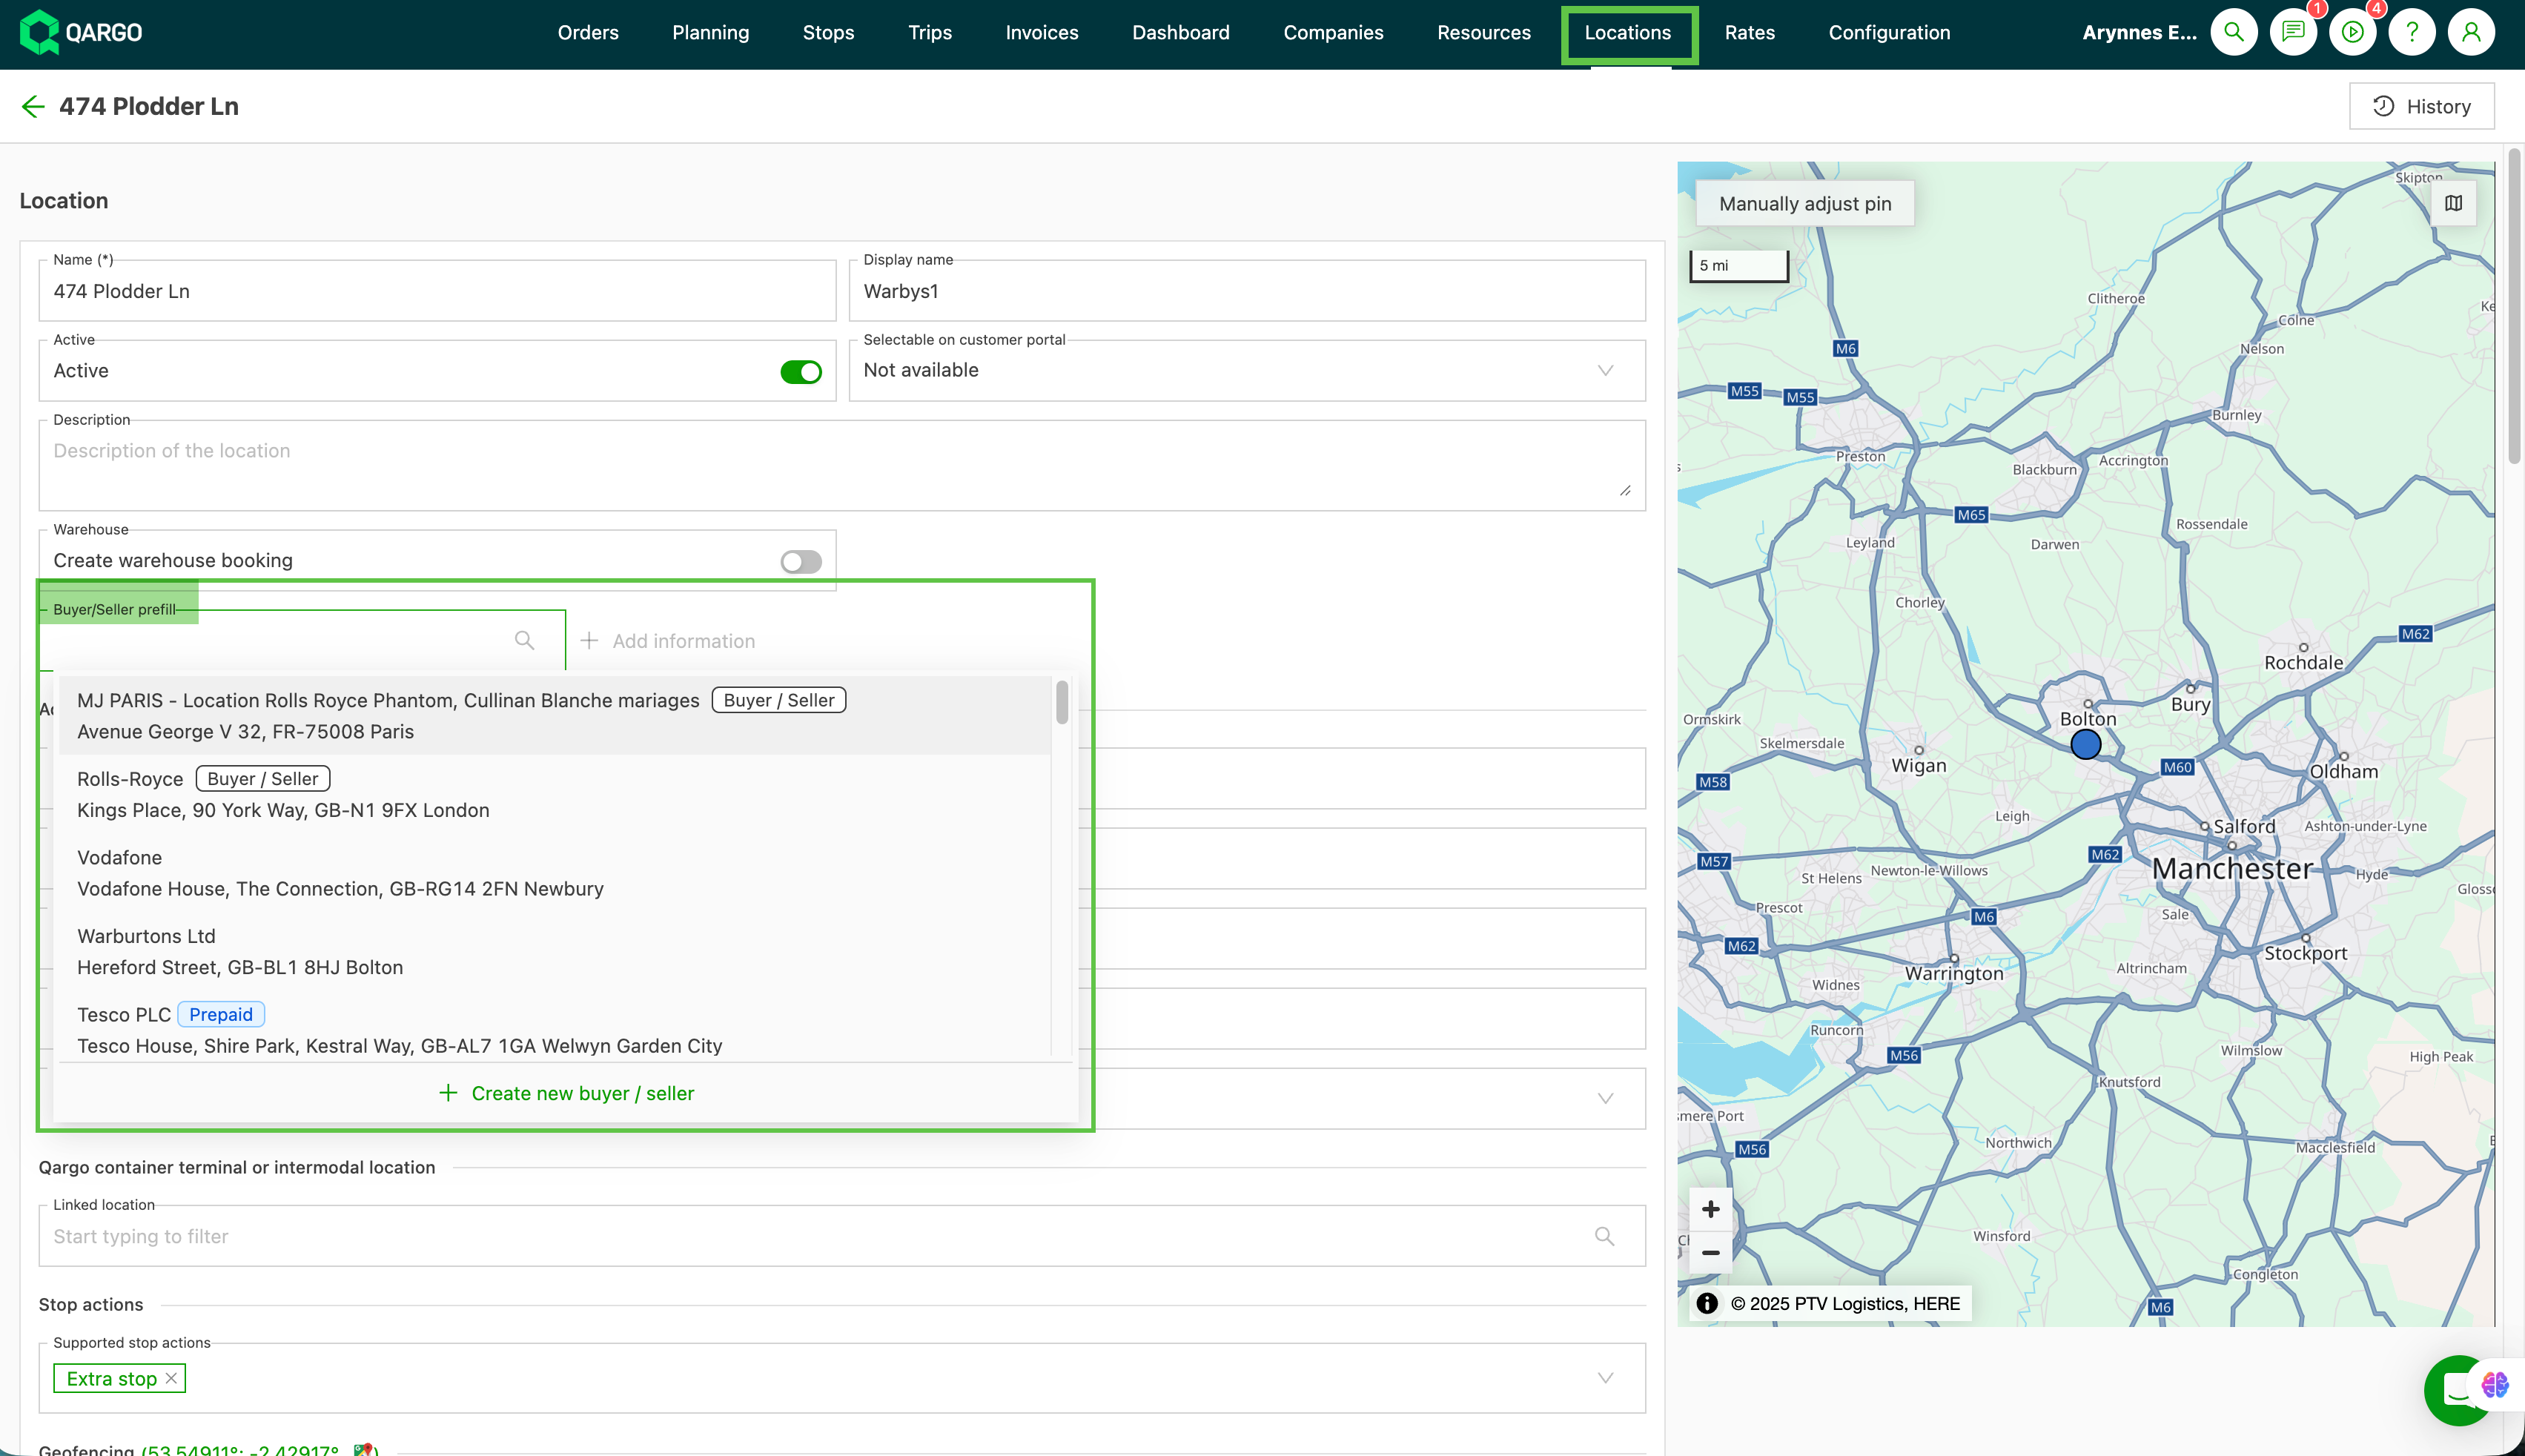
Prefills are available in Order default options on:
-
Transportation service
-
Company profile
-
Location (Note: the buyer/seller field is outside the order capture defaults)
-
-
-
Archiving behavior: Archived Buyer/Seller data is not automatically selected or shown in prefill. Records can be reactivated or relinked as needed with proper permissions.
-
Permissions: Access to Buyer/Seller data and the ability to modify or link records are controlled to protect data integrity and comply with governance requirements.
User experience
-
Users will see:
- Tags or indicators showing the Buyer and Seller associated with a shipment
- Options to select an existing customer as Buyer or Seller
- Prompts to enter new Buyer/Seller data if no suitable record exists
-
The goal is to surface necessary Buyer/Seller information without duplicating data or complicating workflows for archiving and master data management.
Practical guidelines for users
-
Always provide roles when the data is available:
- Seller / Buyer for commercial transactions
-
If the transaction involves multiple parties, ensure the correct Buyer and Seller are linked to the appropriate shipments.
-
Use existing customer records where possible to minimize duplicates and improve data quality.
-
To add or update Buyer/Seller information, follow the guided prompts in Qargo with appropriate permissions.
How to use buyer / seller roles
Configuration
1. Activate fields
To use the buyer / seller fields in an order, make sure the fields are enabled.
-
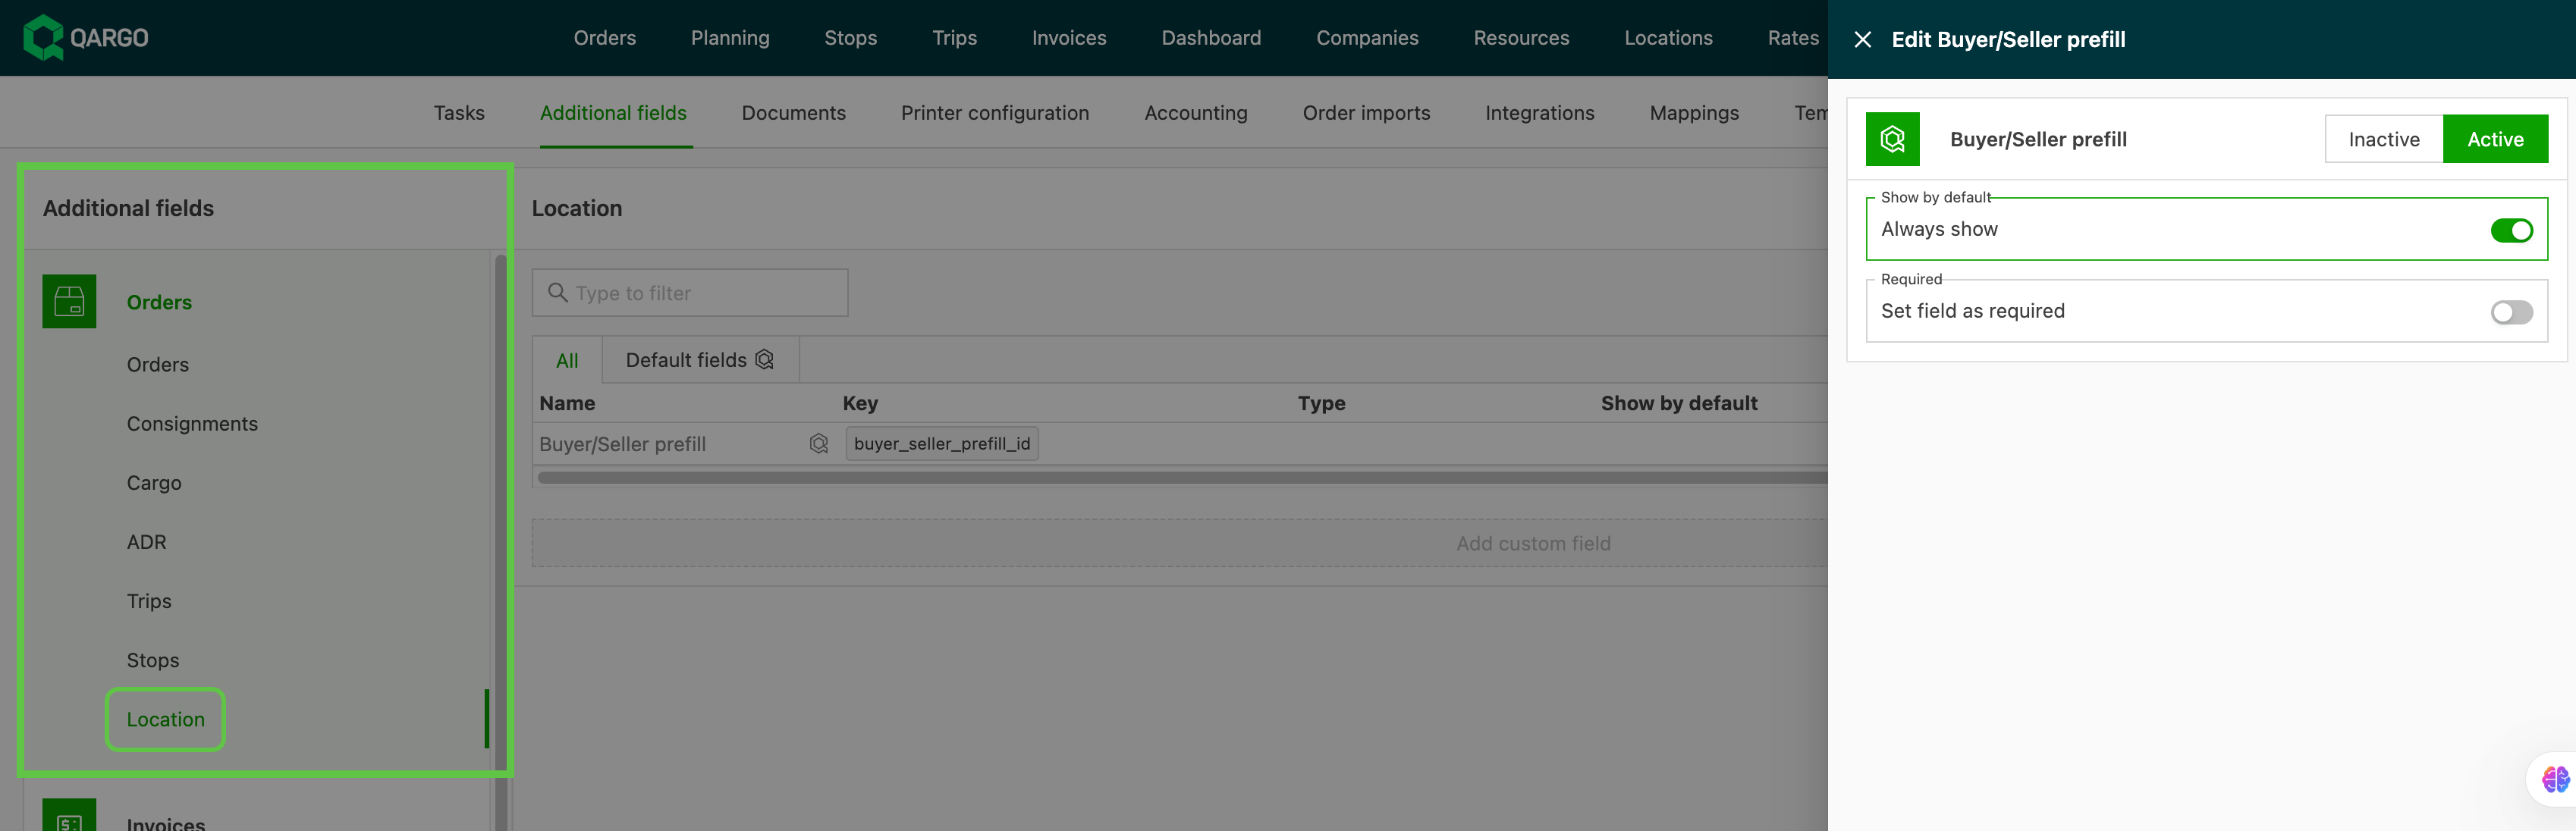
Navigate to Configuration > Additional fields
-
From the Orders side menu, select Shipments
-
Click into the 3 options and set them to Active
- Buyer
- Seller
- Seller EORI number
-
From the Orders side menu, select Location
- Click into the Buyer/Seller prefill option and set it to Active
- Click Save.
2. Buyer/Seller master data
-
Add details to the dedicated database to be used in order creation and data export
-
General info:
-
Include all critical company details. Mandatory fields include:
- Name: the name the company is identified by
- Name on invoice: the legal billing entity that invoices will be addressed to or that is included in customs details
- These are the billing locations of the buyer/seller companies.
-
-
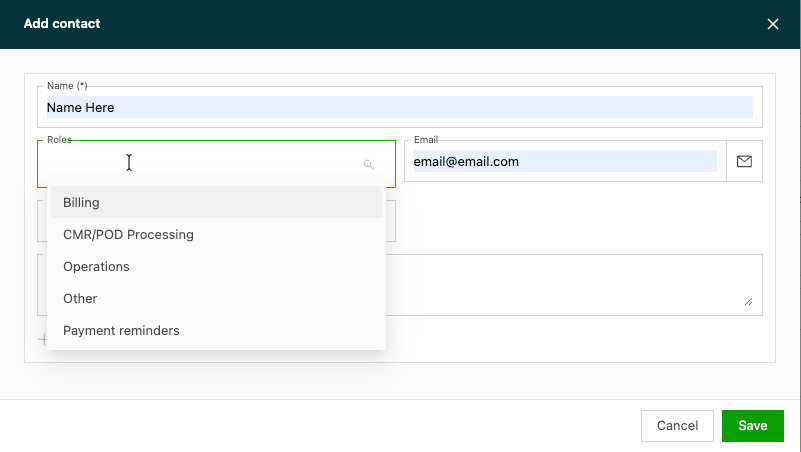
Contacts:
- Add contact name, email, and role as a minimum to enable using contact details for contact tasks, i.e., email notifications.
-
Import/export aliases:
-
Aliases are alternate identifiers (names, codes) for a party or data entity. They ensure correct matching across systems when primary identifiers aren’t a perfect match.
-
Benefits:
- Improves data matching and reduces duplicates
- Maintains regulatory alignment (e.g., EORI) when names vary
- Enables consistent data routing and governance across ERP, carriers, and customs portals
- Matching logic checks primary names first, then aliases
- The UI can display the primary name and aliases to reduce confusion
-
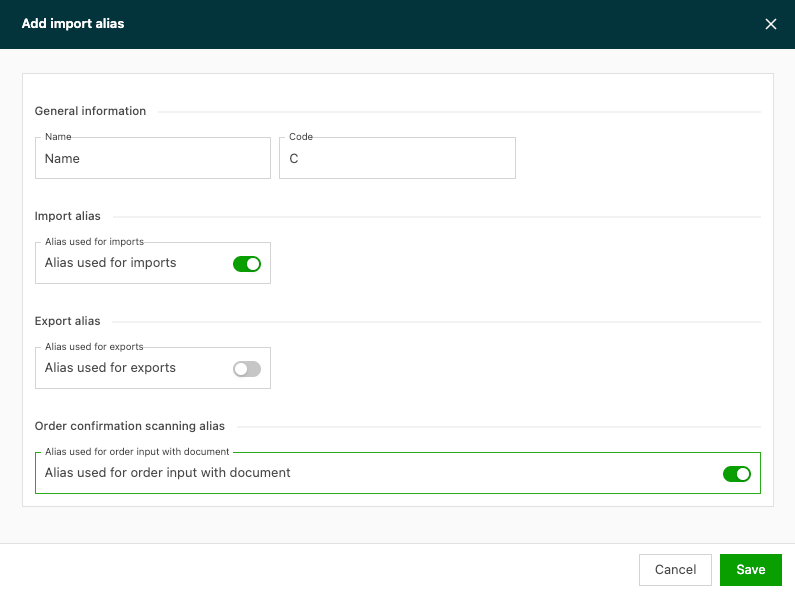
Create a specific alias for import or export data purposes
-
Use the toggle to enable the scanning alias for order confirmations
- When enabled, the alias is taken into account when scanning confirmation documents for order imports.
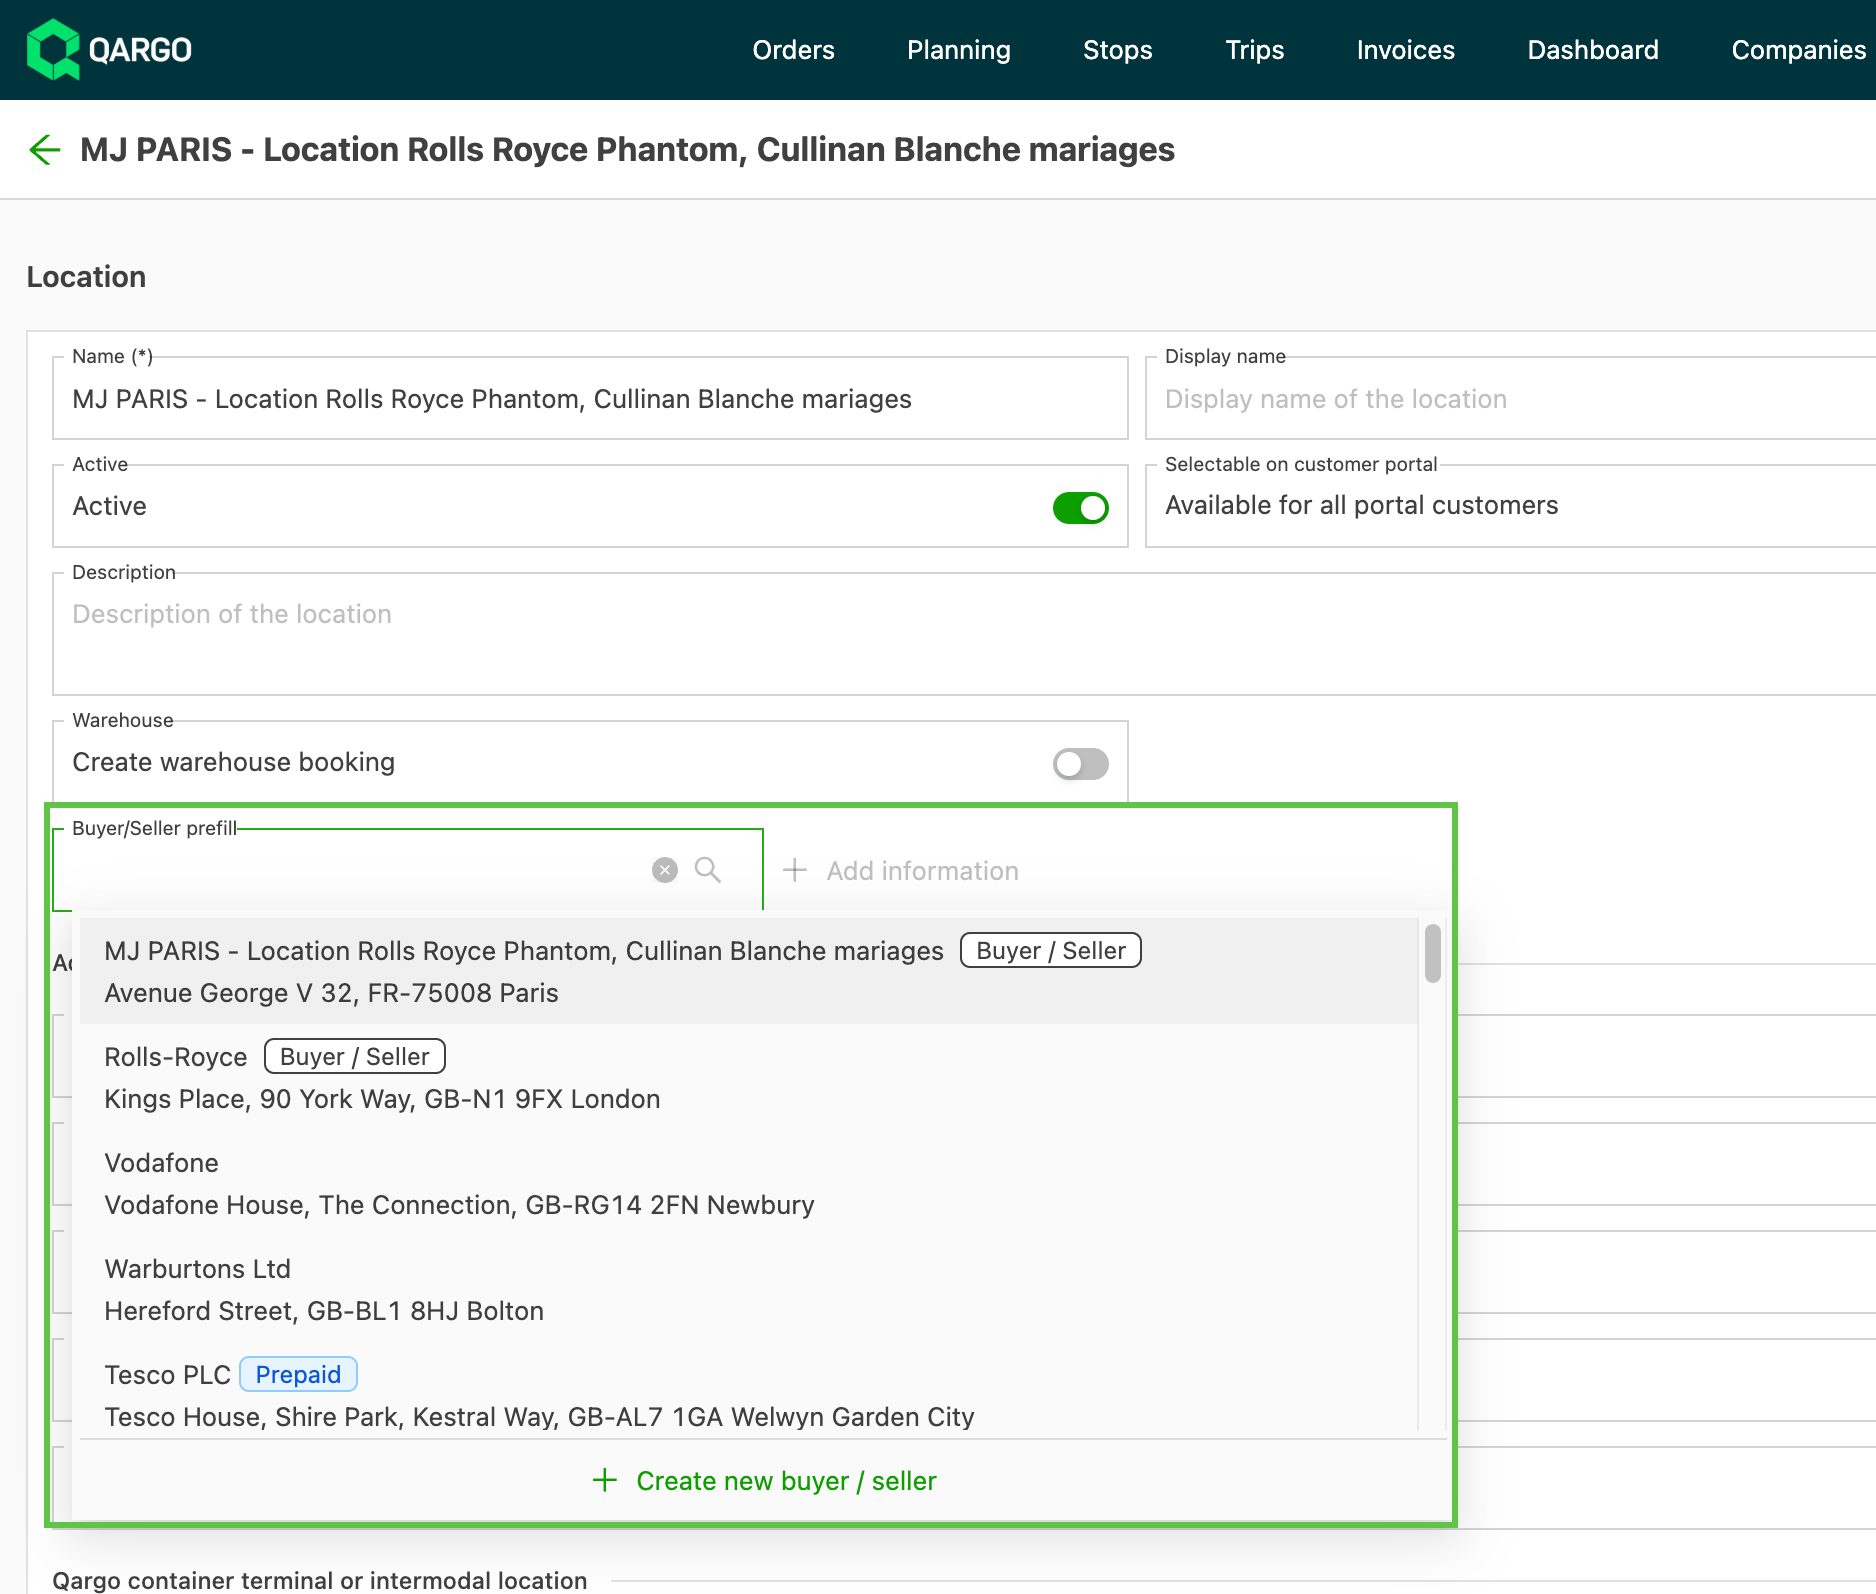
3. Locations
- Add a Buyer/Seller field where a different location can be selected.
- This is the buyer/seller company entry, linked and used as a prefill for order capture.
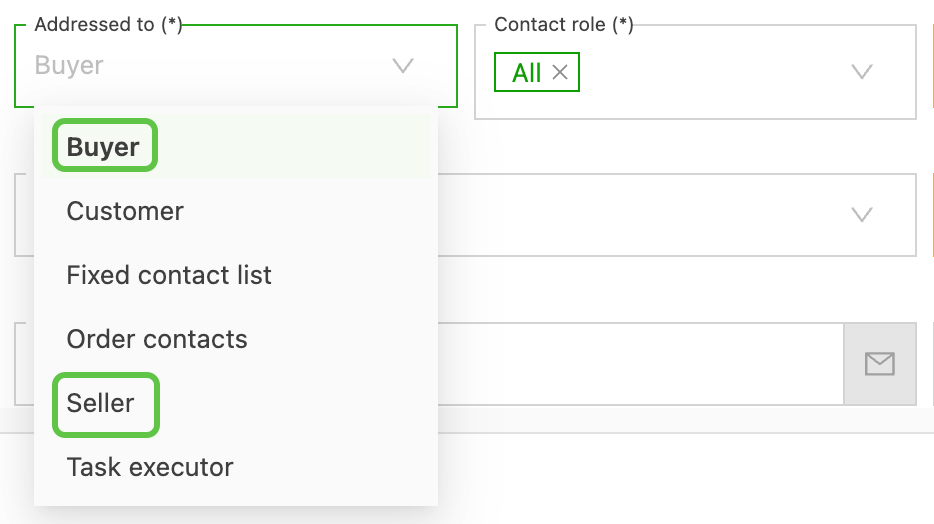
4. Create contact tasks
-
Select the Addressed to party here. The buyer/seller can be addressed if it’s present on the shipment.
Include roles in an order
-
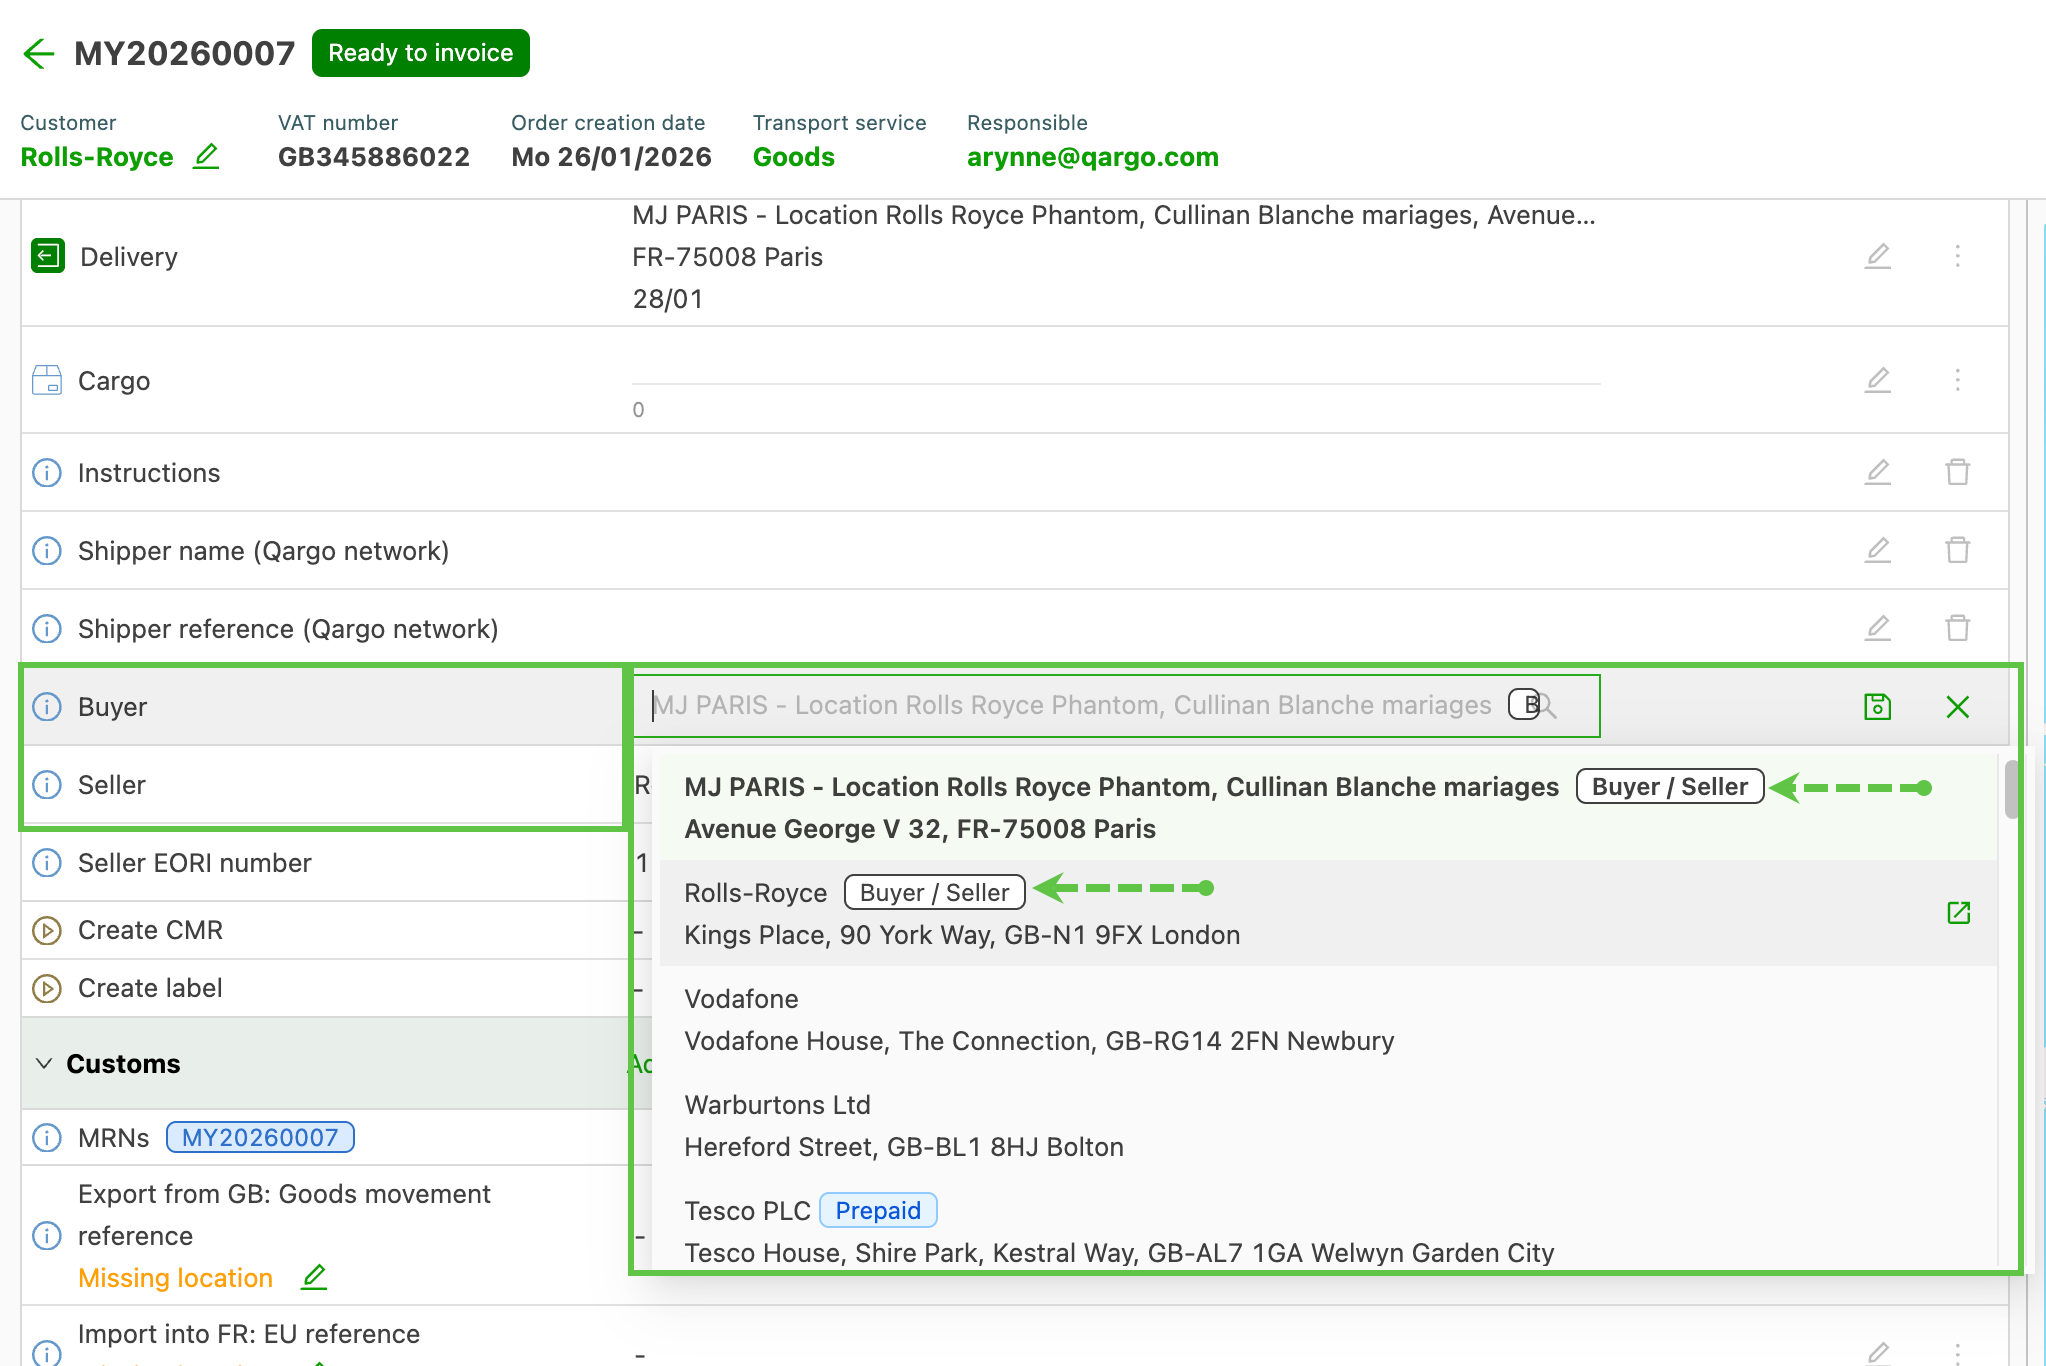
Once the fields are active, Buyer / Seller companies can be selected in the shipment details
-
Where the company is included in the Buyer/Seller database, a label shows on the company record
-
Use inline editing to update the company details if required.
Export data
-
Buyer and seller data can be added to Order export reports
-
Where buyer/seller is activated but nothing is configured on the shipment, the fallback for data exports (PDF and BigQuery) is:
- Seller = pickup location
- Buyer = delivery location
Troubleshooting
What happens if a user archives a buyer/seller profile that is in use?
Archived Buyer/Seller data is not automatically selected or shown in prefill. Records can be reactivated or relinked as needed with proper permissions.
Why is the prefill not working?
- Check whether the company is active or inactive. Inactive (archived) companies do not support prefill order defaults.
- Check the Buyer/Seller profile for any import aliases
- Validate that data fields match for the import and create aliases where necessary
What if a customer profile already exists that should be used as a buyer/seller? Does the company have to be created again manually in the Buyer/Seller database?
-
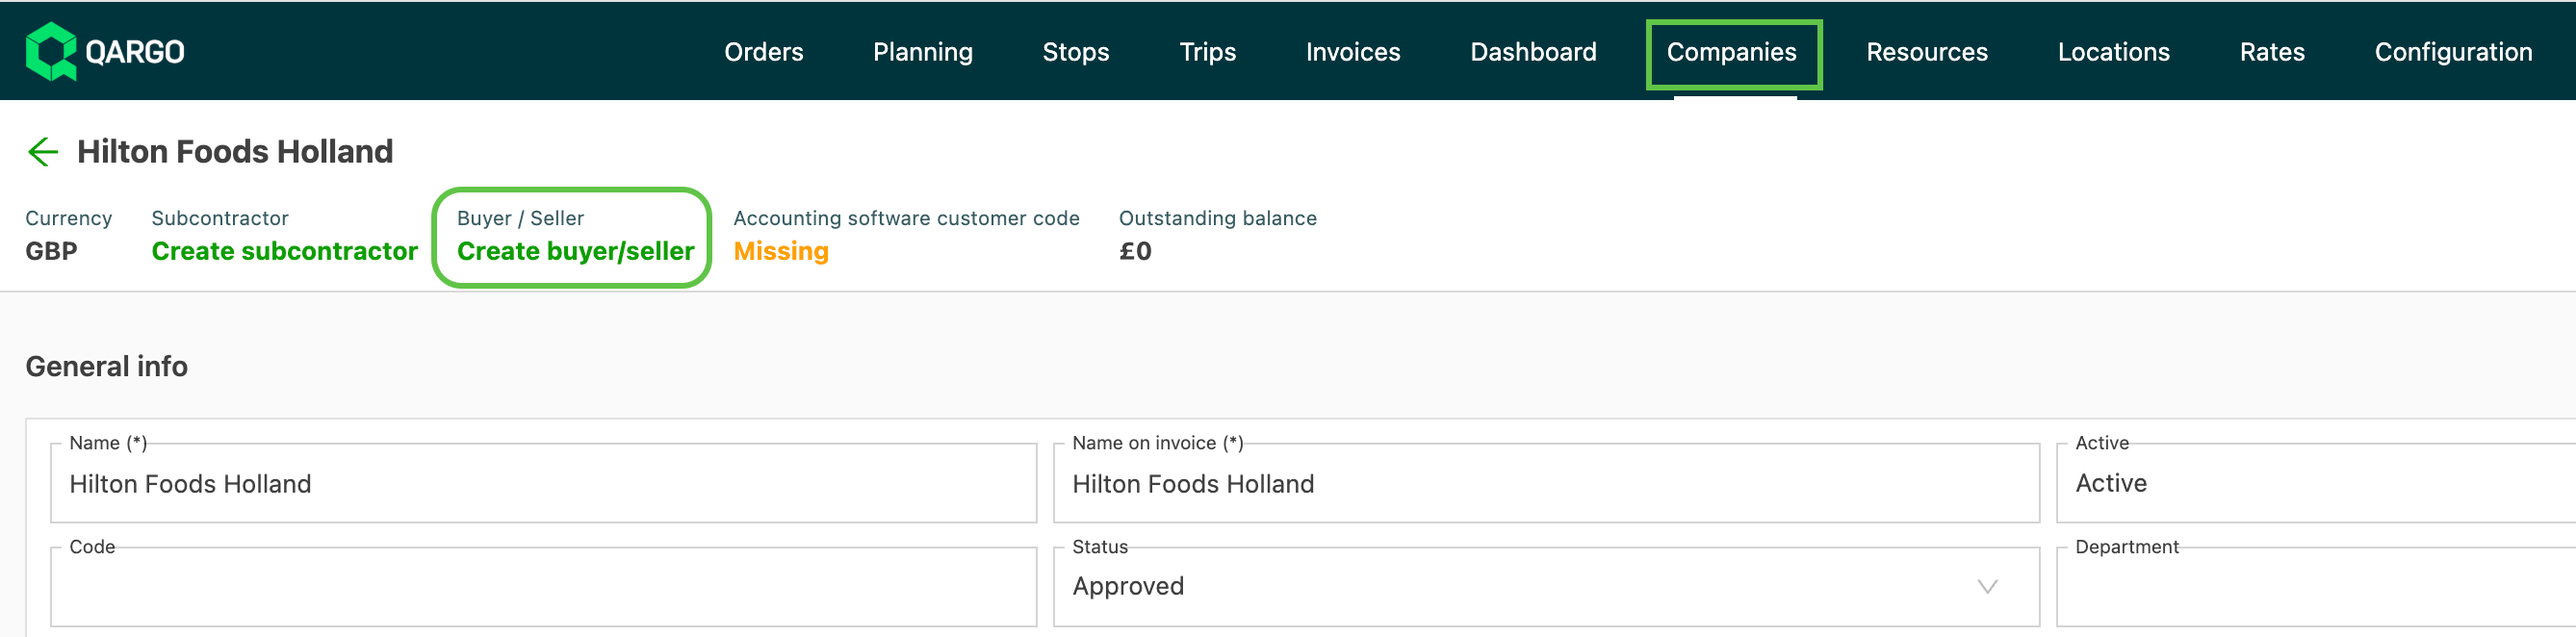
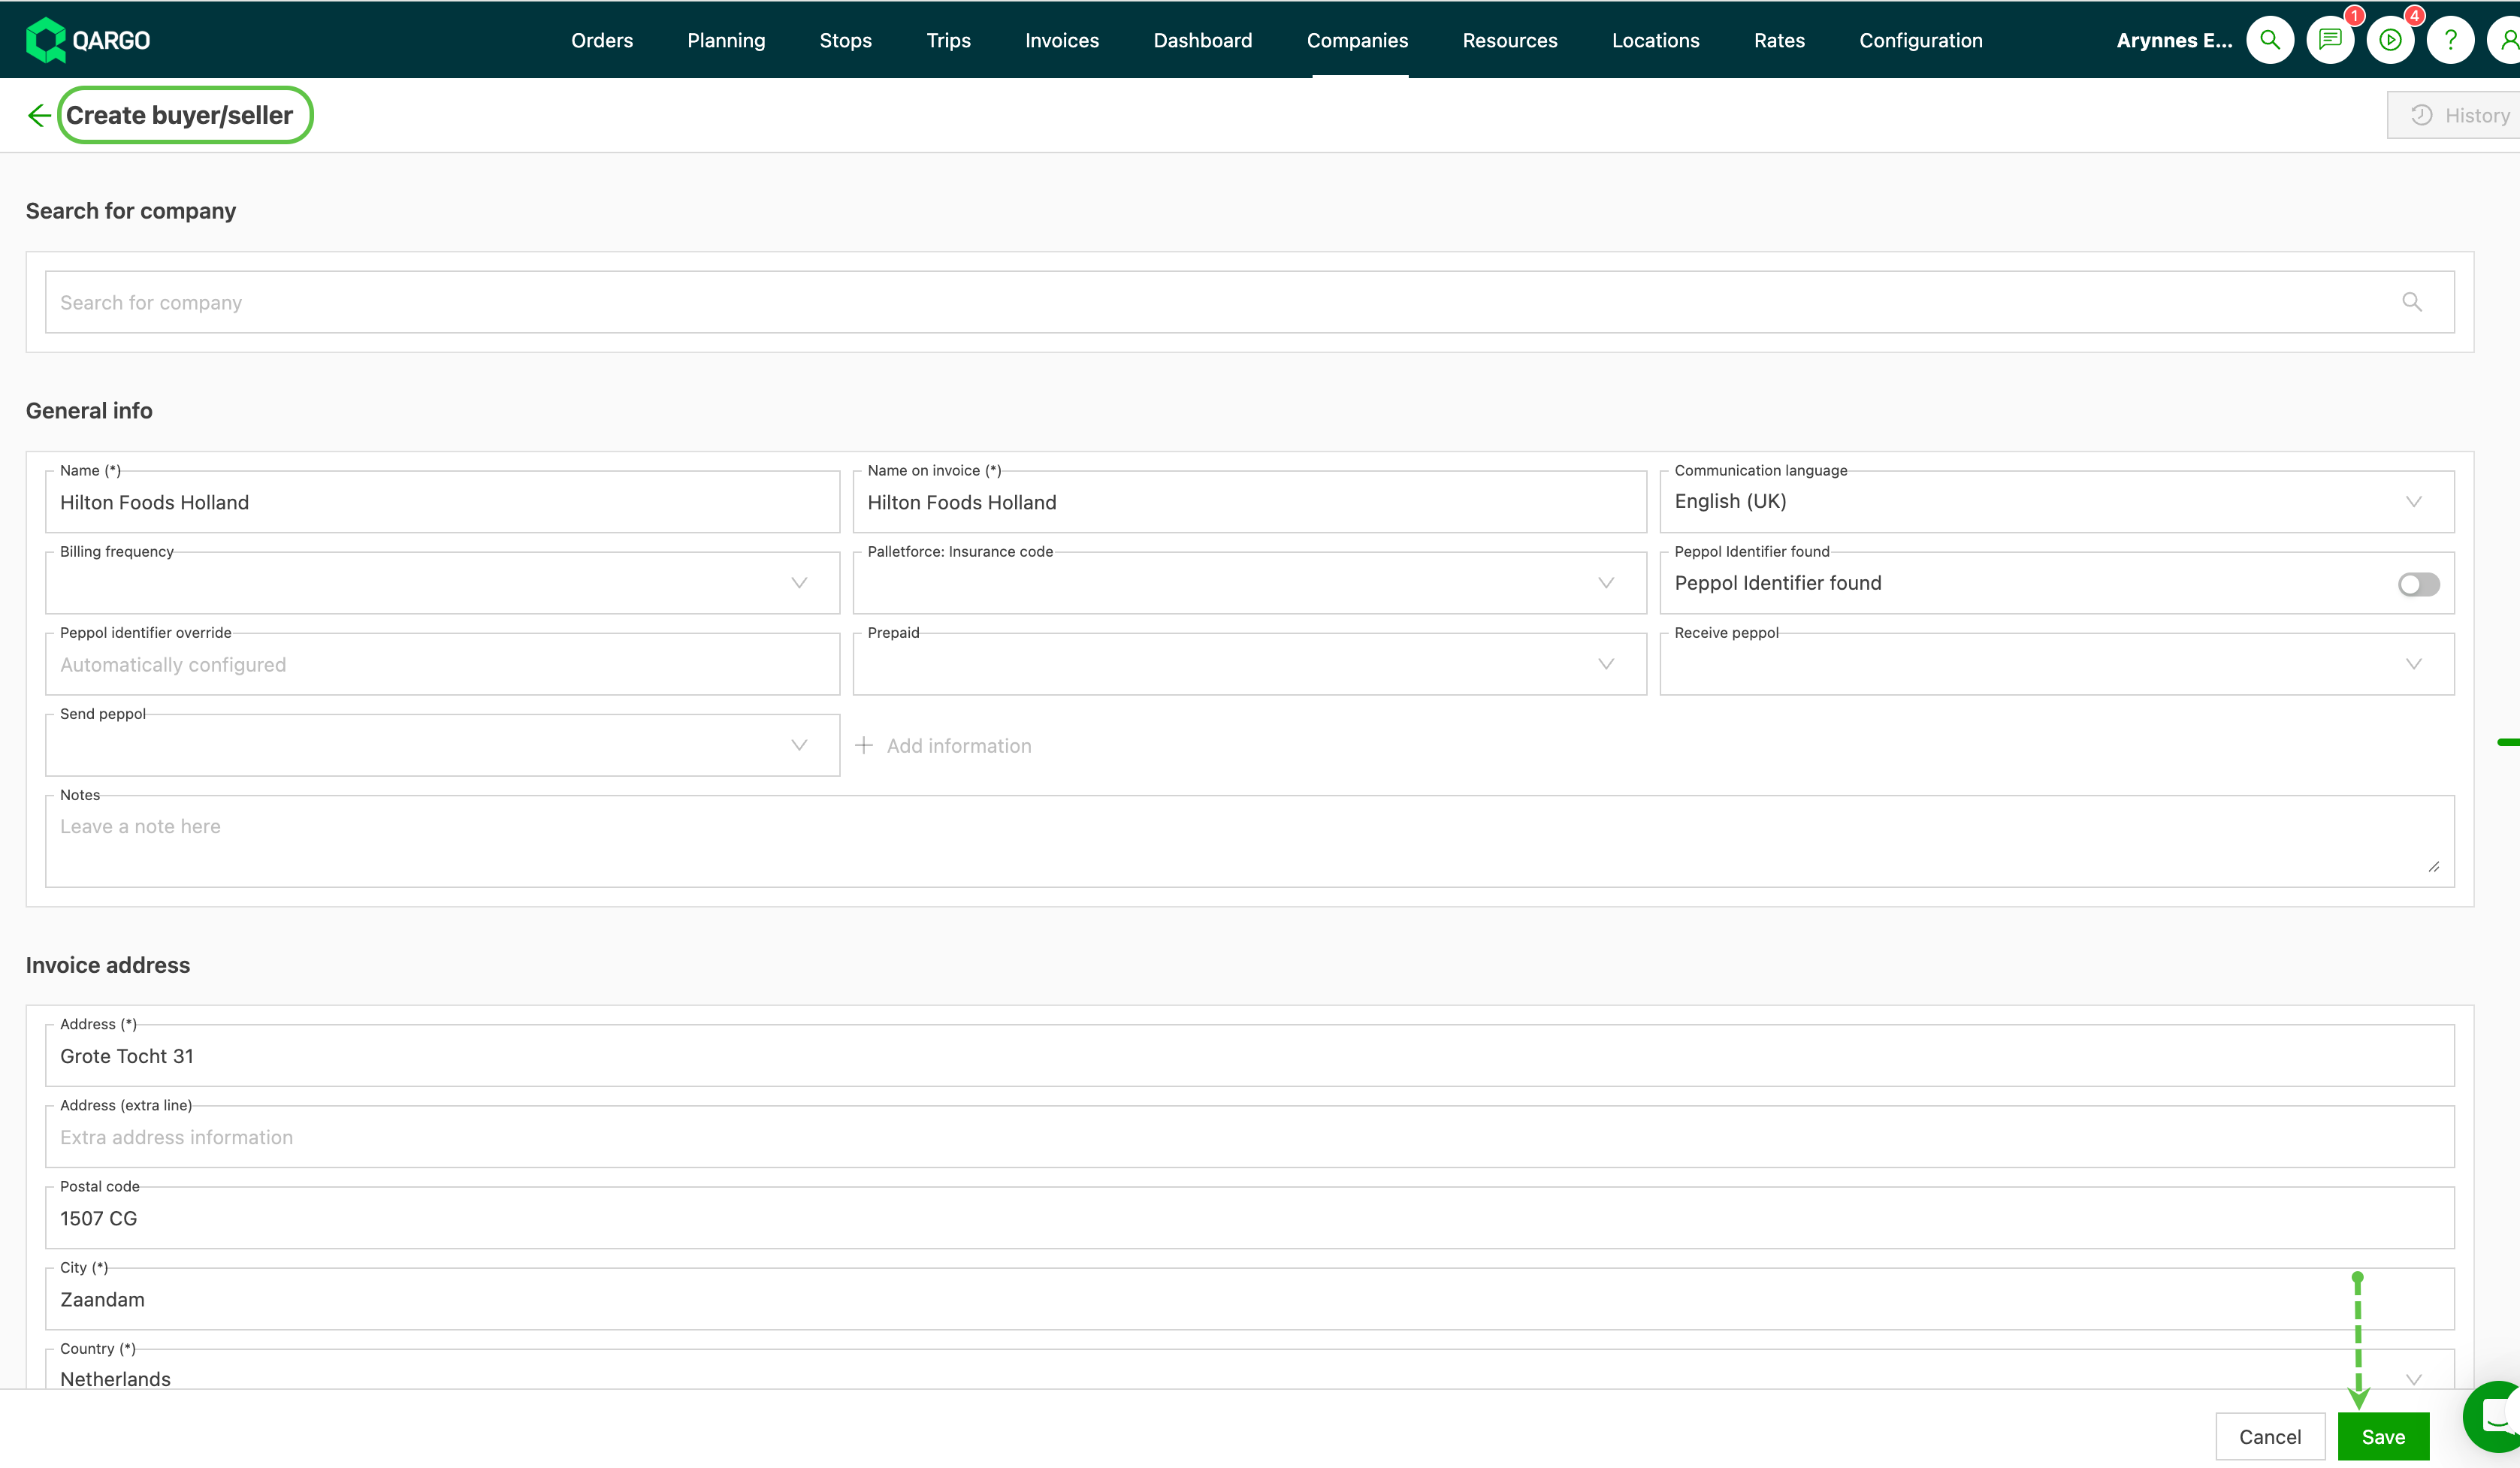
An existing customer can be made a buyer/seller from its detail page.
- Click into the customer profile
- Use the Create buyer/seller link at the top of the page
- All the existing customer details are copied over; make any updates needed
- Click Save
-
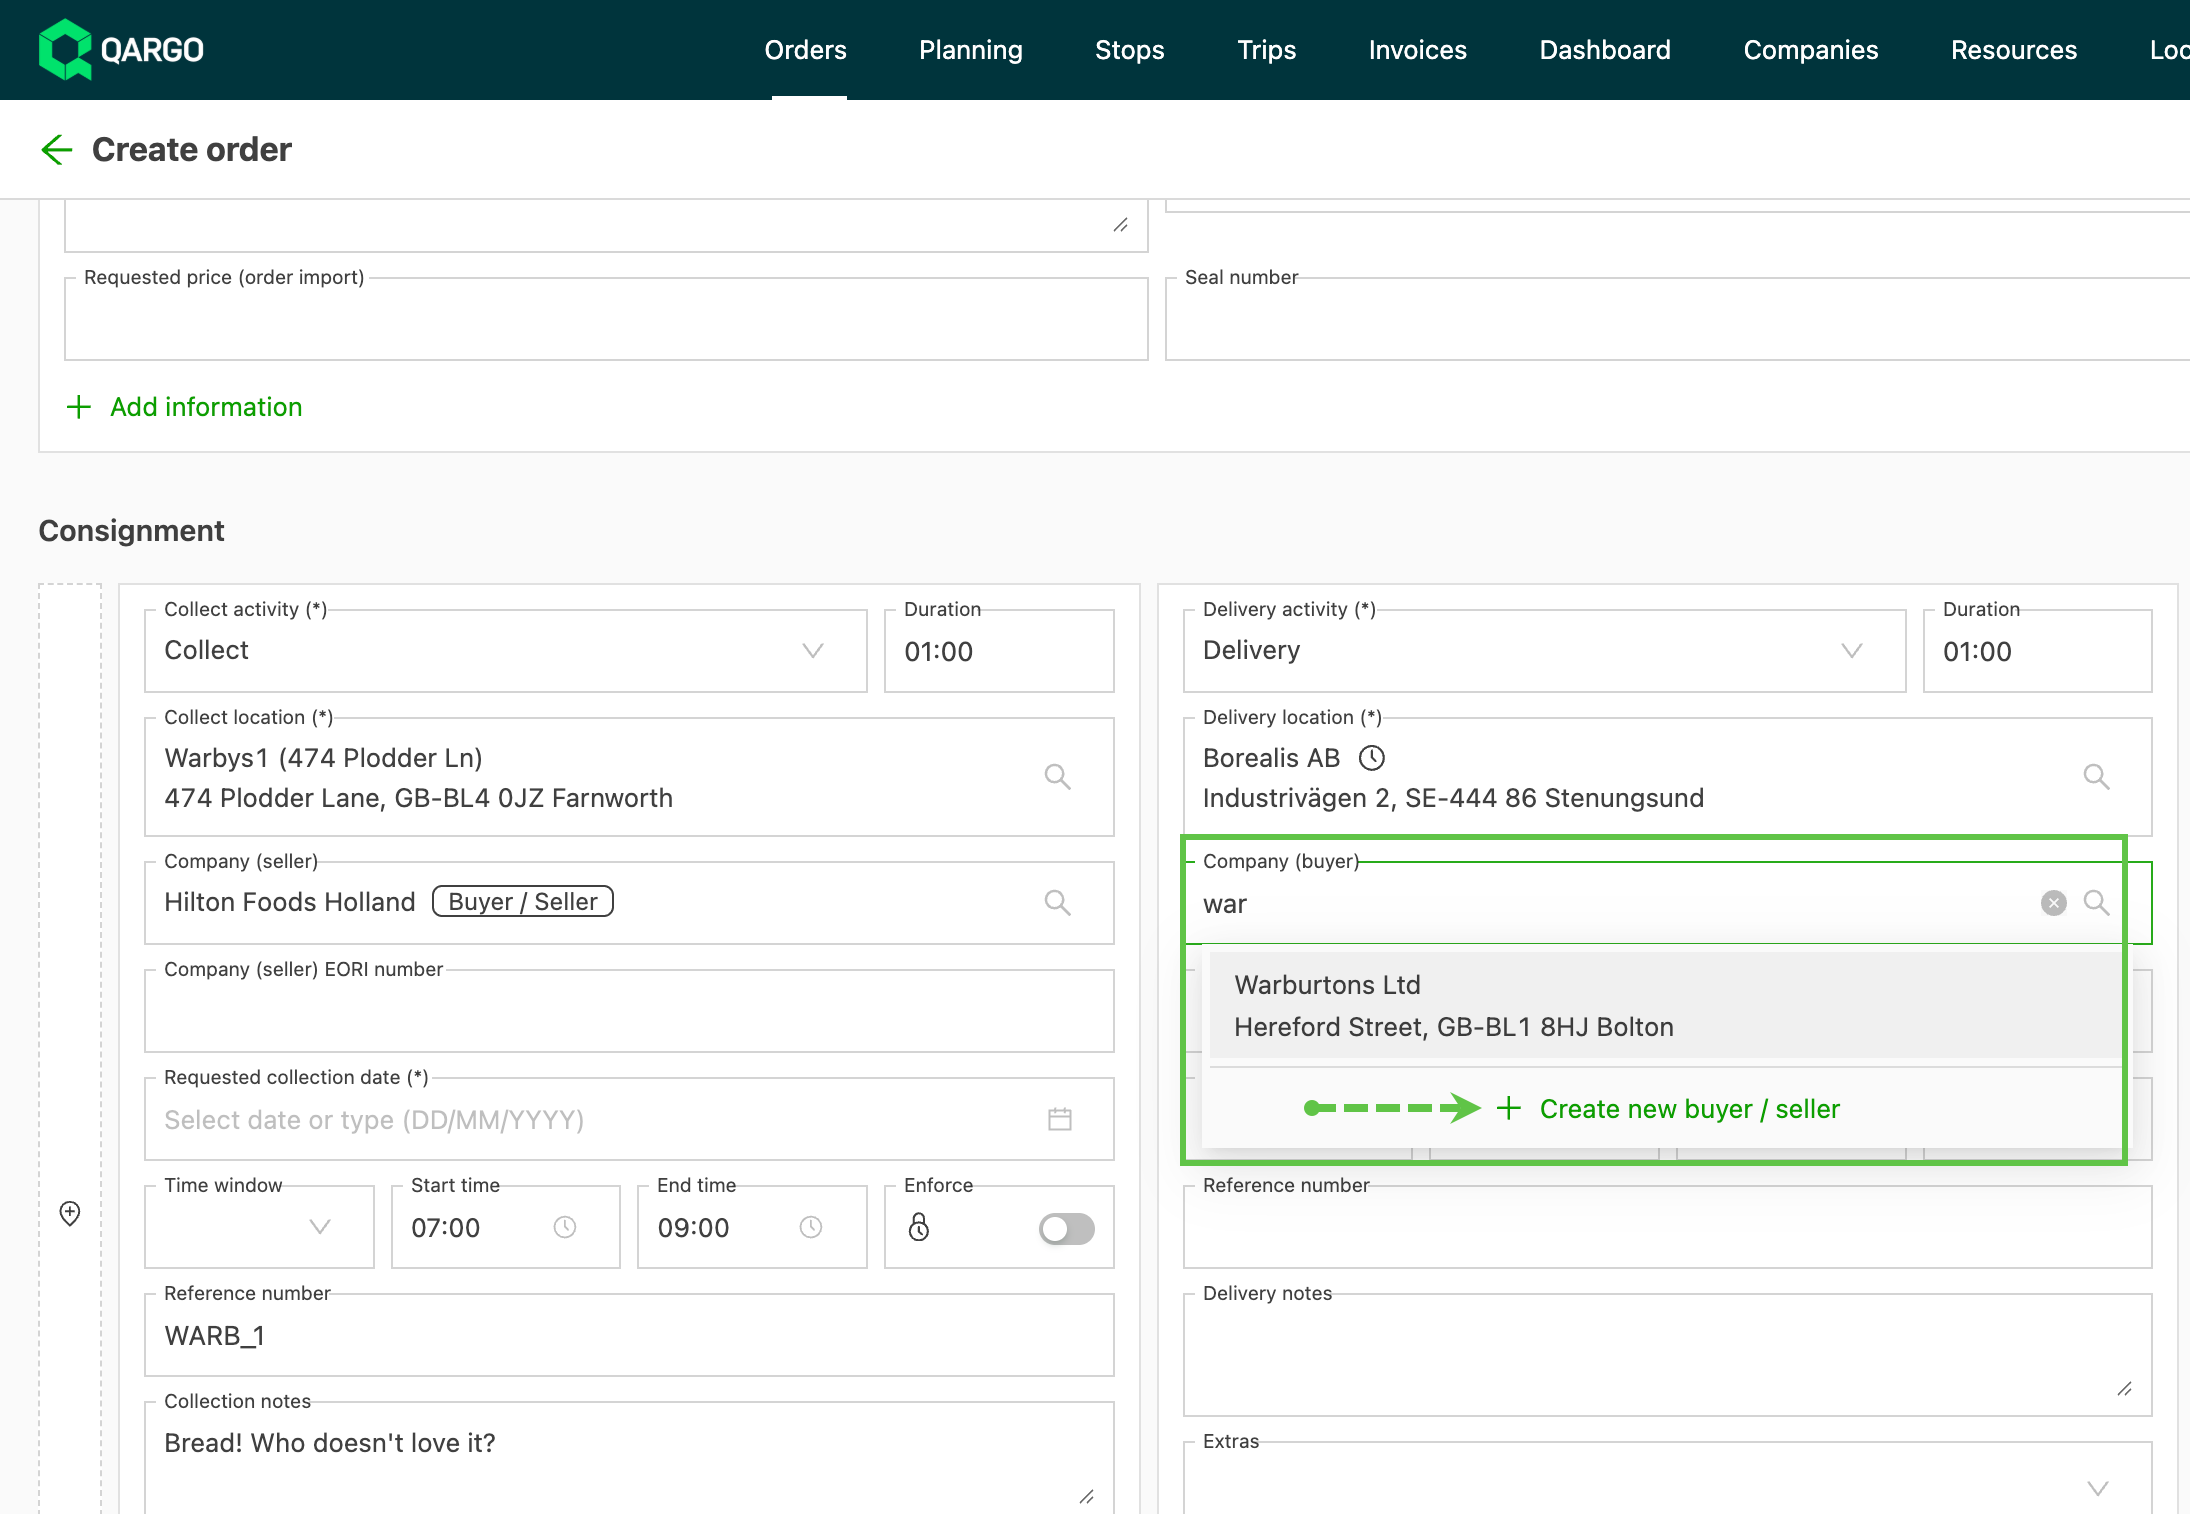
From the order:
-
Select regular customers from the dropdown
-
Use +Create new buyer/seller to add to the database
-
Buyers / sellers that are marked as such have a tag indicating this and are shown at the top
-
Once saved, the customer becomes marked as buyer/seller
-
Why is the order import data incorrect and showing the wrong company name?
-
Verify alias coverage:
- Check whether the intended company has an alias that should match the imported name; ensure the alias exists in the master record.
-
Validate external system mappings:
- Confirm that the alias-to-master record sync is running and that external systems (ERP, CRM, customs portals) recognize the same alias.
-
EORI and identifiers:
- Ensure the alias maps to the correct EORI or tax identifiers to avoid regulatory misclassification.
-
Correcting an import:
-
If a wrong company name was imported:
- Remap to the correct master using the appropriate alias
- Update the shipment record to link to the correct Seller/Buyer master
-
-
Prevention measures:
- Use autocomplete with alias support to reduce manual entry errors
- Maintain a single source of truth for each party and discourage duplicate records
- Regularly run data hygiene and deduplication routines on master data