Configuration – Comments and notes: what, why, how
Add comments to orders, loads, invoices, credit memos, customers, contract carriers, drivers and vehicles, assign a user, set a category and a due date, and track follow-up with a timestamped audit trail.
Table of contents
Introduction
Comments and notes adds categorized comments to orders, loads, invoices, credit memos, customers, contract carriers, drivers and vehicles. Each comment has an assigned owner, an optional due date and a timestamped record.
Click the image below for a video tutorial on comments and notes.
Summary
What is comments and notes?
- A feature that centralizes internal communication and auditing in Qargo.
- Users add comments and notes to orders, loads, invoices and credit memos.
- Each comment has a category and can be assigned to a team member.
Why use comments and notes?
- Clear ownership: every comment names the user responsible for follow-up, which improves accountability.
- Faster resolution: communication and context are centralized on the record.
- Audit trail: the system keeps a timestamped, searchable record of decisions and alerts.
How does it work?
- A user adds a comment to a record, picks a category and assigns a user.
- The assigned user resolves the comment once the task or query is done. Qargo then shows the timestamp and the resolver’s name.
- The Comments icon in the top right corner lists all comments created by or assigned to the user.
- Categories are managed in the Configuration module.
Terminology
| Term | Definition |
|---|---|
| Comments and notes | A feature for adding comments and notes to orders, loads, invoices and credit memos. |
| Category | A label on a comment or note that helps filter and track its purpose. |
| Assigned user | The team member responsible for following up on a comment or note. |
Use cases
Finance query on an order
A finance user needs clarification on a delivery cost. The user adds a comment with the category finance query to the order and assigns it to a planner. Qargo keeps a full, timestamped record for audit purposes.
Invoice query follow-up
A finance team tracks and follows up on invoice queries with comments on invoices and credit memos.
Customer queries and complaints
A customer service team manages customer queries and complaints with comments and notes.
Add and resolve comments
Comments work the same way on orders, loads, invoices and credit memos. The steps below use an order.
Add a comment
-
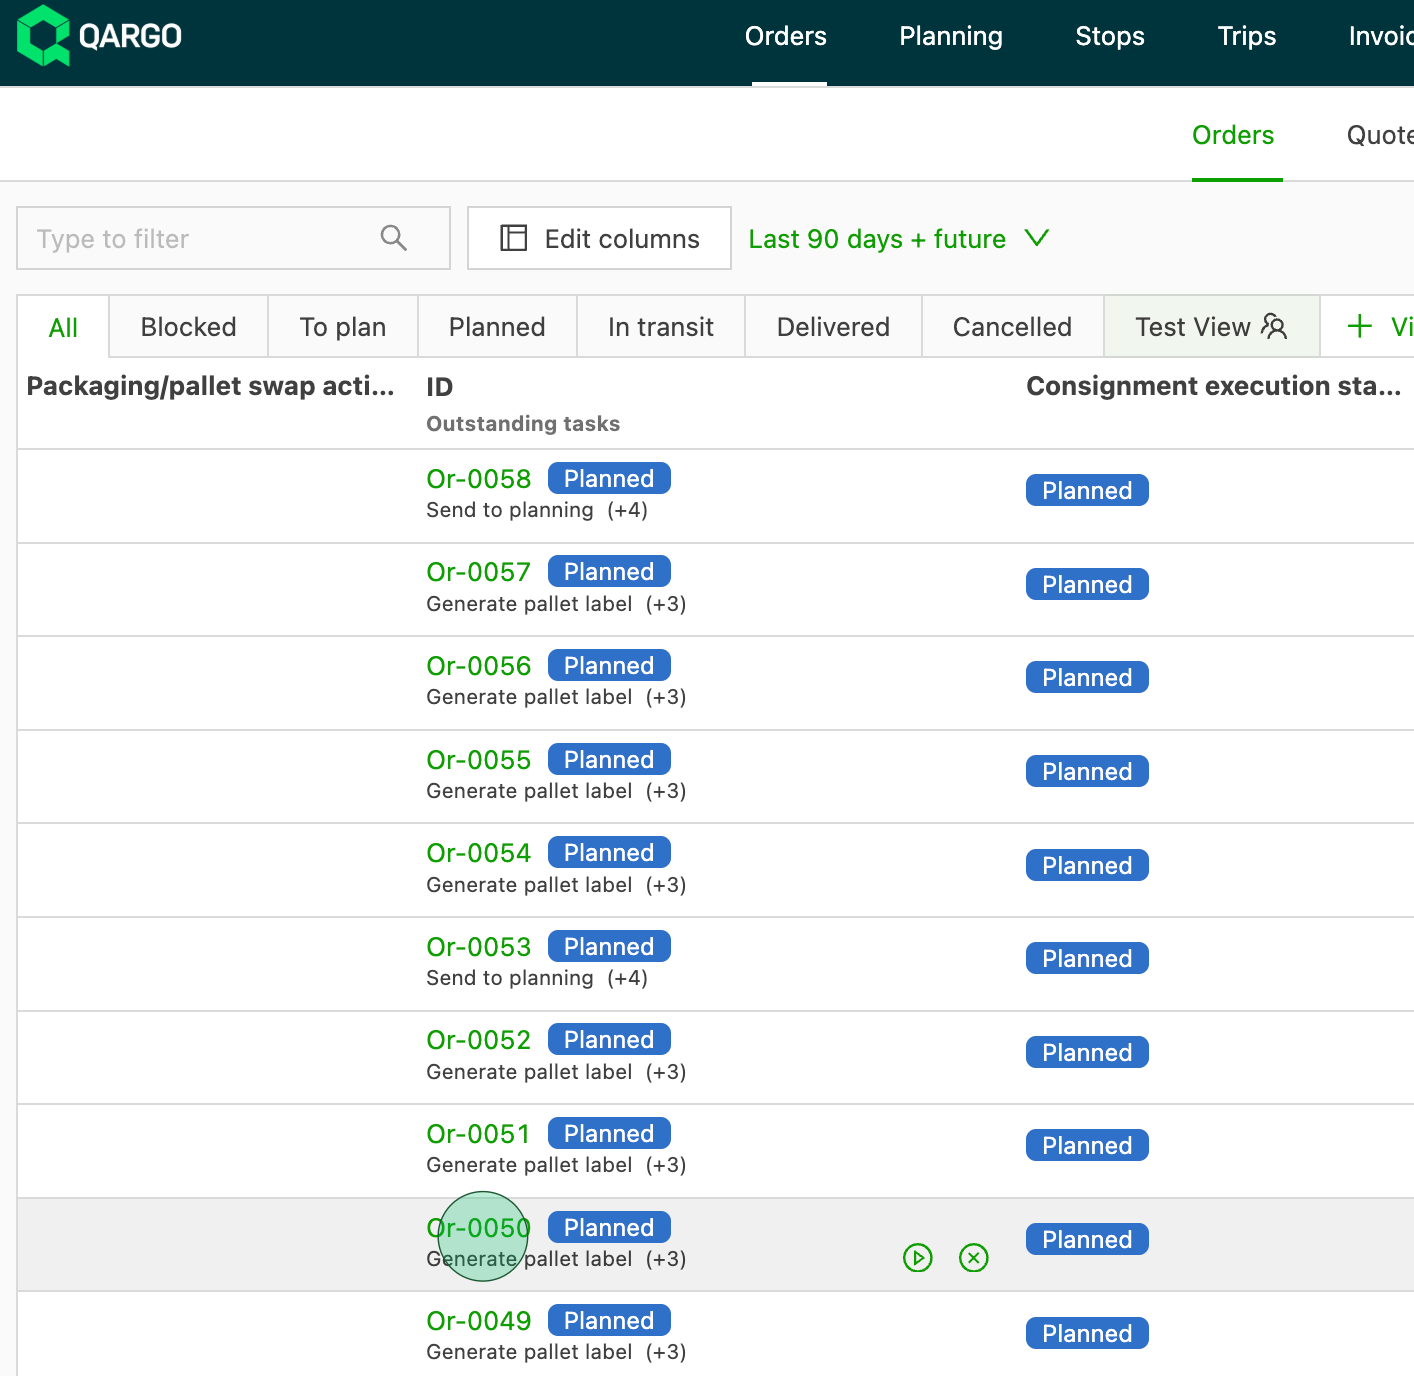
Open the Orders list view and click into an order.
-
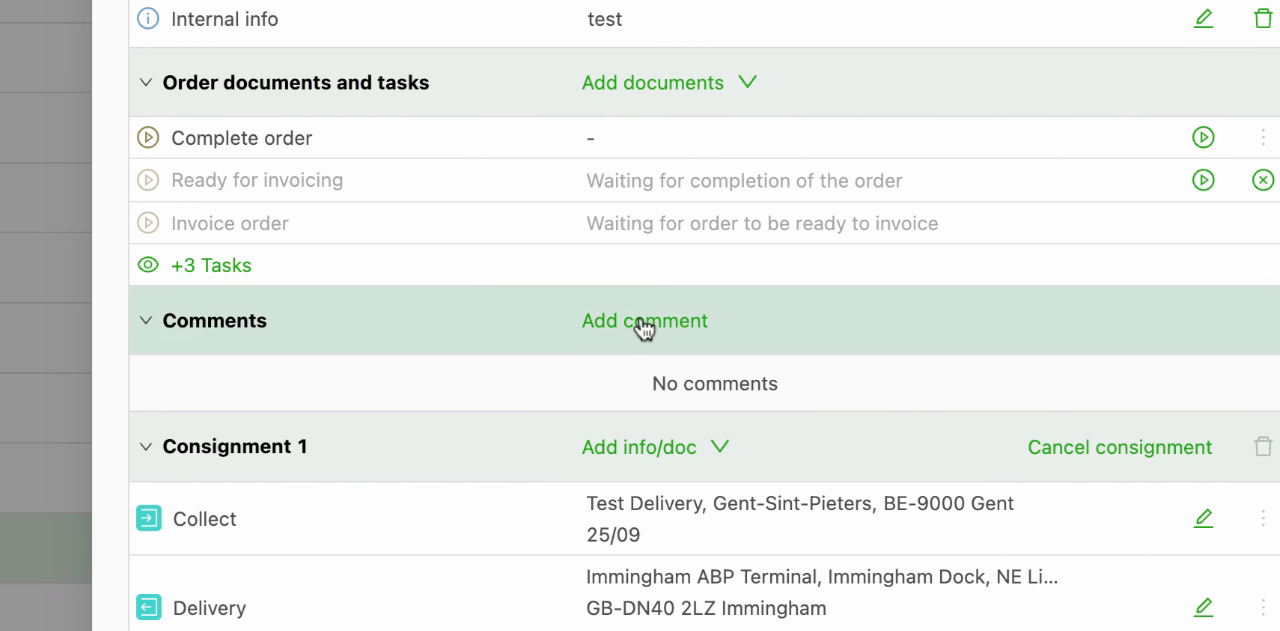
Scroll down to the Comment section and click Add comment.
-
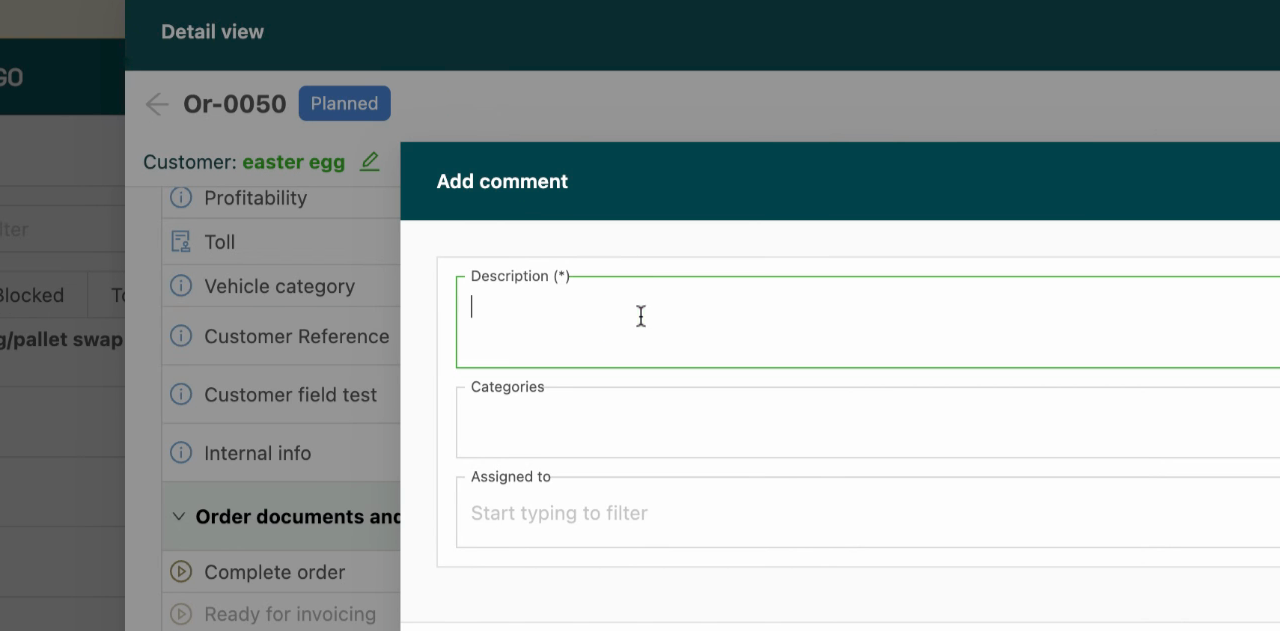
Type the comment in the description box.
-
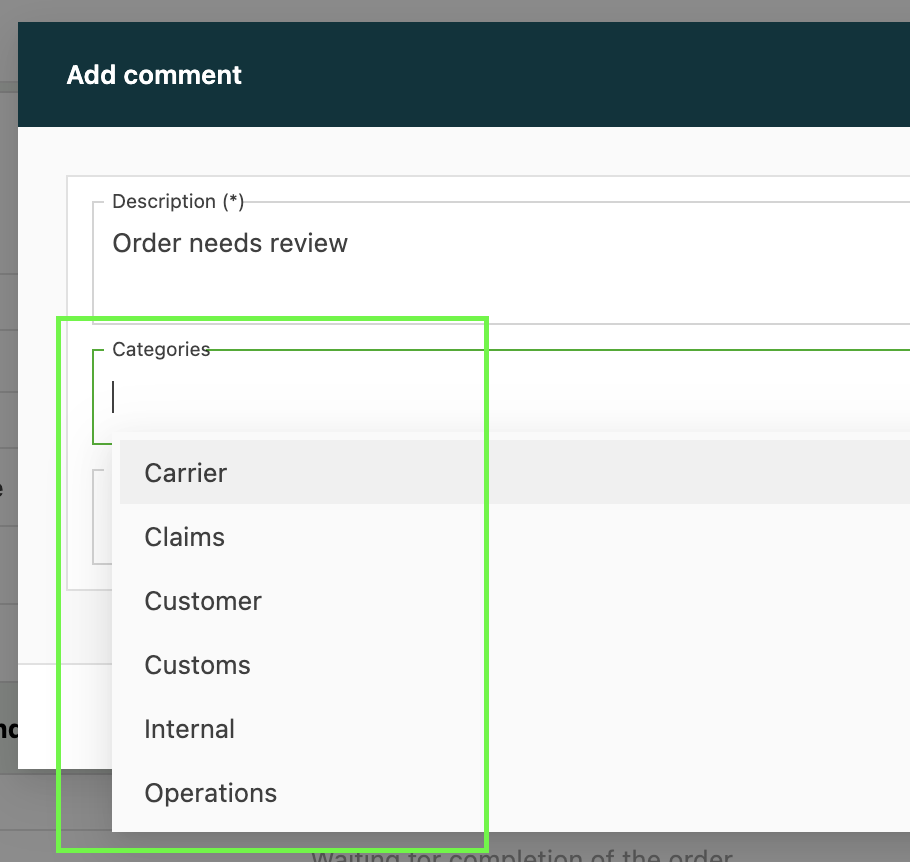
Select a category for the comment.
-
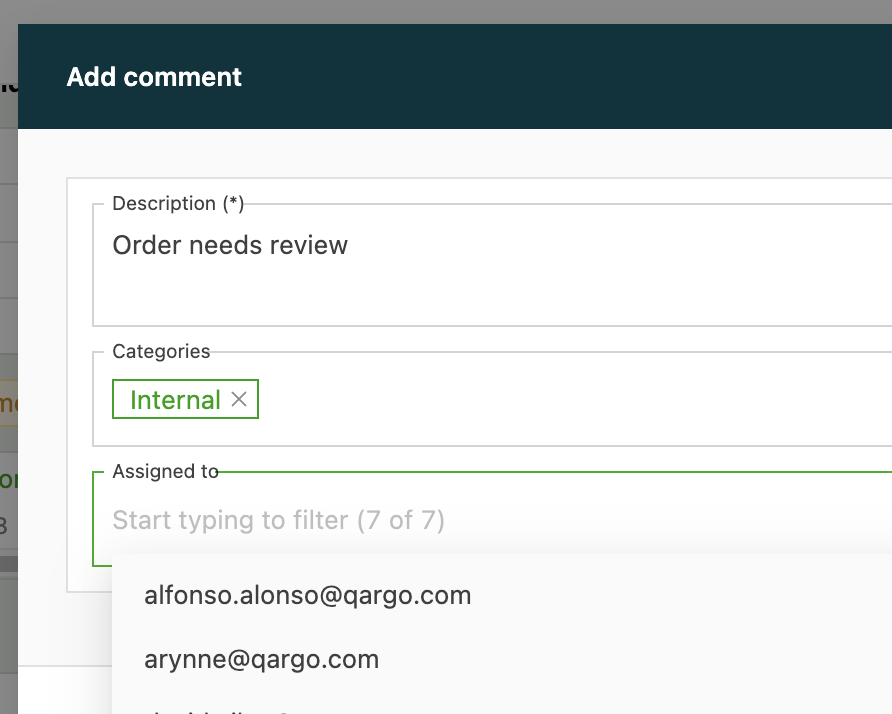
Select a user to assign the comment to, then click Save.
Resolve a comment
-
Check the box on the right side of the comment once the task or query is resolved. The comment then shows a timestamp and the name of the resolver.

Track follow-up
Find comments created by or assigned to the user
-
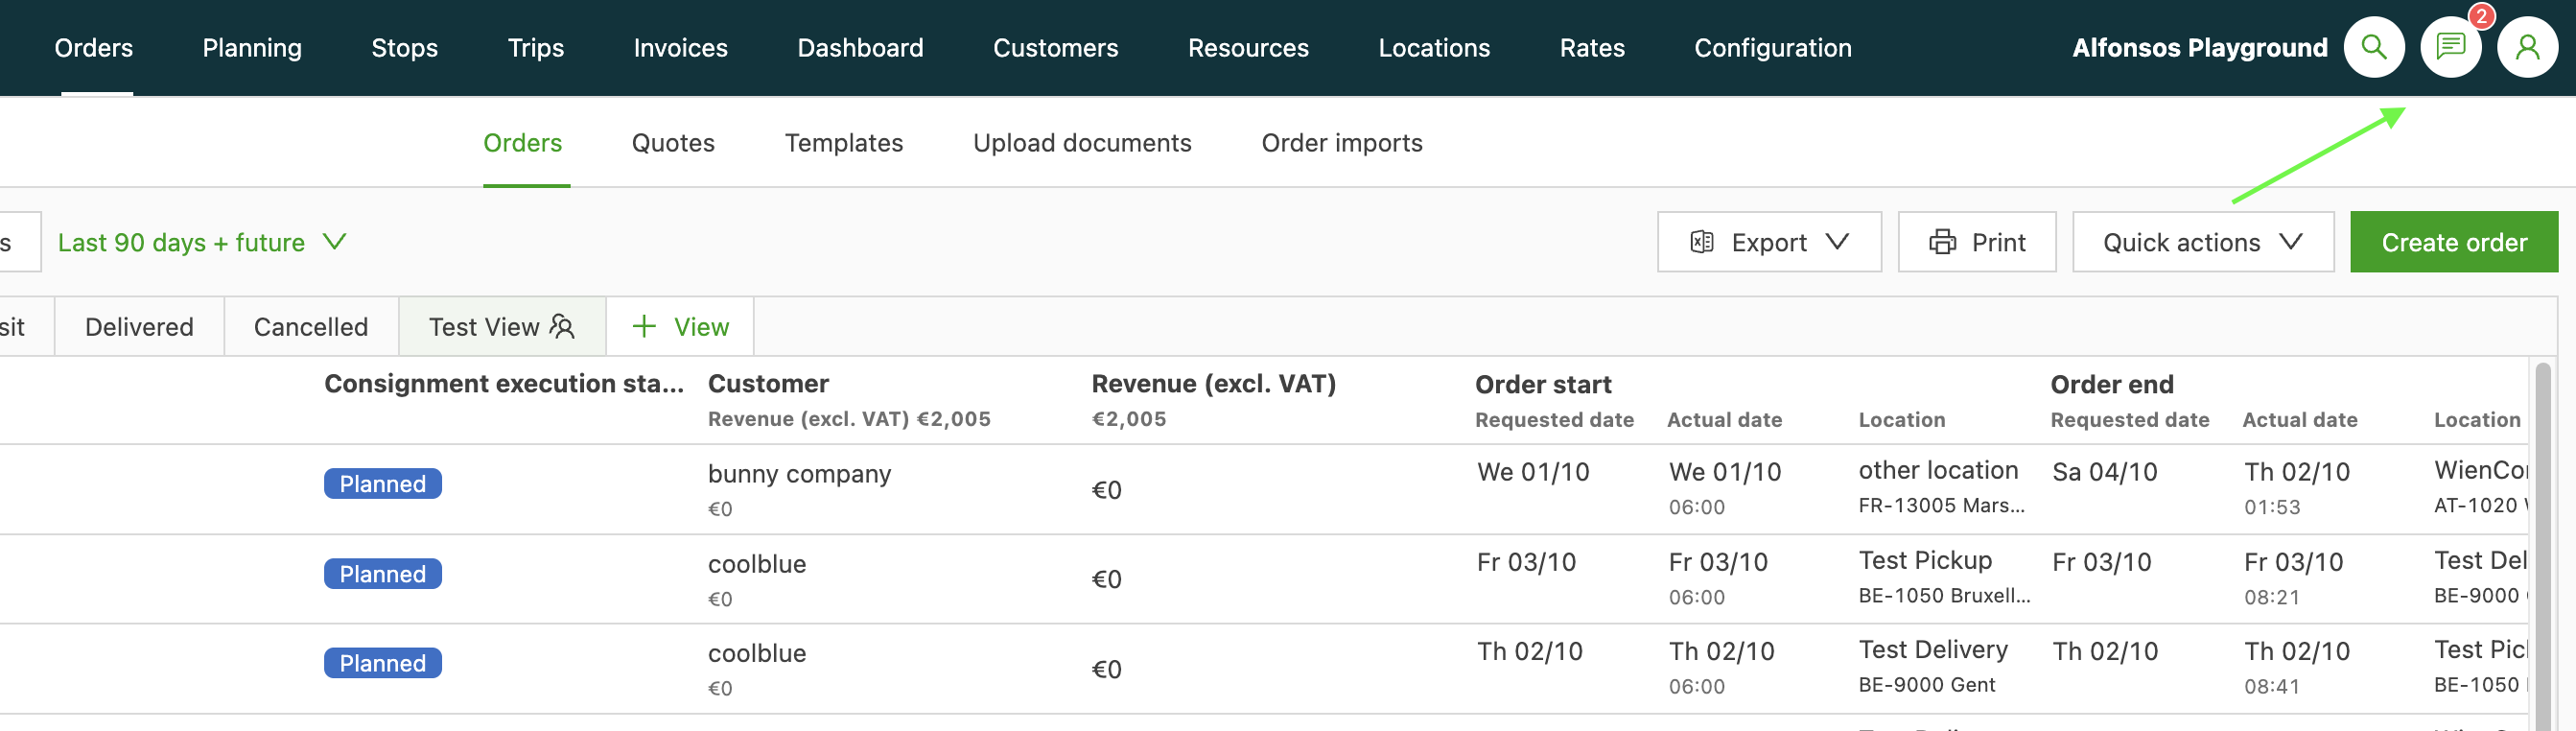
Click the Comments icon in the top right corner of the screen. The list shows all comments created by or assigned to the user.
-
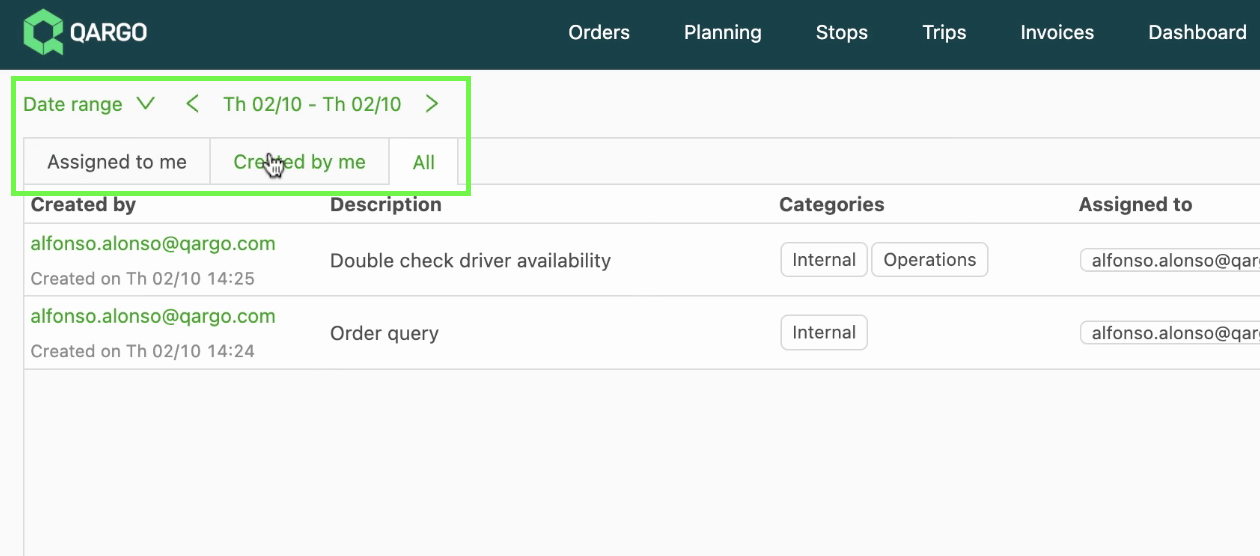
Select a filter to narrow the list:
- Assigned to the user: comments assigned to the logged-in user
- Created by the user: comments the logged-in user created
- Category: comments with a specific category
- Resolution date: comments resolved on a specific date
Comments on customers, contract carriers, drivers and vehicles
Comments also work on customers, contract carriers, drivers and vehicles. Each comment can carry an optional due date and documents, which suits follow-ups that run for weeks.
Where comments are available
- Customers: Companies > Customers
- Contract carriers: Companies > Contract carriers and Resources > Contract carriers
- Drivers: Resources > Drivers
- Vehicles: Resources > Vehicles, including trailers
Add a comment with a due date and documents
-
Open the customer, contract carrier, driver or vehicle, then scroll to the Comments section.
-
Click Add comment.
-
Type the comment in the description box.
-
Select a category and an assigned user, as on any other comment.
-
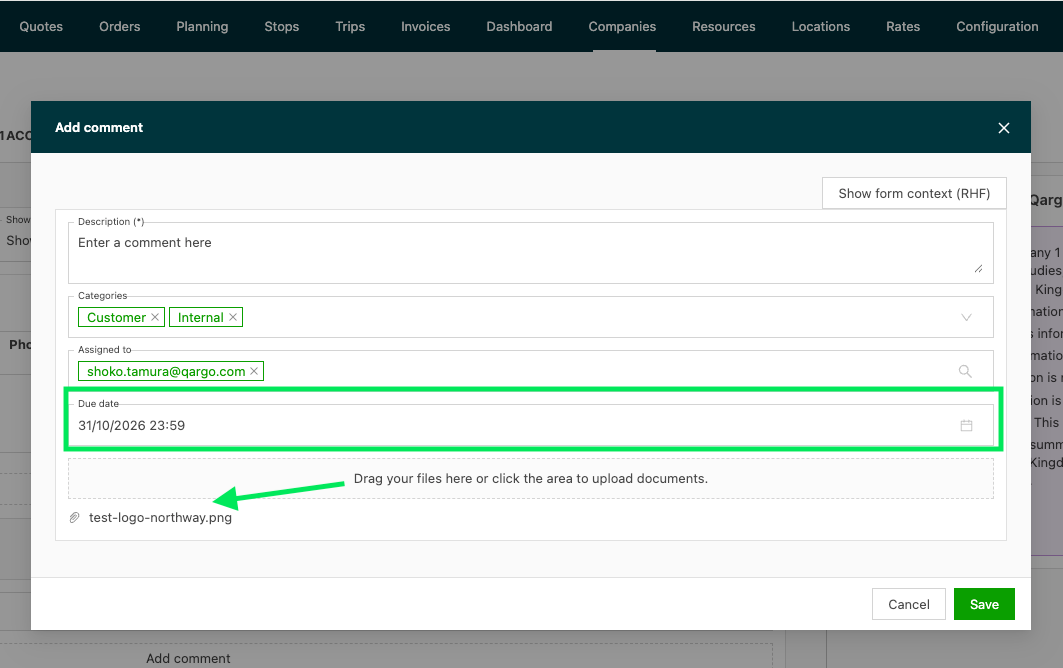
Enter a Due date if the follow-up has a deadline.
-
Upload the documents that belong to the comment.
-
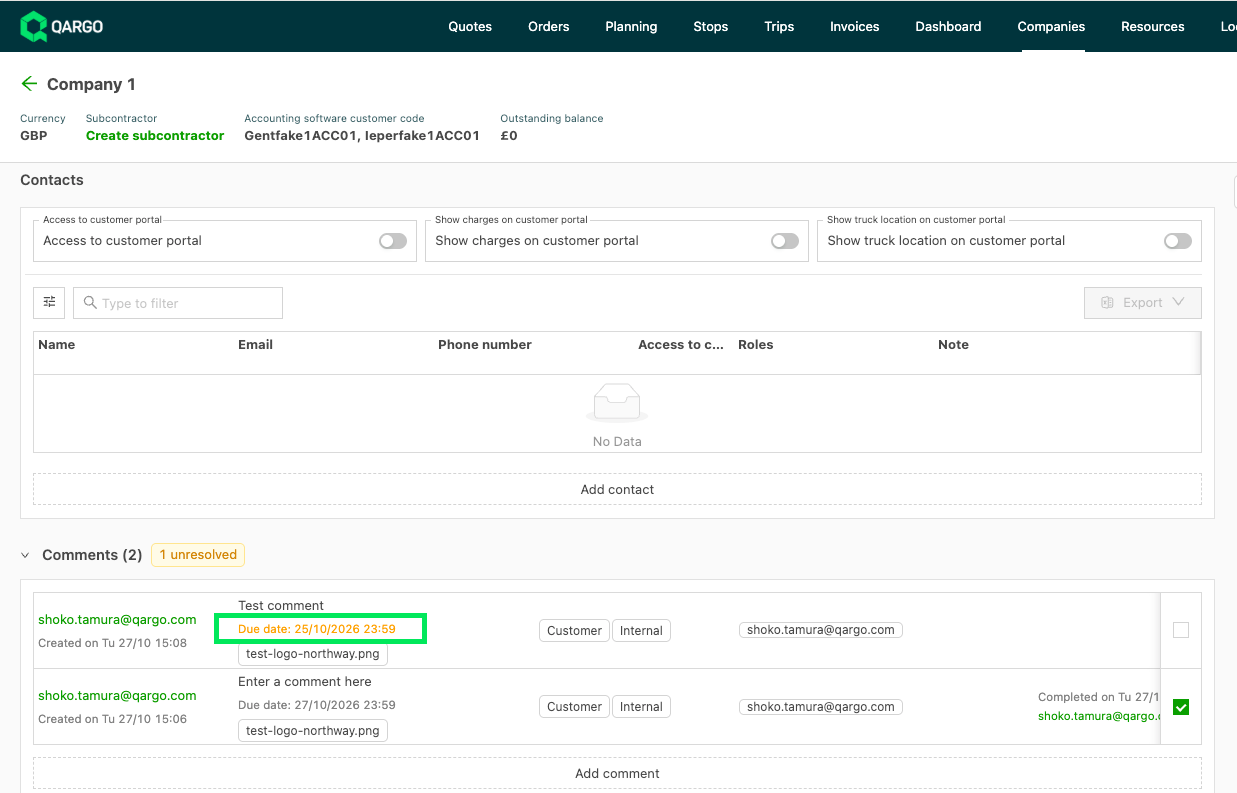
Click Save. The saved comment shows its due date under the description. A past due date shows in orange.
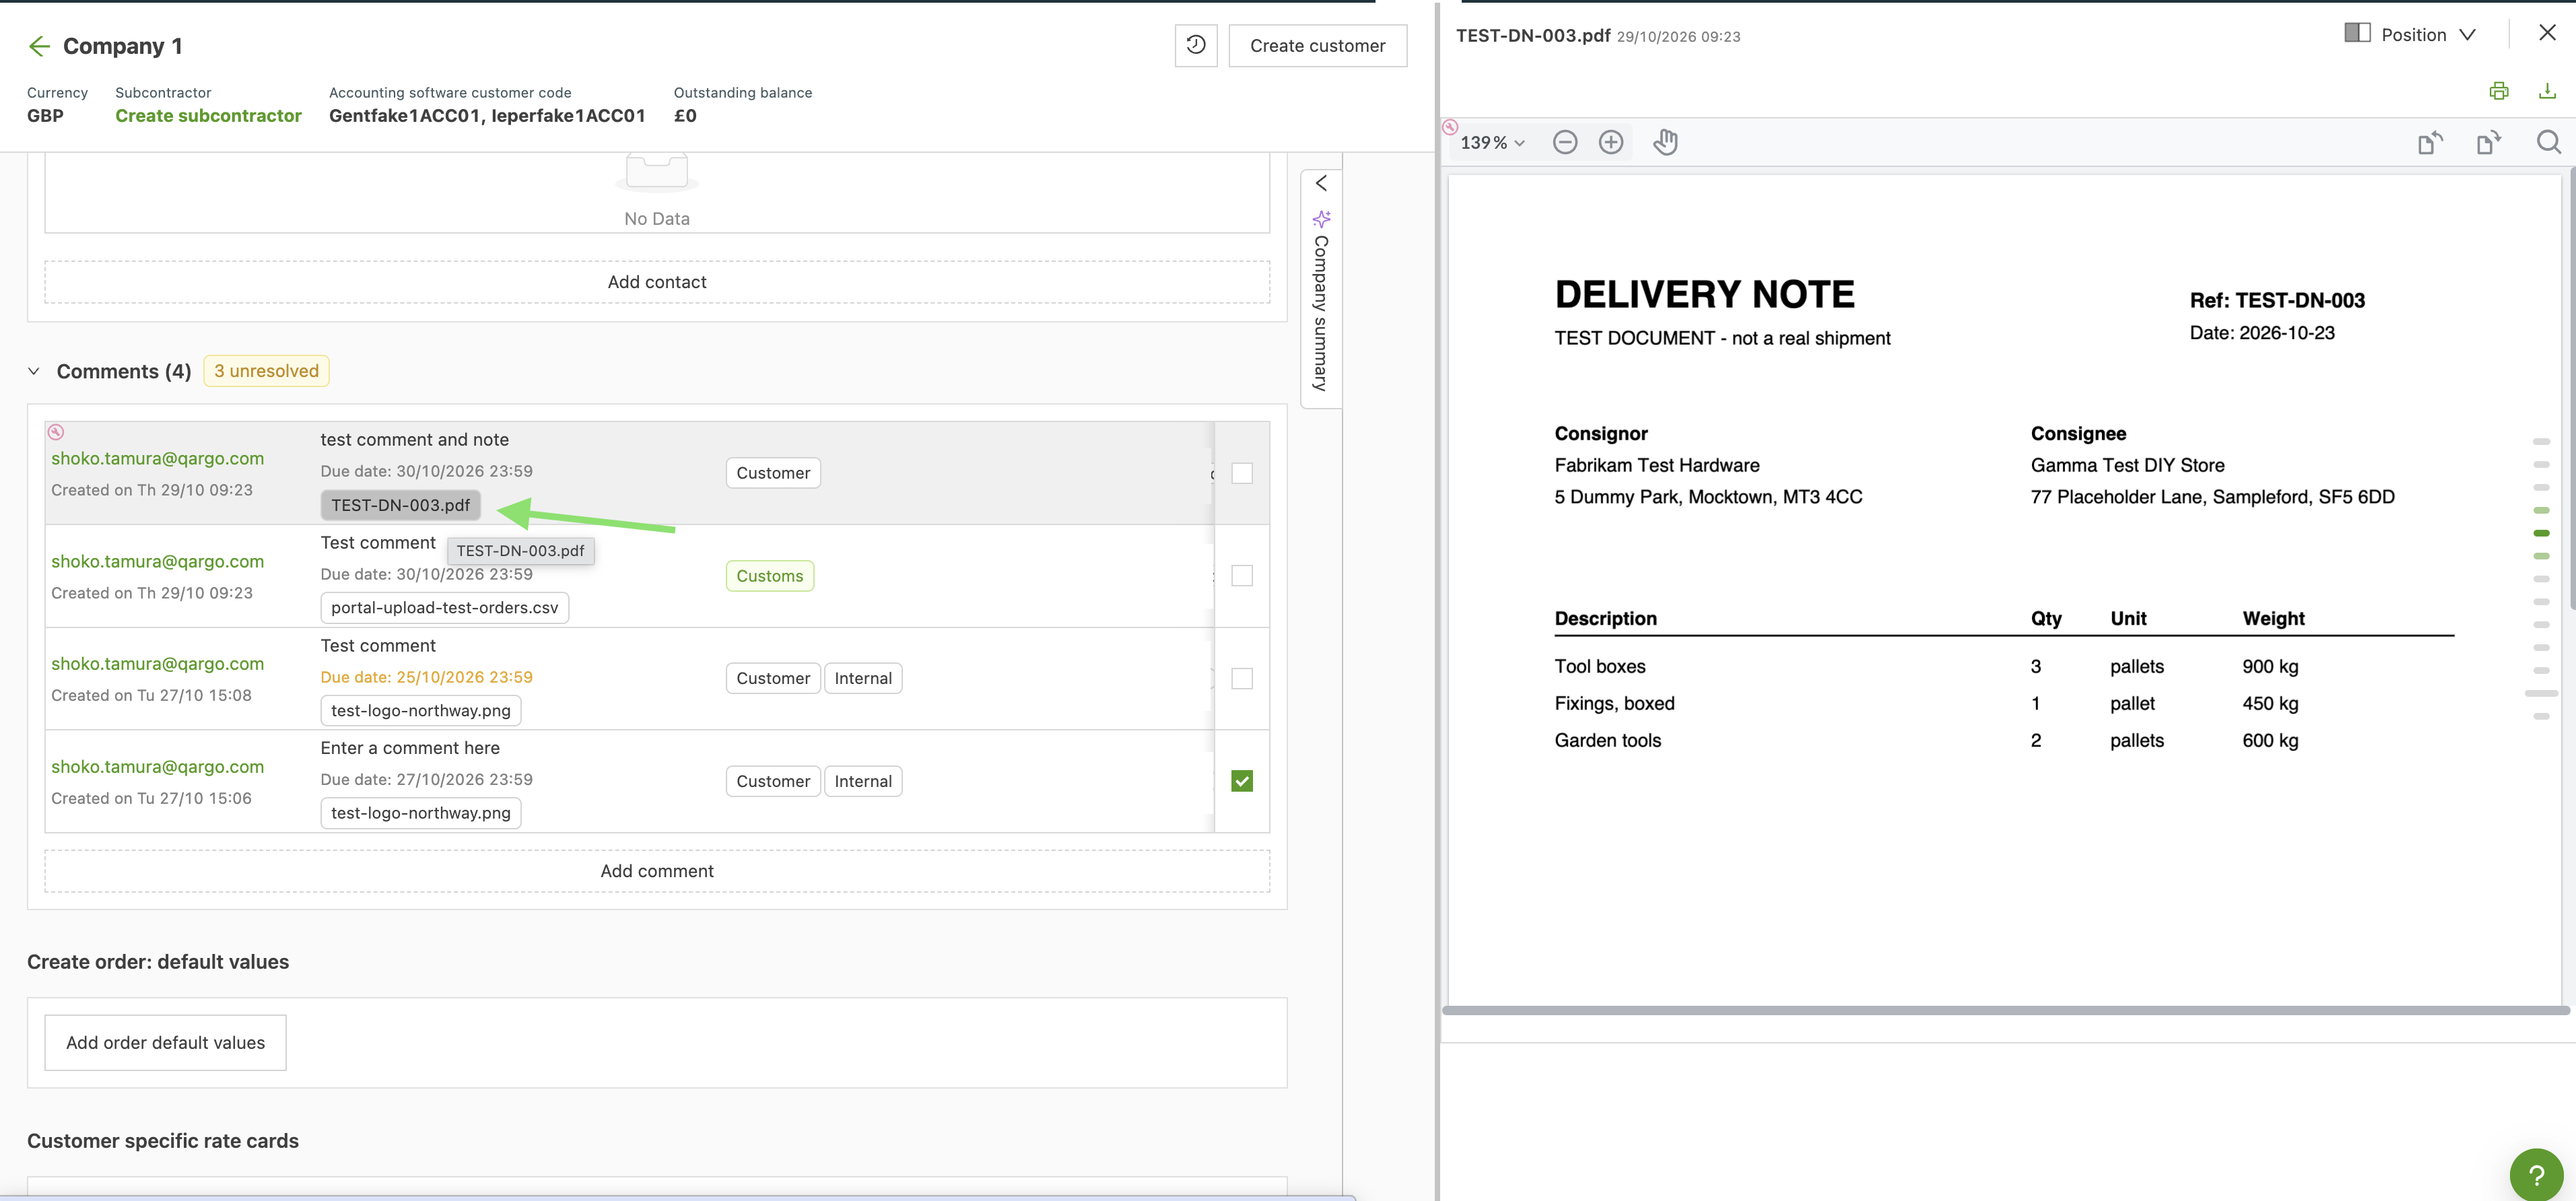
Documents are listed by name. Clicking a document opens it in the side panel.
Track due dates and documents in the Comments overview
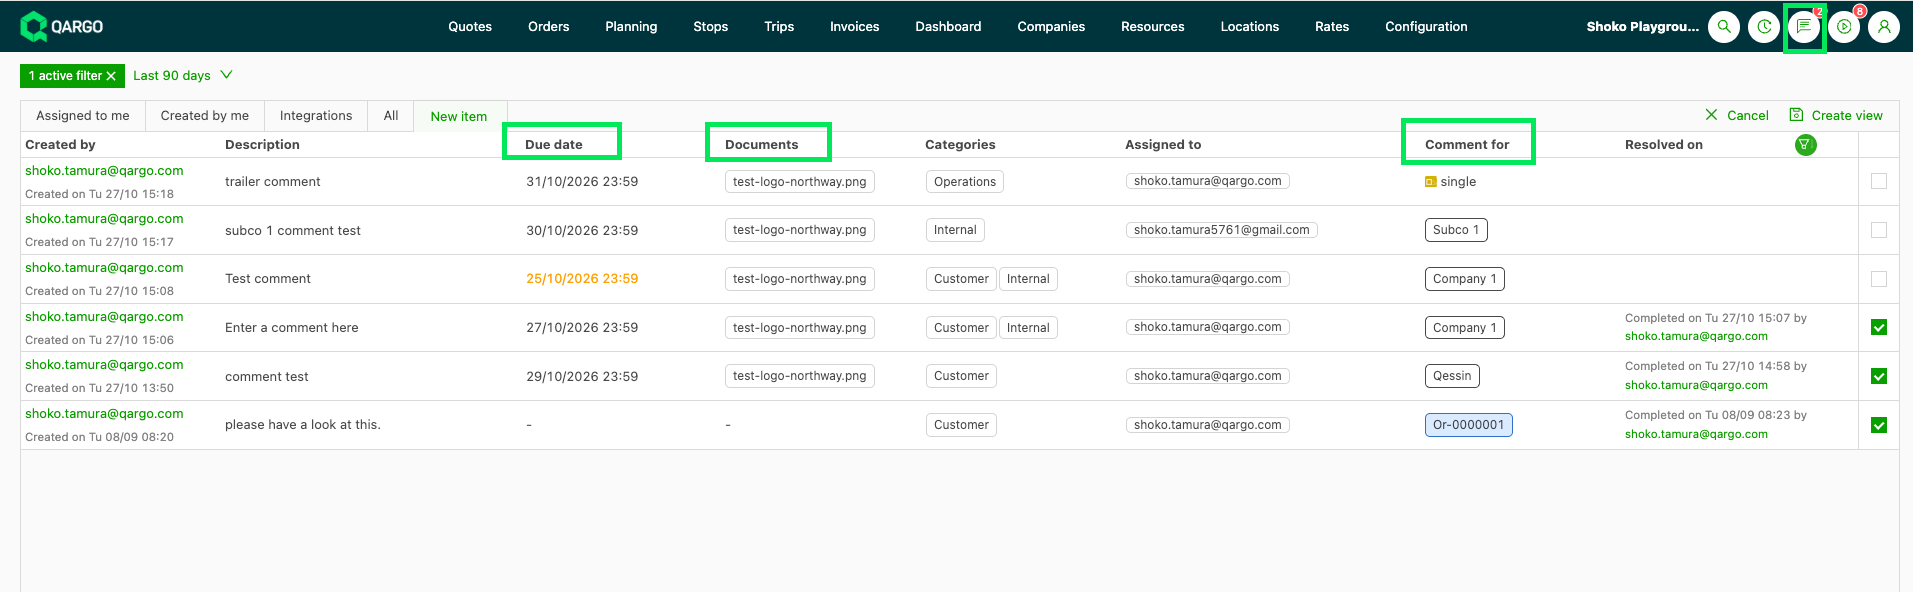
The Comments overview has three columns that cover due dates, documents and the record a comment belongs to.
| Field | Shows |
|---|---|
| Due date | The due date of the comment. A past due date shows in orange, and a comment without one shows a dash. The column filters and sorts like the other columns. |
| Documents | The names of the first two documents. Other documents sit behind a “+x more” tag, and hovering over it lists them. |
| Comment for | The record the comment belongs to: a customer, contract carrier, driver or vehicle. |
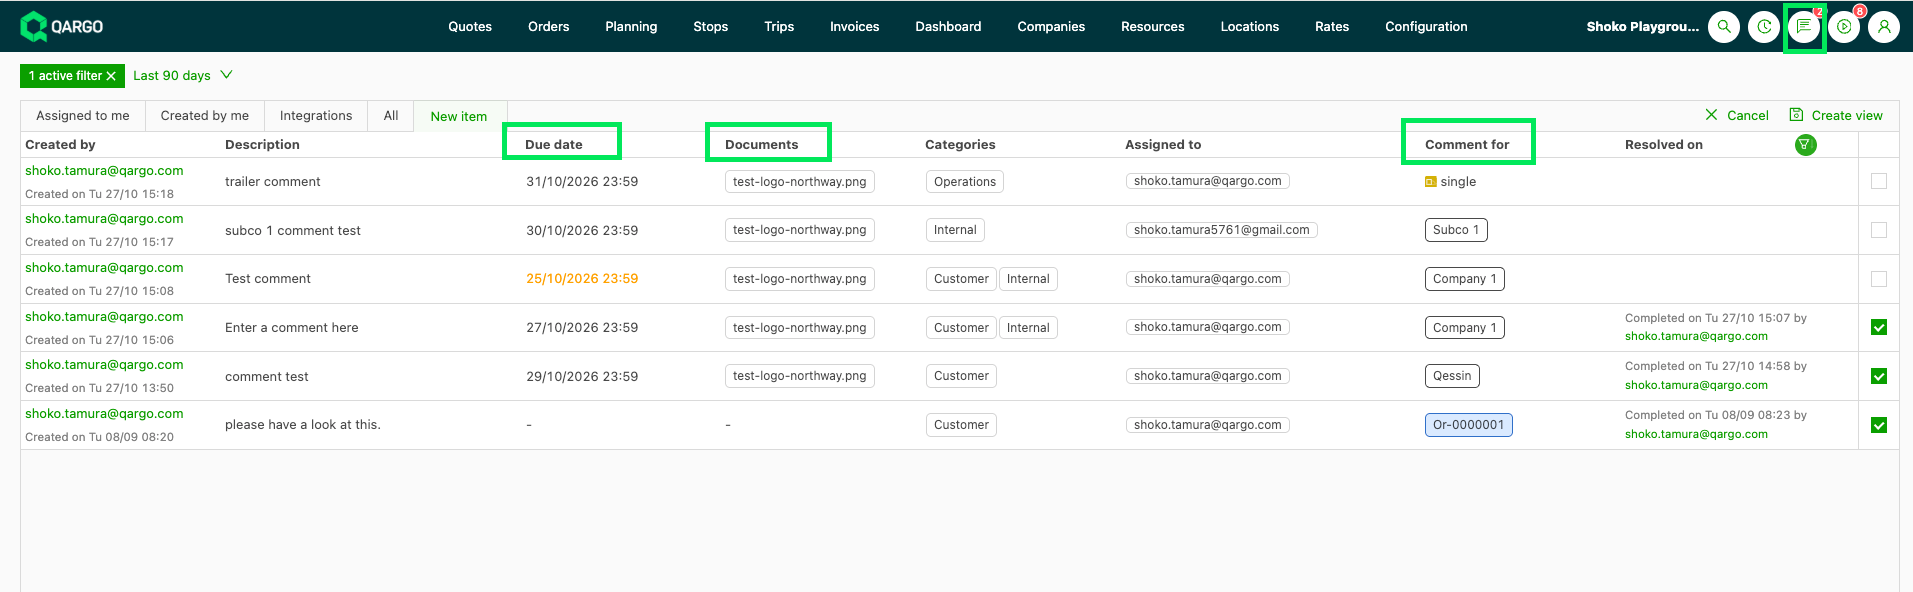
How comments on these records behave
- Documents: a document added to a comment belongs to that comment only. It does not appear in the Documents section of the customer, contract carrier, driver or vehicle.
- Portals: comments on customers and contract carriers are internal only. The customer portal and the carrier portal do not show them.
- Contract carriers: a contract carrier has one comment thread, whether it is opened from Companies or from Resources.
- Trailers: trailers are covered through the vehicle page.
- Existing fields: the Next follow-up date on customers and the Note field on drivers and vehicles stay as they are. They are not converted into comments.
Configure comment categories
Categories can be adapted to match operational needs.
Open the category settings
-
Open the Configuration module.
-
Select the Additional fields tab.
-
Find the Comments section and click Categories.
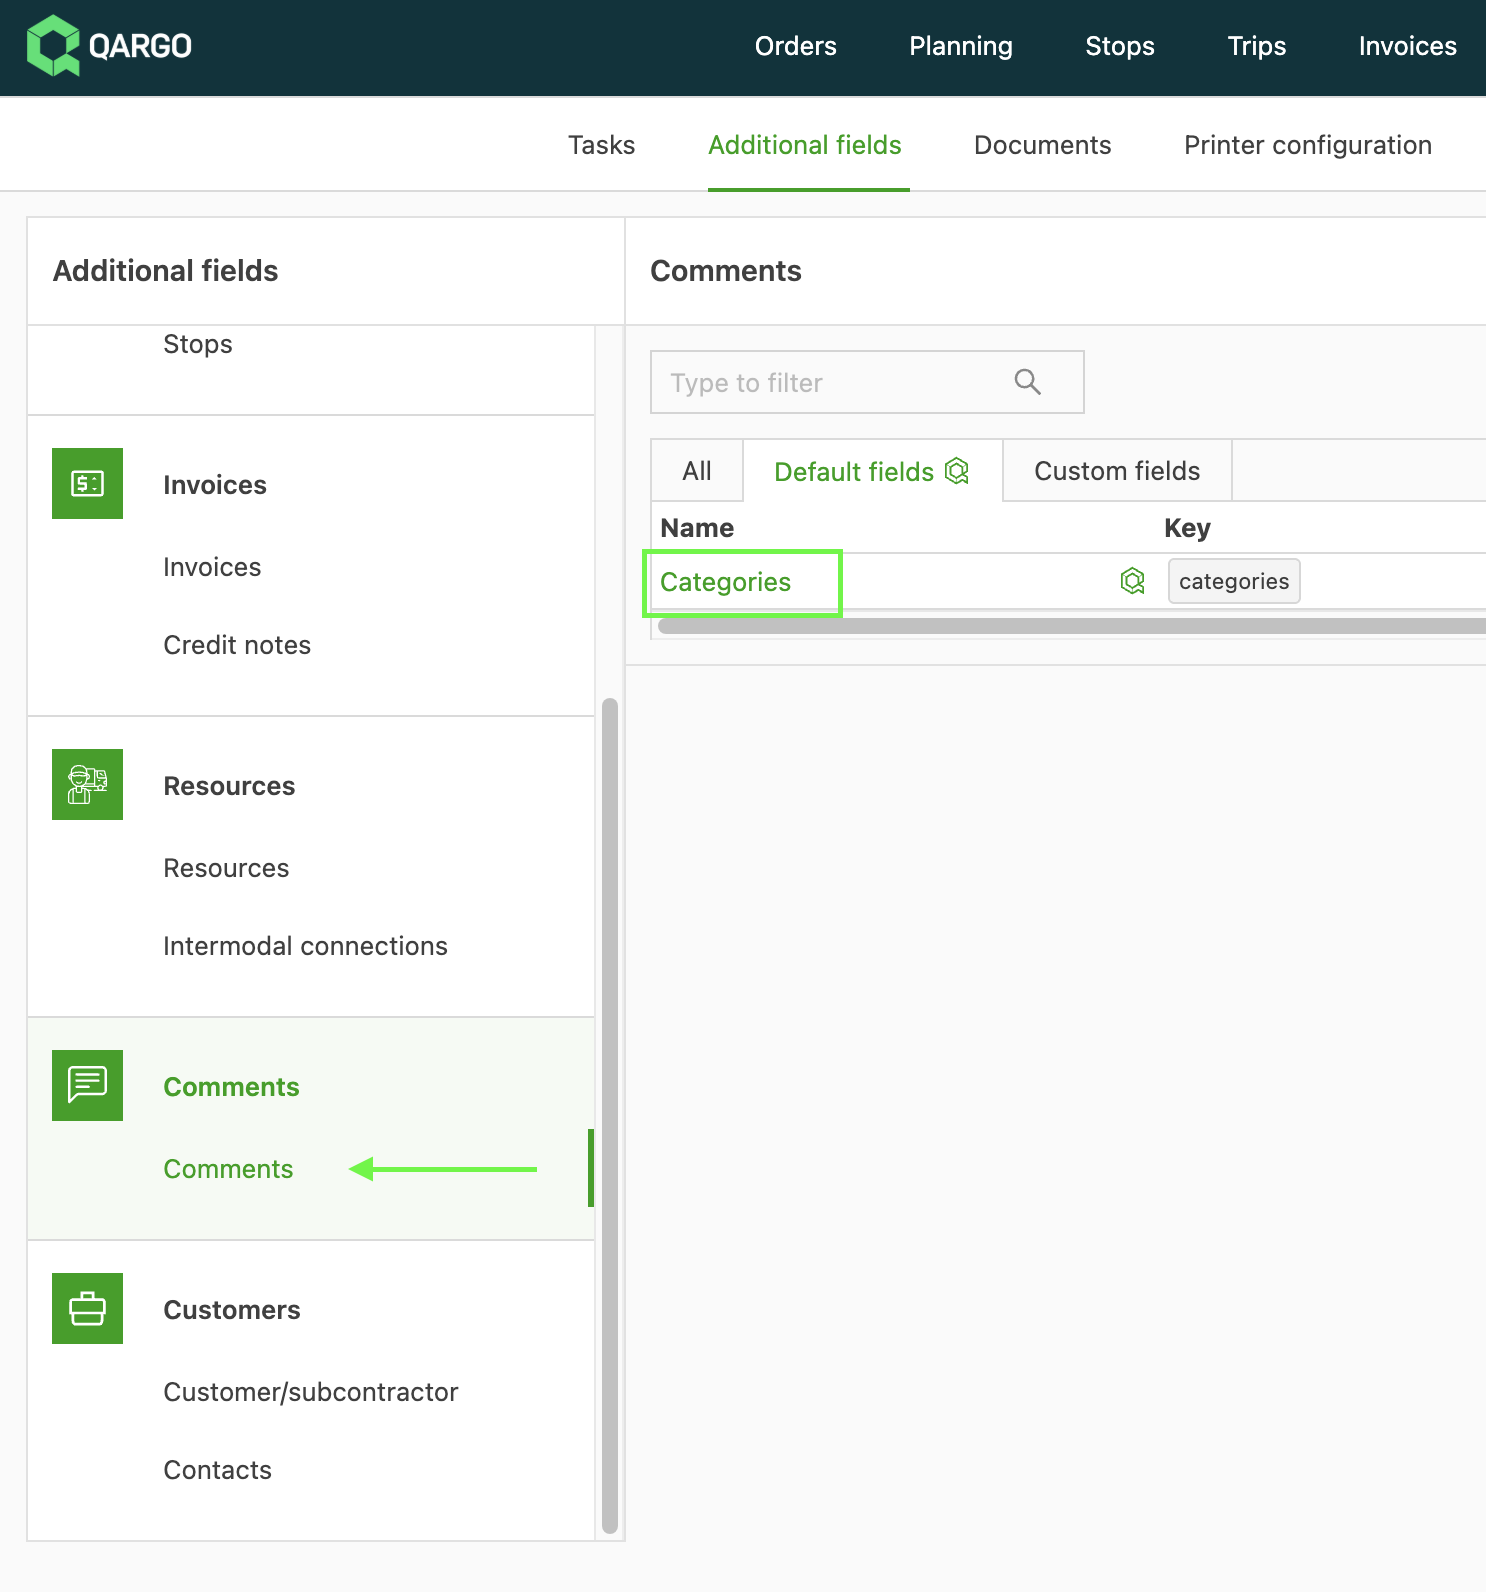
Create, delete and color categories
-
Delete existing categories or create new ones.
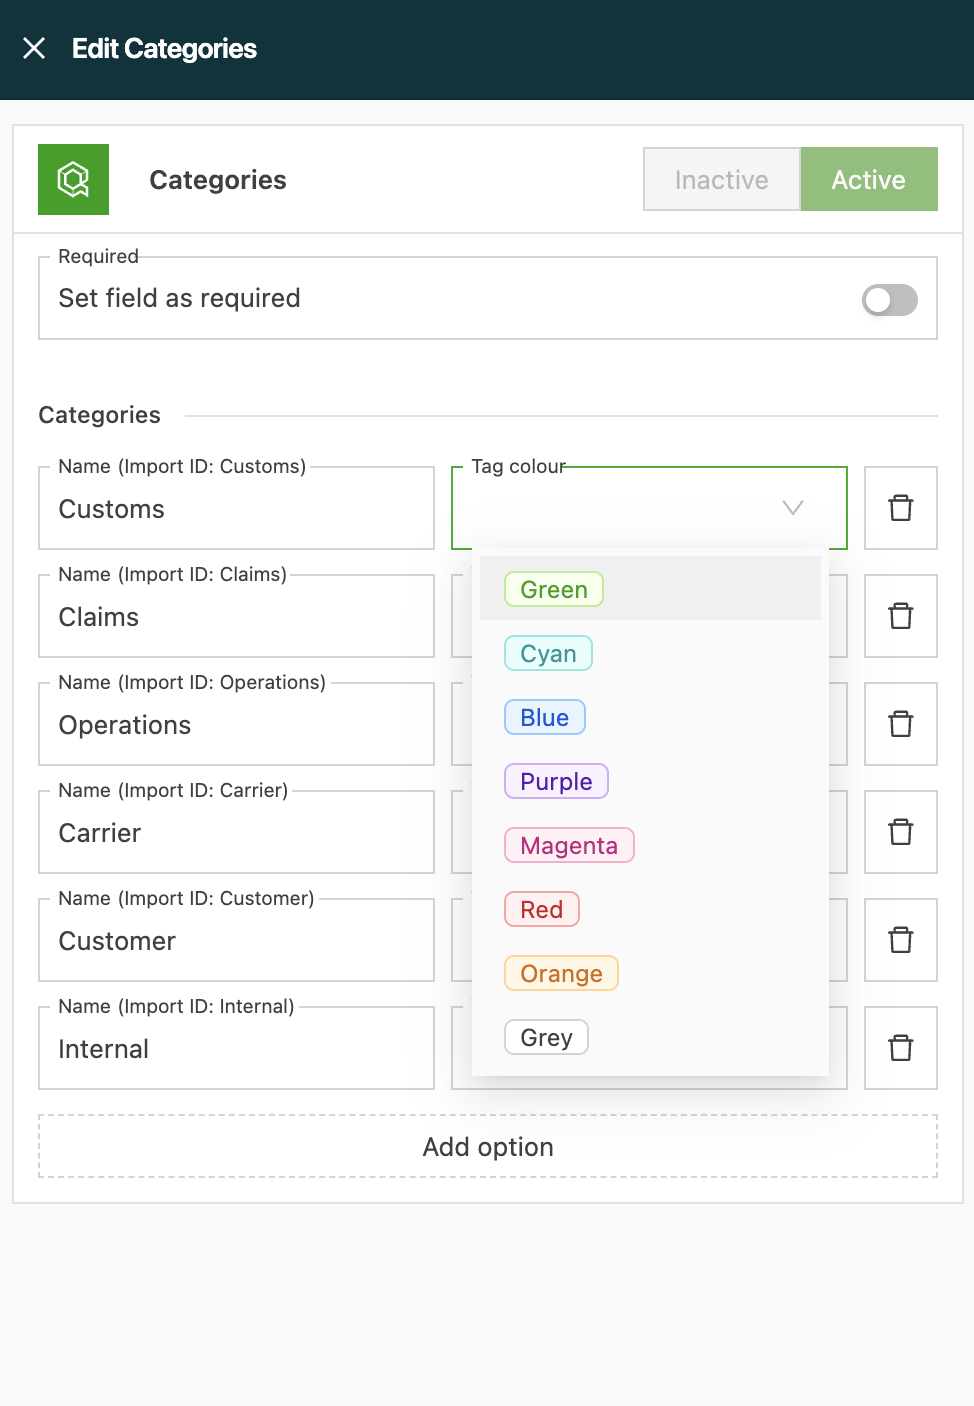
-
Select a color with the color selector to mark a category for quick identification across the platform.