
FAQ – Driver breaks, rest and drive time visibility
Qargo shows driver breaks, rests and drive times through Transics and Trimble, with Samsara support coming soon.
Table of contents
Q. A company has a fleet management system (FMS) integration in Qargo and wants to see more details about its drivers’ breaks and rest times. Is this possible, and how does it work?
A. Yes! Driver break, rest and drive times can be viewed when a supported integration is in use. Qargo integrates with a number of telematics providers, but not every integration supports this functionality.
This functionality is currently available to users with Transics and Trimble integrations. It will continue to roll out to other FMS providers, and Samsara support is coming very soon.
What is supported?
| Activity | Transics | Trimble |
|---|---|---|
| Current break time | ✅ | ❌ |
| Current rest time | ✅ | ✅ |
| Next break due | ✅ | ✅ |
| Next rest due | ✅ | ✅ |
| Wait time | ❌ | ✅ |
| Telemetry | Transics | Trimble |
|---|---|---|
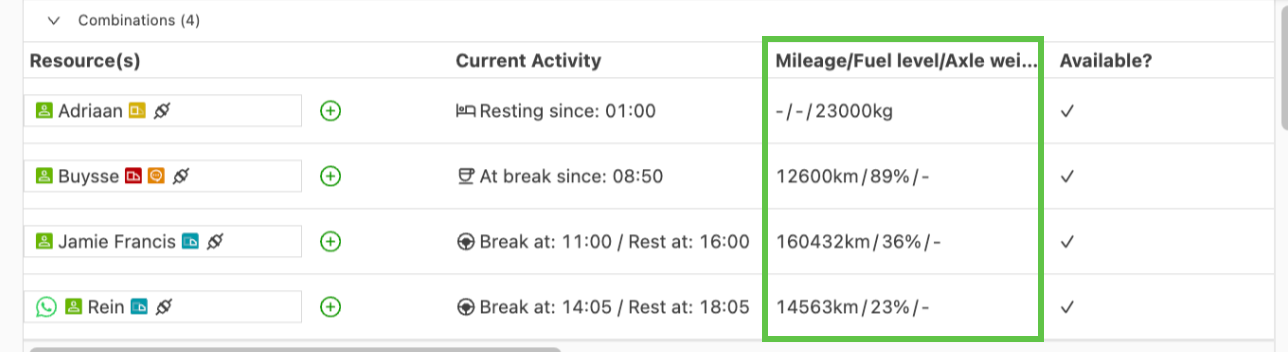
| Current vehicle mileage | ✅ (shown by default) | ✅ |
| Current fuel level | ✅ (shown by default) | ✅ |
| Axle weight | ✅ (requires activation) | ❌ |
Visualize data
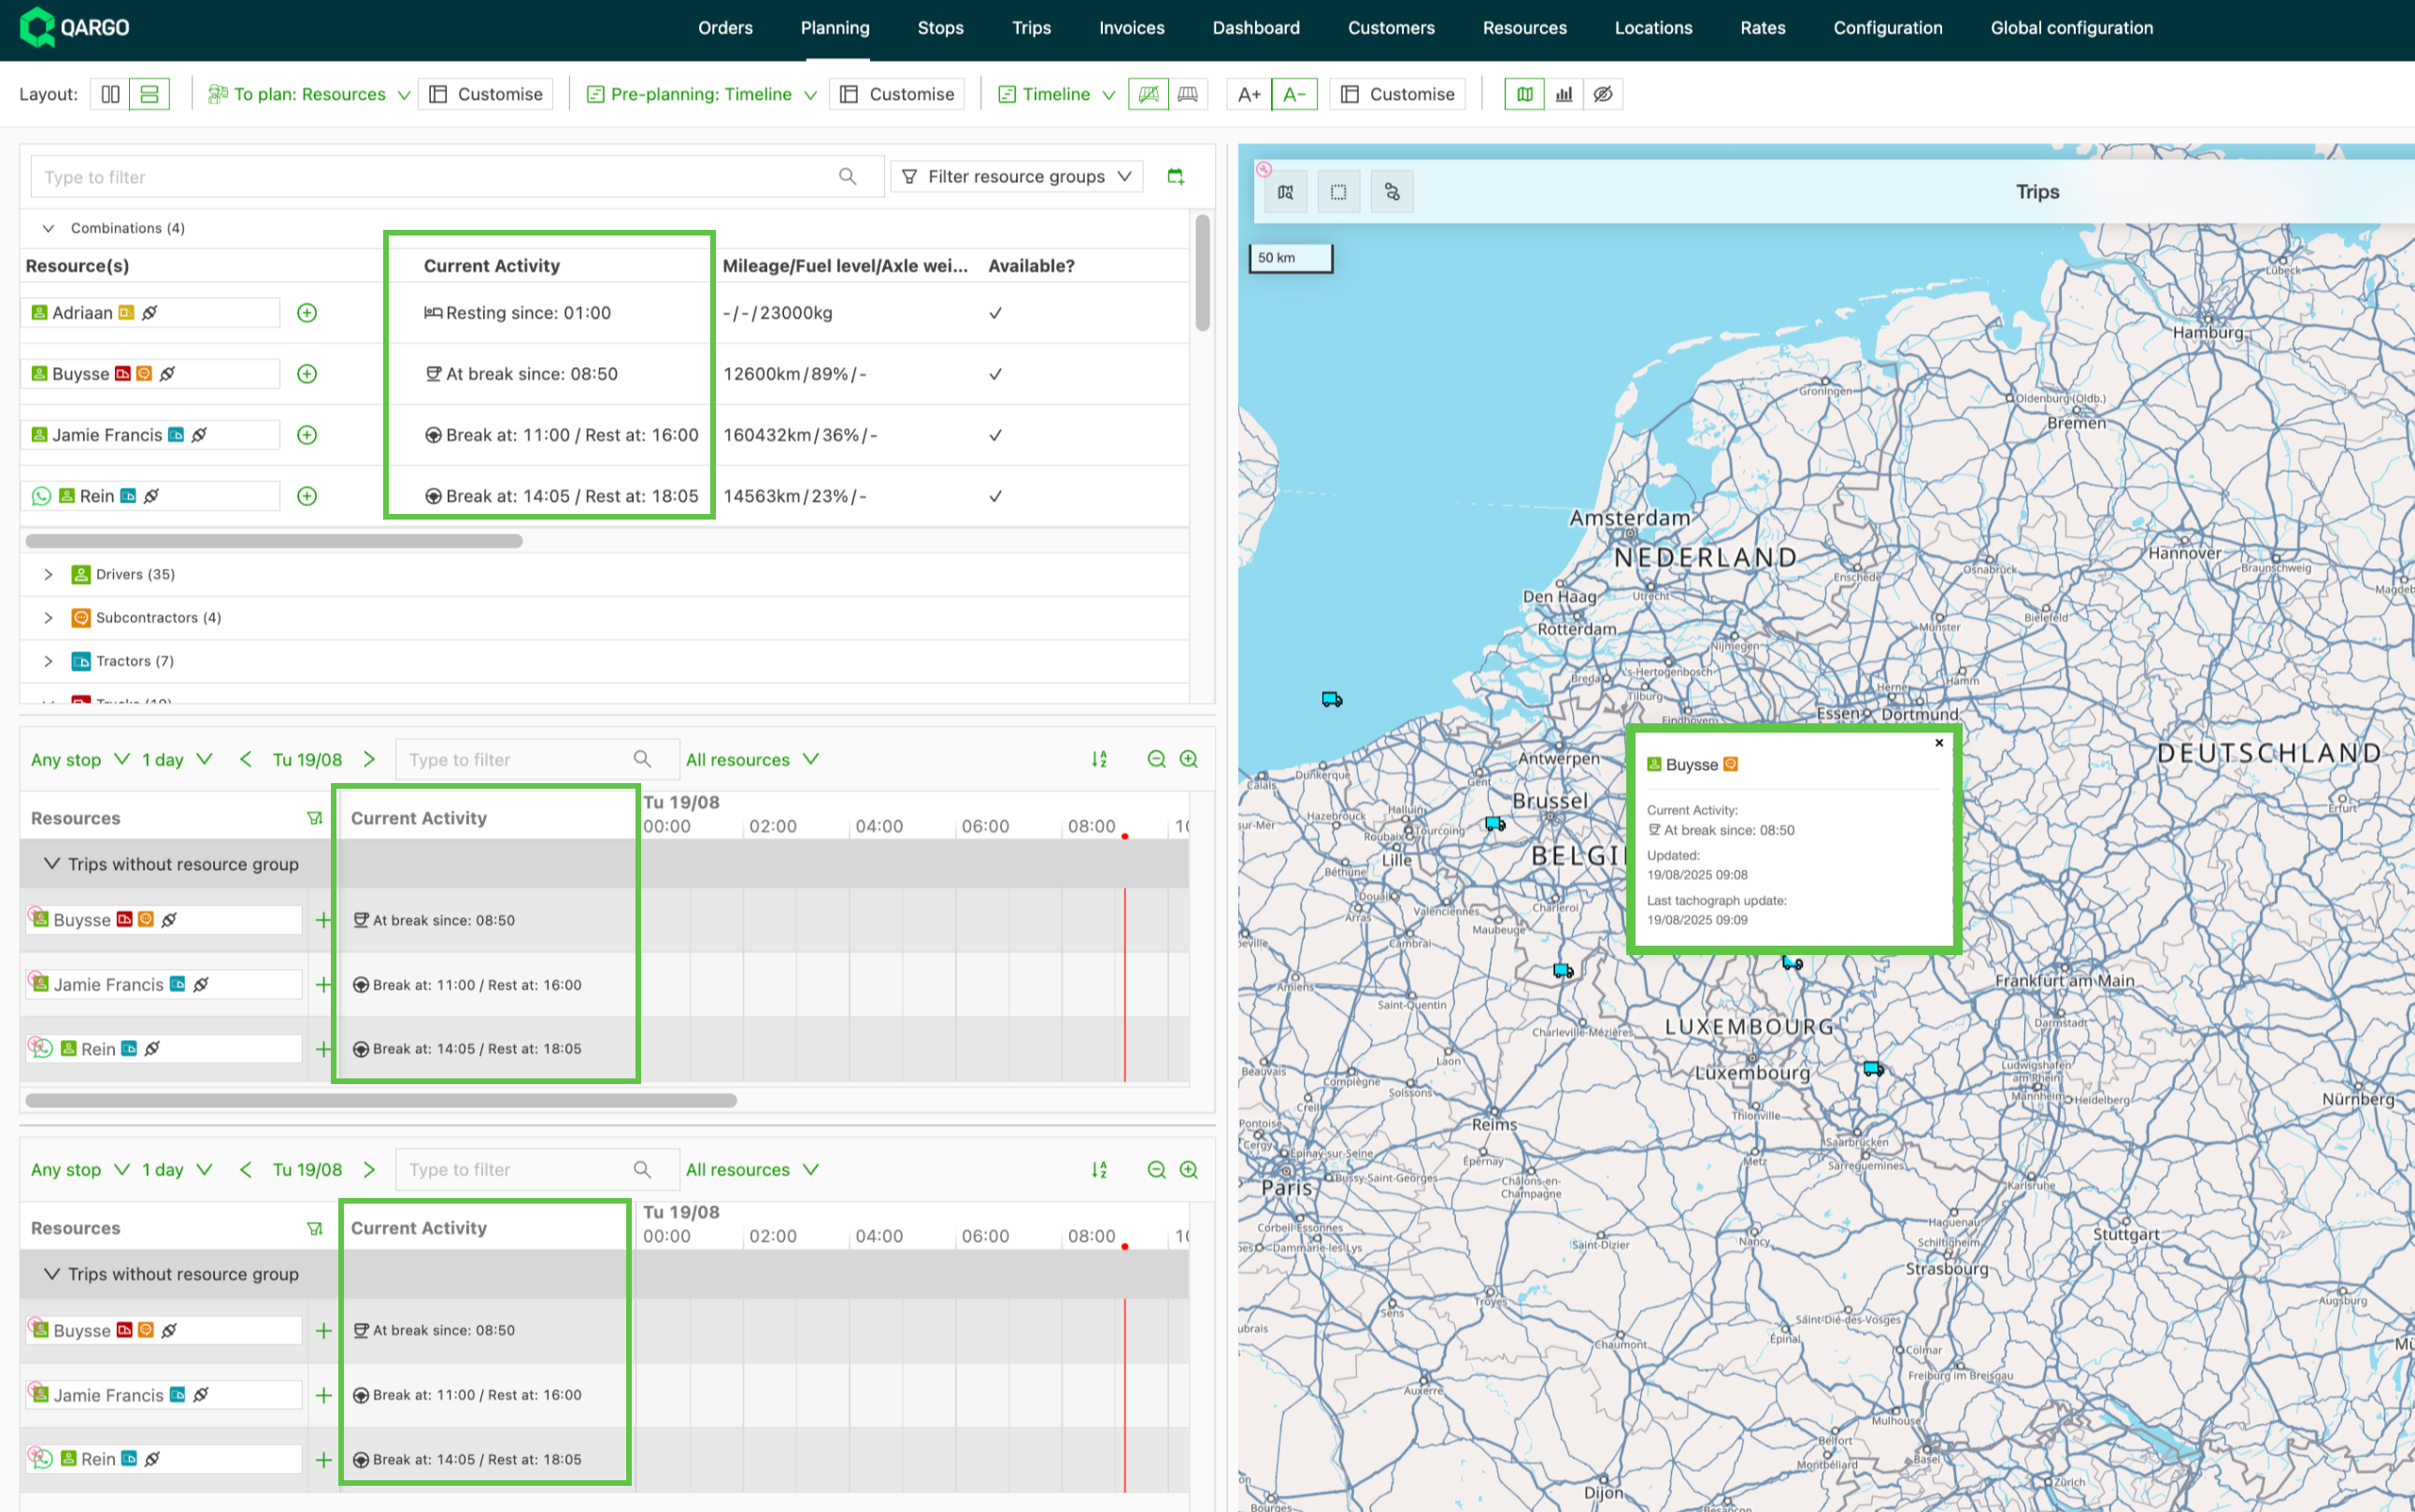
-
Icons that show the current activities
-
 Resting
- This shows how long the driver has been in resting status.
-
 Break
- This shows how long the driver has been in break status.
-
 Driving
- This shows that the driver is actively driving, along with the next break and rest times.
-
Configuration
Transics
-
To pull driver data, add the Transics ID associated with the driver.
- Go to Resources > Drivers.
- Select the driver and scroll to the Transics panel in the driver profile.
- Enter the Transics ID number and click Save.

-
To show axle weight, add the Transics ID to the trailer profile.
- Go to Resources > Vehicles.
- Select the trailer and scroll to the Transics panel in the trailer profile.
- Enter the ID number and click Save.
Trimble
-
To pull driver data, add the Trimble ID associated with the driver.
- Go to Resources > Drivers.
- Select the driver and scroll to the Trimble panel in the driver profile.
- Enter the Trimble ID number exactly as it appears in Trimble.
- The For field defaults to Driver.
- Turn on the Mobile app toggle if required.
- Click Save.

To show vehicle details, add the Trimble ID to the vehicle profile.
- Go to Resources > Vehicles.
- Select the vehicle and scroll to the Trimble panel in the vehicle profile.
- Enter the ID number and click Save.
Stored driver activity events on loads
Breaks and rests are stored on the load itself as individual Planned (scheduled in advance by the planner) or Actual (already taken) events. Each event has a start time and a duration. The history stays available after the load is complete and feeds the load’s duration metrics.
Adding, editing or deleting a break or rest
A break or rest can be added from three places on a load:
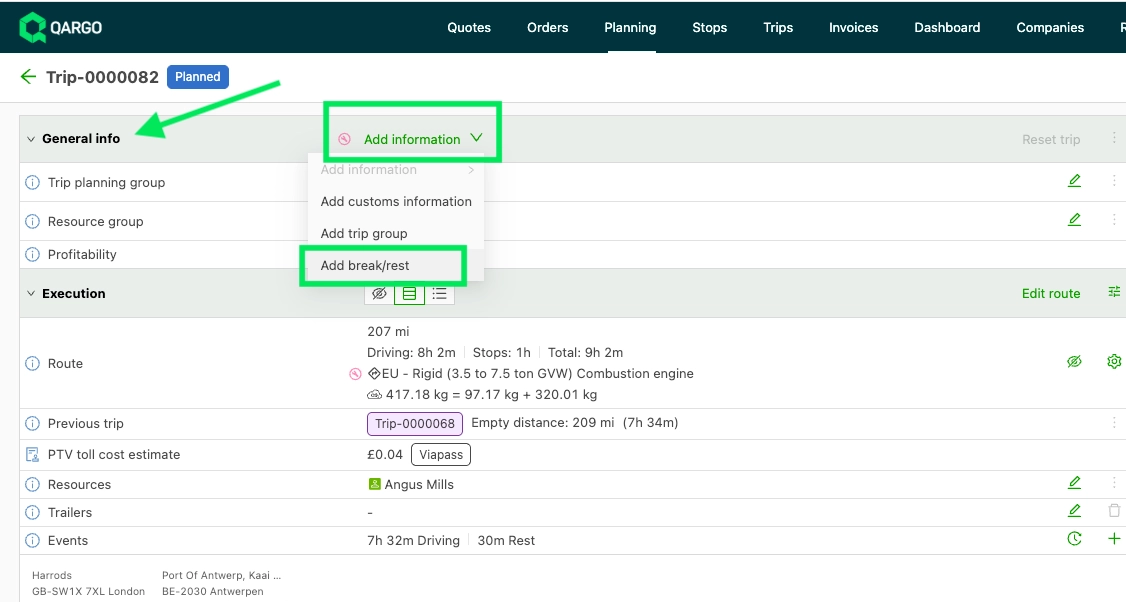
- From Add information on the load detail page
1. Go to Loads > Loads.
2. Open the relevant load.
3. Click Add information > Add break/rest in the General info section.
-
From the Operations events history on the load
1. Go to Loads > Loads.
2. Open the relevant load.
3. Find the Operations section.
4. Click the + icon on the Events row.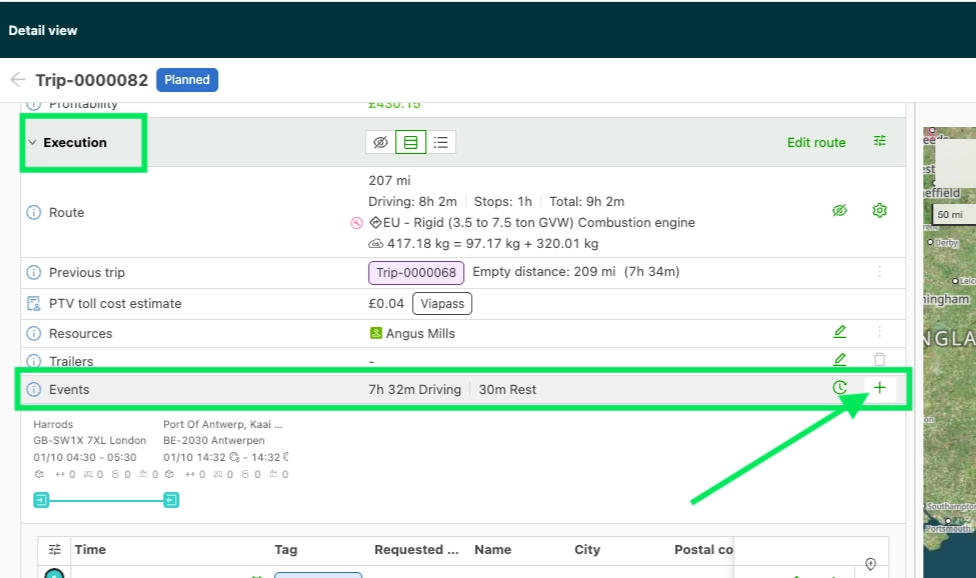
-
From the Planning board on the Planning page, at the time the break or rest should start
1. Go to Planning.
2. Open the Planning board.
3. Right-click the relevant load at the time the break or rest should start.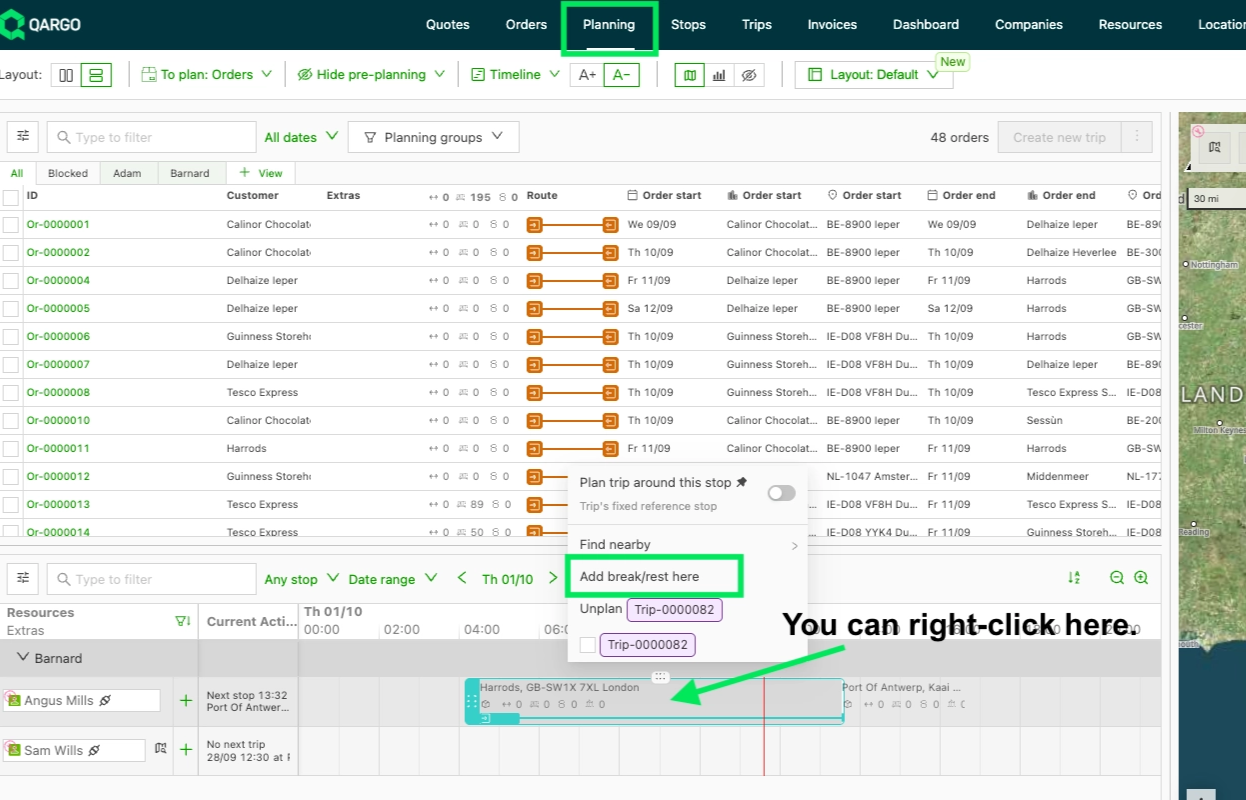
The Operations events history lists every recorded activity with its time, event and source. Clicking an activity with a known location zooms the map to where it happened.
Note
- While PTV’s automatic rest-time calculation is active on a load that hasn’t started, PTV calculates its planned breaks and rests, and they can’t be edited manually. Actual events can still be added. Once the load has started, planned events become editable too.
- Breaks and rests are not shown as shaded segments on the planning board timeline.
- The feature stores the activities, but it does not run EU driving-time compliance checks, calculate weekly totals or produce a driver-hours report.
- The Route section on Loads has changed to Operations. Operations sits directly below General info, with the Route row (distance, duration, ETA, emissions) inside it, next to resources and the Tracking and Events row.
- Transport companies that have manually reordered their load page sections keep their own order. Operations can be dragged back to the top, but the Route row can’t be moved back into General info.