
Invoices – Complete invoice task in bulk
Using the Quick actions and Print functions to complete tasks in bulk makes the billing process more efficient.
Table of contents
Print invoices in bulk
The Print button on the invoice screen makes it easier to print multiple invoices at once. Users can print invoices and their associated documents in bulk, directly from the invoice screen.
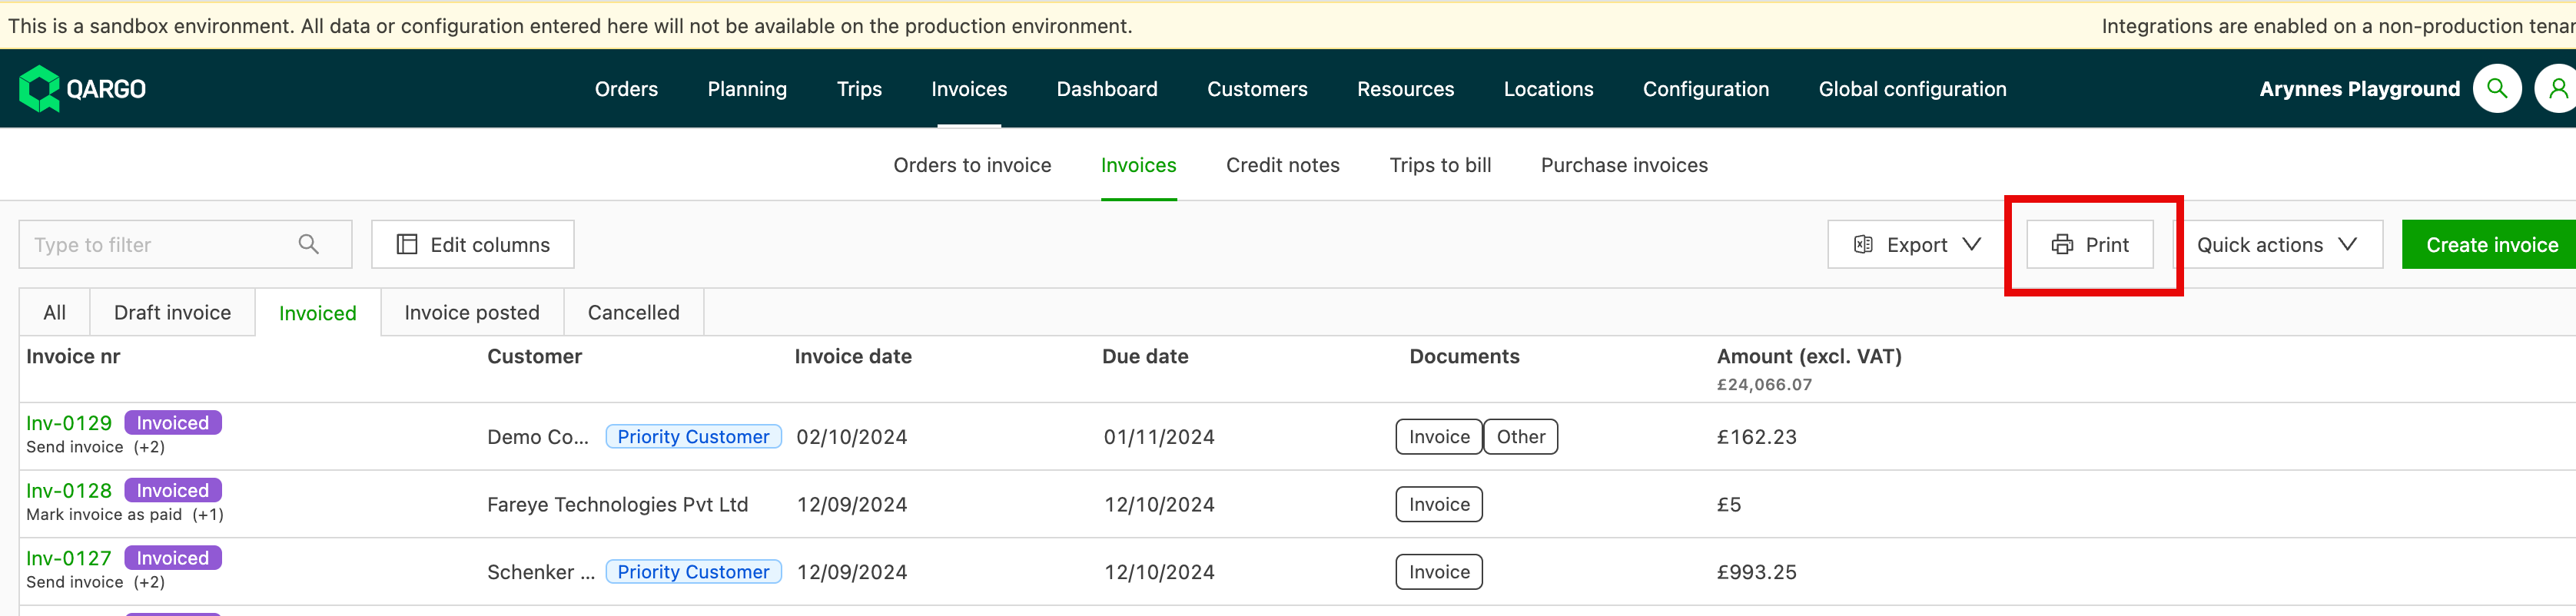
- Navigate to Invoices > Invoices.
- Click the Print button.
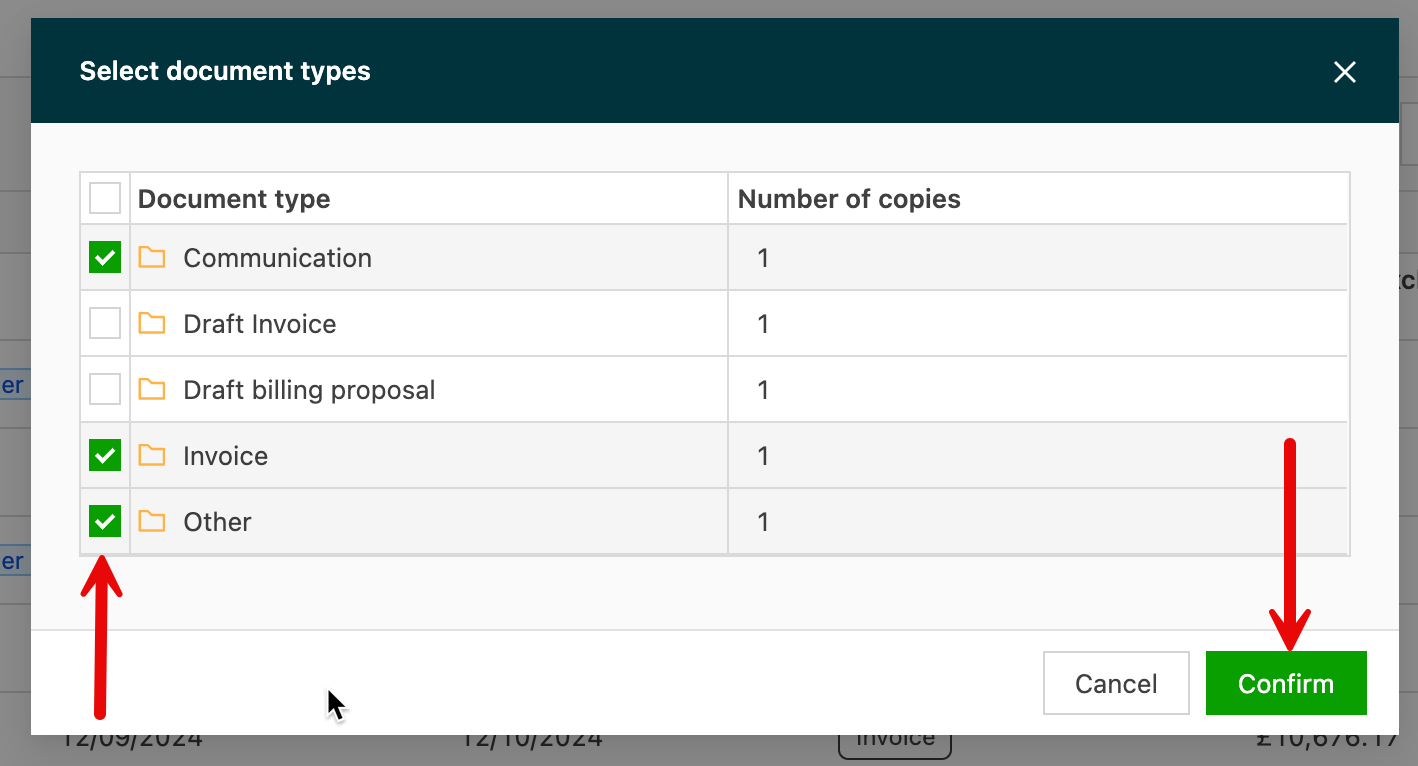
- In the pop-up screen, select the documents to include.
- Use the checkbox at the top to select all, or click each box individually.
- Click Confirm to complete the selection.
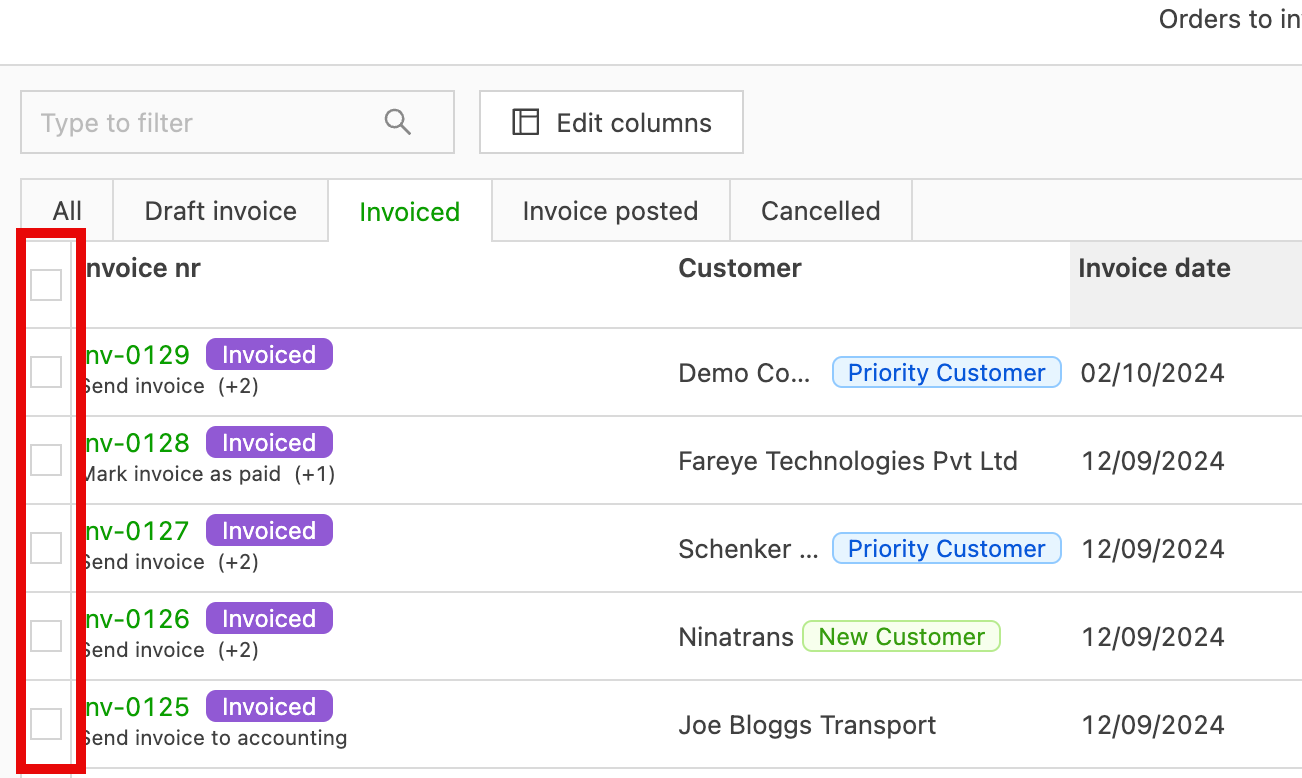
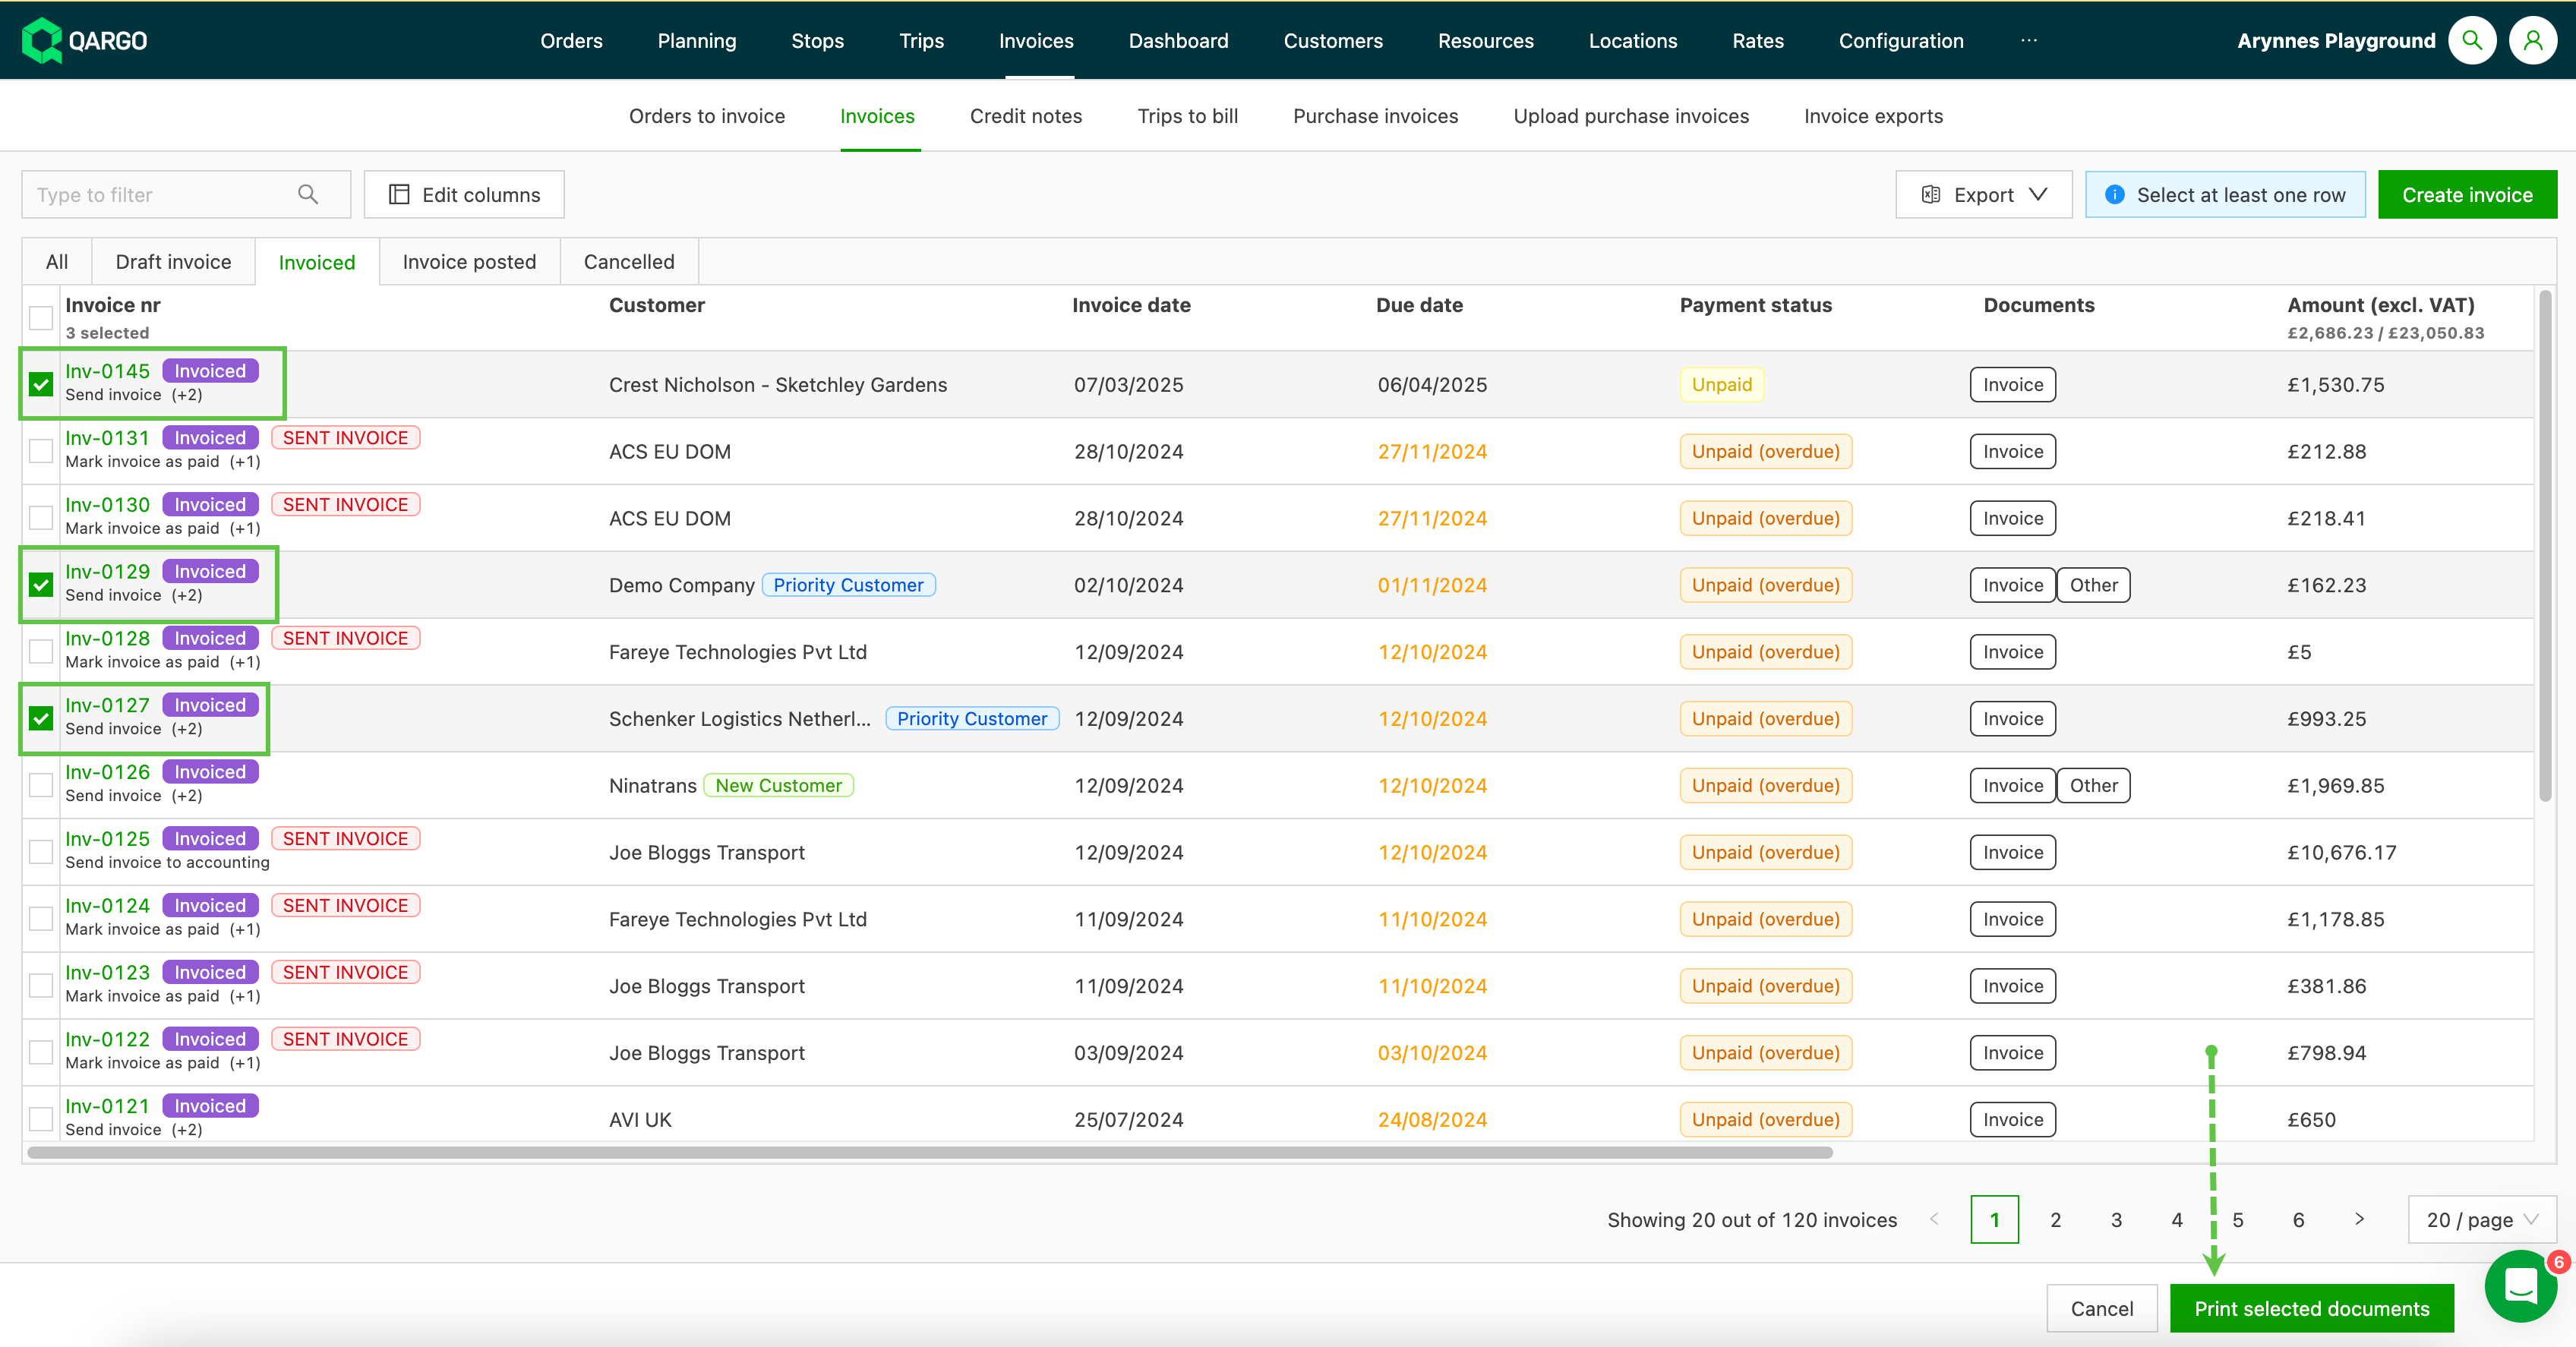
The user is redirected back to the invoice screen. Selection boxes now appear to the left of the invoice number.
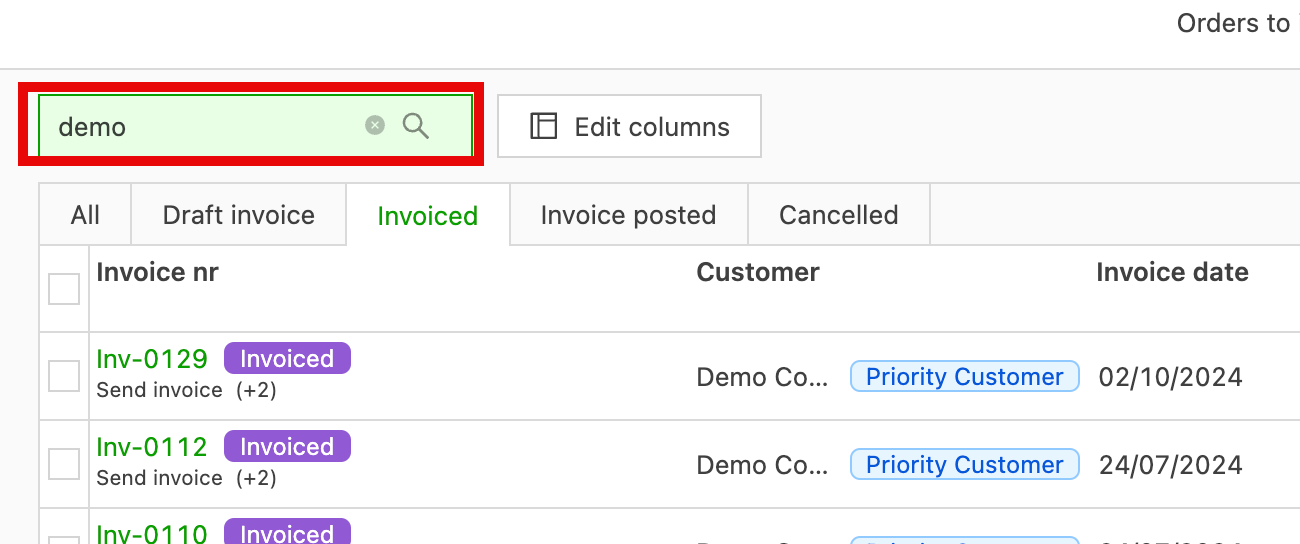
- Use the checkbox at the top to select all, or click the box for each invoice to print.
-
Select the invoices to print.
-
Click ‘Print selected documents’.
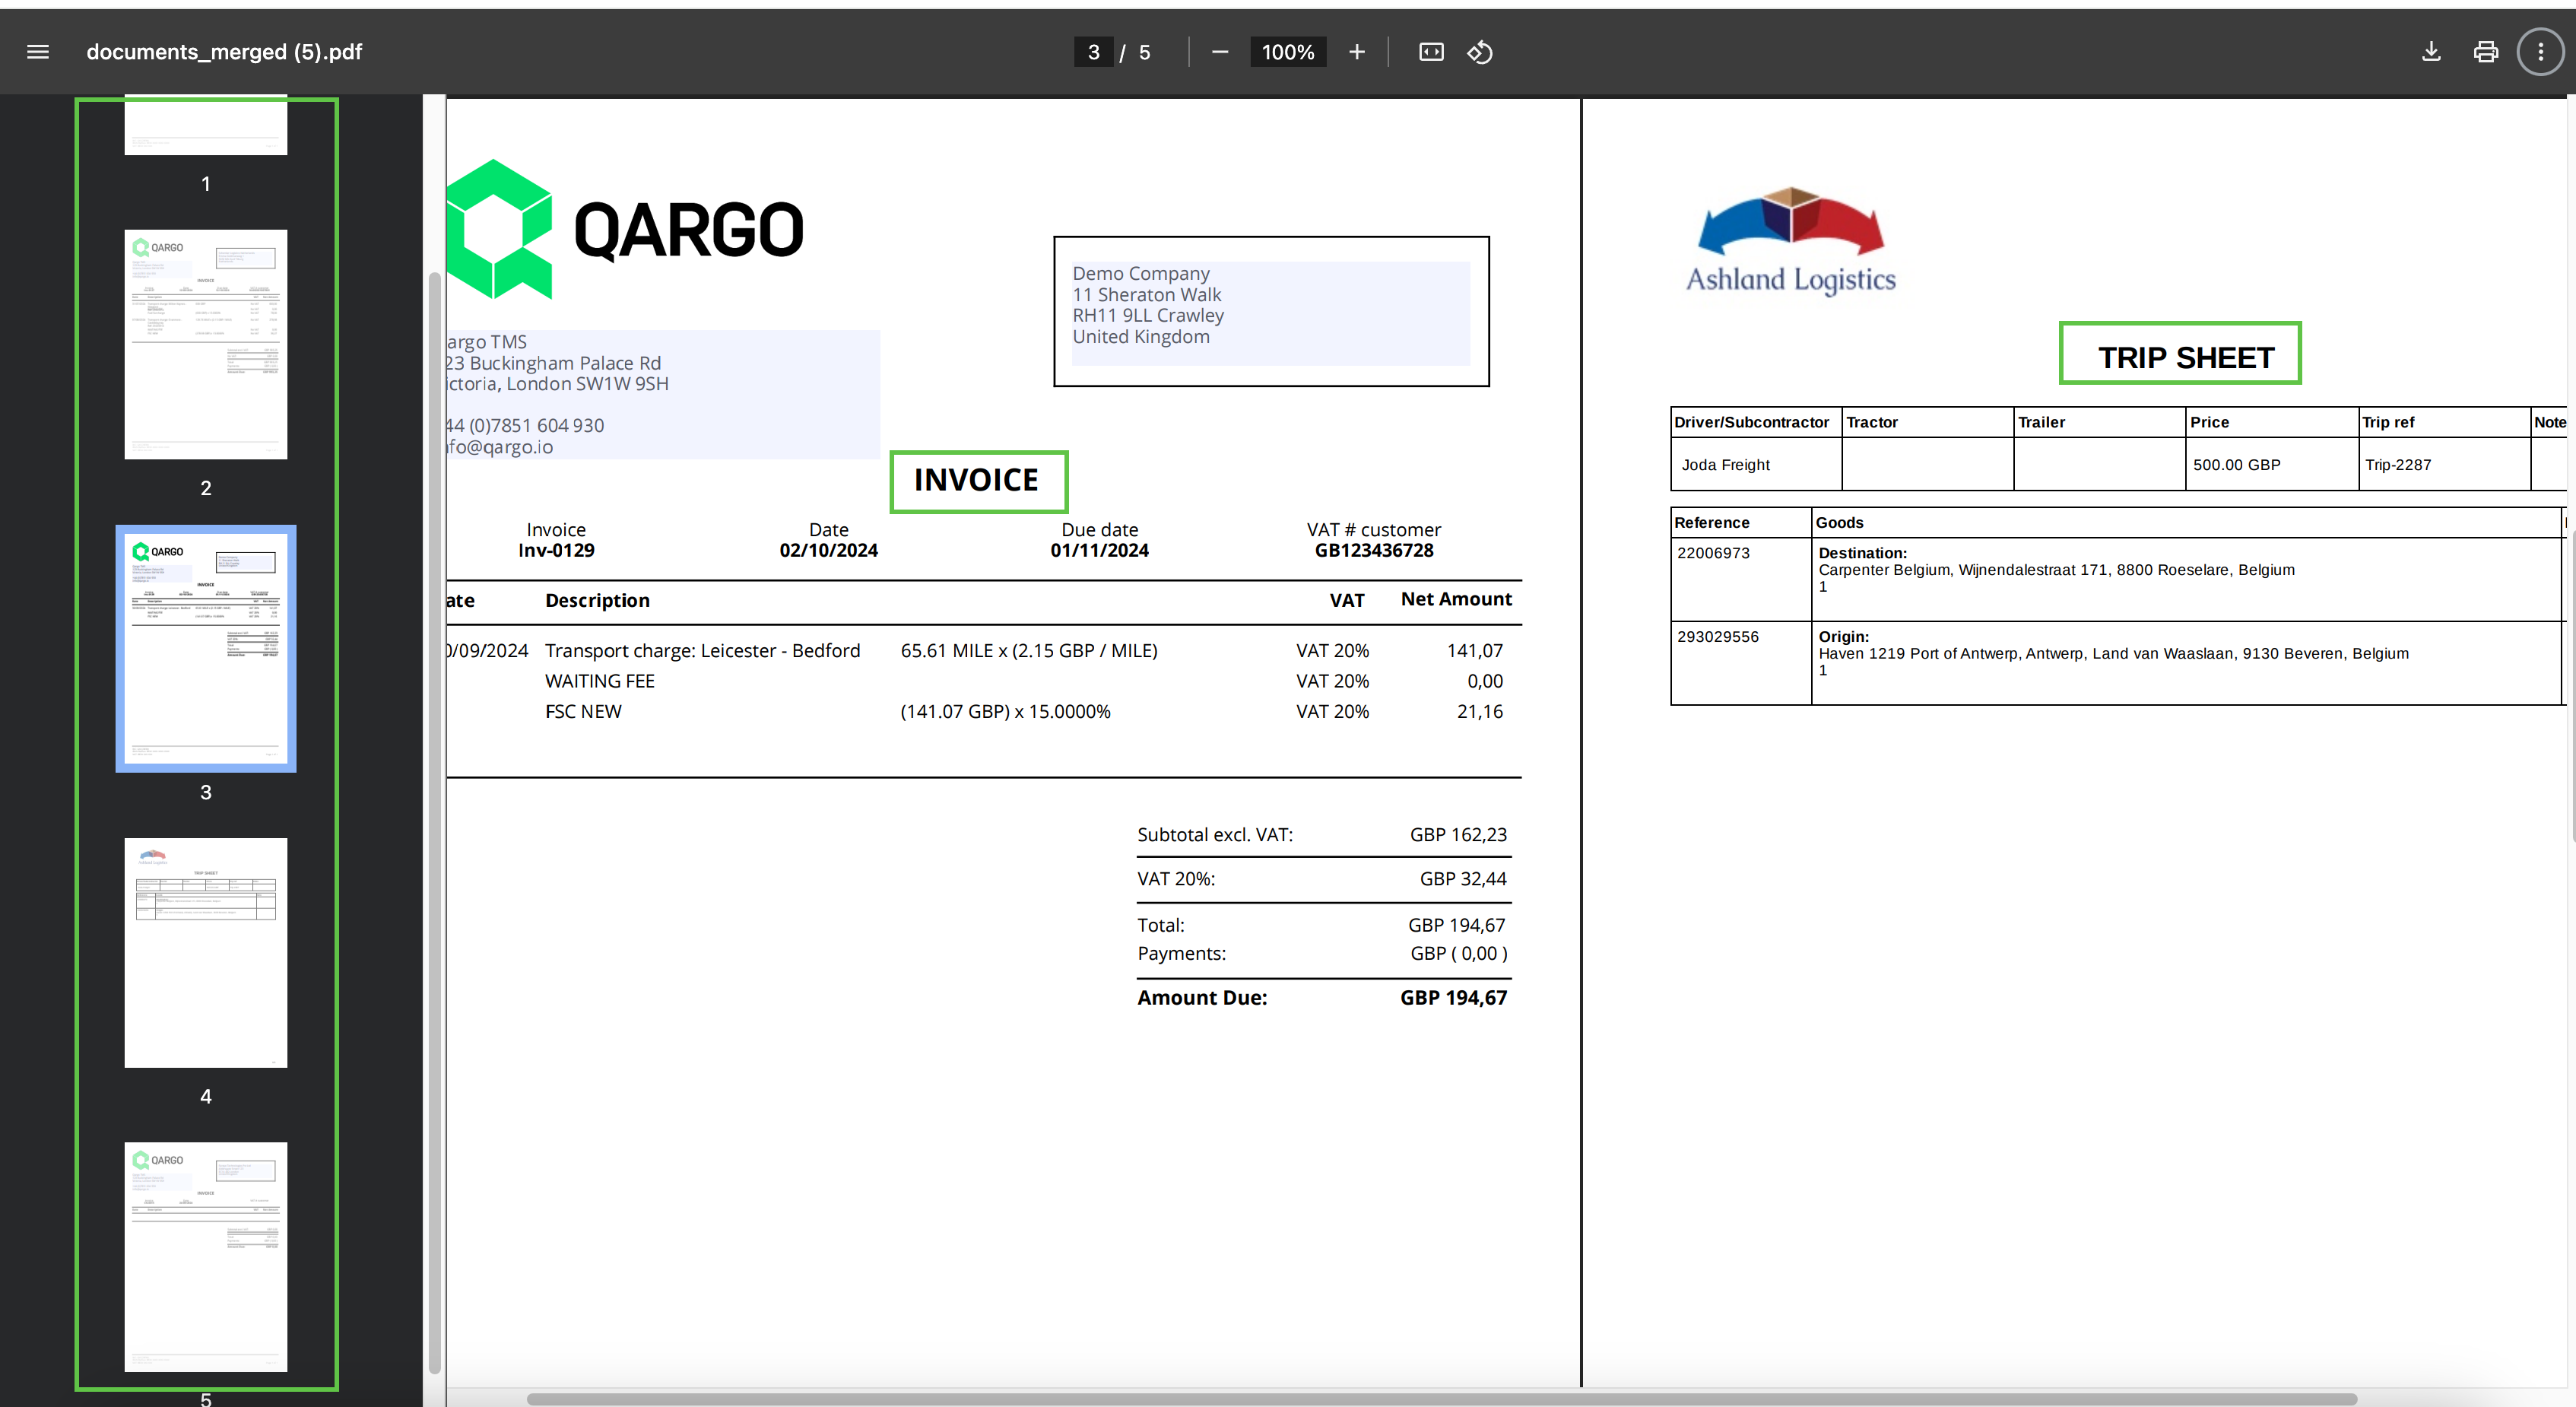
The documents are combined into a single PDF file, which can be downloaded and / or printed. The file includes all the documents associated with the invoice that were part of the initial print selection.
Quick actions
On the invoices list page, ‘Quick actions’ let users perform tasks on multiple records in one action.
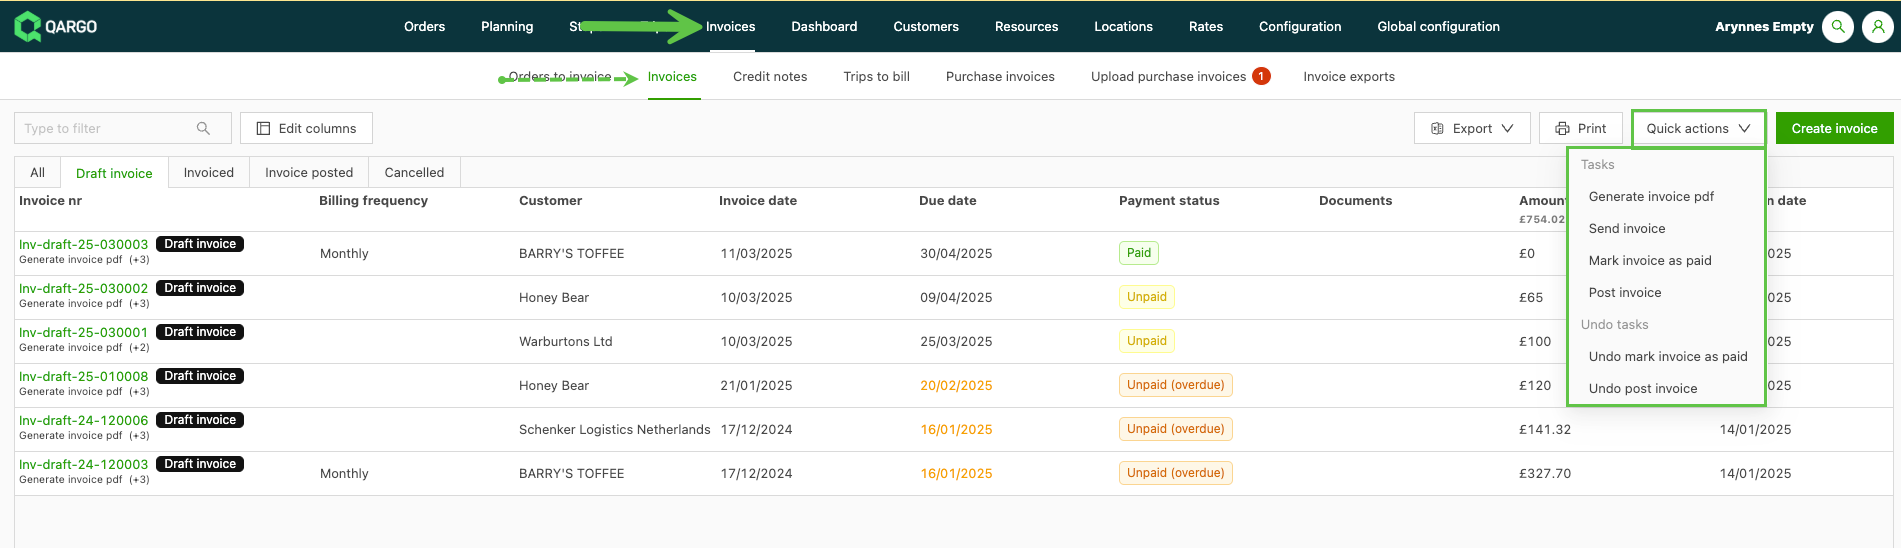
Actions available:
- Generate invoice PDF.
- Send invoice
- Mark invoices as paid / Undo mark invoice as paid
- Post invoice / Undo post invoice
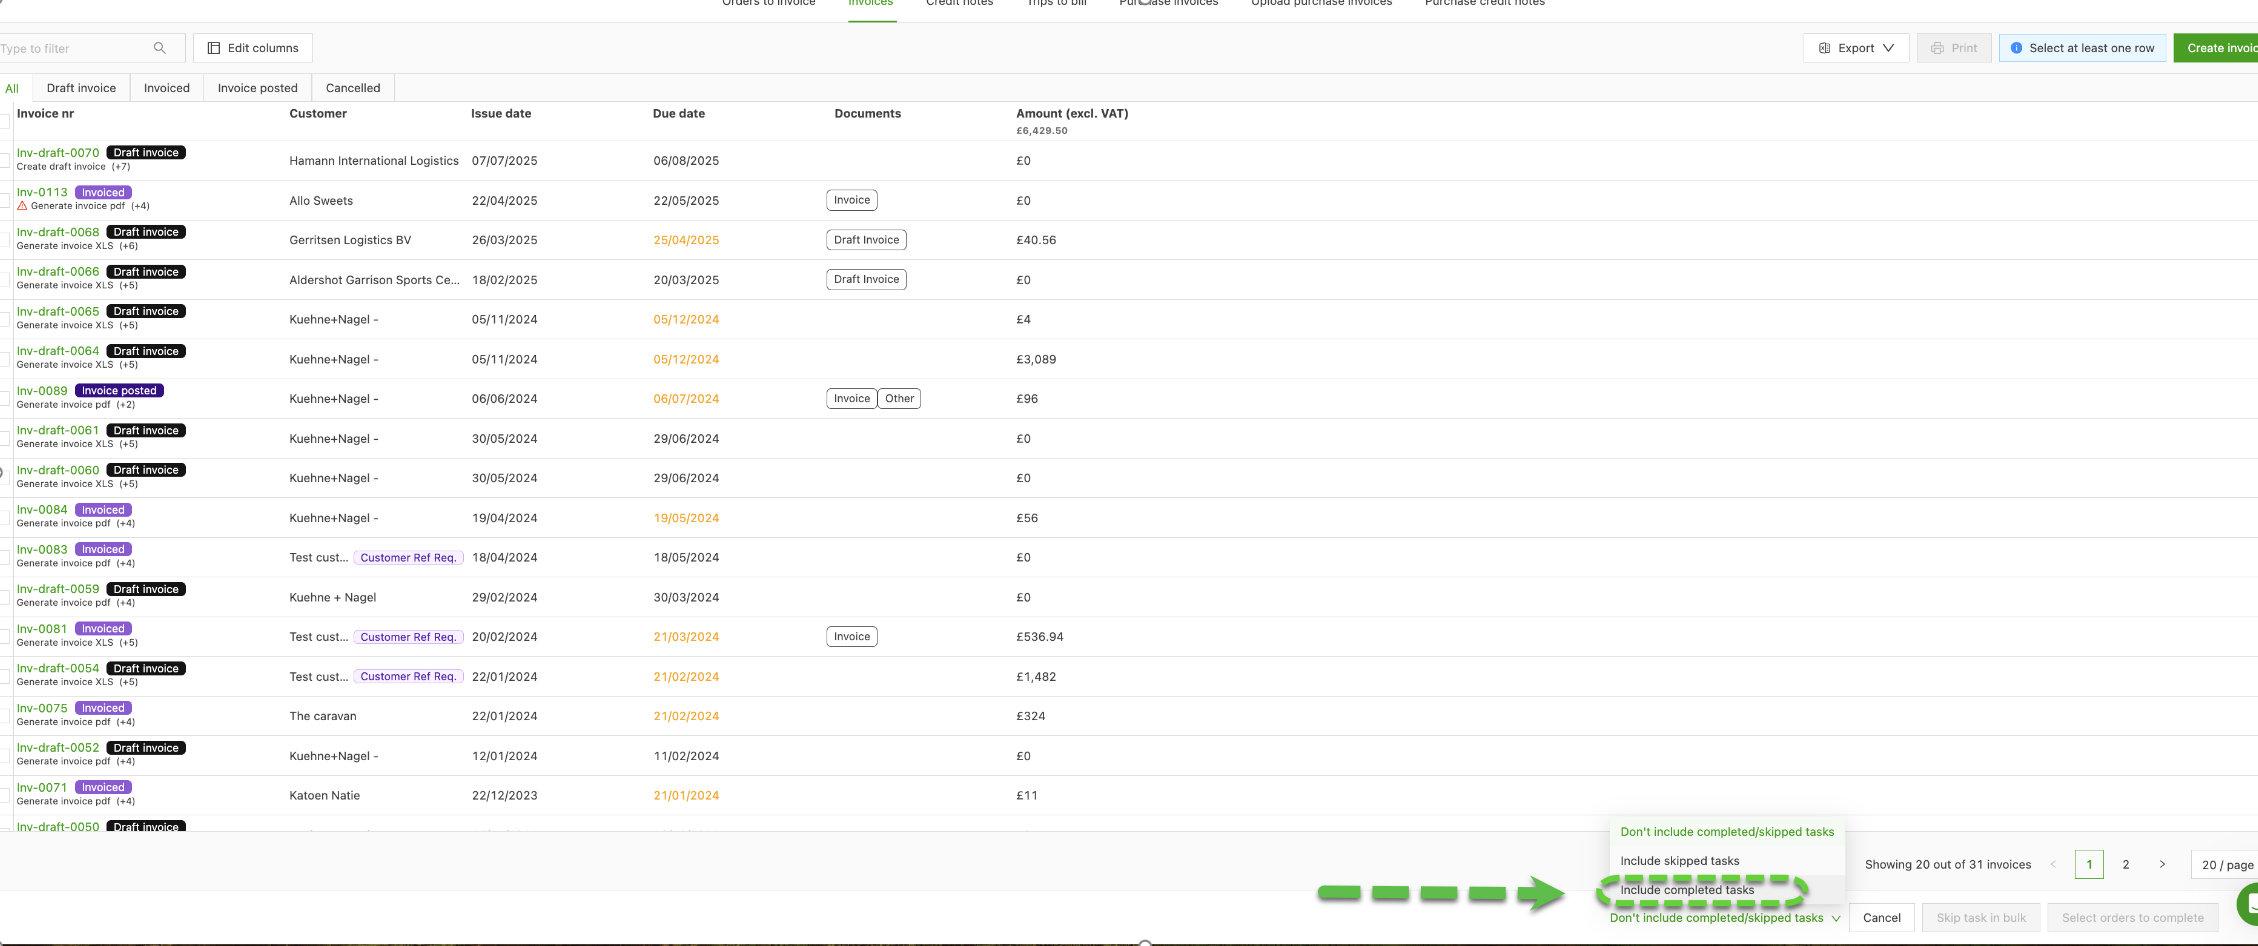
After a quick action is selected, there are 3 options for which records to include:
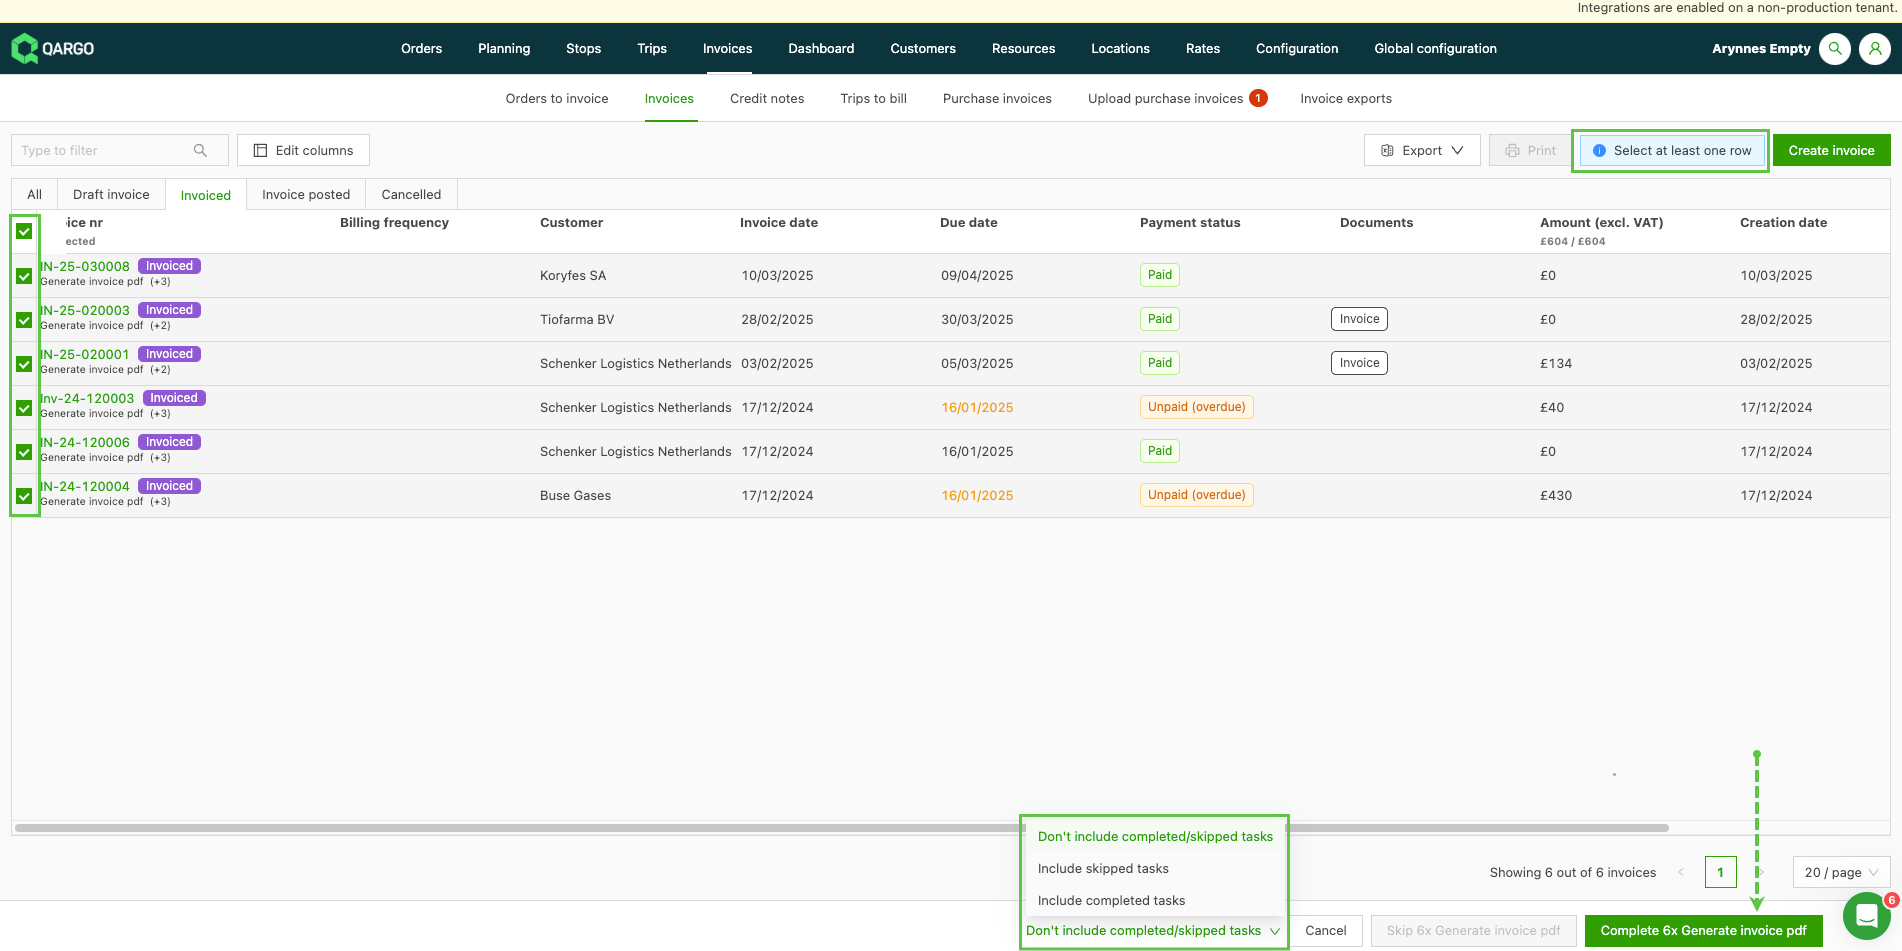
- Don’t include completed/skipped tasks: this only includes outstanding tasks.
- Include skipped tasks: this includes any invoices where this task might be configured to be skipped.
- Include completed tasks: this includes invoices where the task has already been completed.
The system uses asynchronous processing. This allows a large number of invoices or charges to be created at the same time while reducing the risk of timeout errors.
When running tasks in bulk, select all records for processing.
- Not all tasks are processed at the same time.
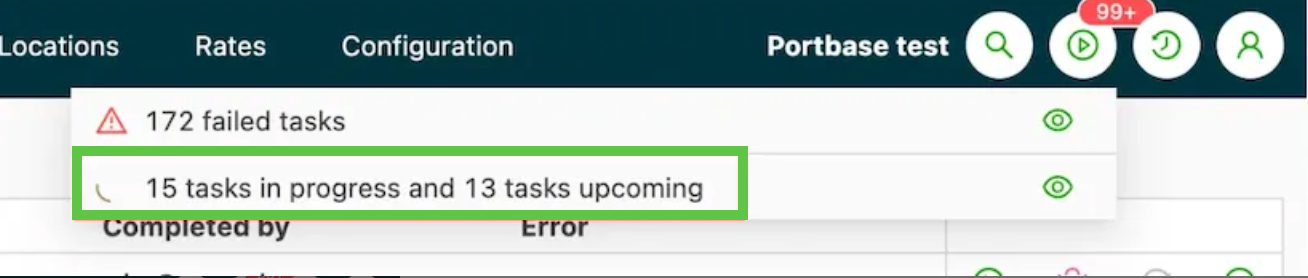
- To tell them apart, tasks show an ‘in progress’ or ‘upcoming’ status. Tasks marked ‘upcoming’ are waiting to be put in progress.
- This happens automatically. Once the records are selected, no further action is required.
The task indicator is displayed while the tasks are being updated:
Multiple records can be selected on the following pages:
- Orders
- Loads
- Invoices
- Carrier invoices
- Credit memos
- Carrier credit memos
Generate invoice PDF.
Use this option to create the invoice PDF file.
- Use the checkbox to select the invoices to generate the file for.
- Click the ‘Complete’ button. This button shows the number of records that will be updated.
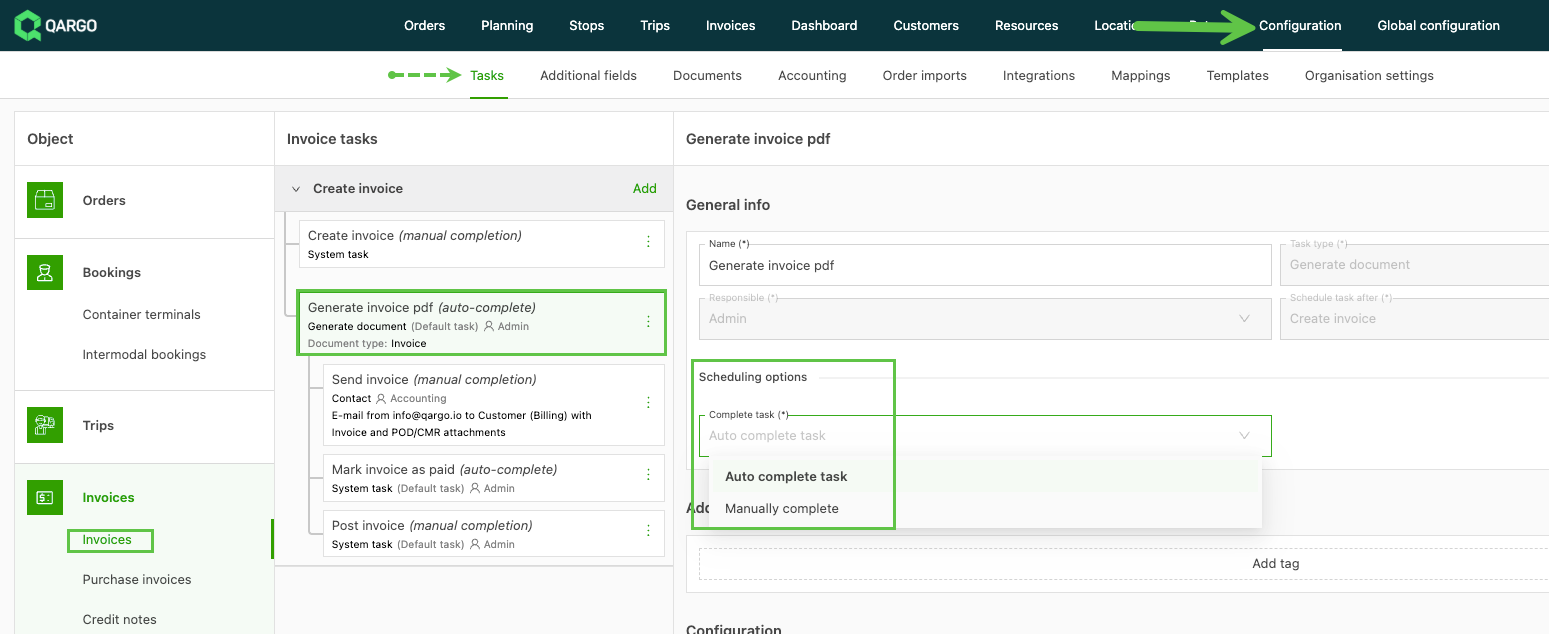
If this task is configured to auto-complete, the PDF file is generated automatically when the invoice is created.
The ‘Generate invoice PDF’ task must be completed before the Send invoice option becomes available.
Send invoice
Once the invoice file is available, it can be sent to the customer. When sending a batch of invoices, use this option to skip sending specific invoices.
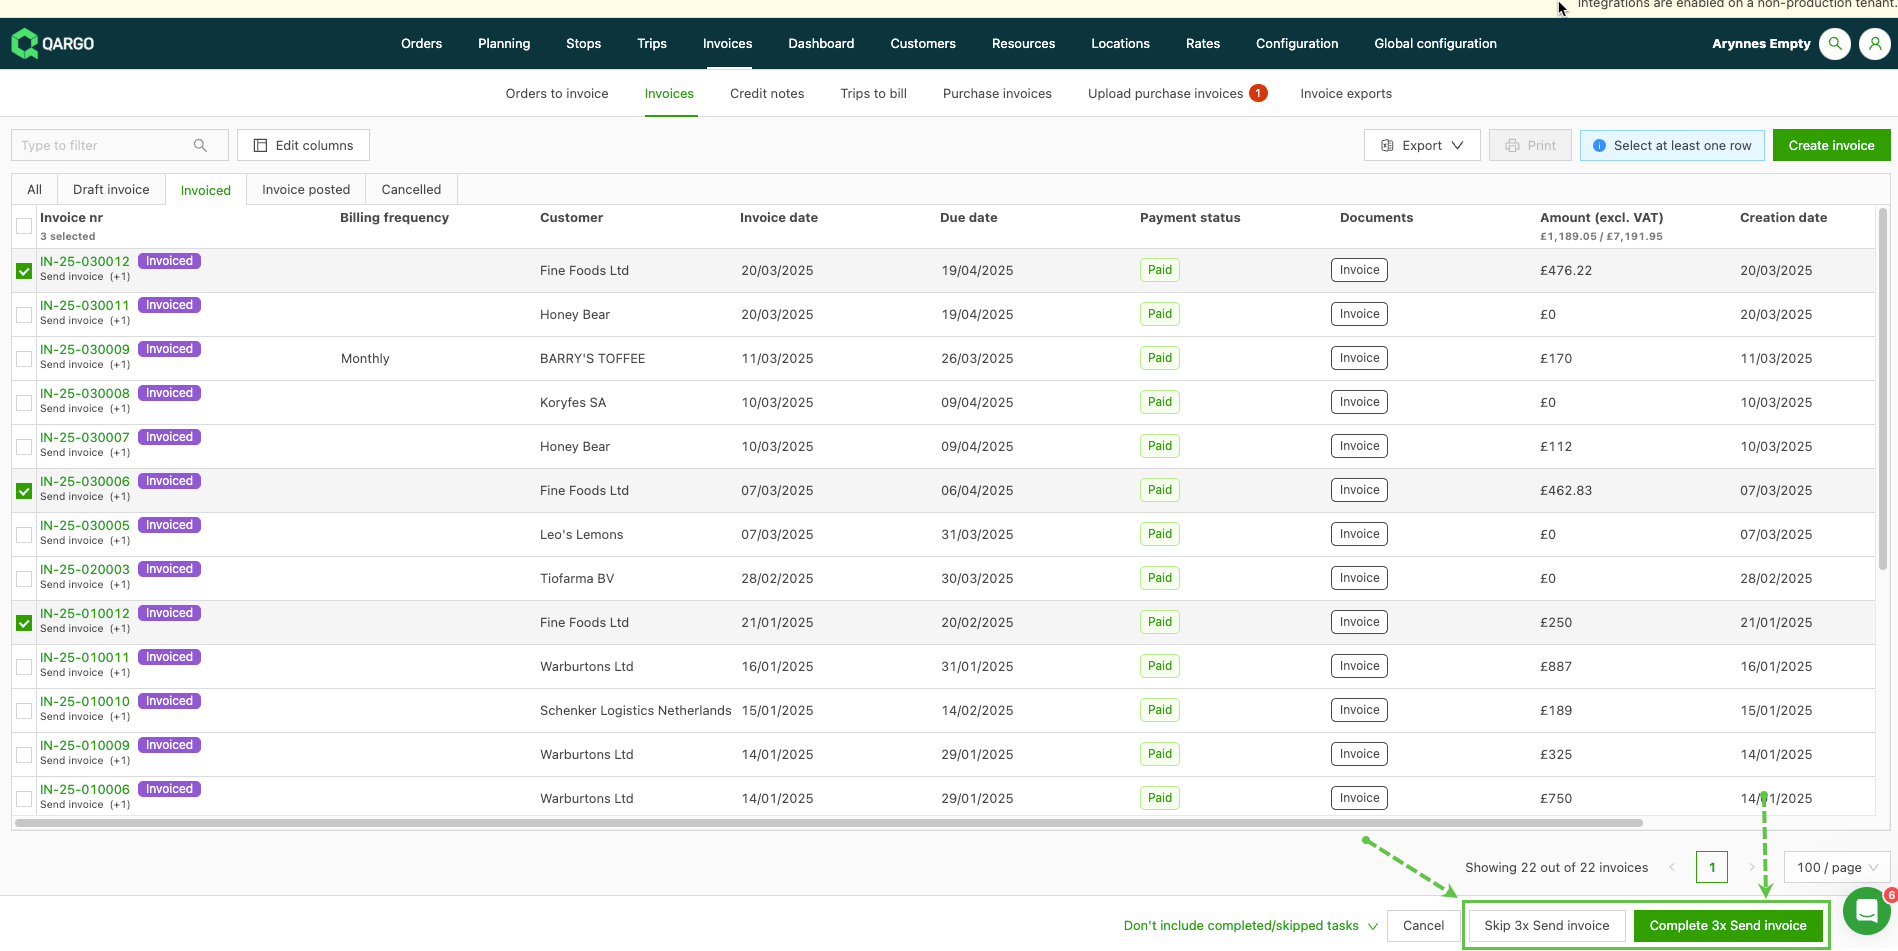
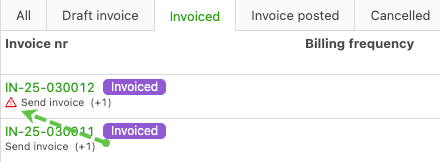
When sending invoices in bulk, the typical default is to send them by email. If the customer does not have the right billing contact email entered, the task fails and an error is generated. Use the retrigger option to update the email address and resend the email.

Mark invoices as paid / Undo mark invoice as paid
The ‘Generate invoice PDF’ task must be completed first. Selecting this option automatically filters the list to show only invoices that have the invoice file generated and are not yet marked as paid.
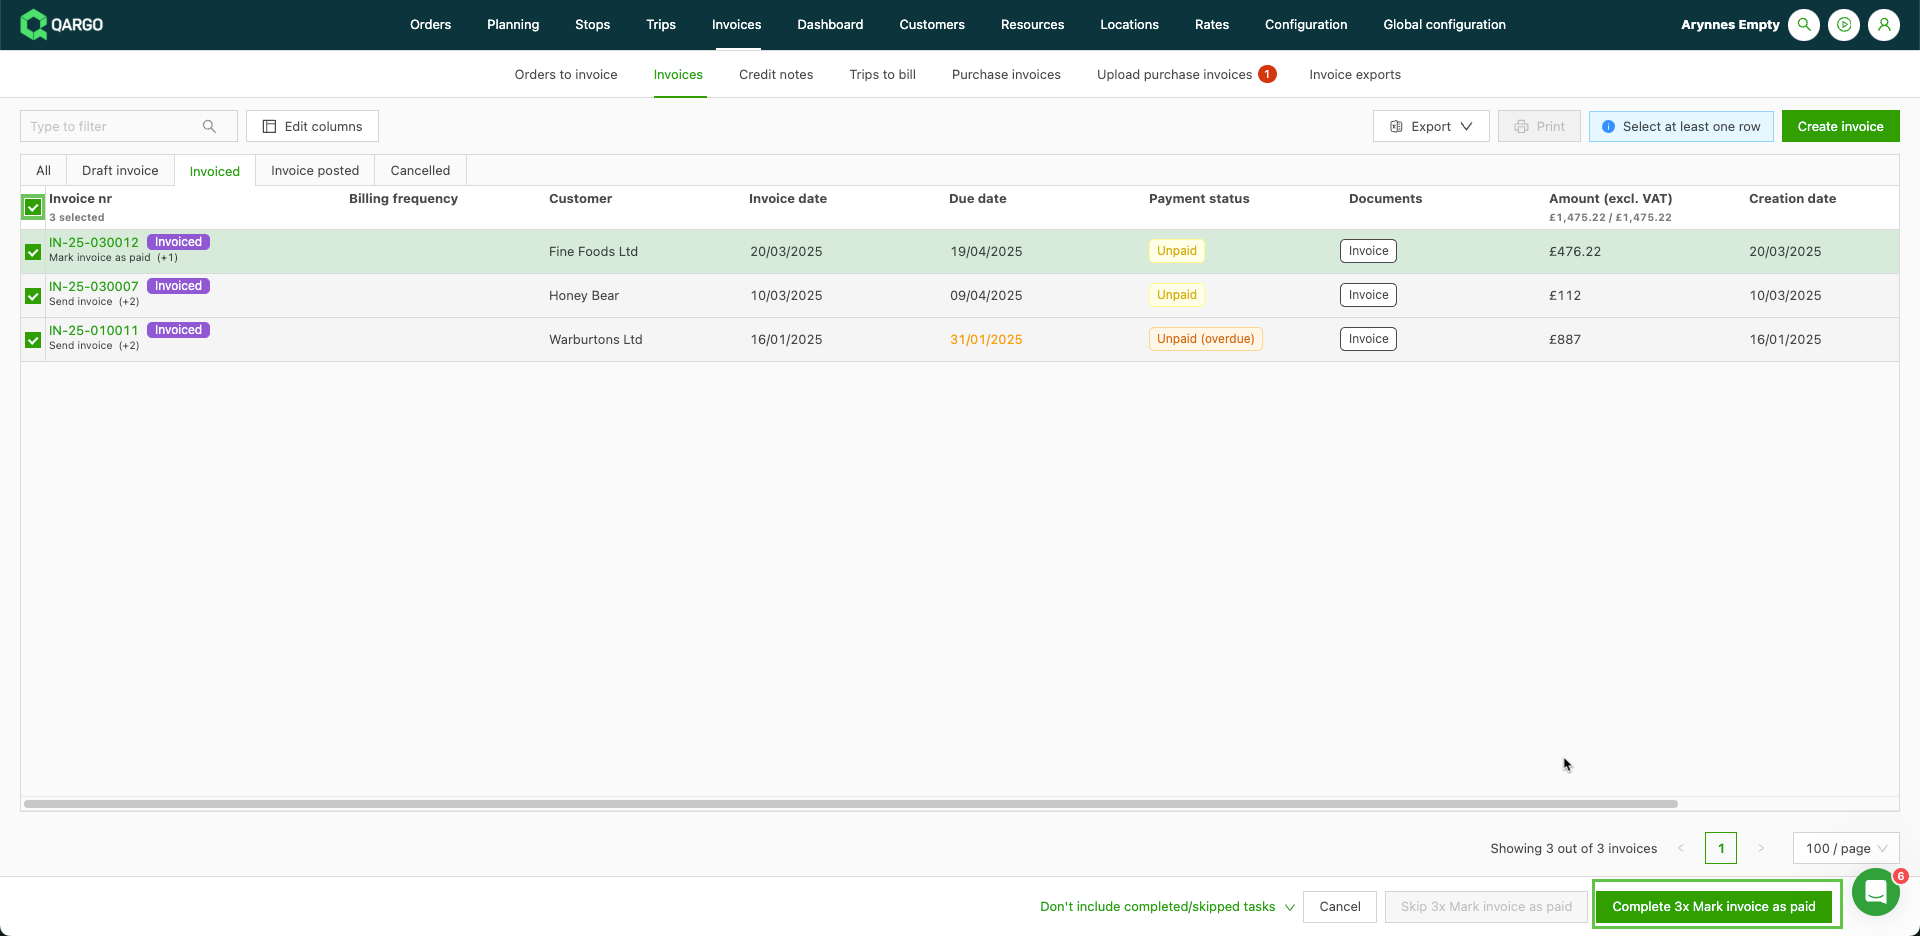
To undo the action, select the invoices to set back to ‘unpaid’. Click the ‘Undo mark invoice as paid’ button. The payment status label updates to unpaid.
Post invoice / Undo post invoice
Invoices can be posted at any point after the PDF file has been generated.
To transfer the sales revenue from an invoice to accounting software, the invoice must have a posted status. Unless an integration transfers them directly to the accounting software, posted invoices can be exported to a file format that is then uploaded.
Click the link below to read more about importing into accounting.
Importing invoices into accounting
Approve charges
When processing invoices, a charge that requires approval shows a red ‘To approve’ label next to the line item.
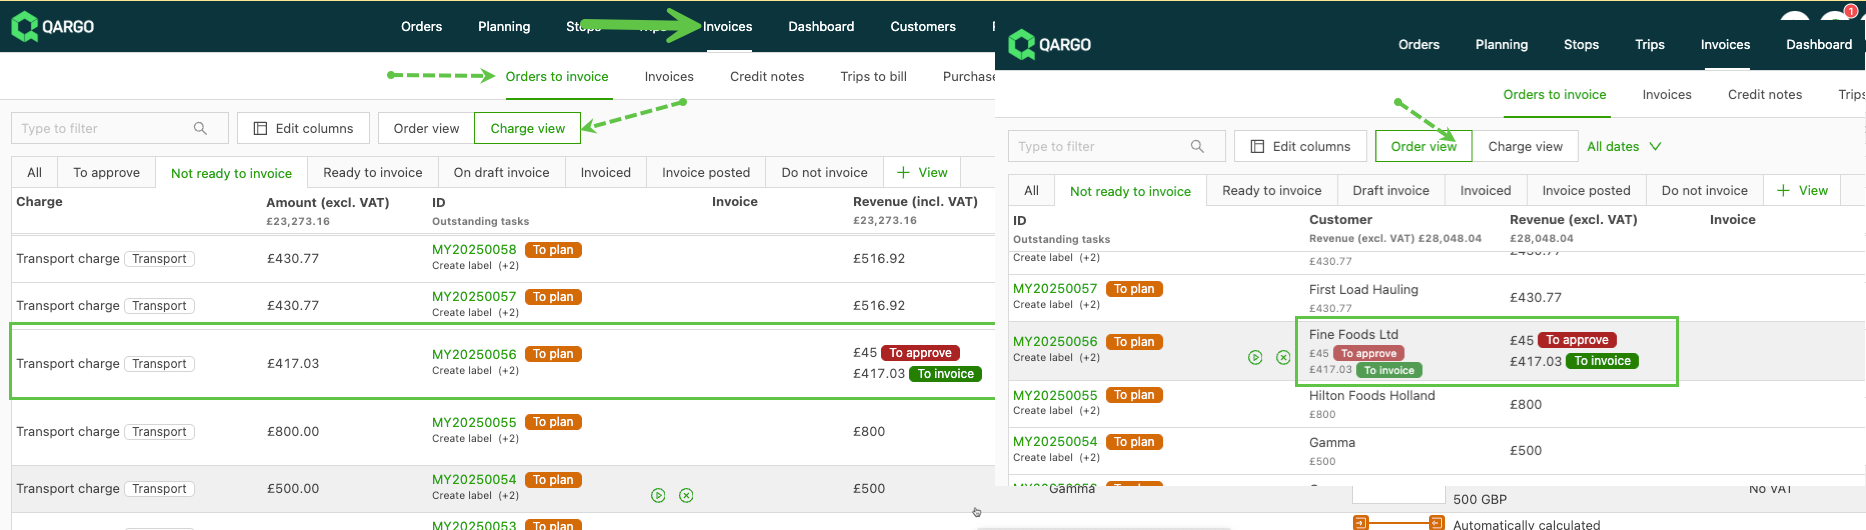
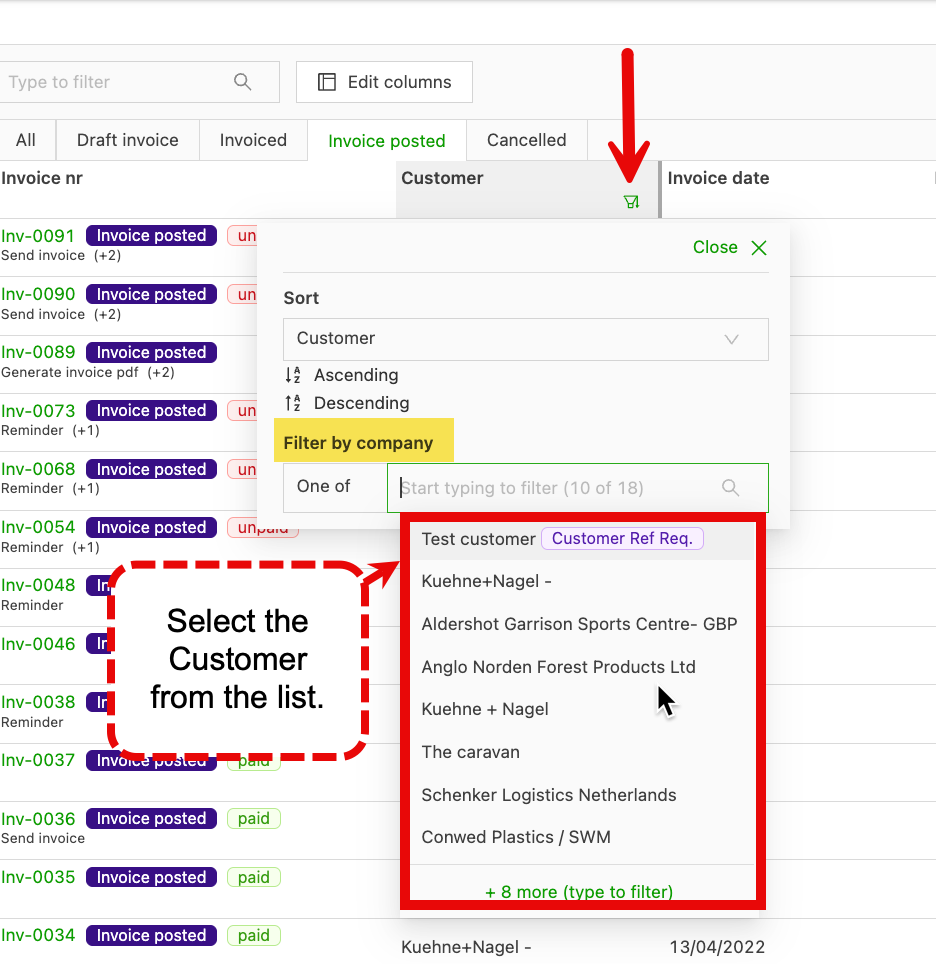
Use filtering on the Revenue column to show all the orders with charges to approve:
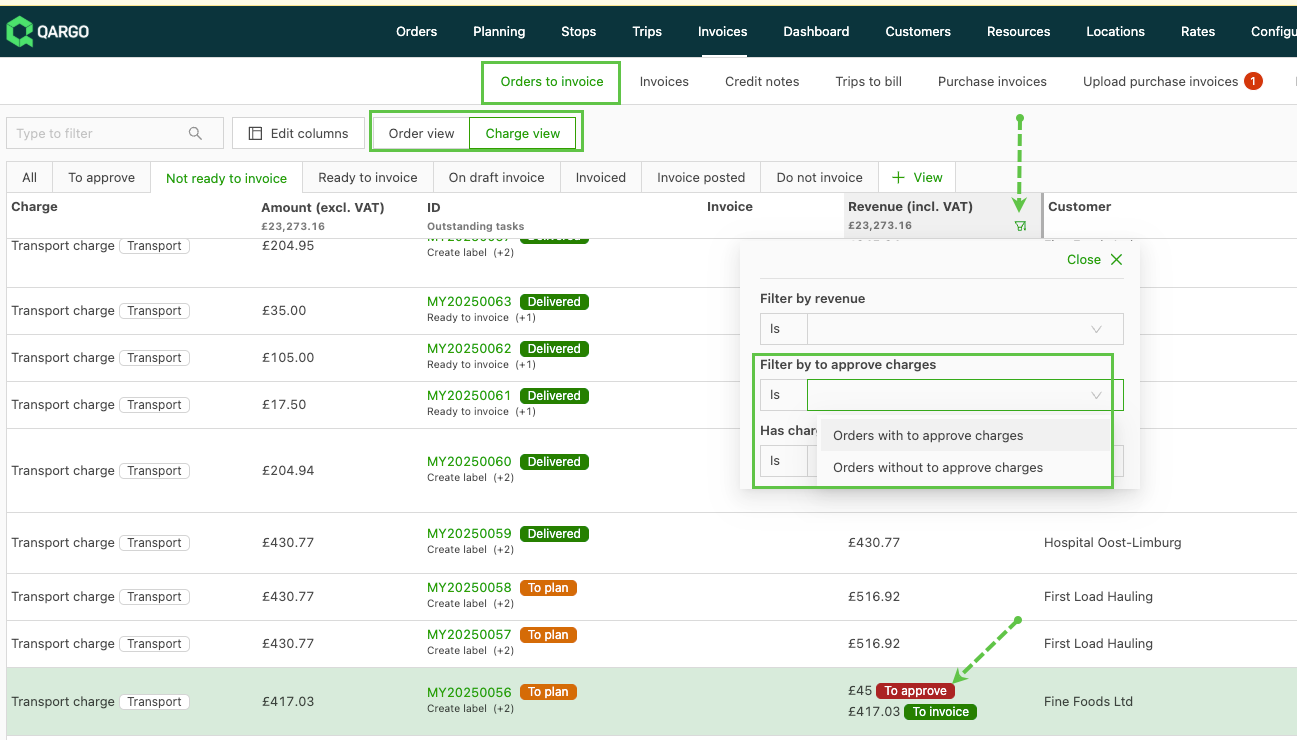
Click anywhere in the line to open the order details. Click or hover over the ‘To approve’ label to show the option to approve or decline the charge:
