Qargo mobile app: Activate the mobile app
This article looks at the steps required to activate and configure the Qargo mobile app for drivers. Qargo's mobile app tracks the GPS location of drivers who sign in with a QR or PIN code, so dispatchers can follow external carriers and contract carriers
Table of contents
When adding a driver, it is possible to give that person access to the mobile app. Drivers need to download the Qargo App on their smartphones.Qargo supports two authentication methods for drivers: PIN codes for load-specific access and email-based login for broader app access.
Activate the mobile app for a driver
-
Go to Resources.
-
Click Drivers in the header.
-
Click the name of the driver to activate on the mobile app.
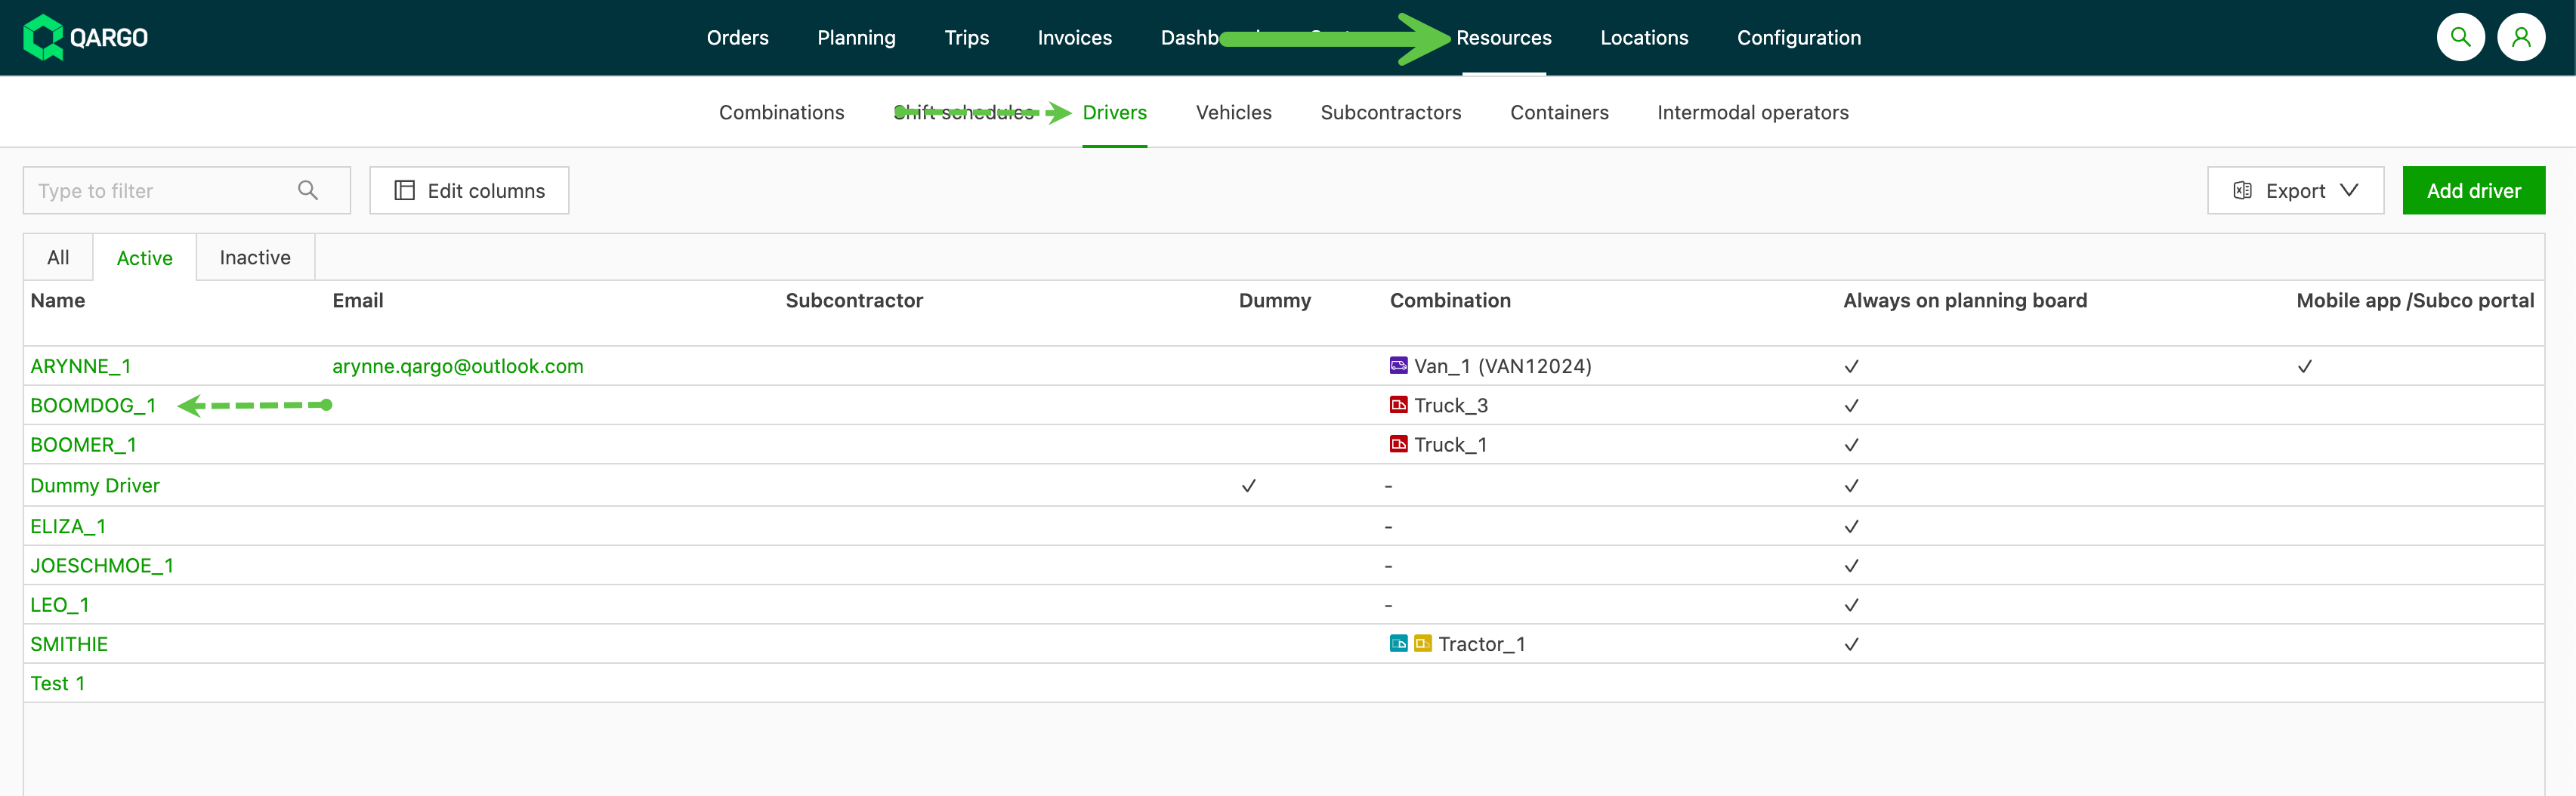
This opens the driver profile. Scroll down to the Mobile app/contract carrier portal panel.
- Enter the driver’s email address (optional).
- If the driver will use PIN codes to access loads in the app, the email is not required.
- Turn on Mobile app access.
- Turn on Access by PIN code (optional).
- If the driver will log in to the app with email and password, PIN codes do not need to be enabled.- To configure email-based login, make sure the driver’s email is entered, and turn access off and back on if the email field is grayed out. Reassign the resource to the load to apply the new credentials.
- Click Save.

- Mobile app access: This toggle enables drivers to enter updates in the app for loads that have been dispatched to them from the account. Once it is activated, the second option is enabled.
- Access by PIN code: This toggle enables PIN code access for specific loads. A PIN code is generated for a specific load and can be sent to the driver through QR codes in load sheets or as a manual code for the driver to enter.- PIN codes are generated only for new loads when a resource with PIN access is assigned. Existing loads do not retroactively receive PINs.
- Reassigning a load to a different resource with PIN access enabled generates a new PIN for that load.
For details on how to use the Qargo mobile app:
Best practices for authentication
- Regularly review and update resource access settings to align with operational needs.
- Make sure the correct authentication method (PIN or email) is enabled for each driver or contract carrier.
- Reassign resources to loads after changing their authentication settings so the updates take effect.
Troubleshooting authentication issues
- If PIN codes are not generating, check that PIN access is enabled for the assigned resource.
- For email-based login issues, confirm that the email address is configured correctly and that the access settings have been toggled appropriately.
Create tasks that will be sent to the mobile app
Once the mobile app has been activated for that driver, tasks can be triggered in the mobile app.
First, create a task that triggers the mobile app.
-
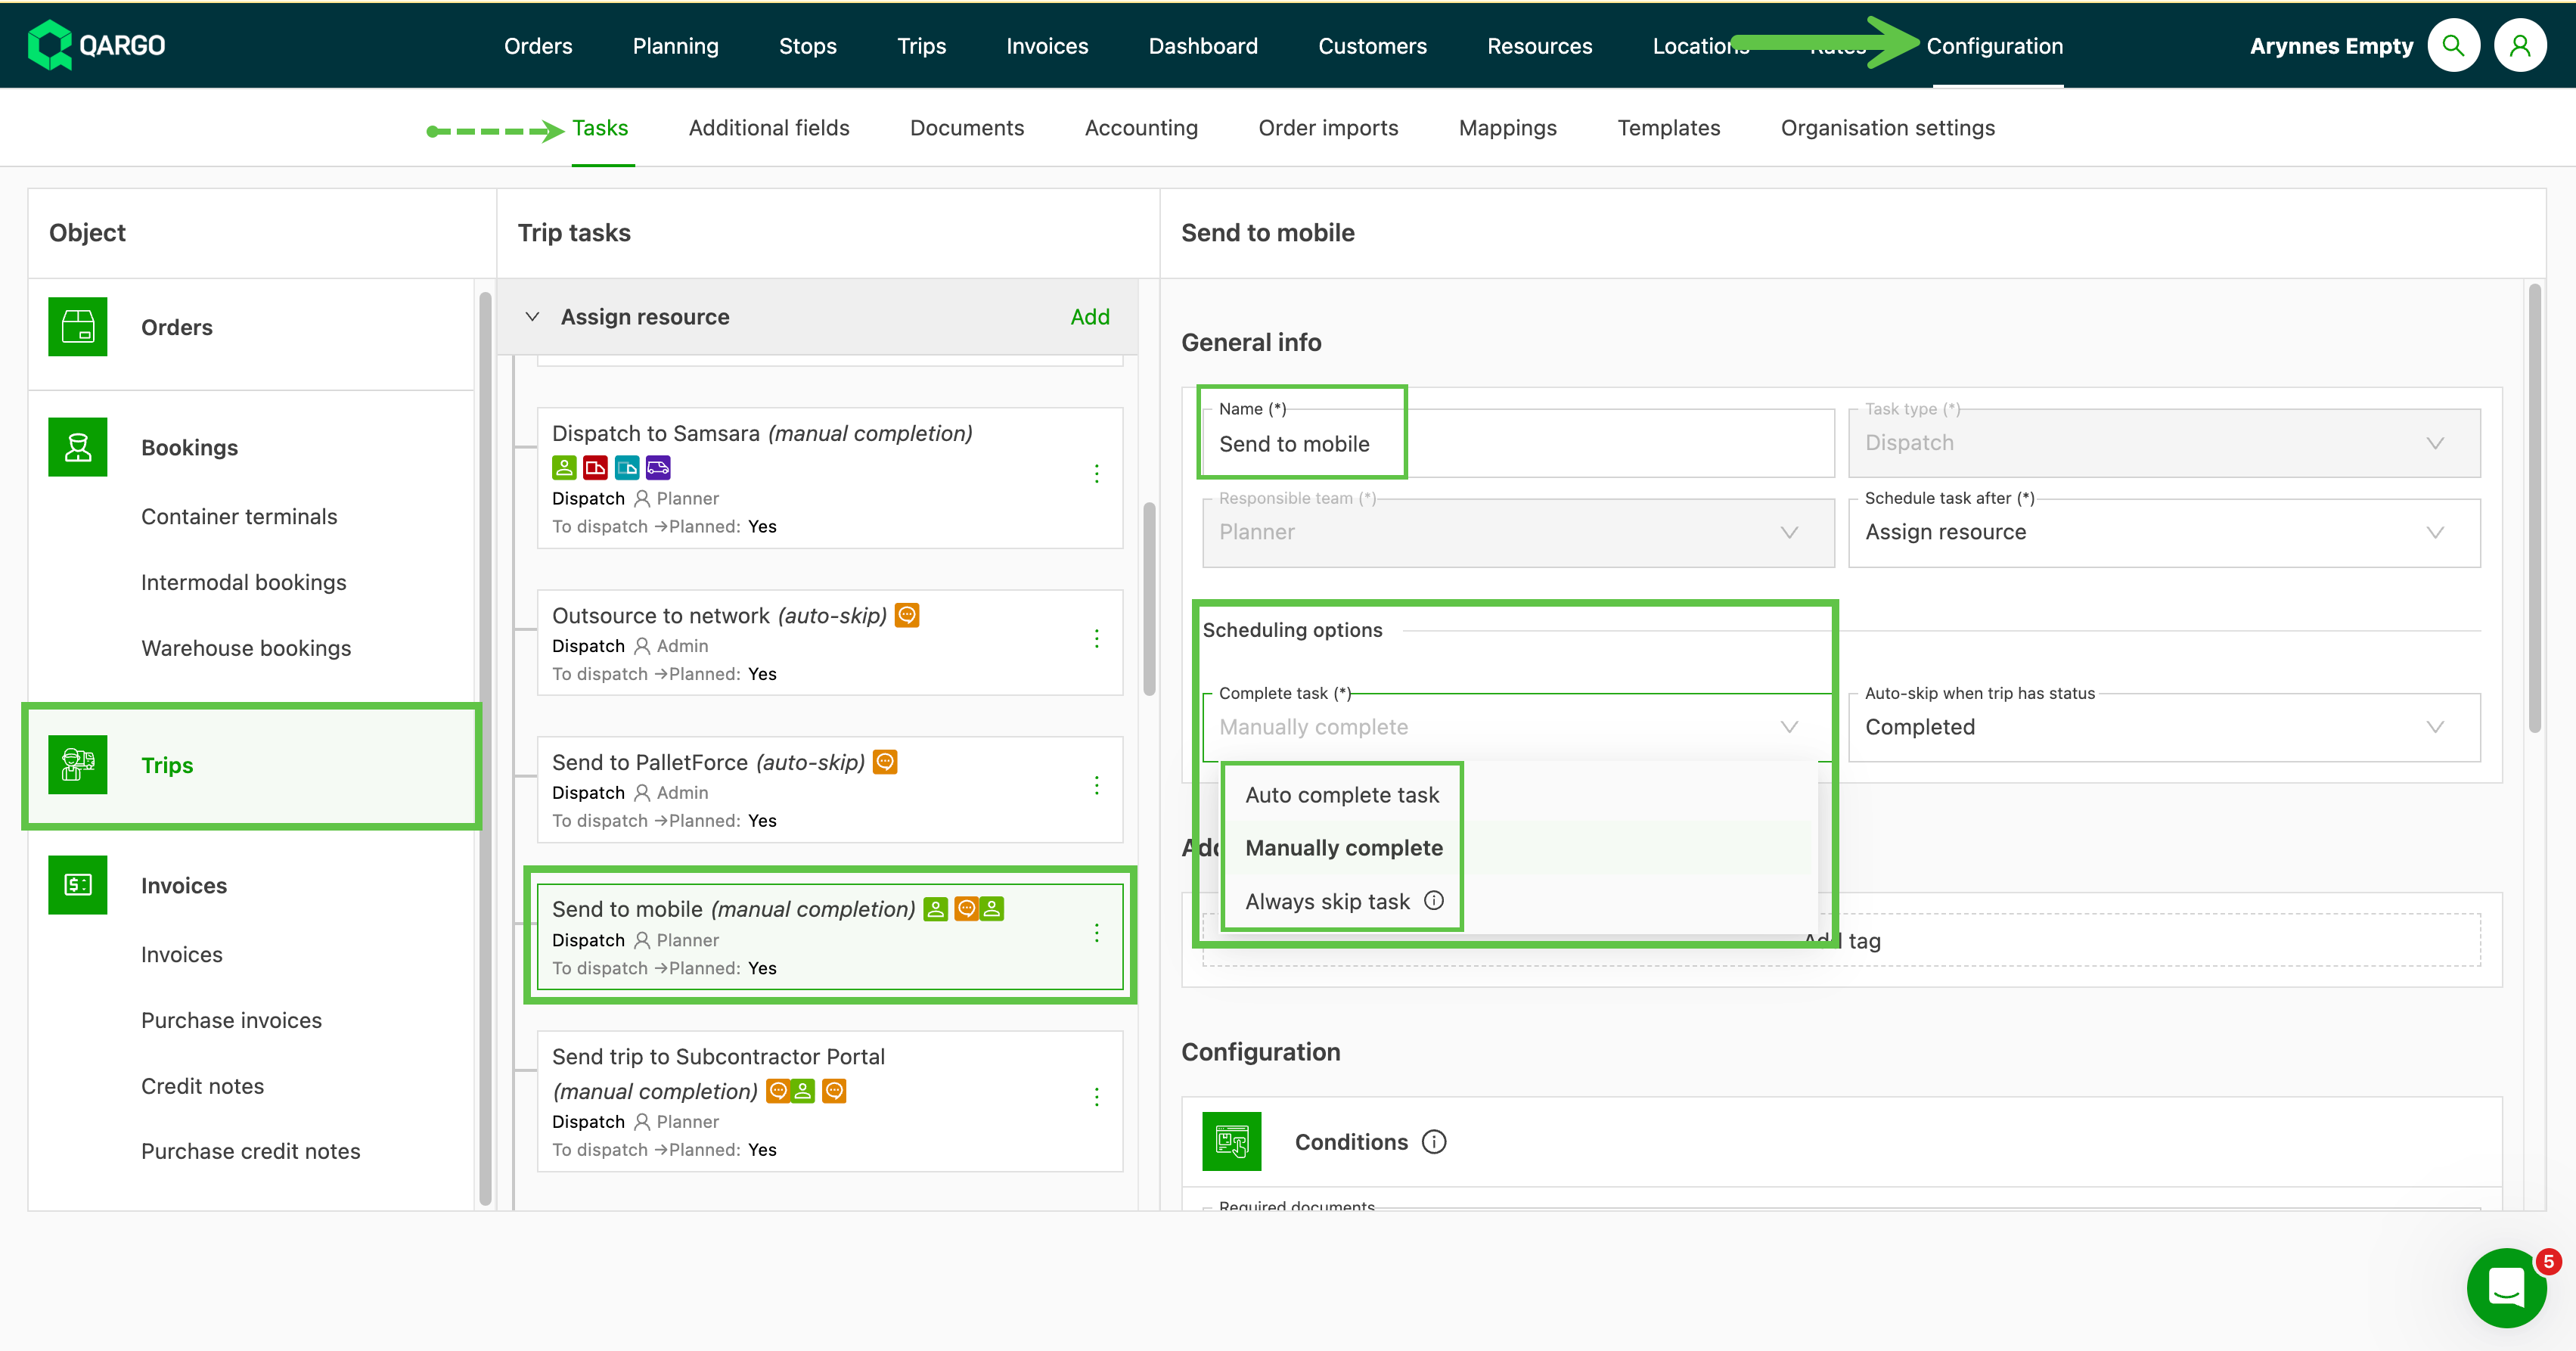
Go to Configuration > Tasks.
-
Select Loads from the side menu.
- Add the new task under Assign resource.
-
Click Add to add a new task to the workflow.
-
In the New task window, select New task or Template.
- New task creates the task parameters.
- Template displays the available templates with pre-filled parameters.
Complete the general info section
-
In New task, give the task a name.
-
Set Task type to Dispatch from the list in the drop-down.
-
Select the team responsible for completing the task.
-
Select when the task should be scheduled in the workflow from the list in the drop-down.
- The task type determines which options are displayed in the Schedule task list.
Complete the scheduling options
-
Select how the task will be completed.
-
Auto complete task. The task is generated and completed automatically as scheduled.
-
Manually complete. The task is generated automatically but requires user input to be completed manually.
-
Always skip task. The task is generated but skipped, and it is not considered part of the workflow.
- Use this when creating a task that only applies to specific customers, and use the override feature to enable it in the customer profile.
-
-
(Optional) Set whether the task should Auto-skip when the load has a specific status.
- Use this option if the load should not be sent to the mobile app when it is blocked, for example.
- When the load status updates, the task is regenerated, but it may require manual completion.
-
(Optional) Add any additional configuration conditions that apply.
-
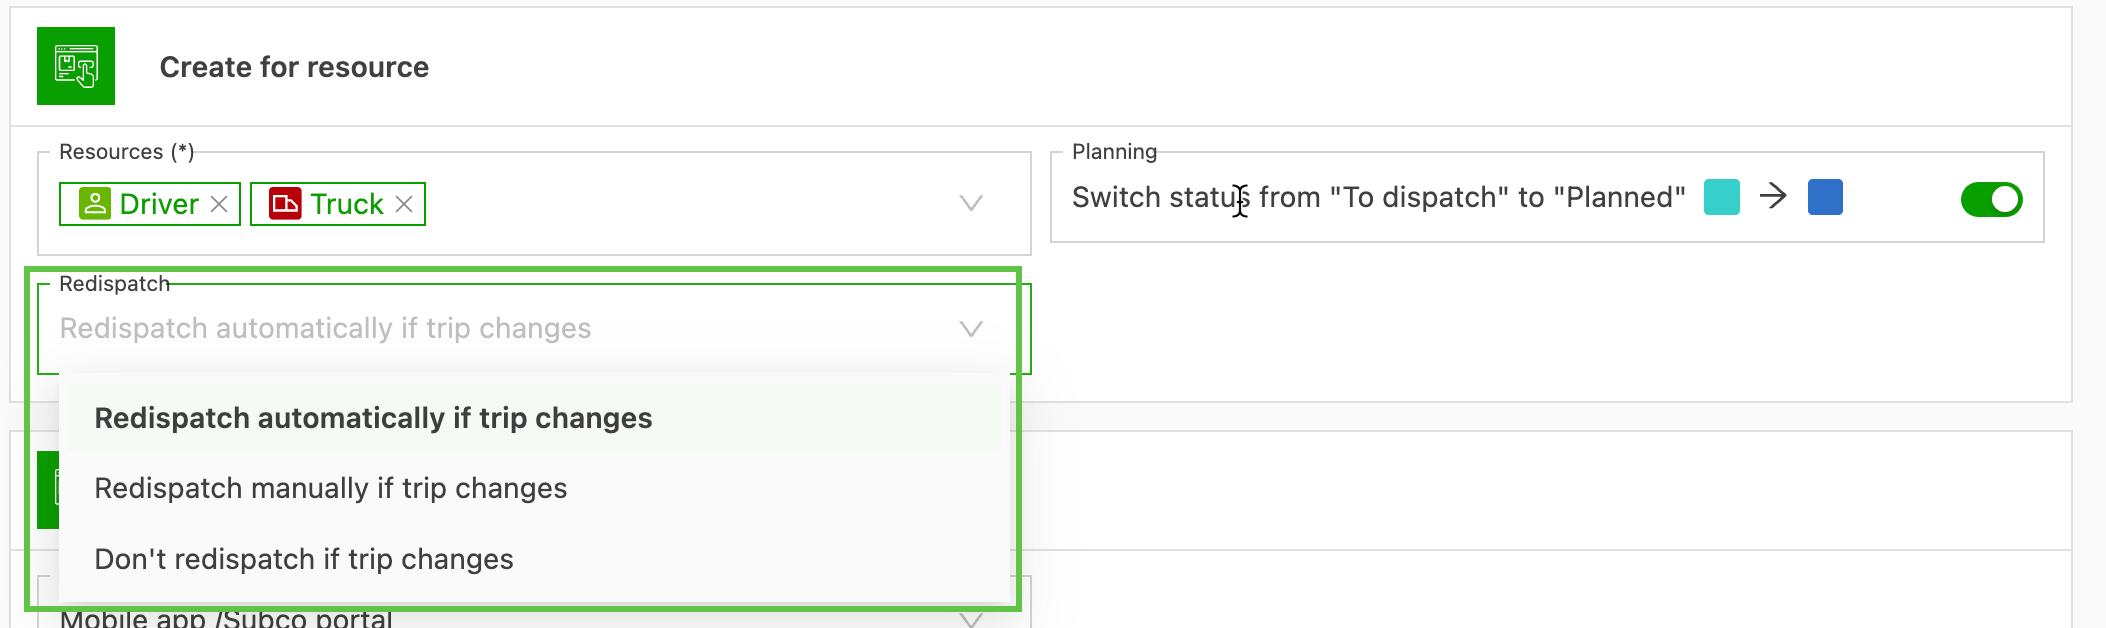
Select the resources the task applies to, for example driver or vehicle.
-
Set the re-dispatch behavior if the load status changes.
-
Under Dispatch, select Mobile app/contract carrier portal from the list of available integrations.
-
Click Save.
Trigger tasks to the mobile app
- The task is displayed in the operations panel in the order details.
- The task is displayed in the Load documents and tasks panel in the load details.
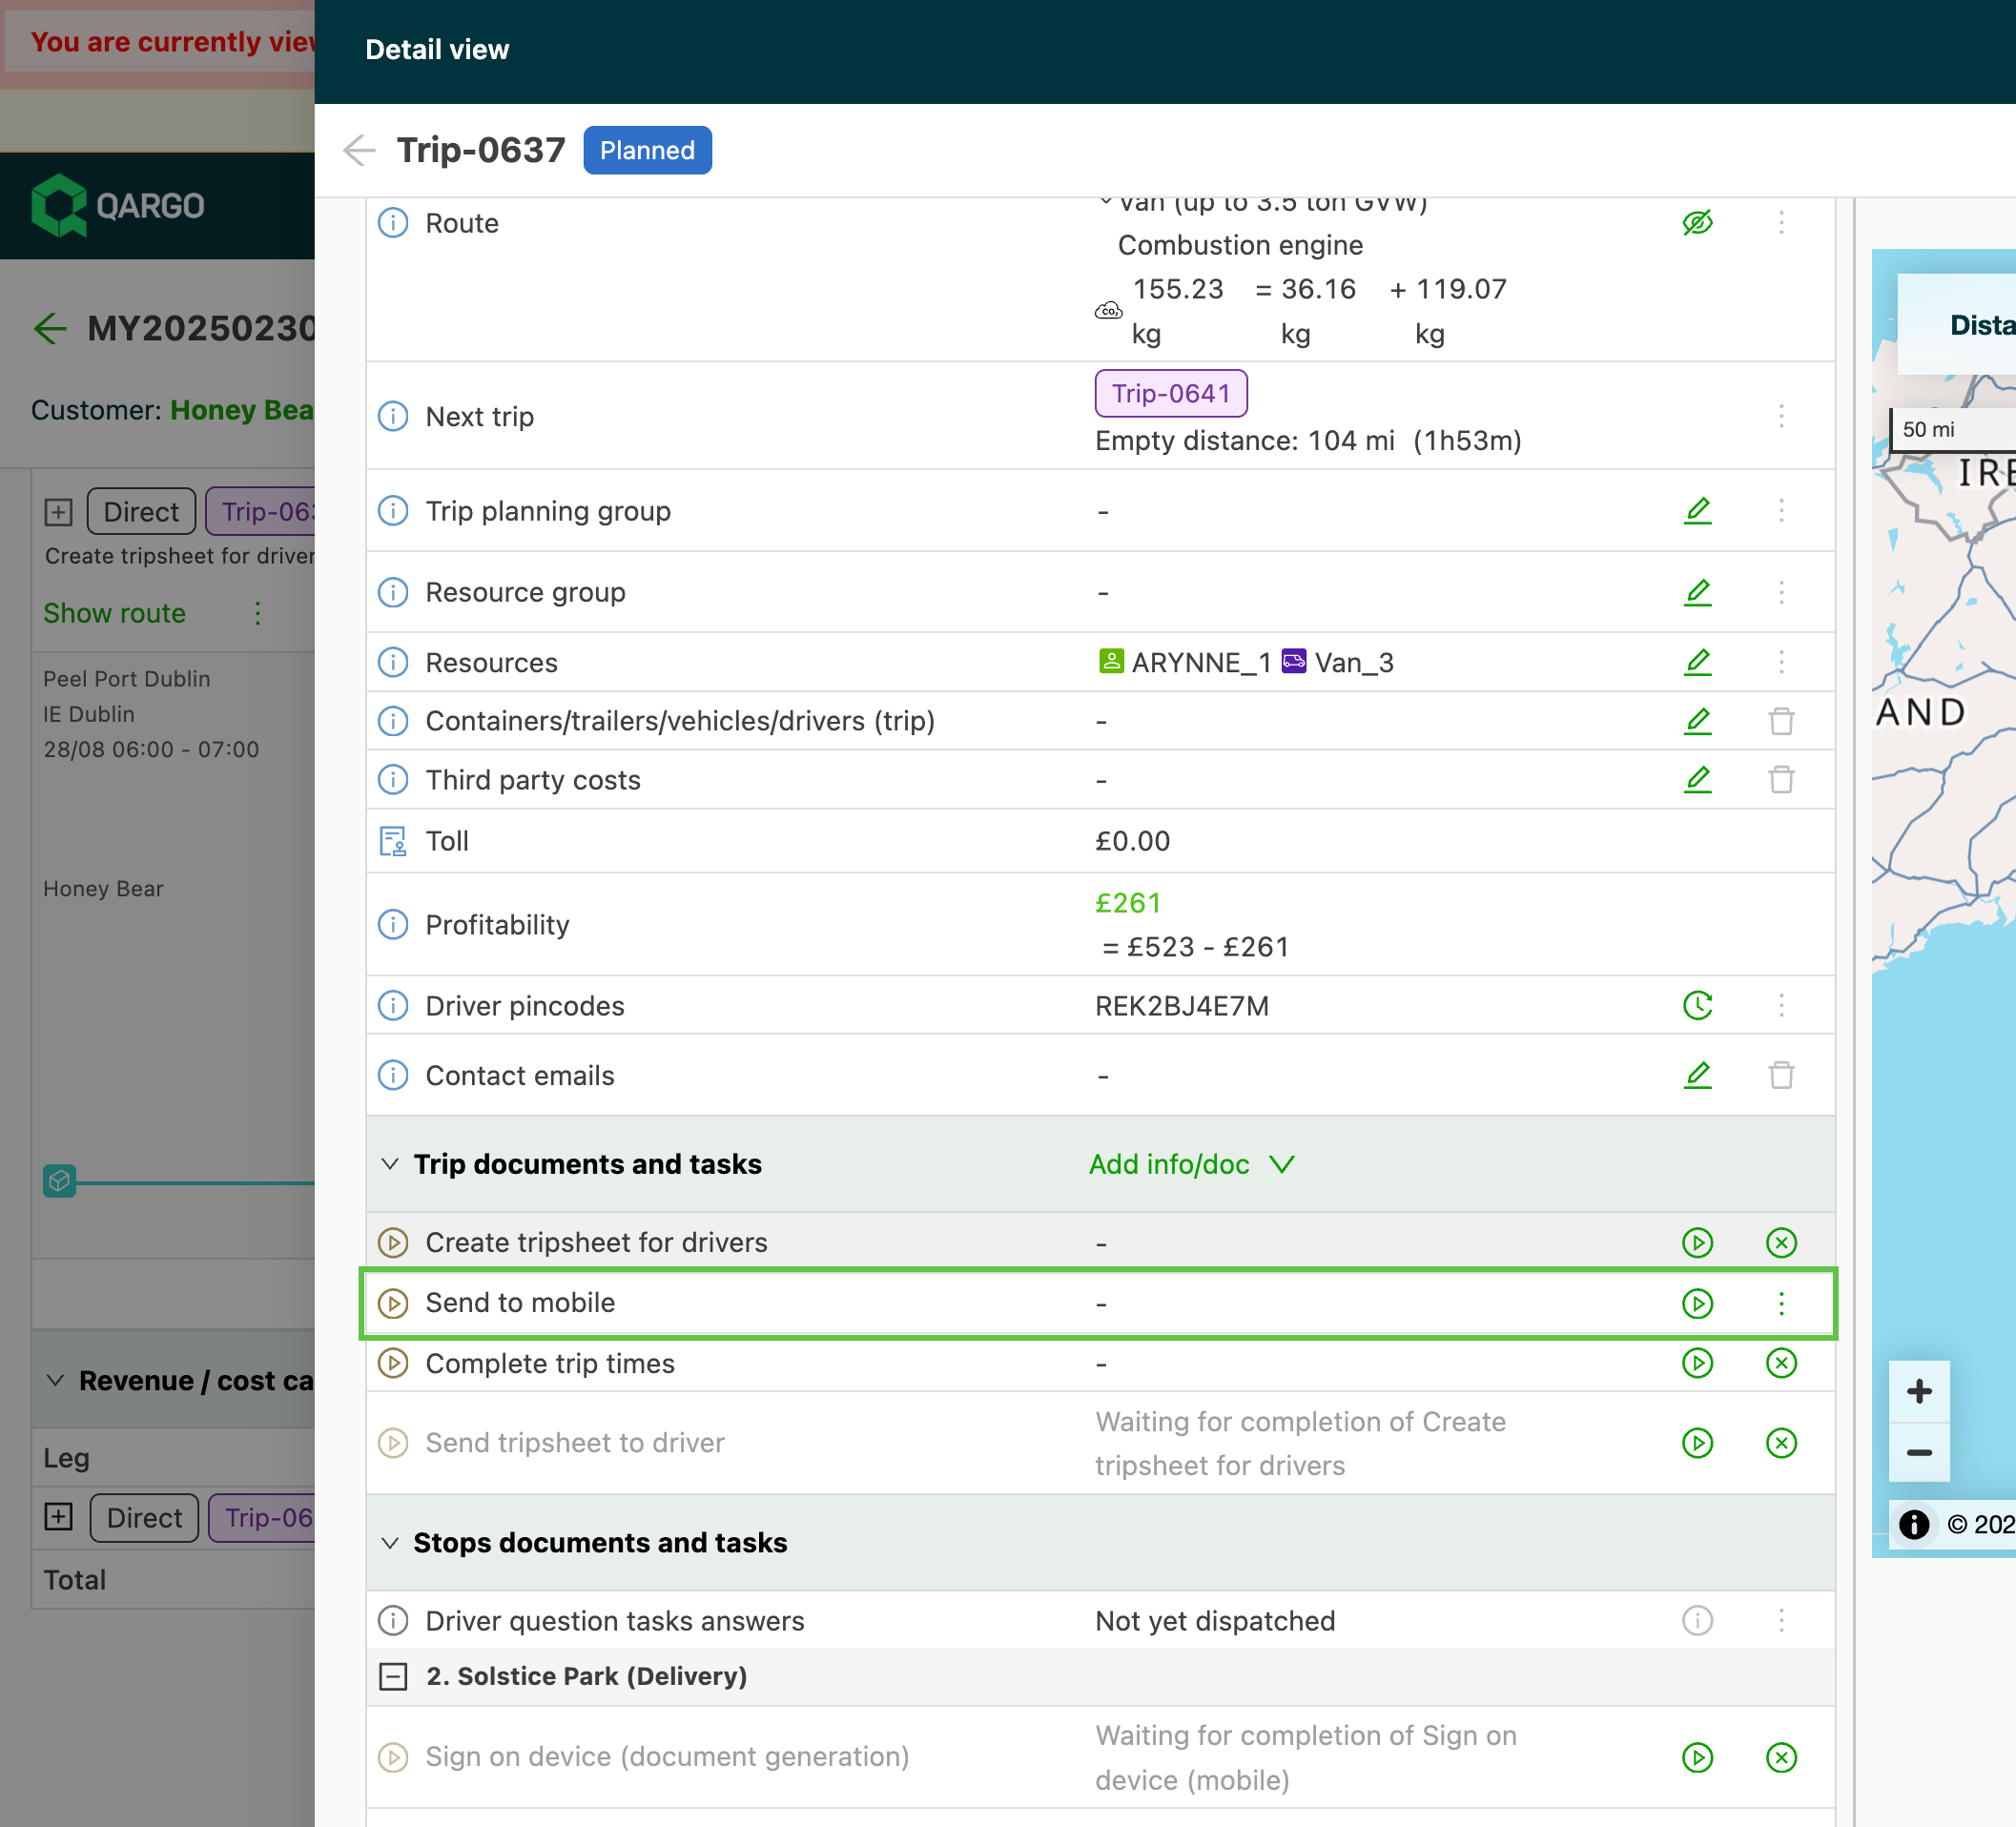
- Click the Execute icon to trigger dispatching.