
Customer portal: Giving access to the customer portal
Table of contents
- Step 1: Activate the customer portal on the company profile
- Step 2: Give a user portal access
- Accessing the portal
- Viewing invoices and credit memos
- Use cases
- How to enable invoice visibility (admin)
- Configure the dashboard statistics and time at stop
- Use cases
- Open the customer portal dashboard settings
- Choose how statistics are shown
- Troubleshooting
The customer portal makes working with customers a seamless process. Giving a customer access is quick and easy to set up. Once access is enabled, users can submit orders directly to the system.
🎥 Watch this video to find out how to grant access to the customer portal, or follow the steps below:
Step 1: Activate the customer portal on the company profile
-
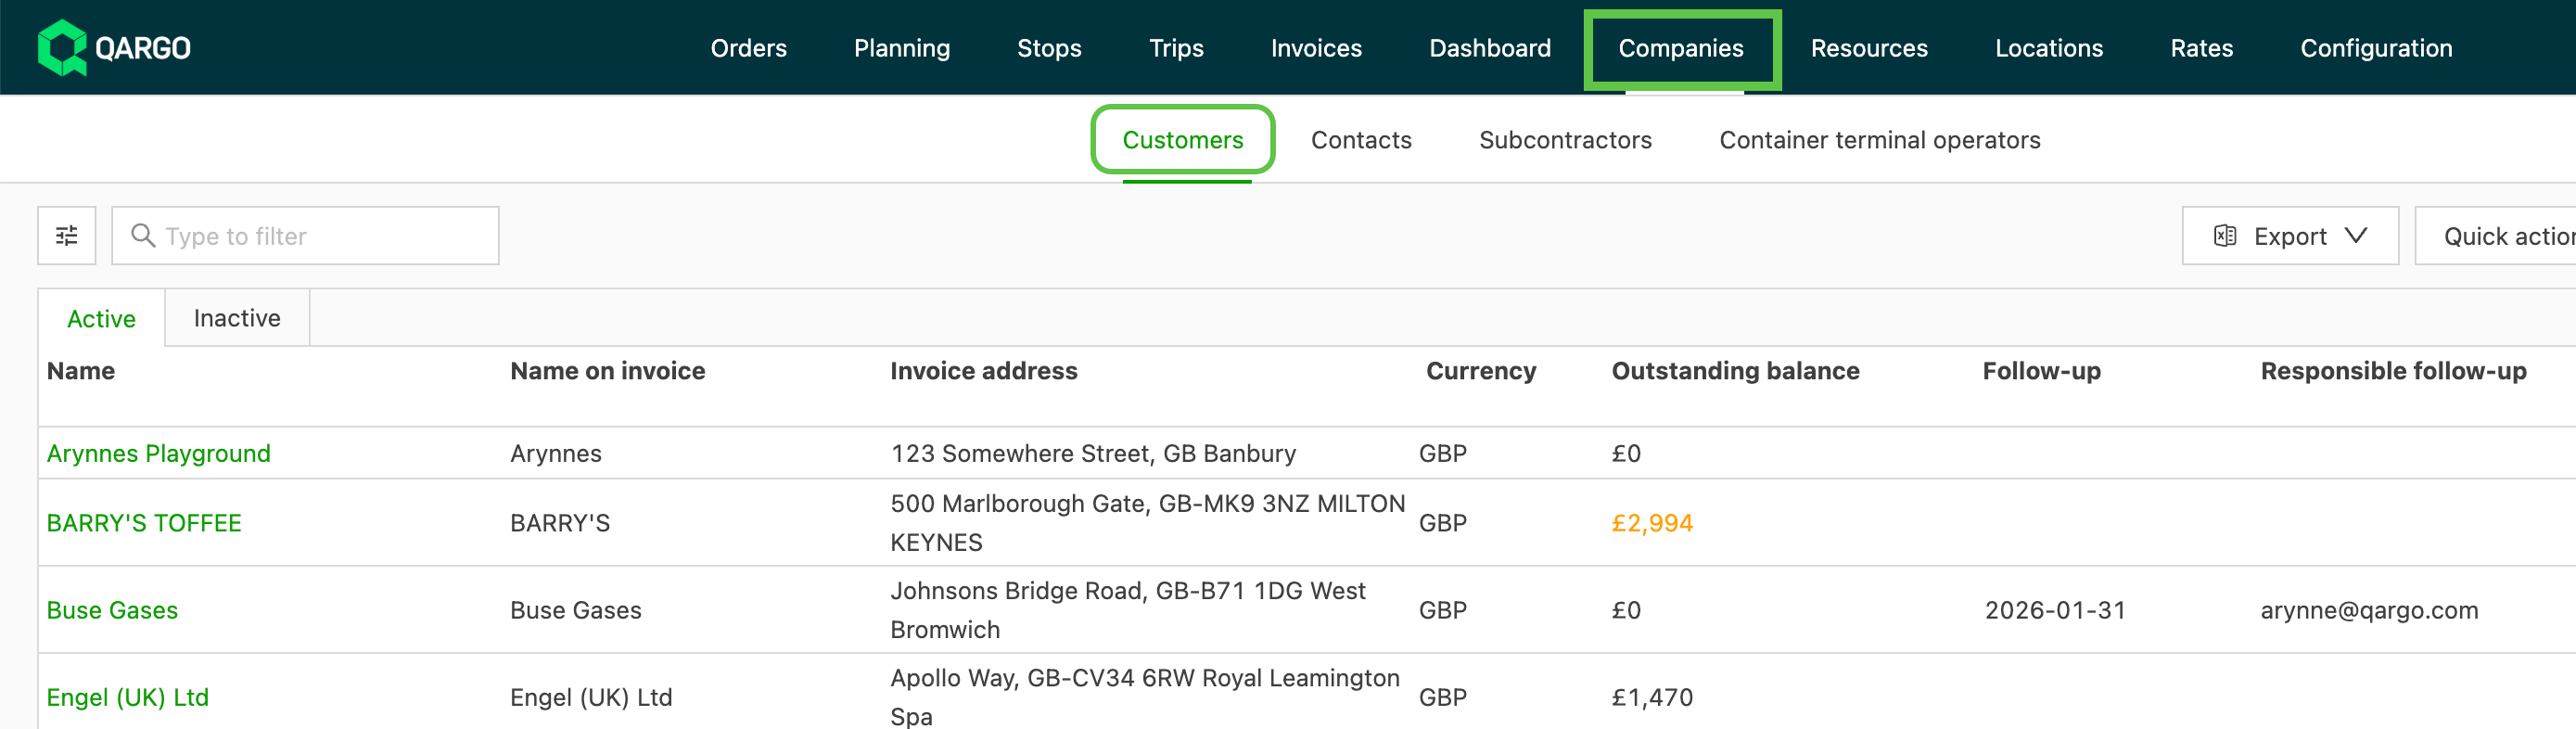
Navigate to Companies > Customers
-
Click the individual customer profile to open it
-
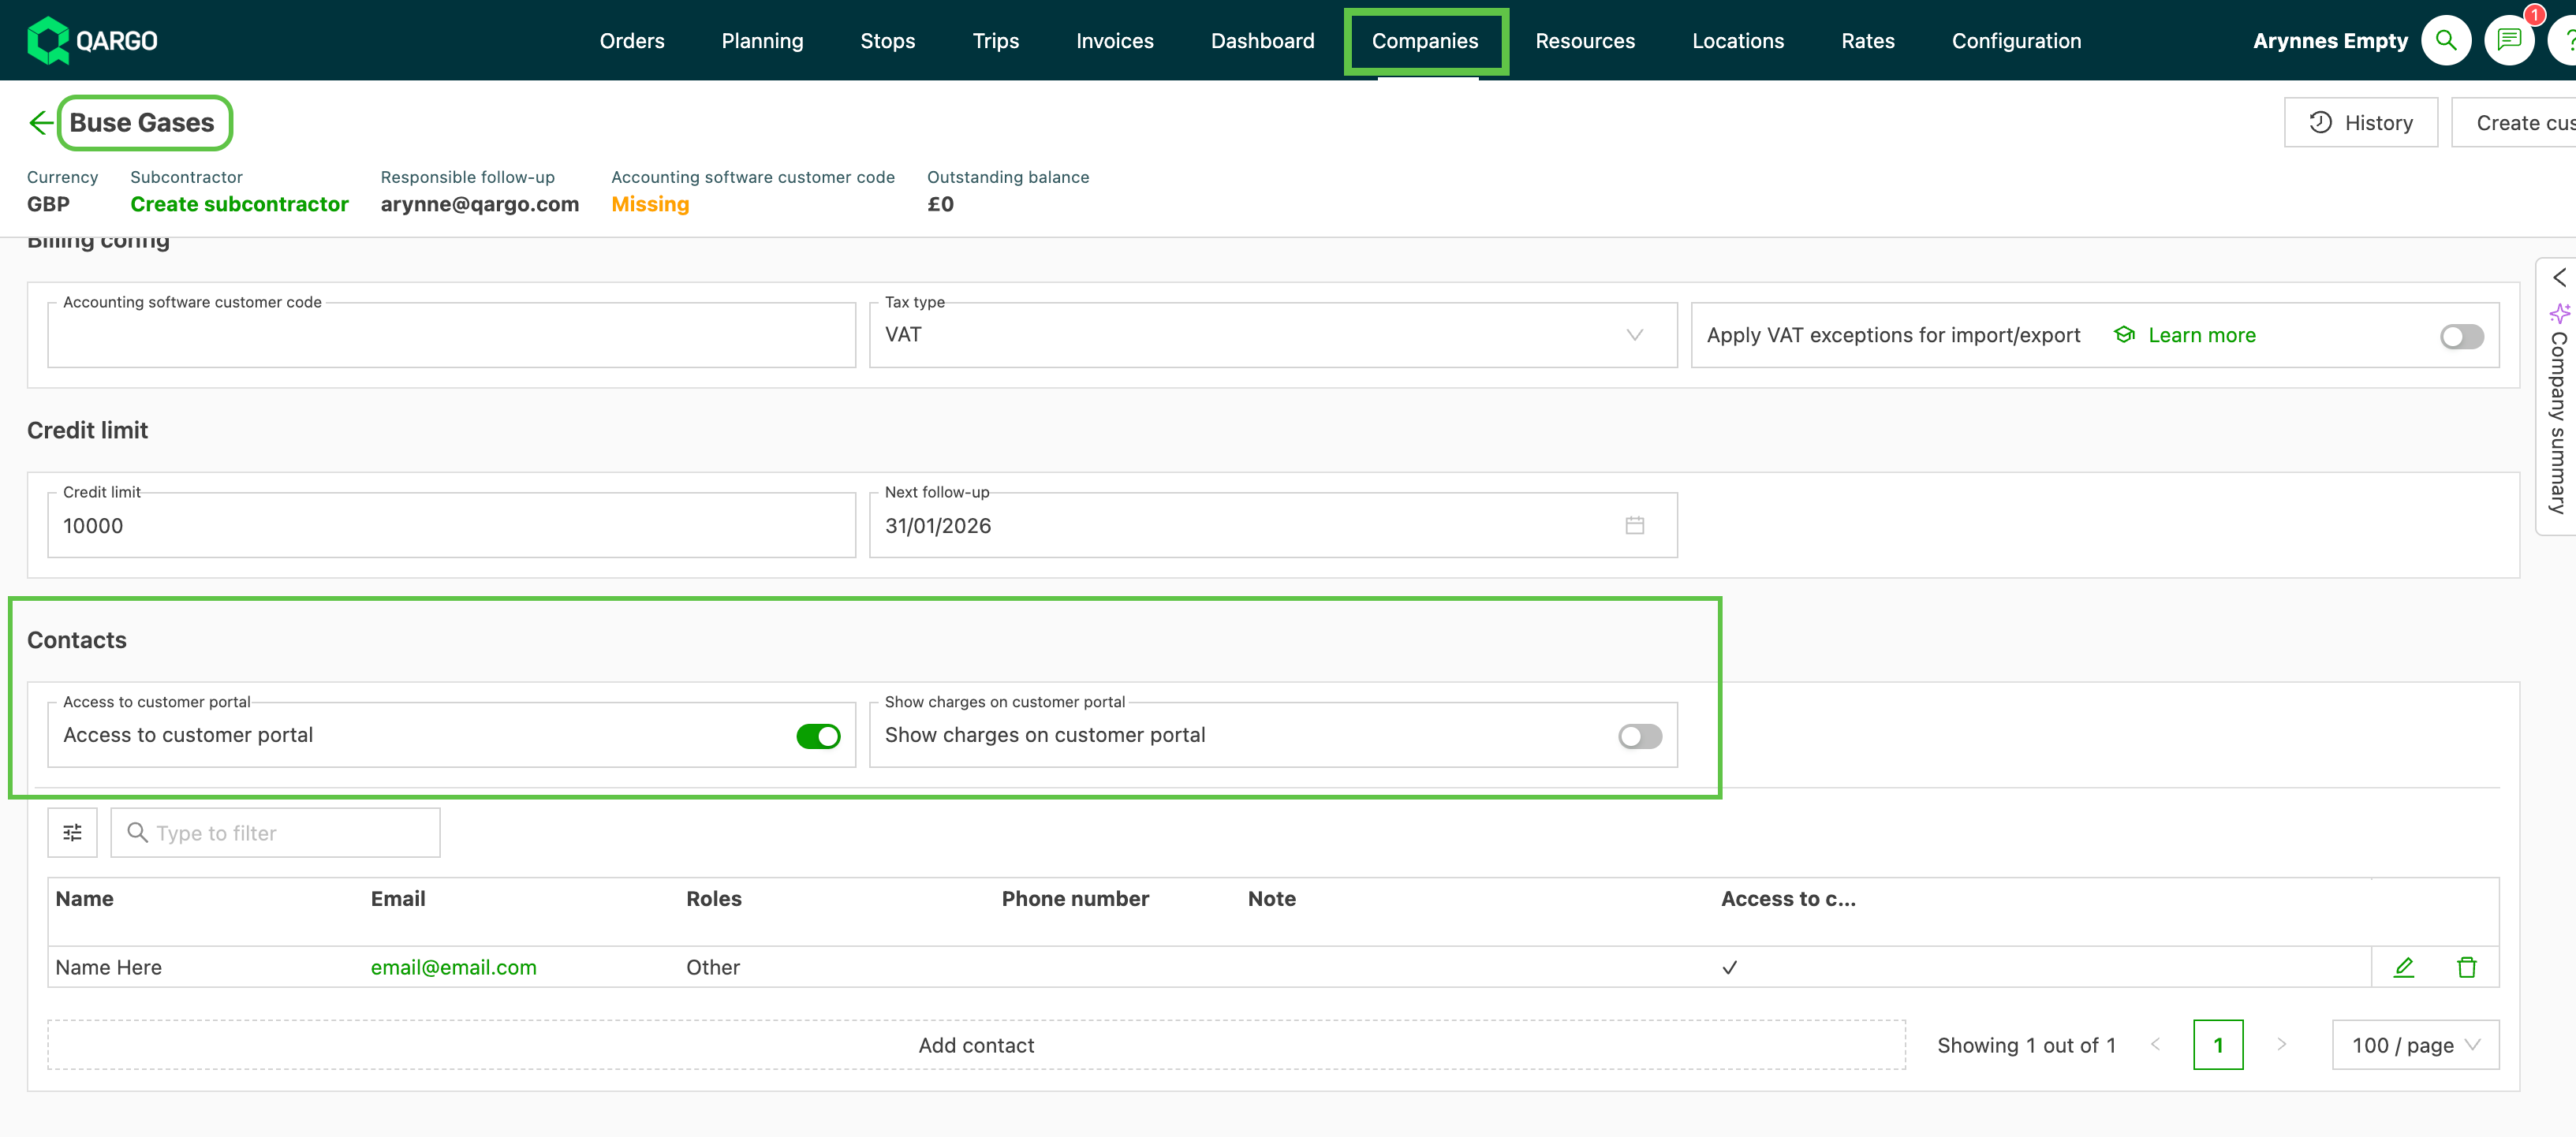
Scroll to the Contacts panel
-
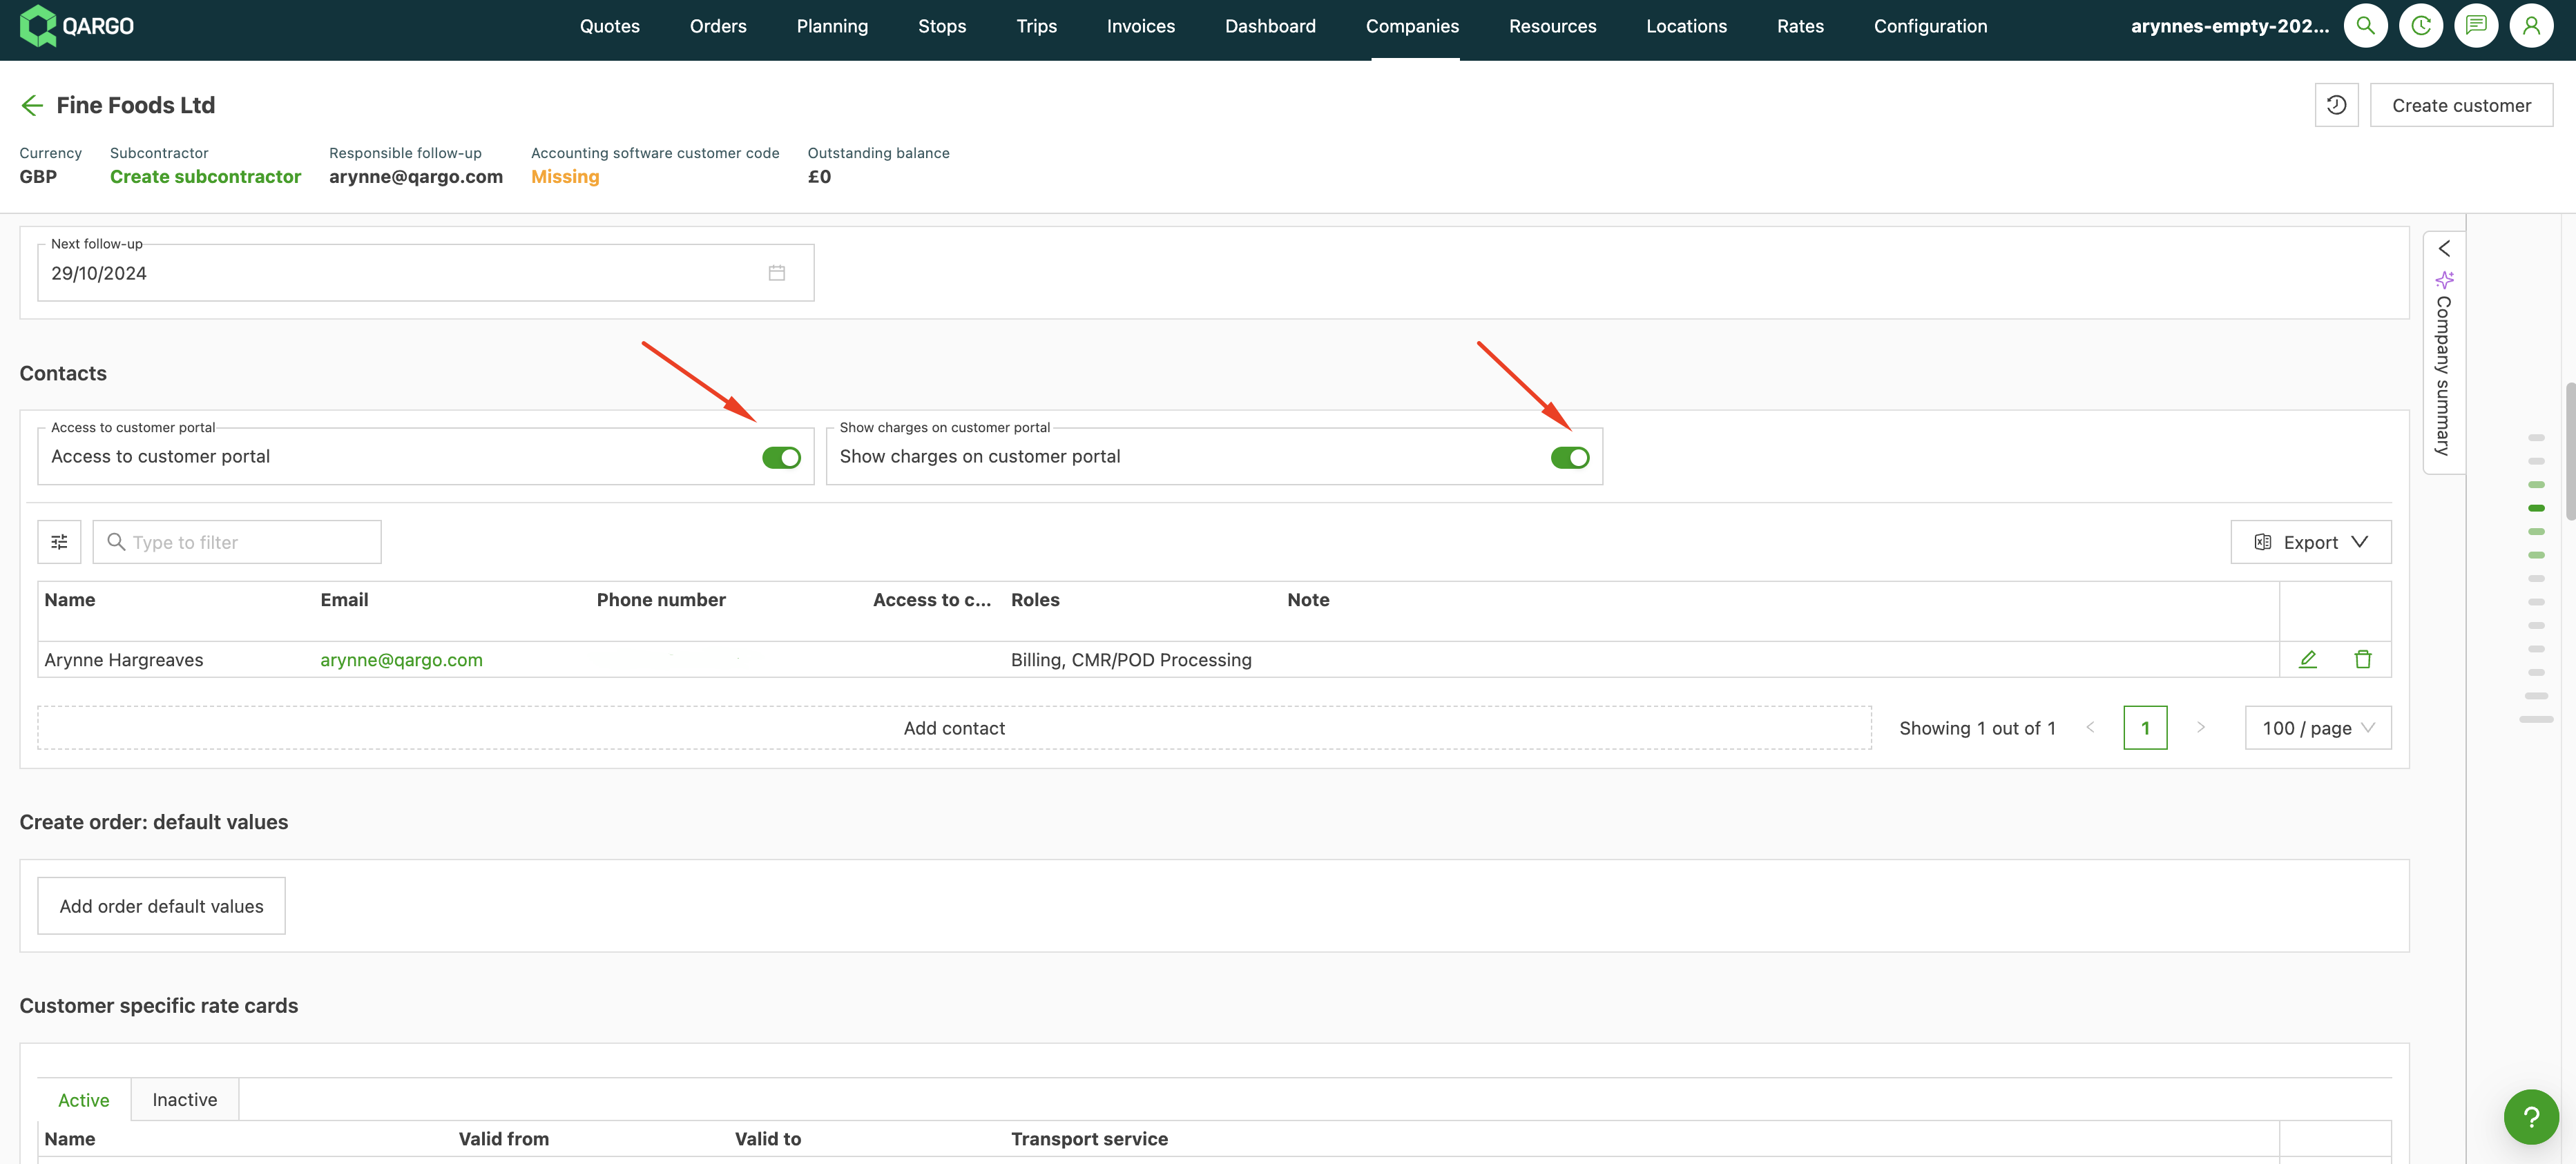
Turn on the Access to customer portal toggle
- To give customers visibility of charges, including approving and rejecting charges, turn on Show charges on customer portal
-
Click Save.
To activate multiple customers at the same time, use the Quick actions function
-
Select the Access to customer portal option under Field*
-
This displays the Access to customer portal toggle; turn it on.
-
Click Save
-
The customer list view now shows checkboxes next to the customer name
- Select the customers to update
- To select all customers, click the first box in the header and all the checkboxes are selected.
-
Click Update details
-
The customer portal is now enabled for the selected customer profiles.
Step 2: Give a user portal access
- User access can be activated via the Contacts panel in the customer profile, or via the Contacts list view if the contact already exists in the customer profile.
From the customer profile:
- Scroll to the Contacts panel in the customer profile
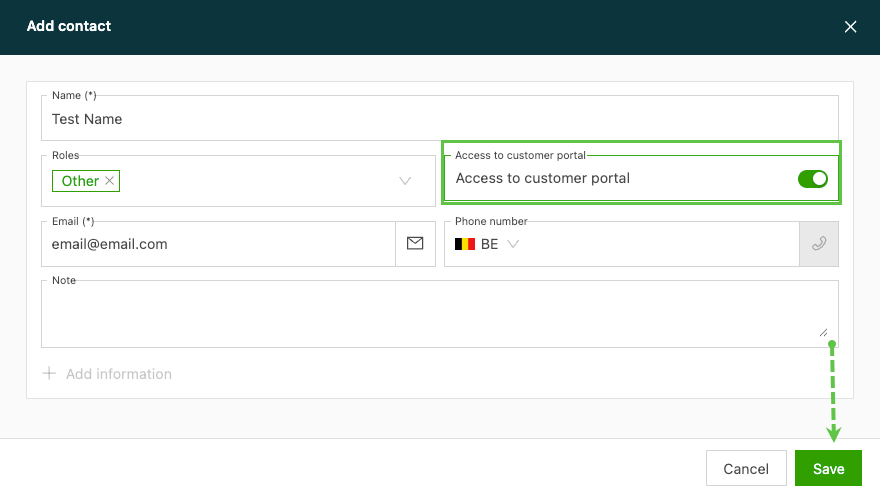
- Click Add contact
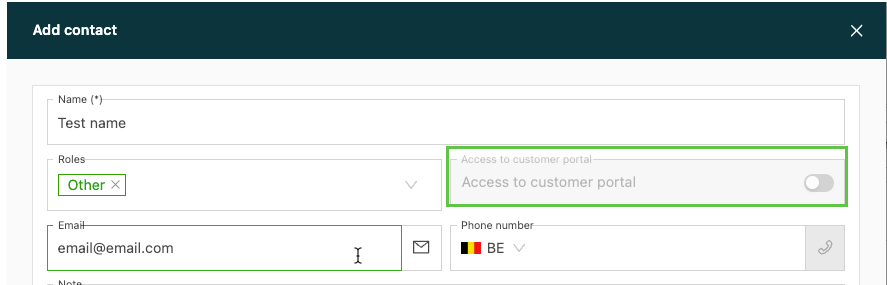
- Enter the contact details, including a valid email
- Turn on the Access to customer portal toggle.
- Click Save
From the contacts list view:
- Navigate to Companies > Contacts
- Click the edit icon next to the contact to update
- Turn on the Access to customer portal toggle.
- Click Save
Accessing the portal
Once the portal is activated, the user receives a one-time email with a link to the Qargo login page.
-
The user enters the registered email and clicks Send login link to receive an email with a secure login link.
- A password can also be used if preferred.
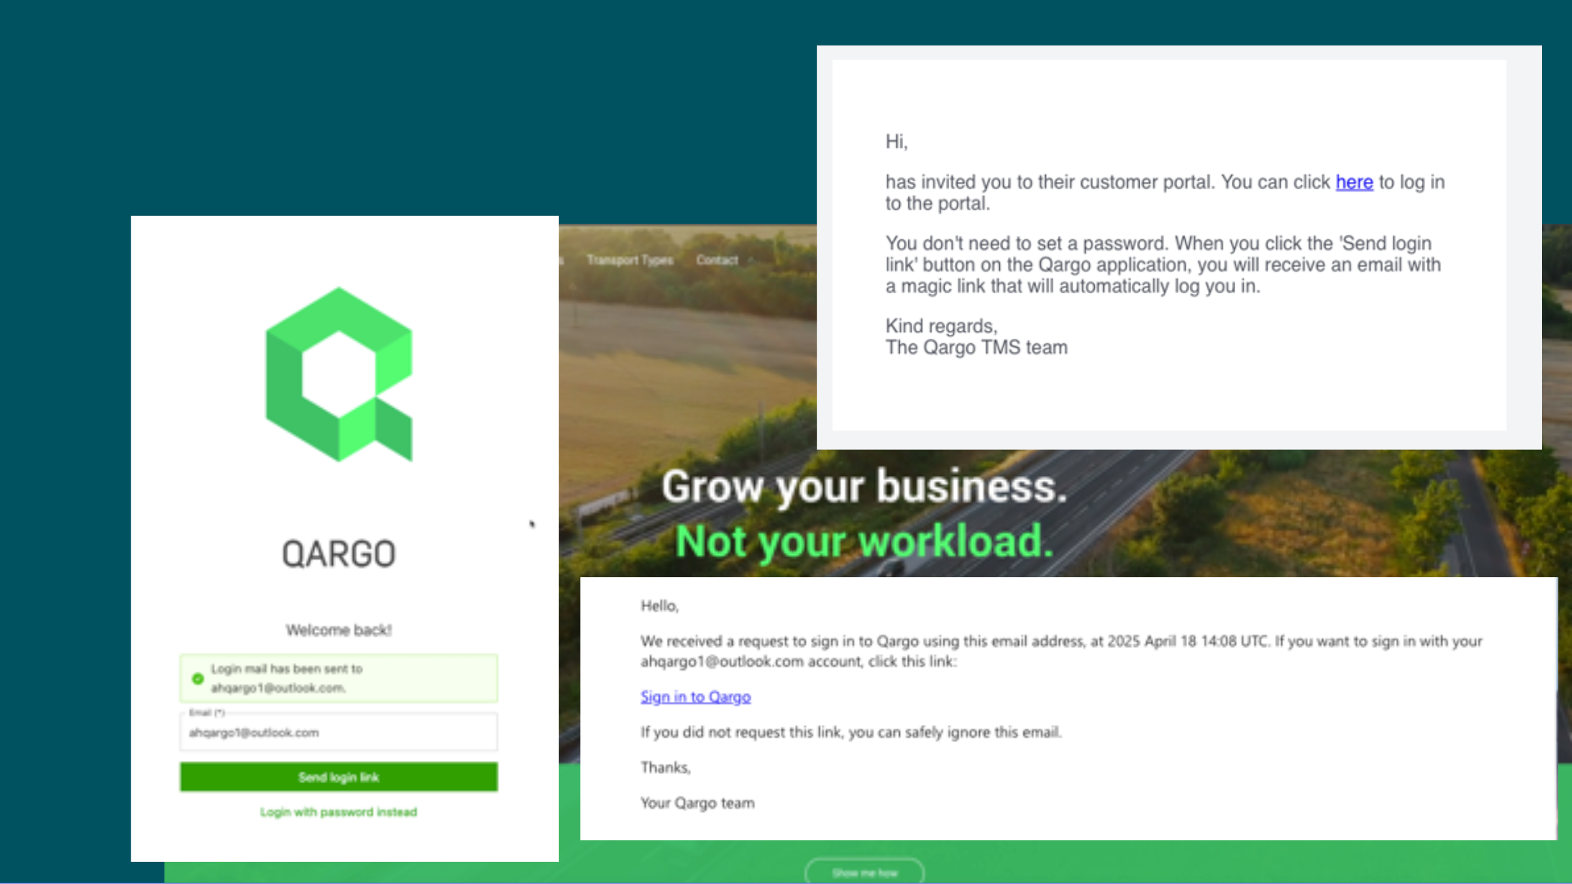
Once users have access, they can:
- Create and submit orders directly to the carrier tenant
- Edit or cancel orders (this needs to be configured first)
- View charges and invoices (once visibility is enabled)
- Review dashboards showing key operational data
- Add and modify location data to use as stops in orders
- Set up printer configuration for easy document printing
Viewing invoices and credit memos
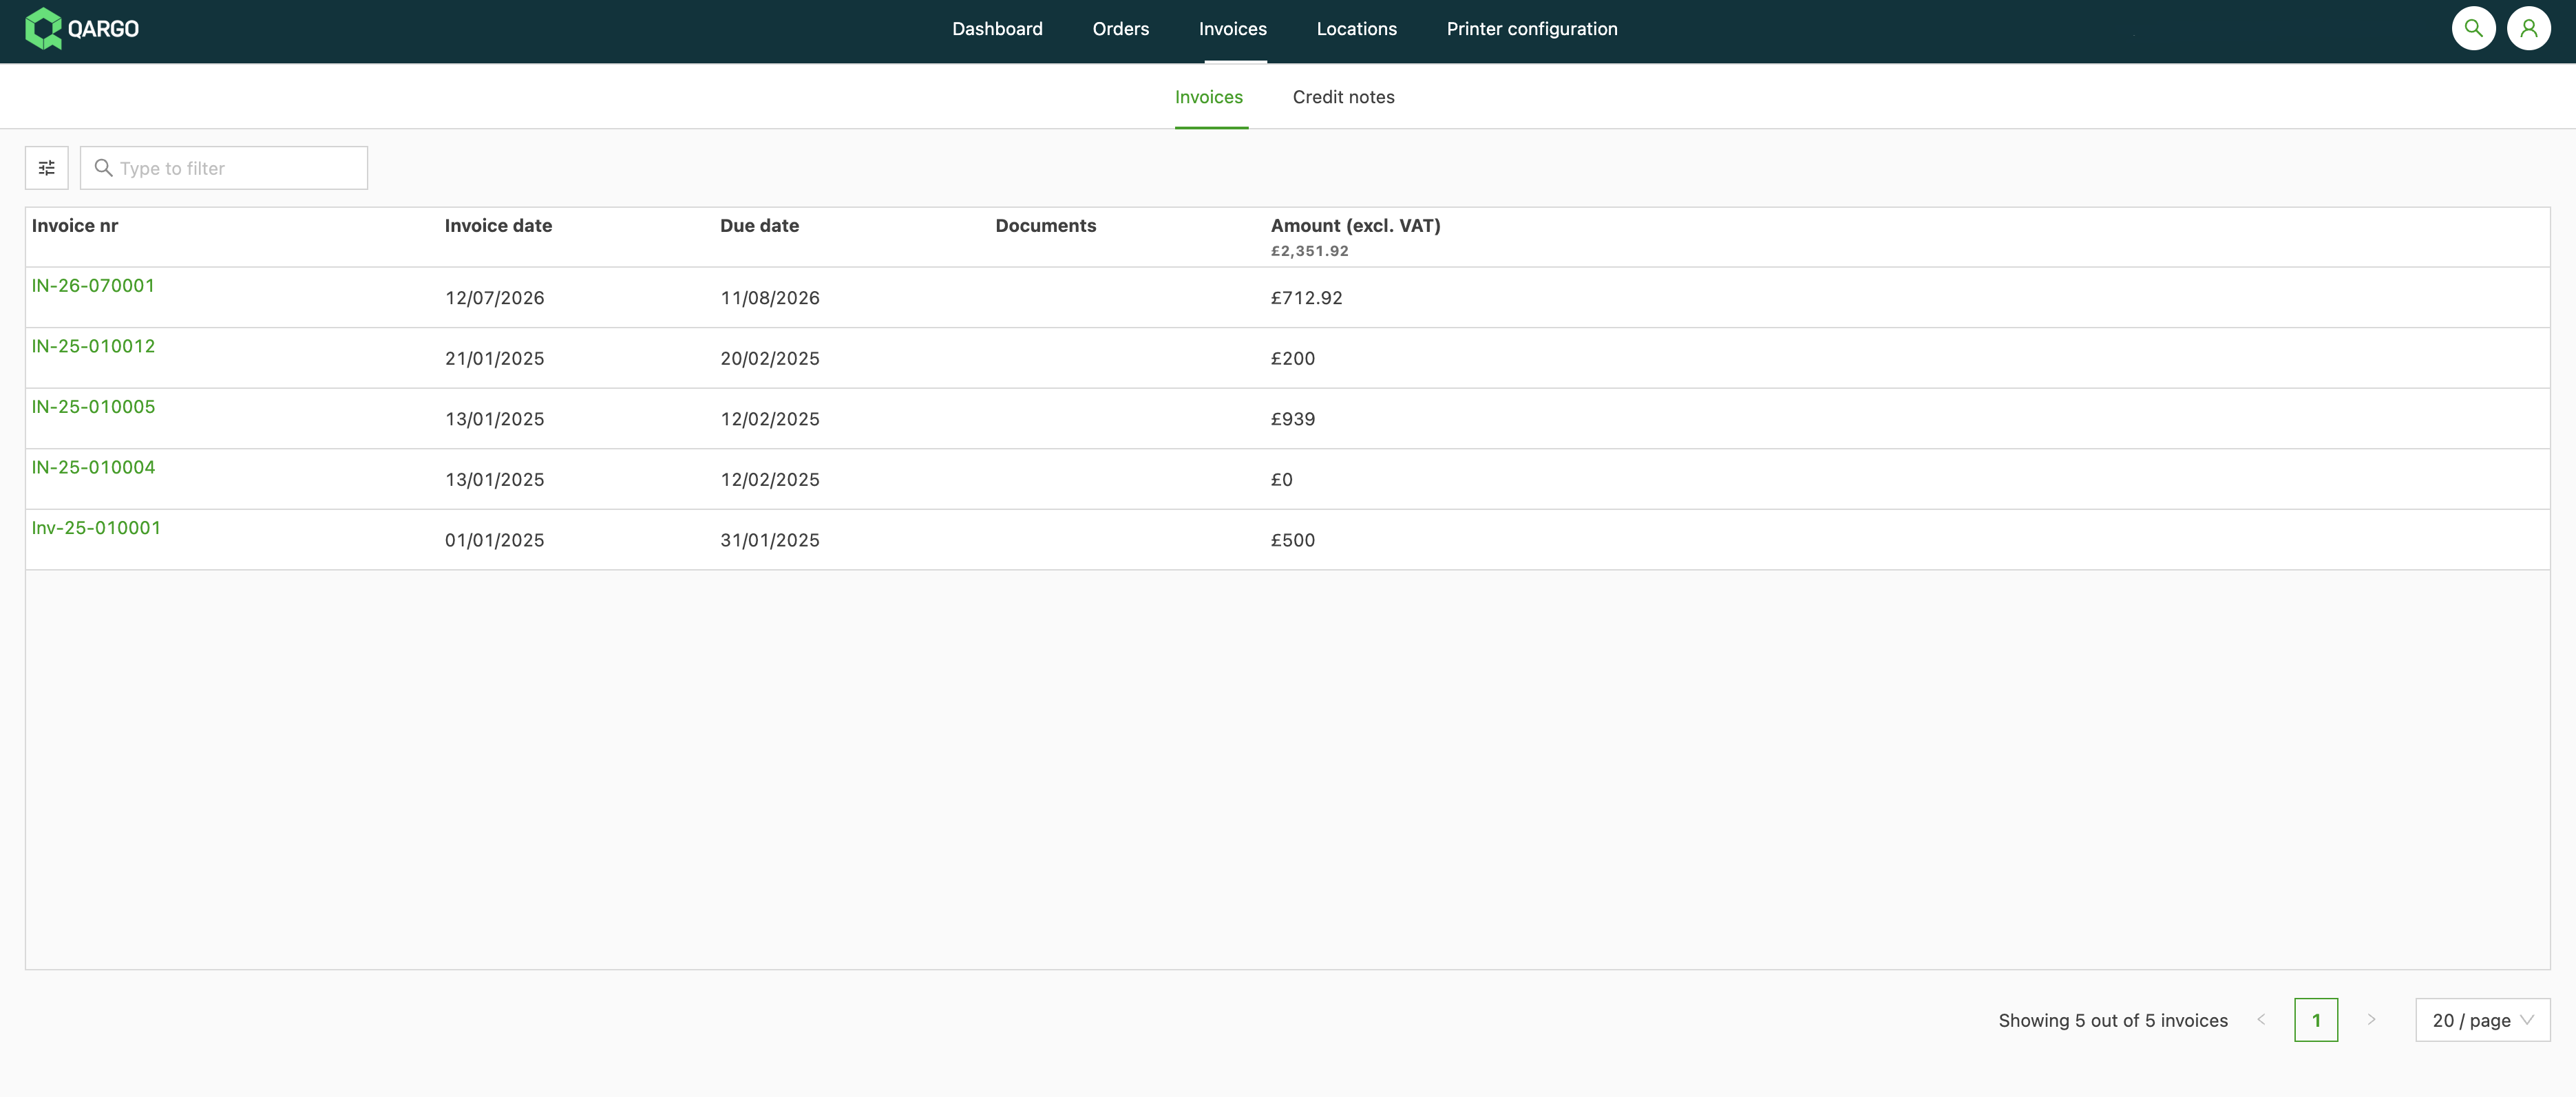
Customers can now view and download invoices and credit memos directly from the customer portal, with no need to contact the operations team.
Prerequisites
A Super Admin must complete all three steps before the Invoices tab is visible to the customer:
- Portal access must be enabled on the customer record.
- The Show charges on customer portal toggle must be enabled on the customer record.
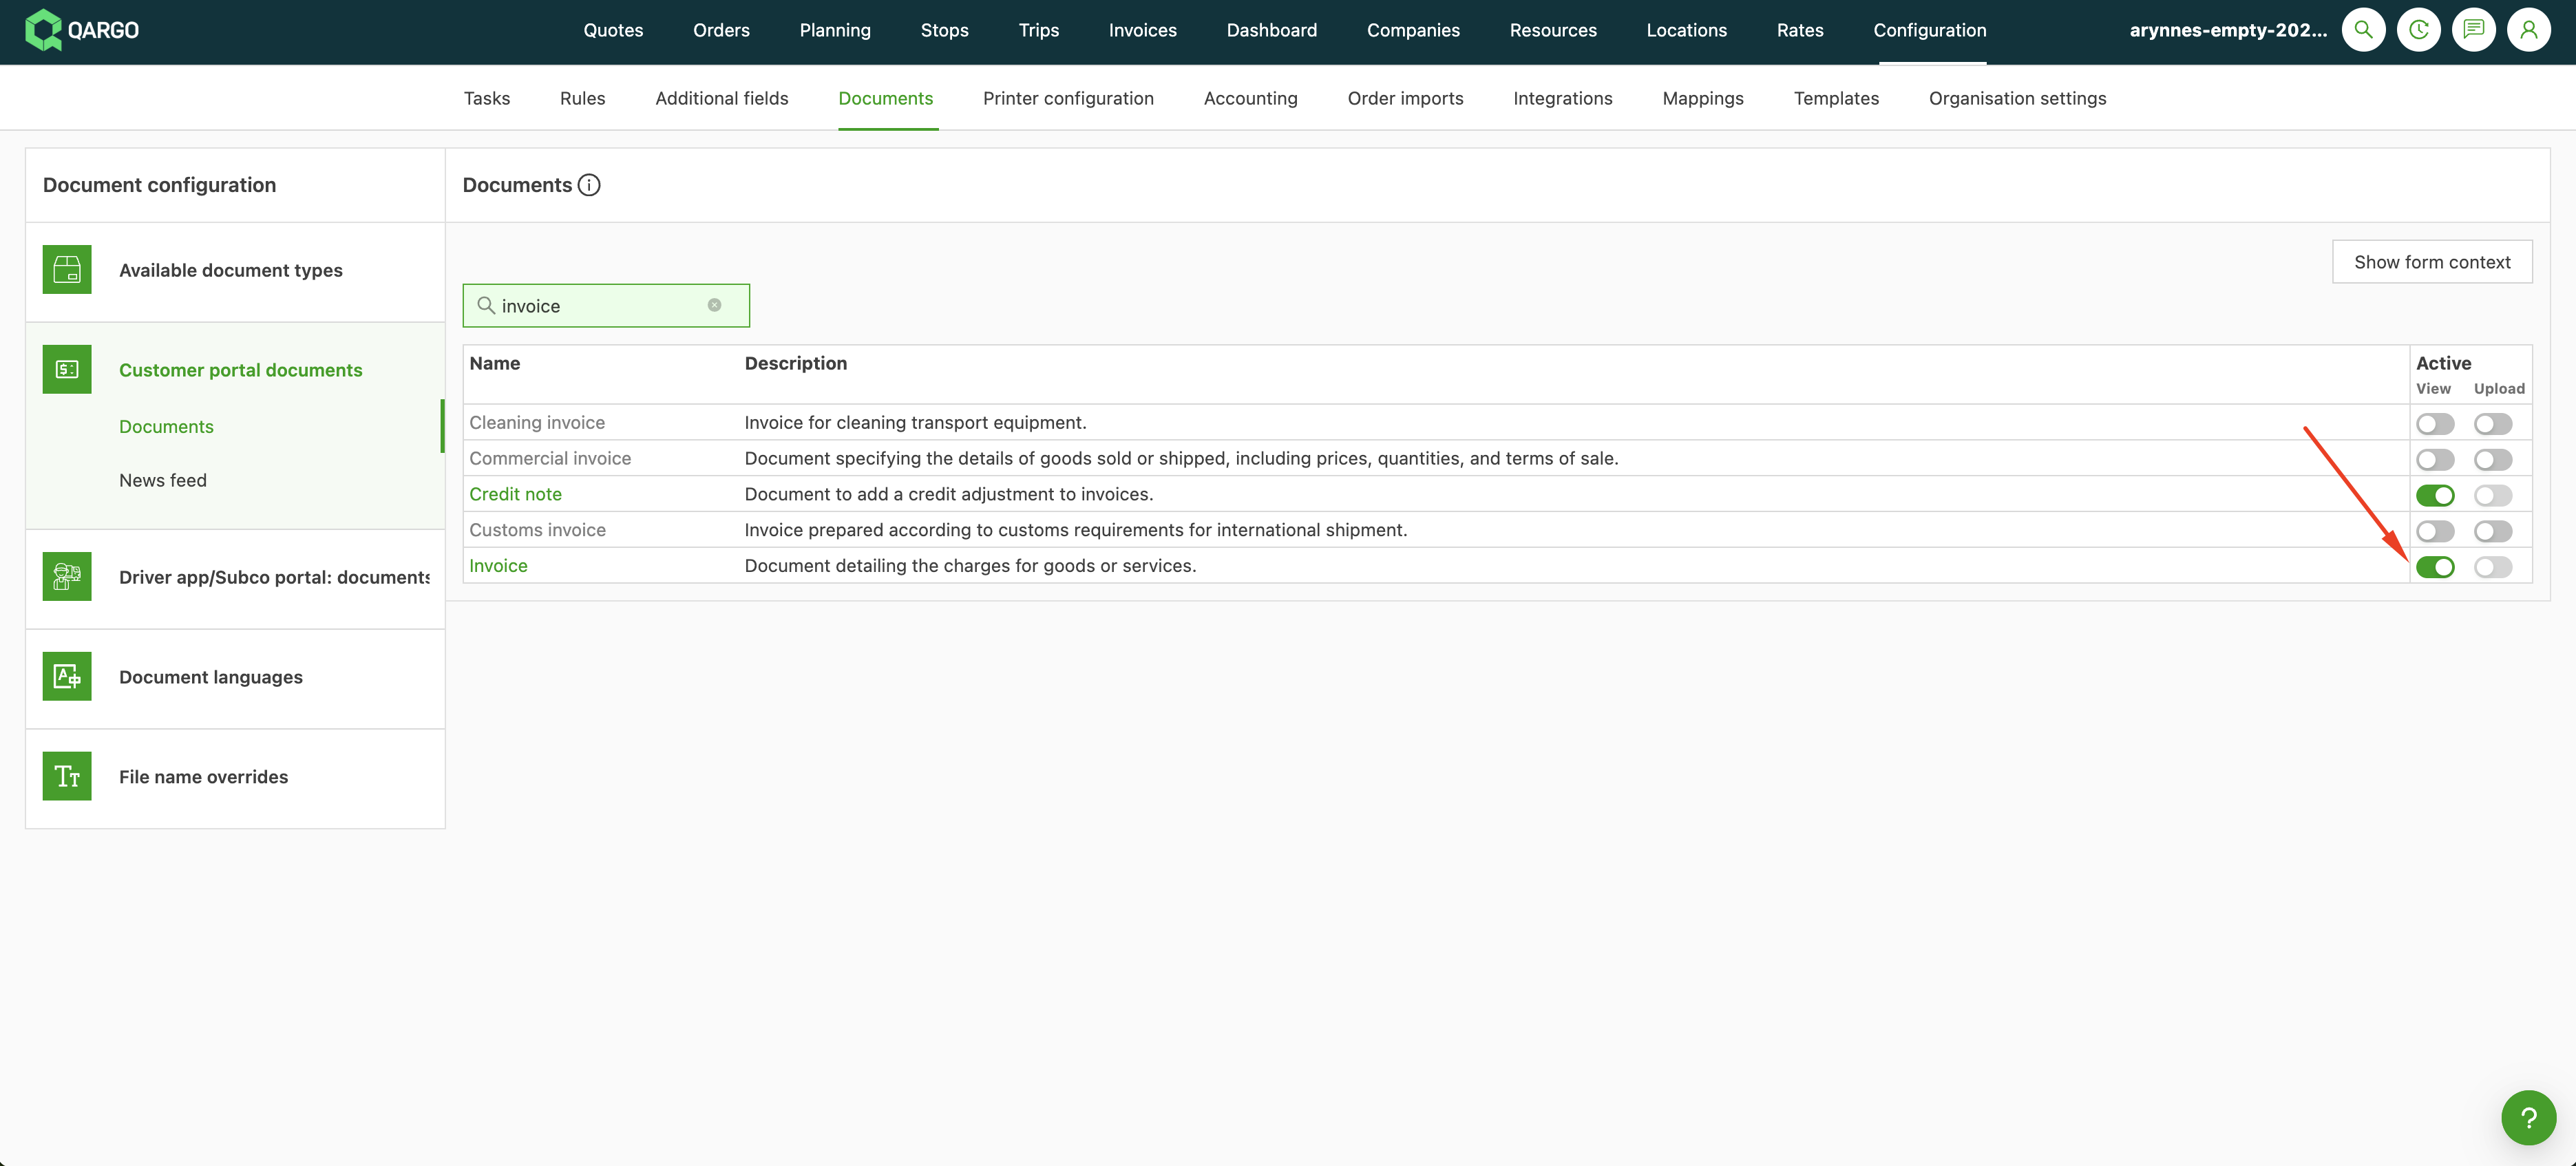
- The Invoice and Credit memo document types must be set to visible in Configuration > Documents configuration.
Use cases
- A customer downloads a PDF copy of their latest invoice without contacting the operations team.
- A finance contact reviews the charge breakdown before approving payment.
- A customer has a question about a credit memo and views the line-item detail directly in the portal.
How to enable invoice visibility (admin)
-
Navigate to the customer record in Customers.
-
Confirm that portal access is enabled for this customer.
-
Enable the Show charges on customer portal toggle.
-
Navigate to Configuration > Documents configuration.
-
Confirm that the Invoice and Credit memo document types are set to visible.
The Invoices tab appears in the customer portal at the next login.
Configure the dashboard statistics and time at stop
Use cases
- Full-load and container operators want portal users to land on a clean orders view, because separate pickup and delivery dials add confusion when an order is effectively one load.
- Network freight operators do not record stop times, so the time-at-stop figure is meaningless and is better hidden.
- Operators who want a single figure per order can switch to total-per-order statistics instead of separate pickup and delivery dials.
Open the customer portal dashboard settings
- Navigate to Configuration > Organization settings > Tenant > Customer portal.
- Find the Customer portal dashboard section.
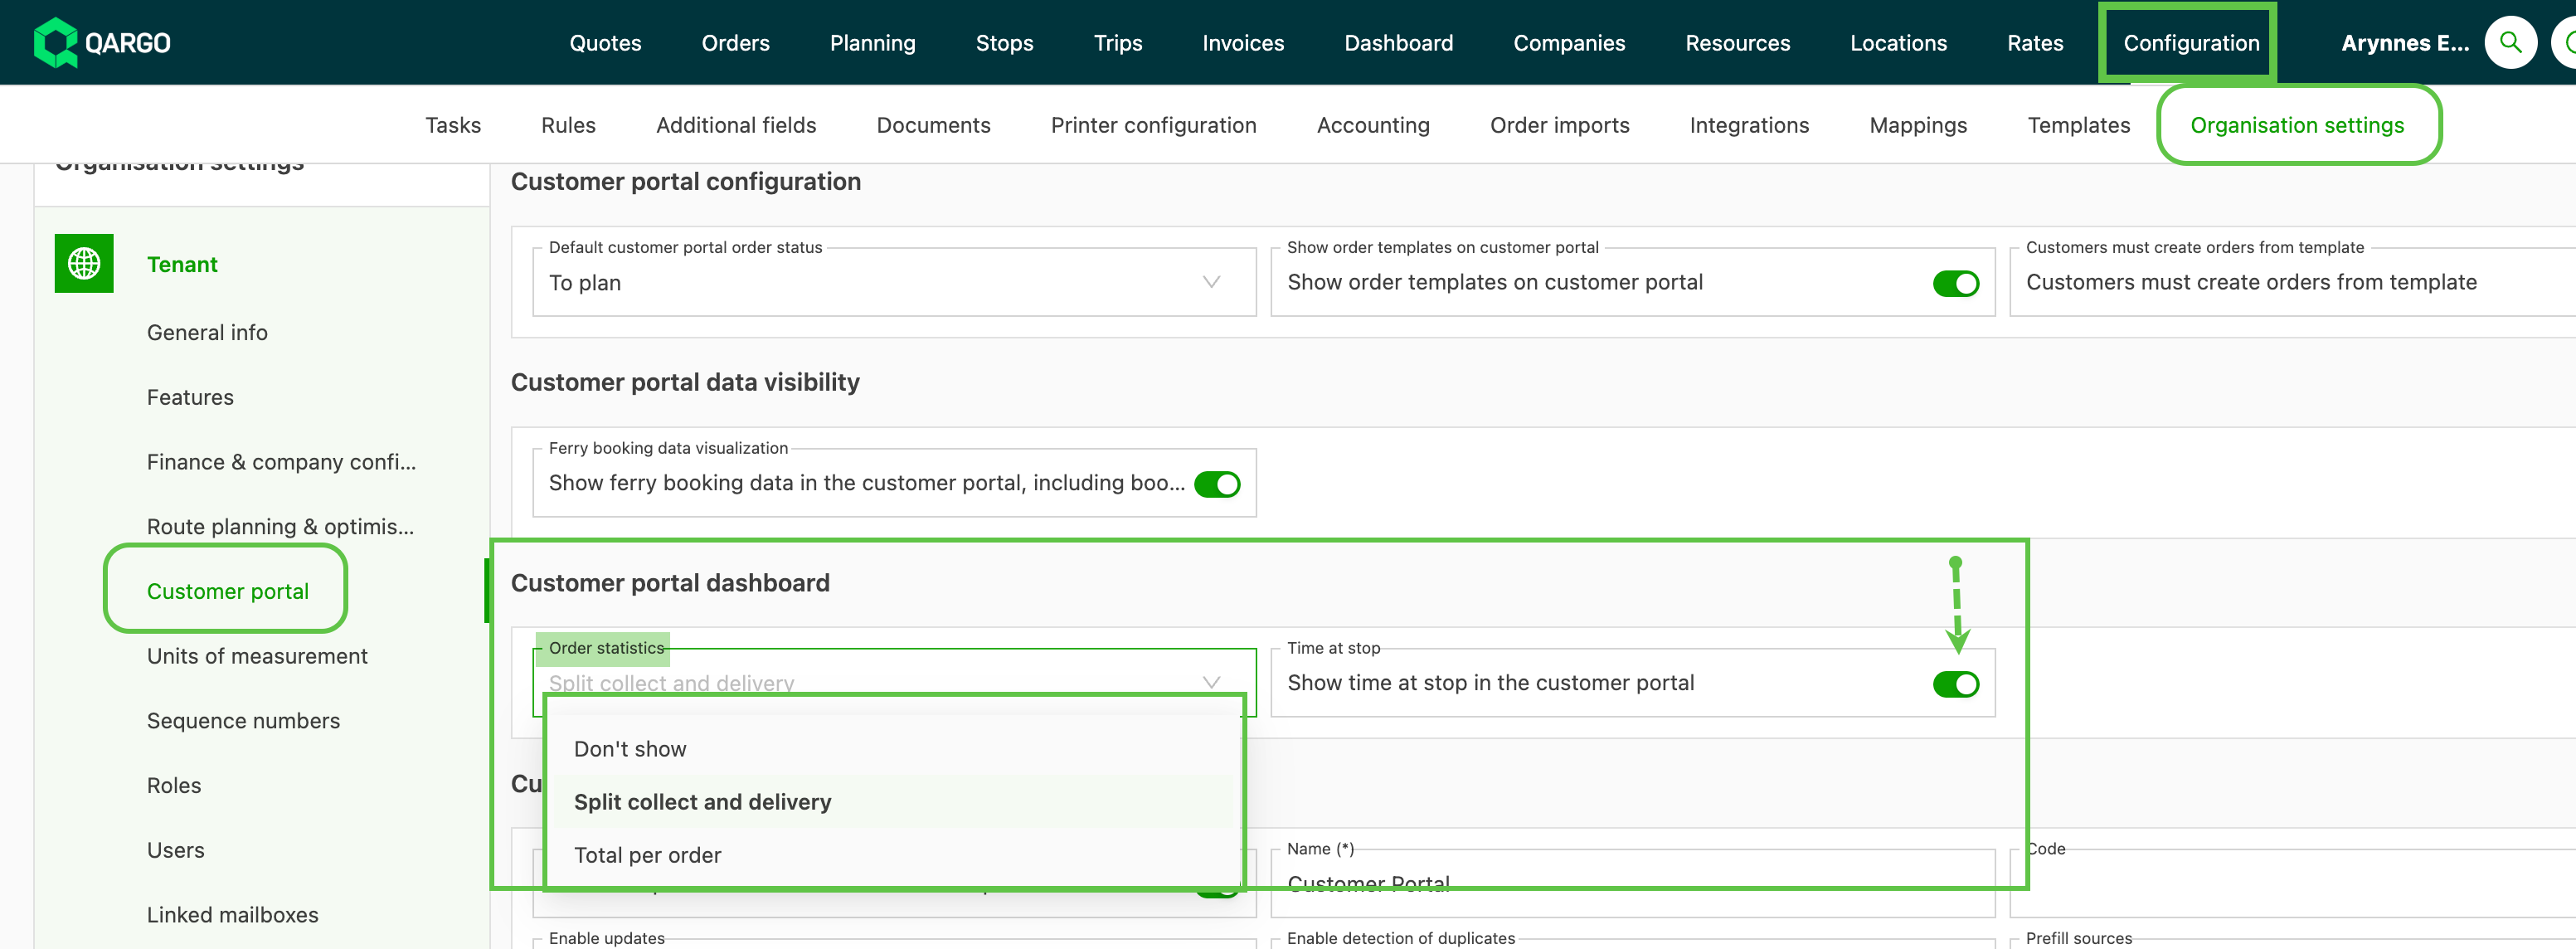
- The default settings are Order statistics: Split pickup and delivery, with the Time at stop toggle on.
Choose how statistics are shown
-
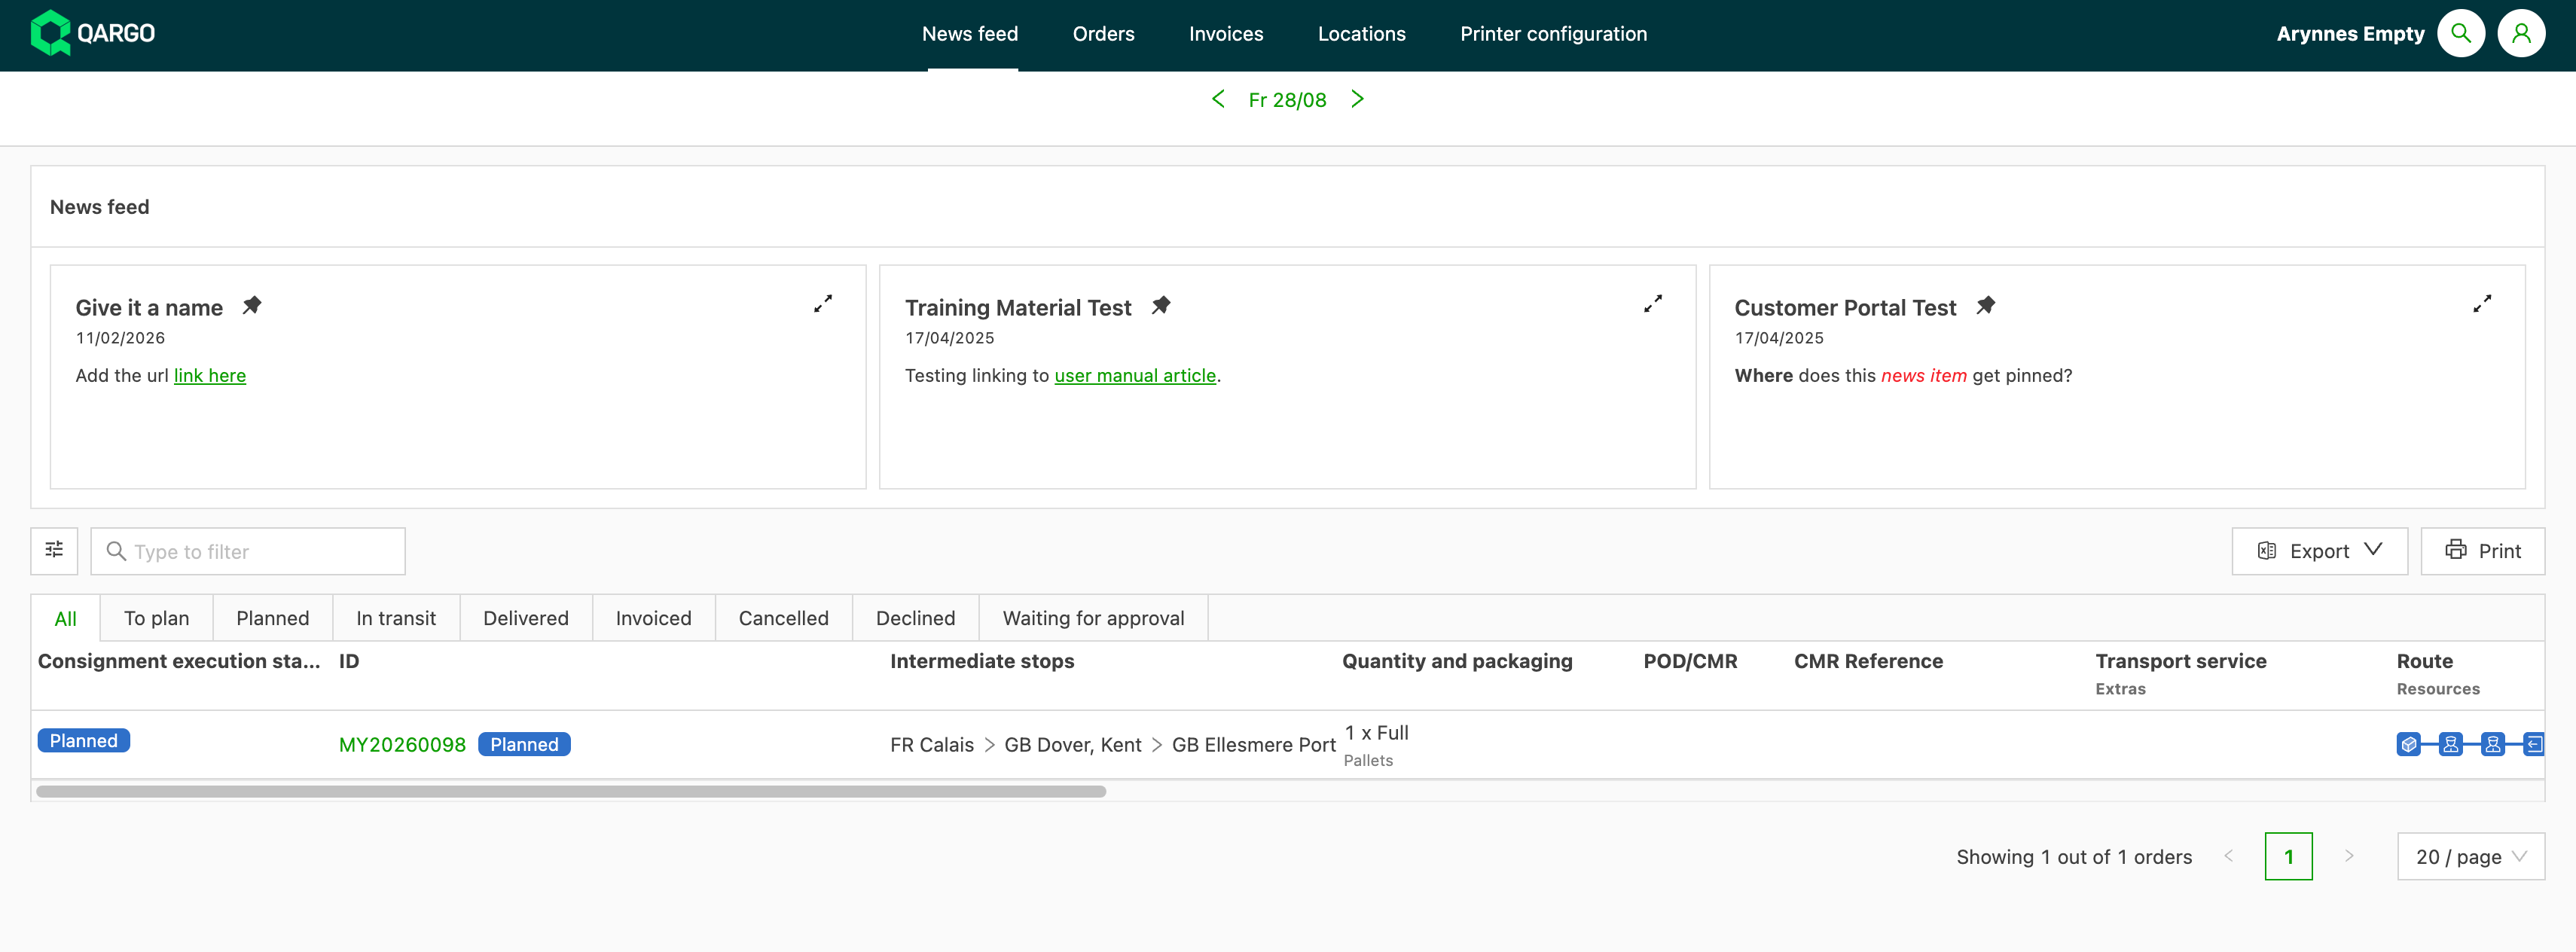
Set Order statistics to Don’t show. When this is set, all dashboard statistics are hidden, only the news feed remains, and the Dashboard tab is renamed News feed.
-
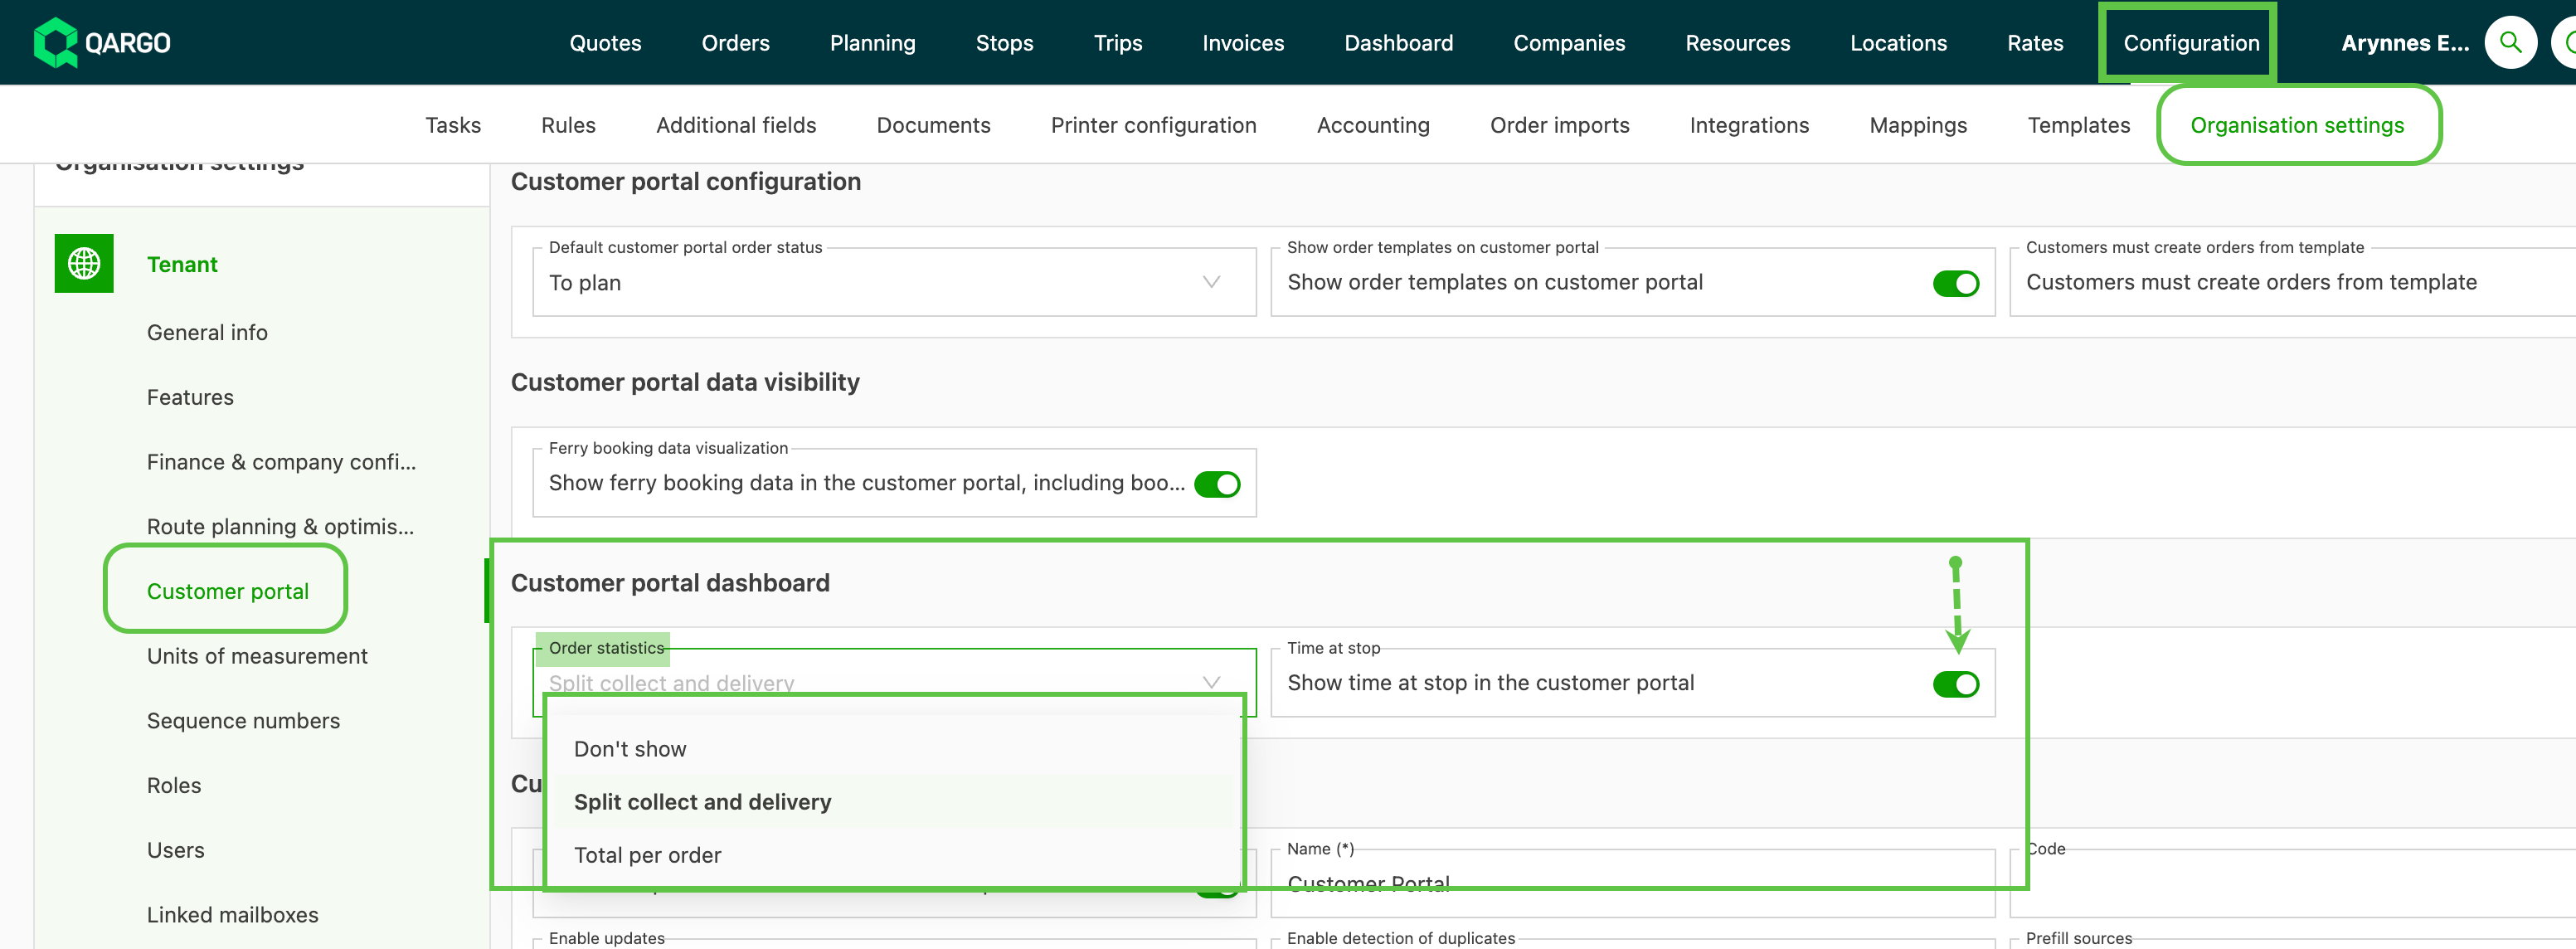
Select an option in the Pickup and delivery statistics dropdown:
-
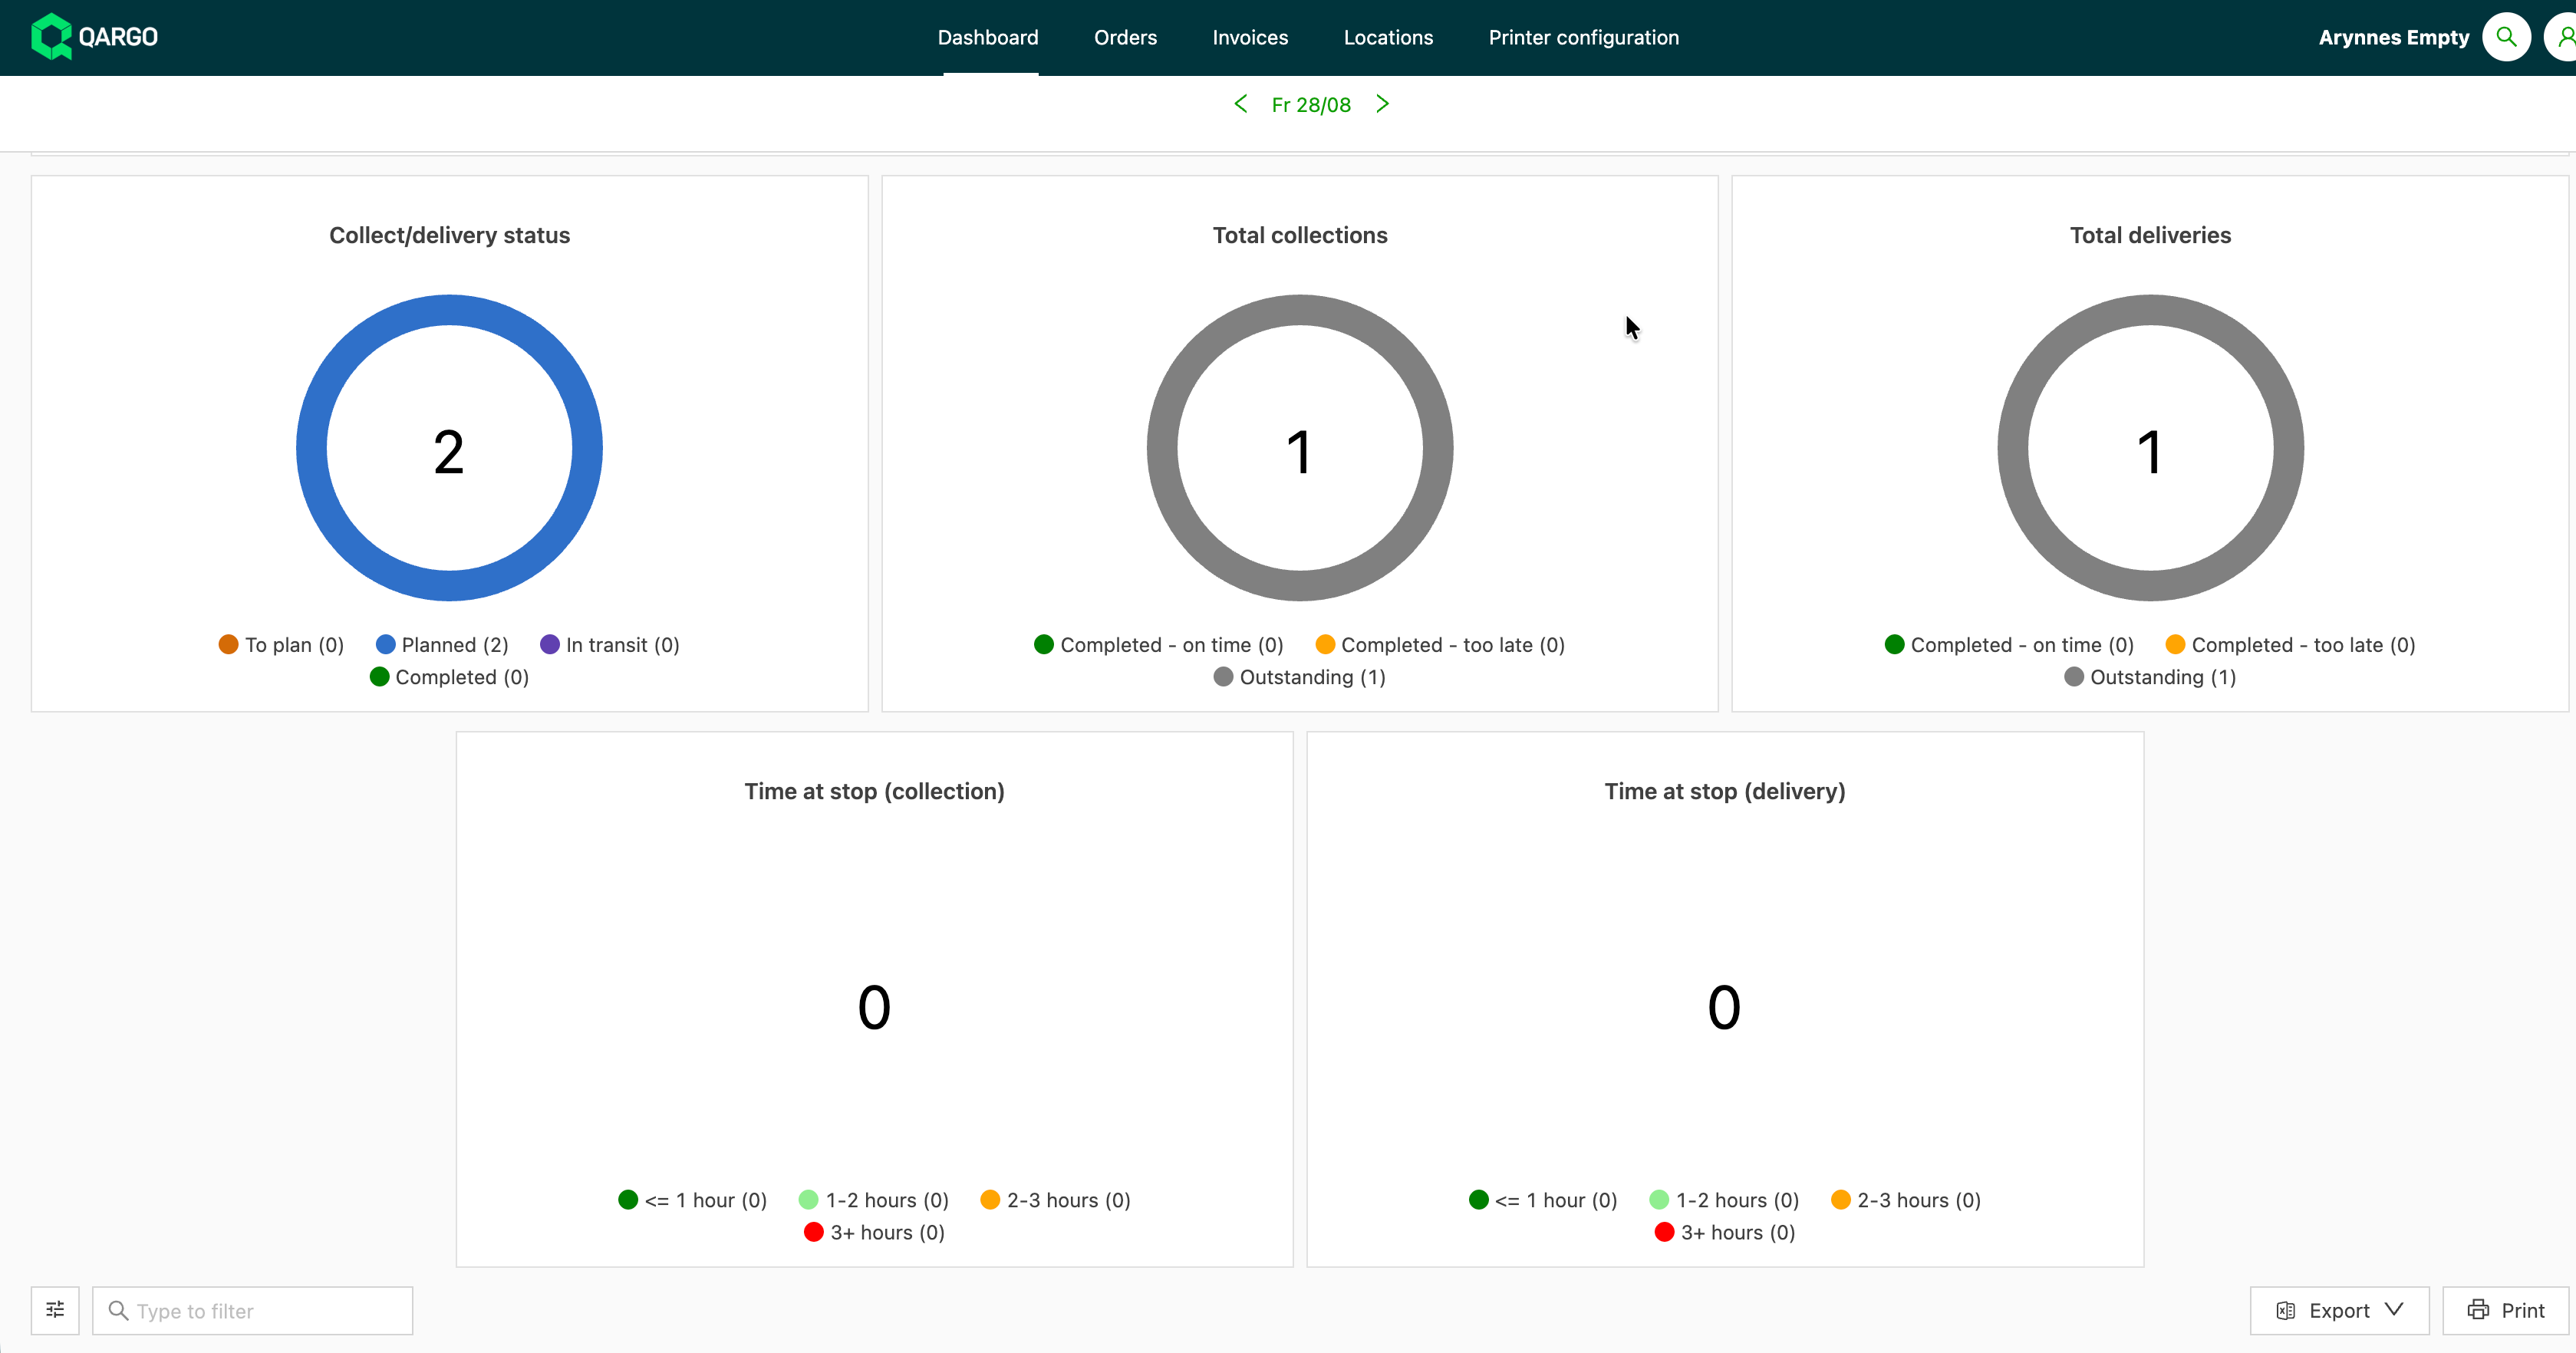
Split pickup and delivery statistics (the default): one dial per status for pickup and one for delivery.
-
Total per order statistics: a single dial per status that counts each order once instead of adding up its pickup and delivery stops, so the dials match the number of orders a portal user actually has.
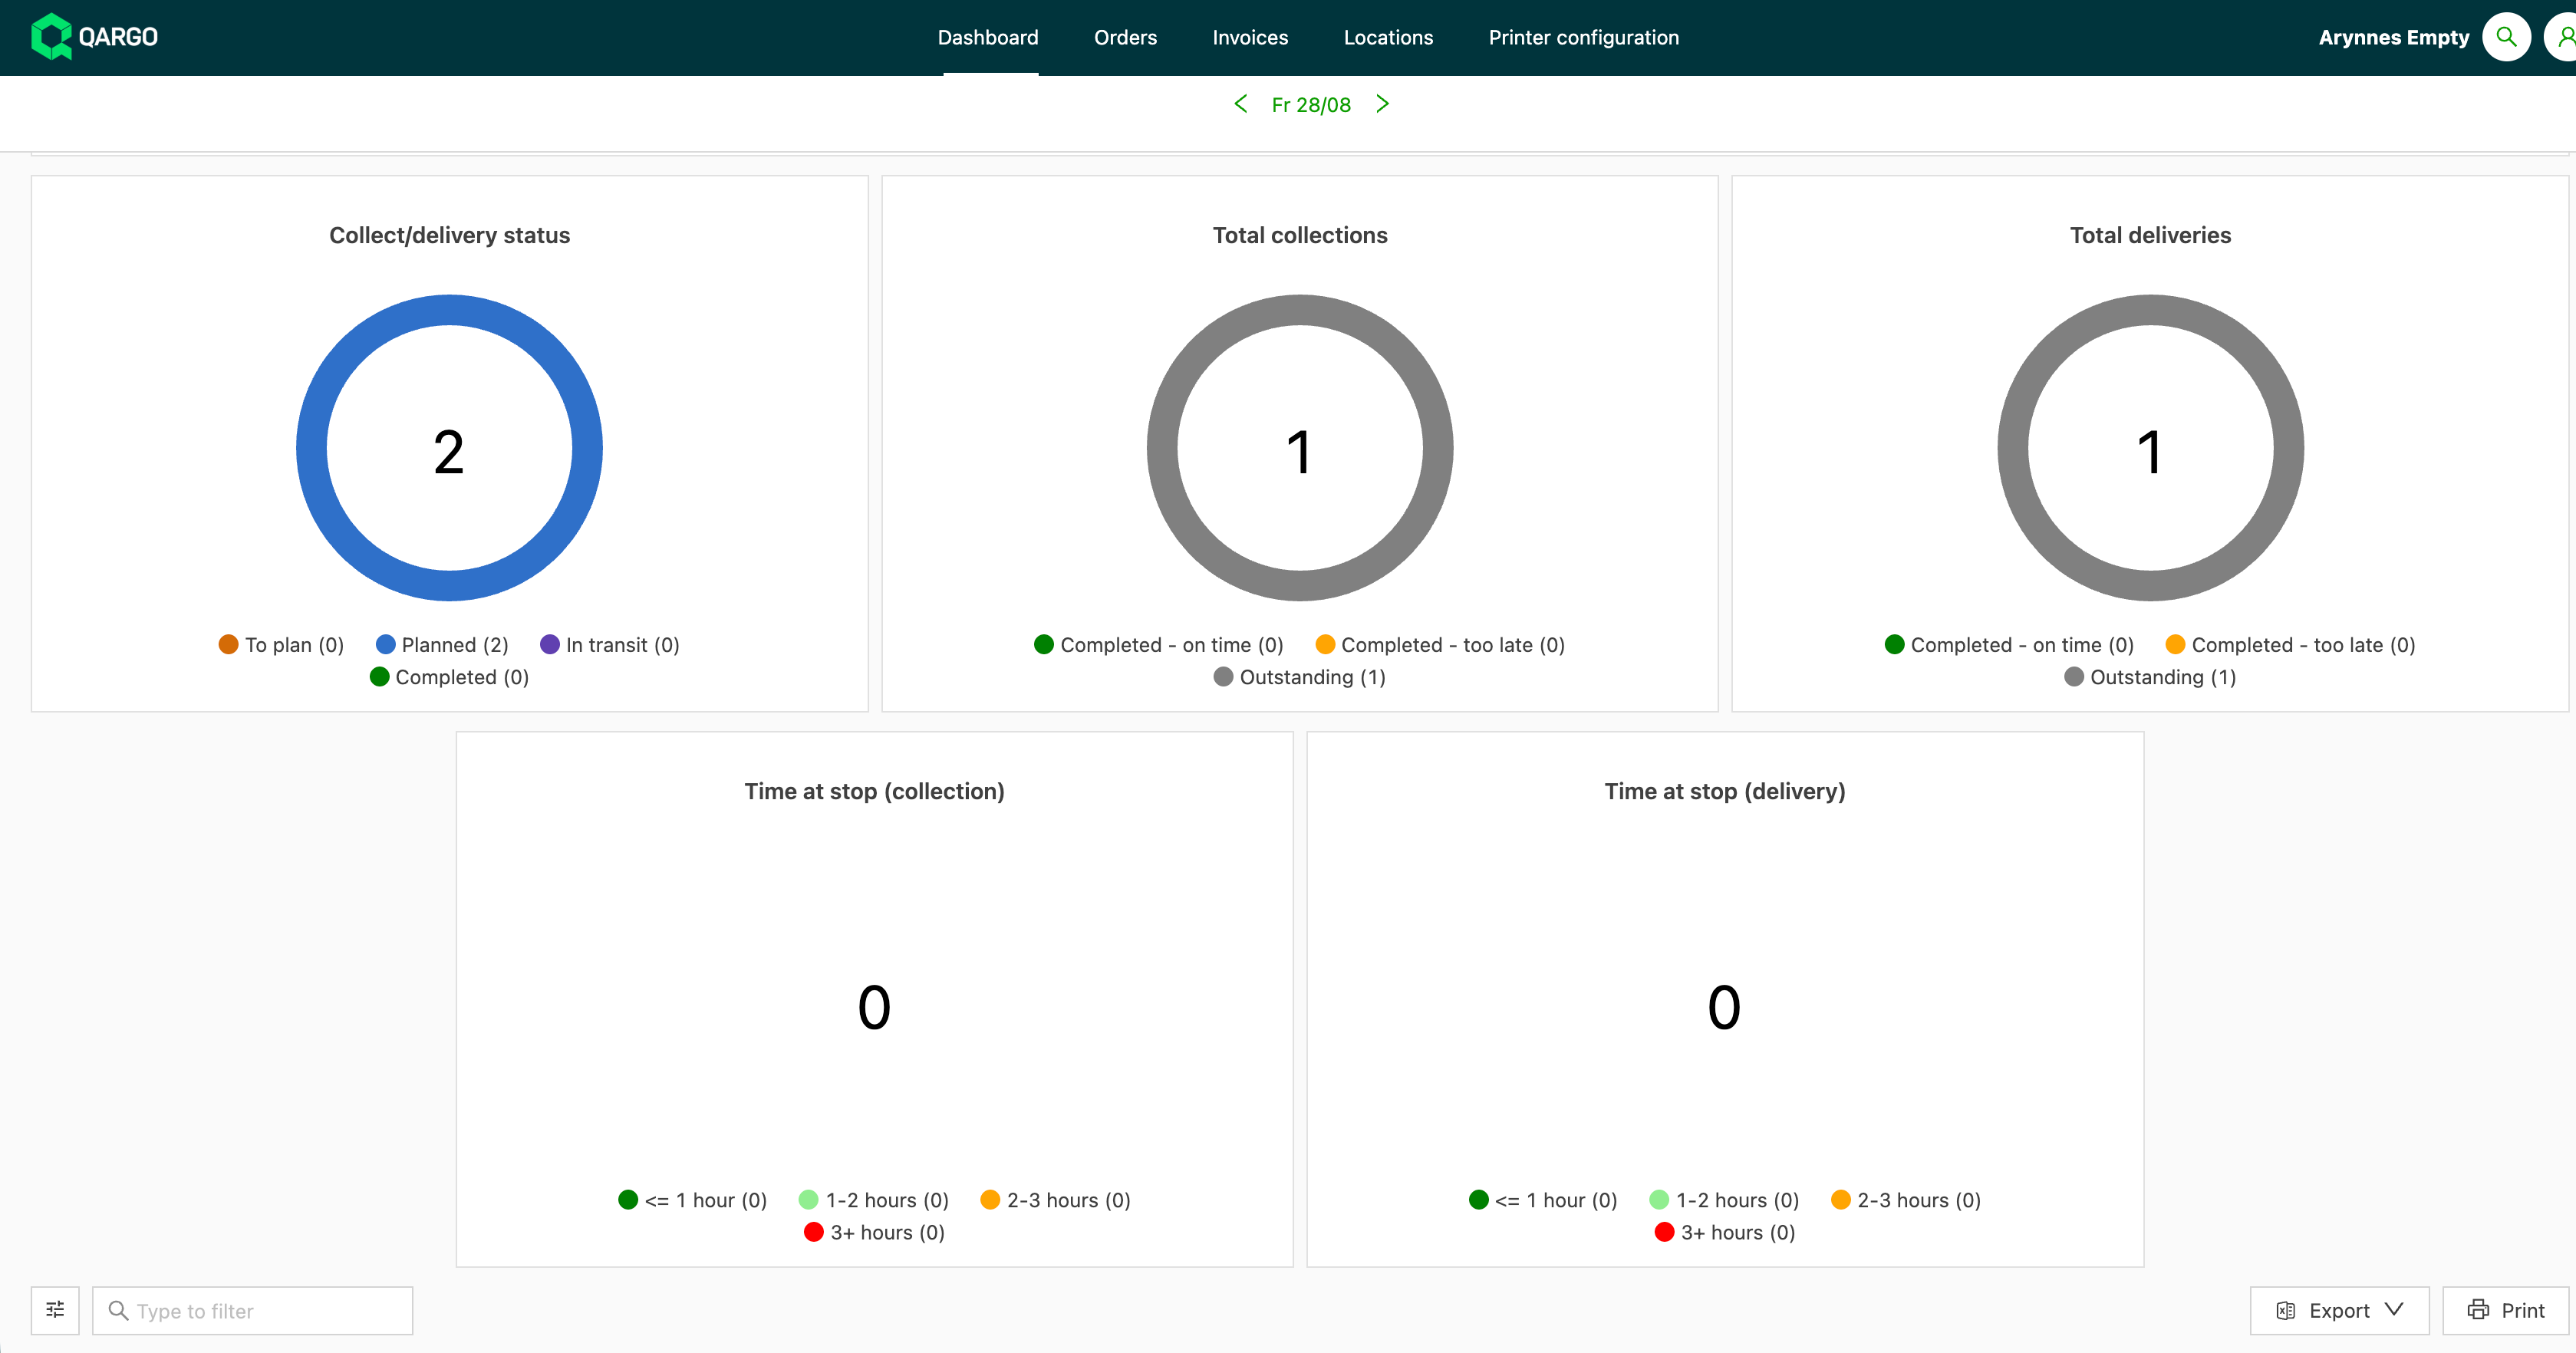
-
-
Select an option in the Time at stop dropdown:
-
Show time at stop (the default): the time-at-stop figure is displayed on the dashboard.
-
Hide time at stop: the time-at-stop figure is removed from the dashboard.
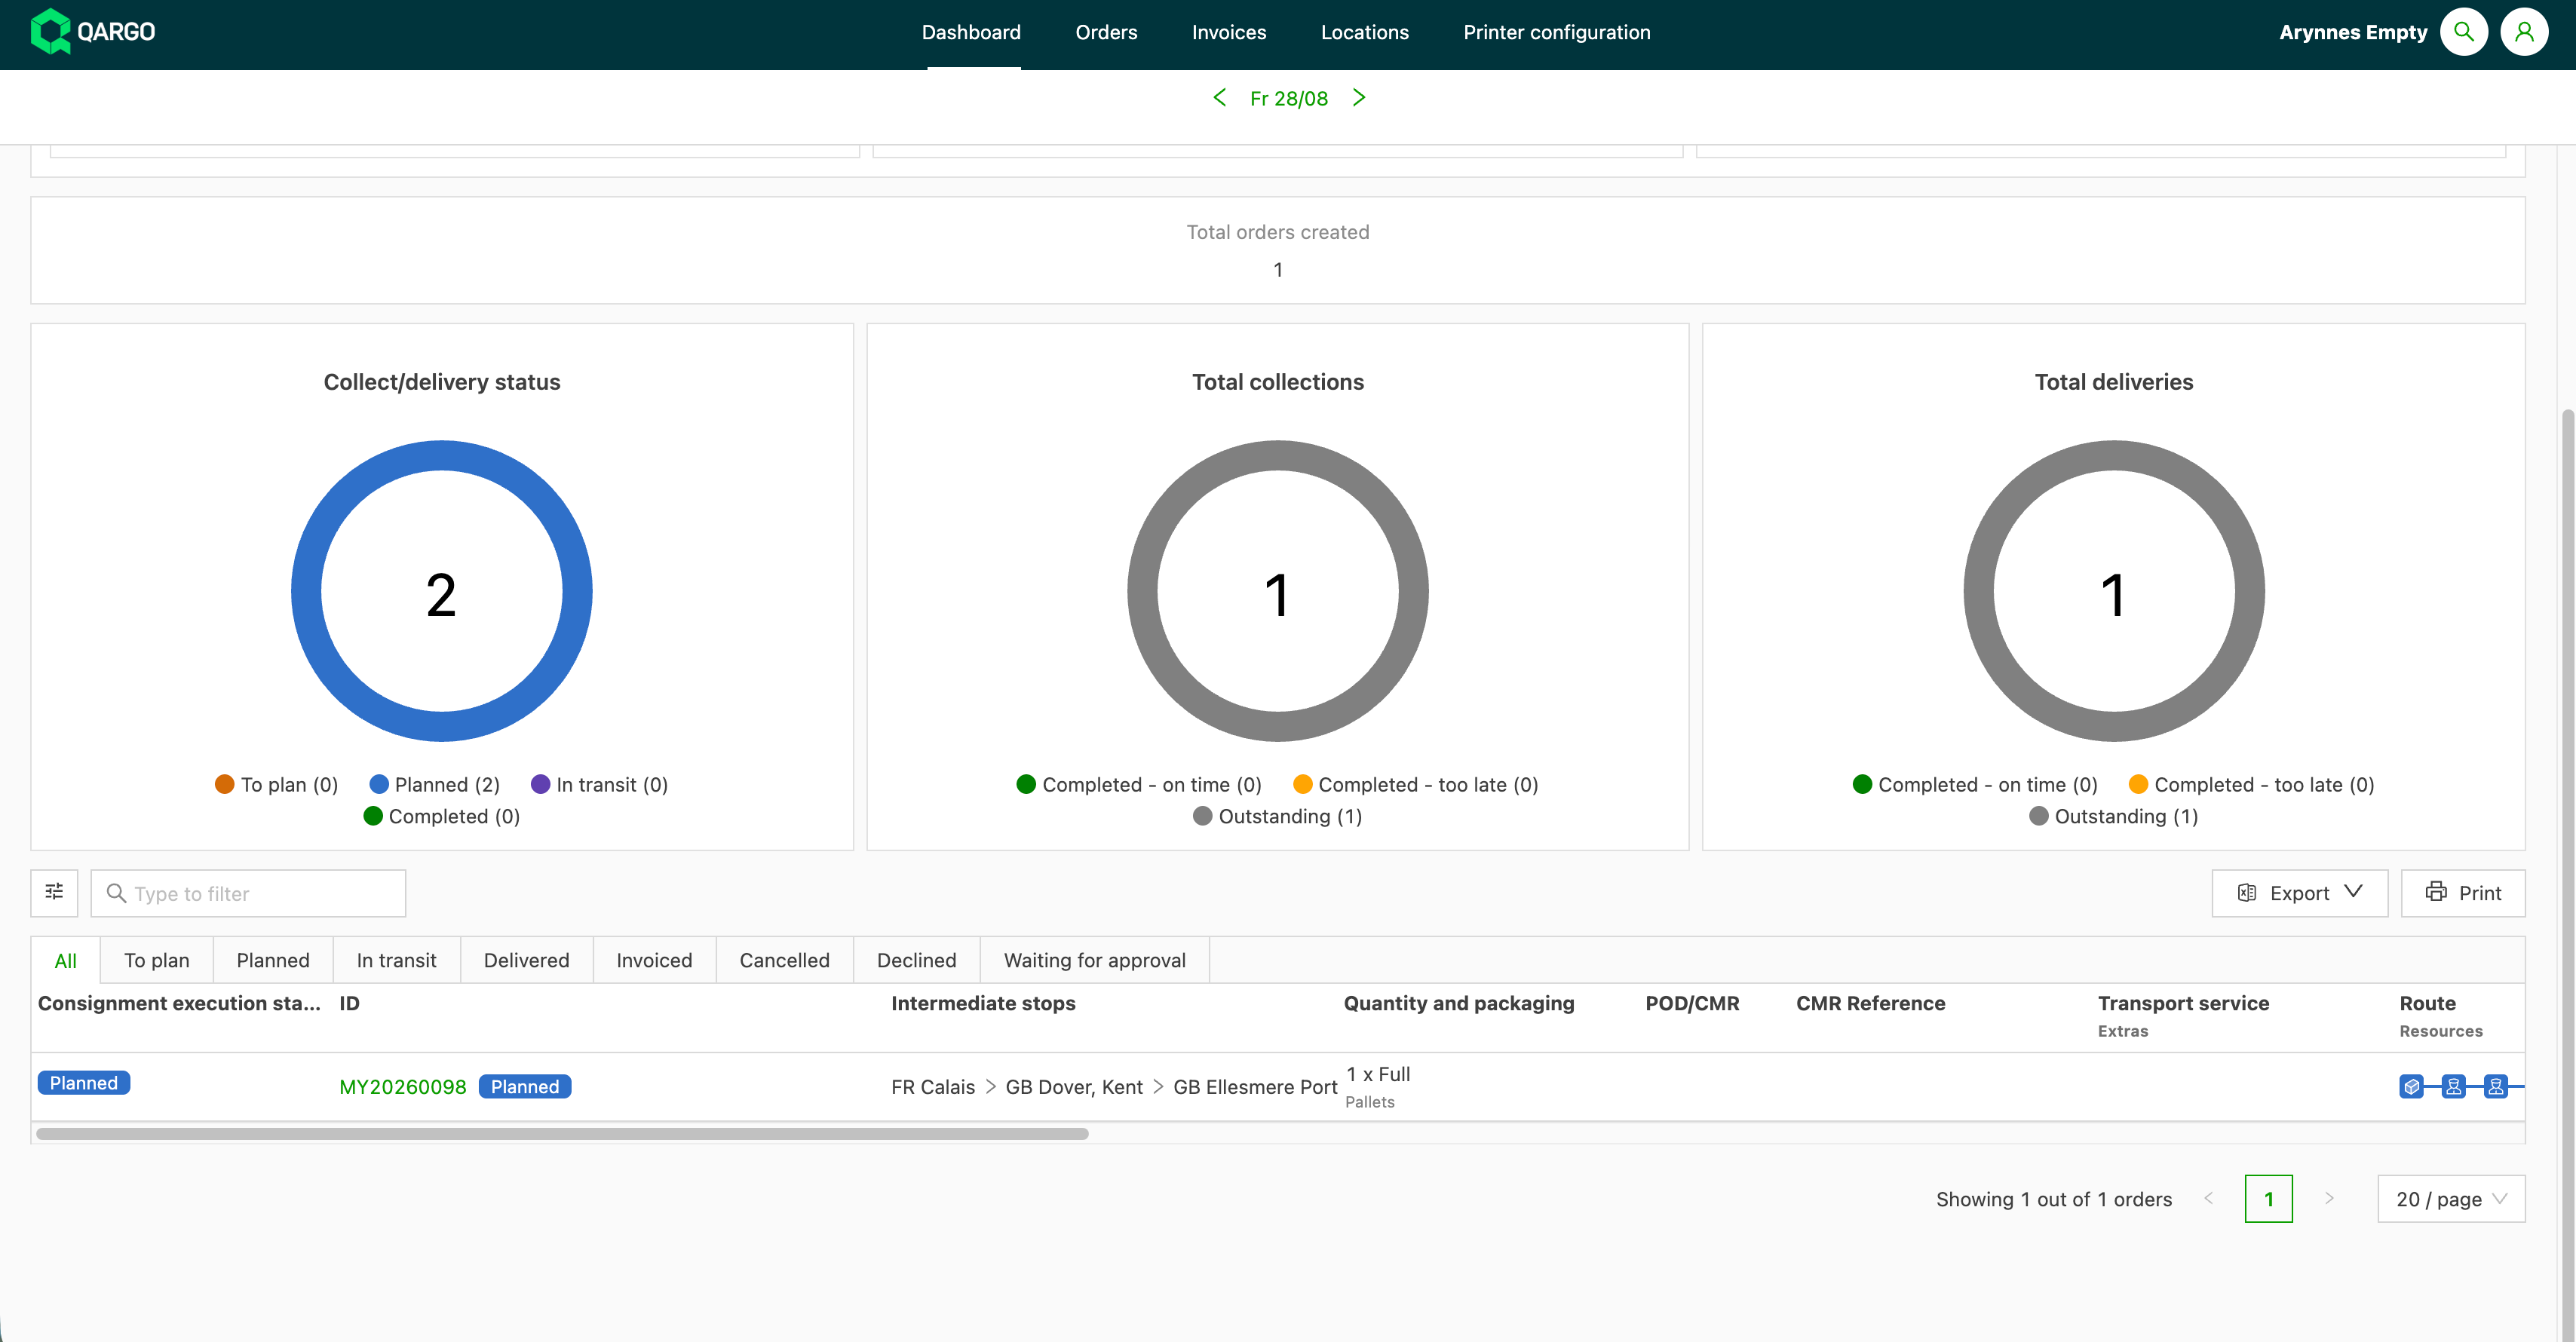
-
-
Save the settings.
💬 Portal users keep receiving announcements even when statistics are hidden, because the news feed stays in place.
To publish announcements, see Customer portal - News feed: What, why and how.
Troubleshooting
| Issue | Resolution |
|---|---|
| The Invoices tab is not visible in the portal. | Confirm that Show charges on customer portal is enabled on the customer record and that the Invoice document type is visible in Documents configuration. Both settings must be active. |
| An invoice is visible before it is approved. | Invoices become visible as soon as they leave Draft status. There is no separate publishing step. |
| Charges are shown alongside the invoice. Is this expected? | Enabling Show charges on customer portal always shows the full charge breakdown. The current version has no option to show invoices without charges. |
| The statistics need to be hidden for only some portal customers | Not supported. The settings apply to the whole tenant and to every customer on the portal. |
| A single dial (such as completed late) needs to be hidden on its own | Not supported. Statistics are all or nothing: either all are shown or all are hidden via Hide statistics. |
| The Dashboard tab disappeared after hiding statistics | Expected behavior. With Hide statistics on, the tab is renamed News feed rather than removed, so the news feed stays available. |
The Customer portal dashboard section is not visible in the settings |
Confirm Super Admin access and that the customer portal is enabled for the tenant. Contact the Qargo account manager if access is needed. |