
Planning: using time window columns on To plan orders
Option to split columns and show stop time windows on the To plan: Orders planning board, so planners can see and filter orders by delivery slot without opening each one.
Table of contents
What
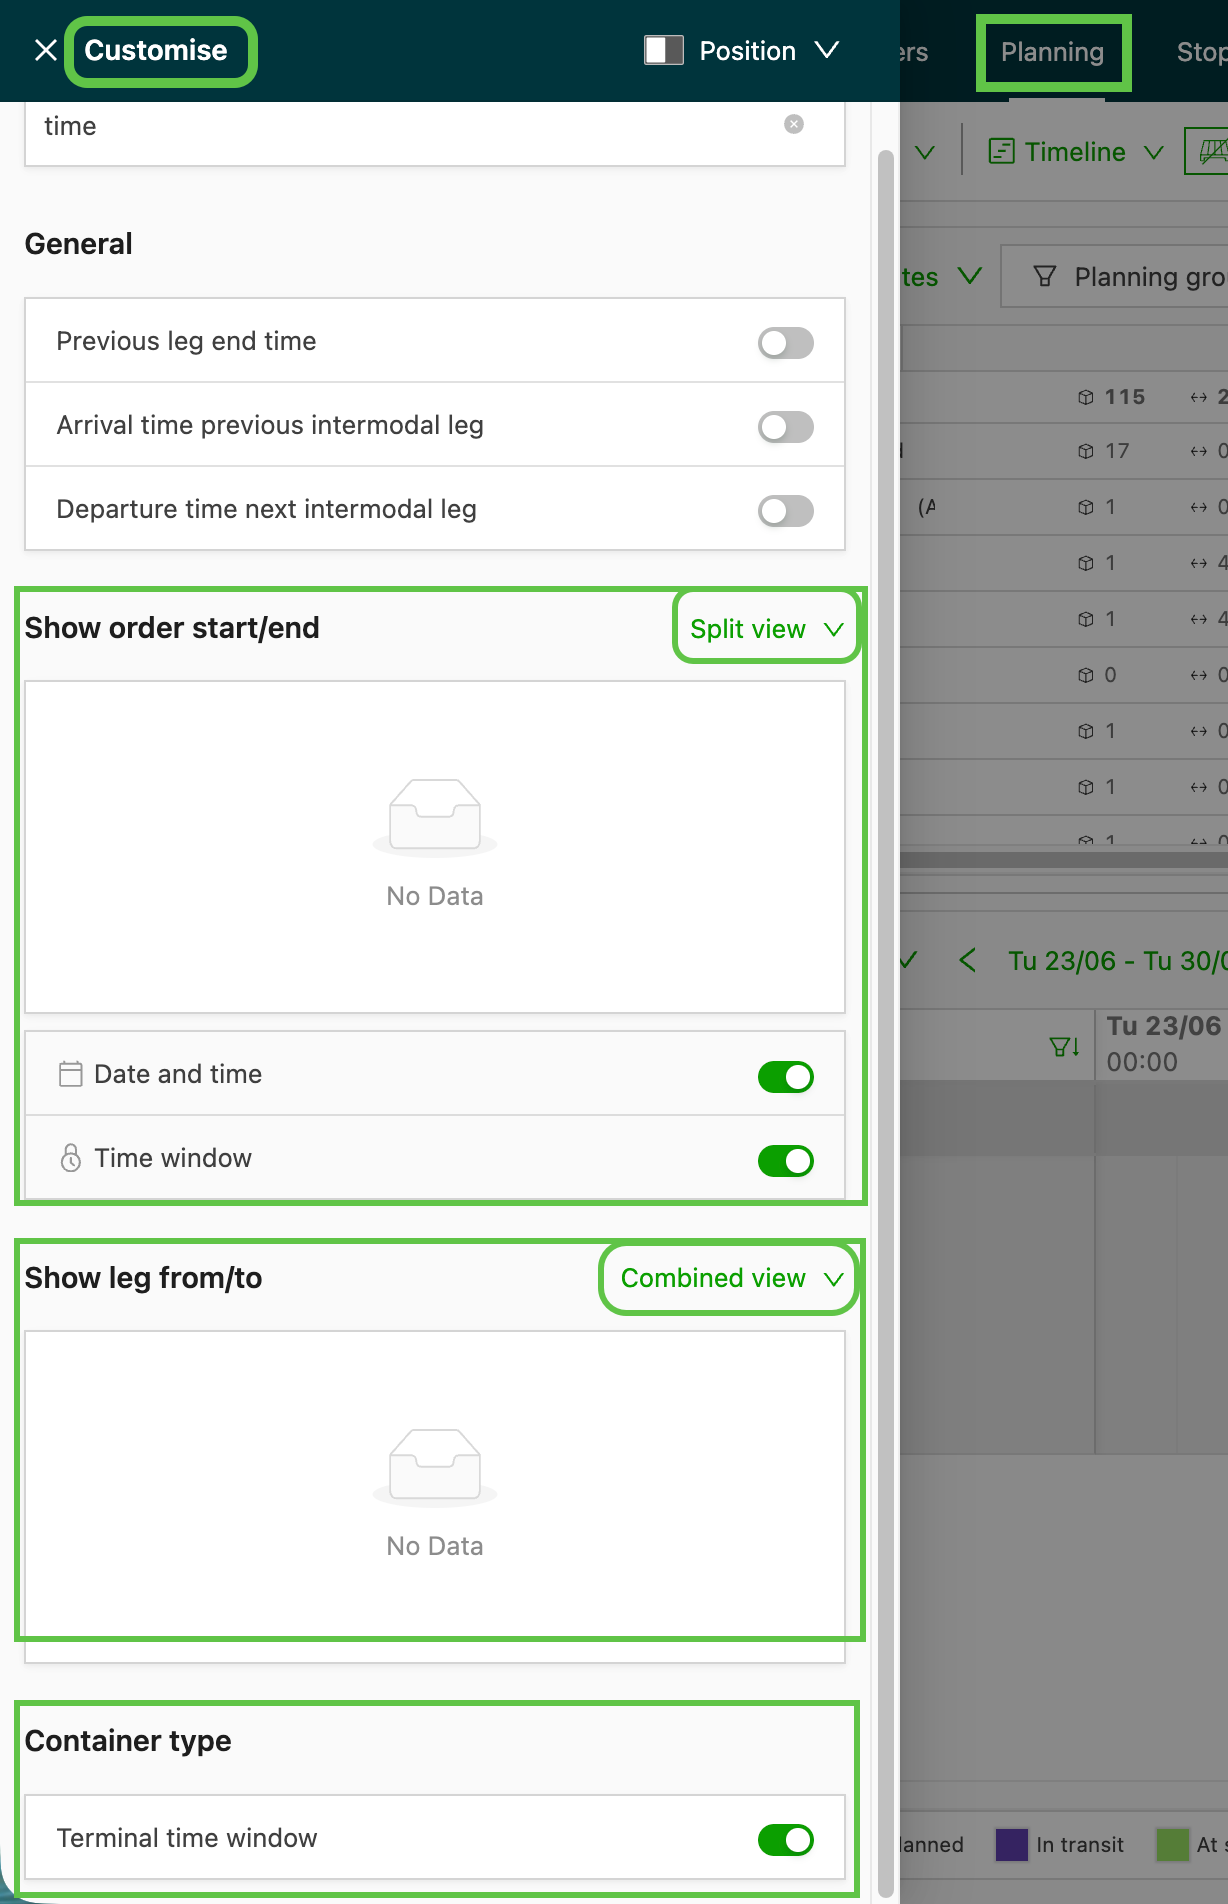
When this option is activated and the Split view option is used, two additional columns show under the Order start / Order end header options. Time window time (the range, e.g., 02:00–03:00) and Time window name (e.g., Booked) show when the columns are enabled in Customize for Order start, Order end, or Load/unload (container). Planners can filter the list by window name to group orders by slot.
Why
Previously, planners saw only the raw time range (e.g., 06:00–12:00) for a stop, never the configured delivery window name (AM, PM, TD, BW). They had to open each order to know which slot applied. They also could not group the planning board by window. This created friction when planning delivery routes and identifying orders for the same time slot.
How
Split the columns for Order start (pickup), Order end (delivery), or Load/unload (container) in Customize. The two time window columns appear automatically as additional Order start / Order end columns. Filter on the window name to show only orders for a specific slot.
Prerequisites
Super Admin: Time windows must be configured under Rates > Order input. The columns then populate automatically; no further configuration is required.
Use cases
- Distribution and delivery planners: see and group orders by their delivery slot (AM, PM, etc.) without opening each one, which speeds up planning.
- Network operators: the named window disambiguates overnight and crossover windows. This prevents export errors when sending to external networks.
Terminology
| Term | Definition |
|---|---|
| Time window | A configured delivery time slot (e.g., AM, PM, TD, BW, Booked) assigned to a stop during order creation |
| Split the columns | A customization toggle in the planning board that reveals two sub-columns for a single parent column (Order start, Order end, or Load/unload) |
| Pickup side | The order pickup stop; the time window comes from Order start |
| Delivery side | The order delivery stop; the time window comes from Order end |
Enable time window columns on the planning board
🎥 This video explains where to configure time windows, how to add them to an order, and how to use them in the To plan overview:
- Open Planning > To plan: Orders.
- Click Customize (top right).
- Toggle Split the columns for Order start (pickup-side window), Order end (delivery-side window), or Load/unload (container) (container-side window).
- Two new columns appear under the additional Order start / Order end columns. They display Time window time and Time window name data.
- Save the view to keep the columns.
Filter orders by window name
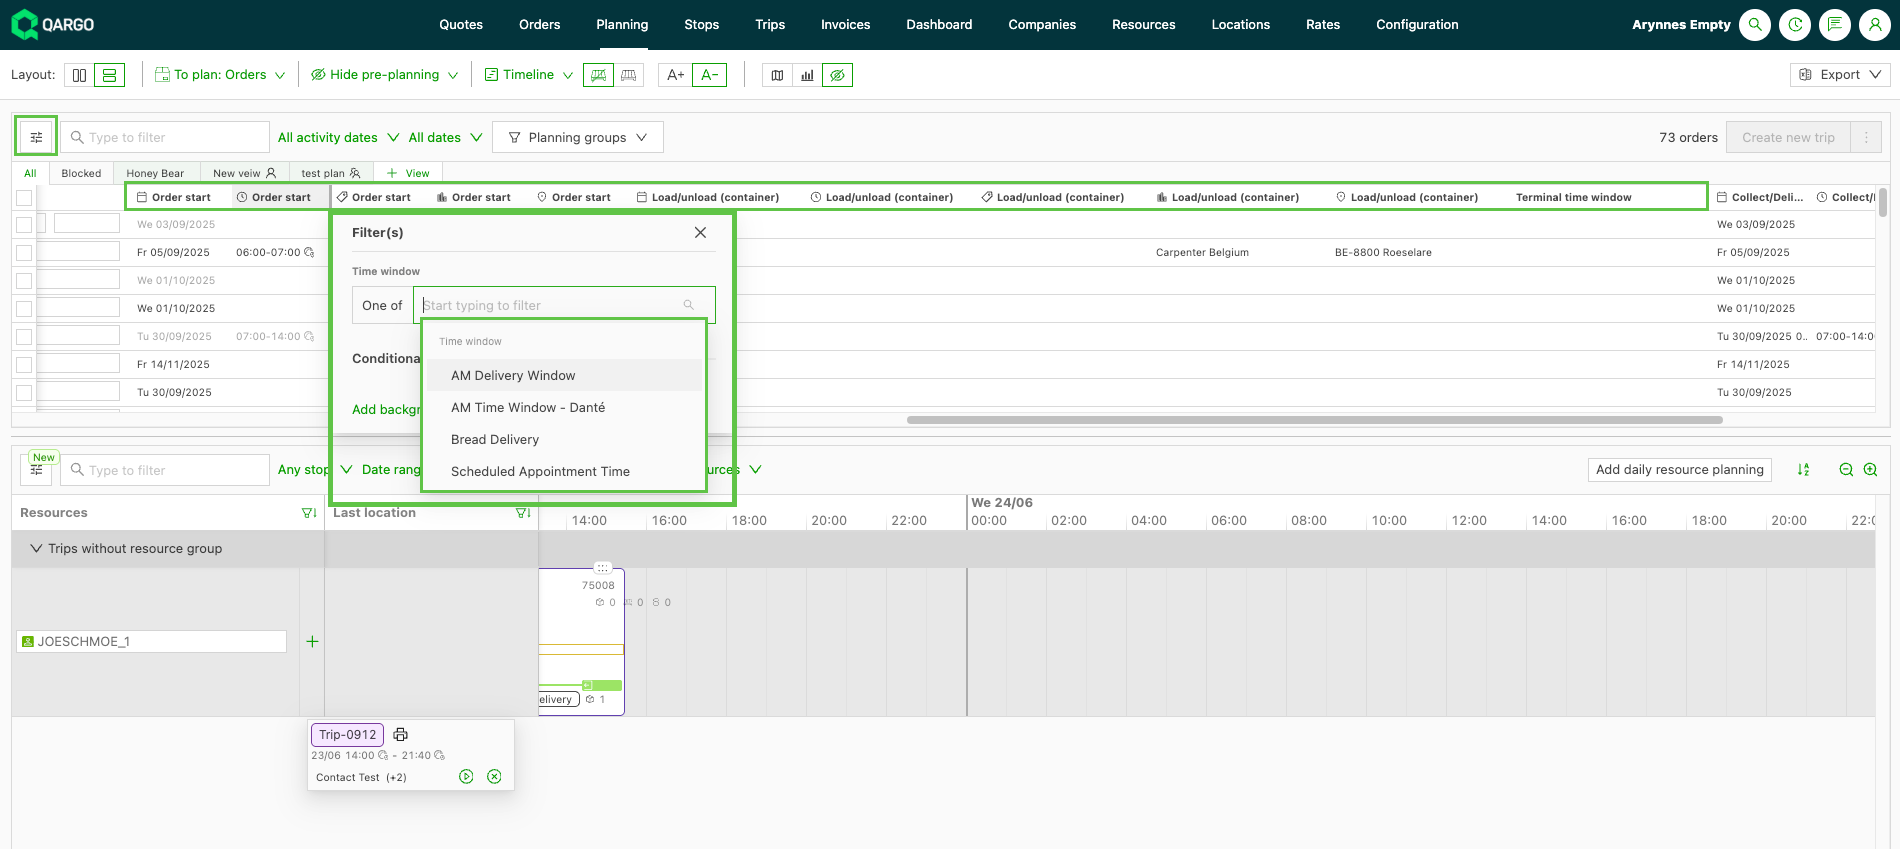
- On the planning board, click the Order start column header for the name filter.
- Select one or more window names from the dropdown (e.g., AM, PM, TD).
- The list filters to show only orders for the selected slots.
Troubleshooting
| Issue | Solution |
|---|---|
| Columns are blank | Confirm that time windows are configured under Rates > Order input. Orders without a named window show blank cells. |
| Time appears twice | If the raw time range still shows in the Order start/Order end column after enabling the split, refresh the page. |
| Window name not in filter dropdown | The window name must be configured under Rates > Order input for that customer/tenant before it appears as a filter option. |