
Loads: load groups
Load groups are an efficient way to bundle loads together and assign a single resource, which is useful when planning intermodal loads. Load group overviews display freight details (weight, volume, pallet spaces and more) directly in the list view.
Table of contents
Introduction
Load groups make it possible to bundle loads together and assign a resource to the group, so all loads have that same resource. For example, the goal may be to copy the route of a single resource (i.e., a container). The resources on the order could be used to:
- Pick up an empty container
- Pick up some goods
- Drop the container for a ferry connection
- Pick it up again
- Deliver the goods
- Drop the empty container again for the ferry connection
- Drop it empty somewhere
This works easily for a single order. If the scenario becomes more complex with multiple orders, there is no easy way to copy the route for that container.
Create a load group
There are multiple ways to create a load group. Once orders are planned into loads, these loads can be added to a load group. If the load group is created outside of the load itself, the load can be selected from a drop-down list of available loads. Alternatively, entering the load number brings up the load for selection.
-
From the detail page of a load
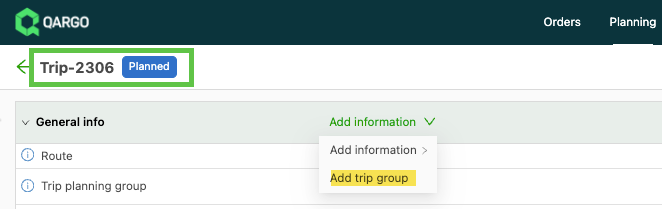
-
Select an existing group and add to it
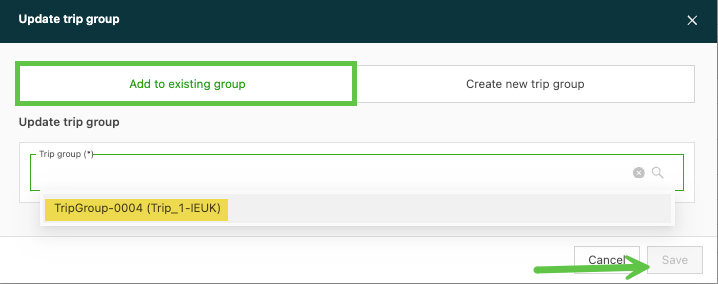
-
Or create a new one
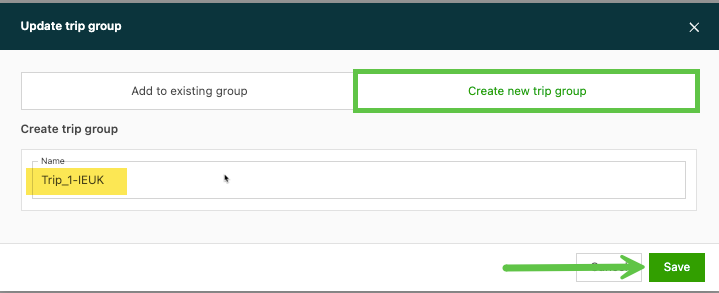
-
Create one from the loads list with a quick action
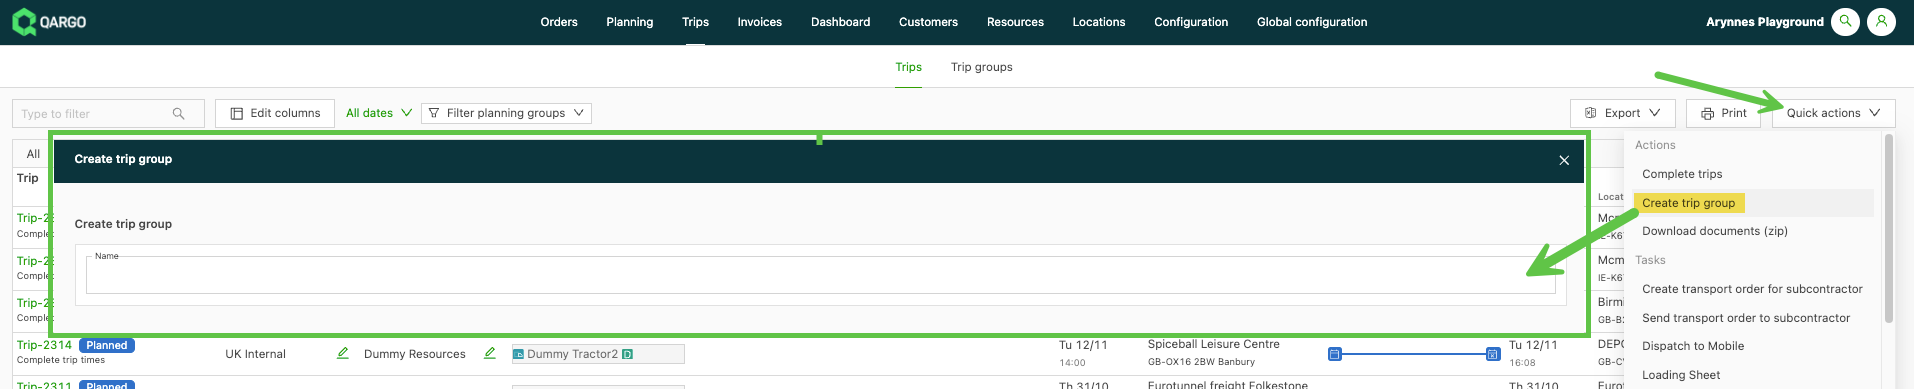
-
Create one from the load groups list with the usual green button in the top right
- Choose a name first
- Selecting at least one load to add to the group is mandatory.
-
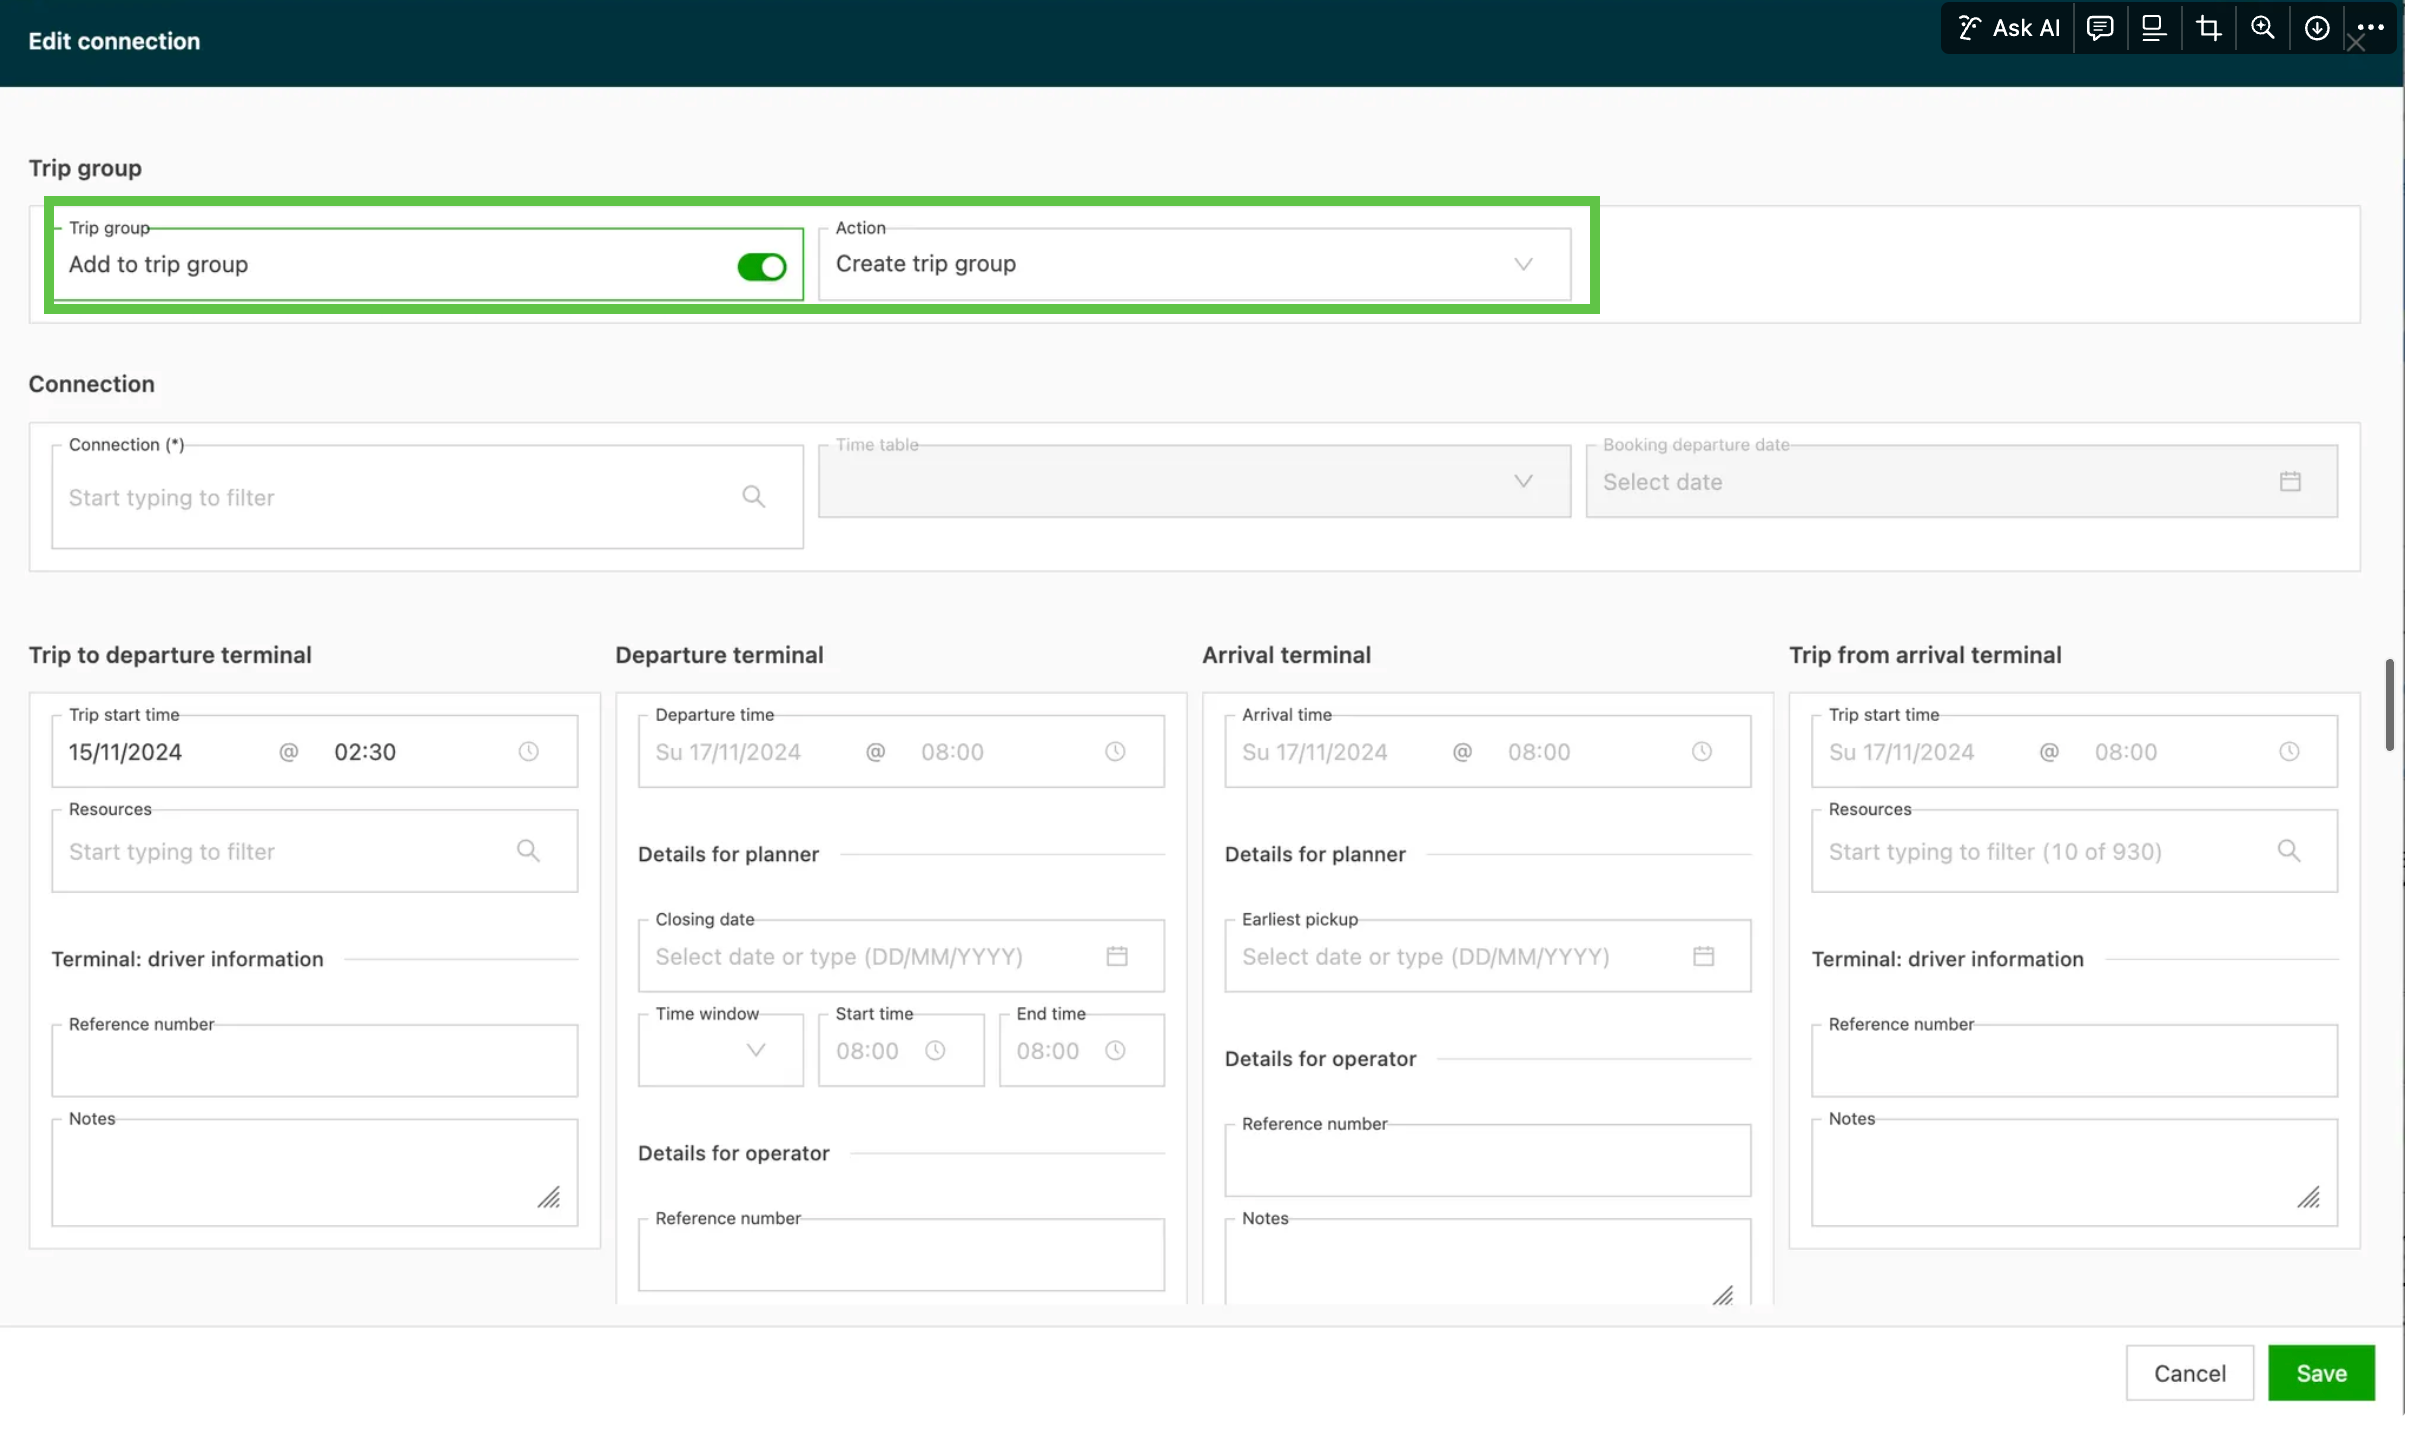
There is an option to create one when creating an intermodal connection
Where are load groups displayed?
-
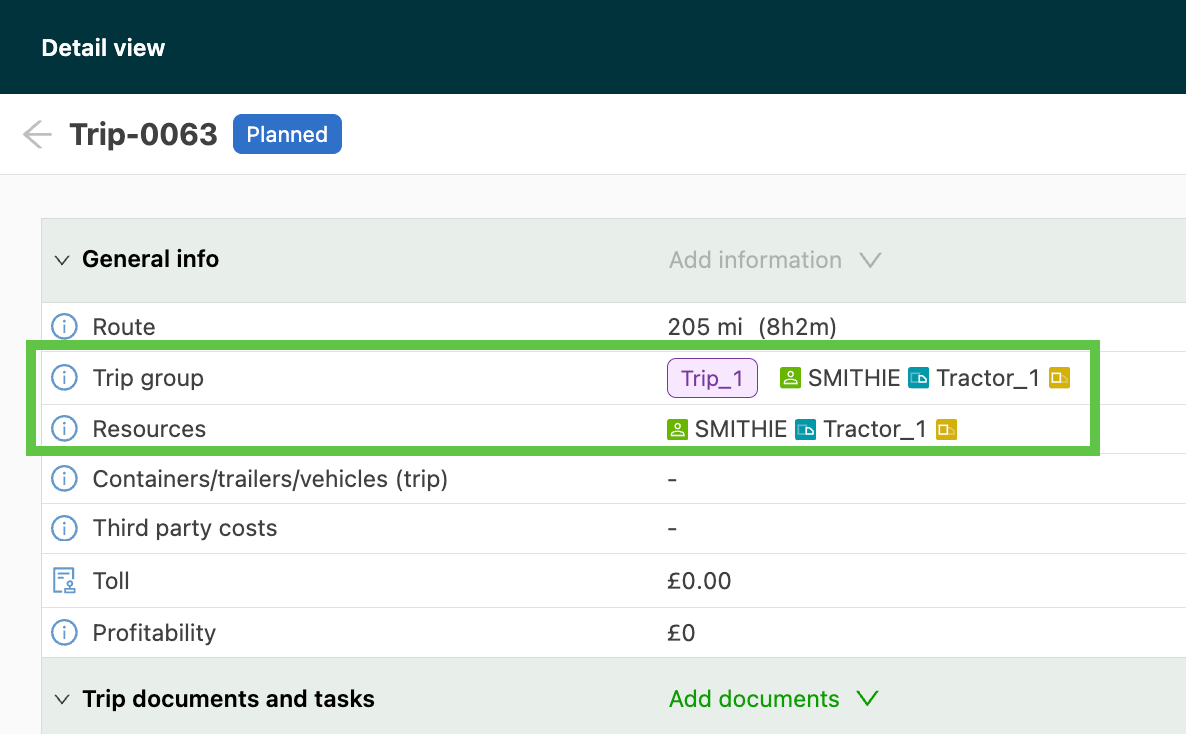
Load detail page: an additional row in the General info section shows the linked load group and its resource(s)
-
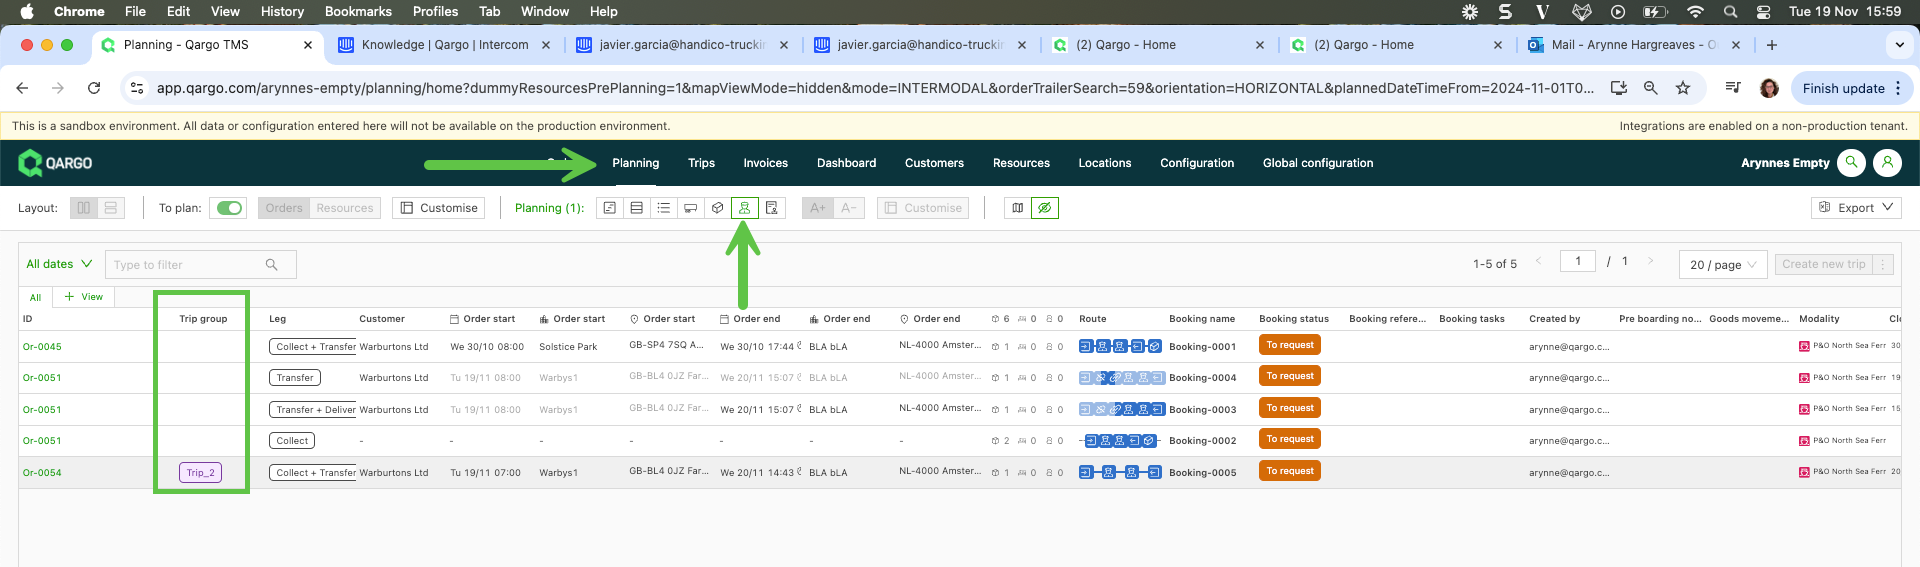
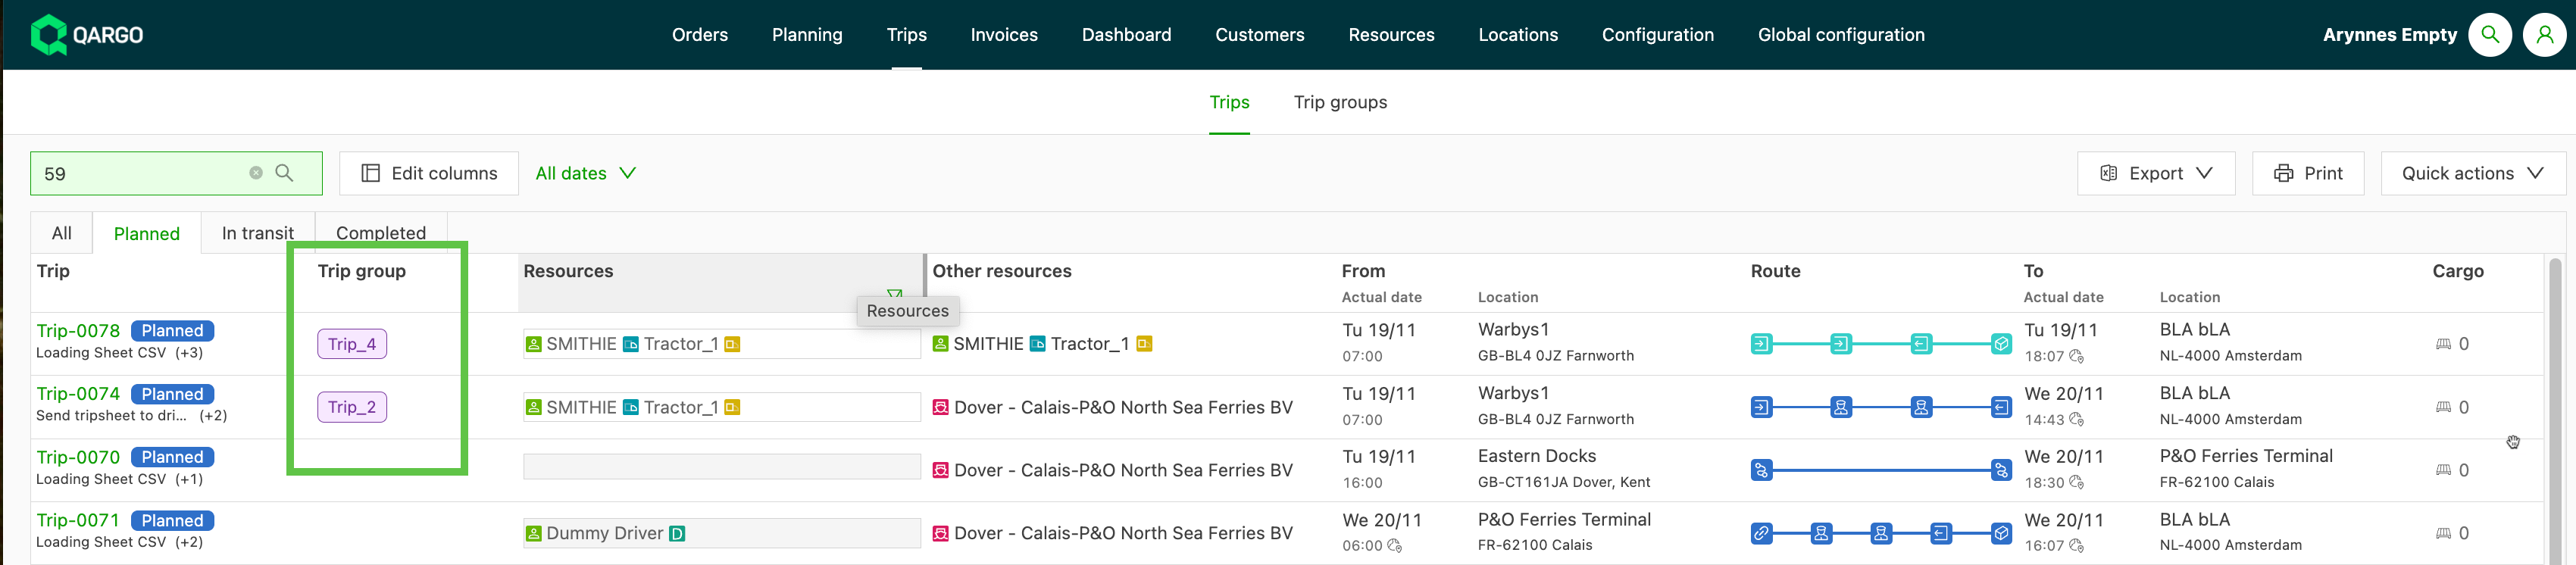
On both the Intermodal list page and Loads list page, there is a new Load group column that can be filtered and sorted
-
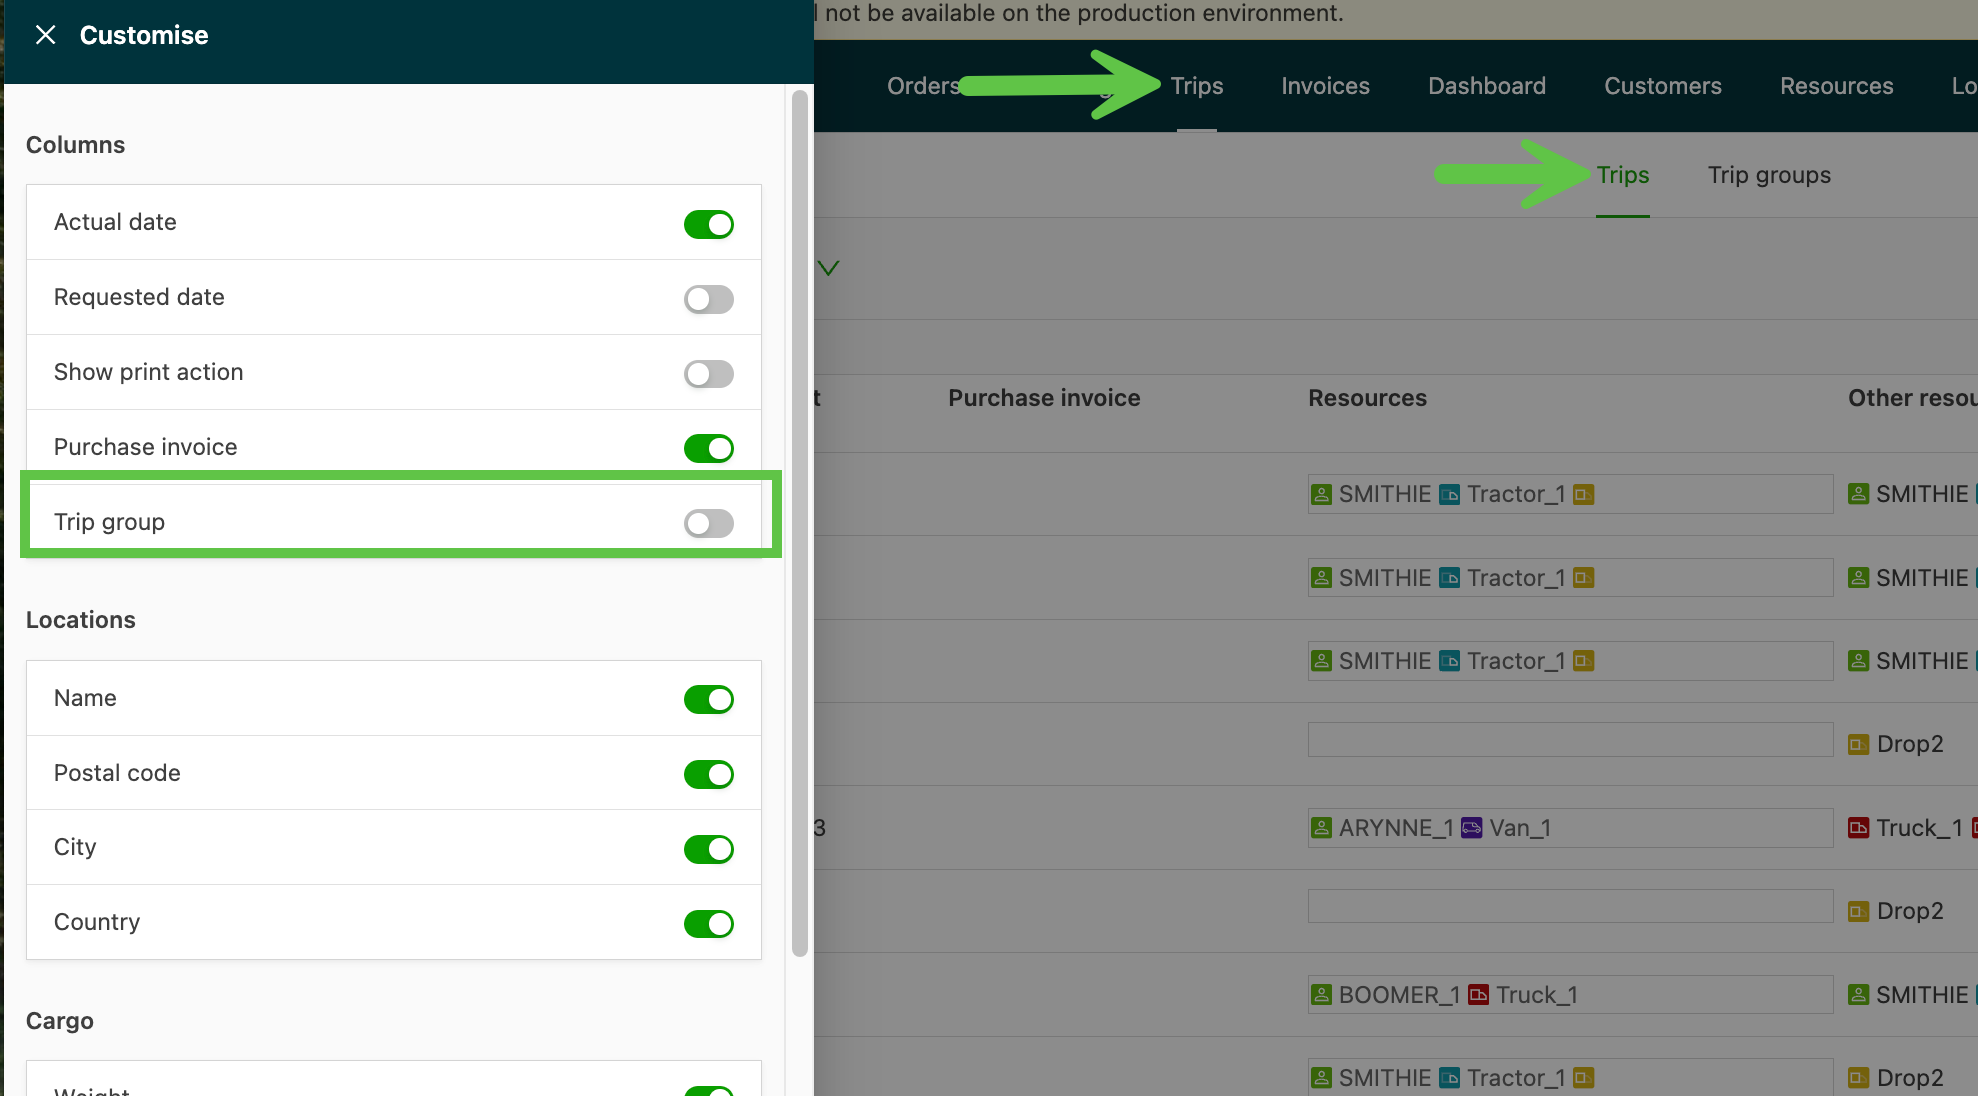
On the planning board, there is a new extra customize option
-
The Load groups submenu list view, under Loads.

Customize the load groups list view to show freight columns
- Planners needed to see freight information (such as weight, volume and pallet spaces) at a glance in the load groups overview, without opening each load individually
- Select Edit columns in the load groups overview toolbar and enable any freight columns from the available list. The selection is saved per user.
Opening the column editor
- Navigate to Planning > Load groups
- Select Edit columns in the top right of the overview toolbar
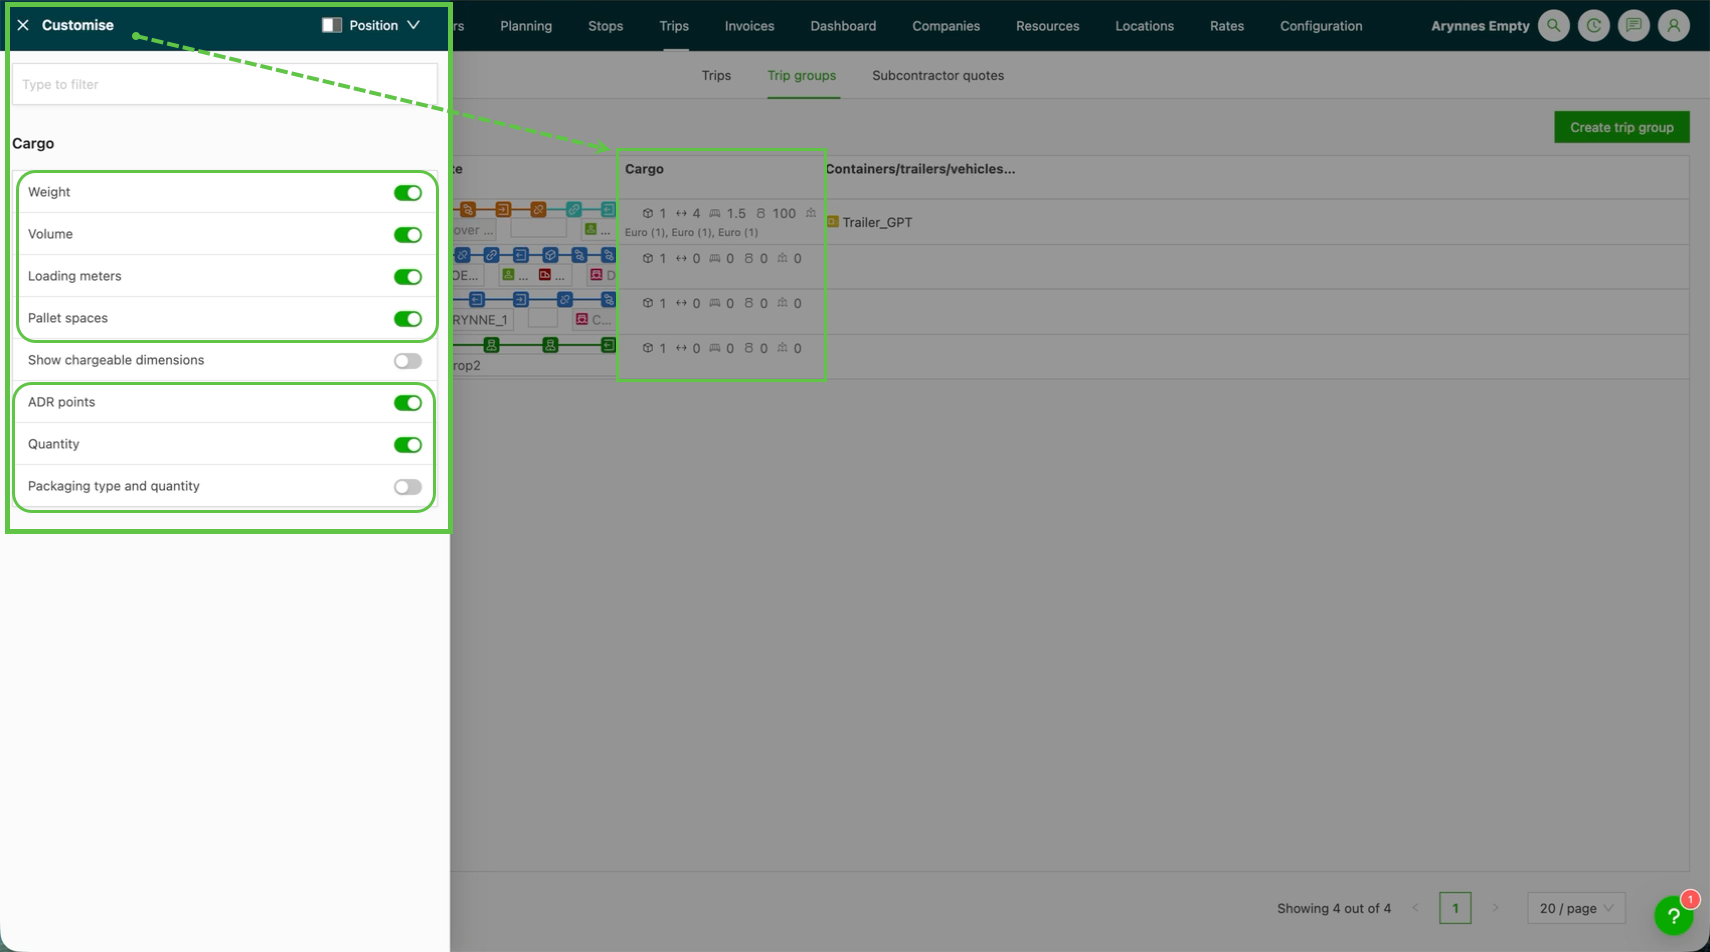
Selecting freight columns
The column editor includes a Freight section with the following available columns:
- Weight – total freight weight for the load
- Volume – total freight volume
- Loading meters – total loading meter requirement
- Packaging type – type of packaging used for the freight
- Quantity – total number of freight units
- Pallet spaces – number of pallet spaces required
- Billable dimensions – dimensions used for charge calculations
- HazMat points – total hazardous materials (HazMat) points
- Toggle the desired columns to the active state
- Close the panel. The selection is applied immediately and saved per user
The selected columns appear in the load groups overview table alongside the existing load information.
Troubleshooting
| Issue | Resolution |
|---|---|
| The Edit columns button is not visible | Make sure the load groups view is active in the Planning module. The button is not available in all planning views. |
| Freight column values appear blank | The load may not have freight data entered. Open the load to verify that freight details have been added to the order lines. |
| Column selection does not persist after a page refresh | Column preferences are saved per user account. Verify that the correct user account is logged in, and contact Qargo support if the issue persists. |
Add orders/loads to an existing load group
Navigate to the load group detail page, either from the list view or by clicking the load group tag of an existing load. The following page is displayed:
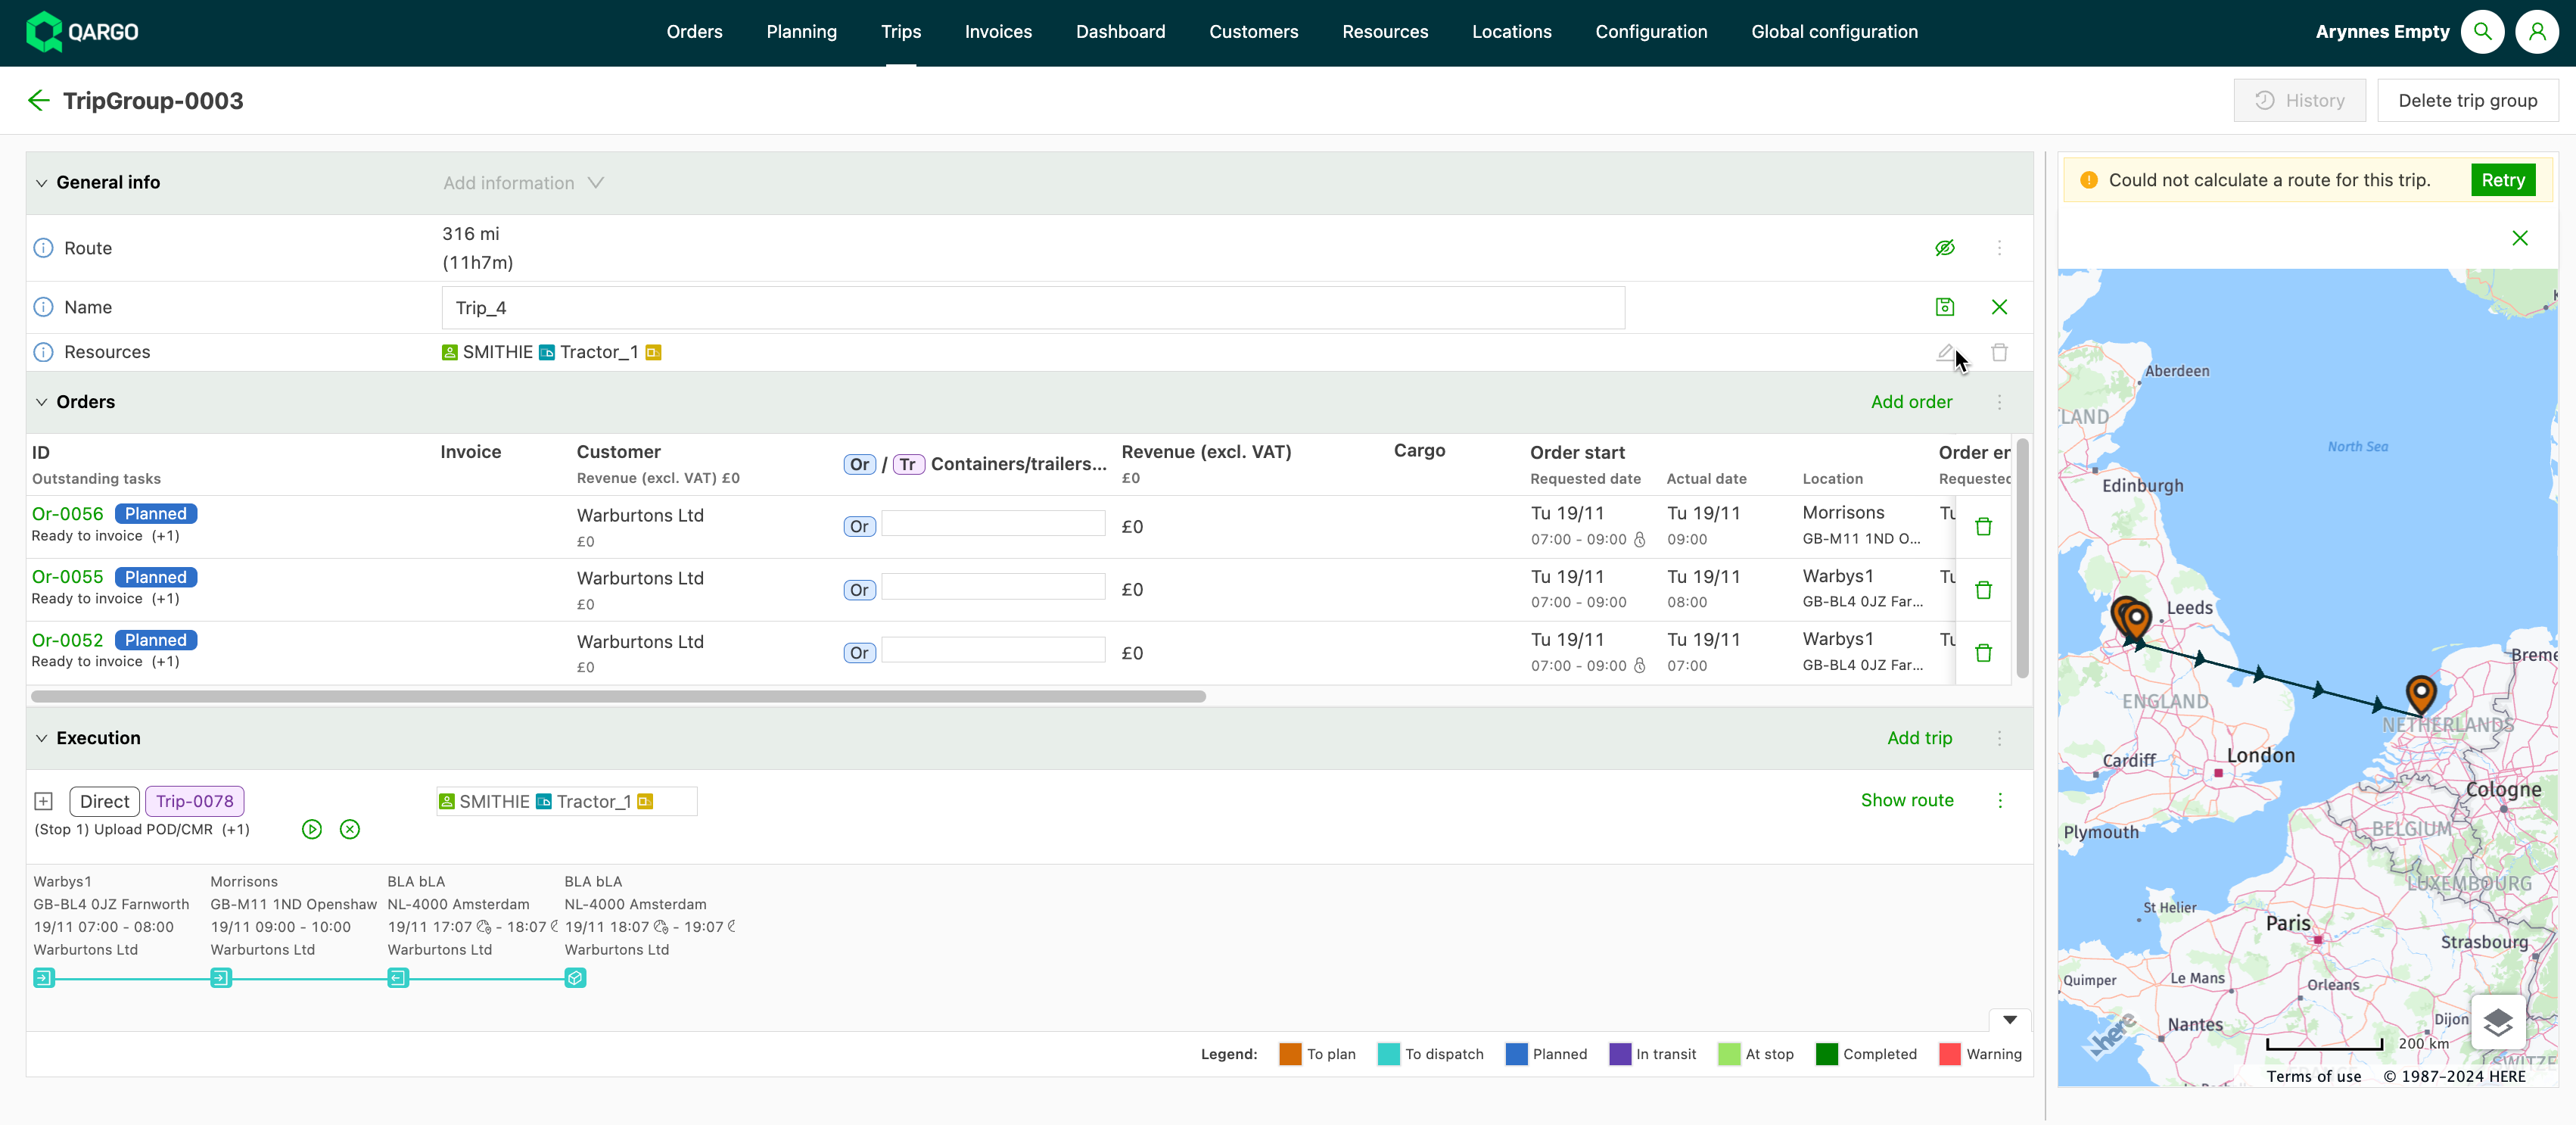
The page has the following sections:
-
General info, which shows:
-
Route
- Summary of distance + duration of each load
- Toggle for the visibility of the route
-
Load group display name
-
The resource assigned to the linked loads
-
-
Linking orders
-
Navigate to the Orders section and click Add order. The full order list is displayed with selection boxes.
-
Select the orders to add and click Add selected loads. This opens a new screen to add orders.
-
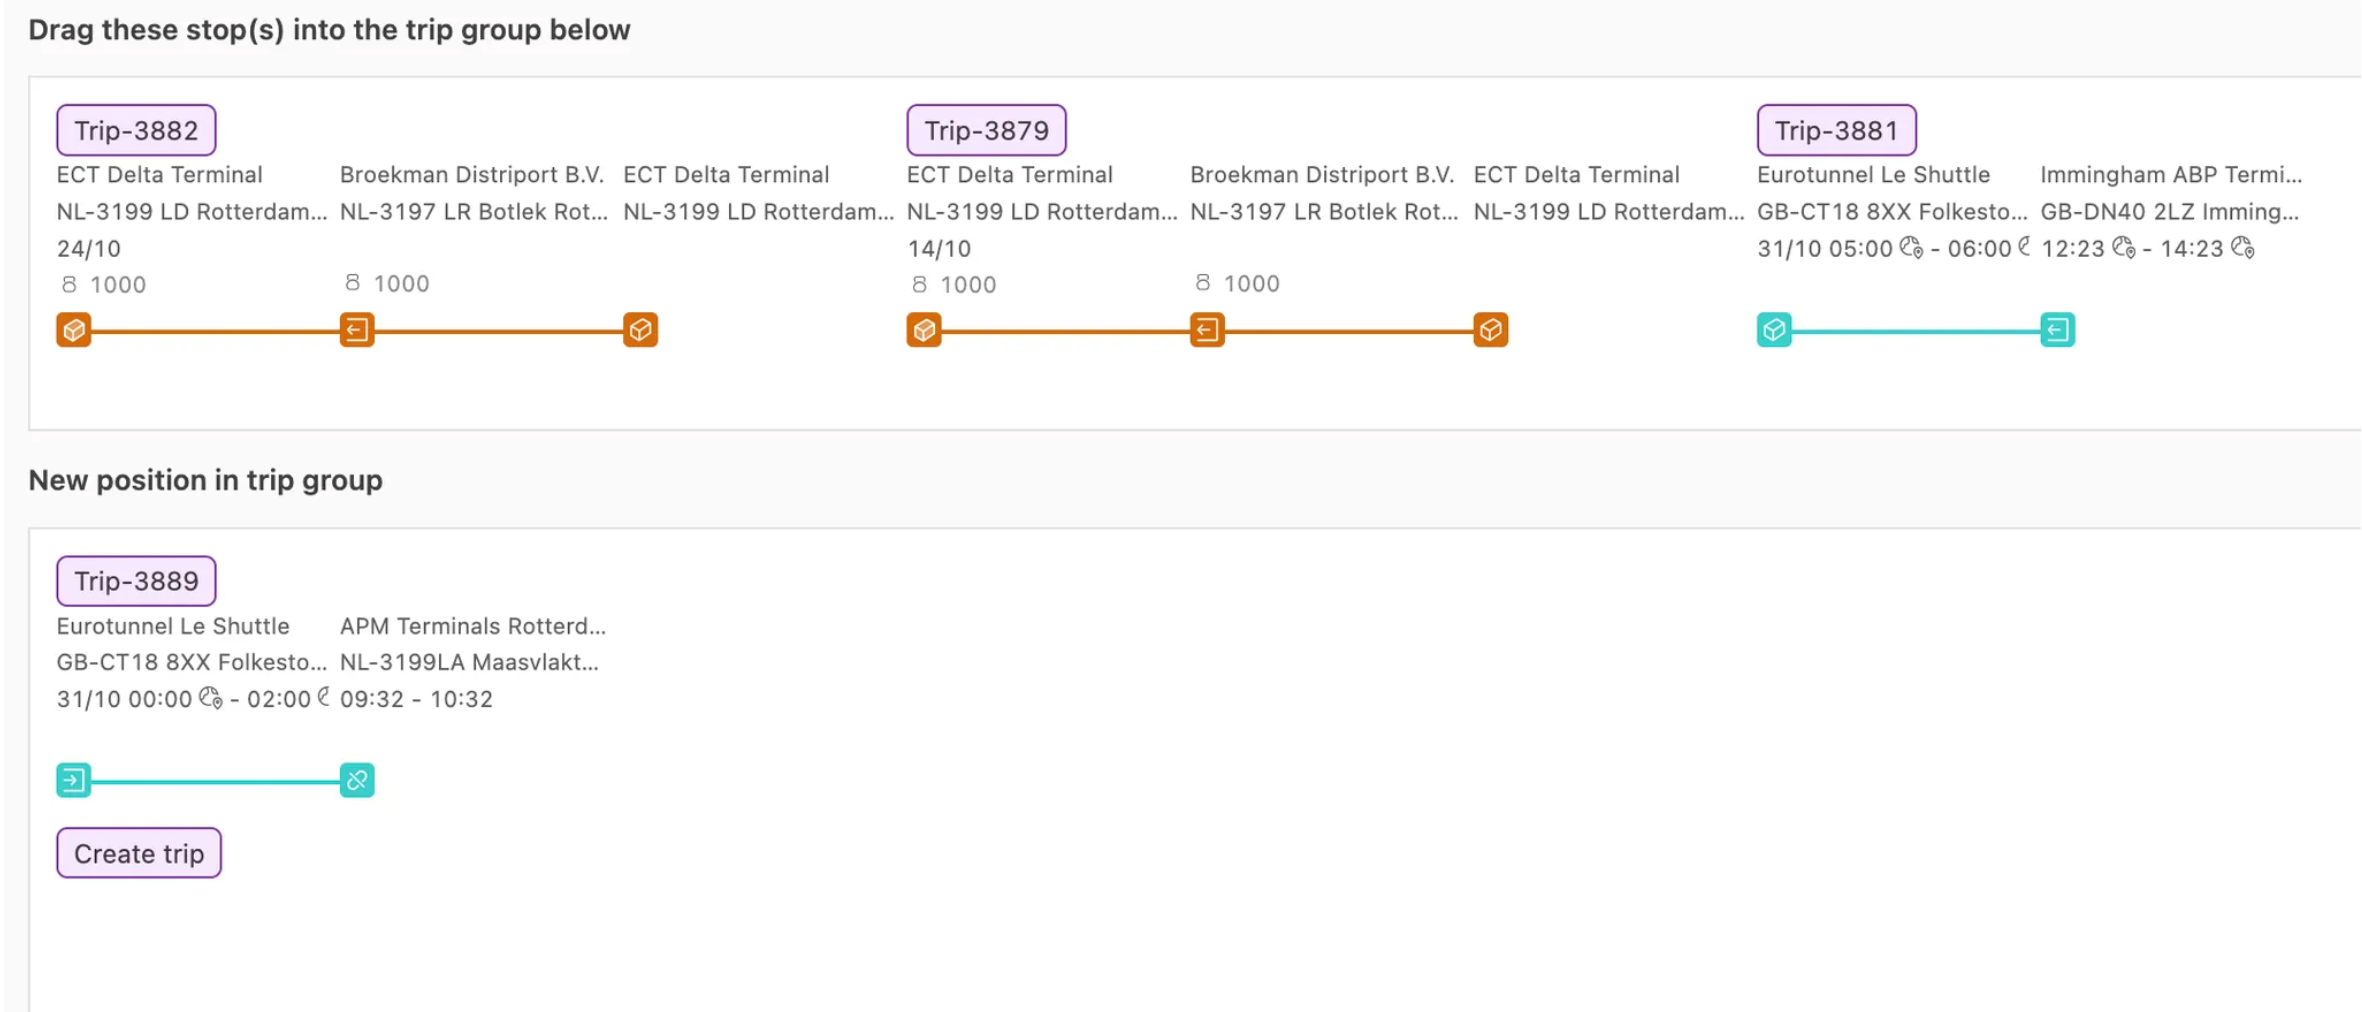
Confirm adding the order to the load, then drag and drop the stops in the current load group.
-
-
Linking loads
-
Navigate to the Operations section. Click Add loads.
-
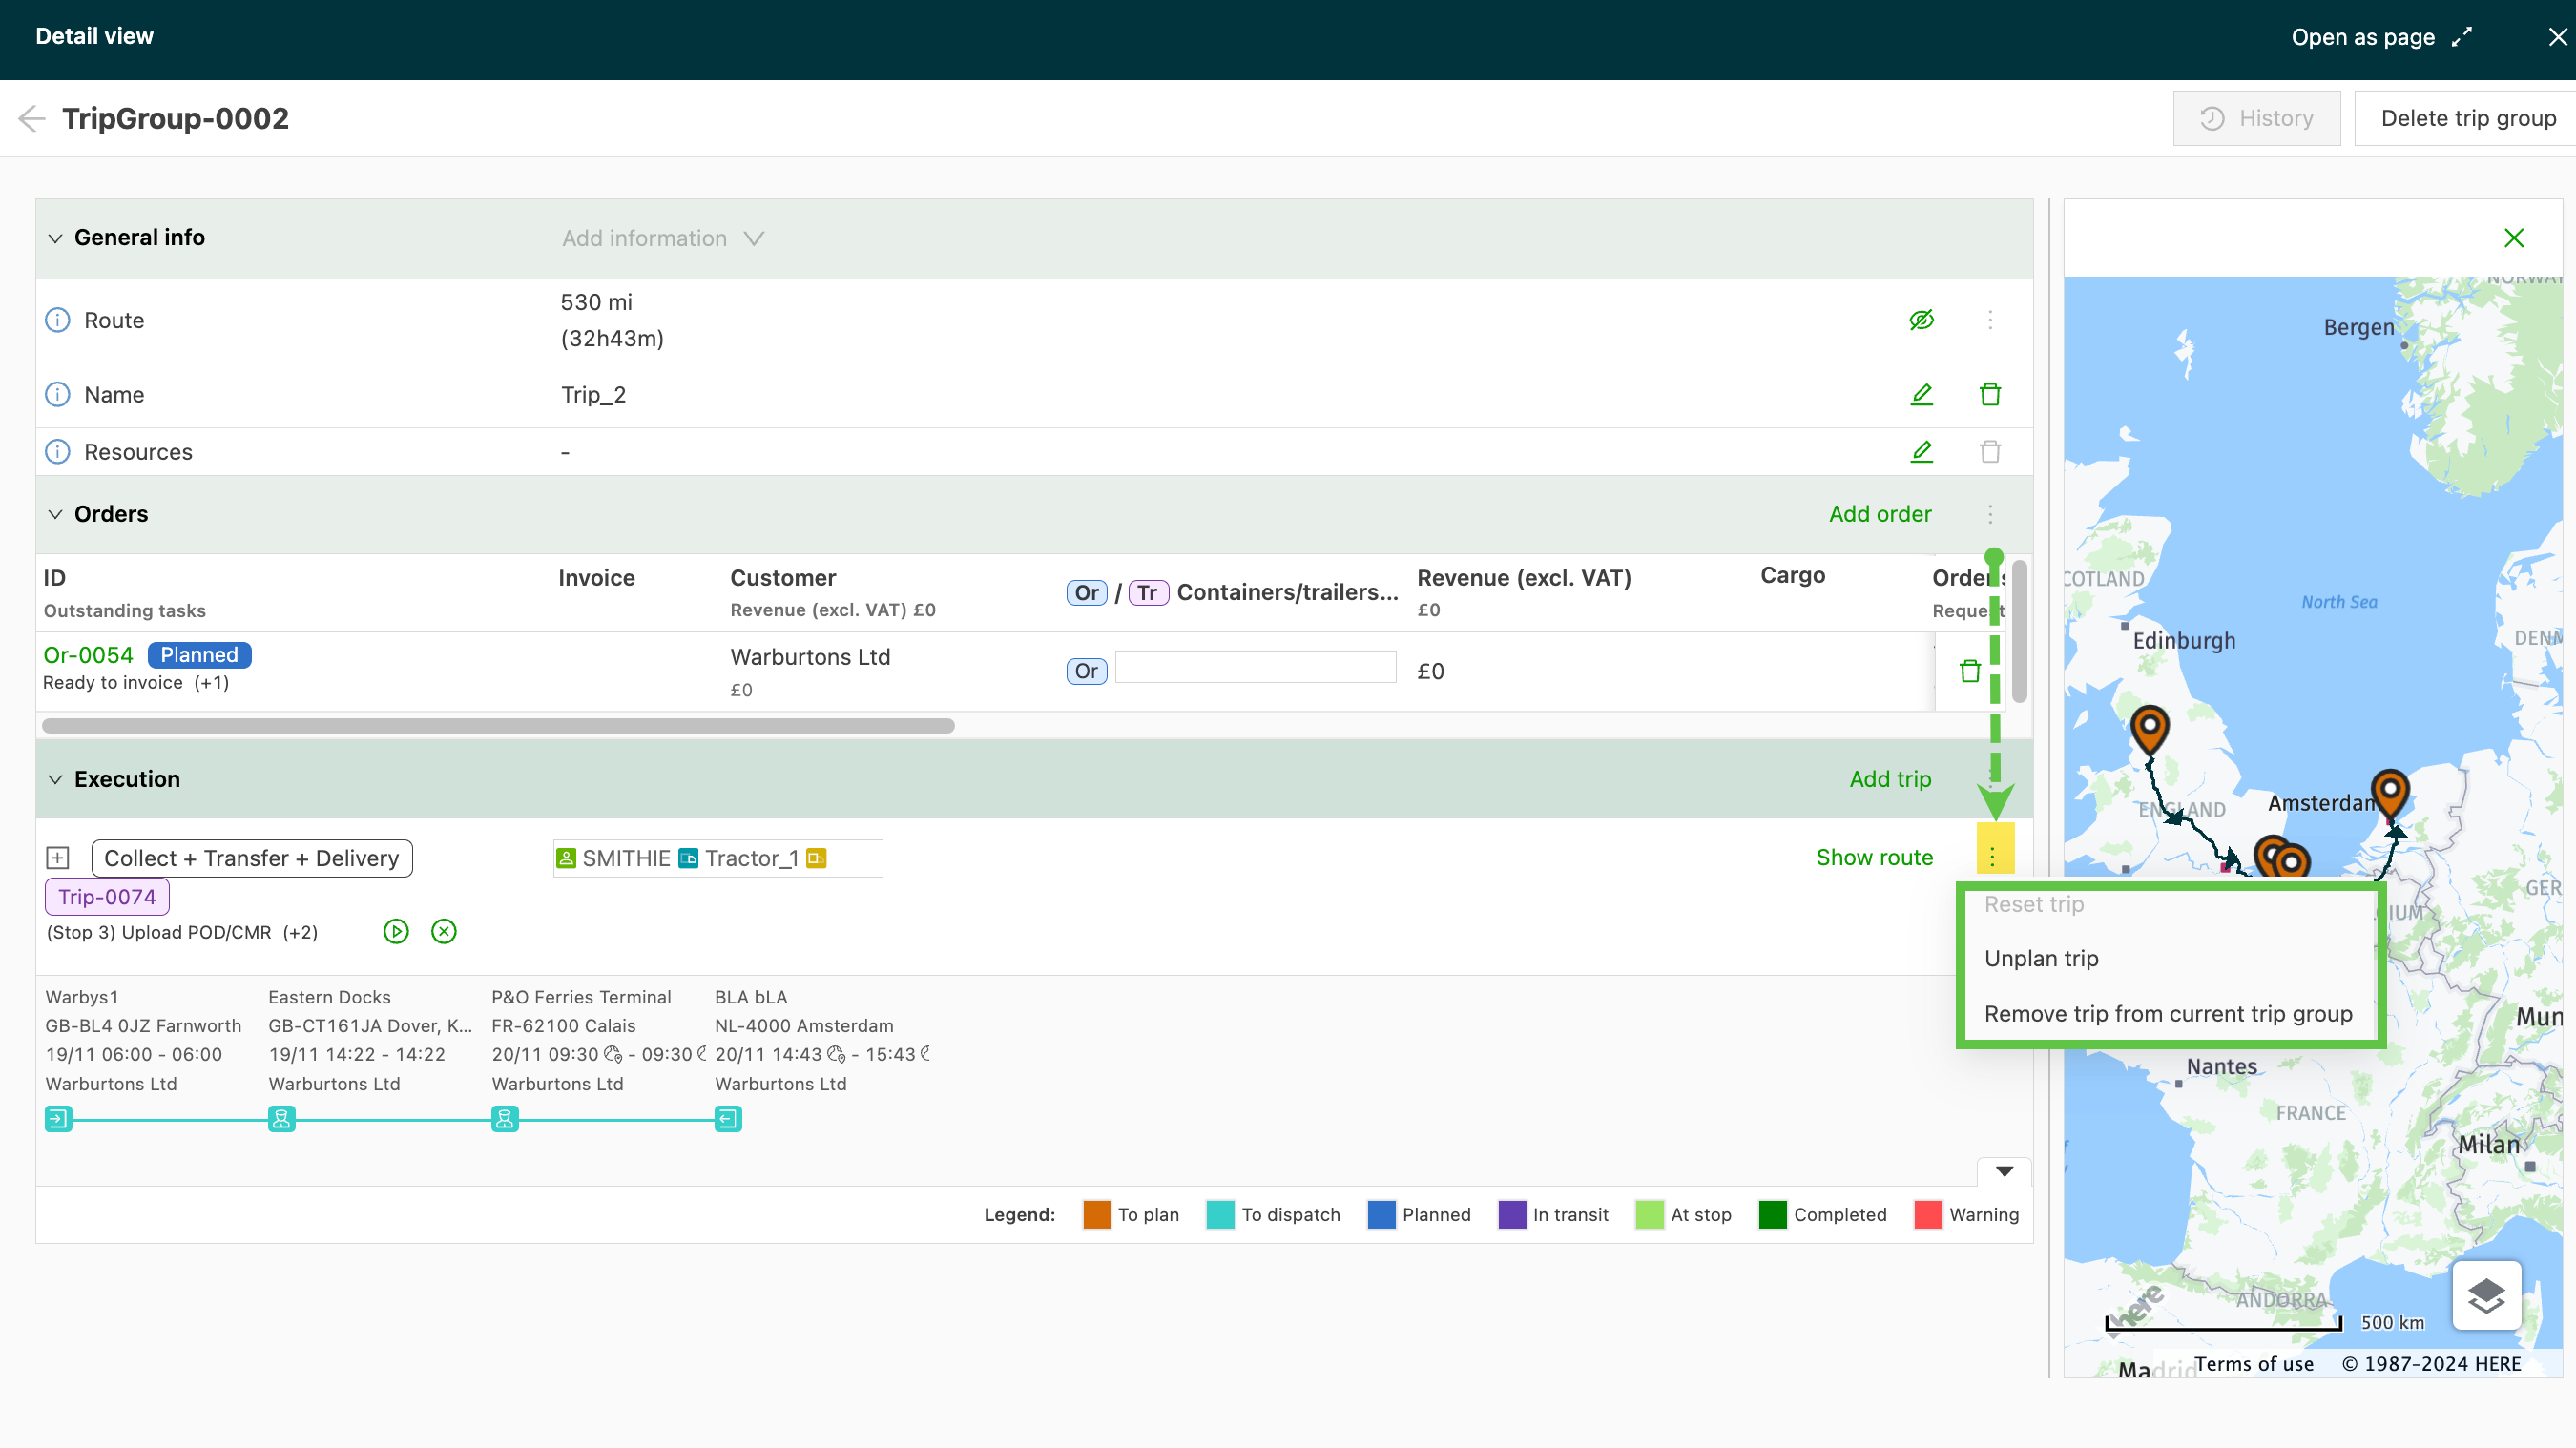
To remove loads, the three dots menu offers 2 options:
- Unplan load
- Remove load from current load group
-
Create an intermodal split
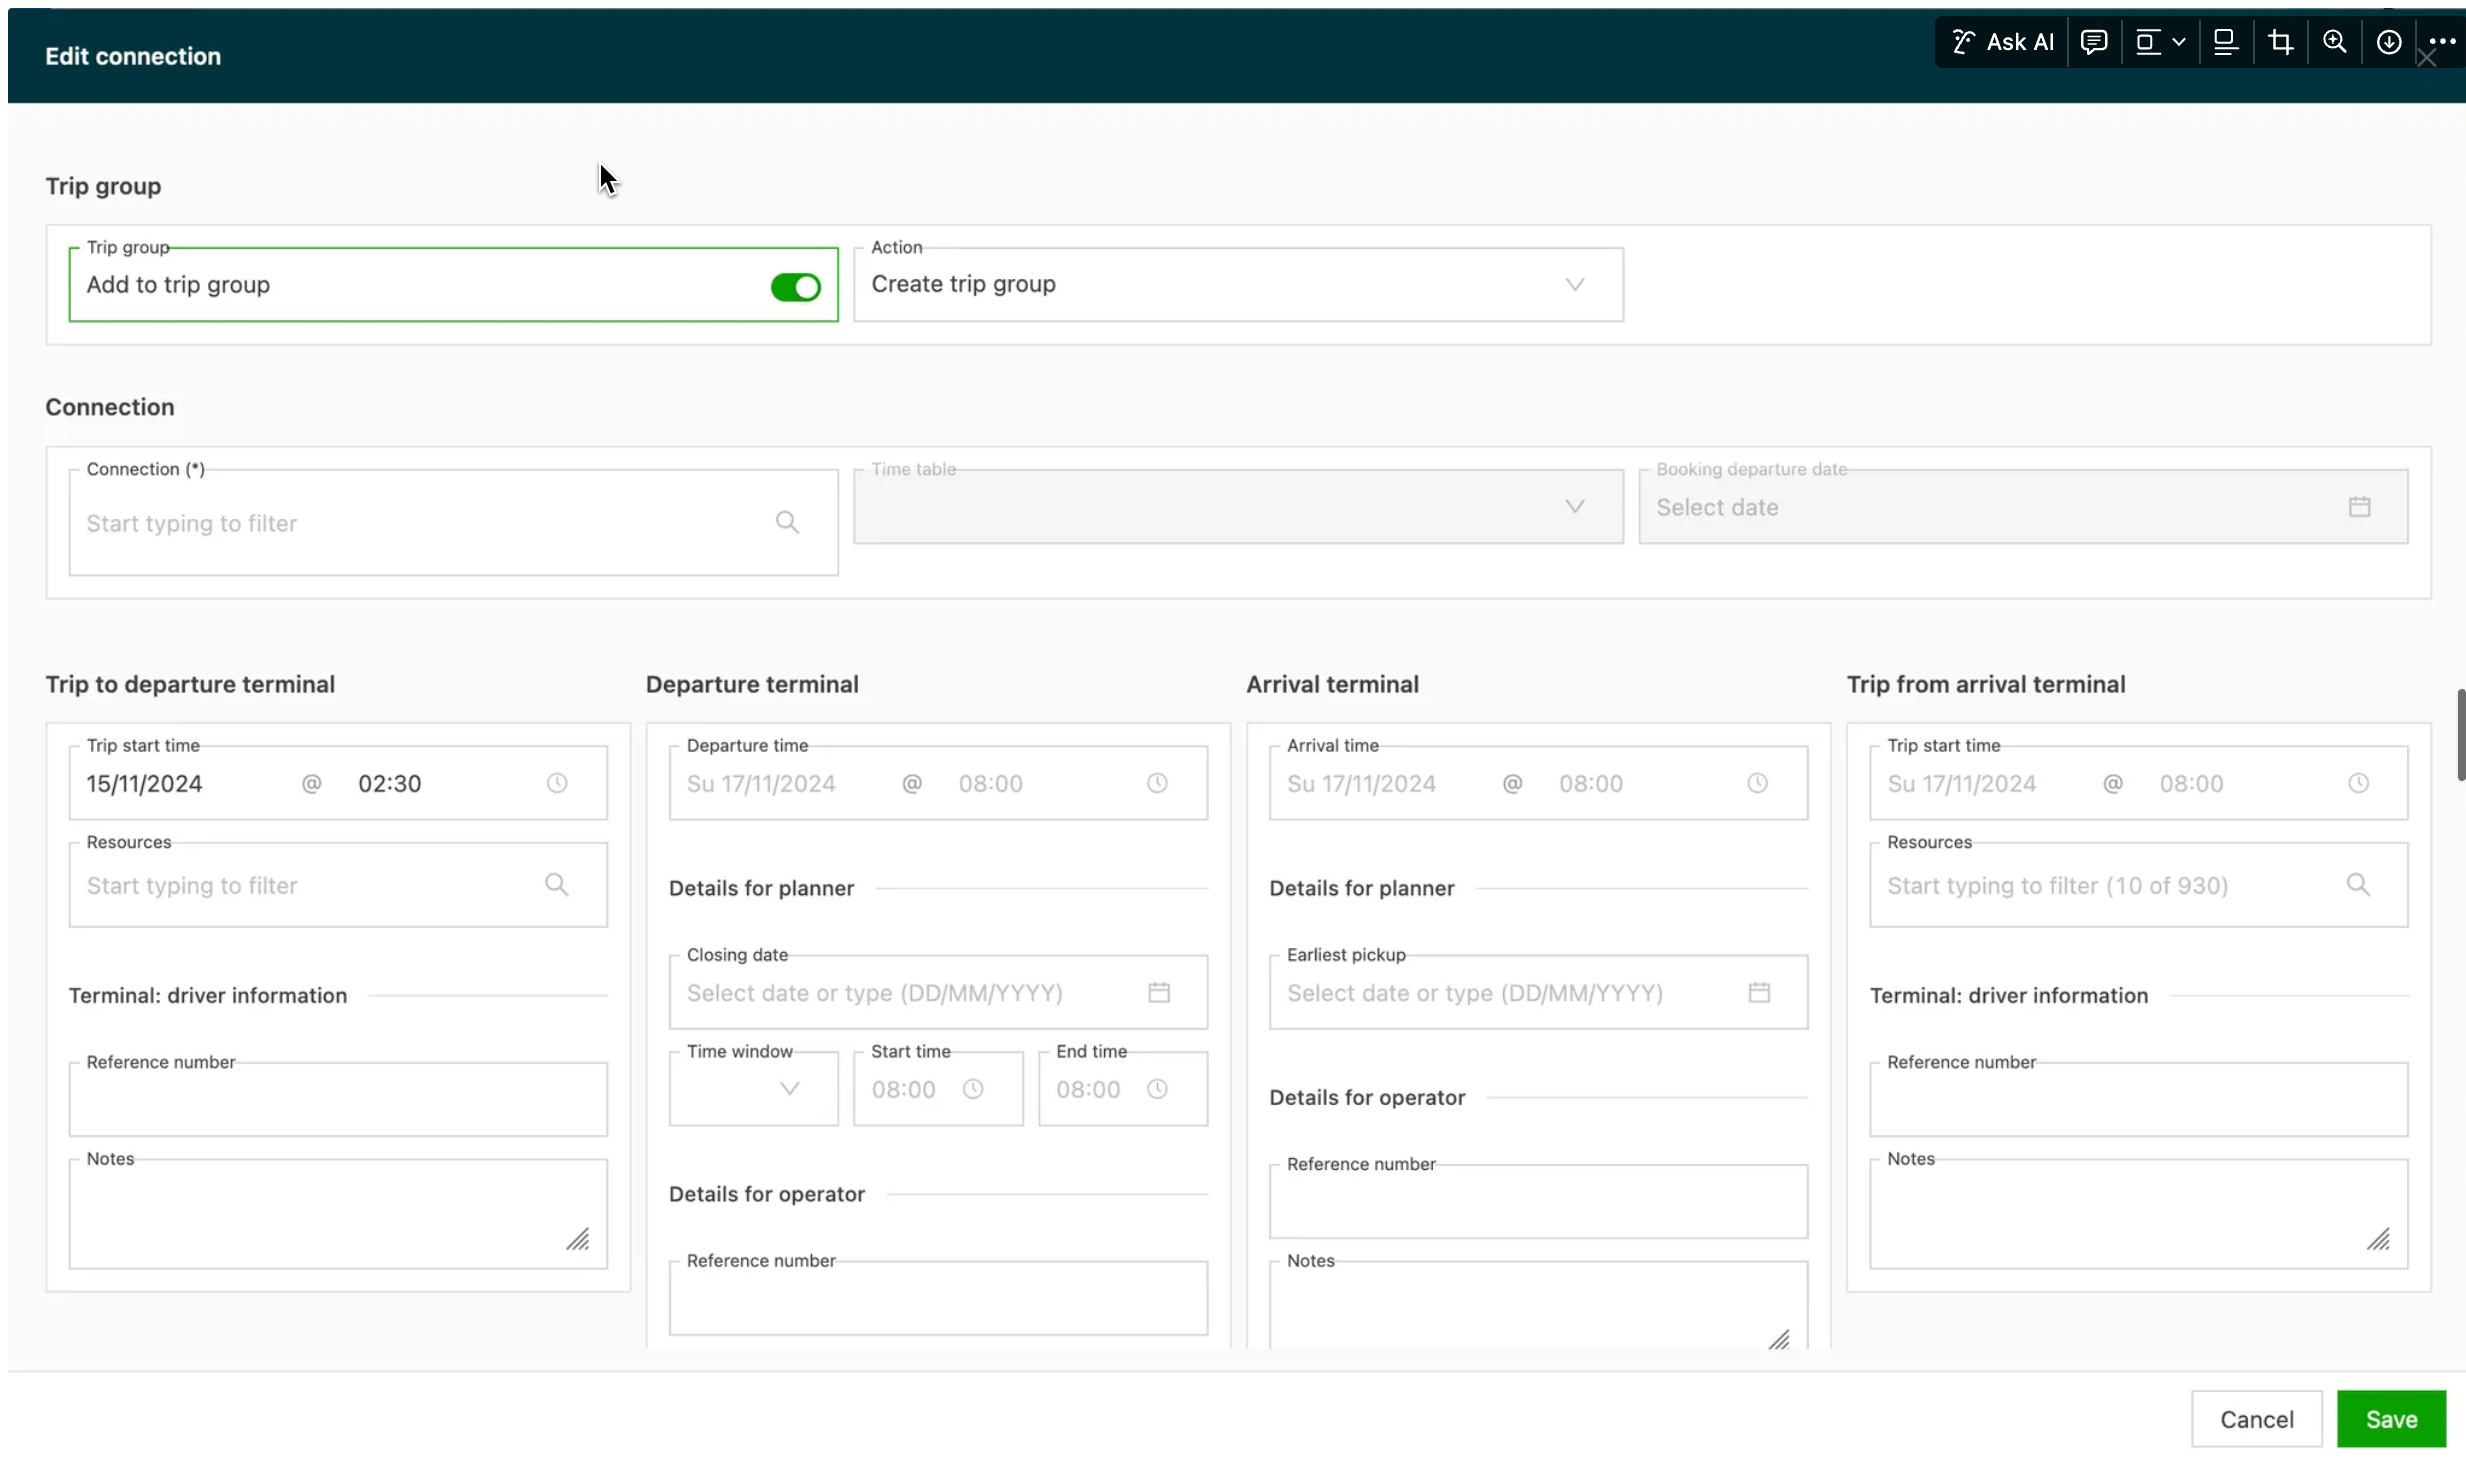
When adding an unaccompanied ferry/train load to an order, the following options are now available:
- Create a load group or add to an existing load group
- Set the resources + start timestamp of the load to the departure terminal
- Set the resources + end timestamp of the load from the arrival terminal
Automatic trailer assignment to the load group on intermodal split
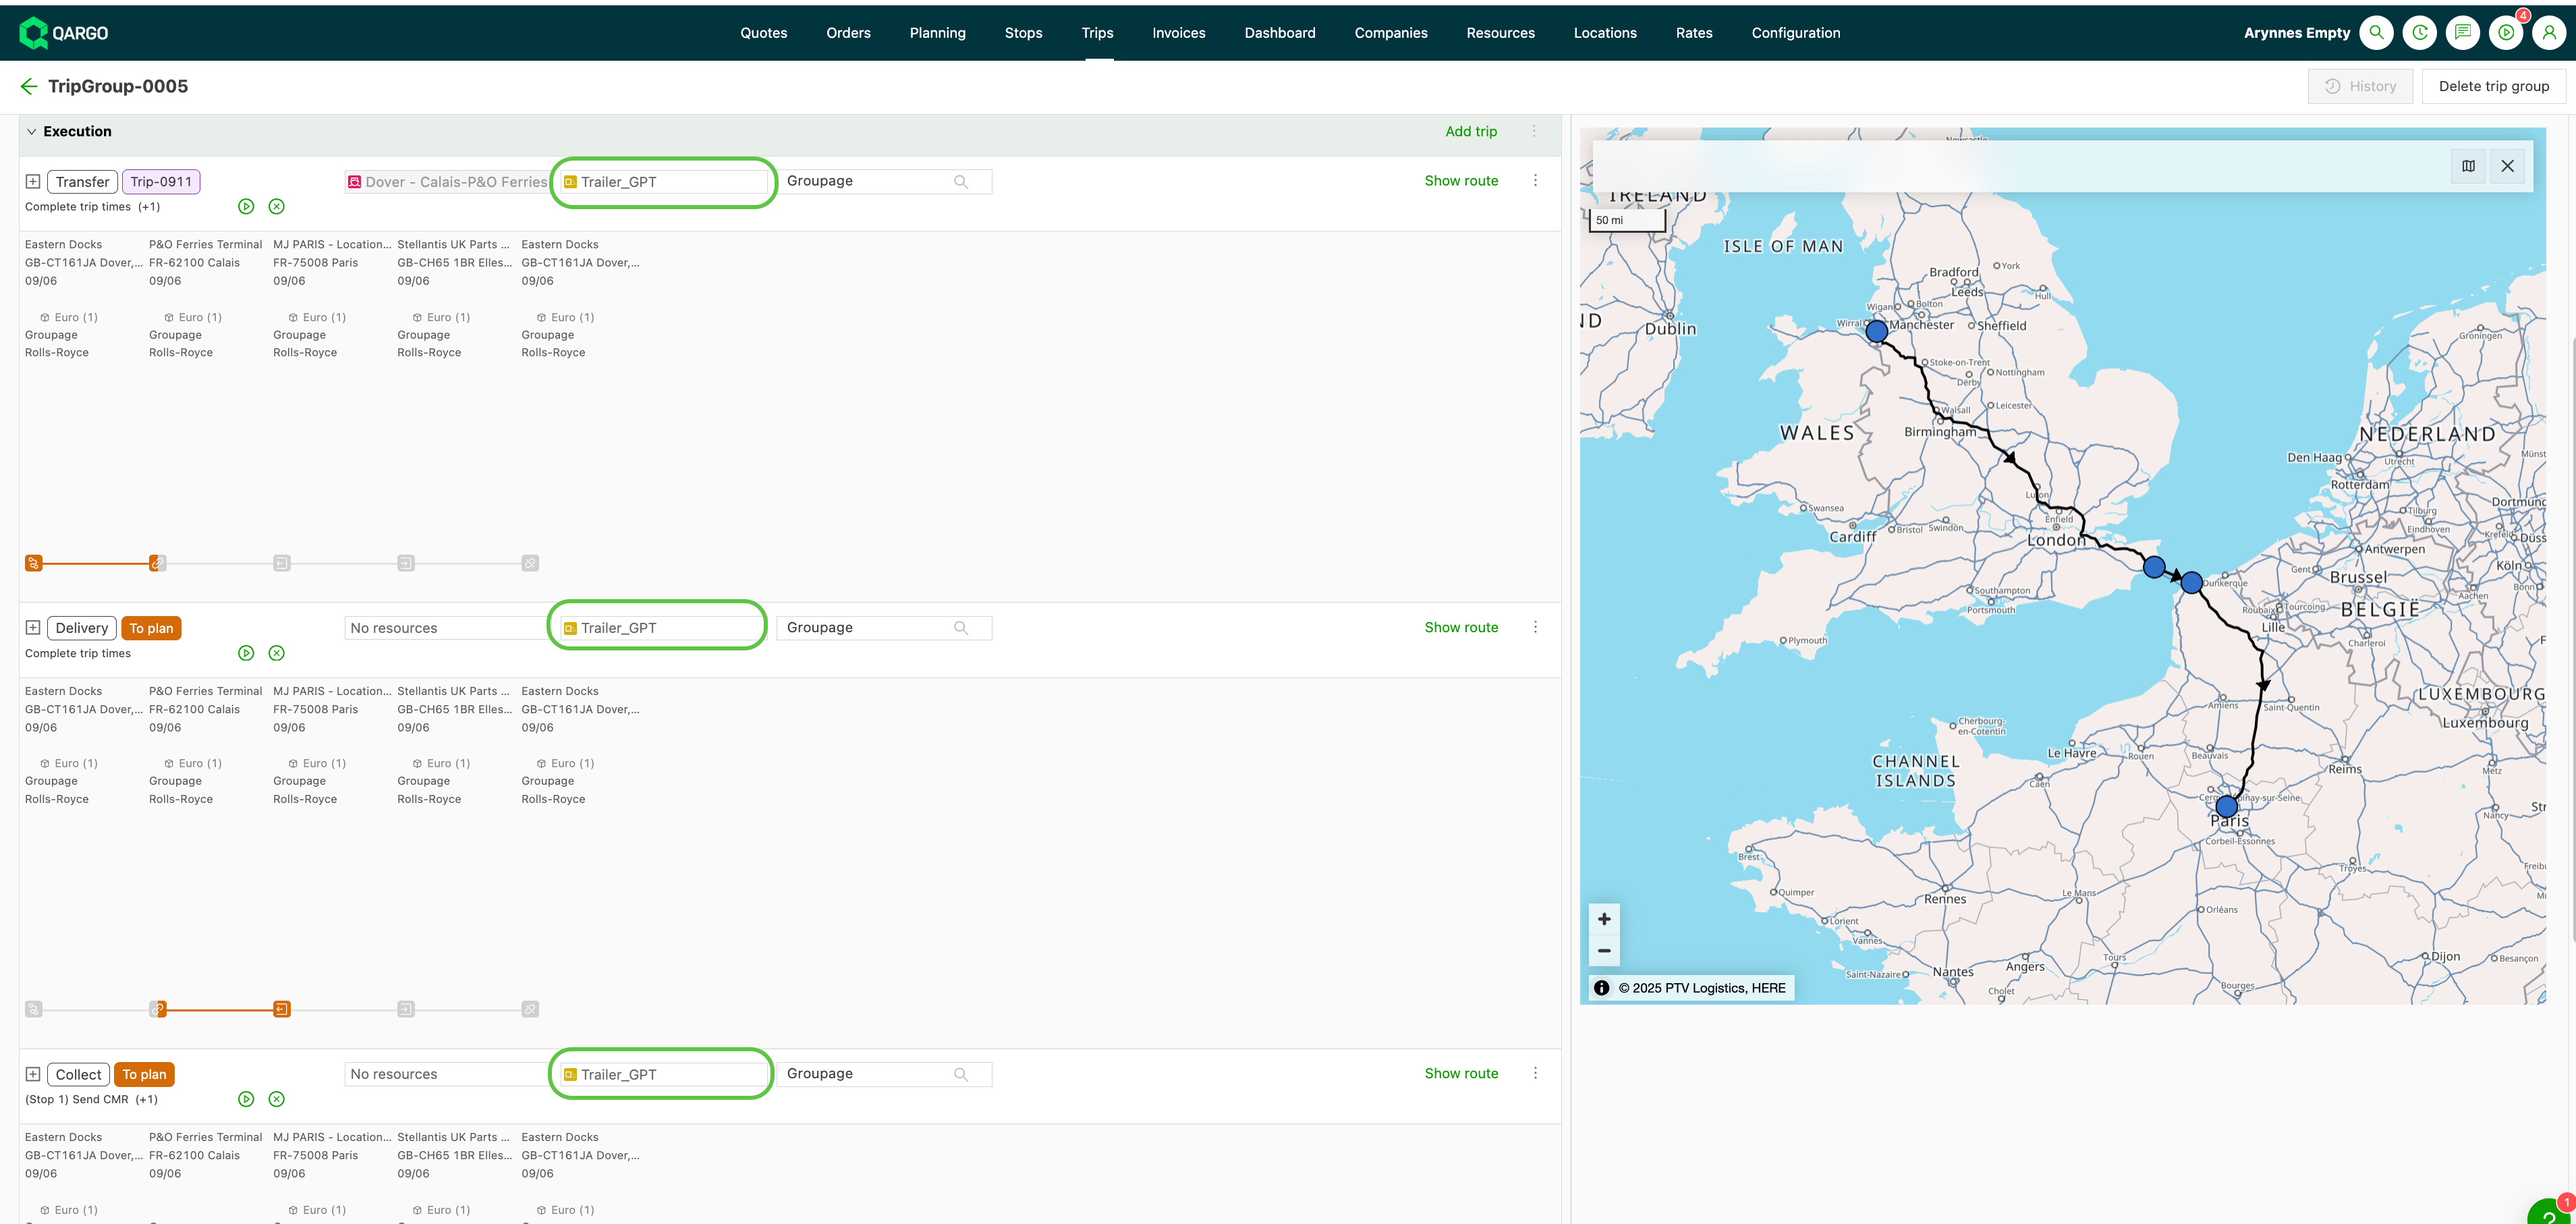
When an intermodal split is performed on a load that already has a trailer (or container, or other secondary resource) assigned, the resource is now automatically promoted from the original load to the new load group. The same resource becomes visible across the pickup, ferry and delivery legs without manual reallocation.
- Secondary load resource allocation is now automatically:
- Promoted from the originating load to the newly created load group
- Removed from the original load in the same operation
Load group allocations apply across every load in the group, so the trailer becomes visible on the pickup, ferry and delivery legs through a single allocation.
Affected workflow
The intermodal split action on the Planning board is unchanged. The behavior only differs in the post-split state of the resource allocation: the trailer now appears on the load group instead of on the original load.
A typical example:
- A load has trailer T-001 assigned
- The planner adds an intermodal connection, creating a load group with pickup, ferry and delivery legs
- T-001 is now allocated to the load group and shows on all three legs
Scope and limitations
| Limitation | Detail |
|---|---|
| Intermodal splits only | Promotion only happens on intermodal splits. Park splits and the Parking: Drop flow are not covered in this release |
| Edit flow | Removing intermodal from an existing load group, or moving a load out of a group, may have follow-up behavior that is still to be confirmed |
| Allocation types | Only secondary load resource allocations (trailer, container, etc.) are promoted. Order-level allocations and third-party cost allocations remain on the original load |
Viewing documents in the load group
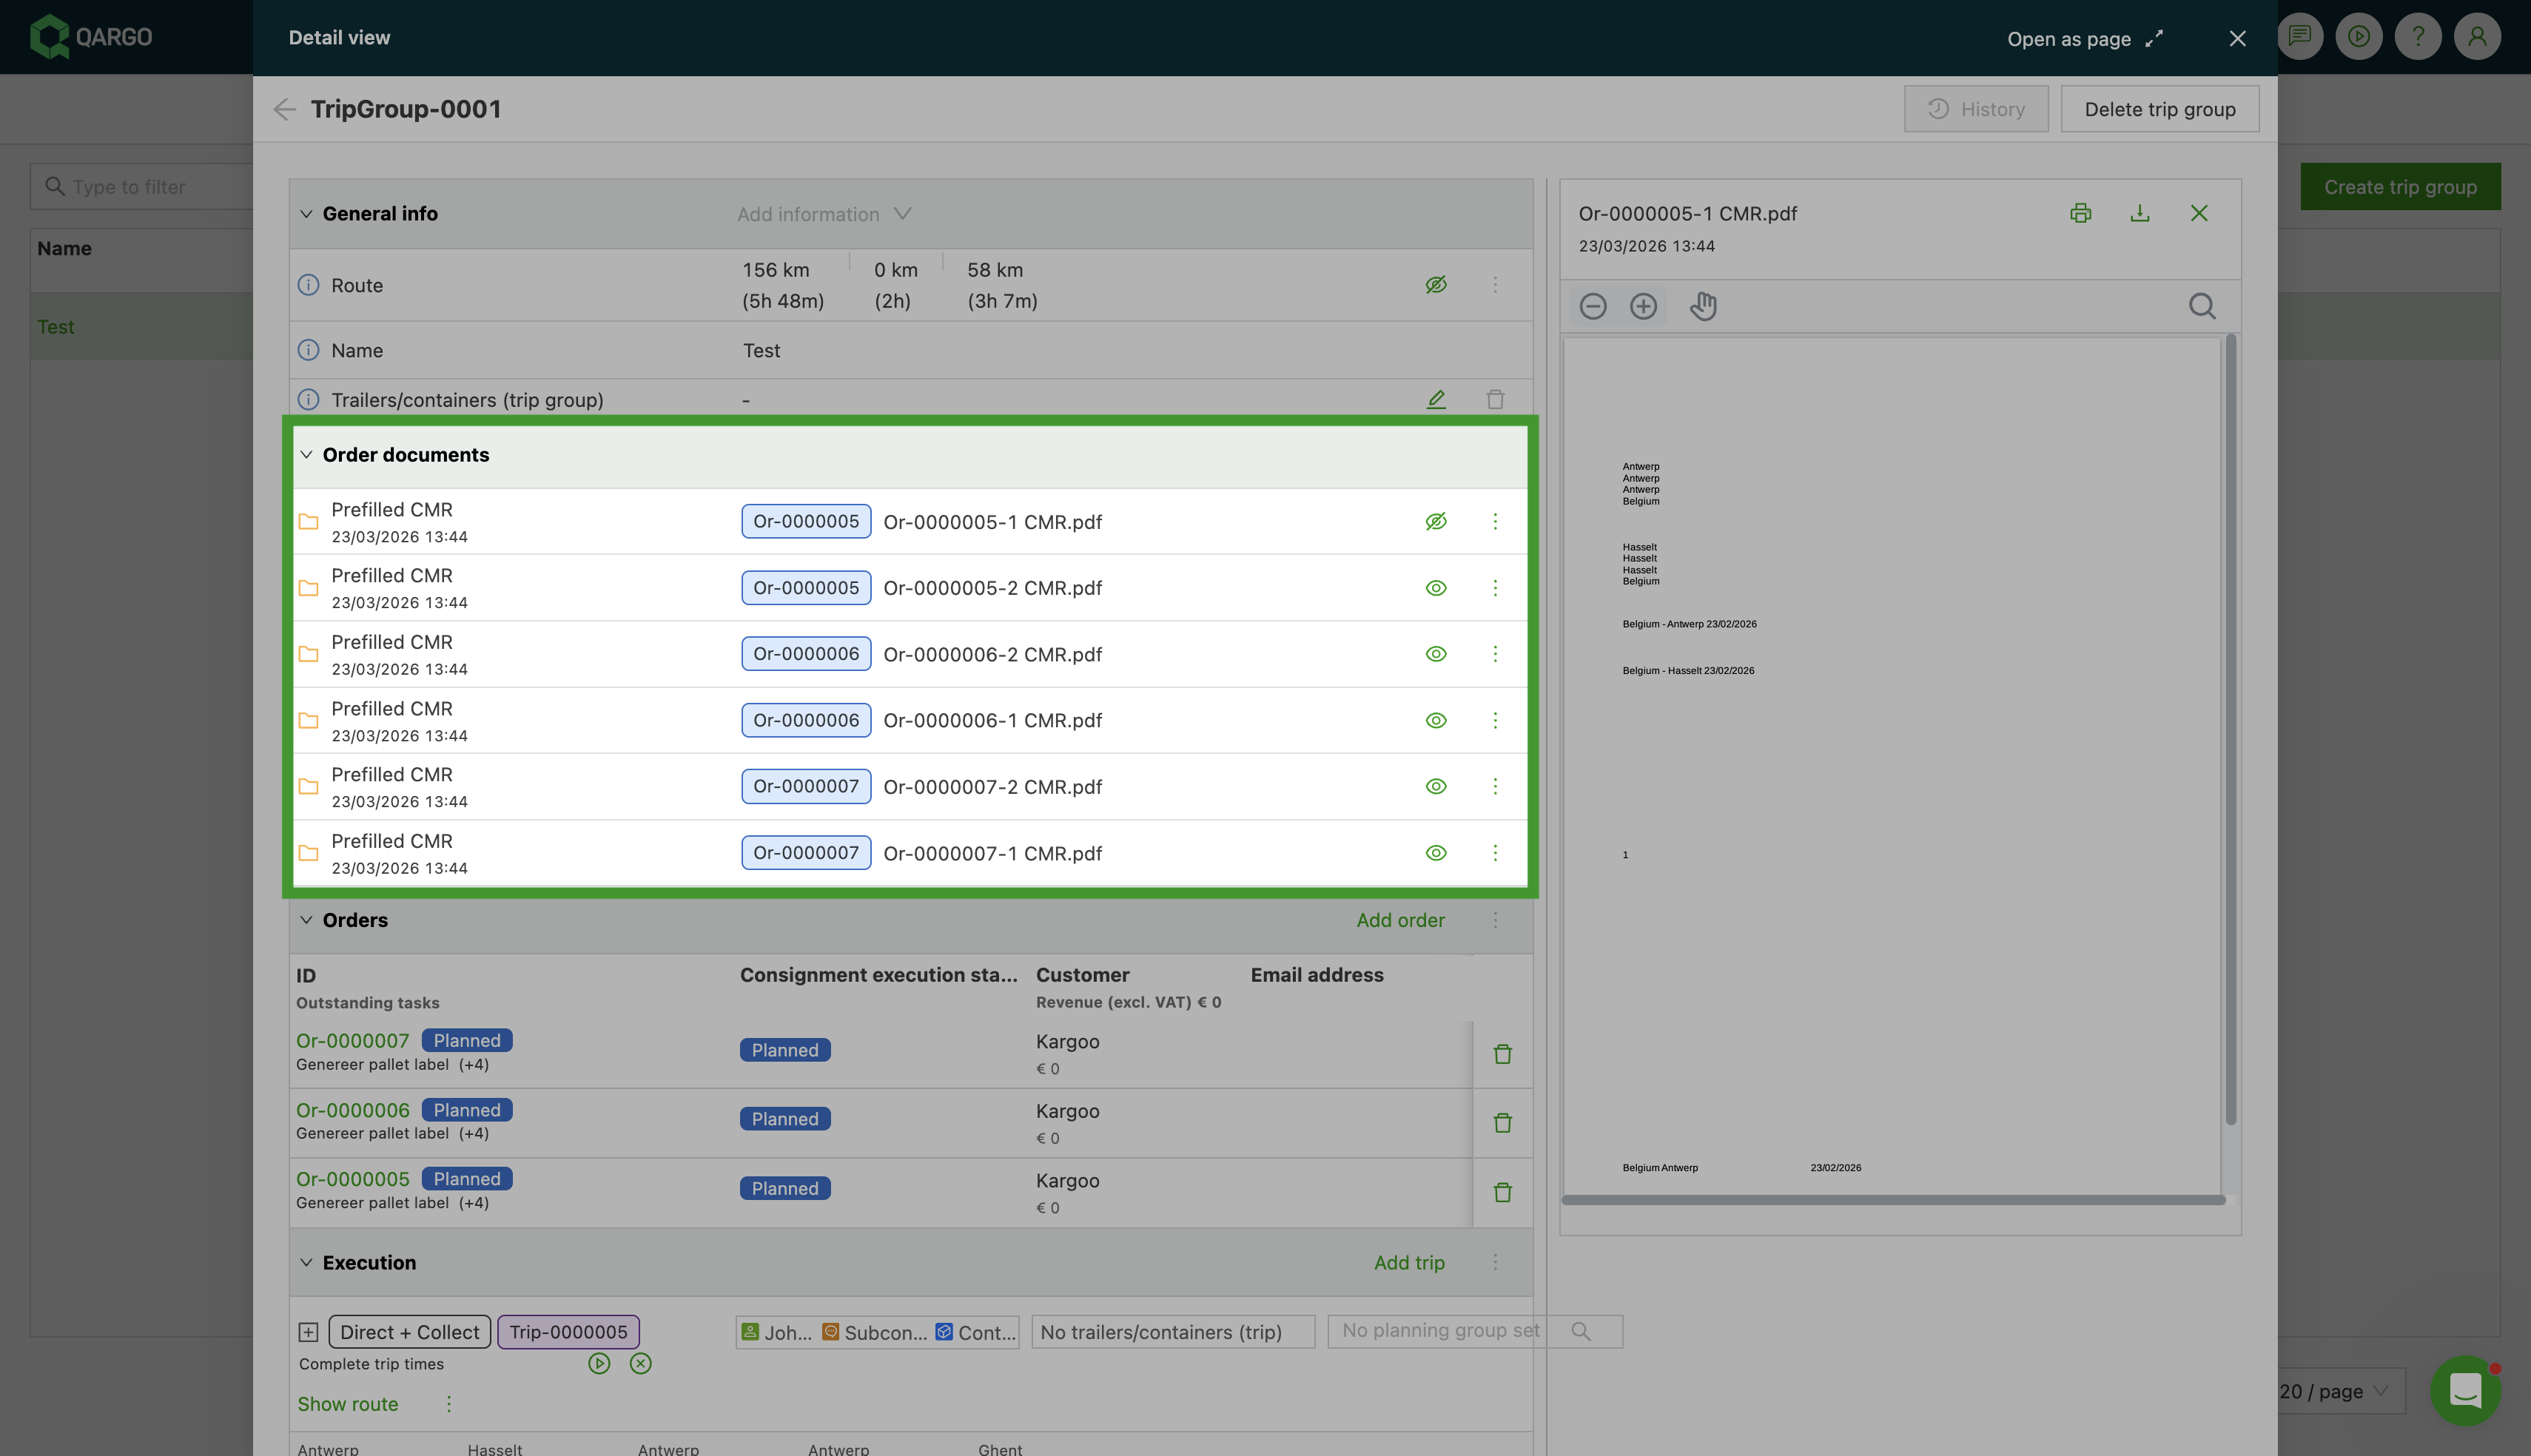
The Order documents section on the load group detail page now displays all documents aggregated from the orders and loads within the group.
- Dispatchers and planners do not need to navigate into each individual order or load to find the relevant paperwork. All documents are surfaced in one place.
Documents are organized into two subsections:
Order documents
-
Shows all documents attached to orders linked to loads in the load group.
- This includes both order-level documents and shipment documents (documents attached at the shipment level, below the order).
- Each document displays a tag indicating which order it belongs to, which makes it easy to trace documents back to their source.
Load documents
-
Shows all documents attached to loads in the load group.
- Each document displays a tag indicating which load it belongs to.
- All documents are sorted by the creation timestamp of their parent order or load, which gives a logical chronological overview.
Updating loads in load groups
- When two loads that are in different load groups are merged, a notification asks whether to merge the two load groups
- When stops are moved out of an existing load (i.e., creating a new load), a notification asks whether to add the new load to the existing load group
Revenue/cost calculation
The Revenue / cost calculation section on the load group detail page gives a consolidated financial overview of all loads in the group. This makes it possible to assess profitability at a glance, without opening each individual load separately.
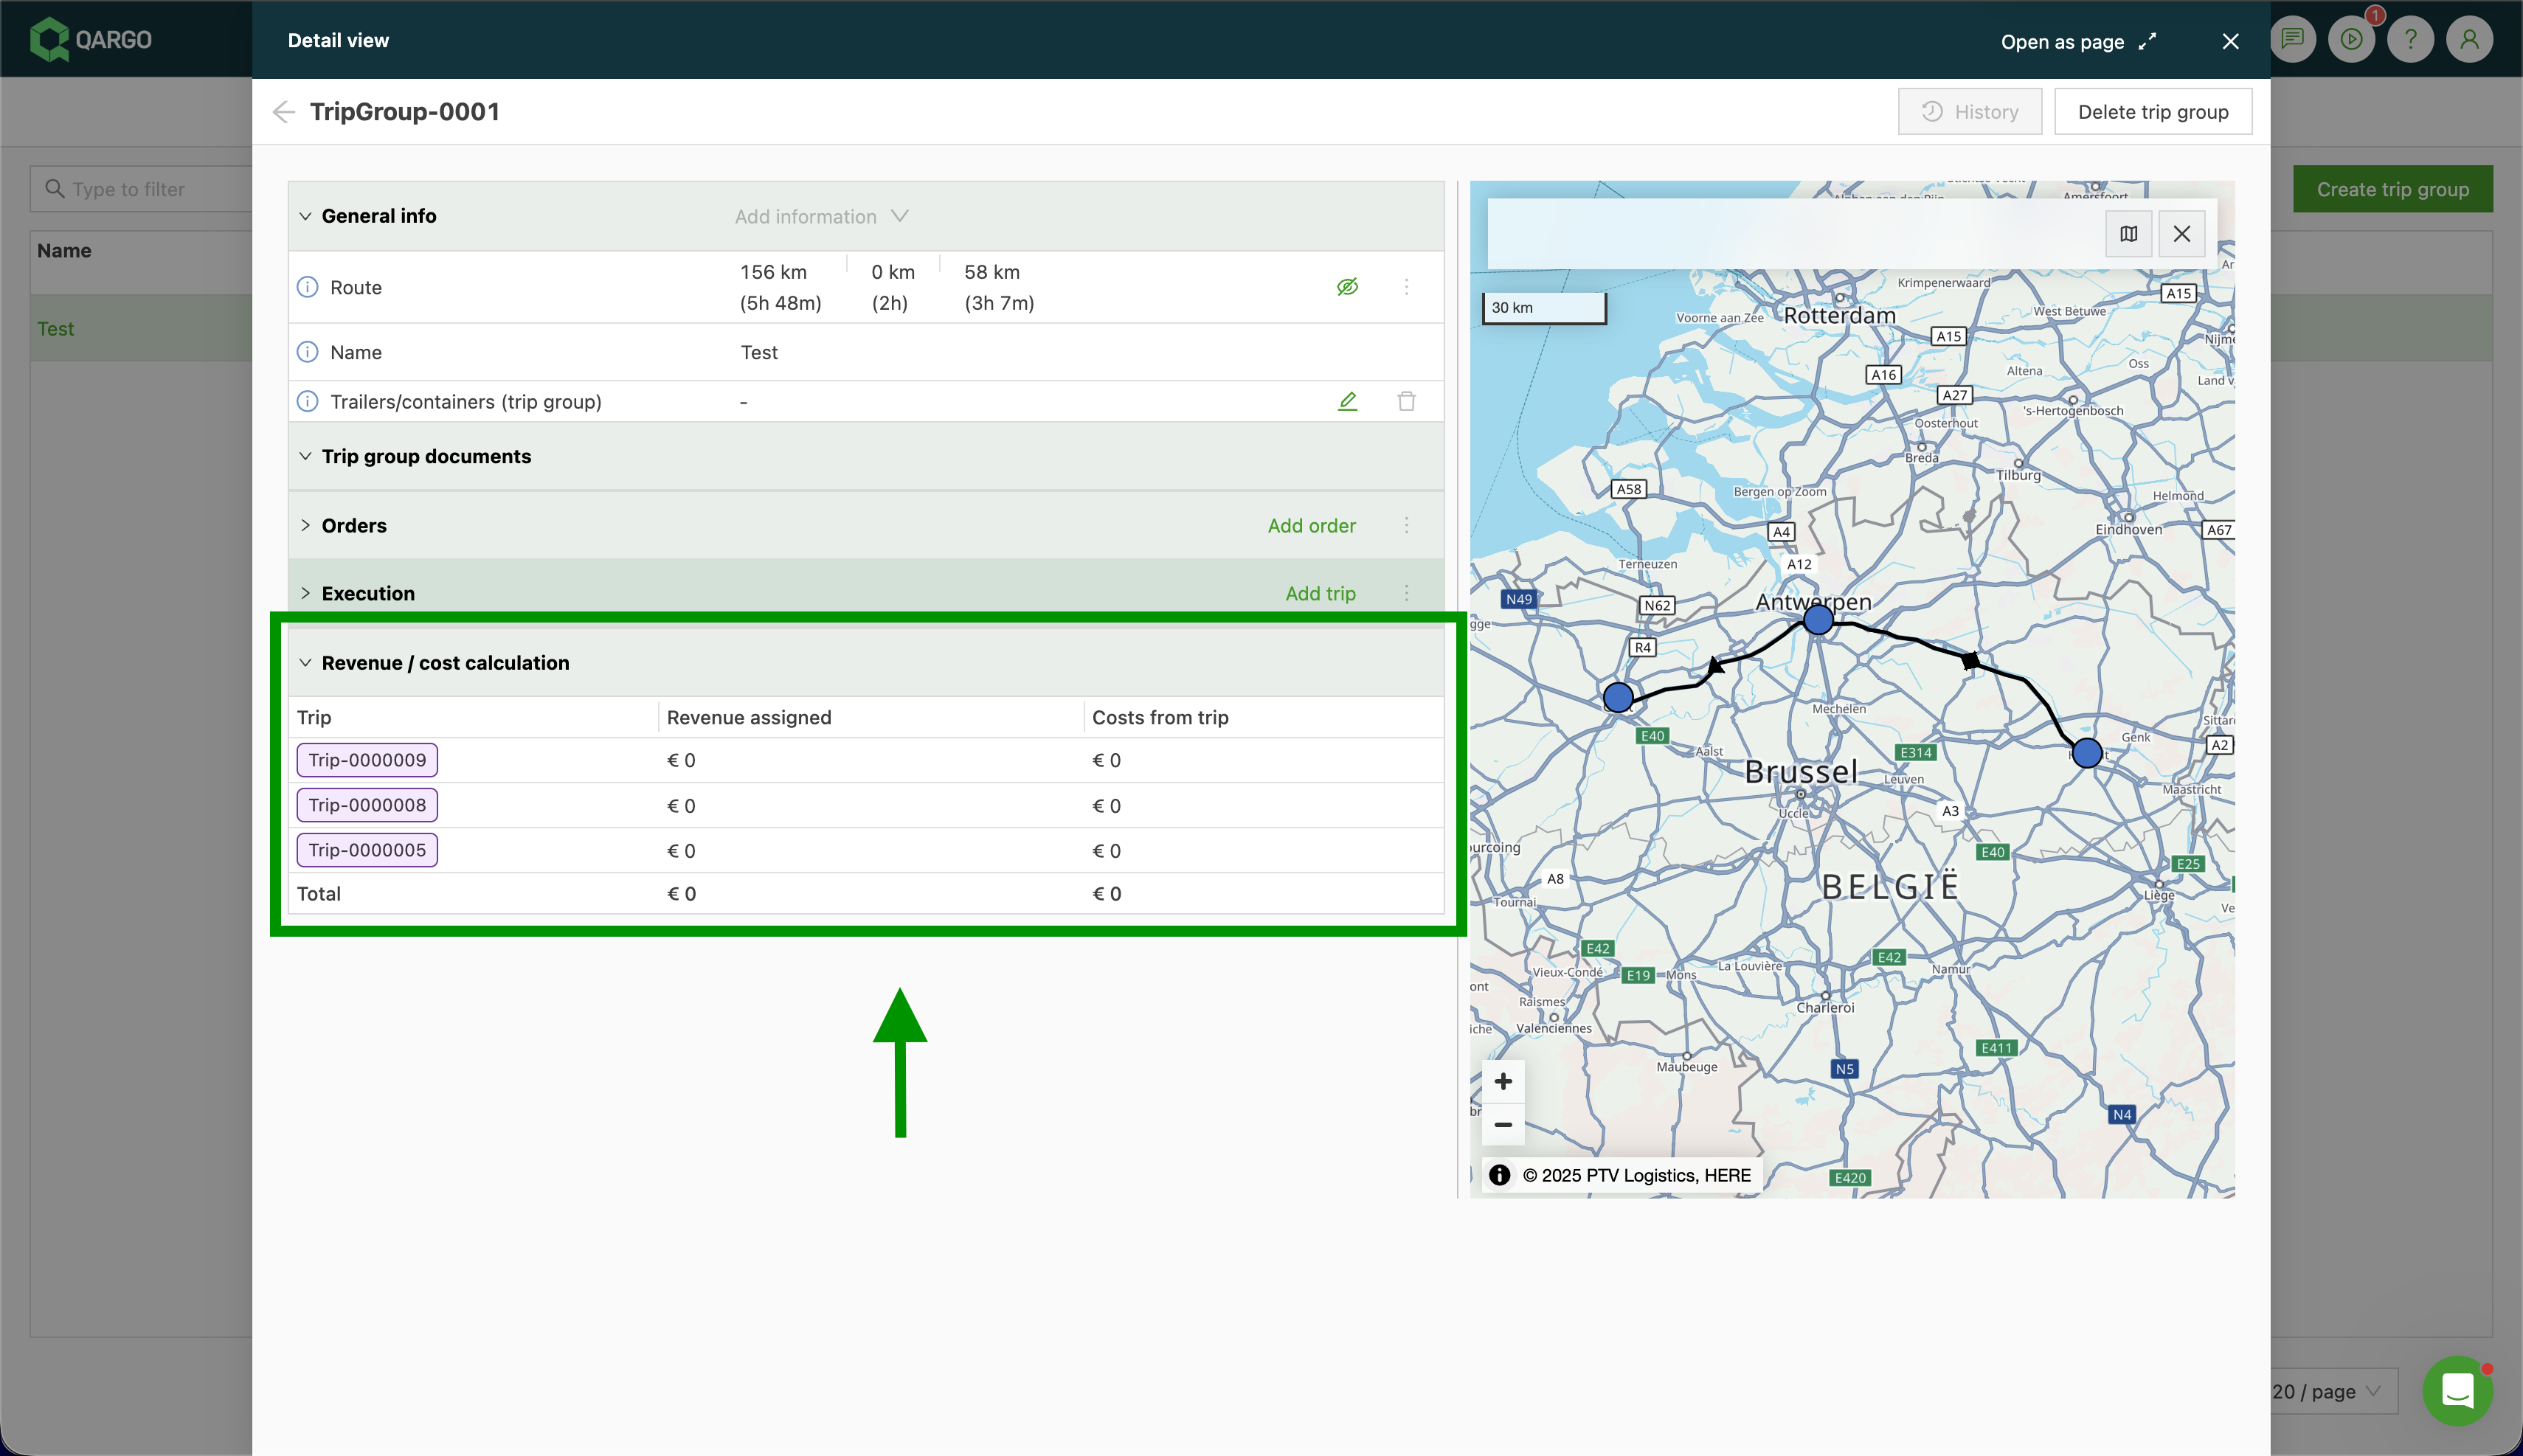
The section displays a summary table with one row per load:
| Column | What it shows |
|---|---|
| Load | Clickable link to the individual load detail page |
| Revenue assigned | The total revenue assigned to that load |
| Costs from load | The total costs across all cost lines on that load |
| Total | Sum of revenue and costs for all loads, grouped per currency |
To view the revenue/cost calculation:
- Navigate to Loads > Load groups and open a load group.
- Scroll down to the Revenue / cost calculation section on the detail page.
- The table loads automatically. No action is needed.
- Click any load name in the first column to go directly to that load’s detail page.
The table is read-only. Revenue splits and cost adjustments must still be made at the individual load or order level. They cannot be edited from the load group page.