
Orders – Create orders in bulk from a template
Easily create bulk orders using recurring or non-recurring templates. Create order schedules and create orders for selected dates.
Table of contents
Orders can be created with the template functionality. This article explains how to create orders in bulk. This is useful when the same type of order comes up often.
Order templates in Qargo let users create orders faster by reusing predefined structures. There are two types of templates: recurring templates and non-recurring templates. Each type serves specific operational needs.
Recurring templates
Create a schedule over a date range to create multiple orders quickly and easily.
Recurring templates are ideal for tasks that follow a repeatable schedule, such as deliveries on specific days of the week. Users can define a weekly schedule over a date range and create multiple orders for that period in one action.
Key features of recurring templates:
- Define a weekly schedule over a date range.
- Create multiple orders in bulk for the specified period.
Recurring template
- Go to Orders > Templates.
- Select the Recurring tab and click an order template.

-
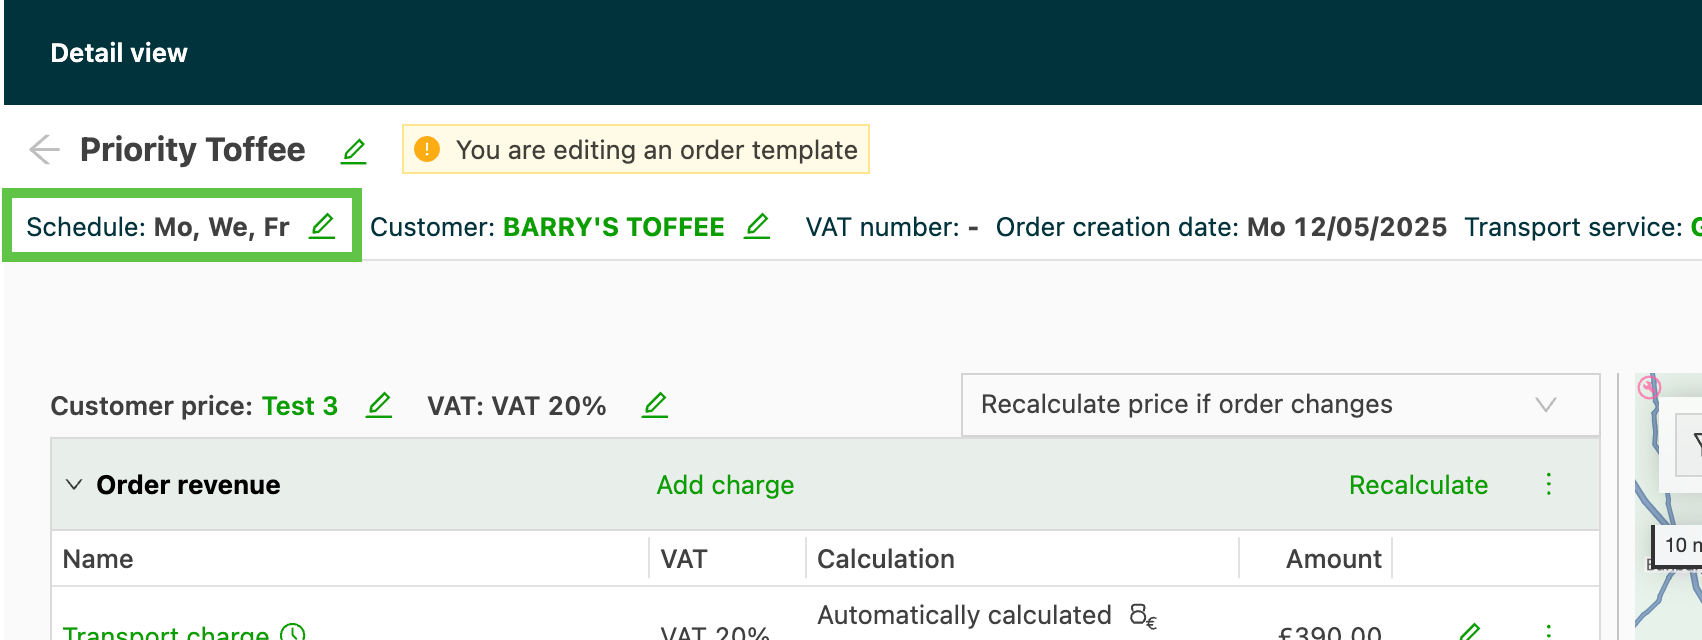
The schedule is shown in the top-left corner of the order details page.
- Click the Edit icon to update the schedule.
Orders are not created automatically from recurring or non-recurring templates. Users must select the dates and start the creation process manually. This gives them full control and flexibility.
With this manual process, users can make adjustments as needed. This ensures that the generated orders match operational requirements.
Create multiple orders over a date range.
-
Select the recurring template to create orders from selected recurring templates.

-
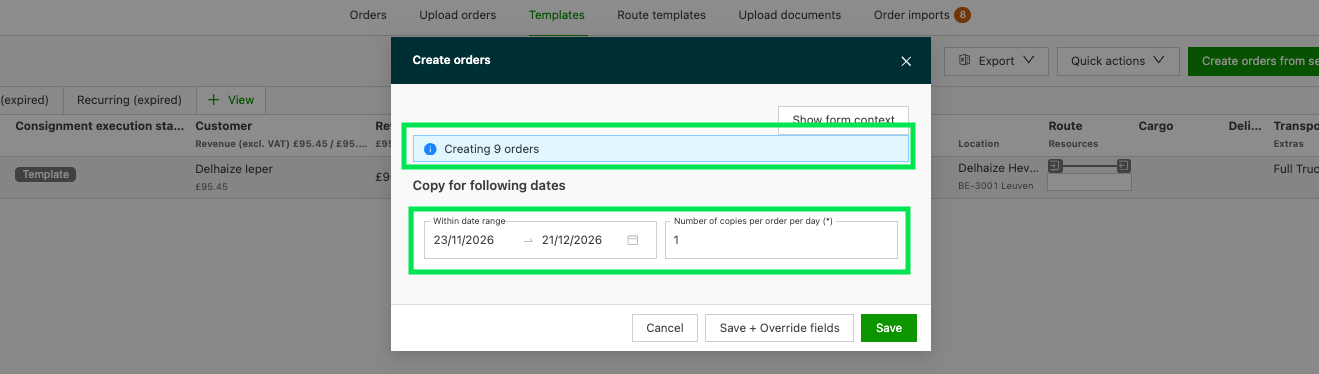
Select the date range for the orders by entering a start date and an end date.
-
Enter the number of copies required per day.
-
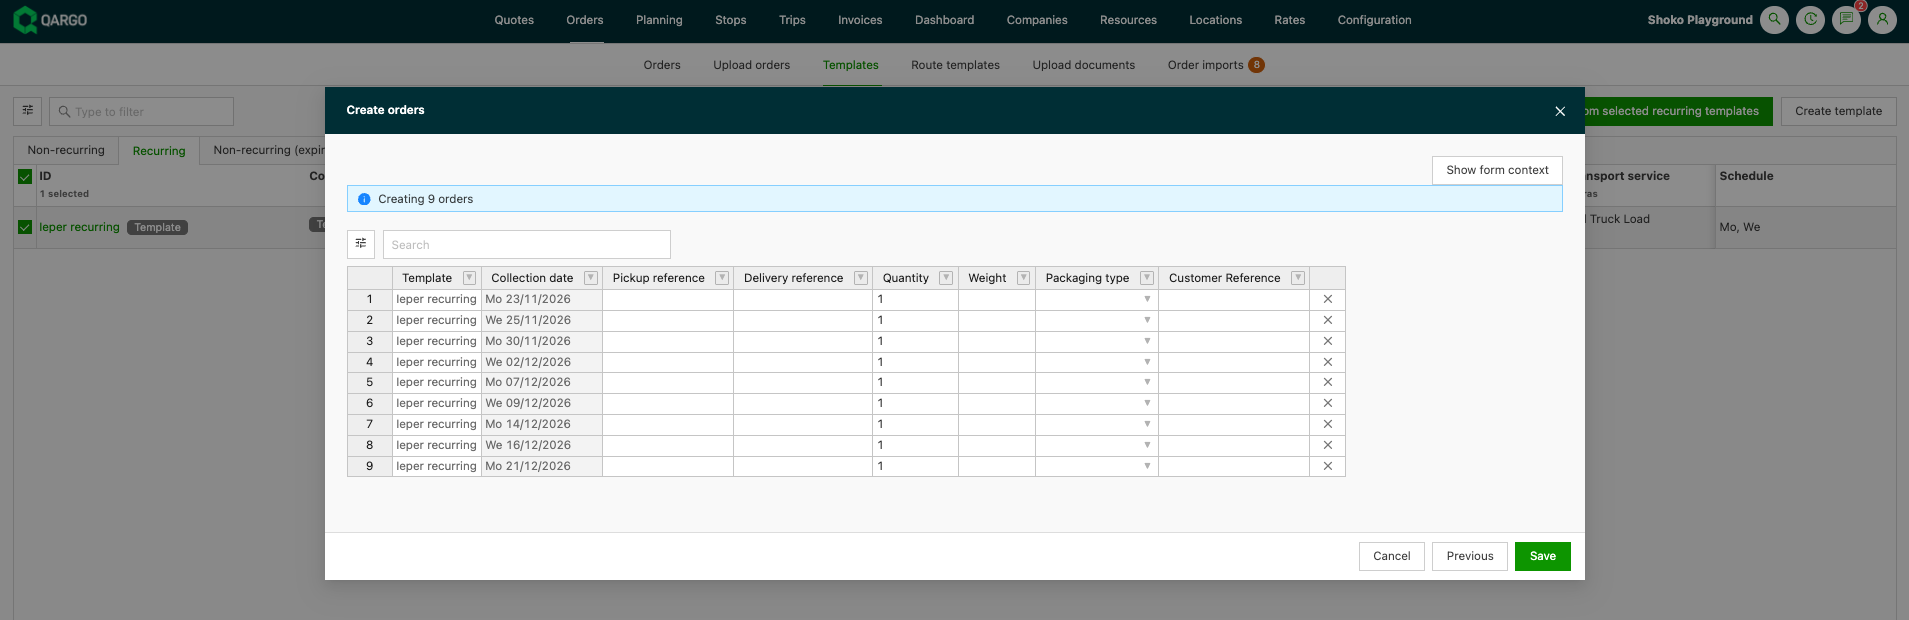
Enter the values per row.
-
Click Save. Each row becomes its own order in To plan.
Update existing templates:
-
Existing templates that are not currently set to a schedule can be updated.
- This moves the template to the Recurring tab.
-
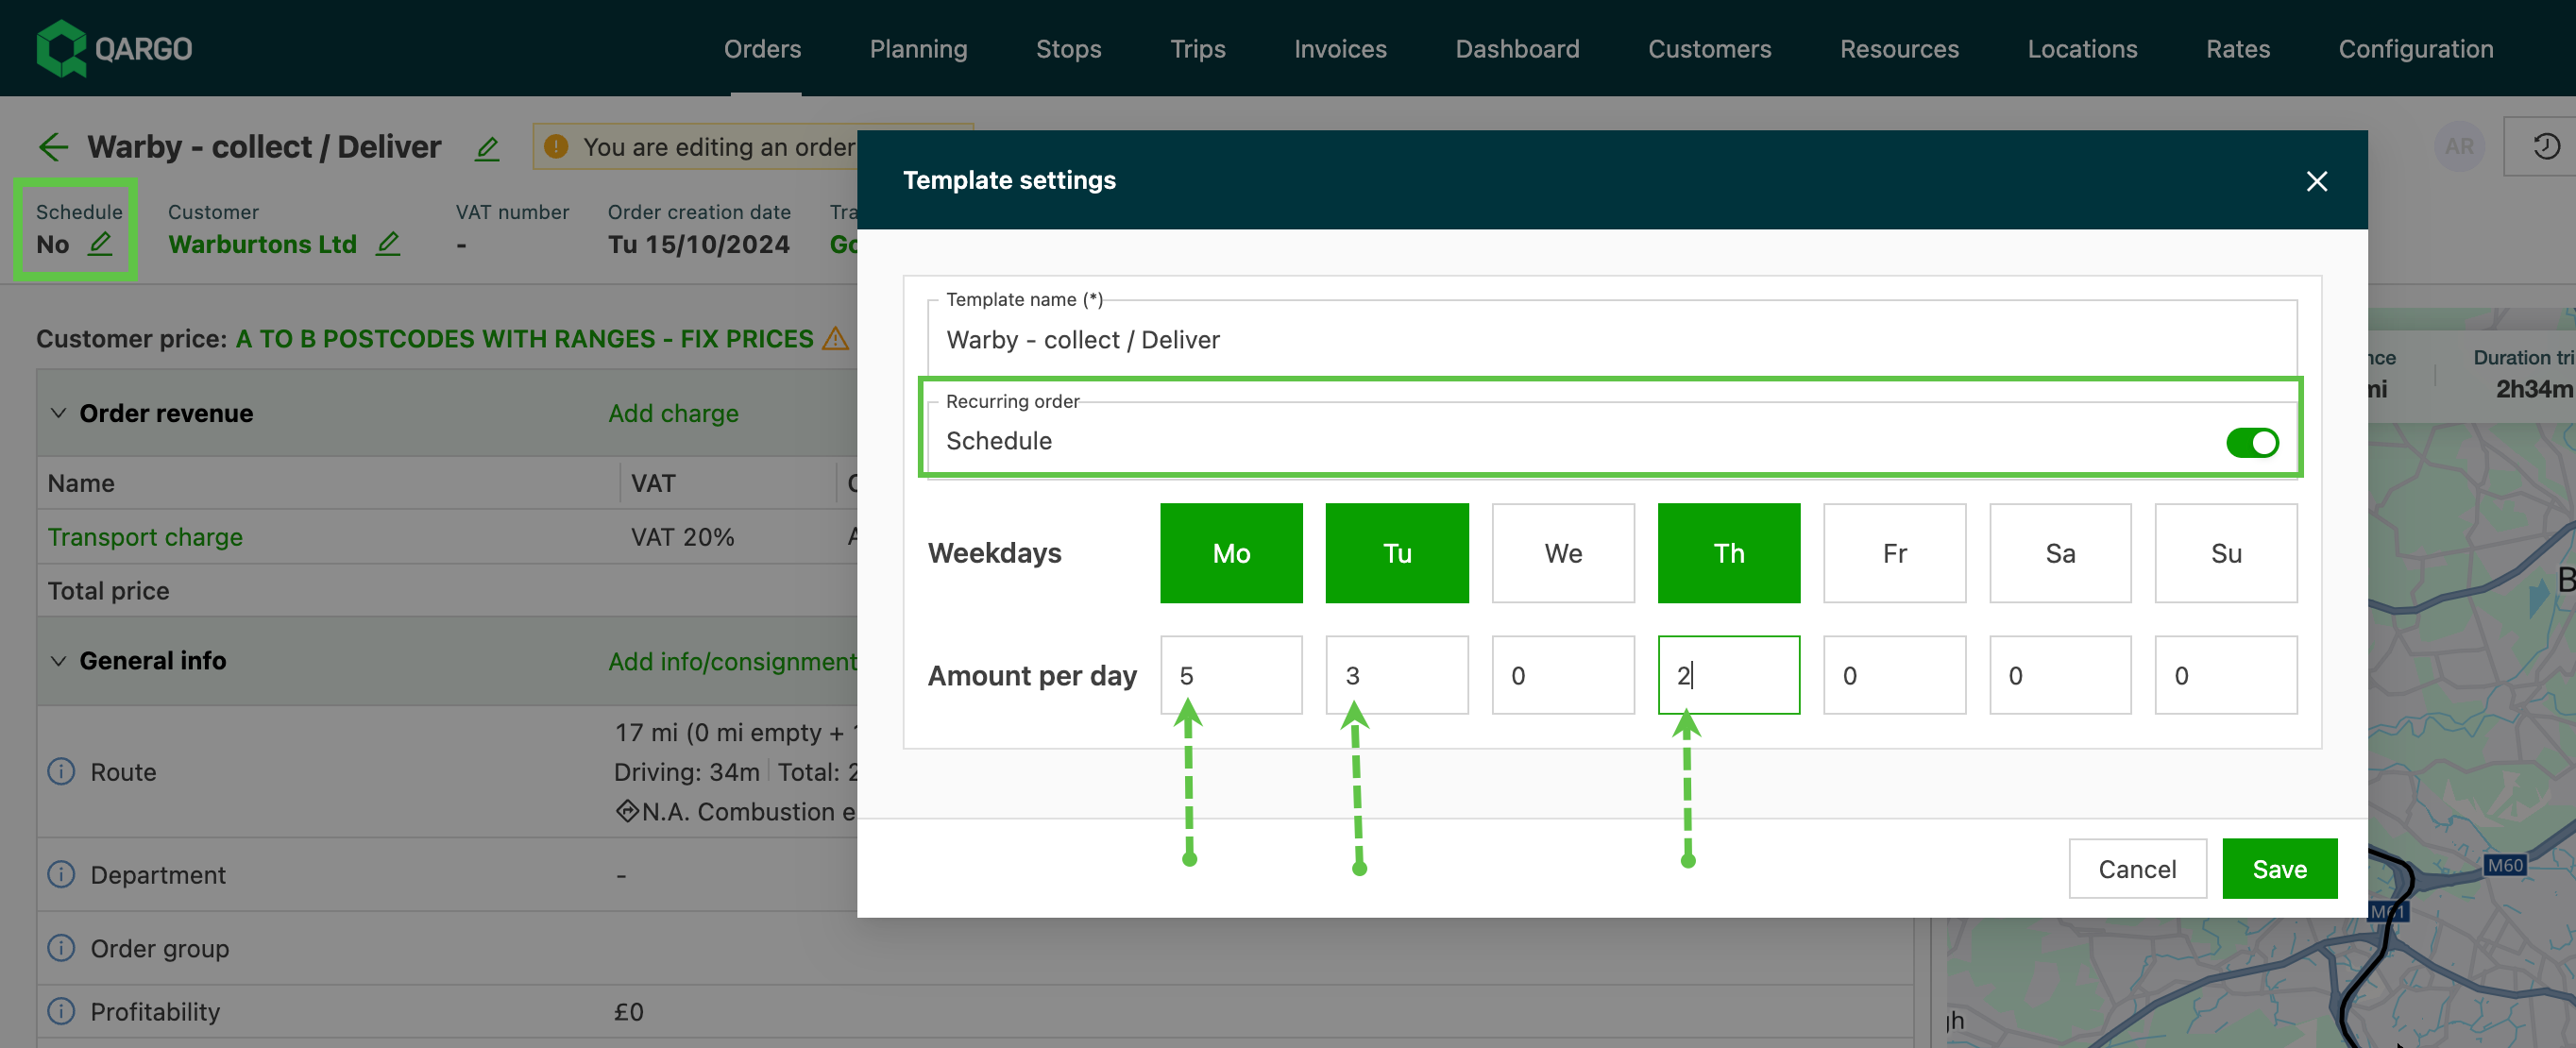
To remove a scheduled template, turn off the Schedule toggle.
- This moves the template to the Non-recurring tab.
-
When updating a schedule, users can enter the specific number of orders to generate per day.
- Click the day to schedule the order. The default value ‘1’ is entered.
- If more than 1 order is required, update the value.
-
Click Save.
Non-recurring template
Non-recurring templates suit tasks that do not follow a fixed schedule. Users can reuse the same structure and create orders as needed by selecting specific dates.
Once a template has been set up, orders can be created from it.
These templates are useful when the route or task structure stays the same, but the dates vary and are chosen as needed.
Create orders from selected templates
-
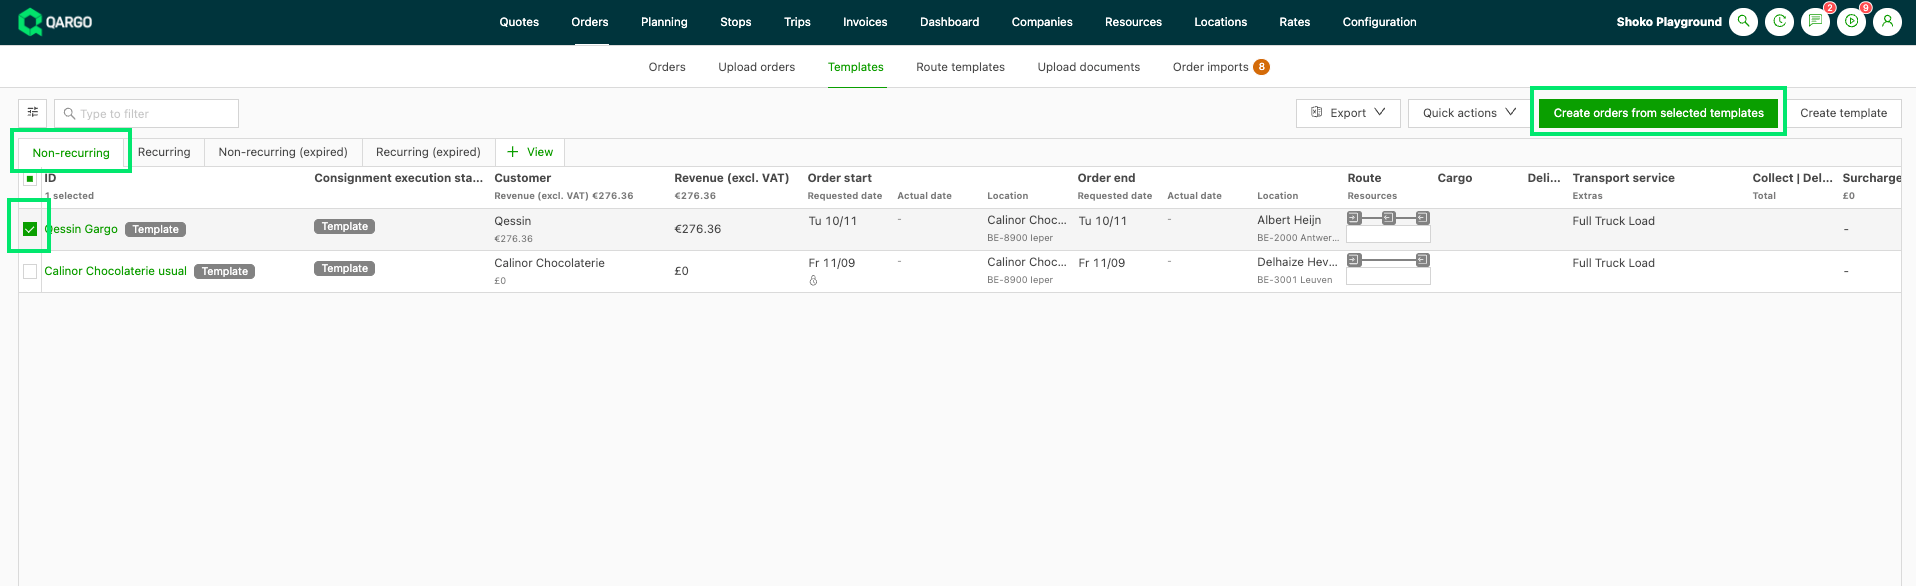
Open Orders > Templates and stay on the Non-recurring tab.
-
Check one or more templates.
-
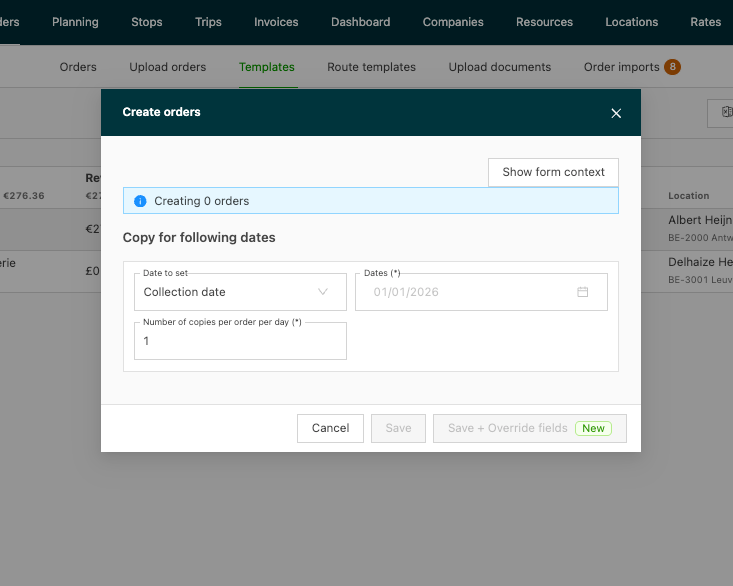
Click Create orders from selected templates. The Create orders window opens.
-
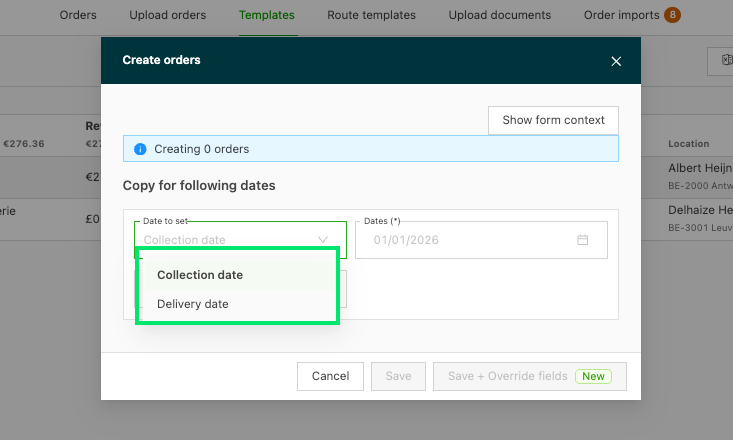
Select the stop to place on the picked dates in Date to set:
-
Pickup date - the order’s earliest stop lands on each picked date. This is the default.
-
Delivery date - the order’s latest stop lands on each picked date.
-
Enter the Number of copies per order per day.
-
Select one or more Dates. The blue alert shows how many orders Qargo will create
-
Click:
Save. Orders get saved immediately.
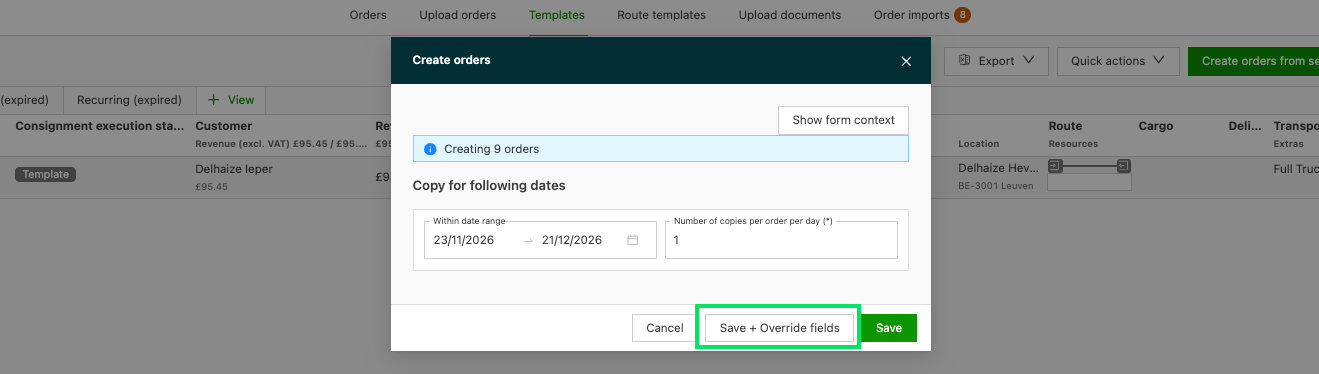
Save + Override field. A table opens in the same window, with one row per order.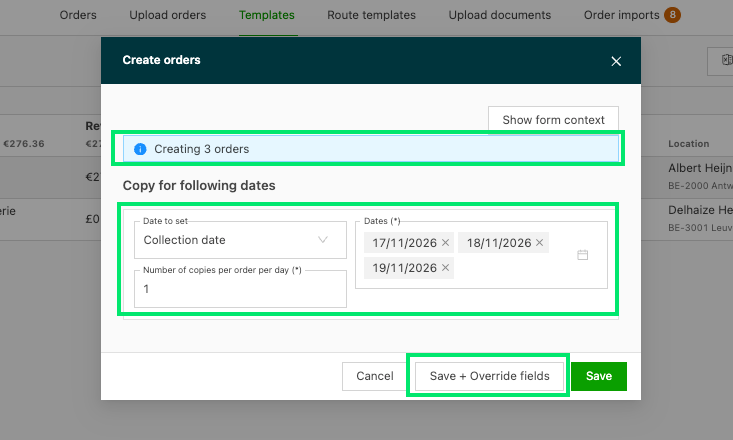
-
Enter the values per row, or paste a block of cells copied from Excel.
-
Click Save. Each row becomes its own order in To plan.
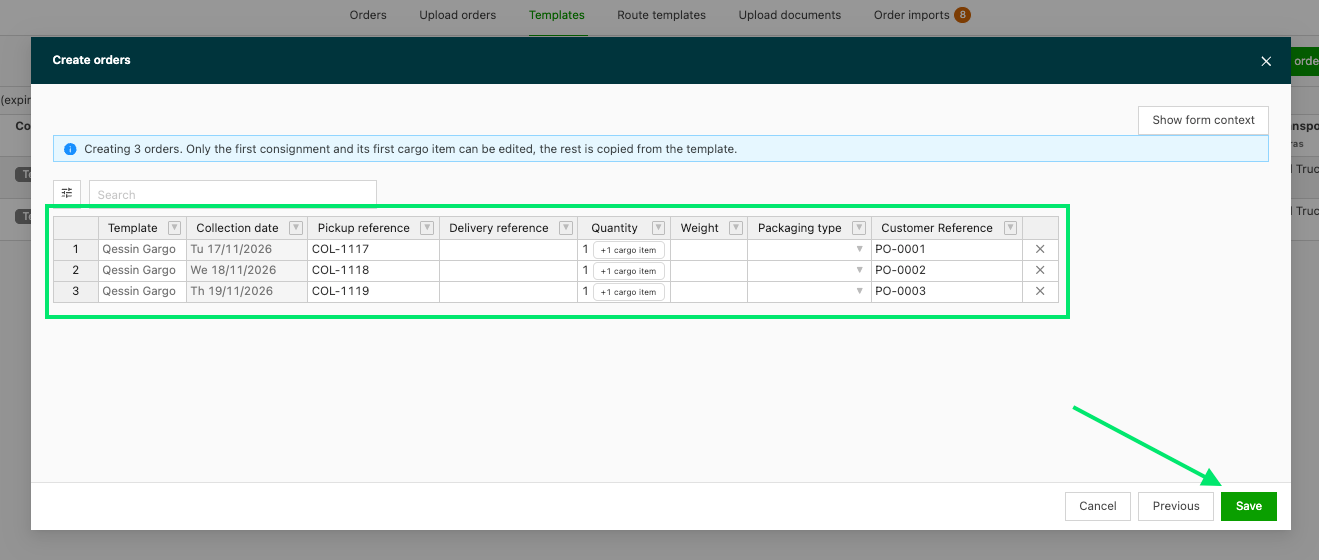
Table columns
| Column | What it shows |
|---|---|
| Template | The template the row comes from. Read-only. |
| Pickup date | The date picked for this row. Reads Delivery date when that option was chosen. Read-only. |
| Pickup reference | The reference of the pickup stop. |
| Delivery reference | The reference of the delivery stop. |
| Quantity | The quantity of the first freight item. |
| Weight | The total weight of the first freight item. |
| Packaging type | The packaging of the first freight item, picked from the list. |
| Customer reference | The customer reference of the order. |
How it works
-
Dates: the other stops move by the same number of days as the anchored stop. Weekends and non-working days are not skipped.
-
Service level: when the order has a service level, Qargo works out each delivery date again from its pickup date. The service level wins over the template’s gap.
-
Dates per row: dates cannot be changed in the table. They come from the Dates picked in the first step.
-
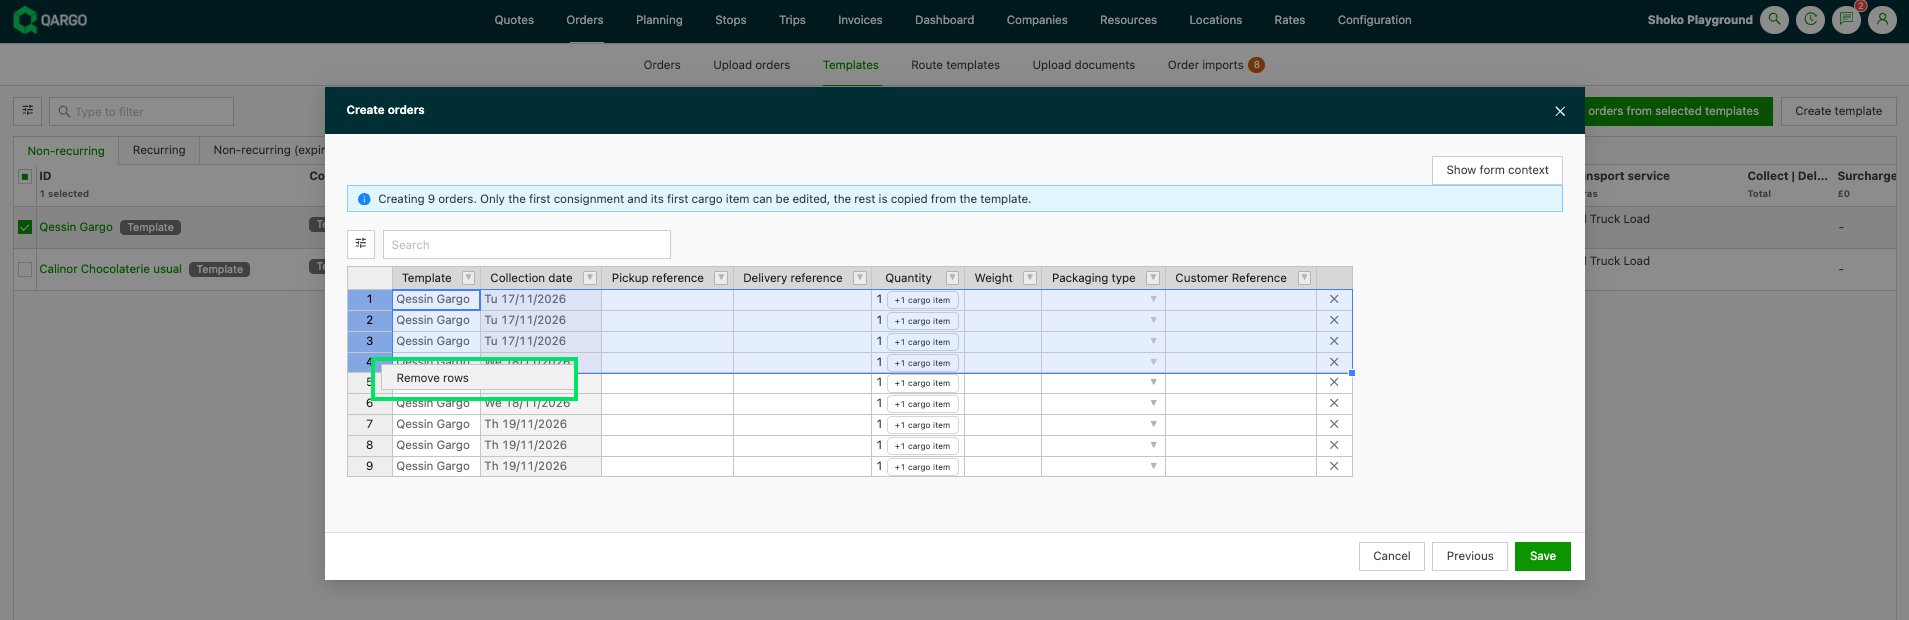
Removing rows: the X at the end of a row removes it. To remove several rows, select them, right-click and choose Remove row.
-
Checks: Qargo checks every changed cell.
-
Save blocked: Save stays disabled until every error is fixed. Errors in hidden columns also count.
-
Several freight items: A template with more than one freight item shows a
+N freight items tag. Only the first shipment and its first freight item are editable, the rest is copied as it is. -
Creating: with two or more rows, Qargo creates the orders in the background and opens the jobs panel. With one row, the new order opens right away.
-
Limits: one run creates at most 500 orders. Above that, Next stays disabled. A date outside a template’s validity period also blocks Next.
-
Recurring templates: on the Recurring tab the button reads Create orders from selected recurring templates. The first step shows Within date range instead of Date to set and Dates. Qargo takes the dates from each template’s schedule. The pickup date is always the stop placed on them.
To learn more about creating template orders, click the link below👇