
Rate card FAQ – pallet network: delivery location and pallet spaces
Create rate cards for a pallet network, where rates are based on a delivery location and number of pallet spaces.
Table of contents
Introduction.
When doing business with pallet networks, setting up rate cards for the variety of rating models can be quite a task. This article looks at one of the most frequently used rating models across the different networks. In this example, there are 2 parameters to consider. Rates are based on the delivery location ZIP code and the total number of pallet spaces on the order. The parameters are listed below. This is configured in a rate table, with a fixed rate that is generated as the transport charge.
Parameters:
- Based on delivery locations only, determined by ZIP codes. These can be specific ZIP codes or ZIP code ranges.
- Consider the goods ordered, based on the total number of pallet spaces occupied.
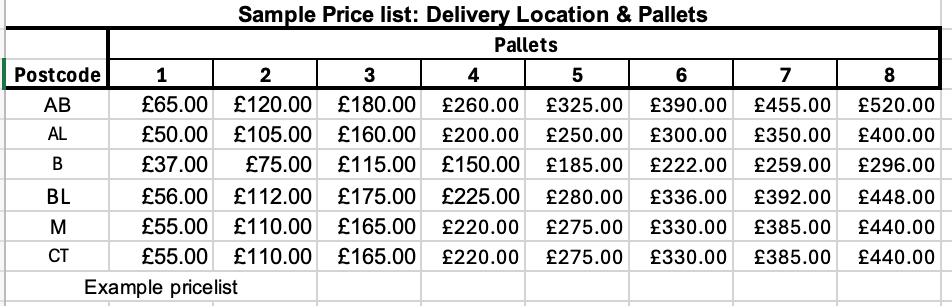
Show price as a:
Fixed amount based on a rate table using the parameters above.
Configuring the rate card.
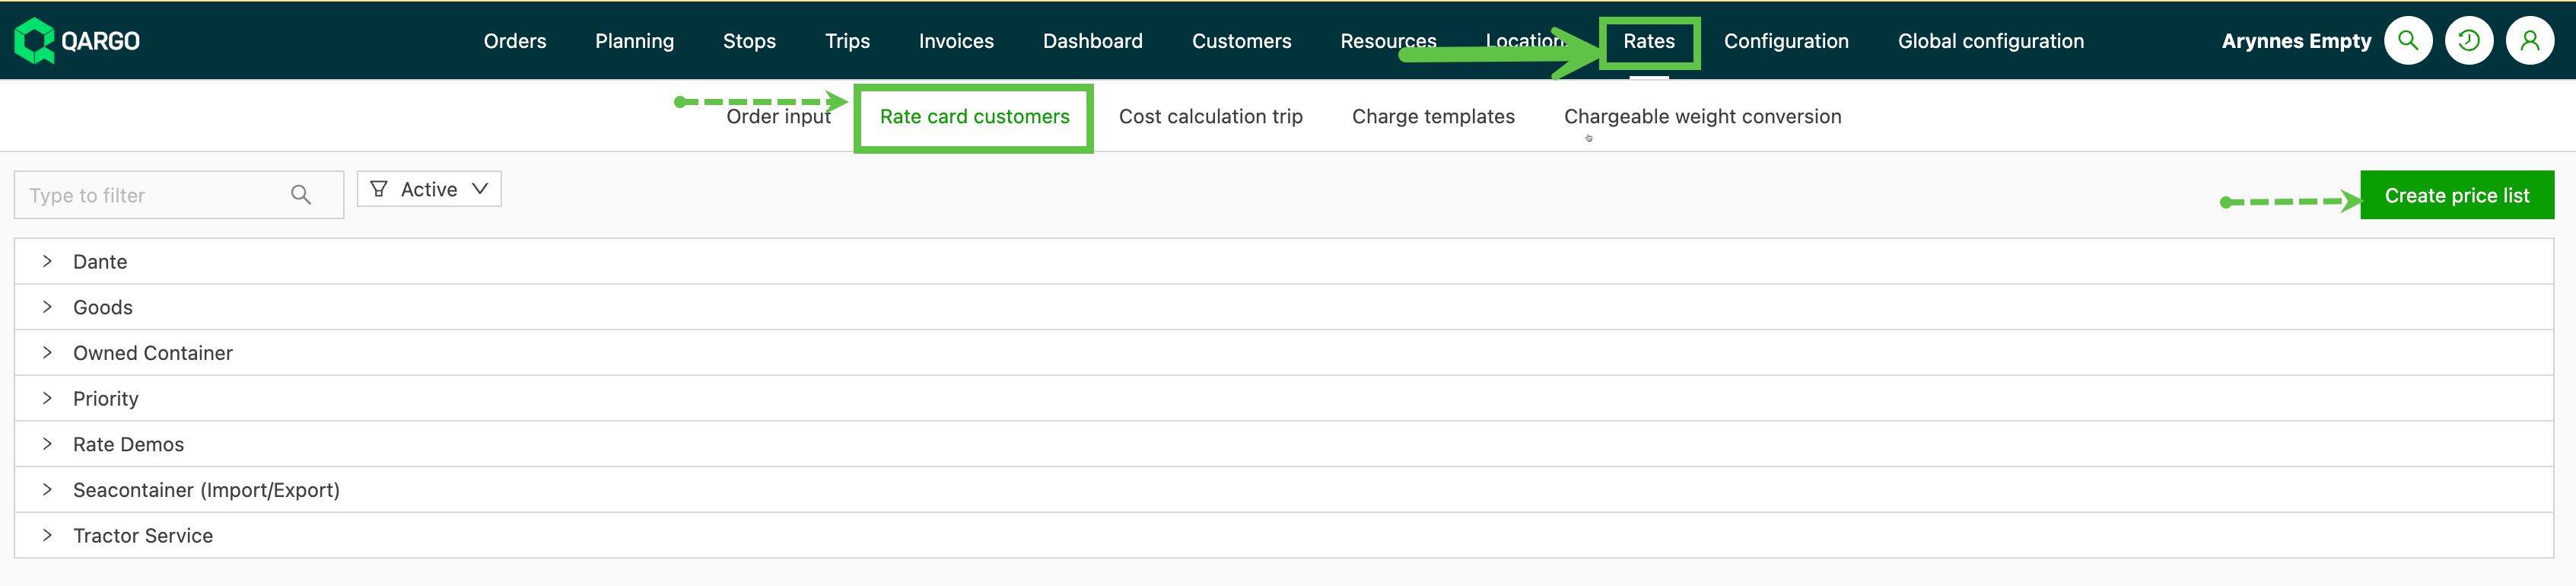
Navigate to Rate & rate card customers.
Click ‘Create price list’. This opens a new screen.
Select the transportation service the new price list is associated with. Give the price list a name that makes it easy to identify. Set a valid from date. If no date is set, the default is the date the list was created.
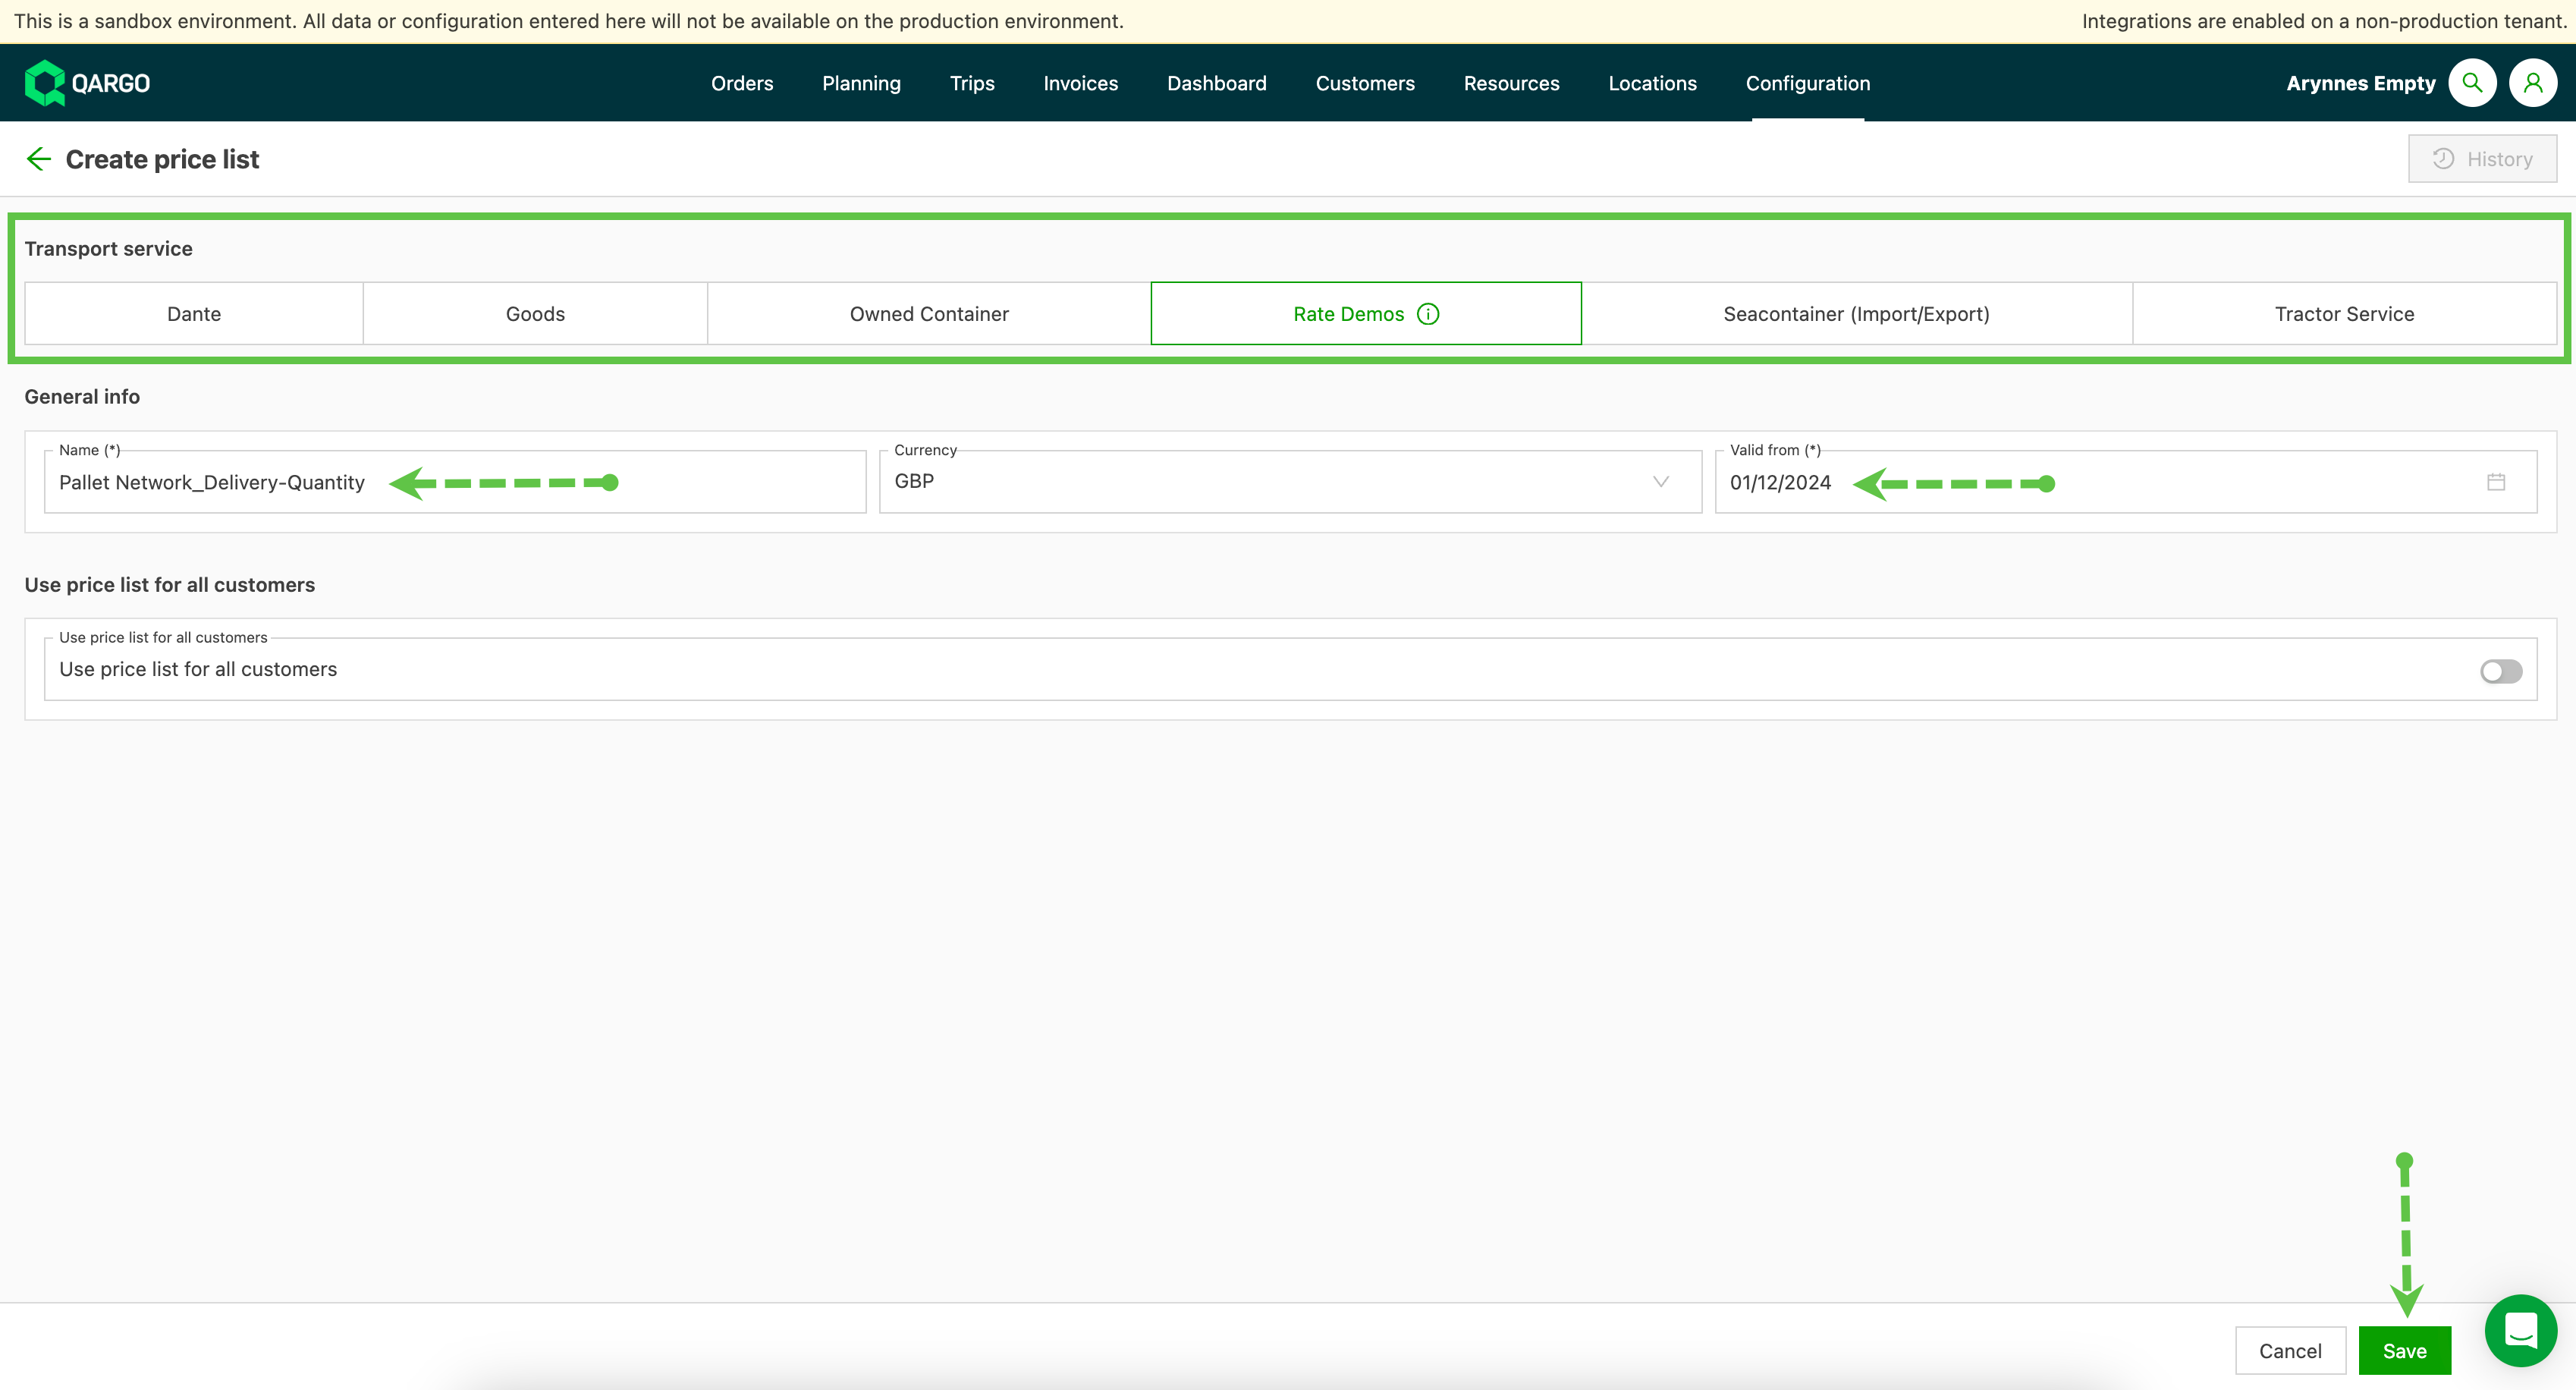
There is an option to set the price list as the default for all customers if required. Otherwise, the price list should be linked to specific customers.
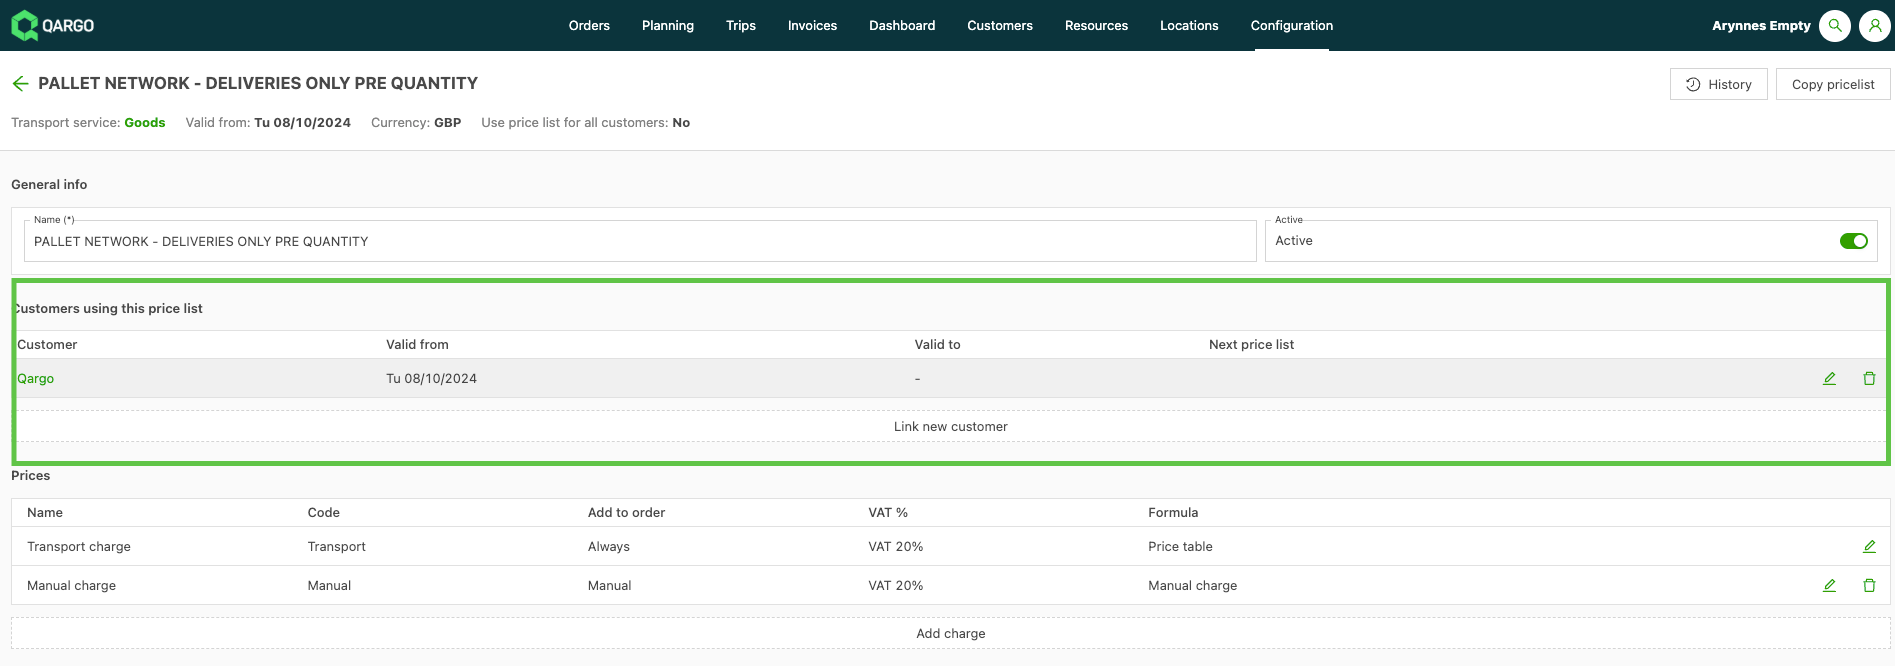
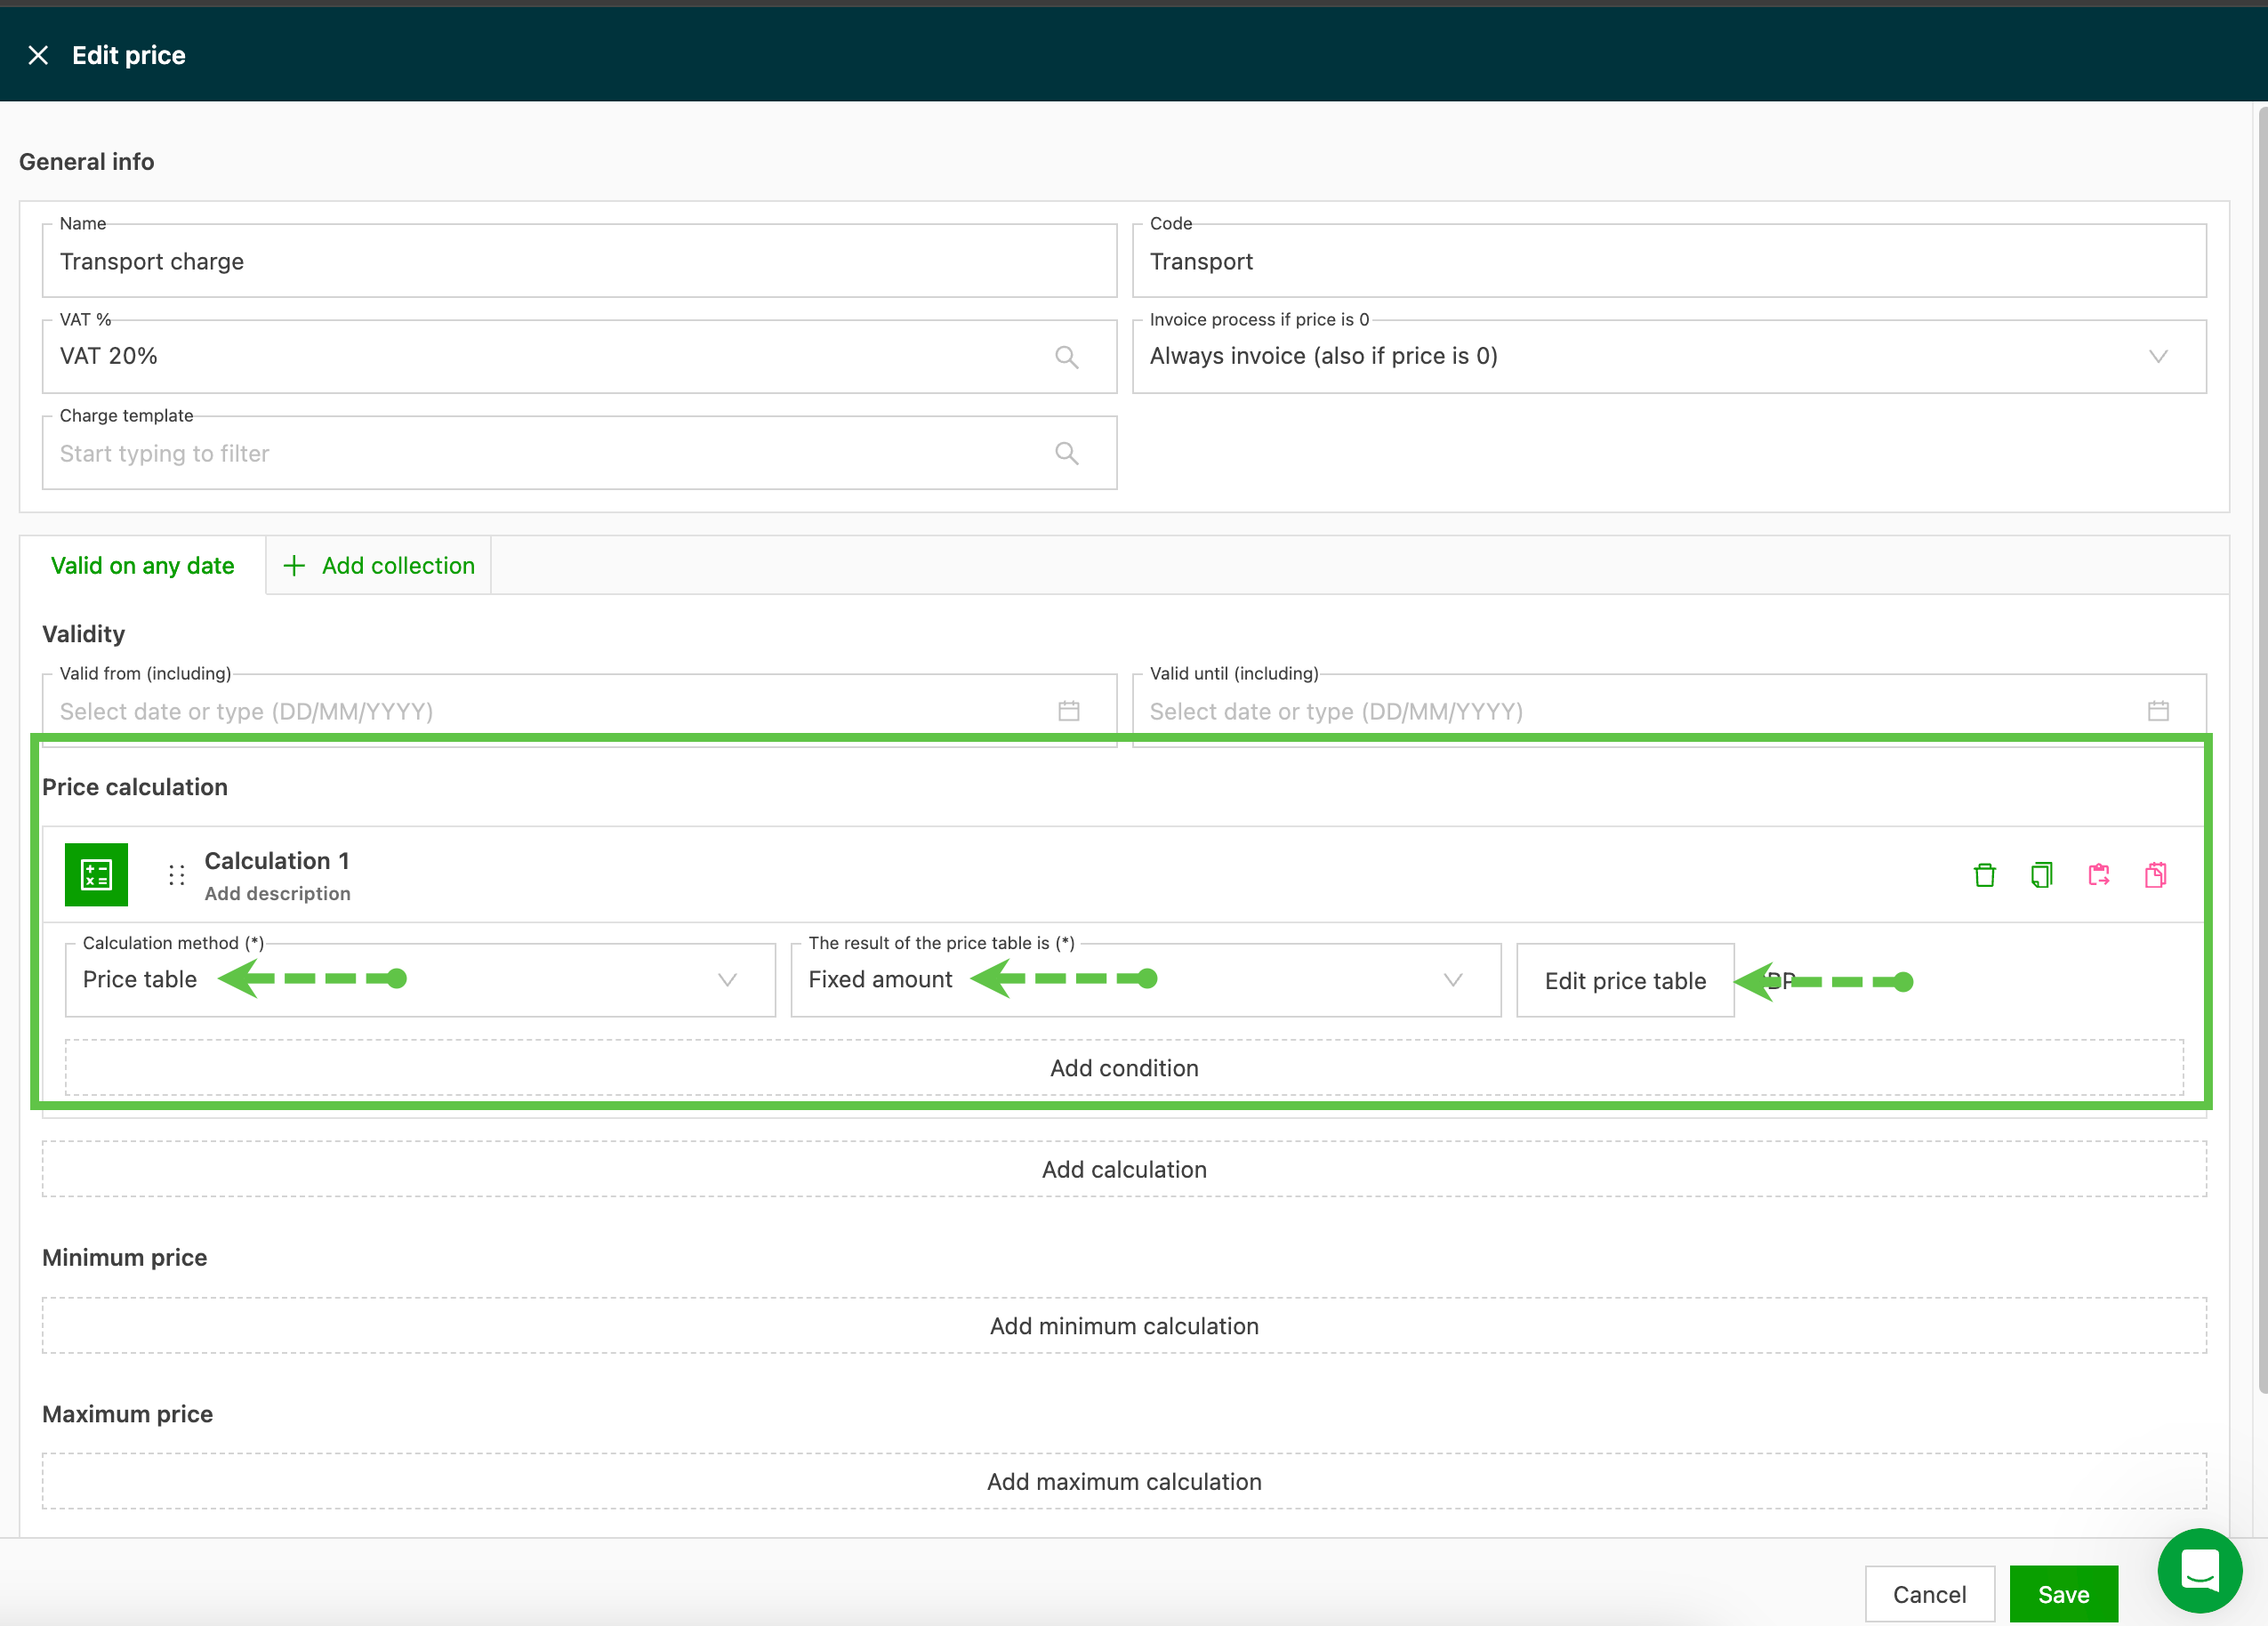
To add the rate table, click the edit icon (pencil) on the transport charge line. This opens the ‘Edit price’ screen. This example has just 1 calculation, but it is possible to set multiple calculations with conditions.
Select Rate table as the calculation method, and select Fixed amount. This enables the ‘Edit rate table’ button.
Click ‘Edit rate table’ to open the Rates screen, where the specific data the price list is based on can be added. In this example, column 1 sets up the ZIP codes and the stop the ZIP code refers to, while column 2 sets up the total pallet spaces as a range.
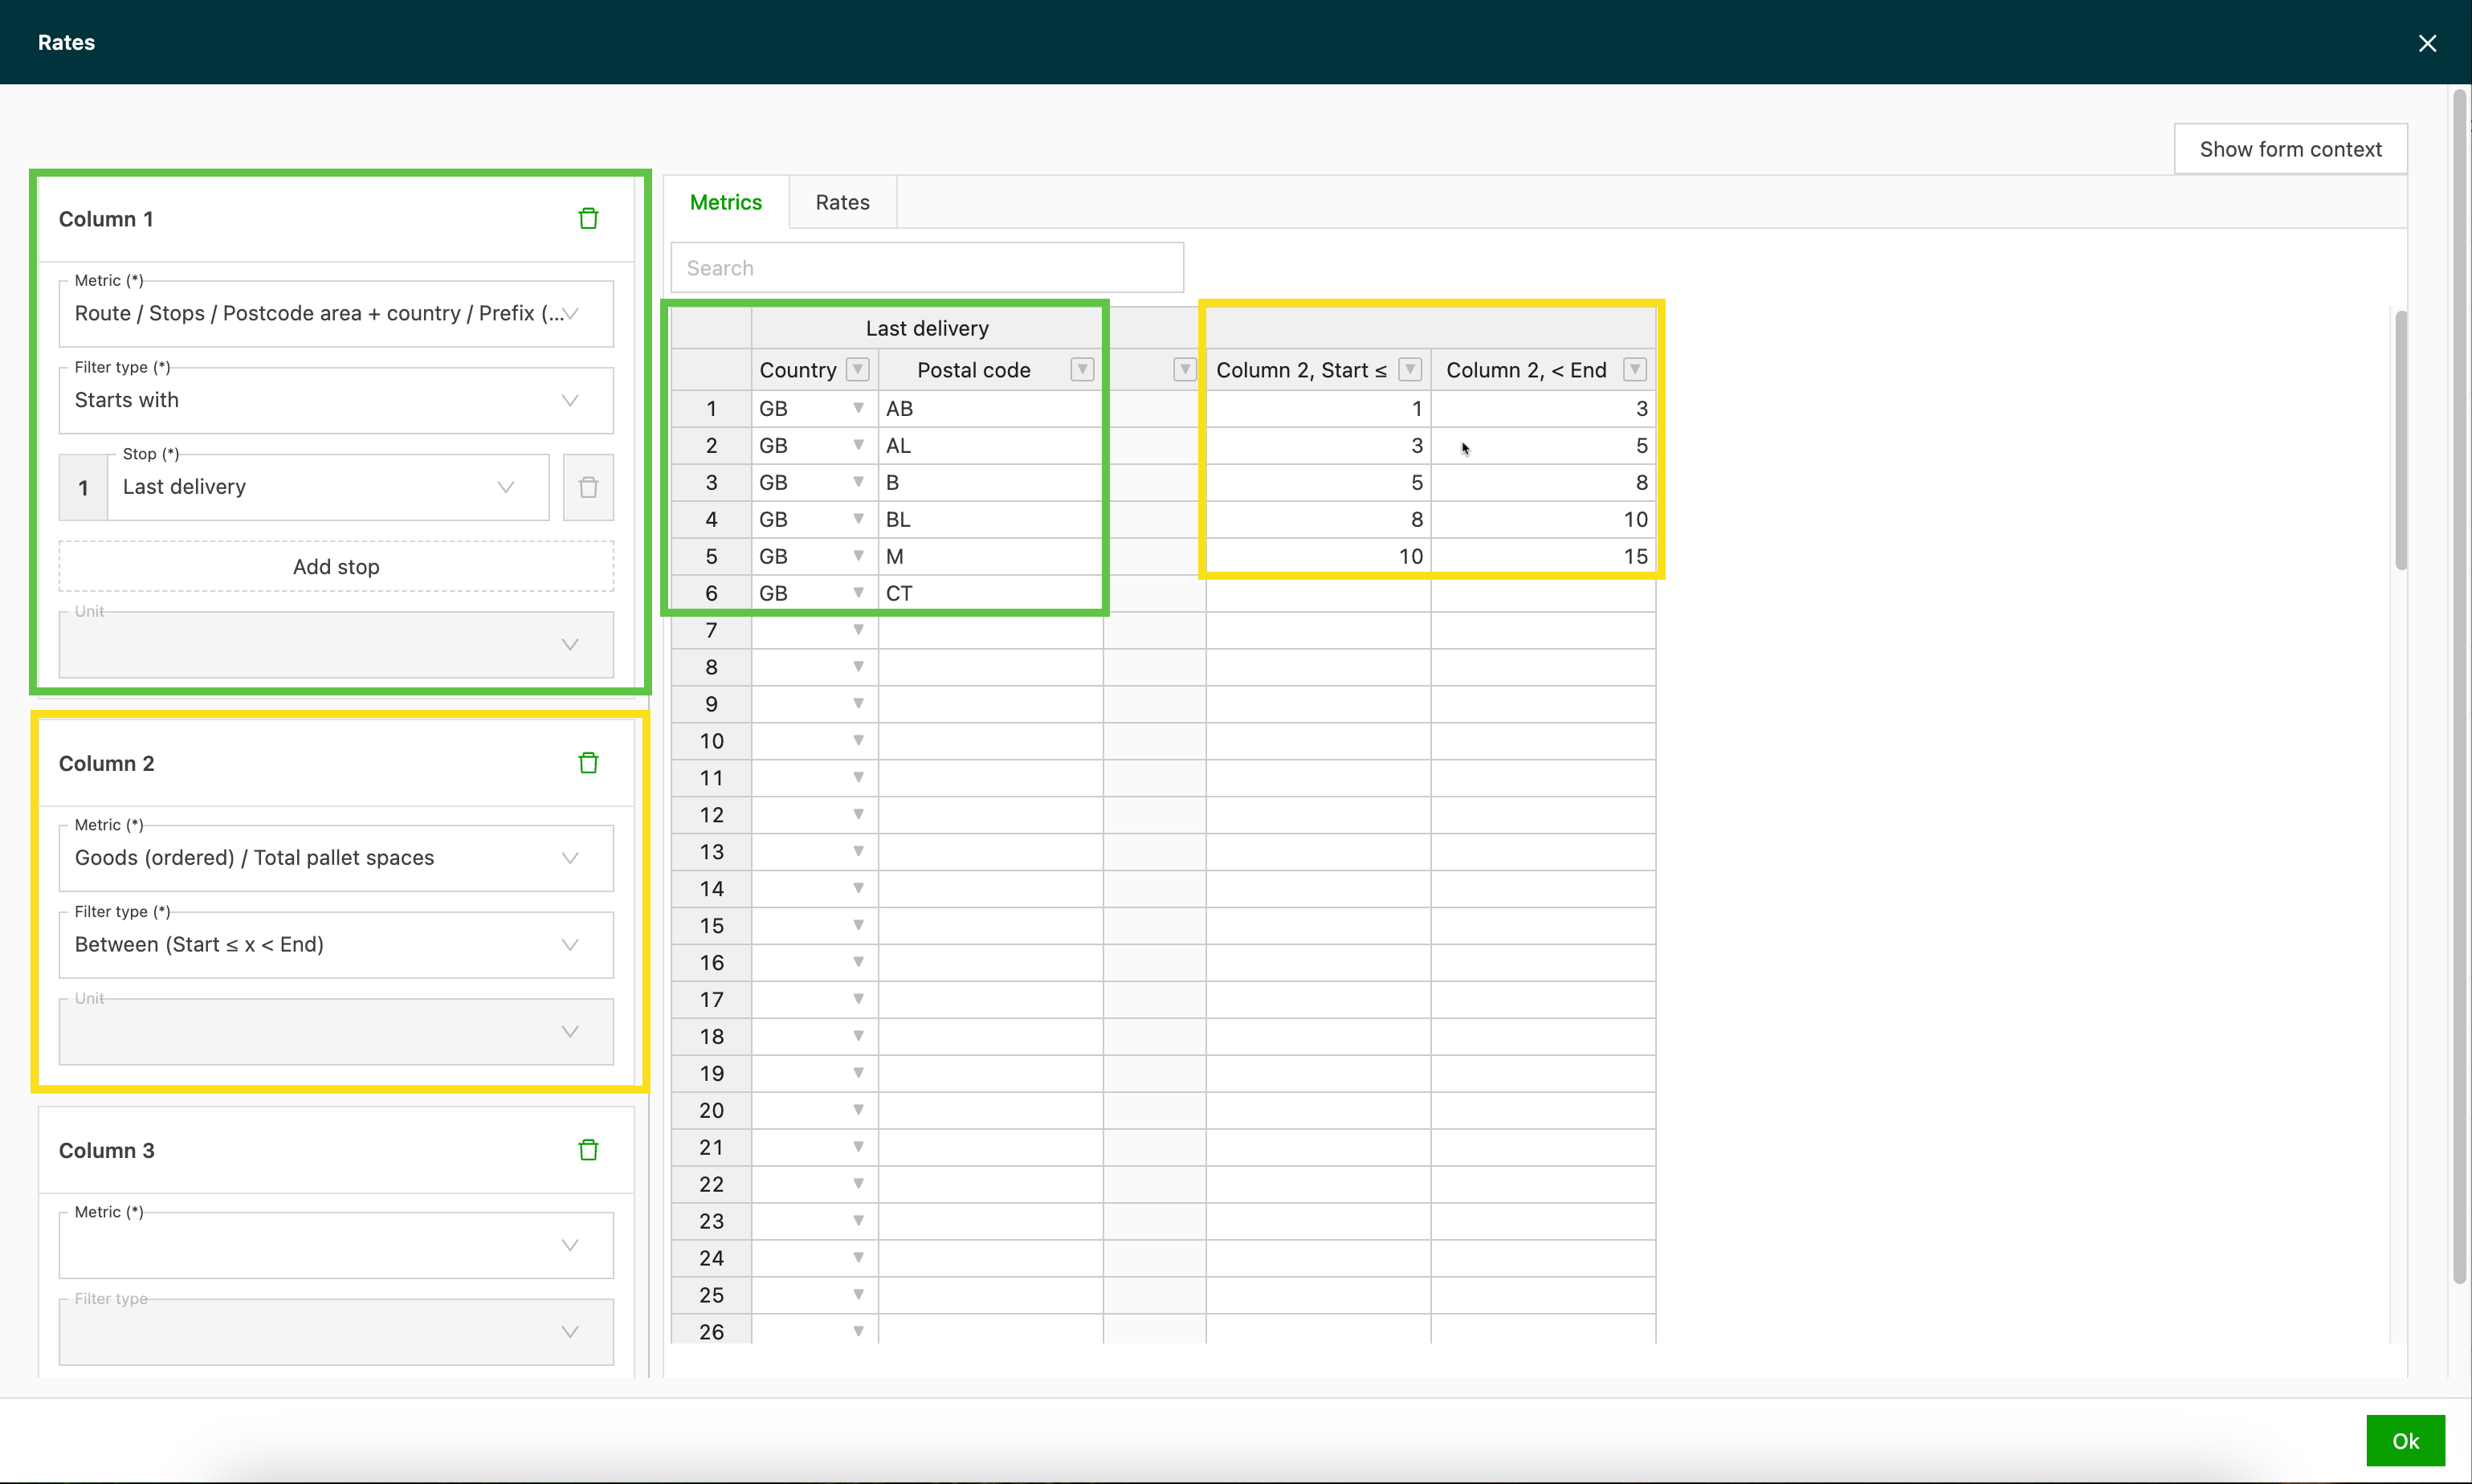
Once the metrics are set up, select the ‘Rates’ tab to enter the rates that apply to each of the parameters set in the metric table.
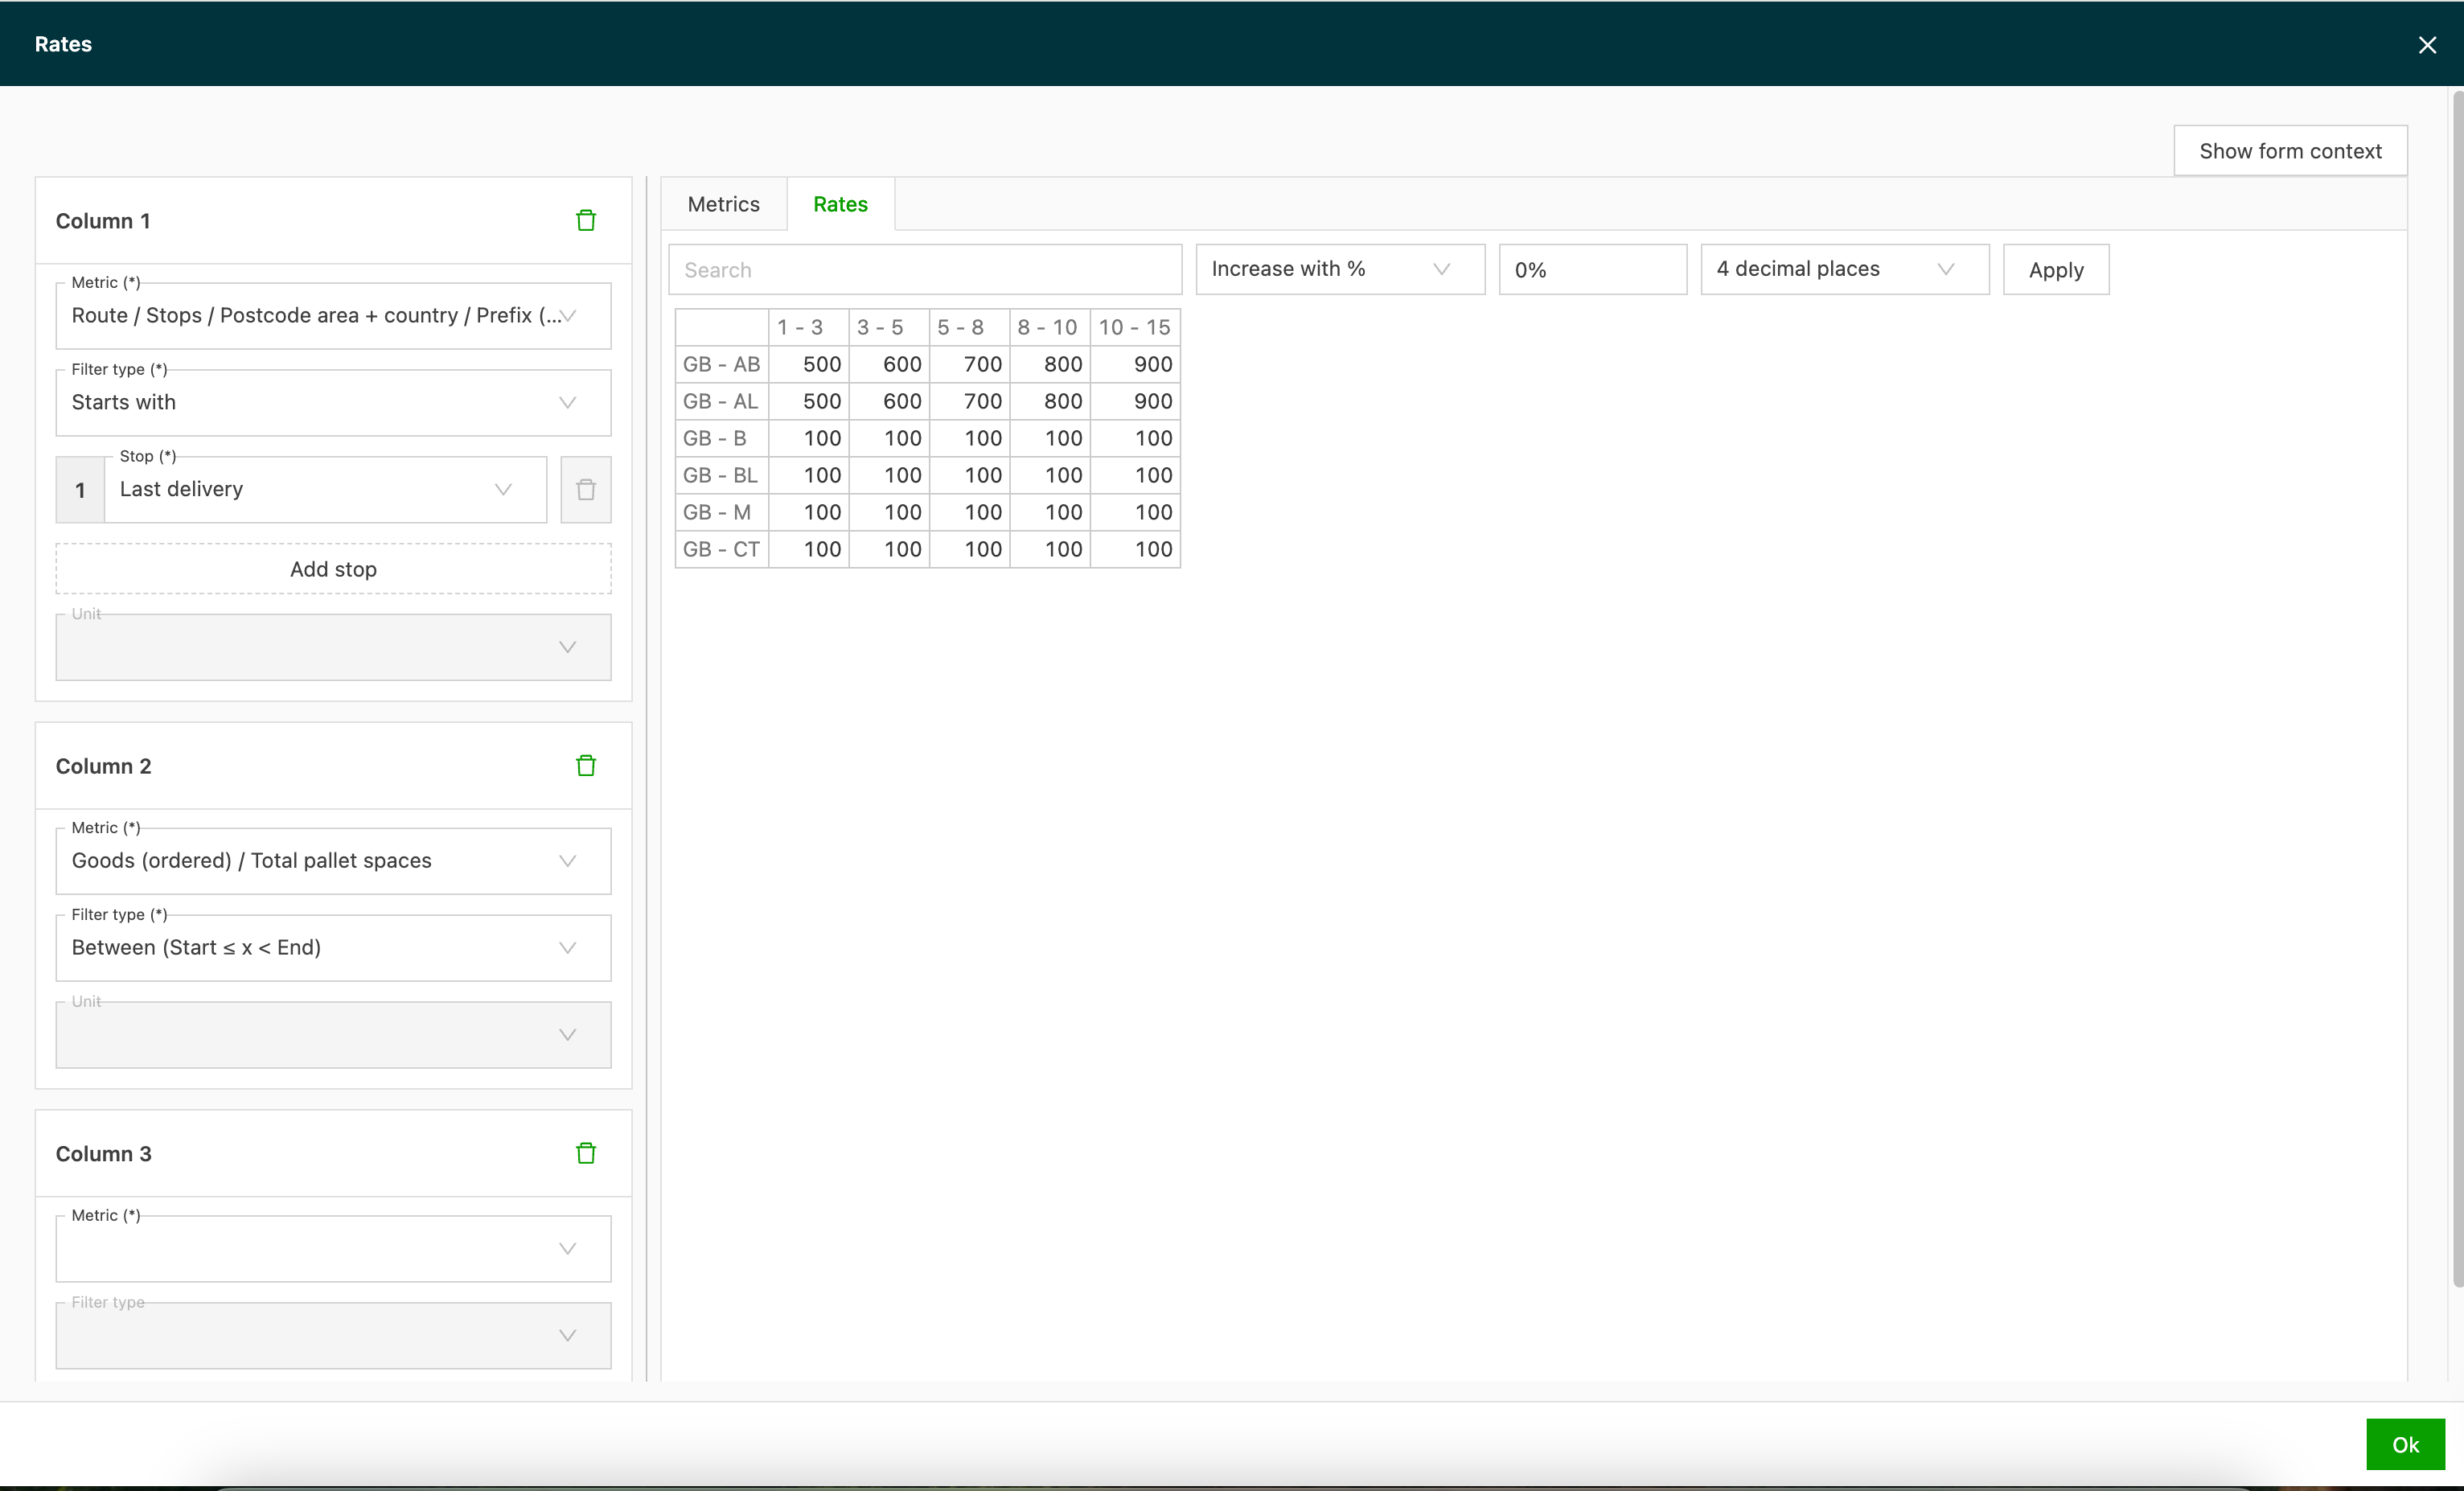
Click OK on the Rates screen, and then be sure to save the price list. This price list now rates orders for the customers assigned to the list, or for all customers if applicable. The transport charge is based on the last delivery location ZIP code and the total number of pallet spaces.