
FAQ: How to approve a charge
This article looks at how to set up and approve charges on orders so they can be invoiced with customer approval
Table of contents
Q. An order shows a charge with a red ‘To approve’ label. What is this, and how is it approved? A quote needs to be sent to the customer, but the charge isn’t showing on the quote. How can it be included?
A. In some cases, charges may require customer approval before they can be applied to orders or invoices. For example, if a waiting charge is applied beyond a free limit or a specific-day delivery is requested, customers may require pre-approval before the charge can be invoiced. Charges marked ‘To approve’ require approval before they show in the total invoice amount. They are included in the revenue charges but show as omitted until approved.
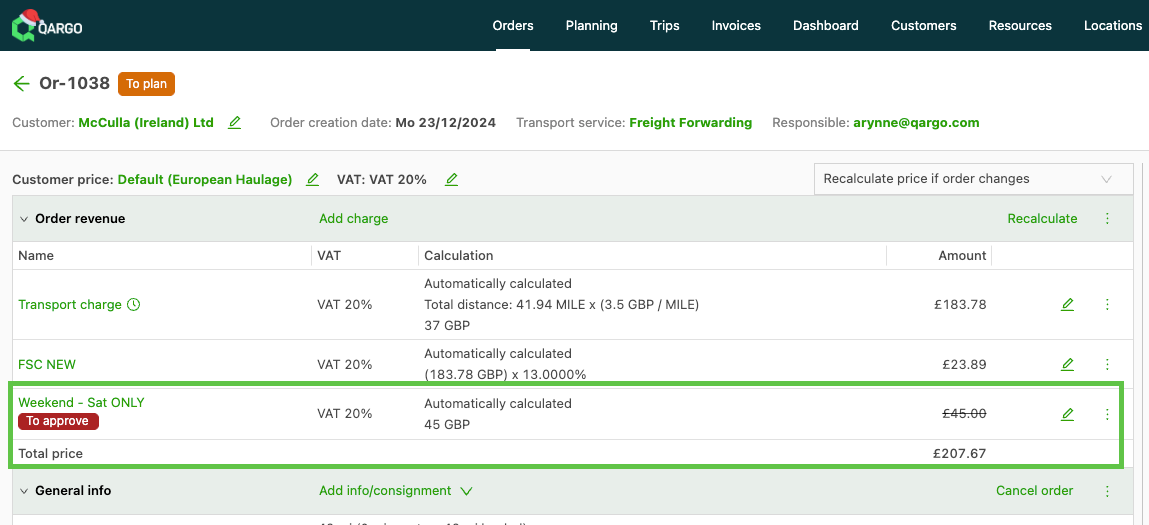
When a quote is generated, this charge is also omitted until approved. Once the charge is approved, the quote can be re-triggered to show the charge included. To approve the charge, click the ‘To approve’ label and select the check mark. This removes the label, and the charge is applied.
Setting up a charge for approval
For a charge to show up for approval, it must be set up as a charge on a price list, with 2 settings set under General info:
-
‘Always add to order’: this toggle must be set to on
-
Invoice process if price 0: set to ‘Only invoice if approved’
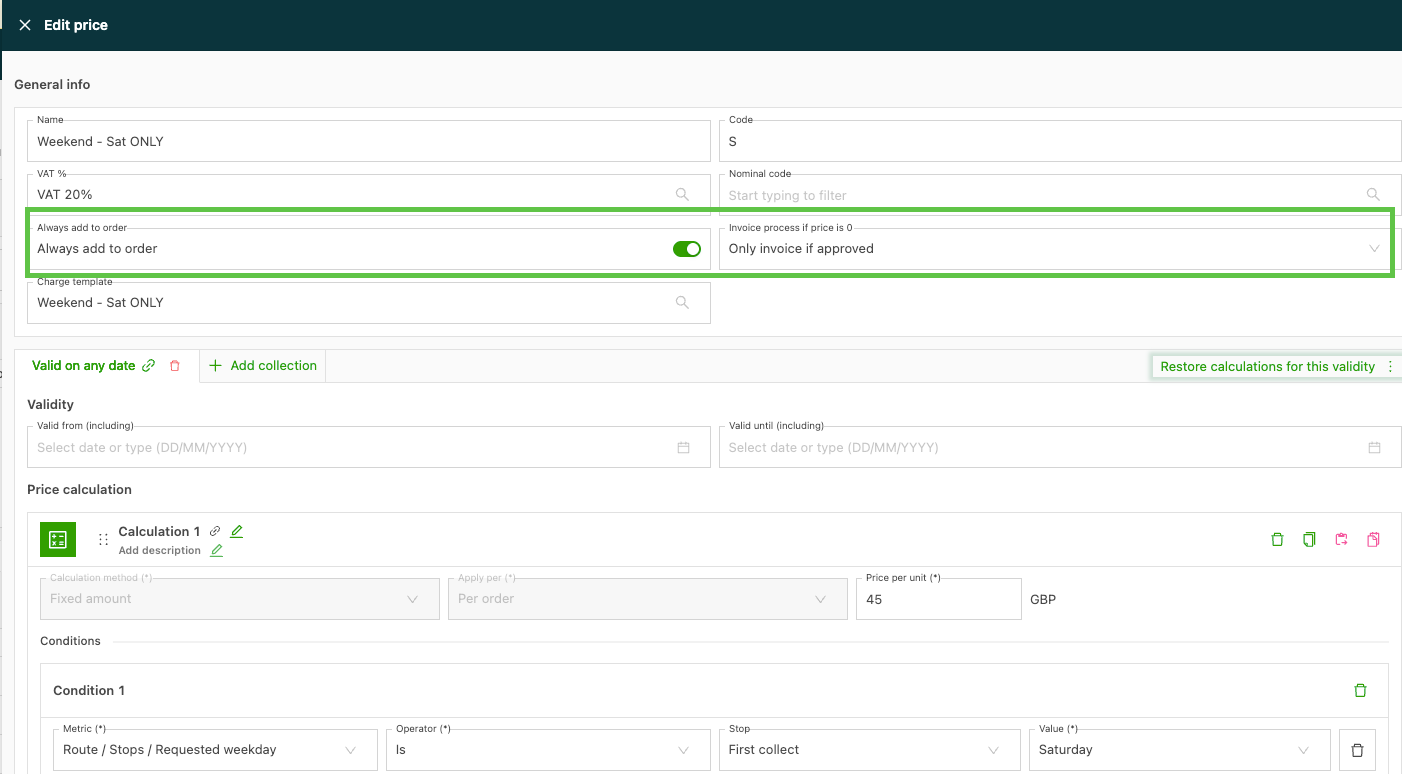
To set a charge:
Once the charge is created, add it to a price list. There are 2 ways to do this.
-
From the charge. From Configuration, select the charge to add. Select the active transportation service and click ‘Link price list’. This opens the list of available price lists for this transportation service. Select the check box for each price list the charge applies to, and click Save. Open the price list and select the Edit icon next to the charge. This opens the edit page. Under General info, update ‘Always add to order’ and ‘Invoice process’. Click Save. The next time an order is created that meets the criteria of the charge, the charge shows with the ‘To approve’ label.
-
From the price list. From Rate card customers, select the price list the charge will be added to. Click ‘Add charge’. A list of available charges appears. Select the check box for the charge and click Save. Select the Edit icon next to the charge to open the edit page. Under General info, update the ‘Always add to order’ and ‘Invoice process’ fields, and click Save.
Approving charges on invoices
When processing invoices, charges can be viewed either by order (Order view) or by specific charge (Charge view). If a charge requires customer approval, it shows with a red ‘To approve’ label next to the line item.
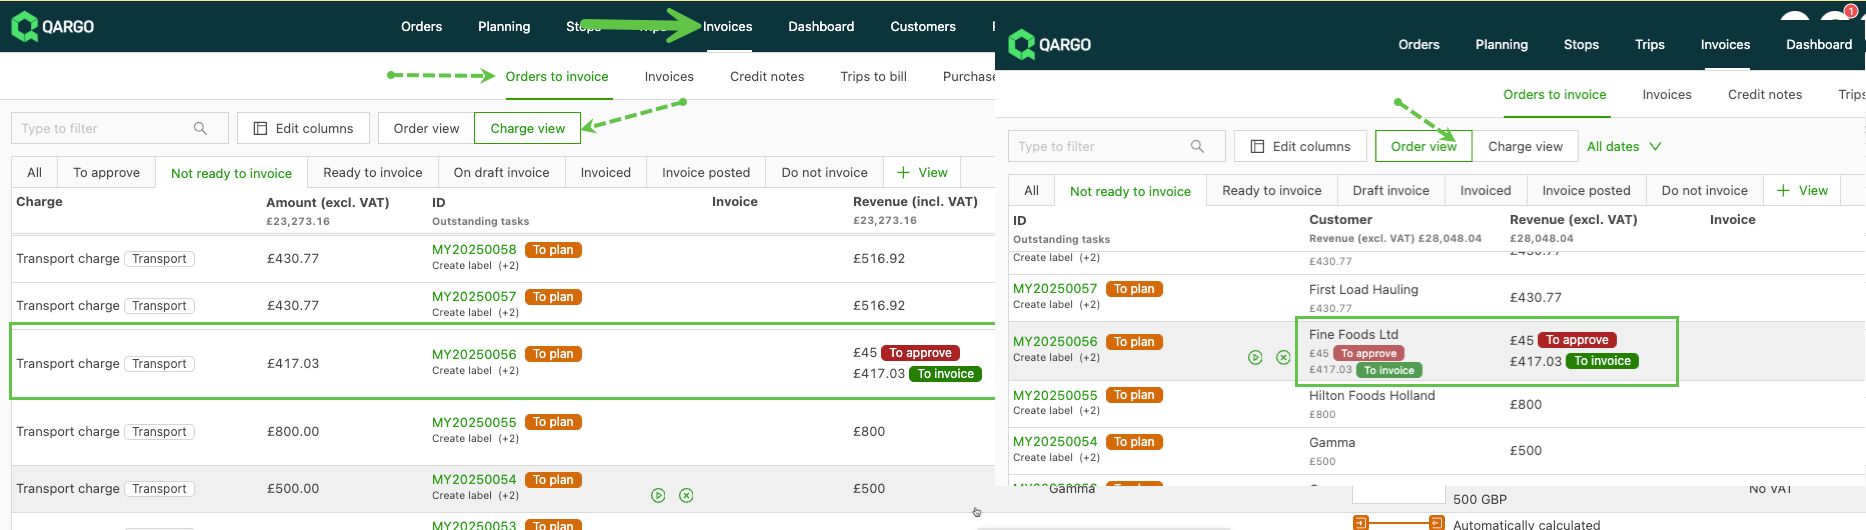
Click anywhere in the line to open the order details. Click or hover over the ‘To approve’ label to show the option to approve or decline the charge:
