
Tasks - Contact tasks: Viewing and sending documents
When working with contact tasks, users can see and act on which document types will be sent and which are required, directly on the task detail page. This helps users verify their configuration and make sure all required documents are in place.
Introduction
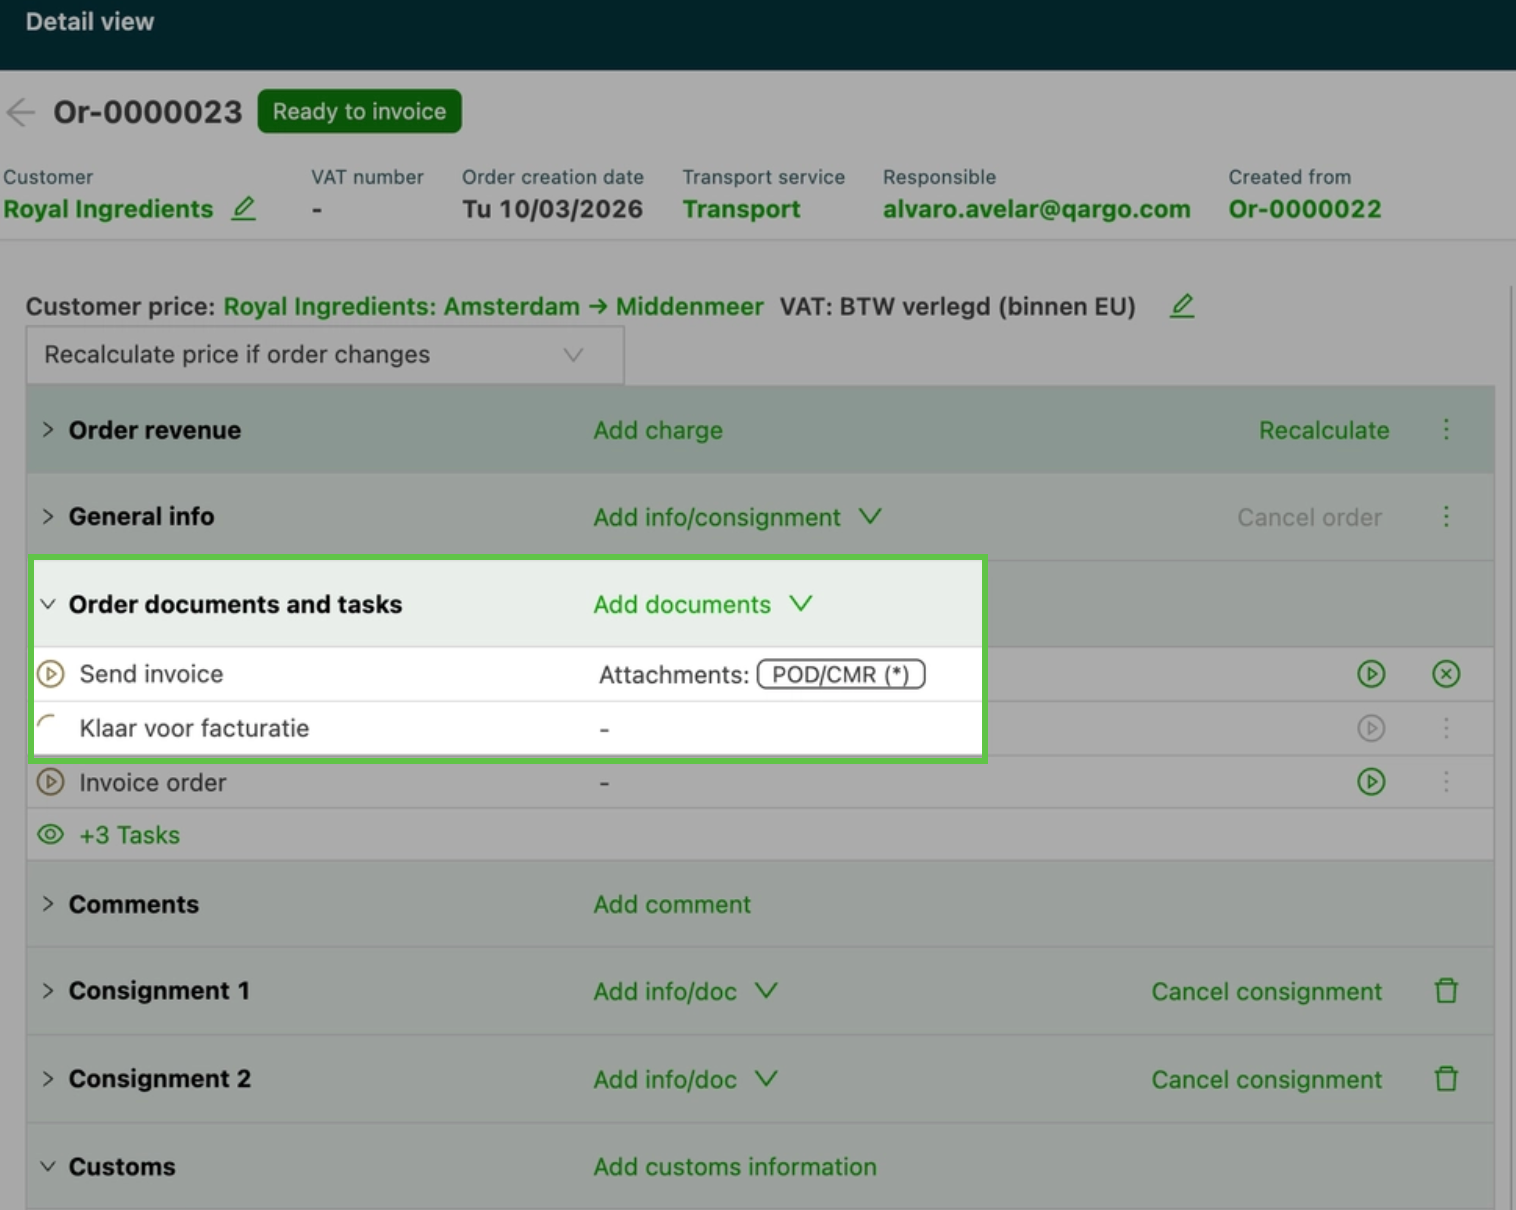
Contact tasks often trigger automated document sends, such as sending an invoice with a POD or CMR attached. When working with Contact tasks, the document types that will be attached to the email are shown directly in the task row, before the task is executed.
- Enhanced visibility lets users quickly verify what will be sent without having to open each individual document.
- A visual indicator (*) shows whether the document is required
Terminology
| Term | Description |
|---|---|
| Task | An action item within Qargo assigned to a load or order, such as generating or sending a document |
| Contact task | A task that sends a communication (email, EDI, etc.) to a configured contact |
| Generate document task | A task that creates a PDF document (e.g., a CMR or loading sheet) based on order data |
| Send document task | A task that sends a generated document to a specified recipient |
| Document type | A category of document in Qargo (e.g., CMR, Invoice, POD, Load sheet) |
| Attached documents | Documents configured to be sent along with the email in the task settings |
| Required (*) | The document type is flagged as required in the task configuration |
Before starting
To show document types on a contact task, the task must have Attached documents configured in its workflow settings. If no documents are configured, nothing appears in the task row.
-
Navigate to Configuration > Tasks
-
Open the contact task from the relevant workflow (e.g., Invoices > Send invoice)
-
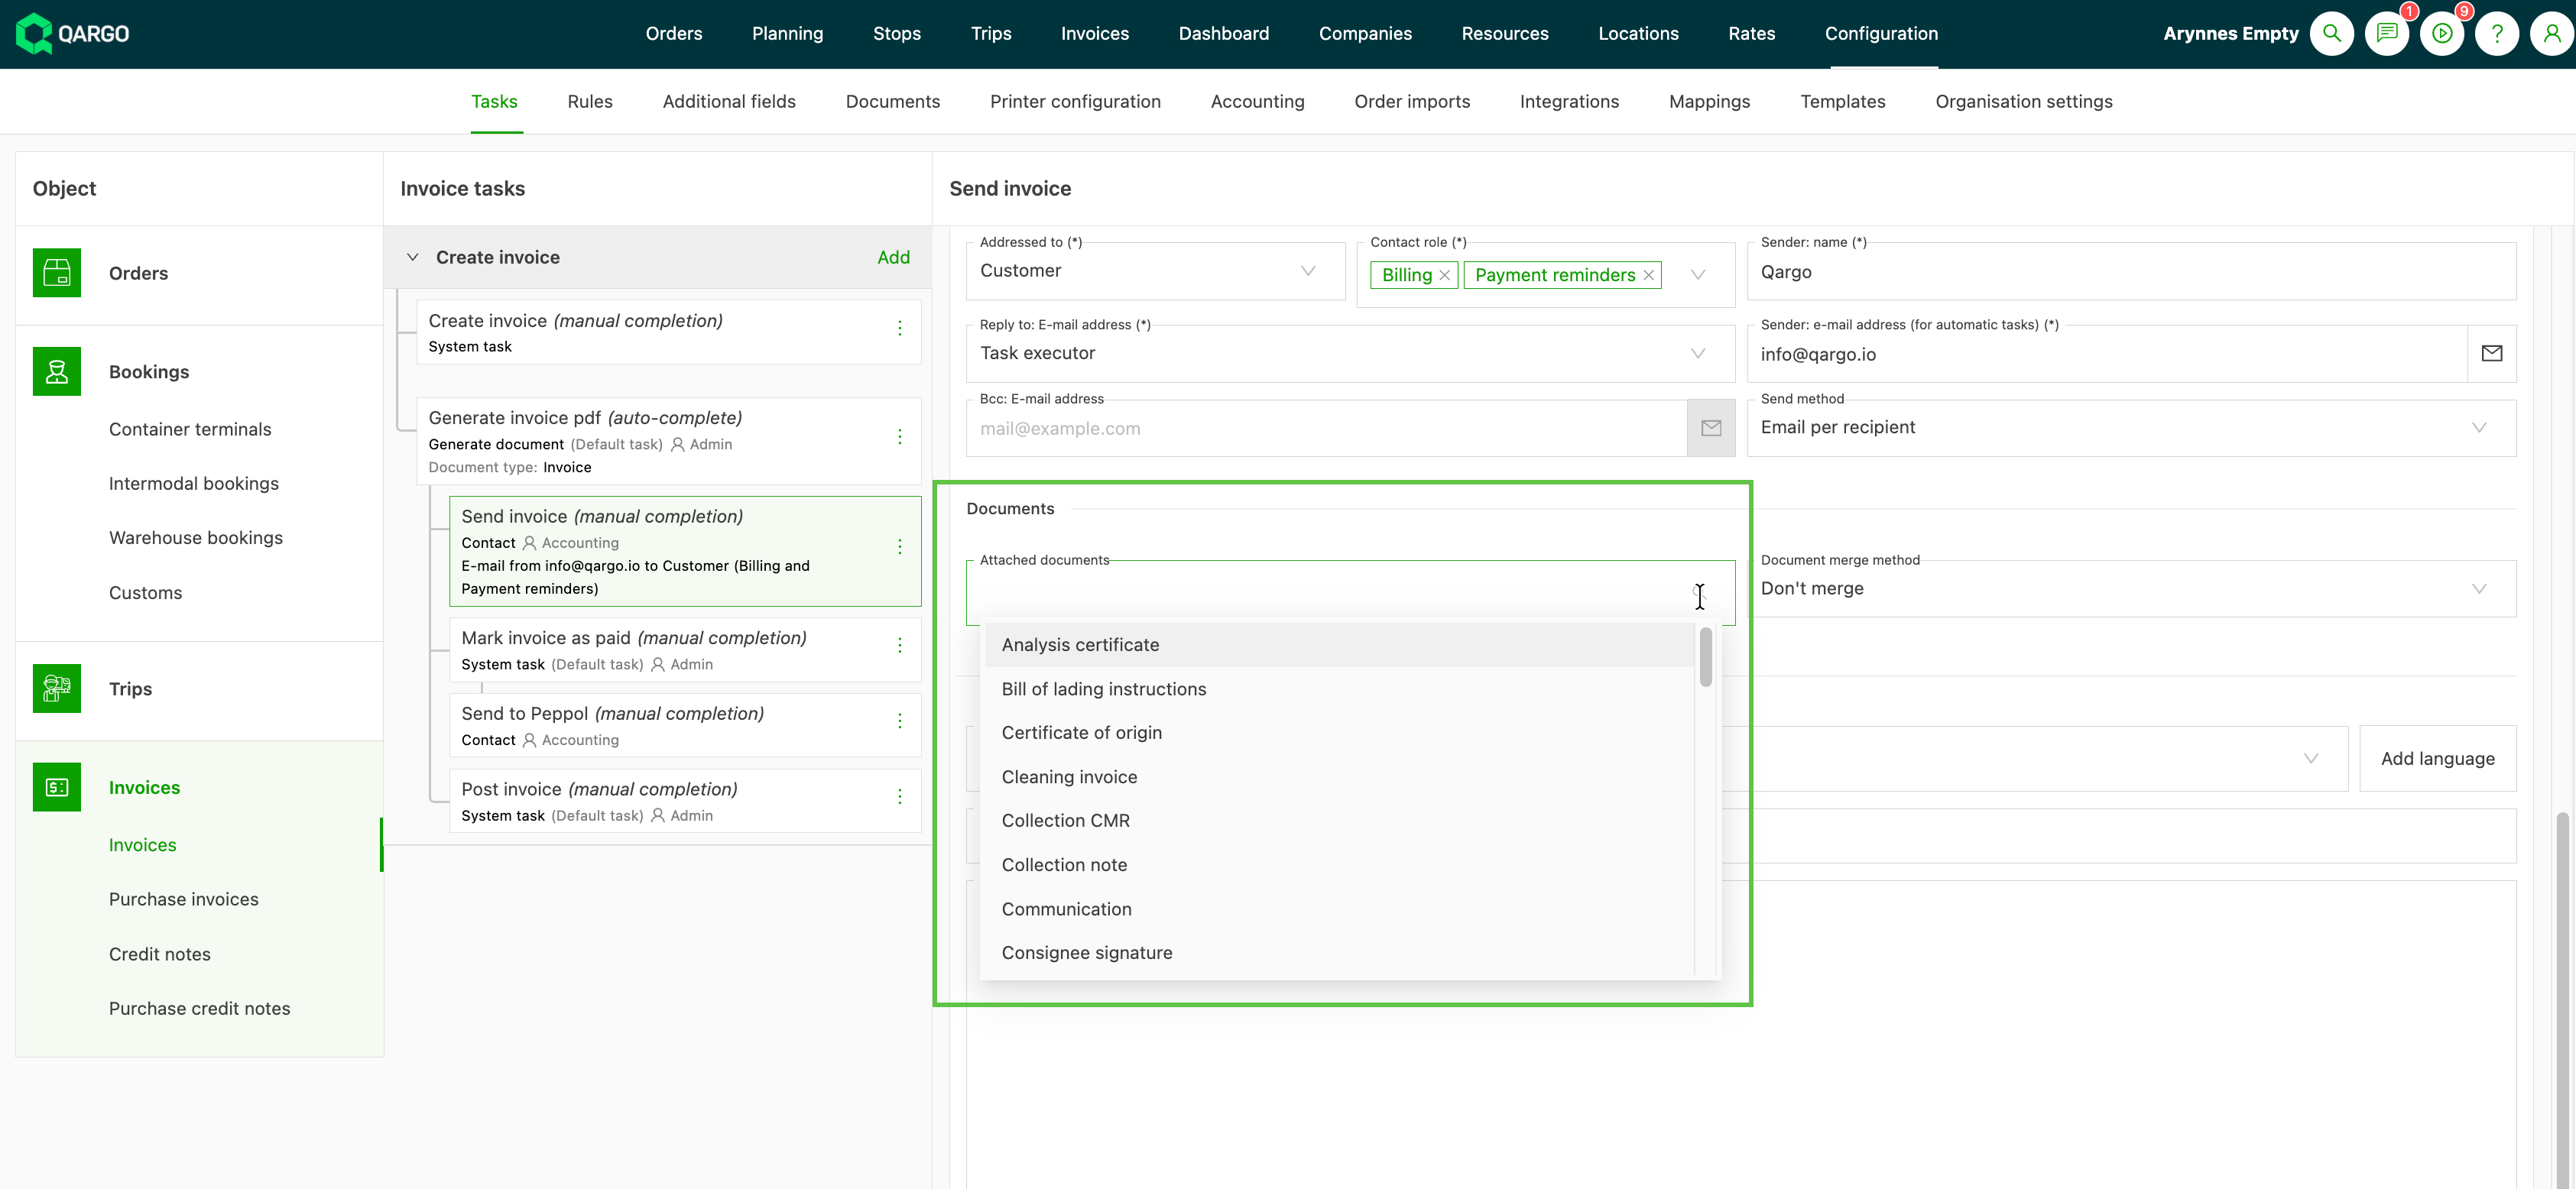
Under Configuration, select the documents that should be included with the email.
-
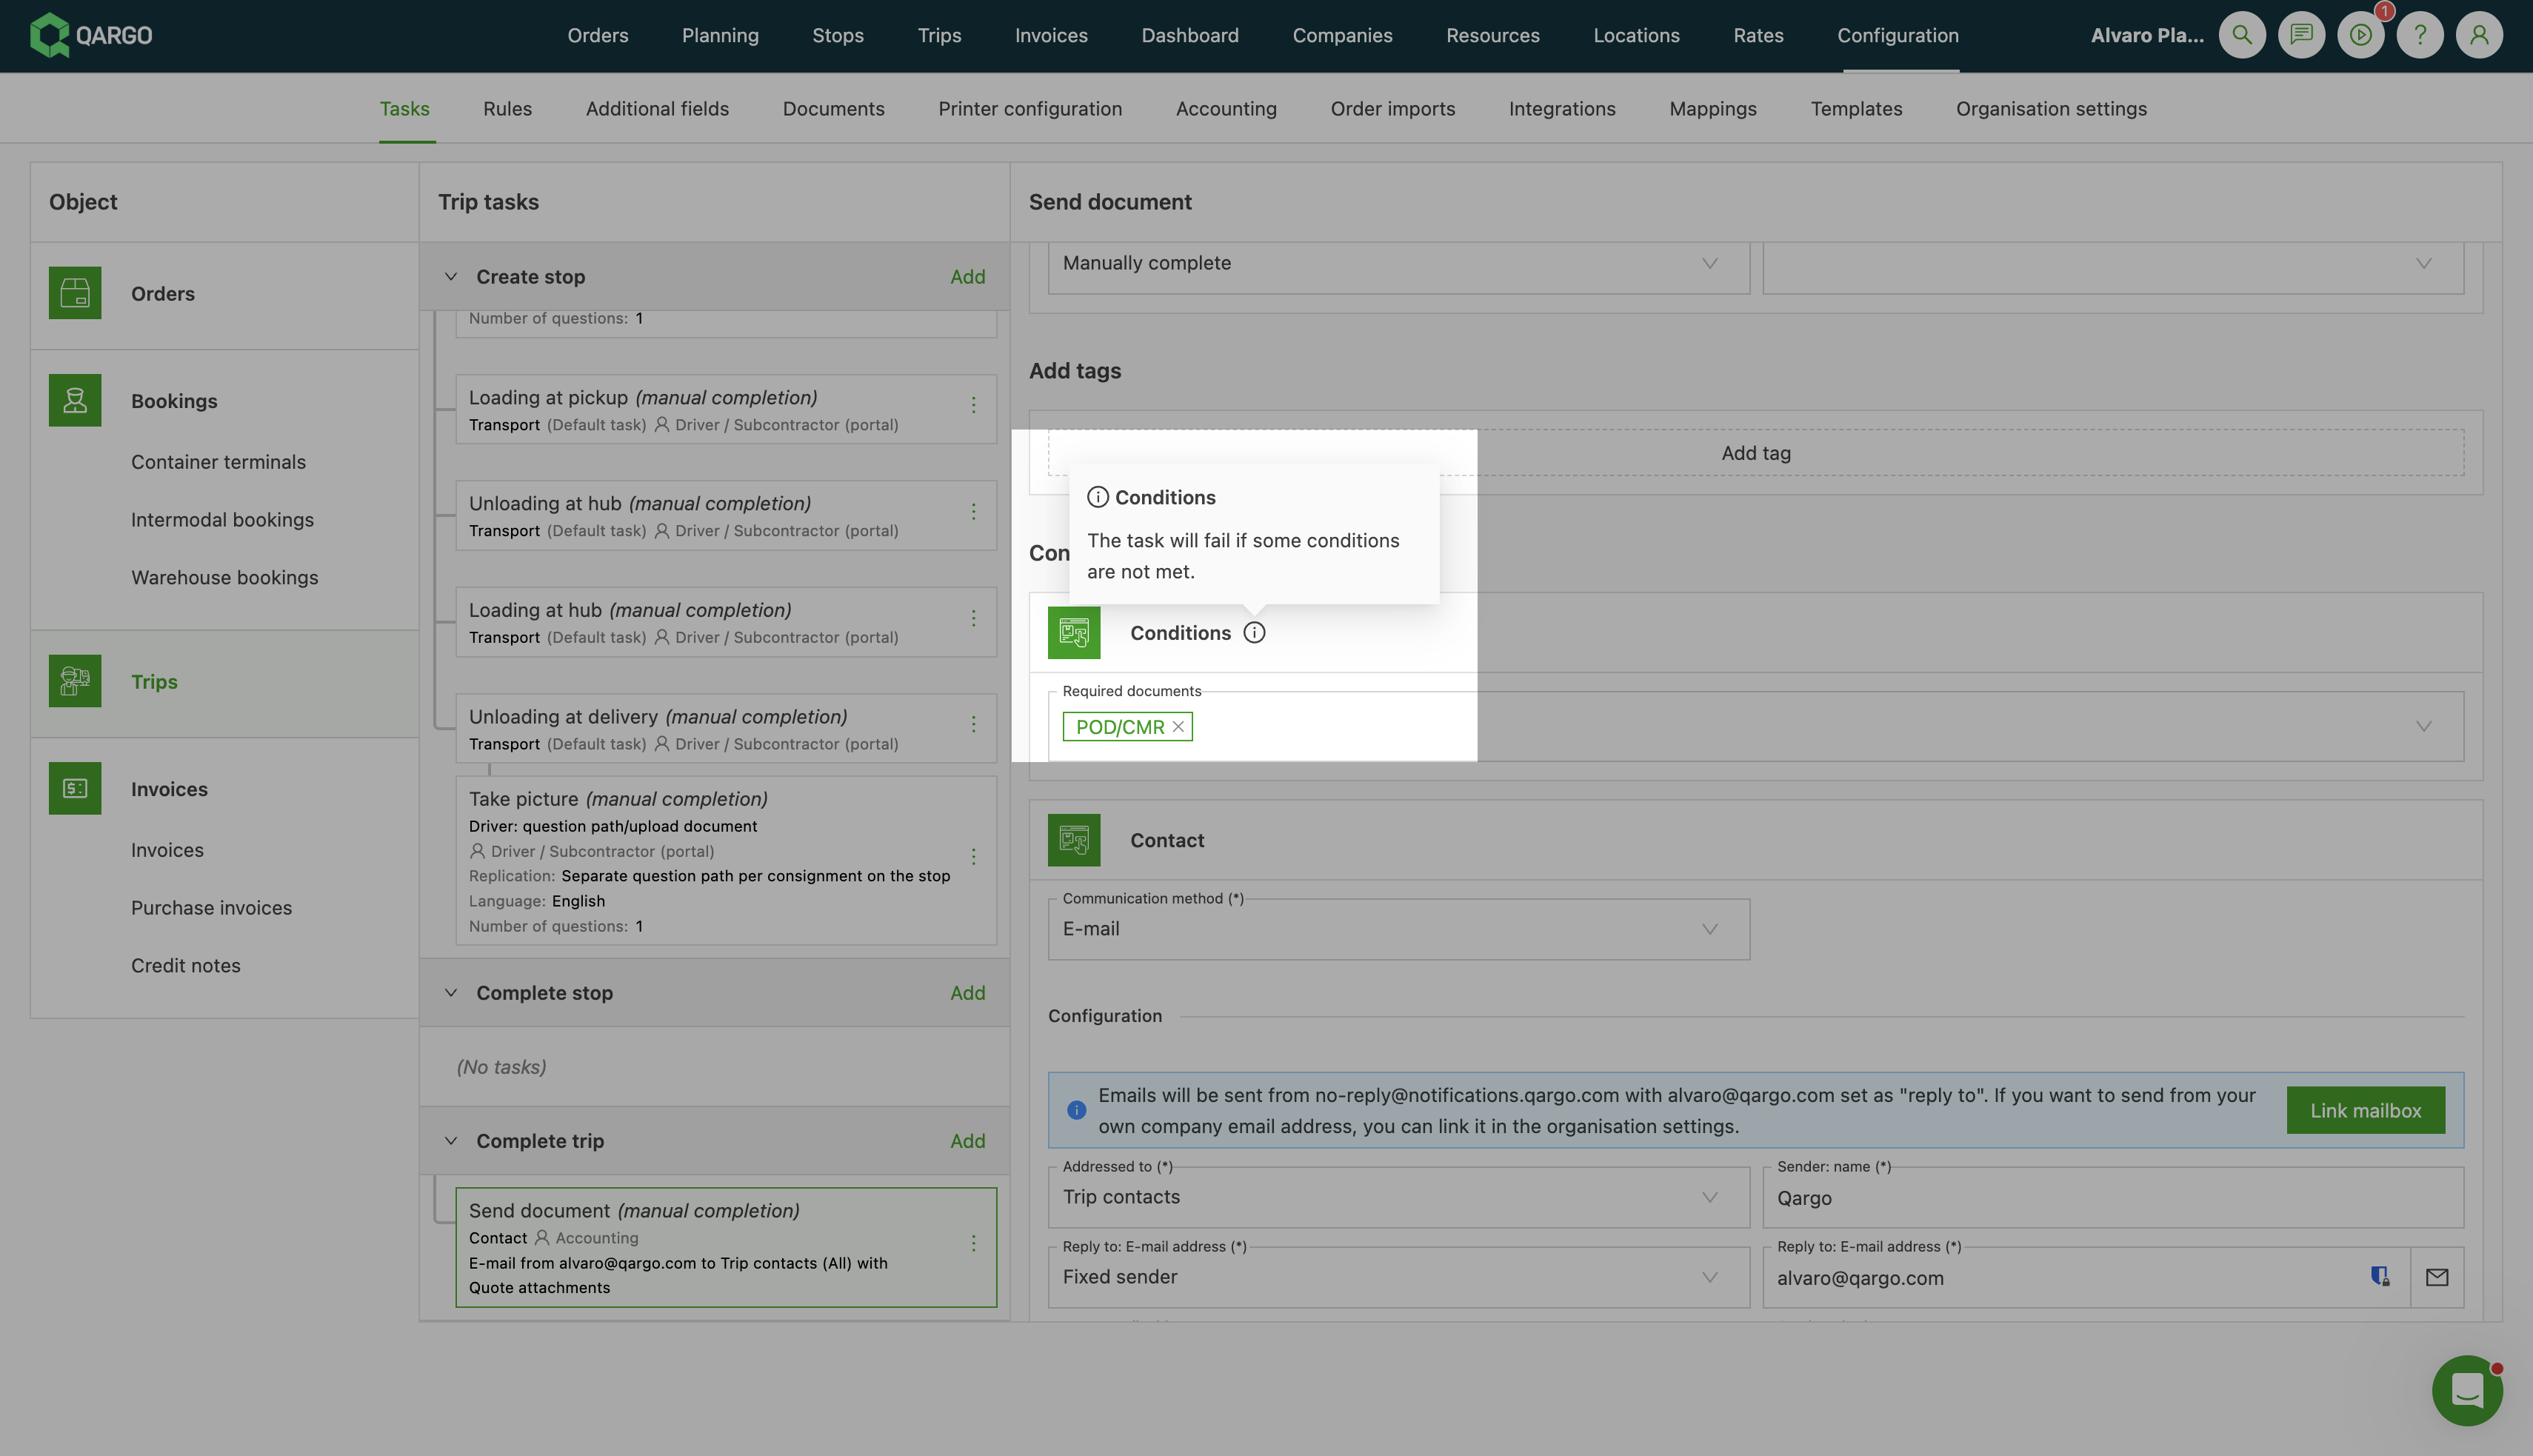
Under Conditions > Required documents, mark any that must be present before the task can be executed.
-
In the Documents panel, select from the drop-down the documents that should be sent with the email
-
Under Conditions > Required documents, mark any that must be present before the task can be executed.
See Tasks - Add workflow tasks for more on setting up contact tasks.
What is shown
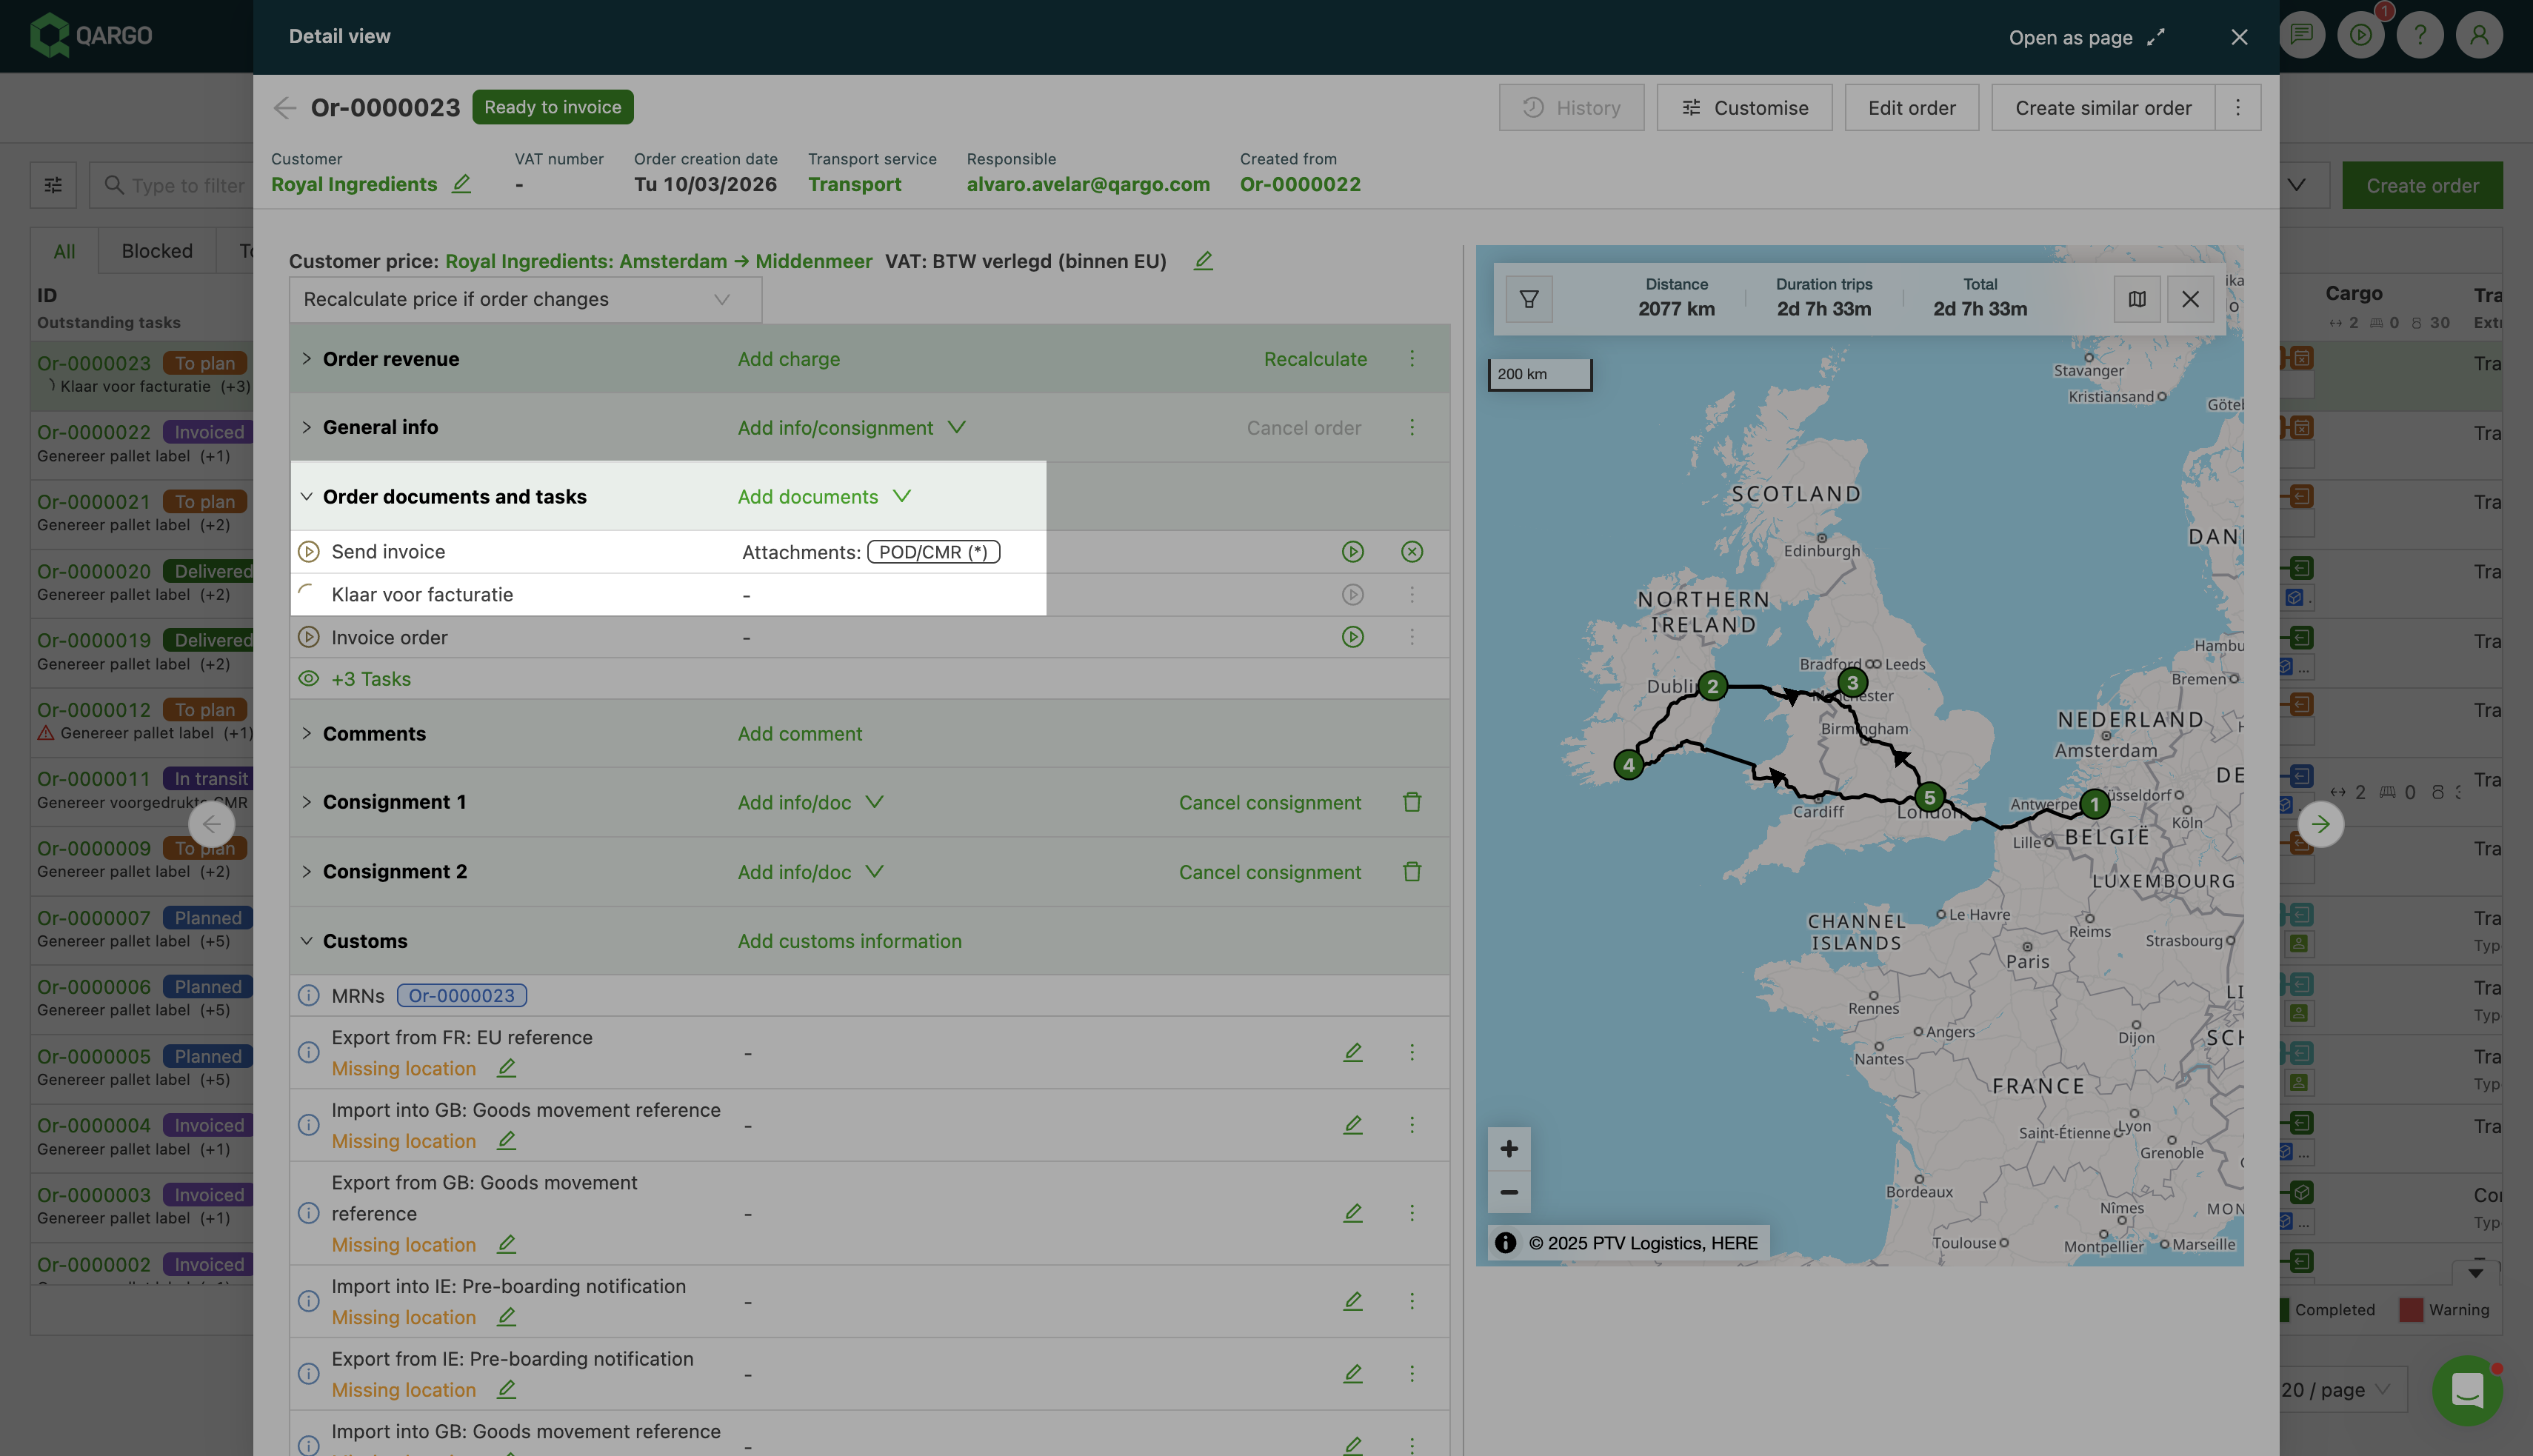
On any detail page where a pending contact task is shown (such as an order, invoice, or customer page), the task row displays an Attachments label followed by the configured document types:
- Document types without a marker: included in the email if the document is available.
- Document types marked with (*): flagged as required in the task configuration. These should be present before the task is executed.
How to view document types on a contact task
- Open an entity where the contact task applies, for example an active order or an invoice in the correct workflow stage.
- In the Order documents and tasks section (or the equivalent on the entity), locate the pending contact task.
- Read the Attachments label directly on the task row. The document types are shown inline, with (*) marking any that are required.
Example: The Send invoice task configured with POD/CMR as an attached and required document shows Attachments: POD/CMR (*) directly in the task row. This confirms that the POD/CMR will be sent along with the invoice and is required before sending.
Generating and sending a document in one step
What is this feature?
- When a Send document task is completed and the document has not been generated yet, the system automatically generates it first, combining both steps into a single action
Why was it built?
- Previously, two separate task completions were required: generate first, then send. This created extra steps and the risk of accidentally skipping the generate step before trying to send.
How does it work?
- Completing a Send task triggers automatic document generation if the document does not exist yet. The document is then sent in the same action. If the document was already generated, the existing version is sent without regenerating it.
Generate and send workflow
The combined generate and send functionality is active automatically for all Send document tasks. No configuration is required.
Completing a Send task
- Navigate to the load or order containing the document task
- Open the Tasks panel
- Select the Send action on the relevant document task
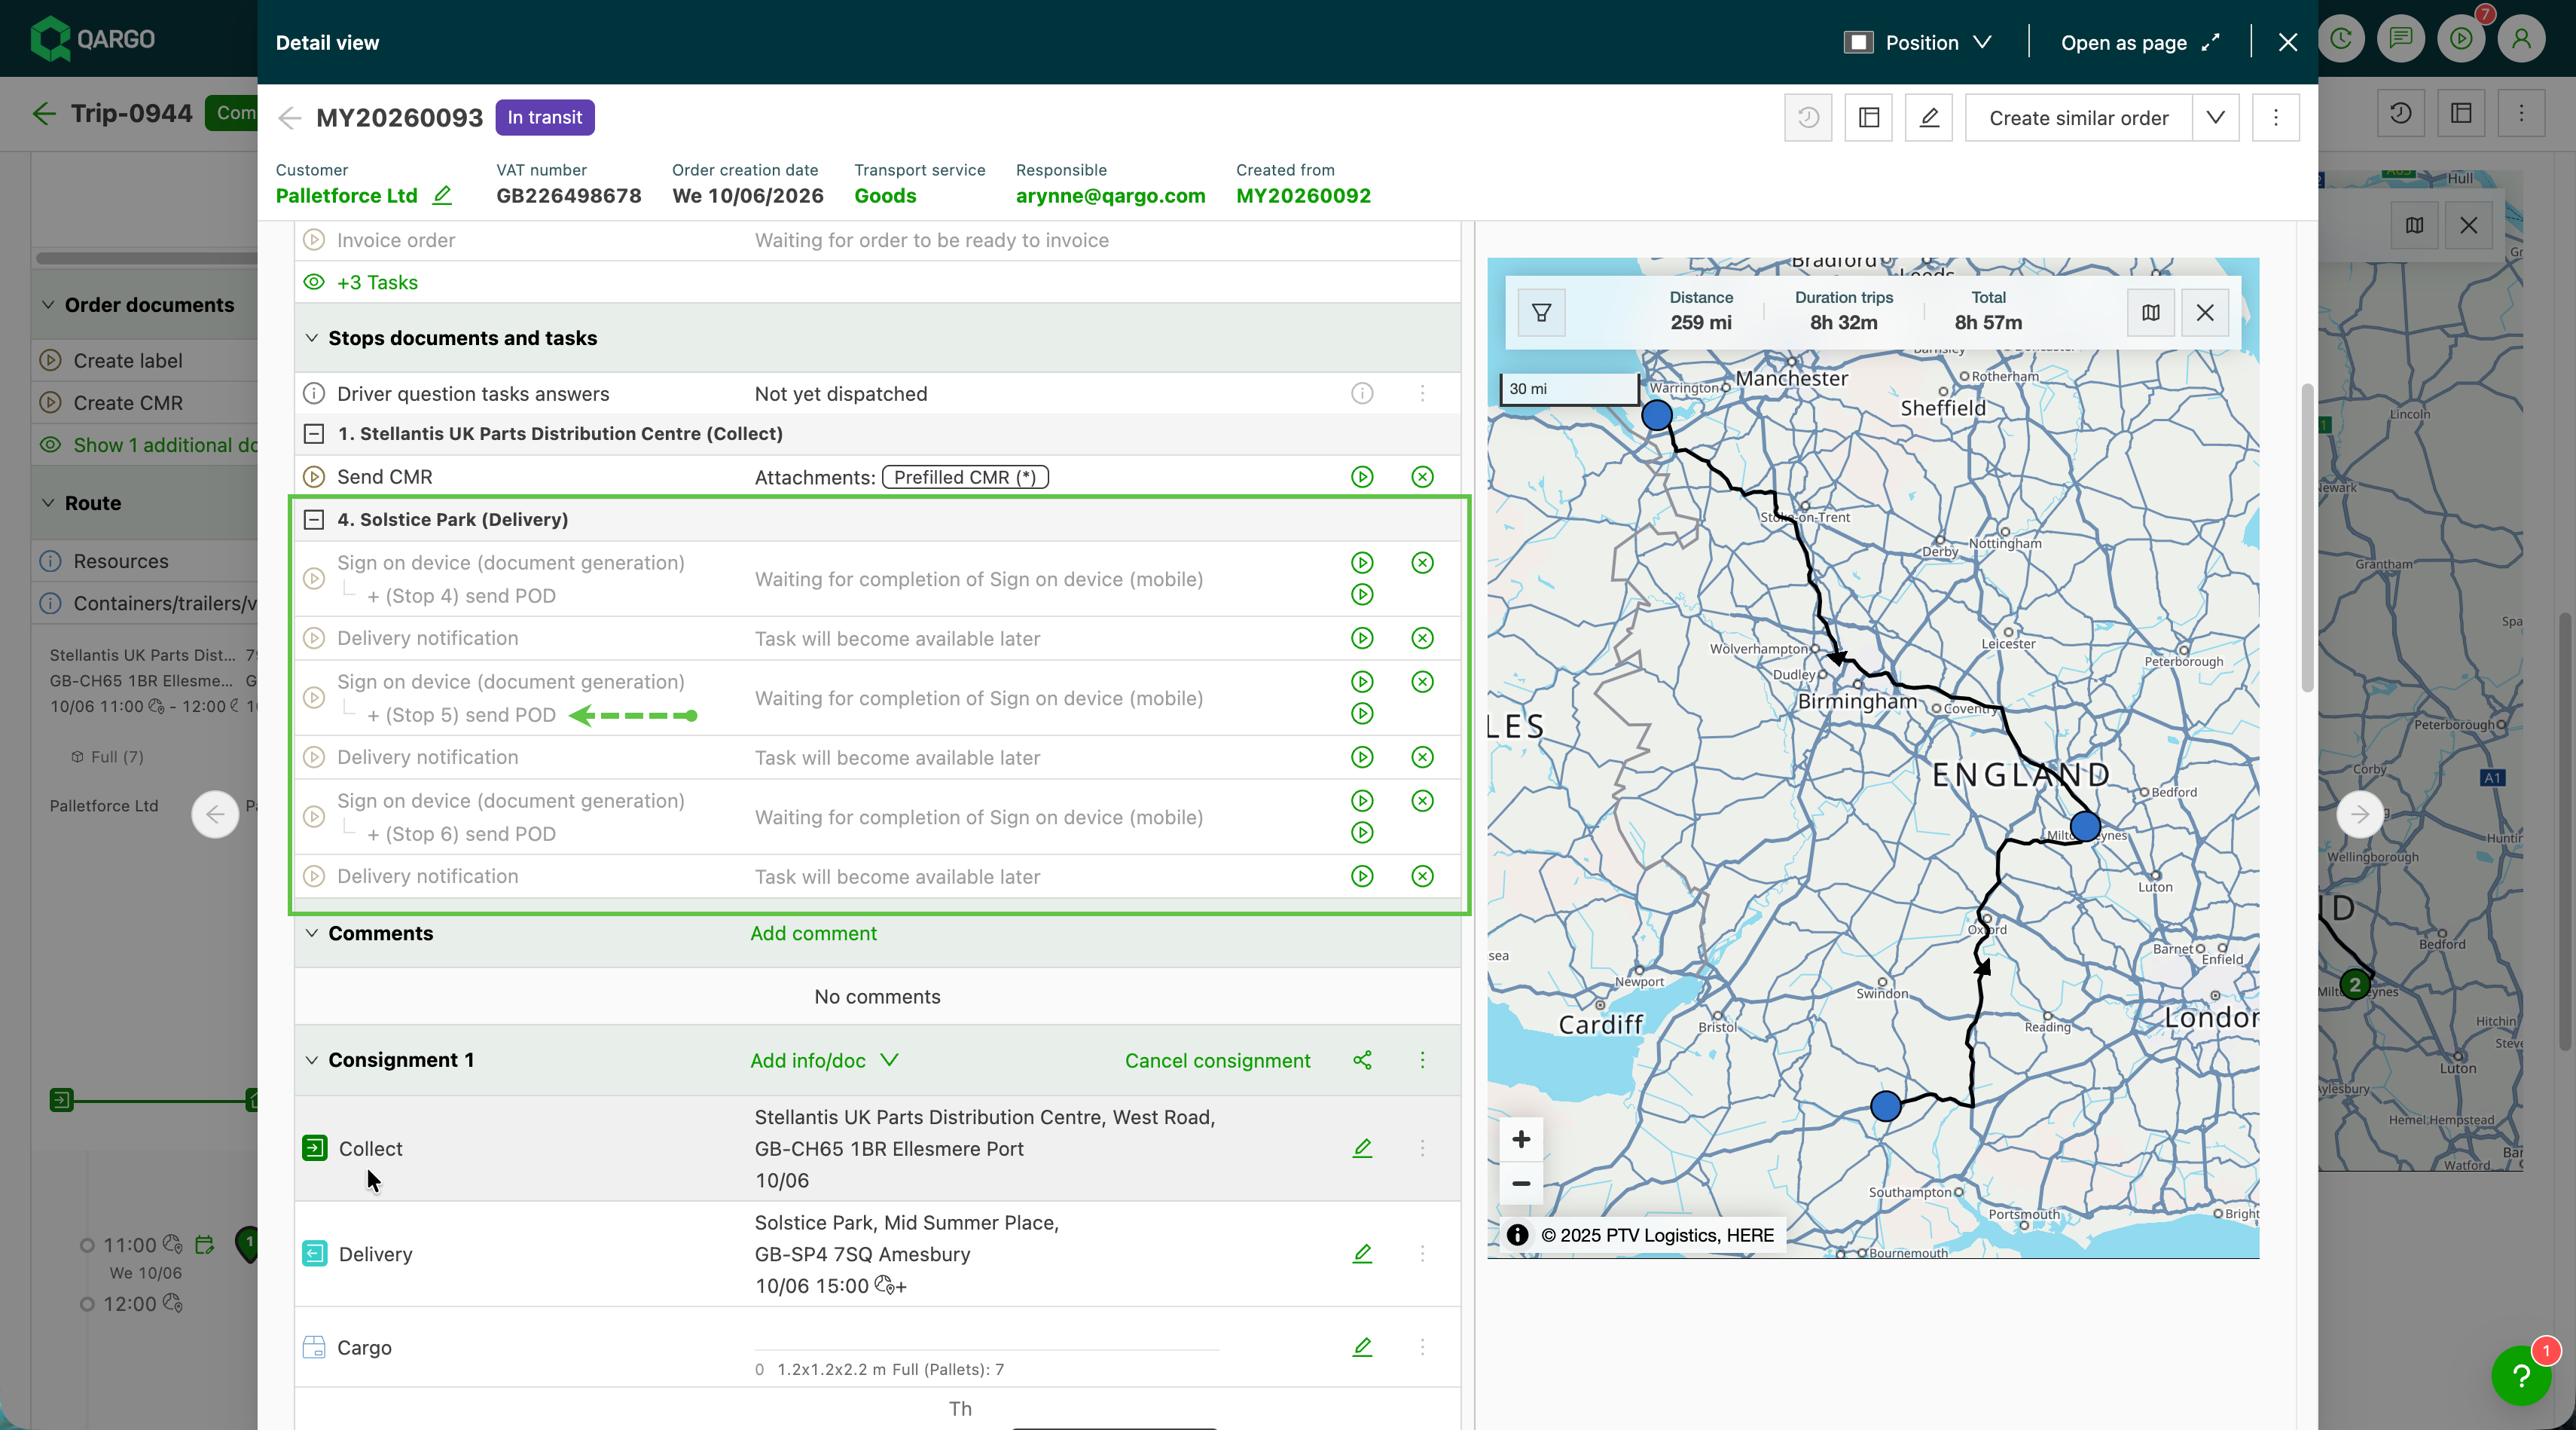
If the document has not been generated yet, the system generates it automatically before sending. No separate generate step is needed.
Reviewing the sent document
Once both steps are complete, the task is marked as done. The document is available in the Documents section of the load or order.
Troubleshooting
| Issue | Resolution |
|---|---|
| The recipient did not receive the document | Check that the recipient email address is configured correctly in the task settings or document template. |
| The task remains open after using the Send action | Refresh the page and check the task status. If it remains open, contact Qargo support. |
| The wrong document version was sent | If a document had already been generated, that version was sent. Regenerate the document and complete the Send task again to send the updated version. |
| The Send action is not visible on the task | Confirm that the task is a Send document task type. Generate-only tasks do not include a Send action. |